desmato
Members
-
Joined
-
Last visited
Everything posted by desmato
-
Thomas, I love those wrench racks !
-
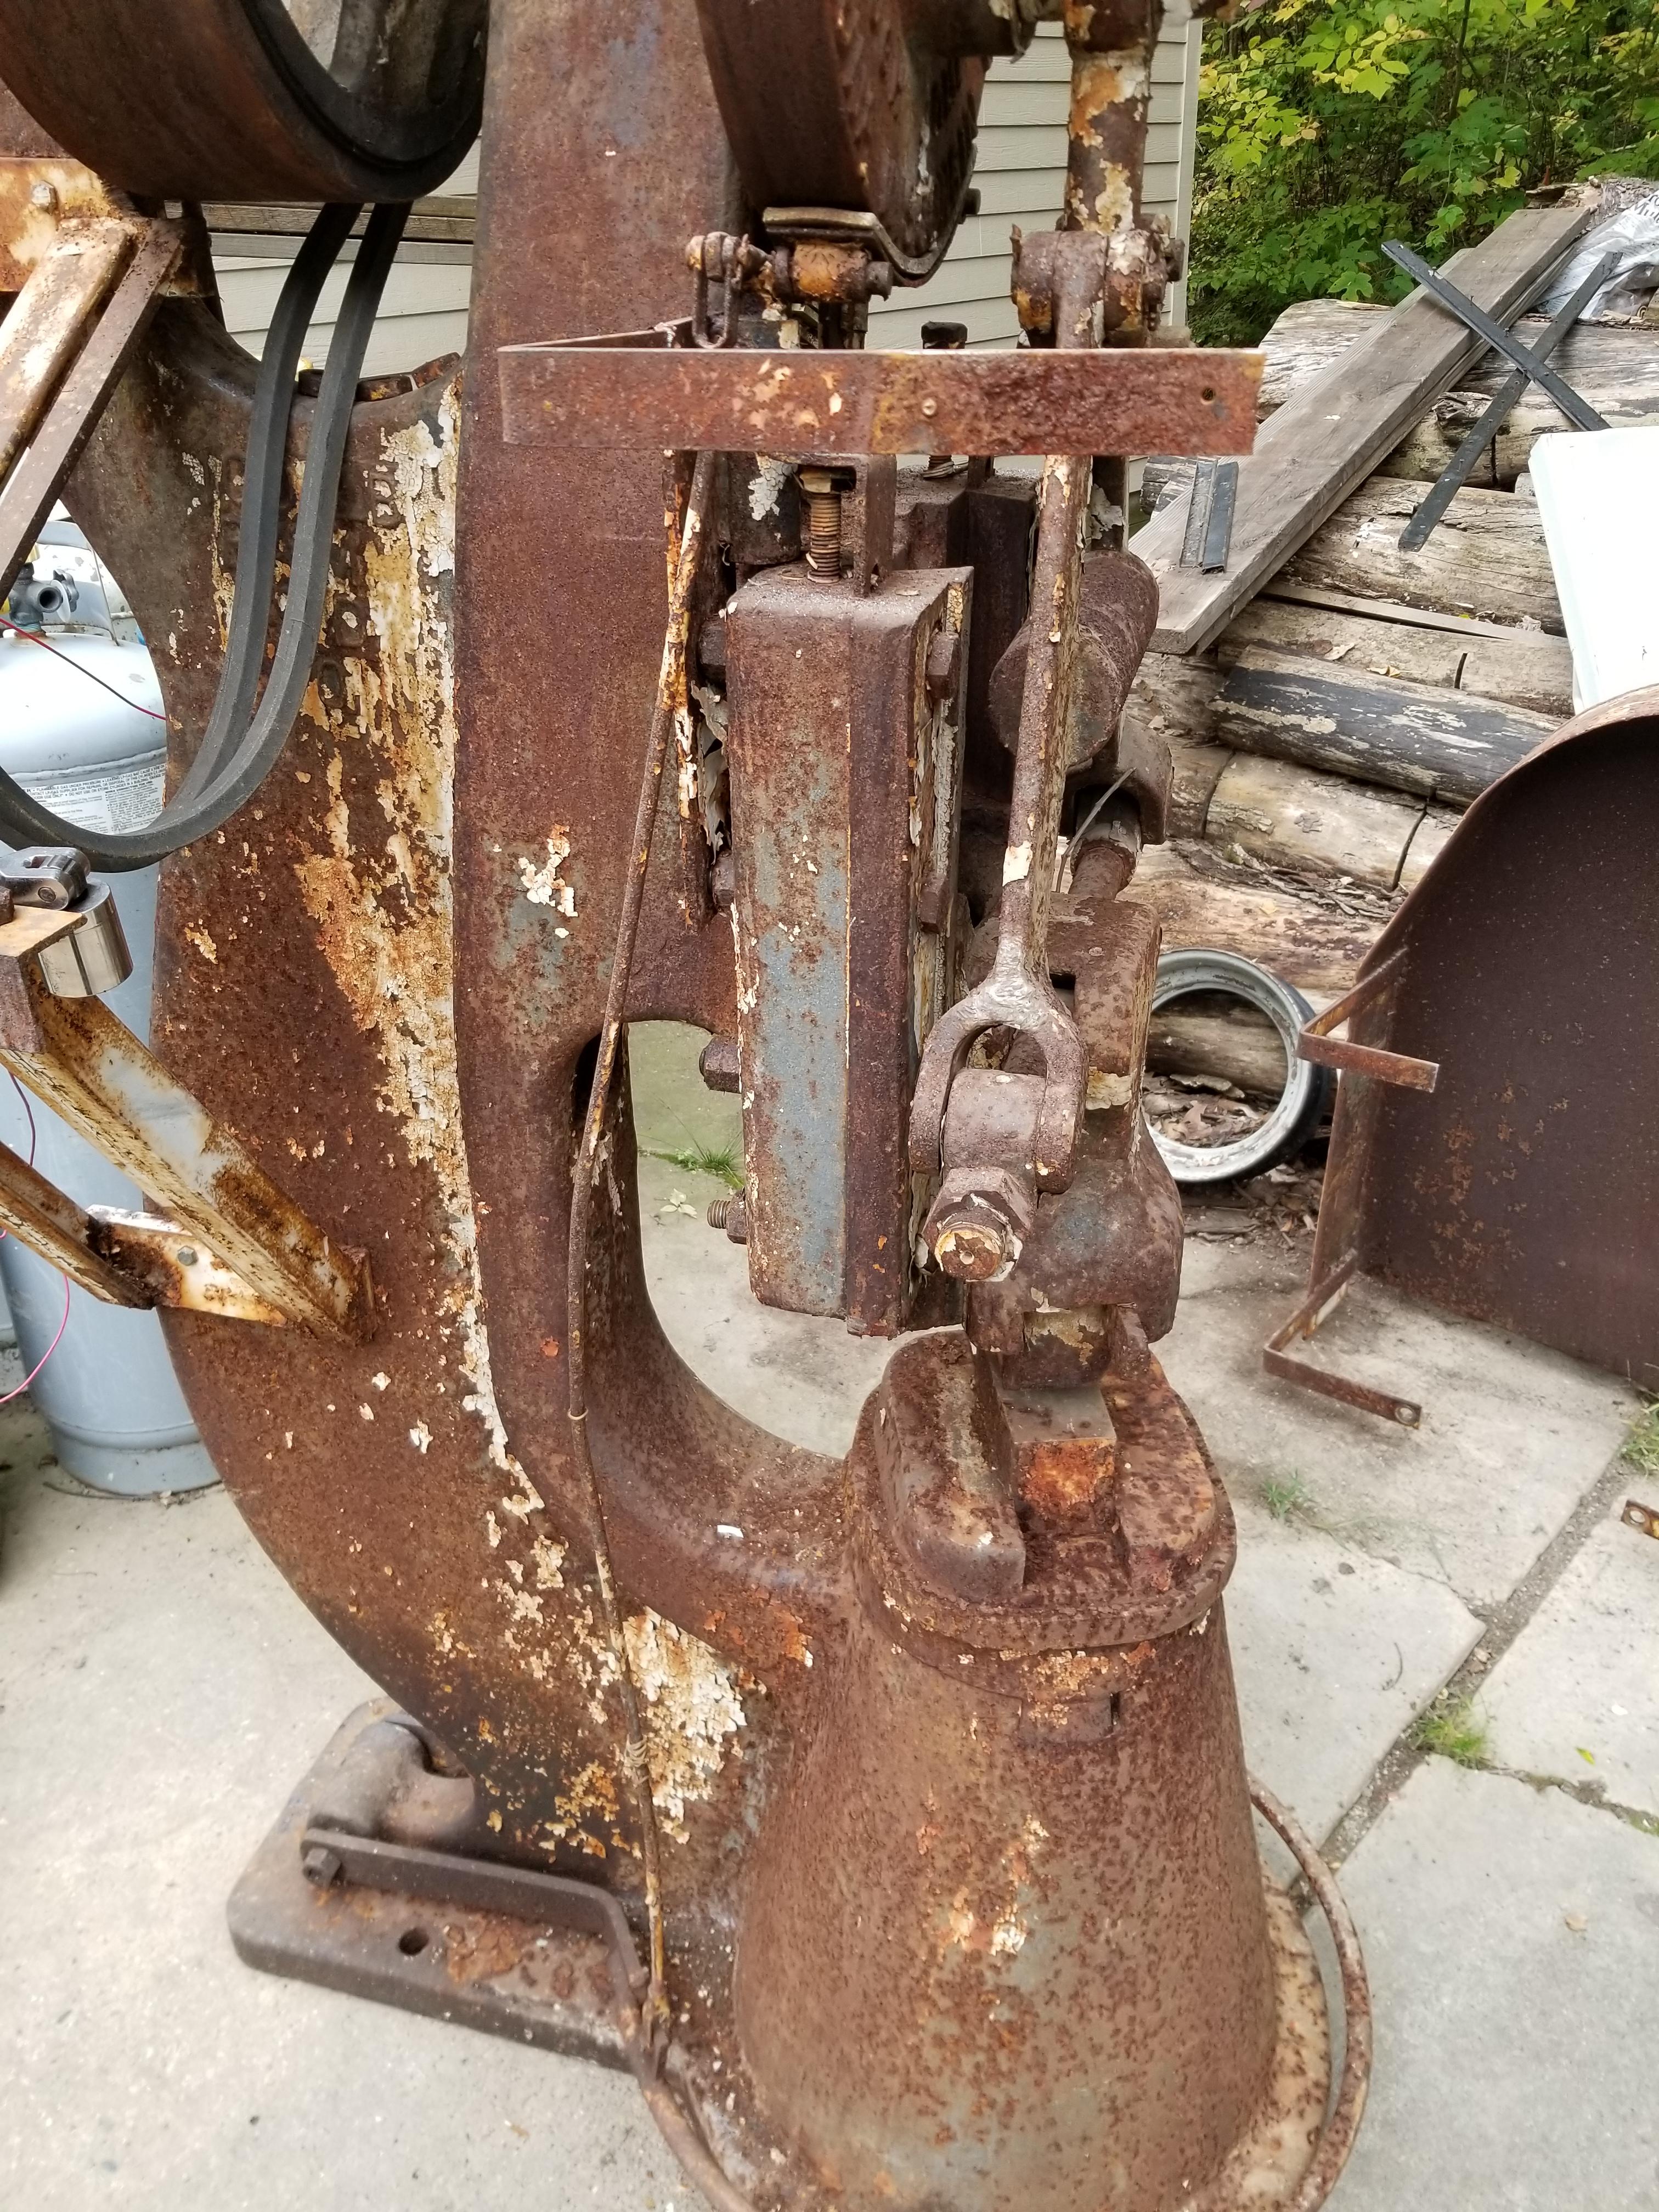
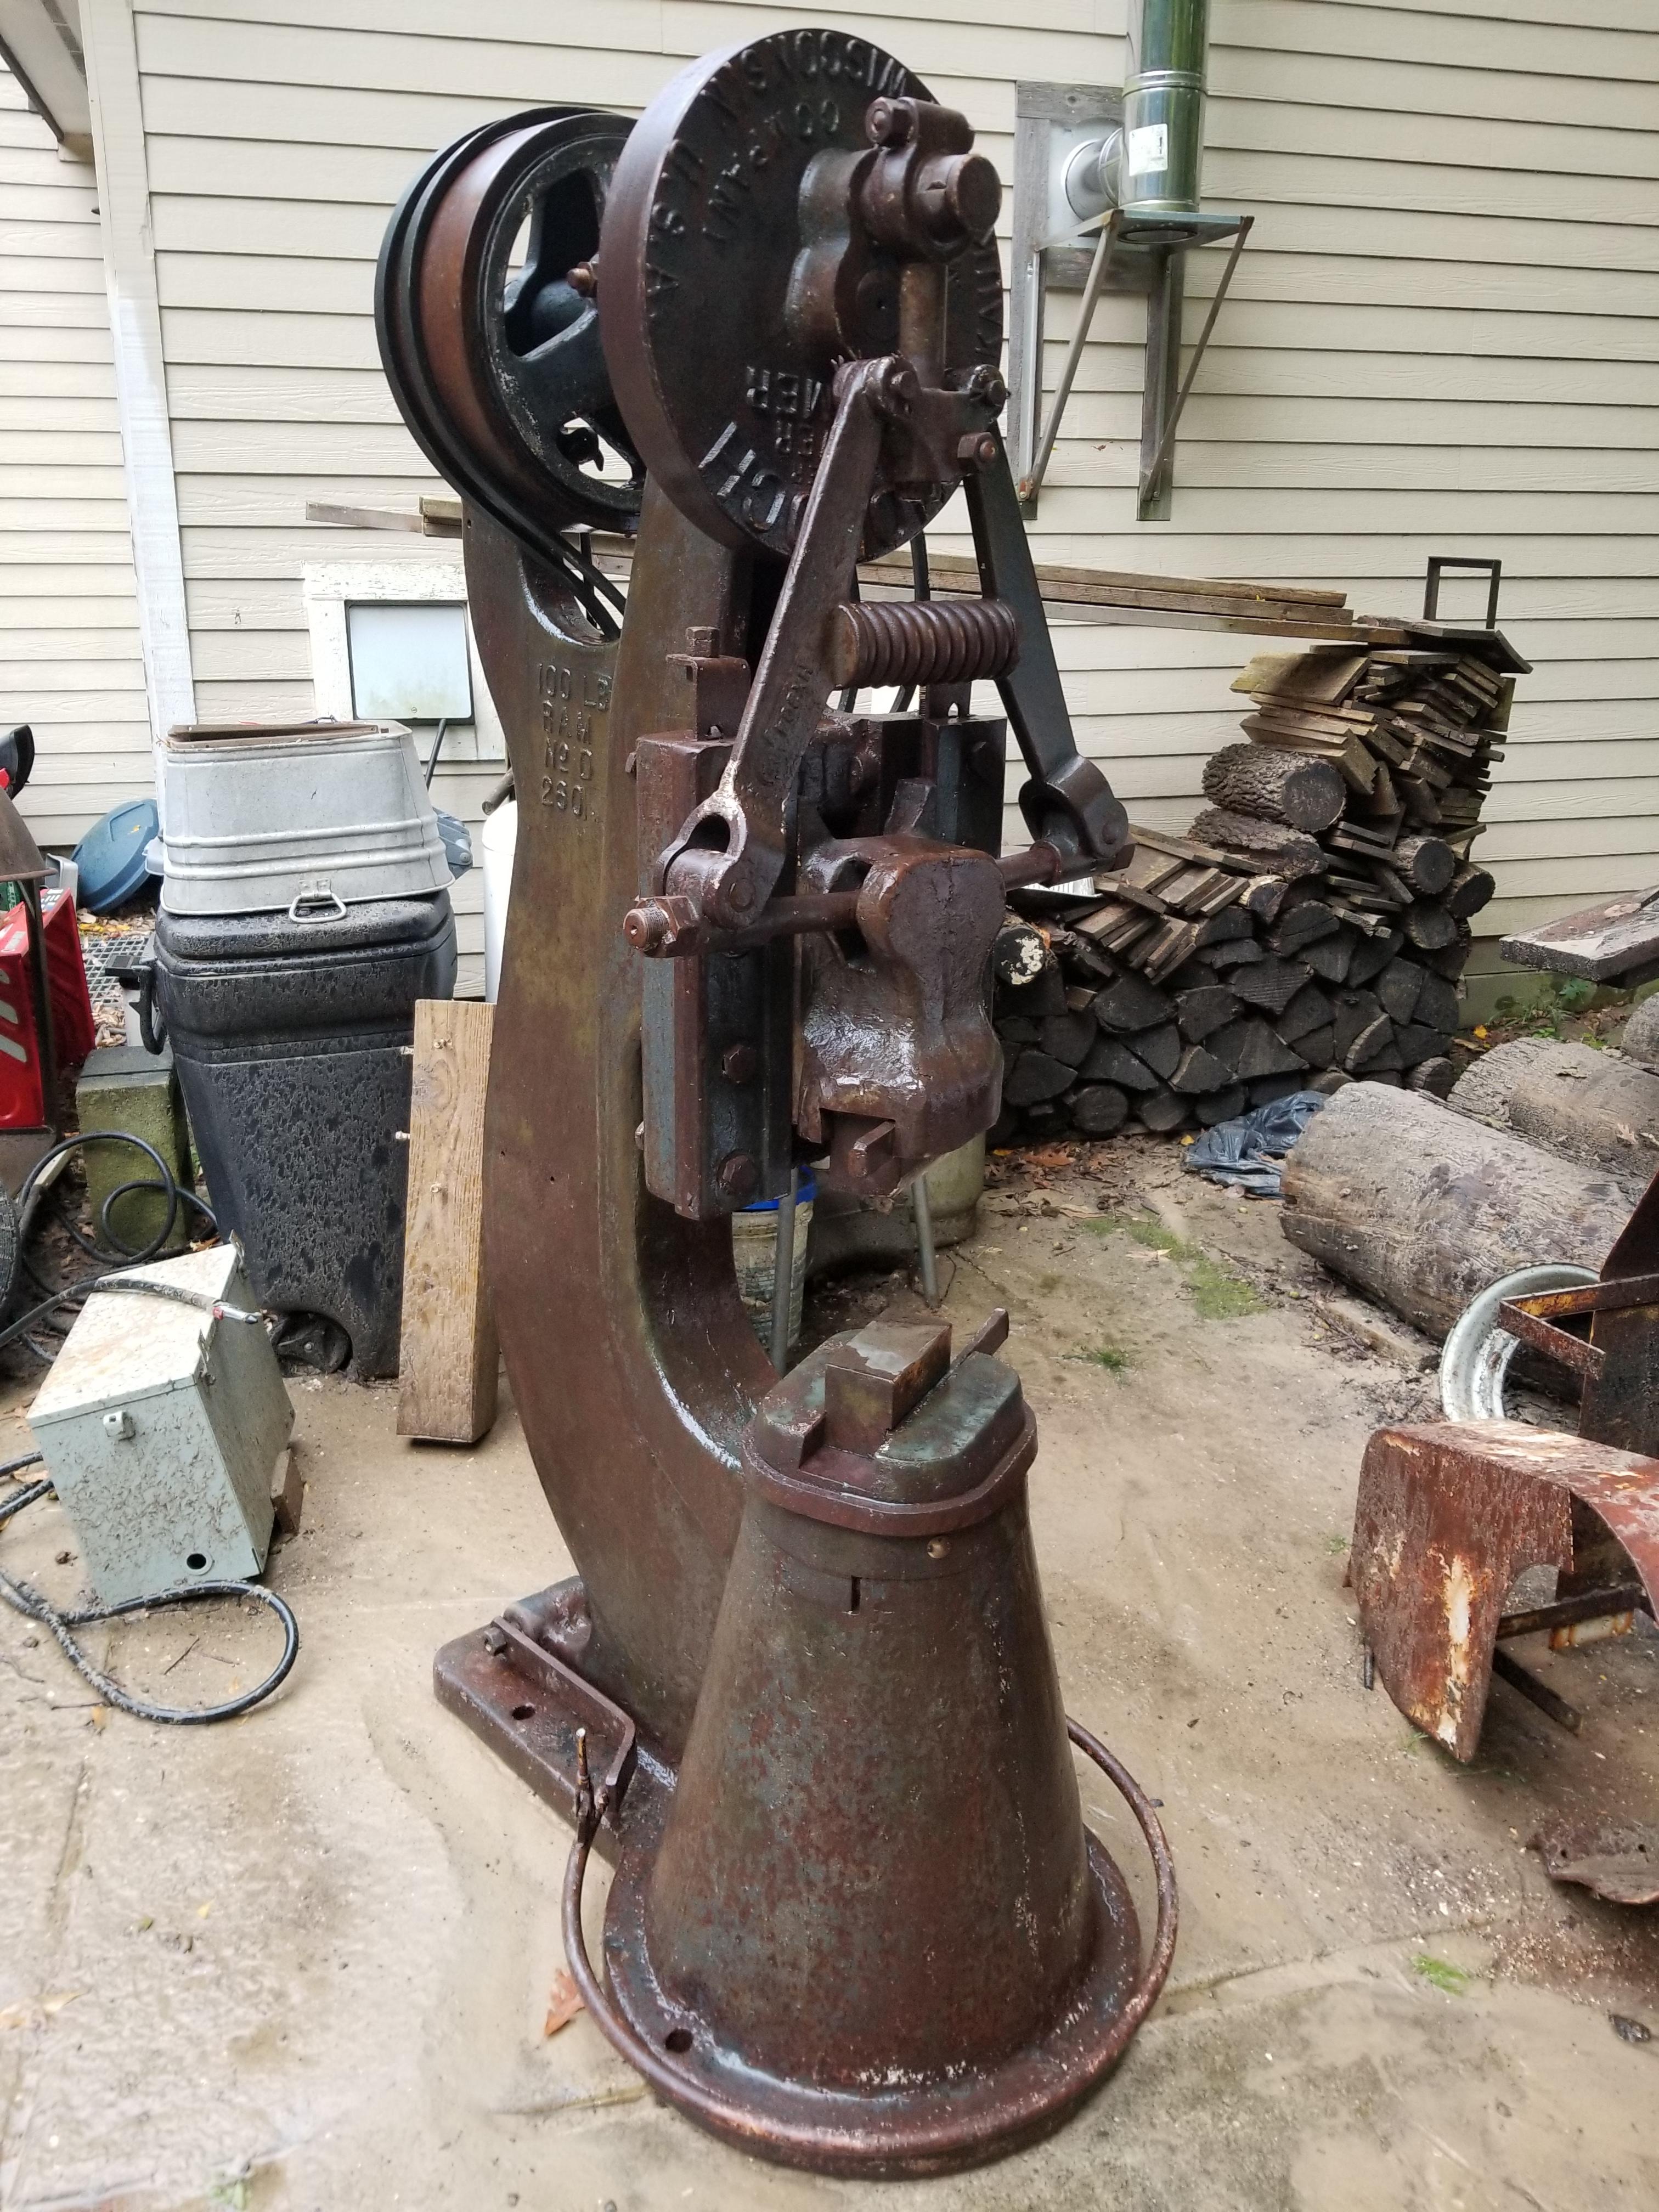
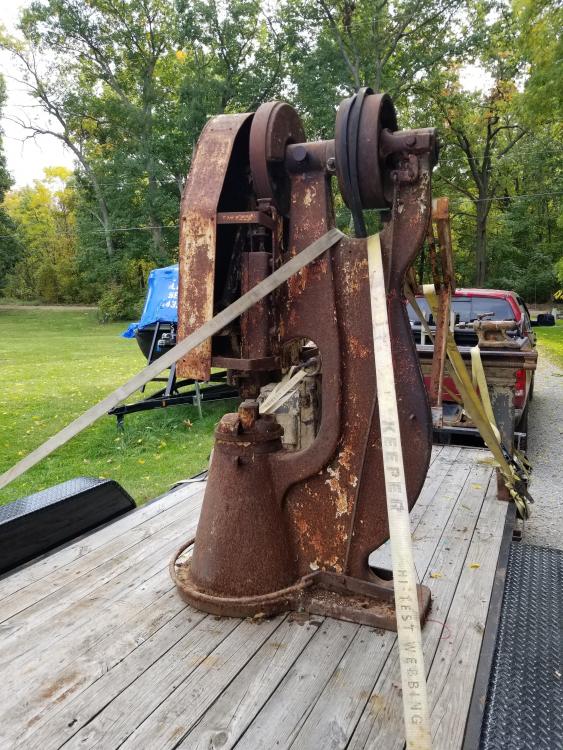
I will possibly put the guard or some semblance of it/one back on once it's all done. I especially think the brake is a winner. Just need to flip it around and do a minor redesign. Thomas, I used to play and referee paintball in the Packard plant back in the early 90s, good times ! Frosty, I am seriously thinking about that ironworker but I just dont have the real estate for it. It a flywheel drive unit and is surprisingly not that large considering it's working capacity (3/4 x 8" plate !!!) It weighs between 3 & 3.2k # per old literature. That's as it sits without electric
-
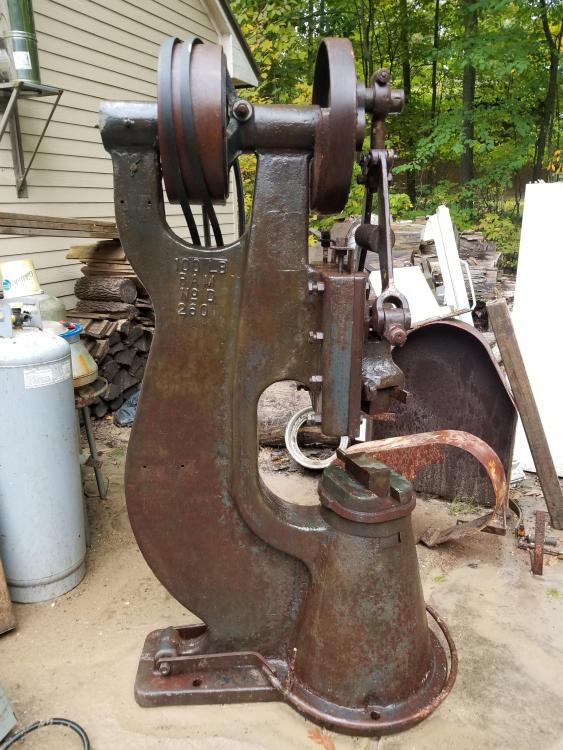
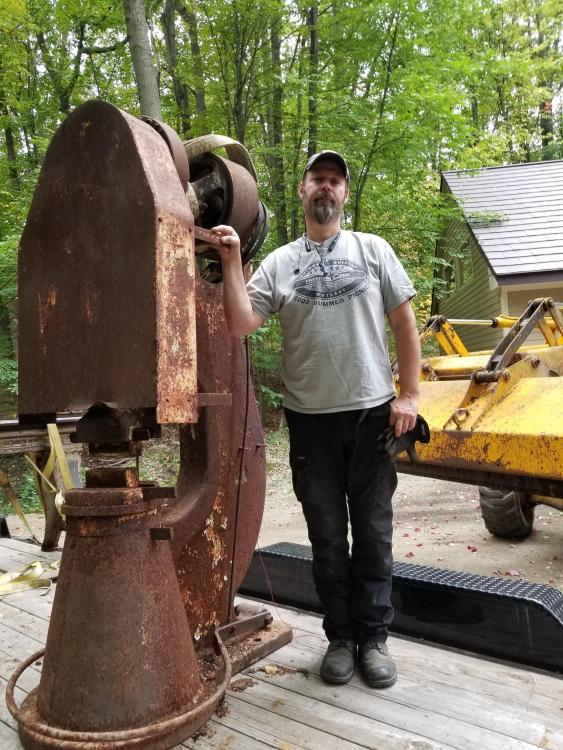
I was blessed by Thor (or Tubalcain) himself ! I scored a 100# Moloch power hammer in Wonderful condition. It looked rough at 1st but a little power blasting and removing the owner added guard, and now it looks the proper hammer. It was in a decrepit building in Flint, Mi that was a parts manufacturer for Buick back in the day. It was sitting under a non existent roof and partially covered. I am SO glad I was able to get her out of that tomb and into a loving shop. Yes, I'm a big guy !


-
Nope, no sacrifices this week ! It looks much better now that I removed the OSHA guard and pressure blasted it. Everything freed right up with zero disassembly so I'm gunna do a few minor things and NOT take it all apart. Time to clear coat the patina and put her to work !


-
Here's my new project. 100# Moloch I will be chronicling the rebuild on my F.B. page. I'll post a link once I start.
-
My tub is an HDPE 40 gallon ? from our fireworks business (bulk Amonium Nitrate) and it does have a lid, now gainfully employed the tub is indoors but .... Thomas, I do most all my work with HR / A36 and it's use as a quench tub is because I'm impatient to let stuff cool, especially when I need to touch it for whatever reason before moving to the next step or make changes. Never had hardening/cracking issues, but now I most certainly will. It also serves as a quench tub for my belt grinder and band saw + welding and torch work. Nearest hose is 150' away so easier to just have it. I like the film of oil as that will help the tongs out as well.
-
For years I've never had issues but this year, I have a TON of mosquito larvae in my tub. never really though about it until now, but what do others do to minimize the stagnant water woes ? maybe I need to use it more often
-
Looking for the correct stand for my Buffalo 14" hand crank blower. should look like this. does anyone have one with a junk or locked up blower mounted to it ??? Todd

-
Jon, read through this as well. a LOT of the same questions with answers plus the way I did mine. Todd
-
DaMaakus.... they are for my Aunt-in law for her cottage. She has 3 grand kids that are not real good at respecting things. Great kids, just need some polishing. 58er... WOW !
-
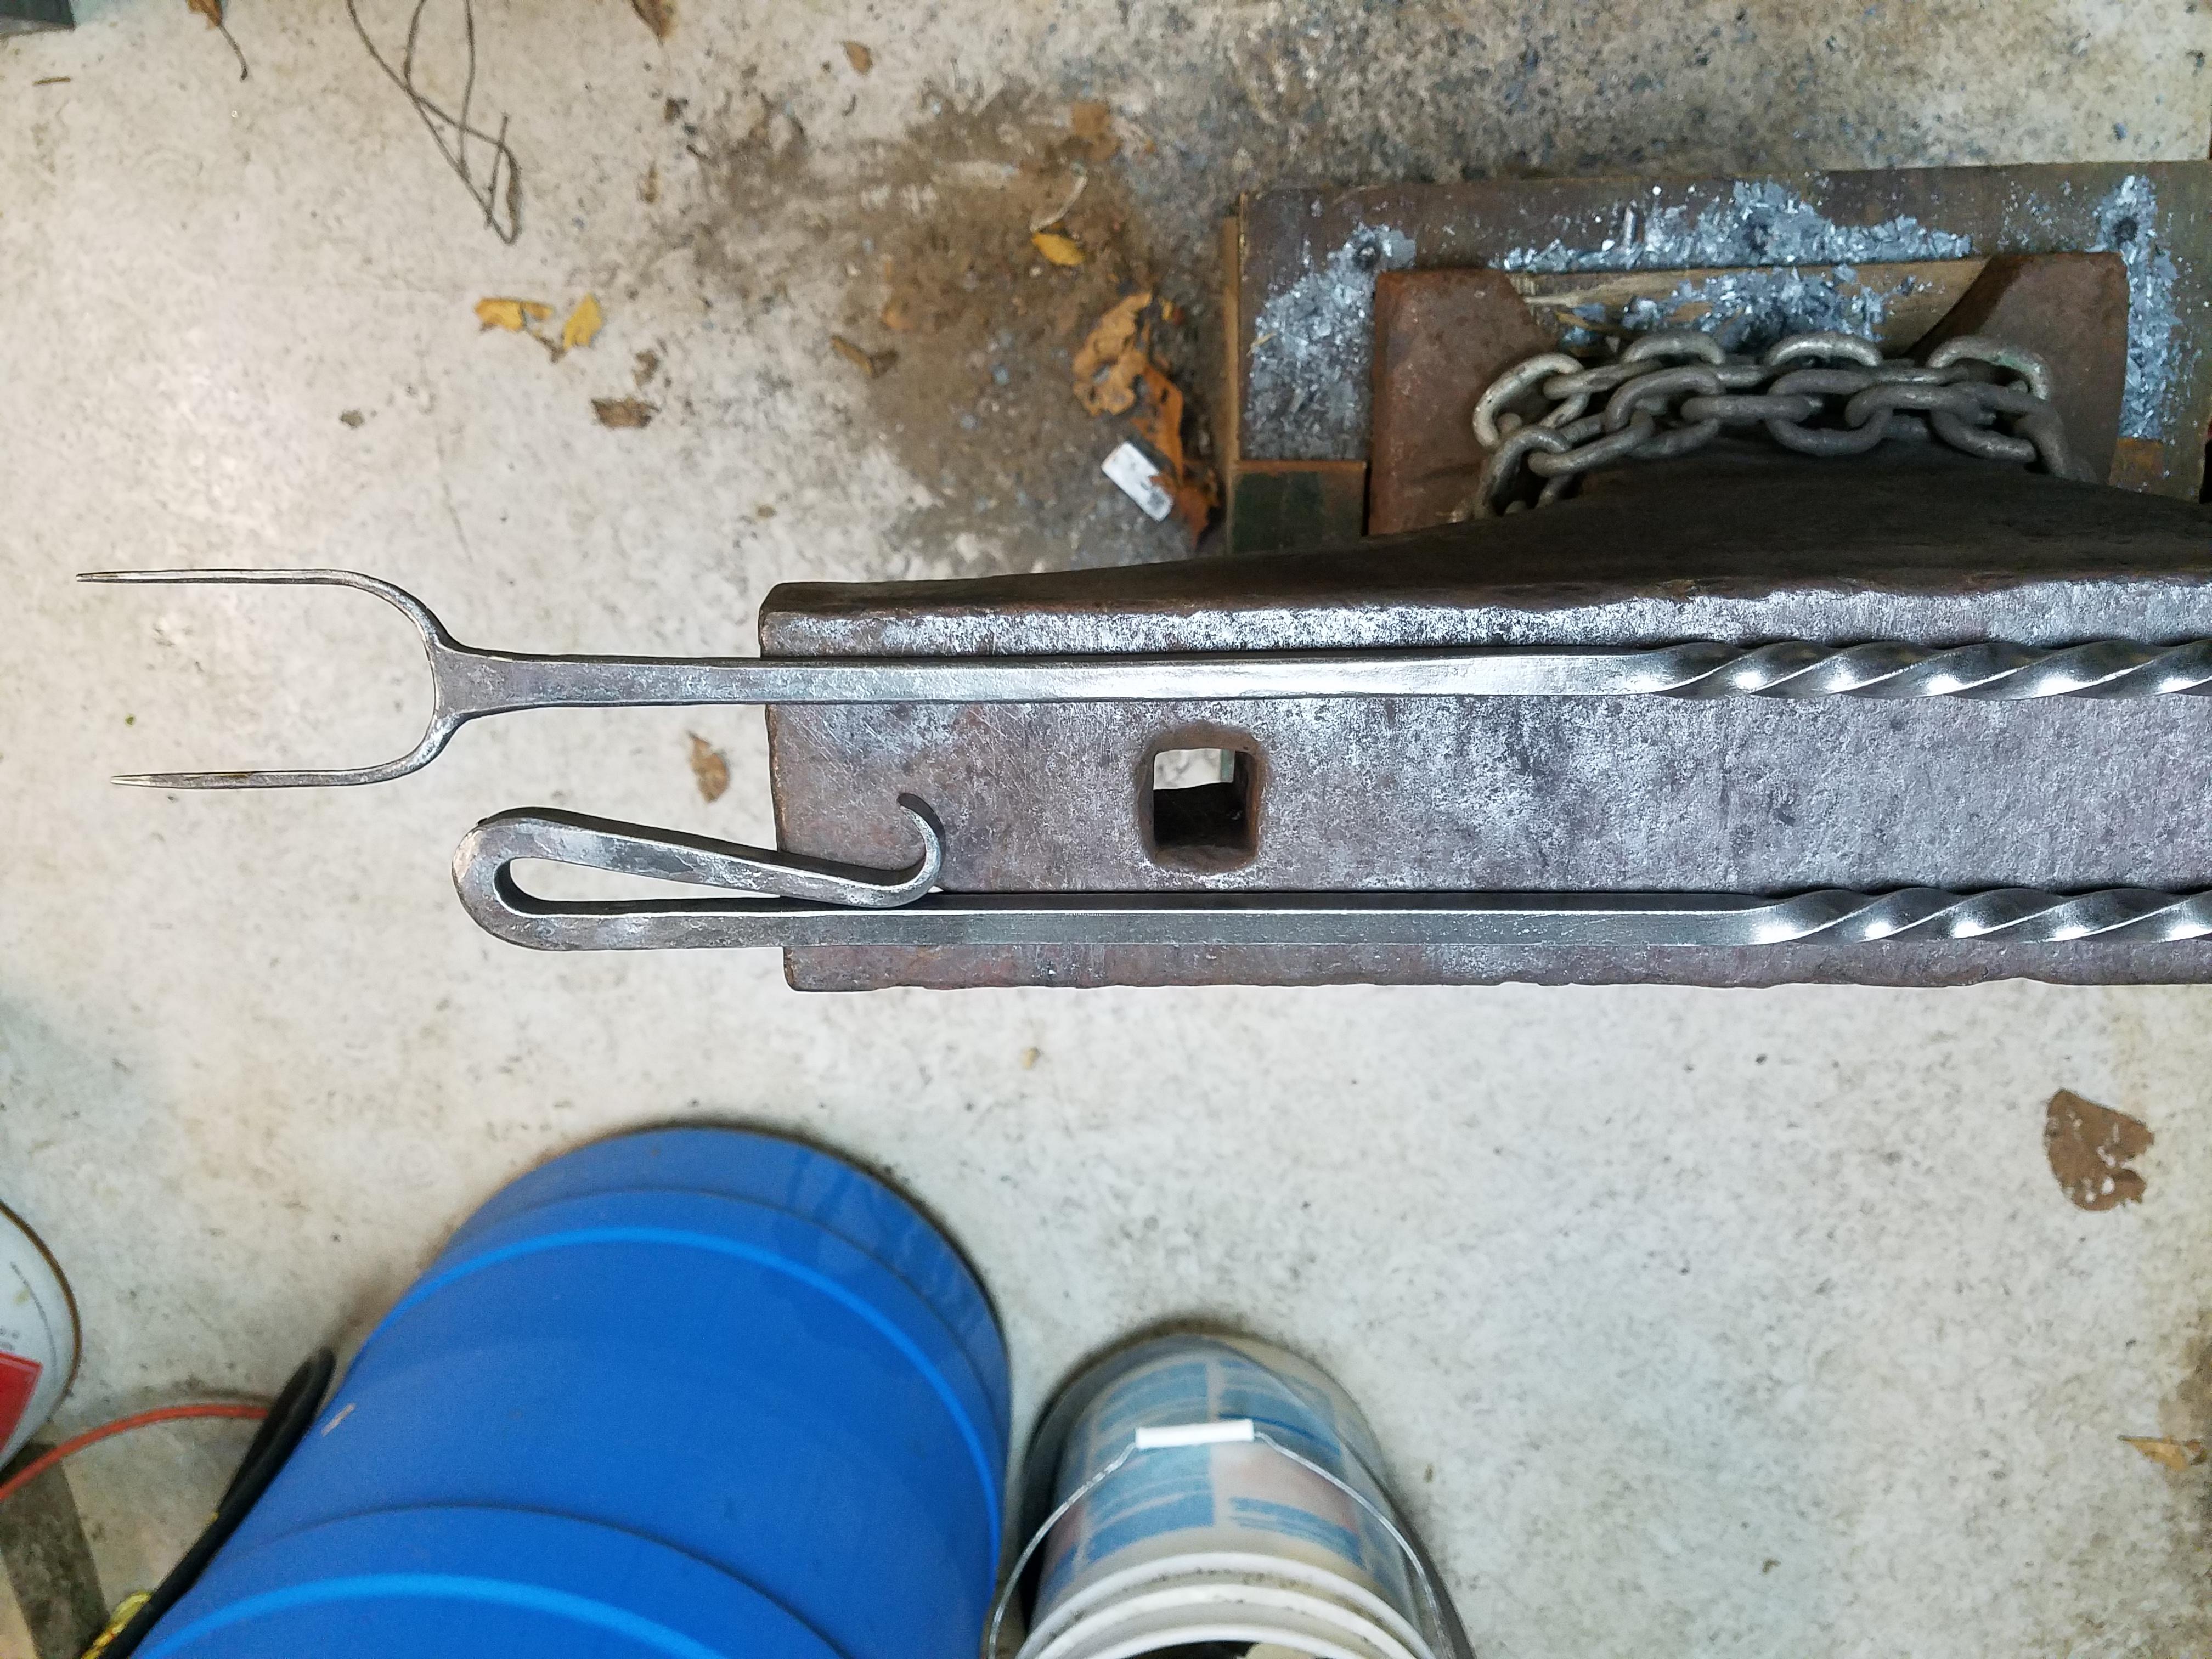
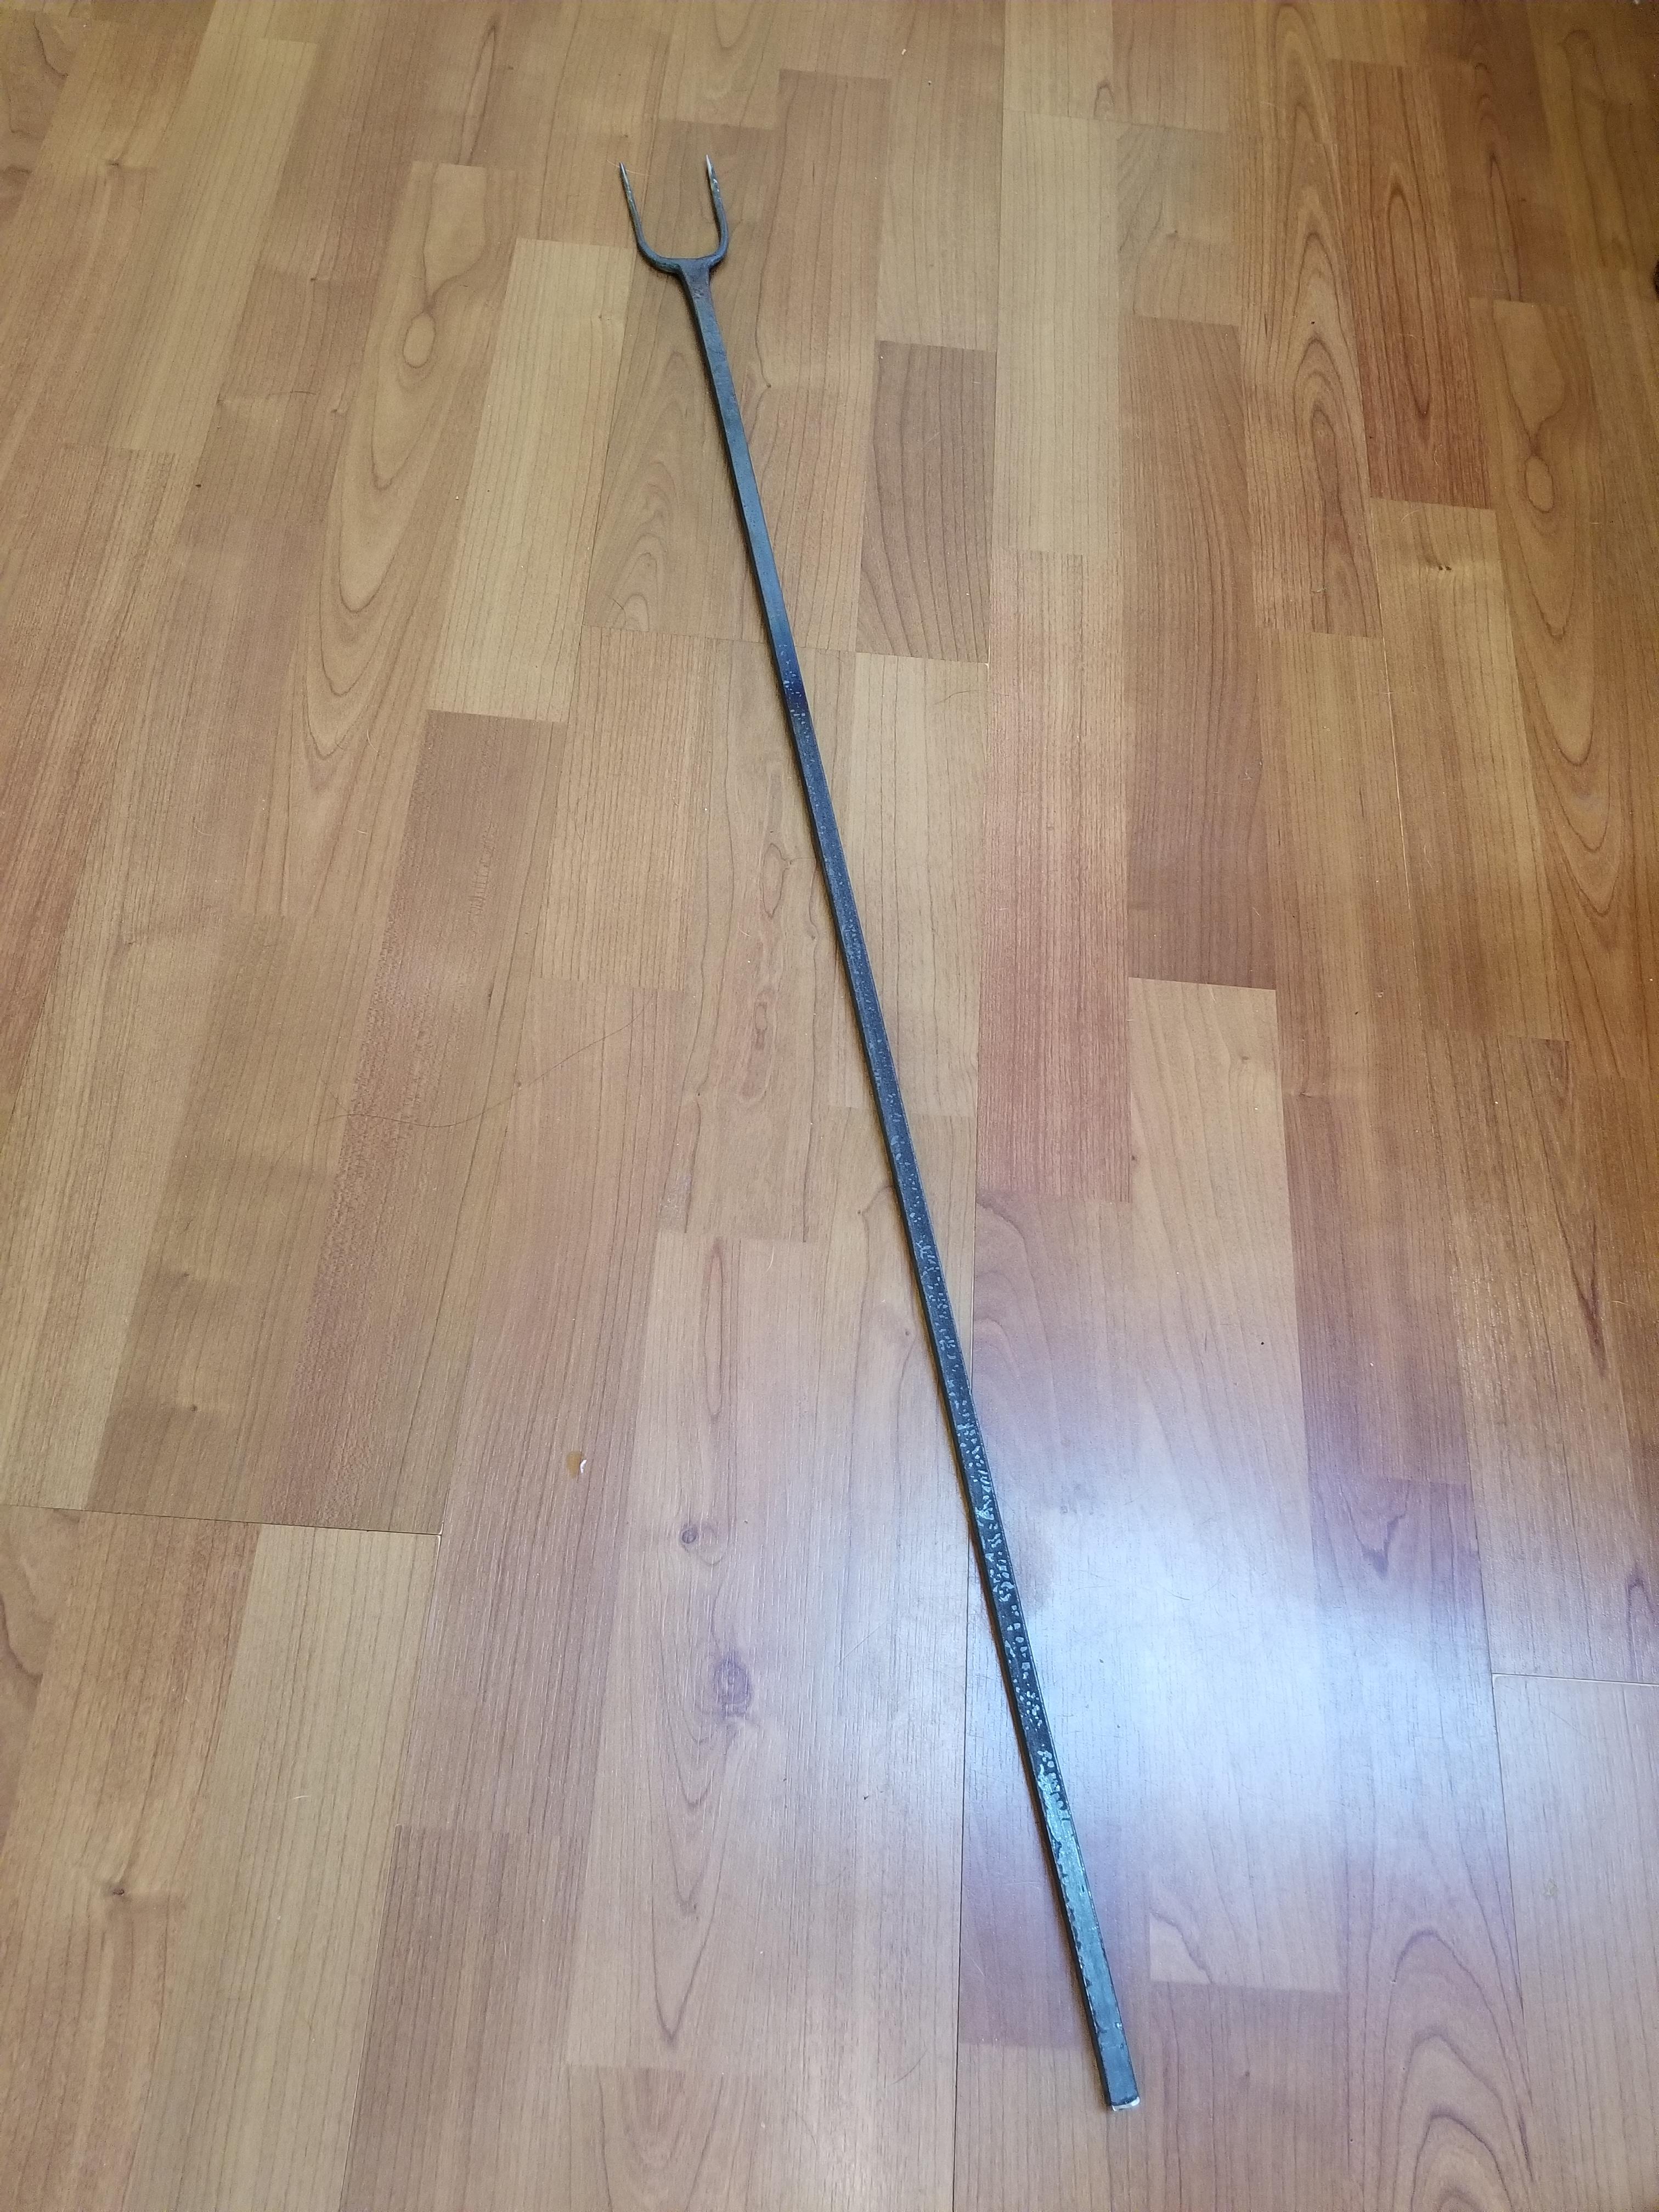
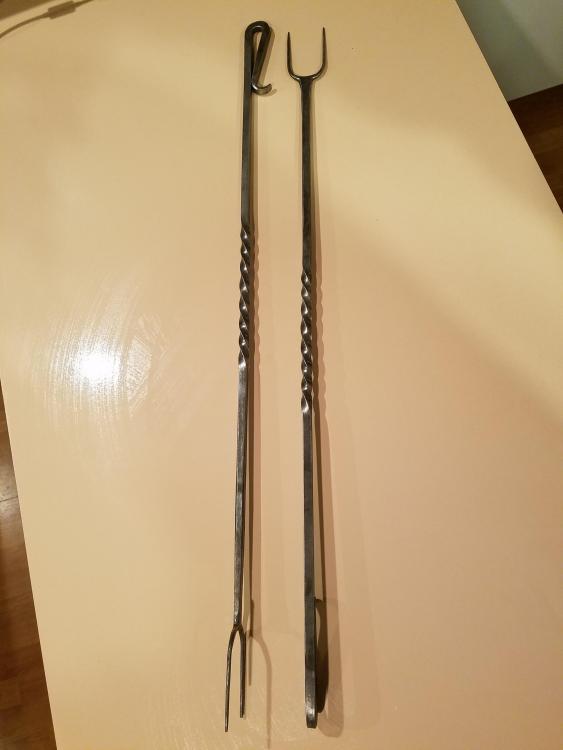
Toasting forks for the aunt. 3/8" H.R. I may add a matching poker but I'm out of 1/2" and don't feel like drawing out 5/8...

-
I finished the 2 roasting forks for the aunt. (The ones I burnt my leg on) 3/8" sq. H.R. (blech) 32" tip-tip. Nothing too fancy. They will probably be left outside and abused by children.

-
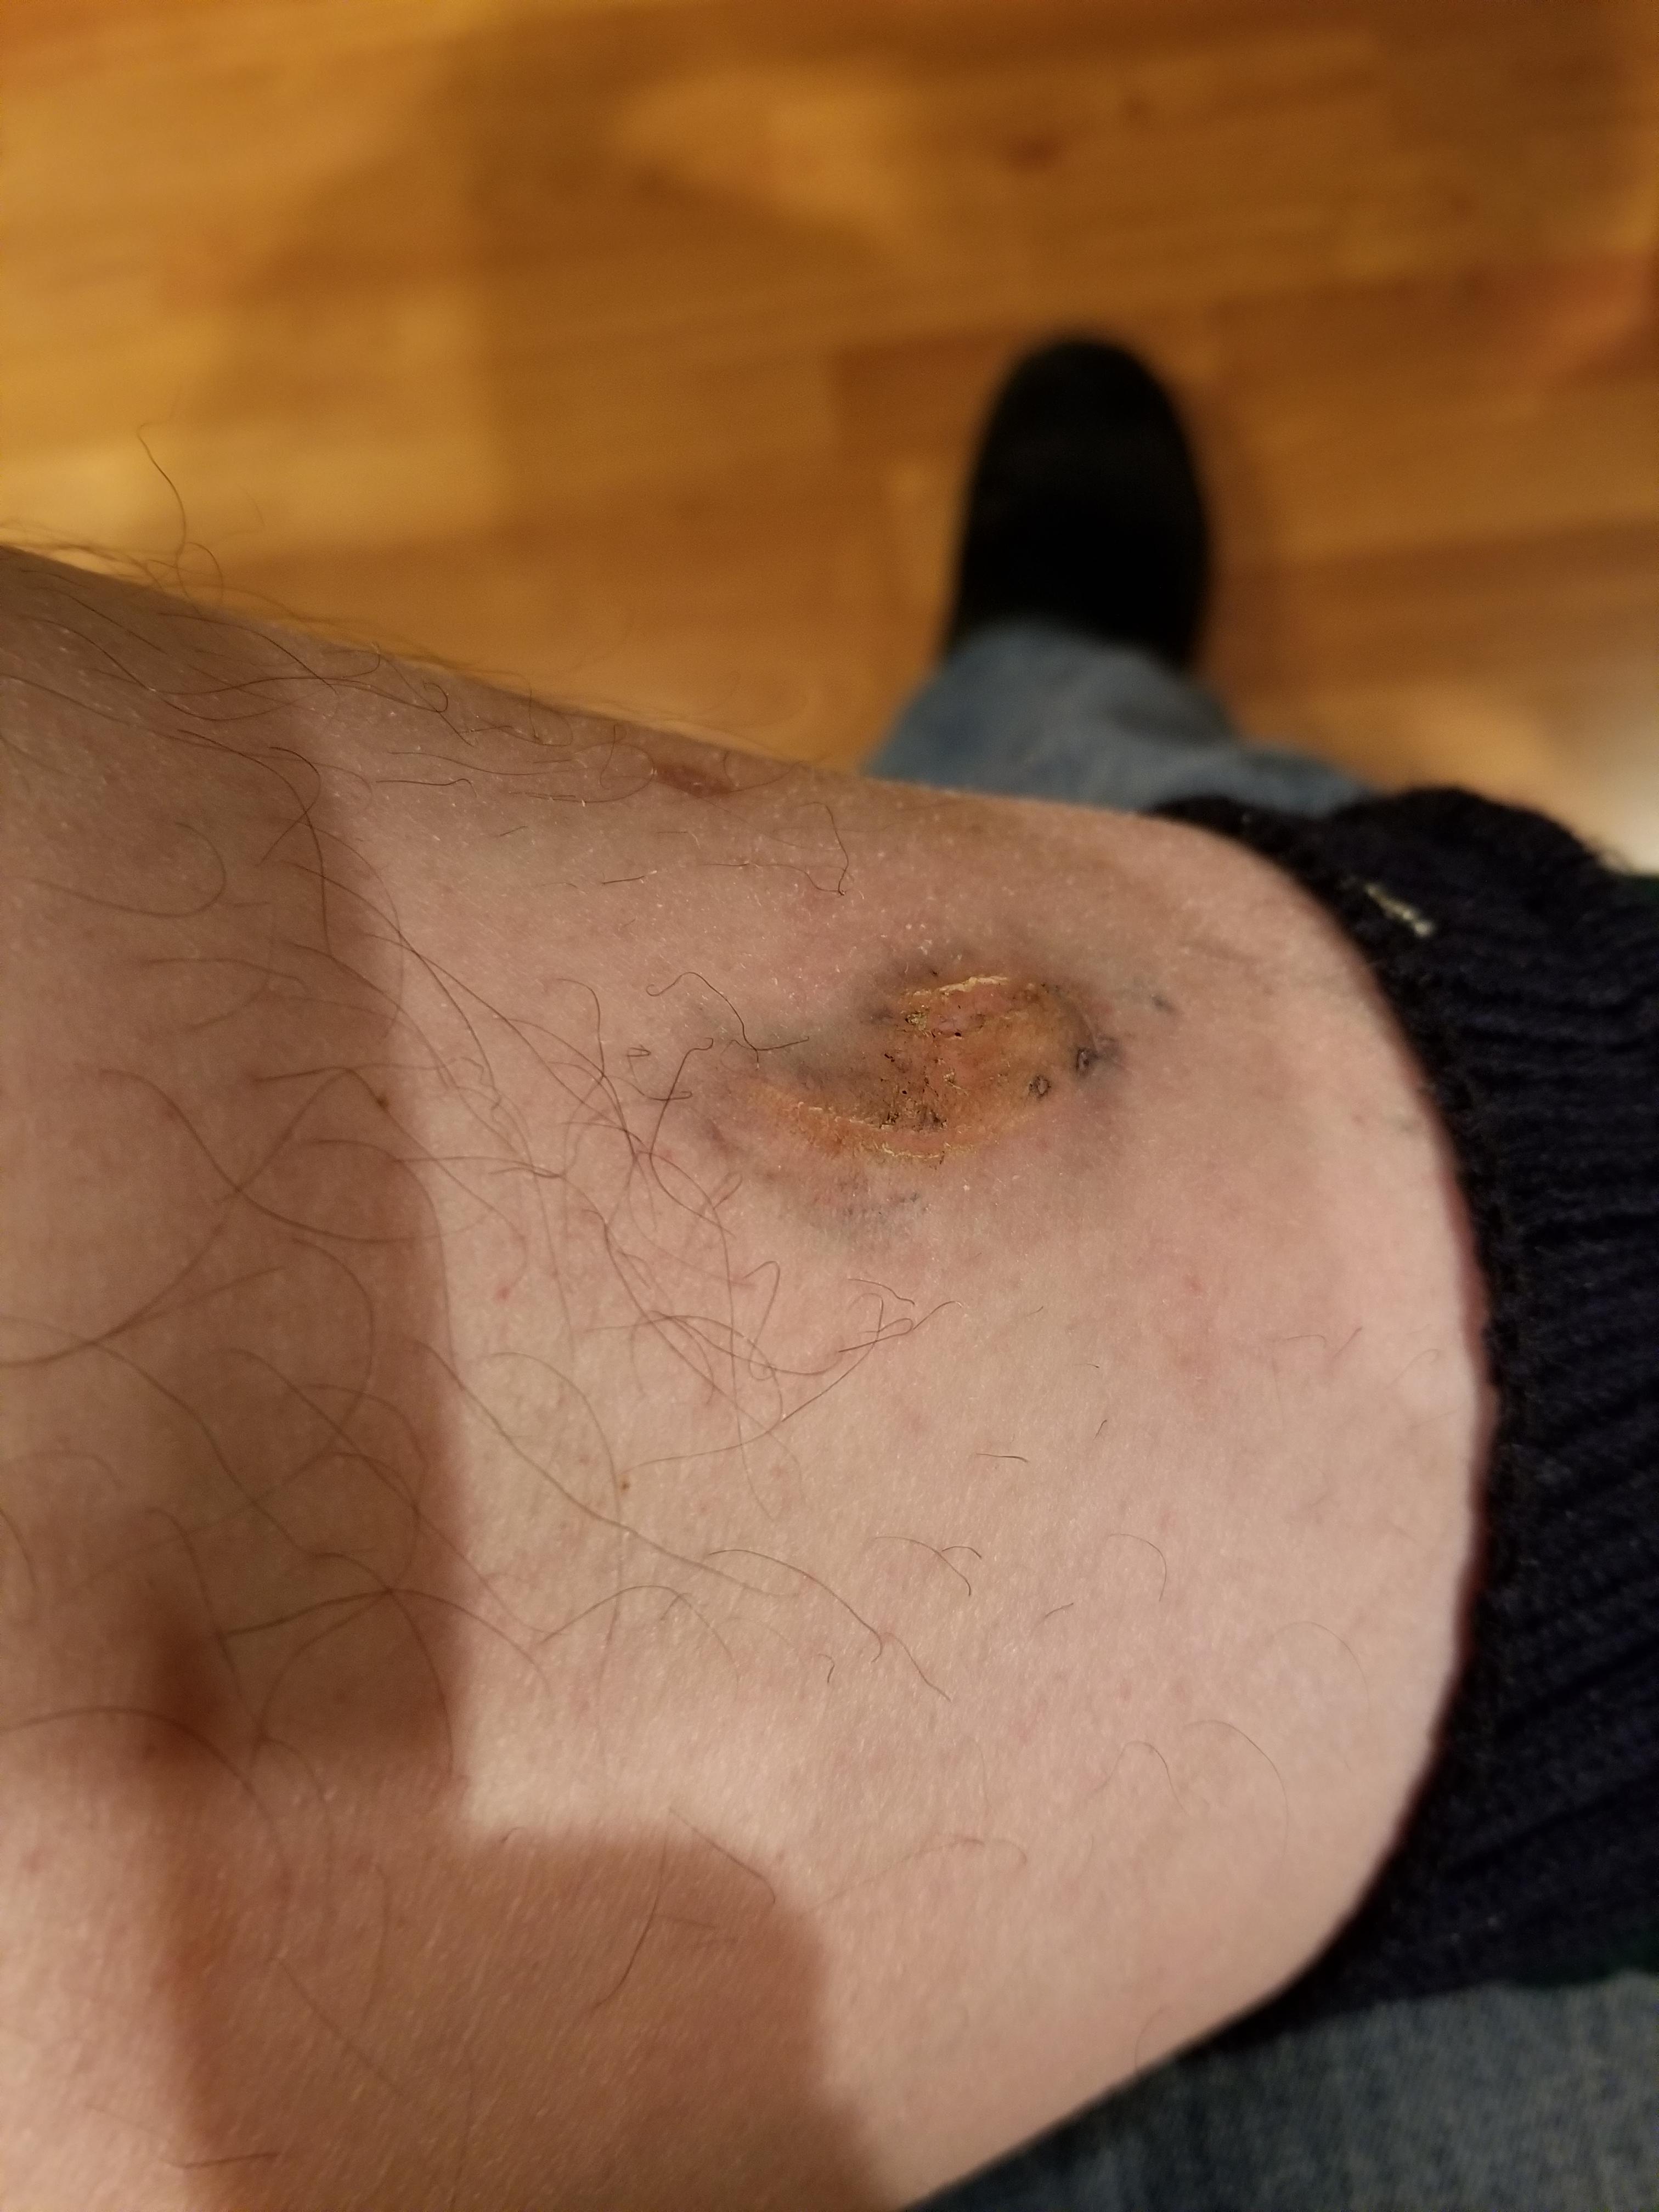
I've been in the welding, fabricating game for 30+ years and had my share of stupid + ignorant mistakes. Burned a hole between my big and 2nd toe from arc welding with nylon topped tennis shoes on (33 years ago), Caught the shoulder of my Carhartt on fire Mig welding on a trailer (5 years ago) and so on. the stories "we" could share given enough time. This caught me totally off guard. I wear a long apron but stand 6'3" and I can't think of anything I could have done different other than leather shoes, but even those could have 'issues' in other ways. Sadly, it's the nature of the game. Play with fire ling enough and you're gunna get burned !
-
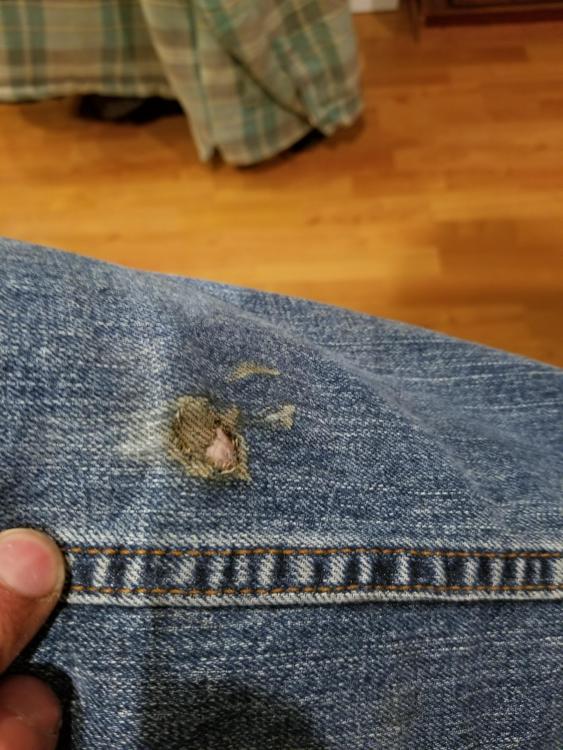
Aren't all boots 'open top' ?? Jen, I was wearing my jump boots (11" tall) under my Jeans. the ledge they made was enough to catch the bar just right.
-
I started on toasting forks for xmas gifts. As I was upsetting the 3/8 bar on the anvil, it slid off the edge and right into my leg where it promptly stopped at the top of my boot, wedging itself into my leg..... time for some leather chaps !


-
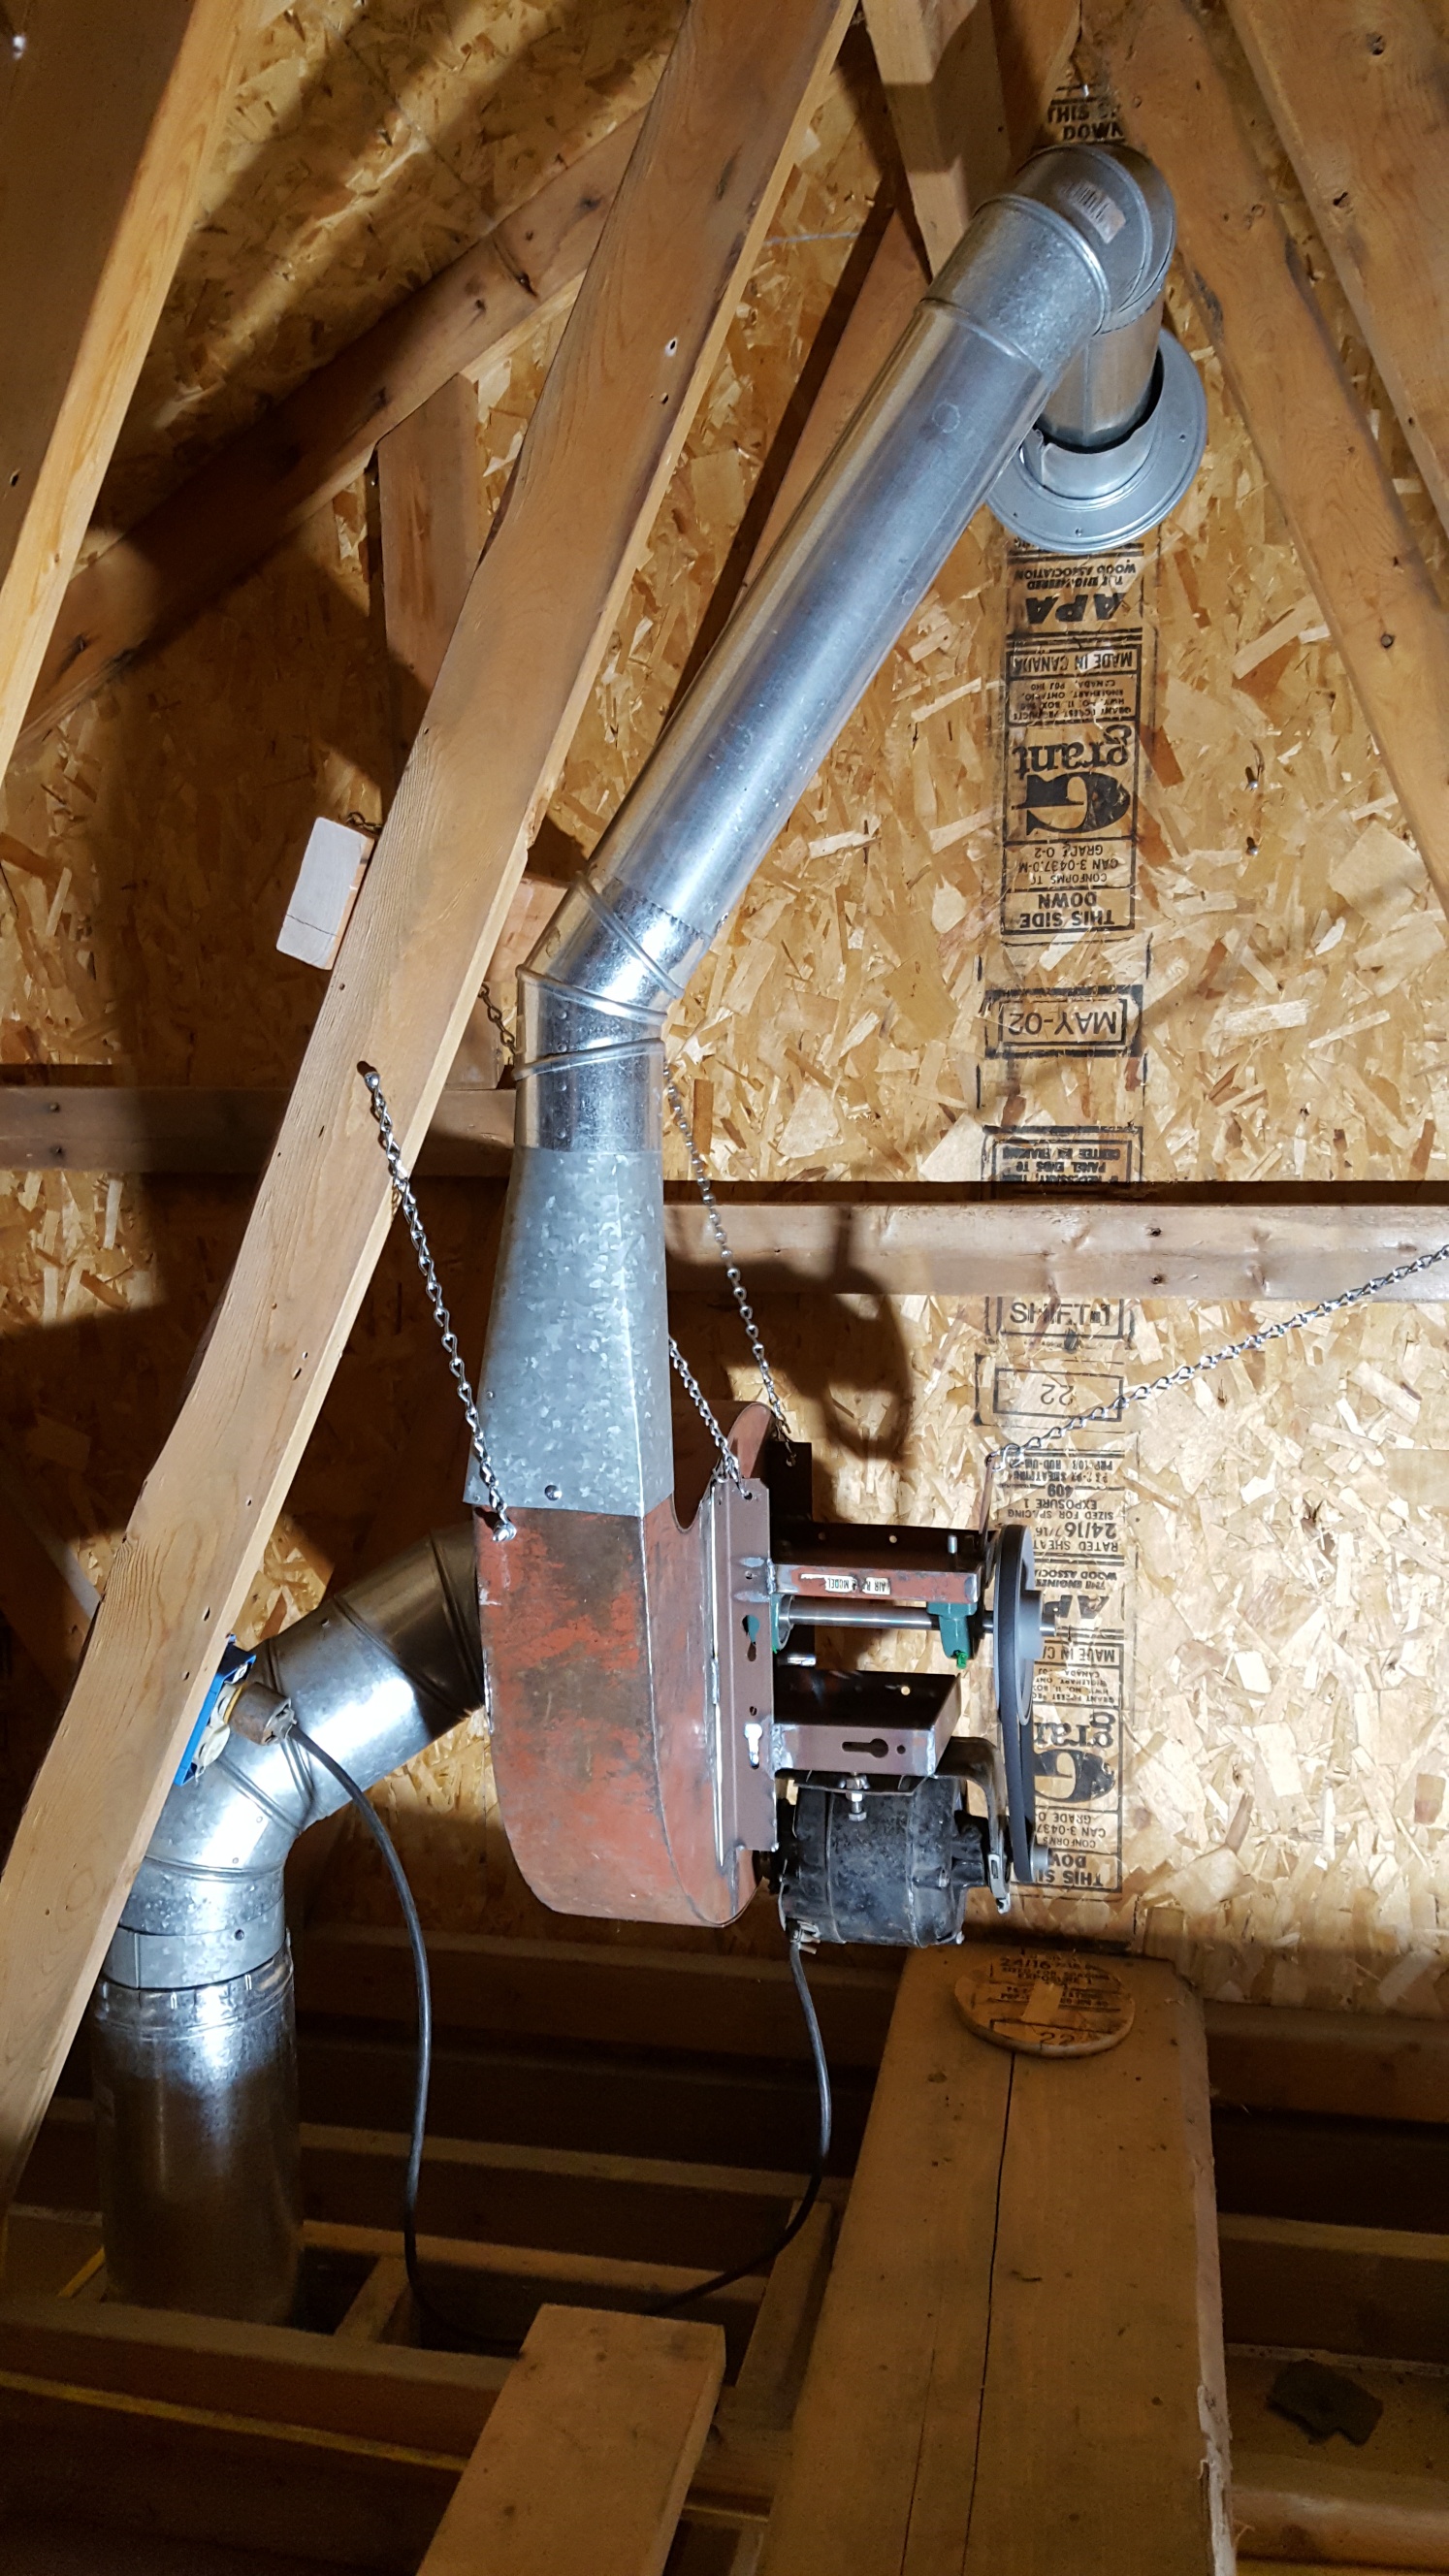
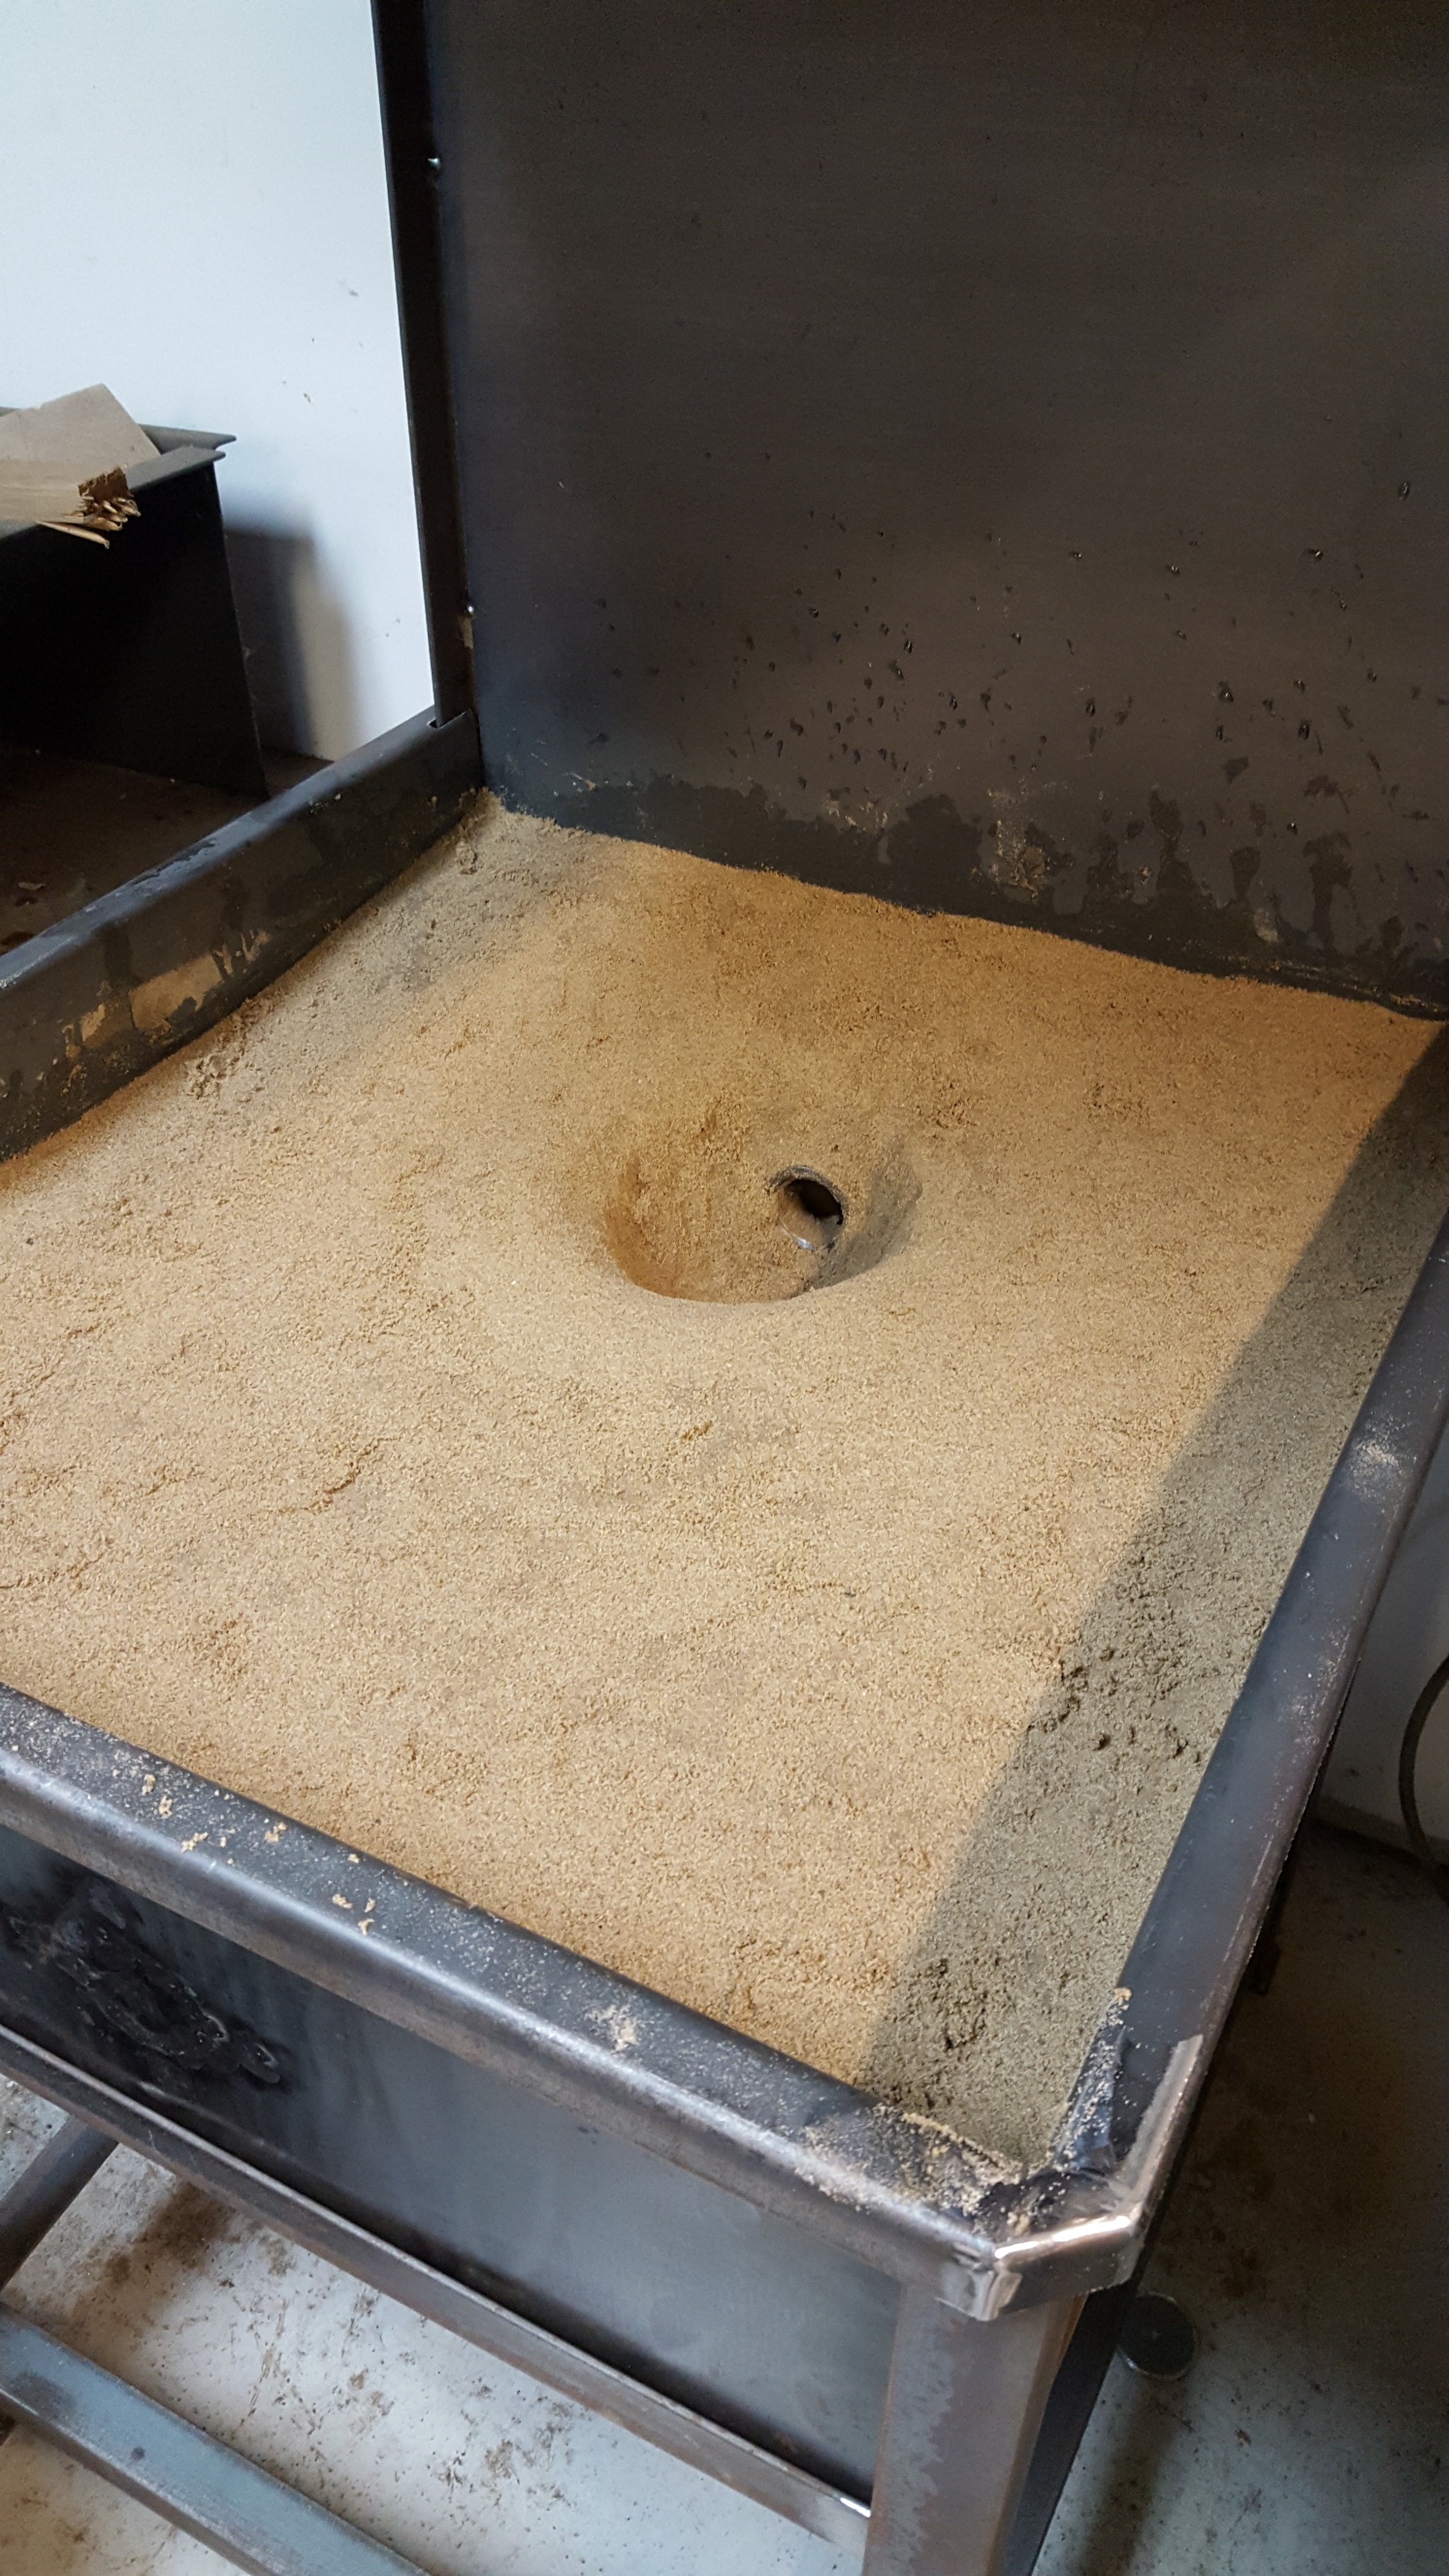
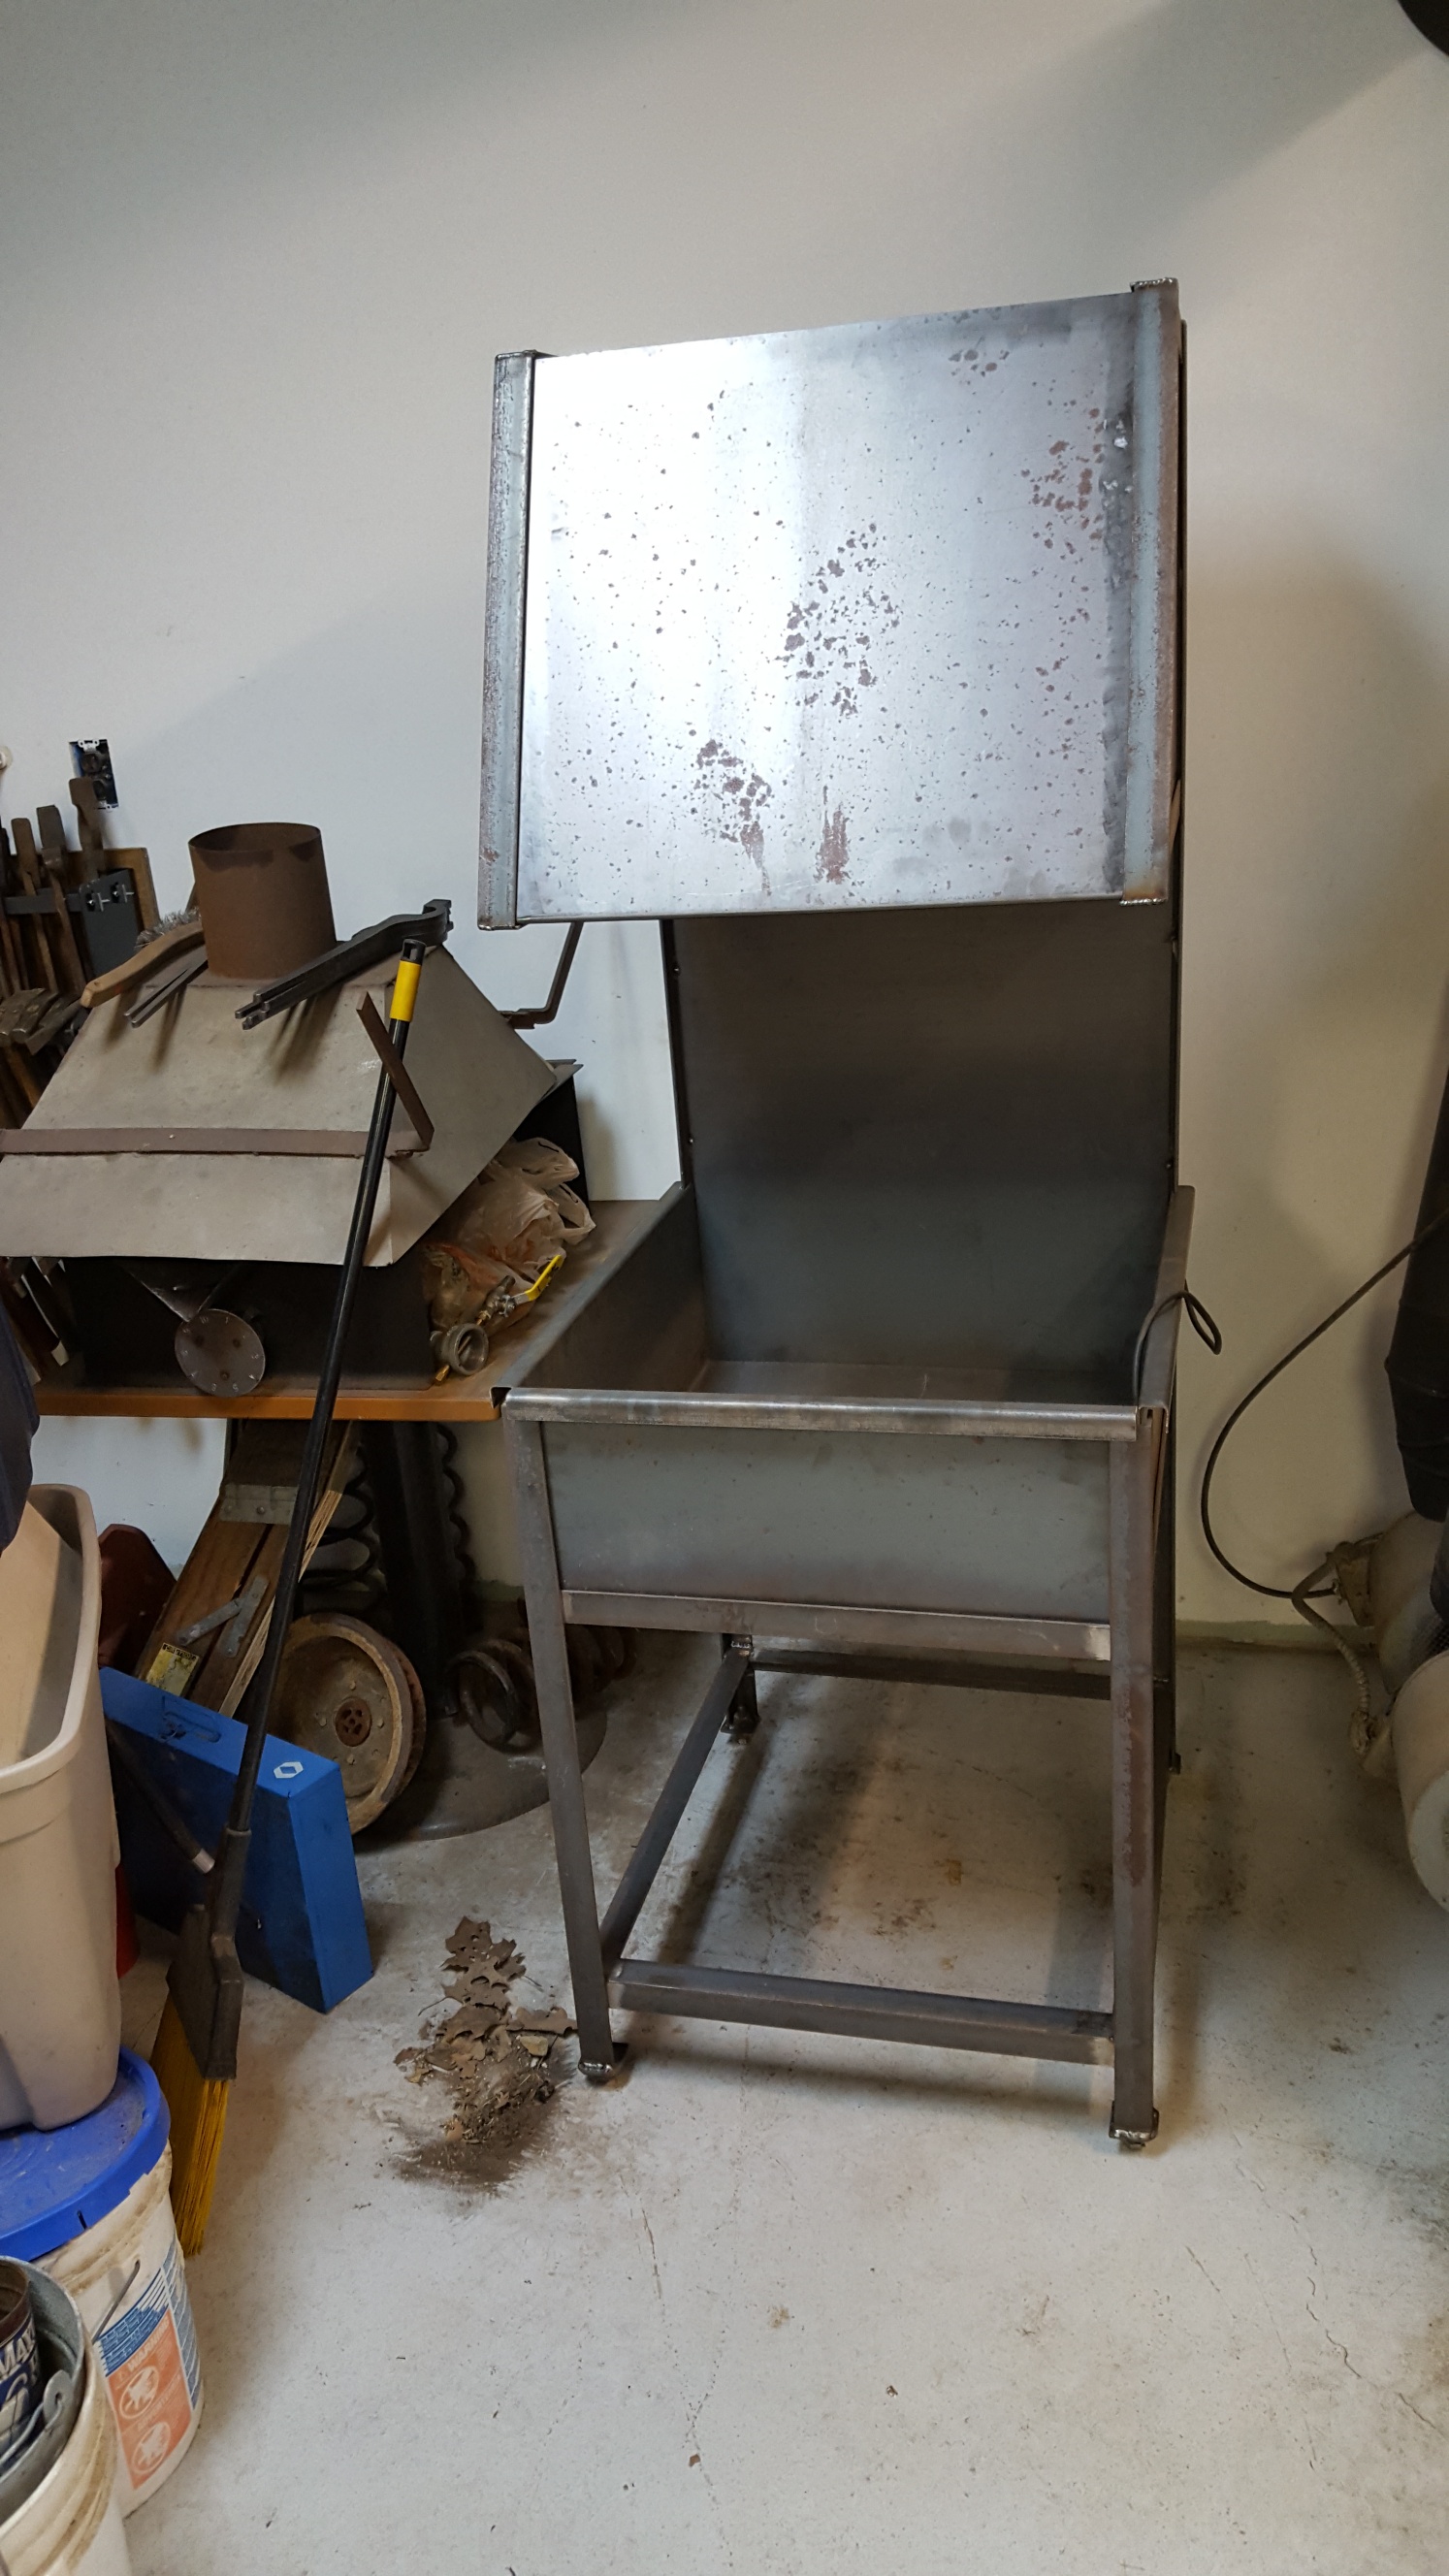
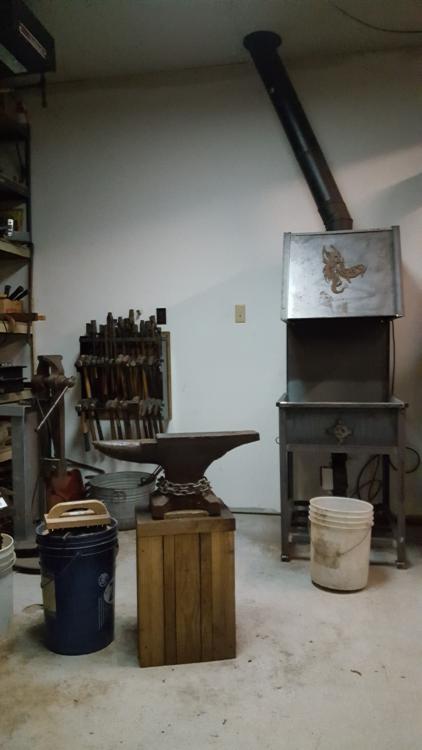
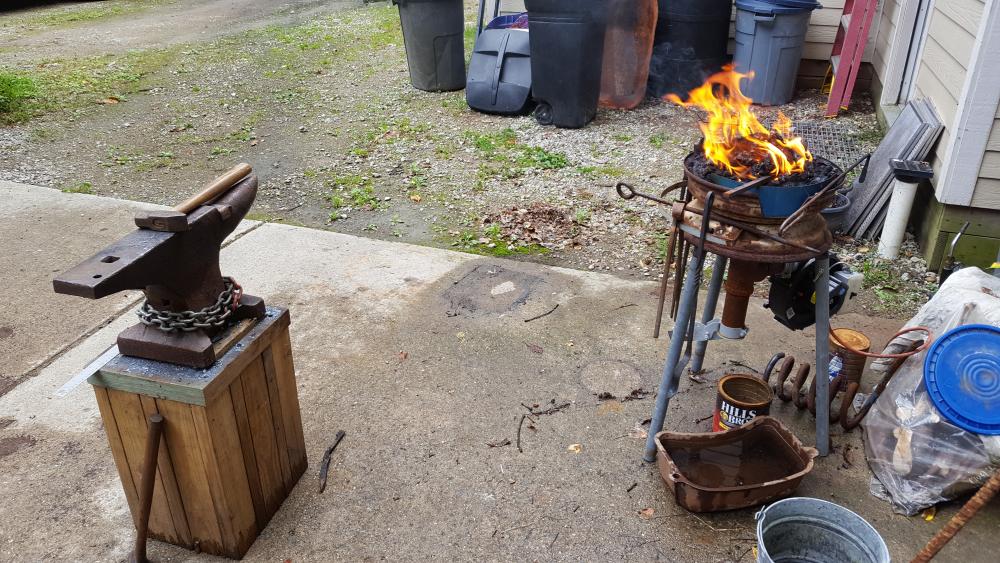
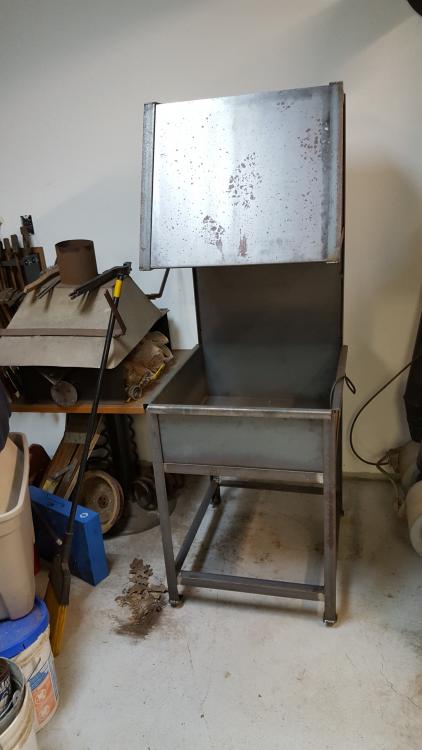
Ok, long time since I started this thread. been spending too much time on cars, women and booze.... Wait, that's not it. well, cars is somewhat correct. Anywho, heres a more recent photo of the newly created forging area in the shop. This is slowly becoming less a car shop and more the metal shop. I'm sure at some point I will actually build the dedicated forge, but for now I gotta work with what I got (10x more than most, I know) The sand is gone, it was more for photos and a test for the vent system. I spray galvanized the pan and haven't filled it back up yet. I used a T fitting for my bypass air valve, I cut a slit in 1/4' rod and welded a flap to it. this is under the pan and connected to a push/pull rod on both sides (for us ambidextrous types) I included a shot of the powered vent since there were a few discussions of their feasibility. Todd


-
My thoughts... a 12" chimney 4' above the highest point within 10' (3' within 10' is code) is big enough to not need the addition draft provided by the extra 4' of "cap". You can add it later if required but leave it off and see how it draws. Todd
-
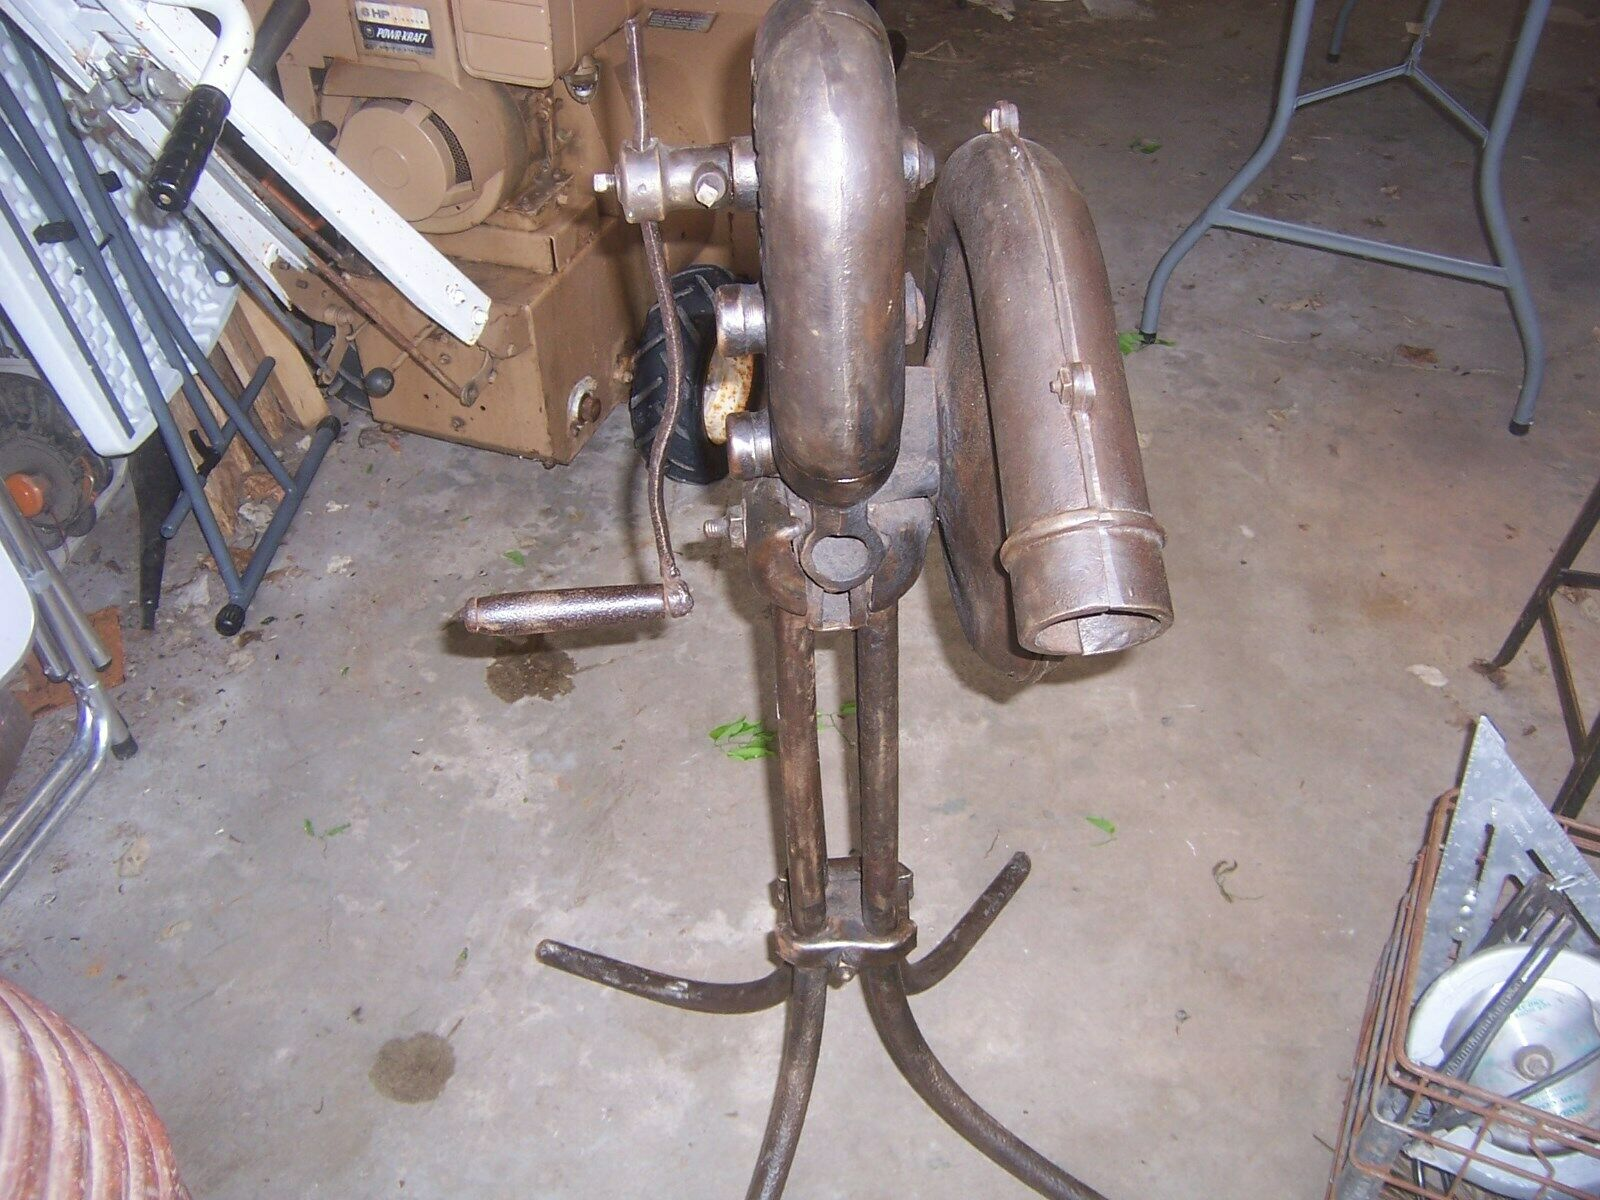
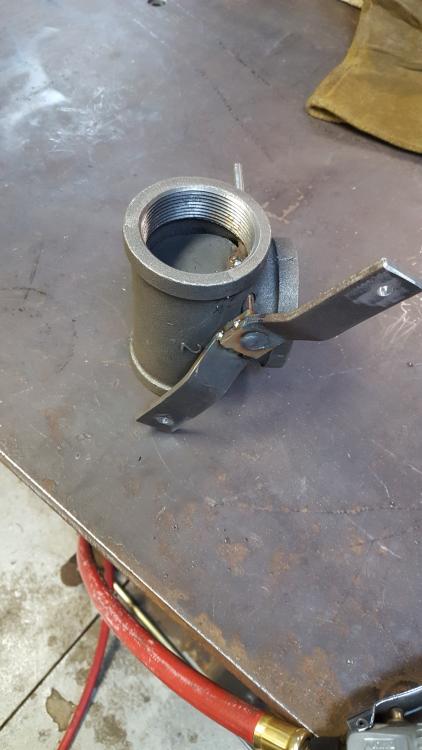
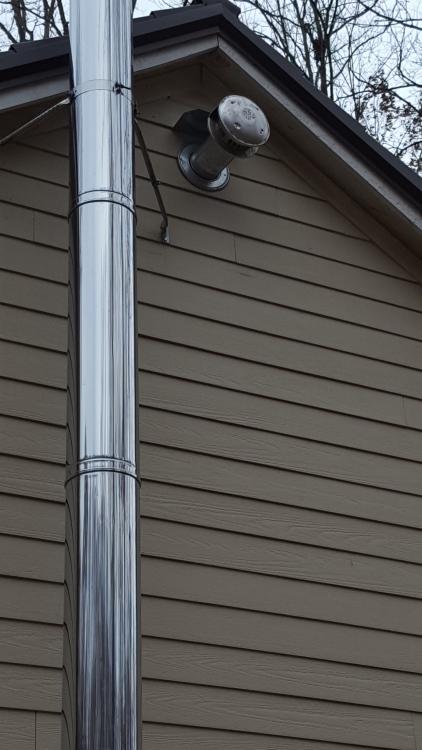
I had a similar situation/need. I have a press-formed aluminum roof that i will NOT put holes in so the need for an alternative vent system prompted me to design a powered vent. I used an old walk behind leaf blower housing and impeller for the "power". I am driving it with a 1/4hp 1740rpm 110v motor. pillow block bearings and shaft for the impeller, 1.5" drive x 6" driven pulley gives it 435 shaft rpm which is about perfect. The housing has a 6" inlet from the forge hood (B-vent through the ceiling), and 4" outlet which I connected to a B-vent and exited through the gable with a thimble (I even made a little platform for the birds that WILL nest above it). Mounted a switch on the wall next to the forge to turn it on/off. The blower assy sits in the attic space right above the forge, so nice and quiet without any insulation but even quieter with ! There is enough fresh air being drawn in with the smoke to keep the temp down but the housing and impeller are thick enough to handle it. I am planning on splitting the input to use above my welding table. will need to fab some metal slide valves similar to those used in a woodworking dust collection. Todd


-
Not sure if it will help but here's a pic of it in an old catalog i found in the interwebs.... I was researching a downdraft/powered vent system myself.
-
The profile looks suspiciously like these pickup tongs. Maybe a little lower die of sorts ? Heck, while you have it, make some !
-
Awesome, thanks a bunch ! Mine was missing the dump cover as well. I assume those rotted away rather quickly given the corrosiveness of the ash and age of these forges. I just cut some sheet and used a screw with a spring under the head for tension. works fine. As for the belt, if it's too tight it won't allow the flywheel/blower to spin fast or for long. Mine had a cloth belt that was way too tight. being made of cloth, it slipped easily prompting the original installer to make it tight. No Bueno. I don't believe these were never meant for FORGING but rather light duty farm work, periodic shoeing, riveting etc. no way to get a deep fire even with piling the coal up high.
-
Hey PVF... can you give me the measurement of the handle from the pivot point to the eyelet, and the length on the connector link ? I have the same forge, though it's the older 4 legged version, and I am missing the handle, pivot and link. trying to get those measurements as exact as possible. Yours looks to be as close to original as I've seen. BTW, the 3 holes are for a heat shield, the missing chunk..... sadly, it's missing. Thanks, Todd
-
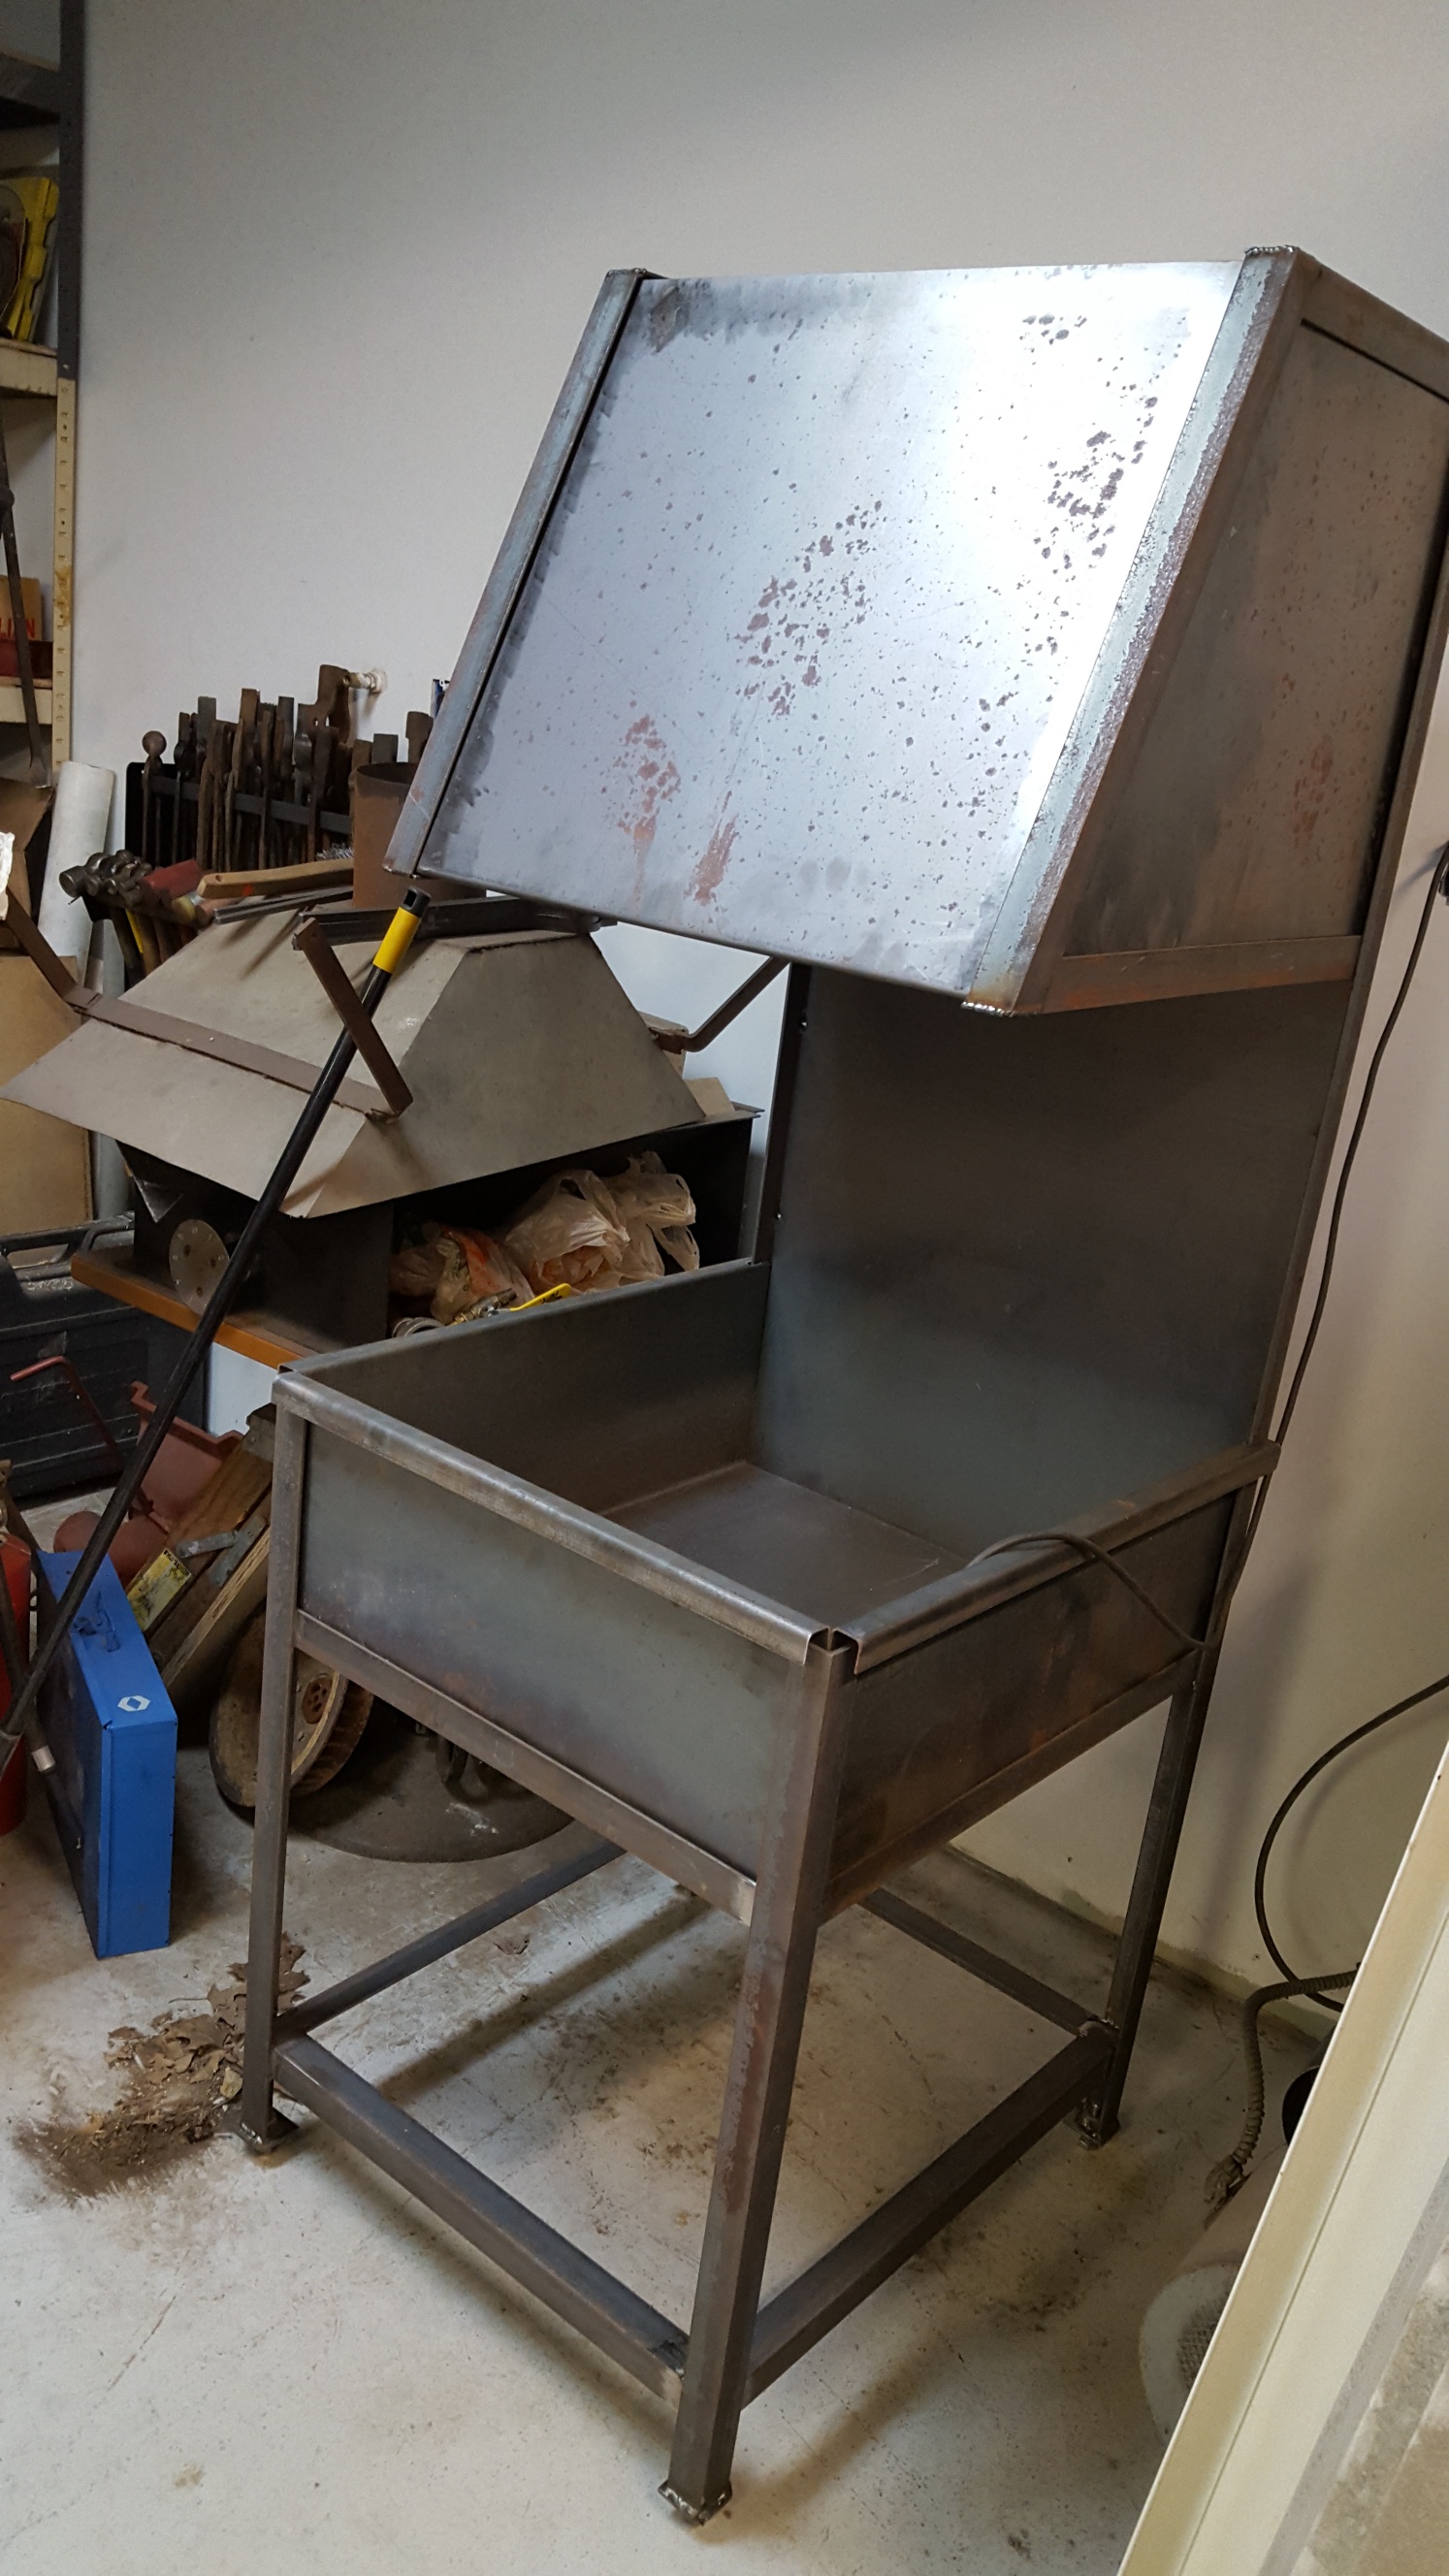
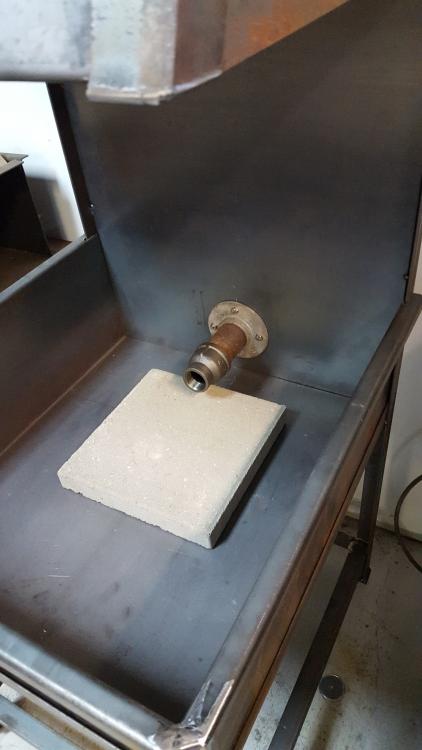
Indoor photo shows my home made Whitlox inspired V-box on the left hiding under the vent hood. 11ga. mild steel frame & 2" stainless tube inside 2" stainless pipe for the air control, fire brick lined.... did I say "inspired" ? (look closely under the hammer/tong rack and you can see a never used forge pot laying on the floor) To the right of the V-box is the almost completed "English" side blast. 14ga. sheet & 3/16 x 1-1/2" angle. 2" black pipe, 1-1/2' reducer, a home made diverter made from a "T", filled with sand ready for a clay 'skin'. It will have a water cooled bosh tank/tuyere later on. Outdoor photo is my old portable bottom blast made from a UTG (hubless) trailer wheel and a cast iron floor drain that sits down inside the wheel. The legs are removable as well and held in with spring pins. Blower is a brushless furnace inducer (exhaust) motor that I rebuilt which is super quiet and moves air ! Todd


-
I am almost finished with the sideblast build. picked up some 2" black pipe, elbows, flanges today and hope to have it fired up by next weekend ! I will be making a water cooled tue-iron/bosh tank but I need to get back to forging. I still need to cap the hood and install the powered vent (see other post) which I also picked stuff up for today. Had to rearrange part of the shop to make room for indoor forging until I build the dedicated shop, so excuse the mess. (you can see my Whitlox inspired charcoal forge & hood next to it) Todd here's a crappy video of the powered vent. my 1st youtube video... my kids would be proud (NOT) https://www.youtube.com/watch?v=GYfeybH7M2w

-
WOW....... I can't believe how long it's been since I posted the last update. Since then, I am on rev 3.0 which is also the final. I was only using the box fan motor as a "proof of concept" to see if my idea made enough draft to go further and as I and others thought, it didn't have enough oomph to spin that impeller and bearings from a dead stop. It DID however, prove that it should work so now I have a 1/4 hp. standard A/C motor driving the system and it works GREAT ! I haven't plumbed it yet since I've been busy with everything else besides Forging, but I'll post a link to the youtube video below. Todd https://www.youtube.com/watch?v=GYfeybH7M2w Now to finish the side blast build and connect this 'sucker' !