desmato
-
Posts
71 -
Joined
-
Last visited
Content Type
Profiles
Forums
Articles
Gallery
Downloads
Events
Everything posted by desmato
-
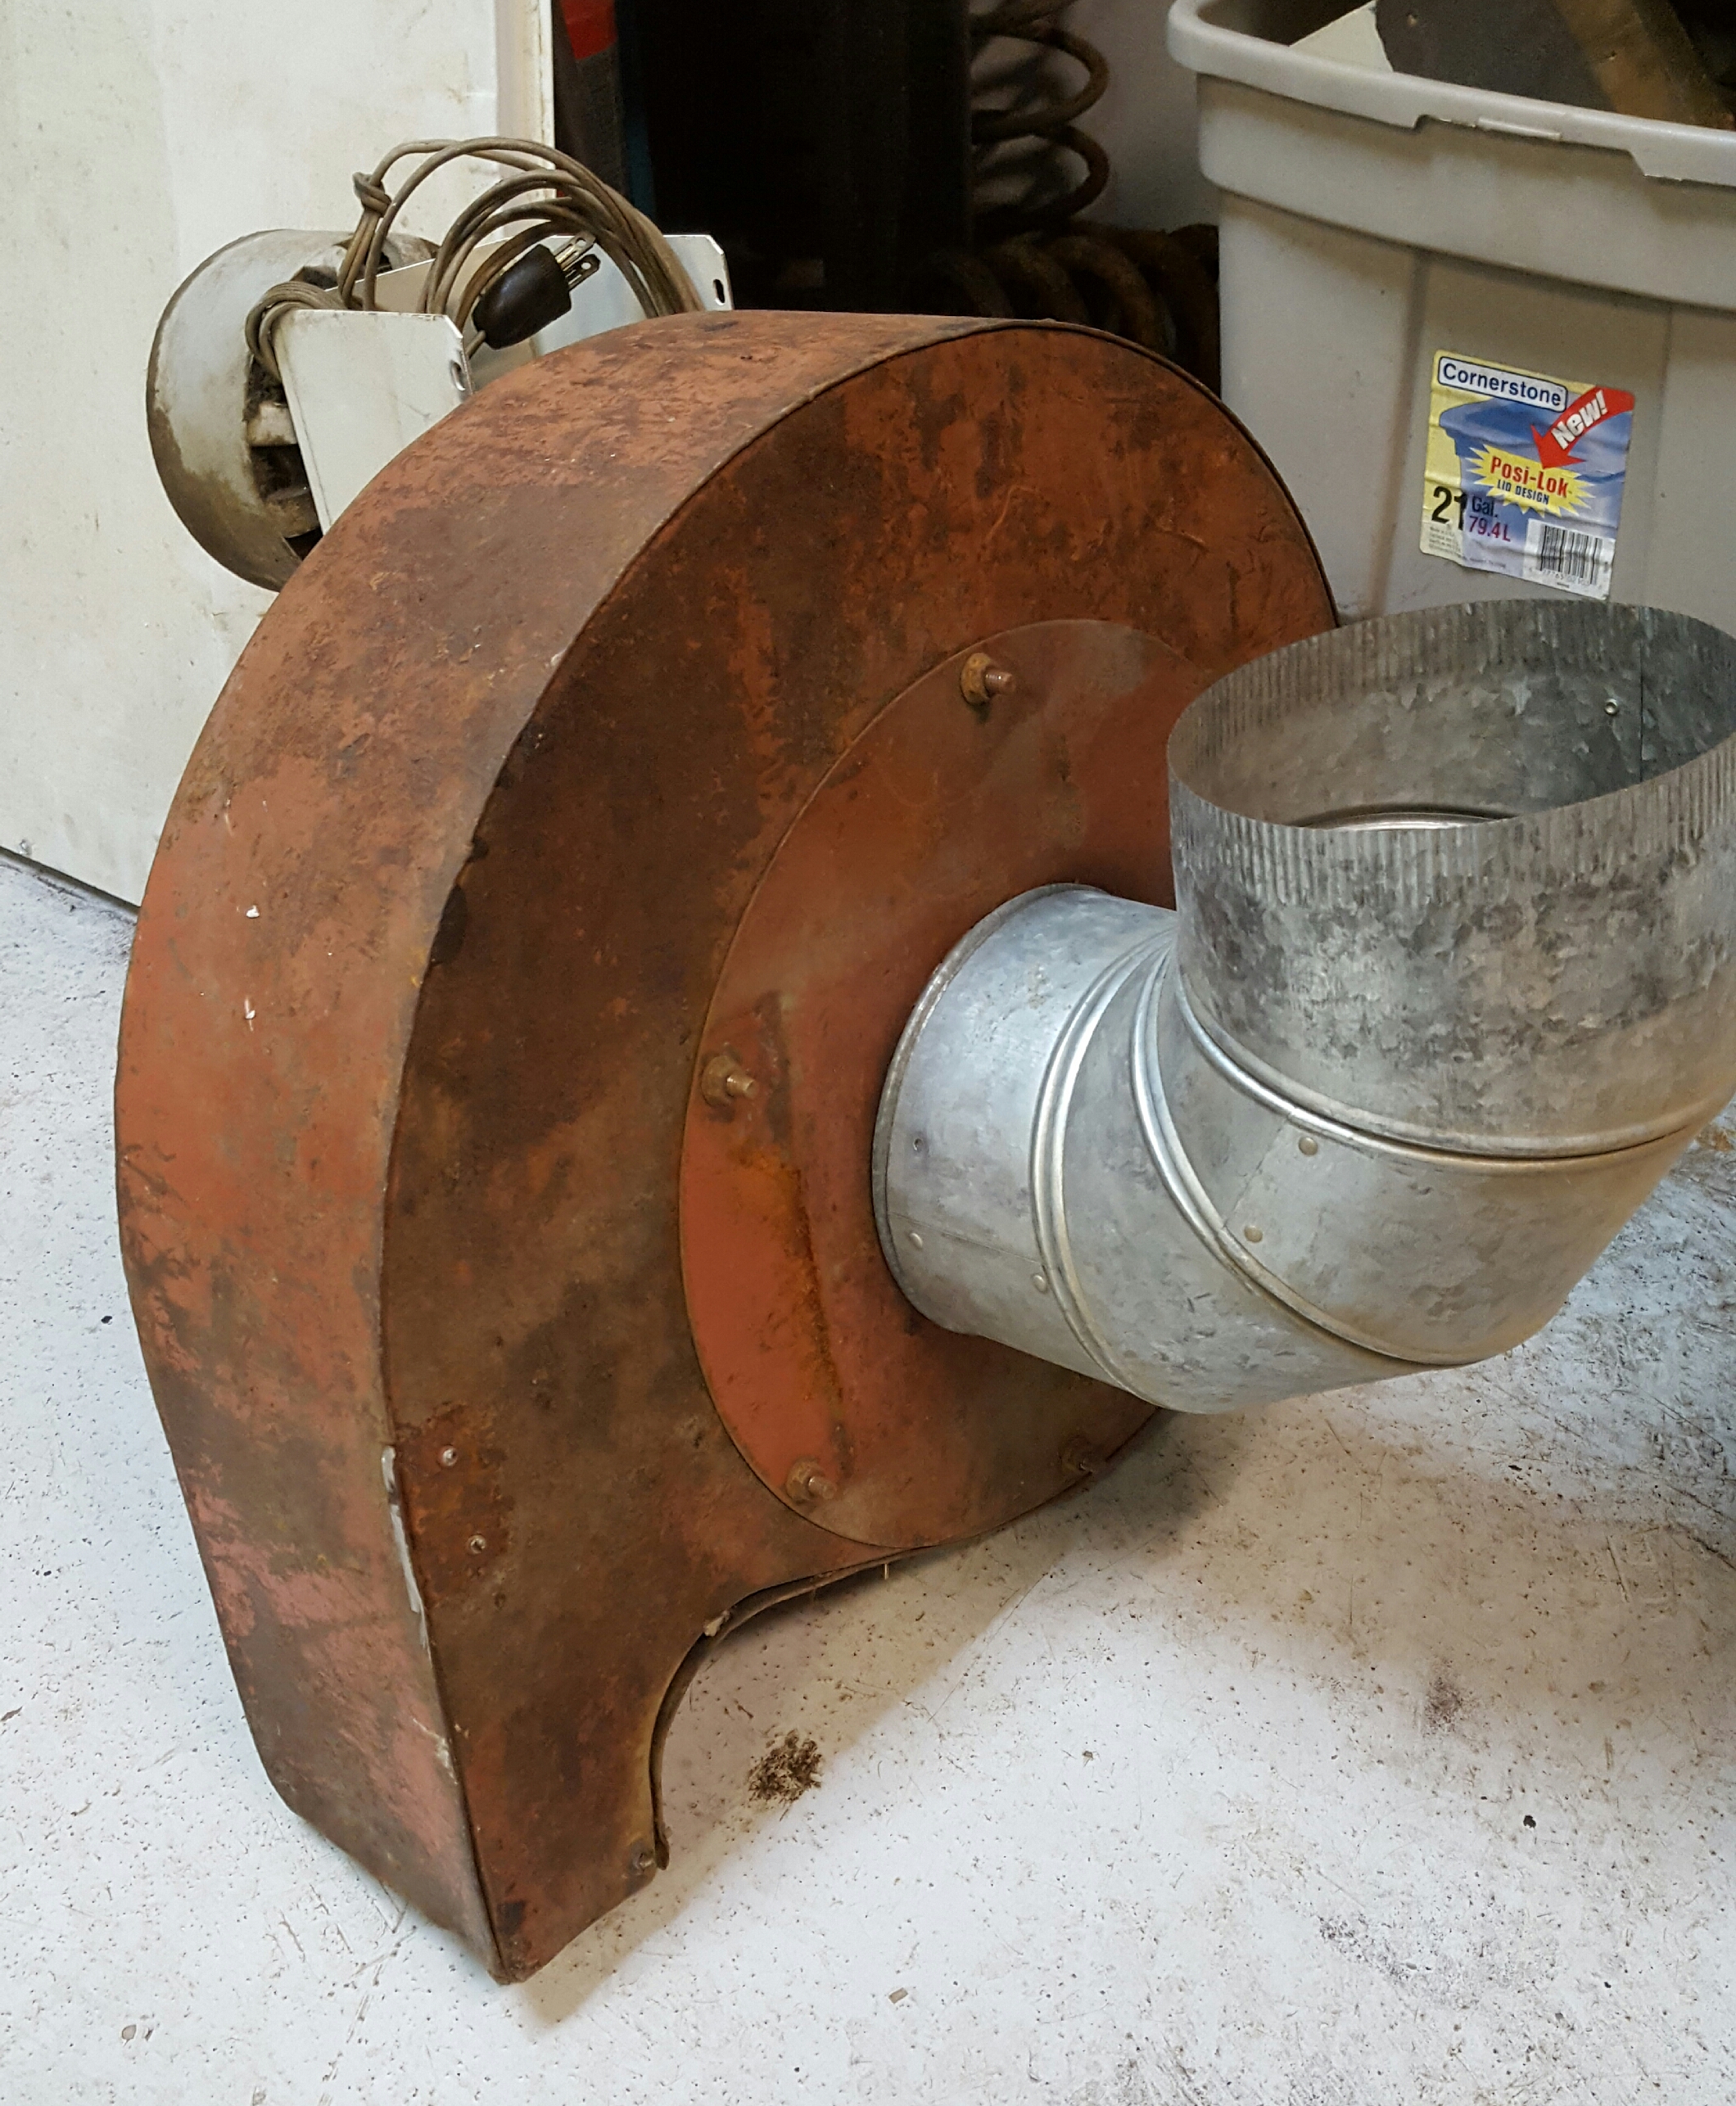
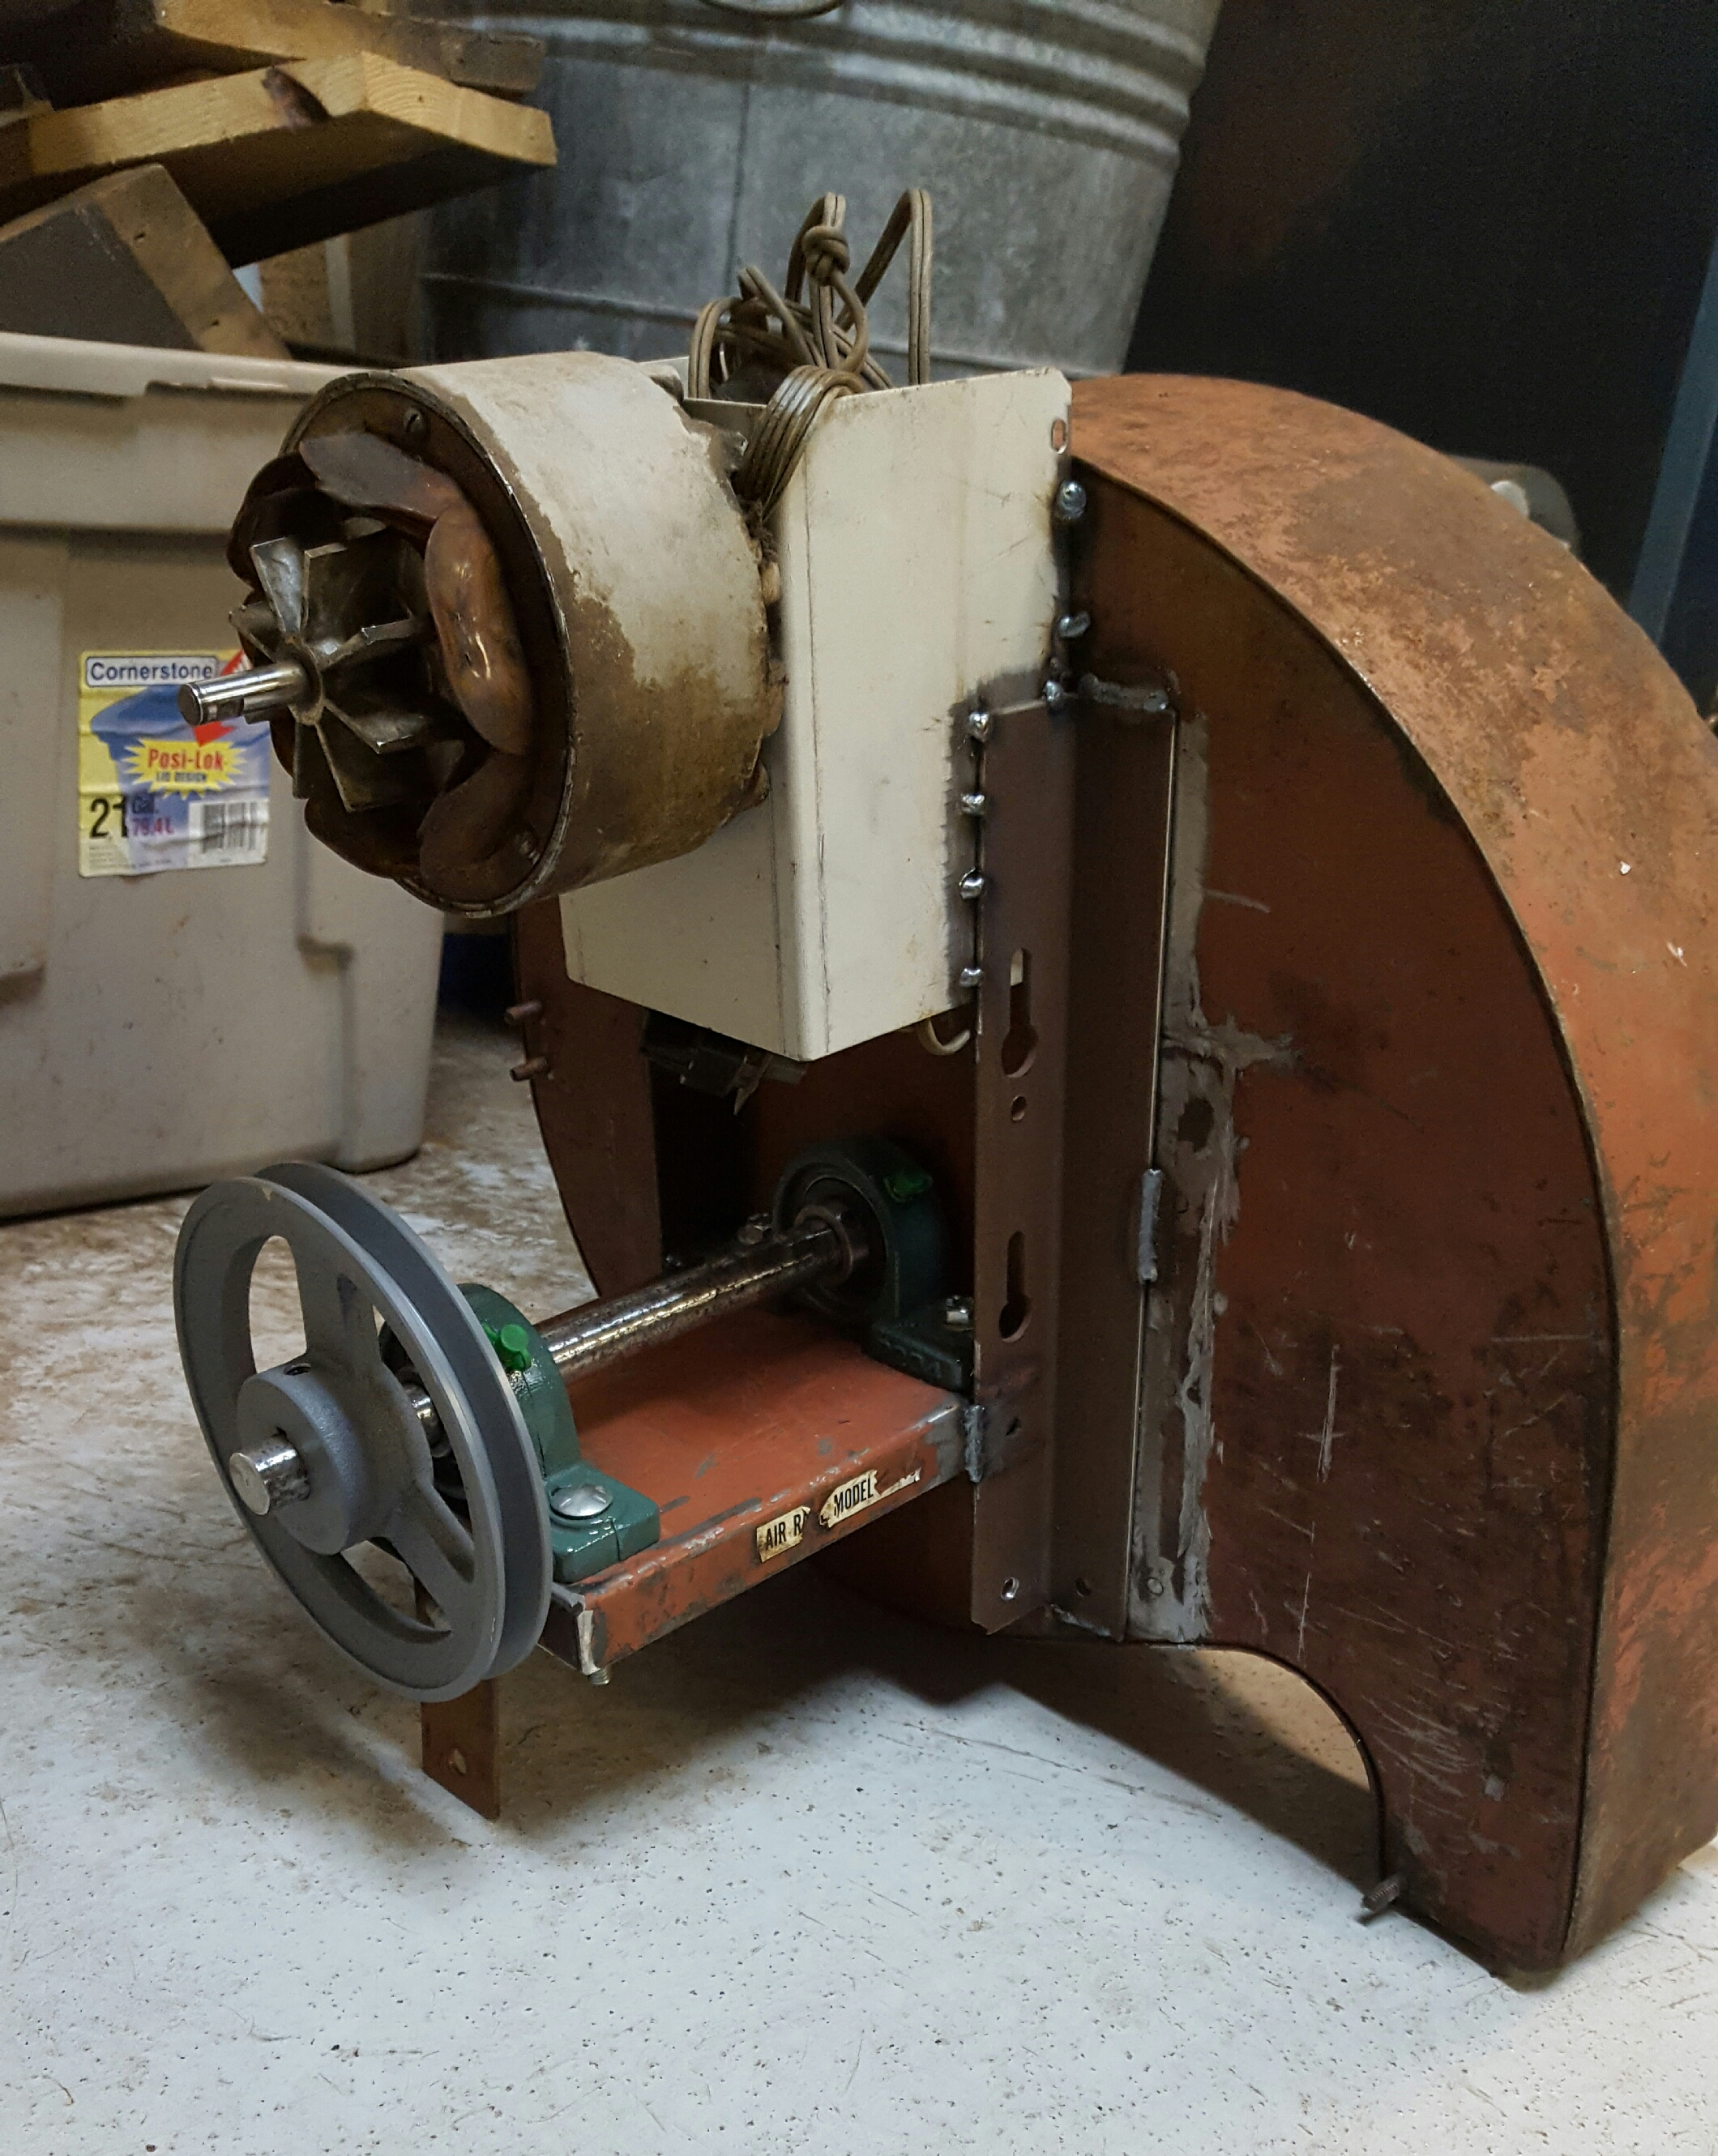
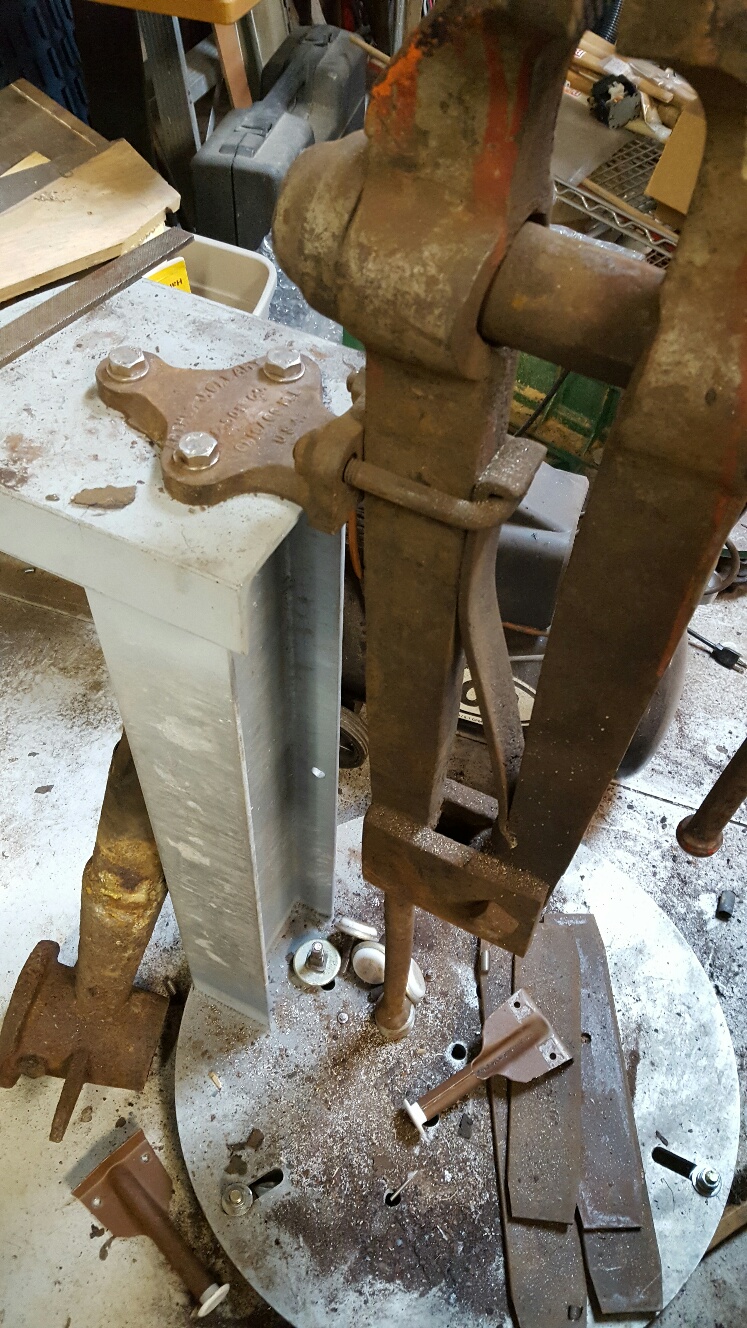
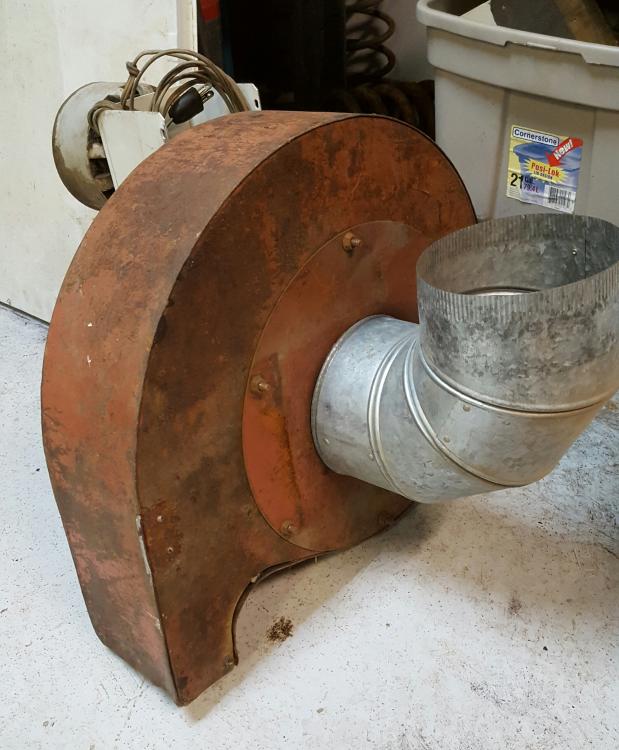
So here's an update. I have the assembly all fab'd up, just need to grab a belt (hopefully can get by without a tensioner) and then see what kind of draft it has. I used an old box fan motor which has 3 speeds, is brushless and reversible not that I will need that. Once I finish the shakedown, I'll mount and plumb it in. photos show it upside down (I have a pulley for the motor and..... pay NO attention to the bedrail. it was free and fit the build) Todd

-
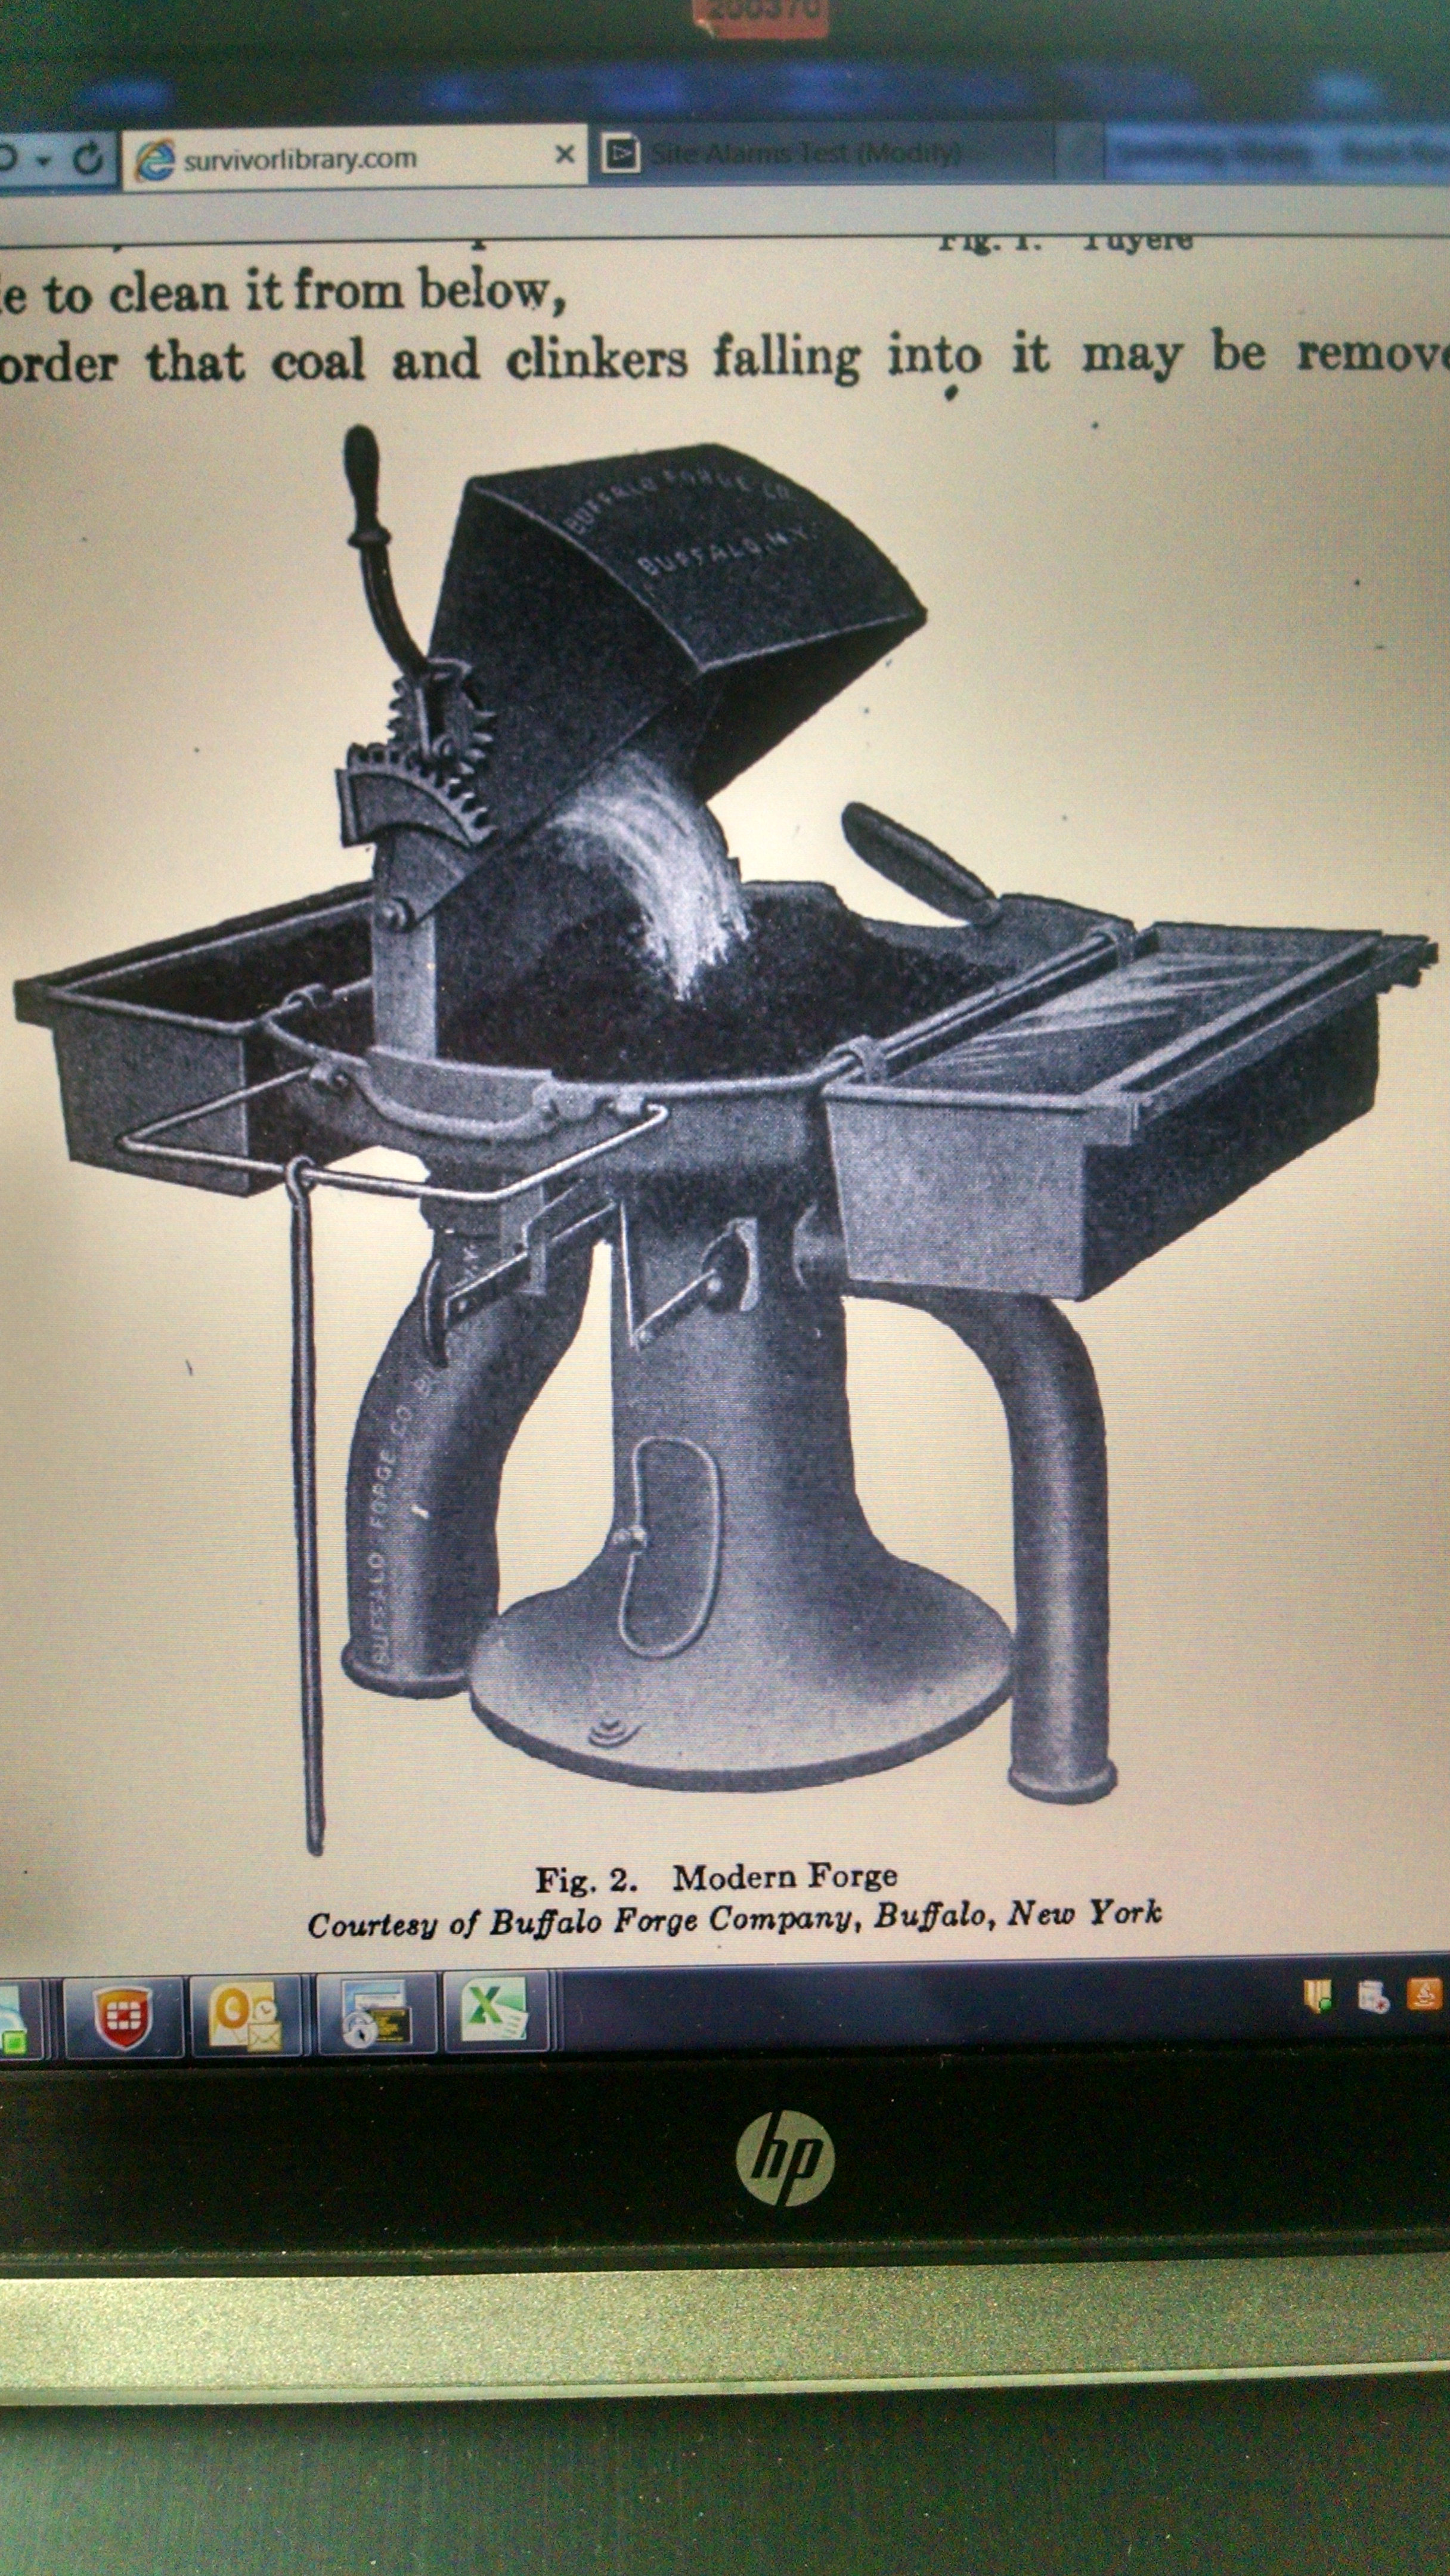
1st, where'd you get that photo from ? looks to be an online book 2nd, I may have the correct tuyere breaker combo for that. Do you have a photo of what you need ? I've been on the lookout for the downdraft version of that forge as seen below, but yours is practically the same and what I have is possibly for that setup. the part I have is in the middle with the hand crank blower attached (not supposed to be) Here's the post regarding it and what I'm working on...

-
V-bit/Bolt tongs all the way
-
I could do better pics if needed. those were quick cameraphone shots off the cuff for the post. just say the word. seems like all the vices I've seen that have the pivot peg held in with a tapered wedge all use the "tenon" style mount, whereas the treaded pivot uses either the 'double wedge' or 'U-bolt" based on the age. Really, to get it useable, a piece of angle iron and a u-bolt will work for all vices as Thomas P. said... The top vice (laying on the floor) is about 100# and I always fear snapping that tenon off with heavy twisting etc. I may make a u-bolt mount for it to preserve the original mount as that vice is an early 1800's by my estimation. Seeing as I have it down for cleaning, now's the perfect time. Todd The wedge style cloverleaf I have is forged down from a solid 1-1/2" bar and the strap is 5/16" ....
-
Yeah, I was struggling with finding the right rpm. I have a 1740 RPM motor with a 1-1/2" pulley and ordered a 6-1/4" for the fan. I calculated it around 415 RPM (fuzzy math) which may still be a bit fast. Since this is a work in progress, I'm sure a bit of tweaking will be required. I'm also looking for a cheap variable speed motor control to fine tune it.
-
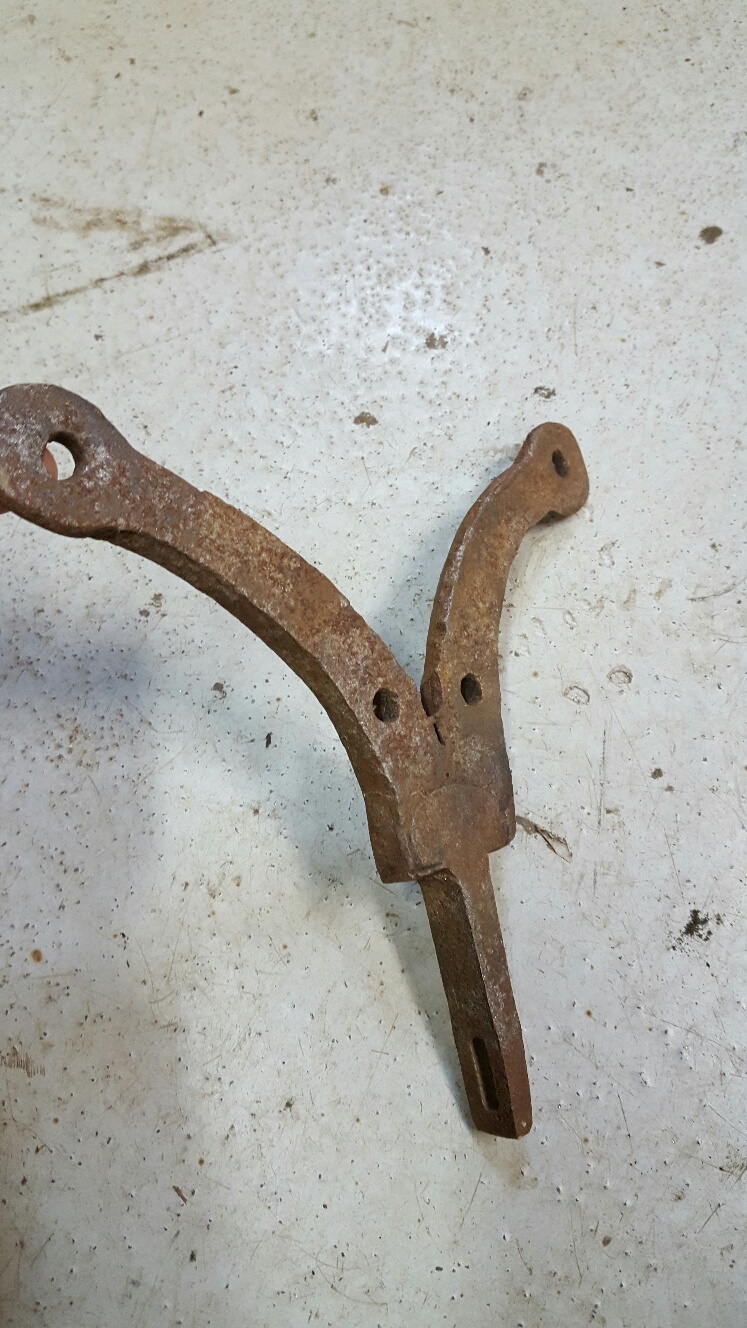
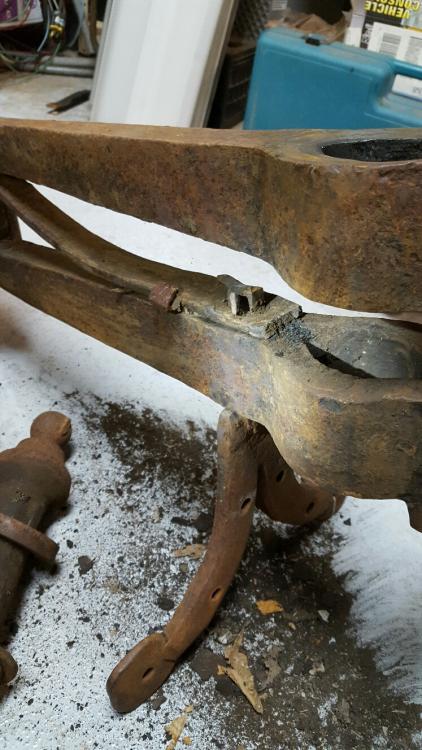
I have 2 "cloverleaf" mounts, one older 'double wedge' and obviously forge welded together, the other was factory made (Arthur O'Leary) using a U-bolt Here are the mounts for the ones I have. these tend to be the 3 styles you'll see and are in order of oldest to newest..... Oldest: mortise/tenon style. Goes through the leg and spring, secured with a tapered wedge. (you can see the tenon is forge welded on) Middle: double wedge style. Has a flat strap that wraps around the leg and holds it against the mount. uses an opposed double wedge to tighten/secure it. (Likely forged from bar stock. can also see the welded eyelet) Newest: U-bolt style. Self explanatory and the easiest to duplicate using angle iron etc.


-
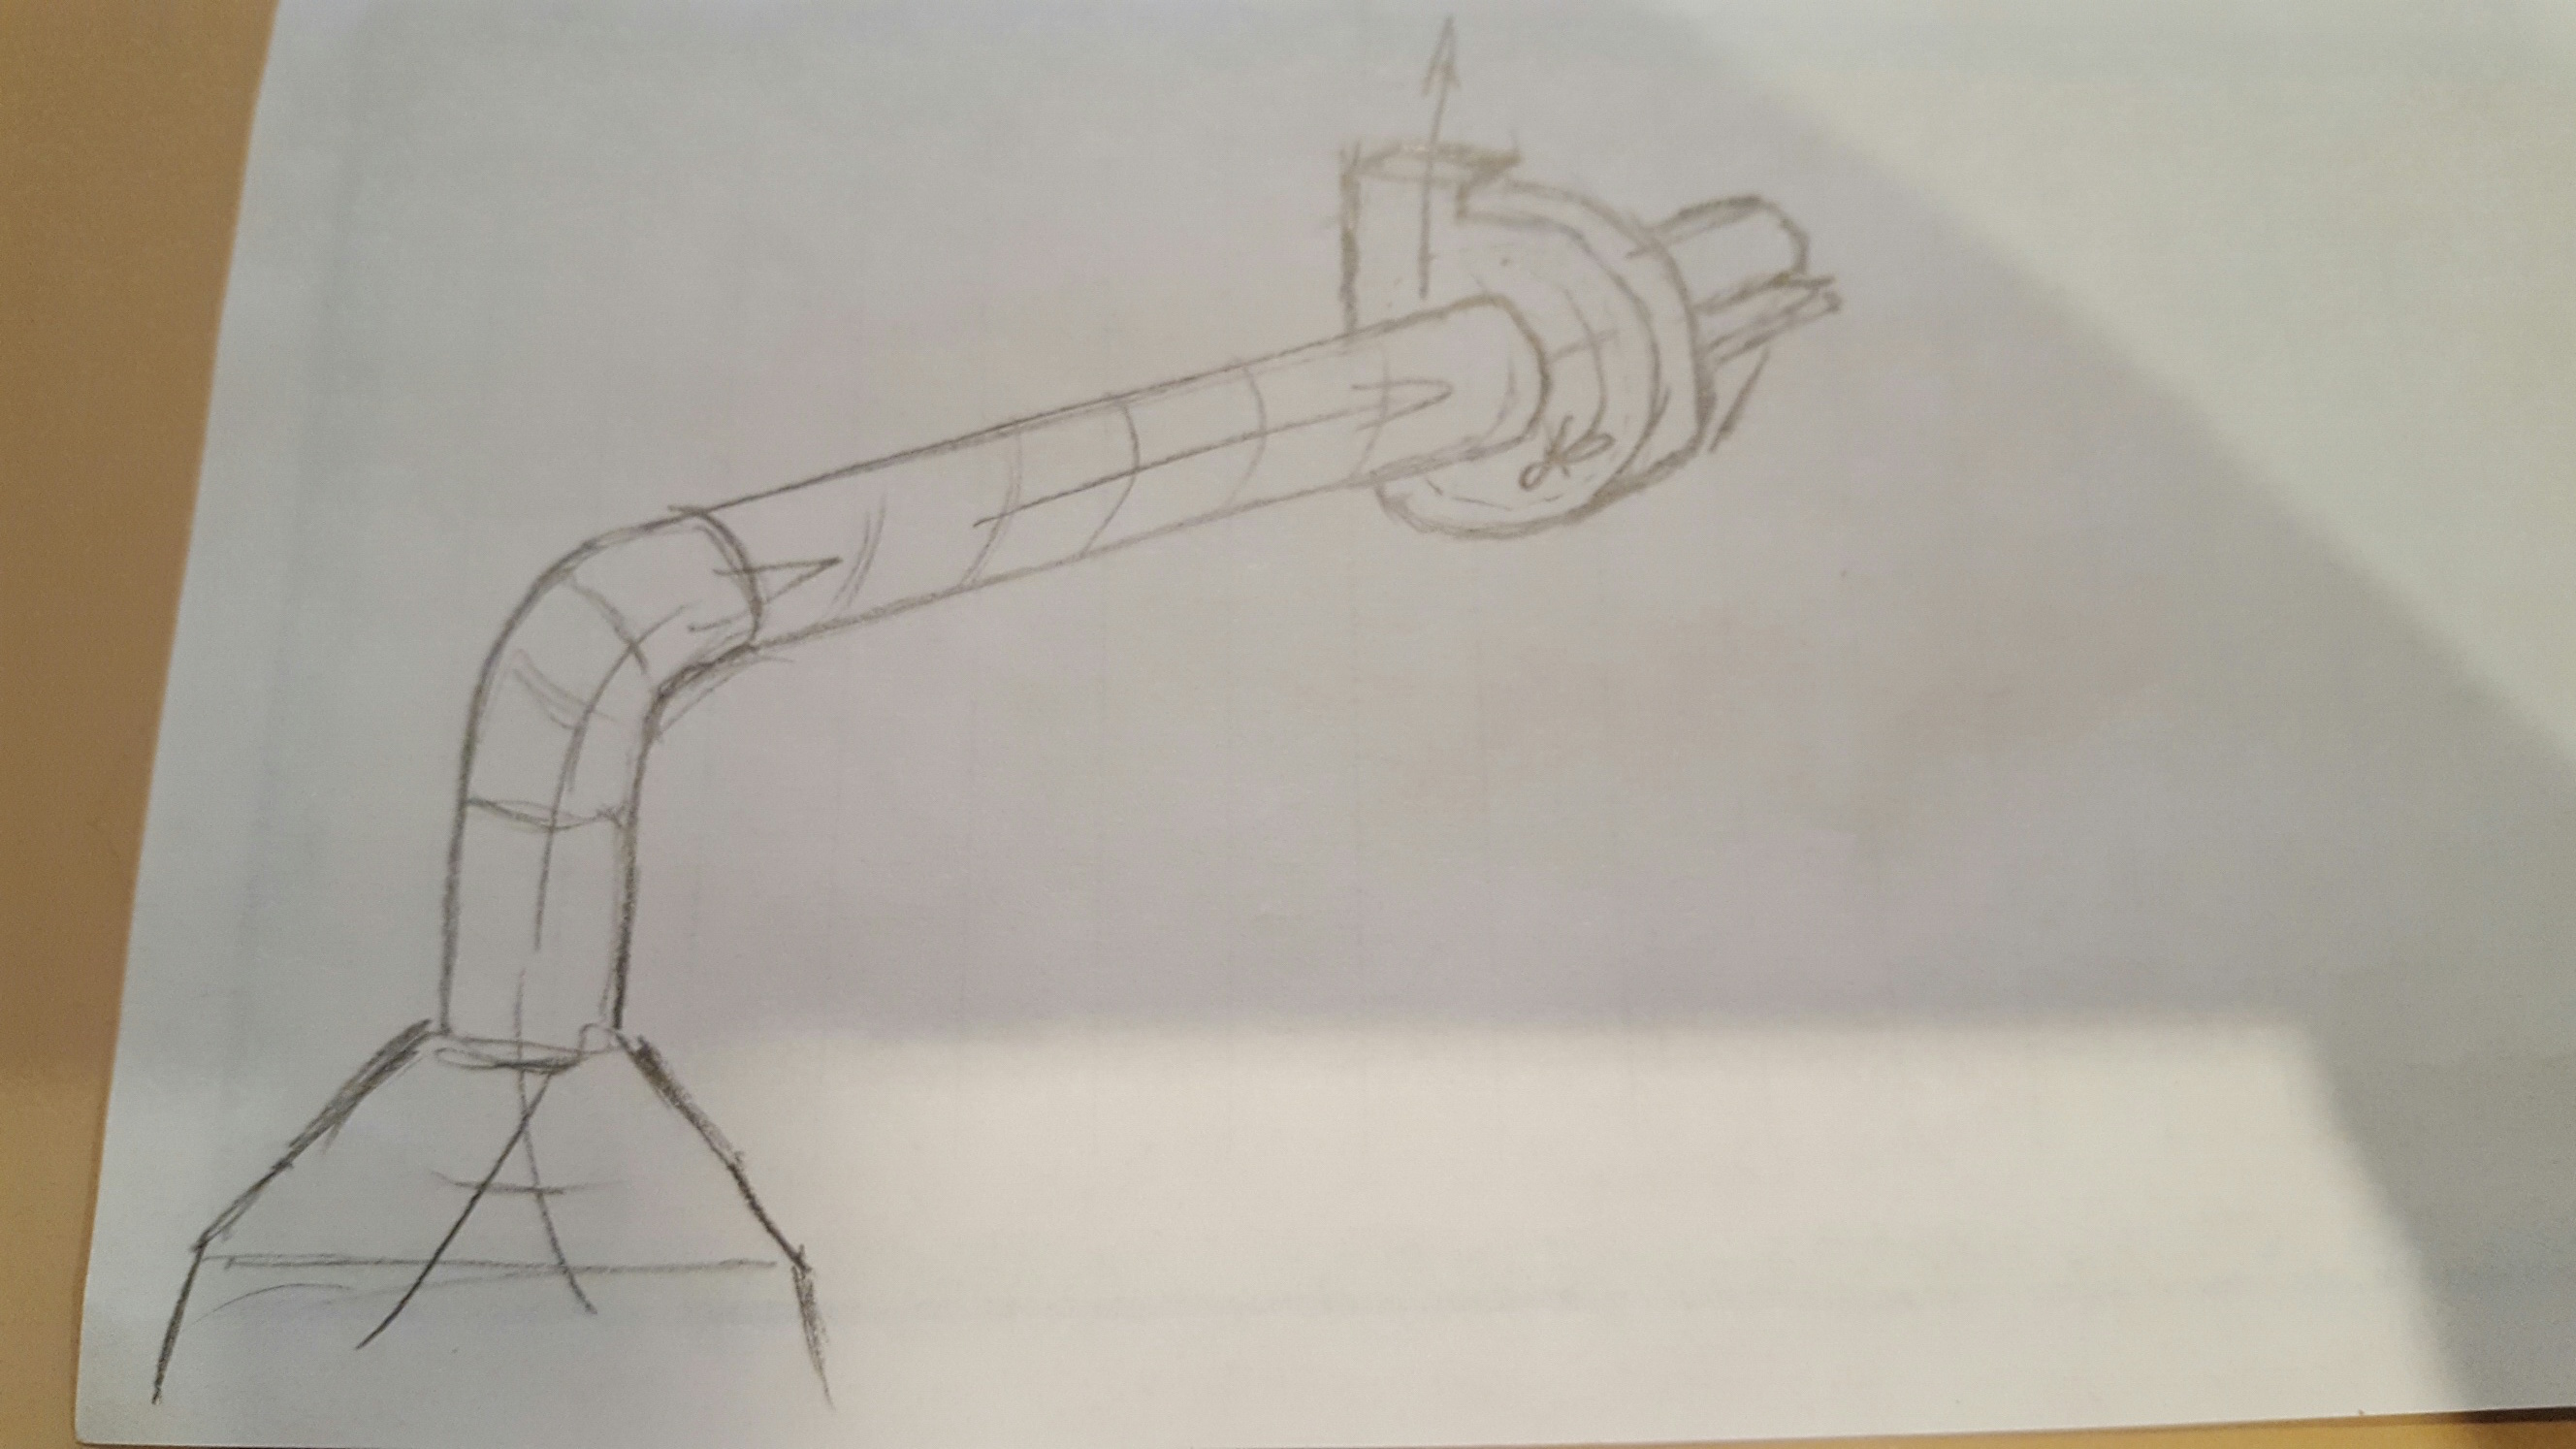
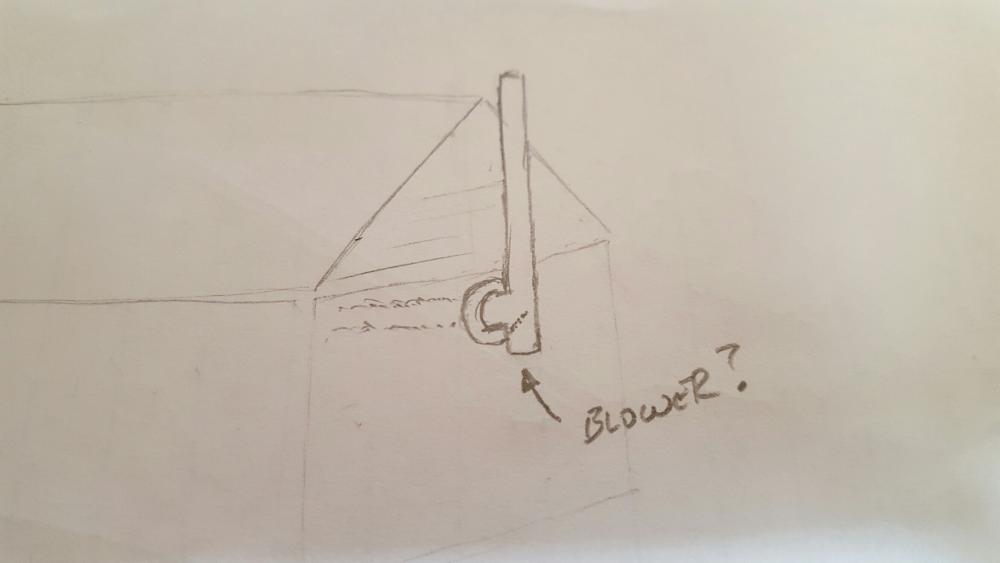
I saw your video and was commenting in my 1st post about it. I like your idea but I recall you saying somewhere about replacing the old vacuum motor for something a bit quieter or less bodged. I have to make 2- 90* bends to exit the wall, which I think may create too much restriction for your setup to work properly. I want to do something similar but I also want to use the smallest diameter pipe possible through the wall. I need to go up into an attic area, then out the gable, hence the 2 - 90* bends in the pipe. My thoughts are: 10" horizontal pipe in the shop connected to the inlet/suction of the "blower" assembly and a 6" pipe exiting the blower and shop. Since it will create positive pressure, I should be able to go smaller in diameter on the outlet just as the leaf blower it came from works The motor will not be in contact with the gasses or elevated temps, only the impeller and housing which are both very thick steel. (8mm for impeller and ~ 2mm for housing) I have the 2- pillow block bearings, jack shaft + pulleys on order. I already have a 1/3 HP 1725 rpm motor, so....... we'll see how it SUCKS in the next few weeks.
-
I have seen that first vice on the A2 craigslist for the last 5 months and based on the asking price, it'll be there for 5 years. The newest one you got has the spring and mount correct, just needs slid up. I just picked up my 5th leg vice this week. have yet to clean it all up but it's a fairly old one based on the hinge pin held in with a tapered peg and the mount as well. (goes through the leg and spring) weighs around 90# I'll post pics of all mine at some point if anyone really cares. only one is in use right now anyways Todd P.S. based on your avatar....... how happy are you with the movies being made and Edris Elba as Roland ??????
-
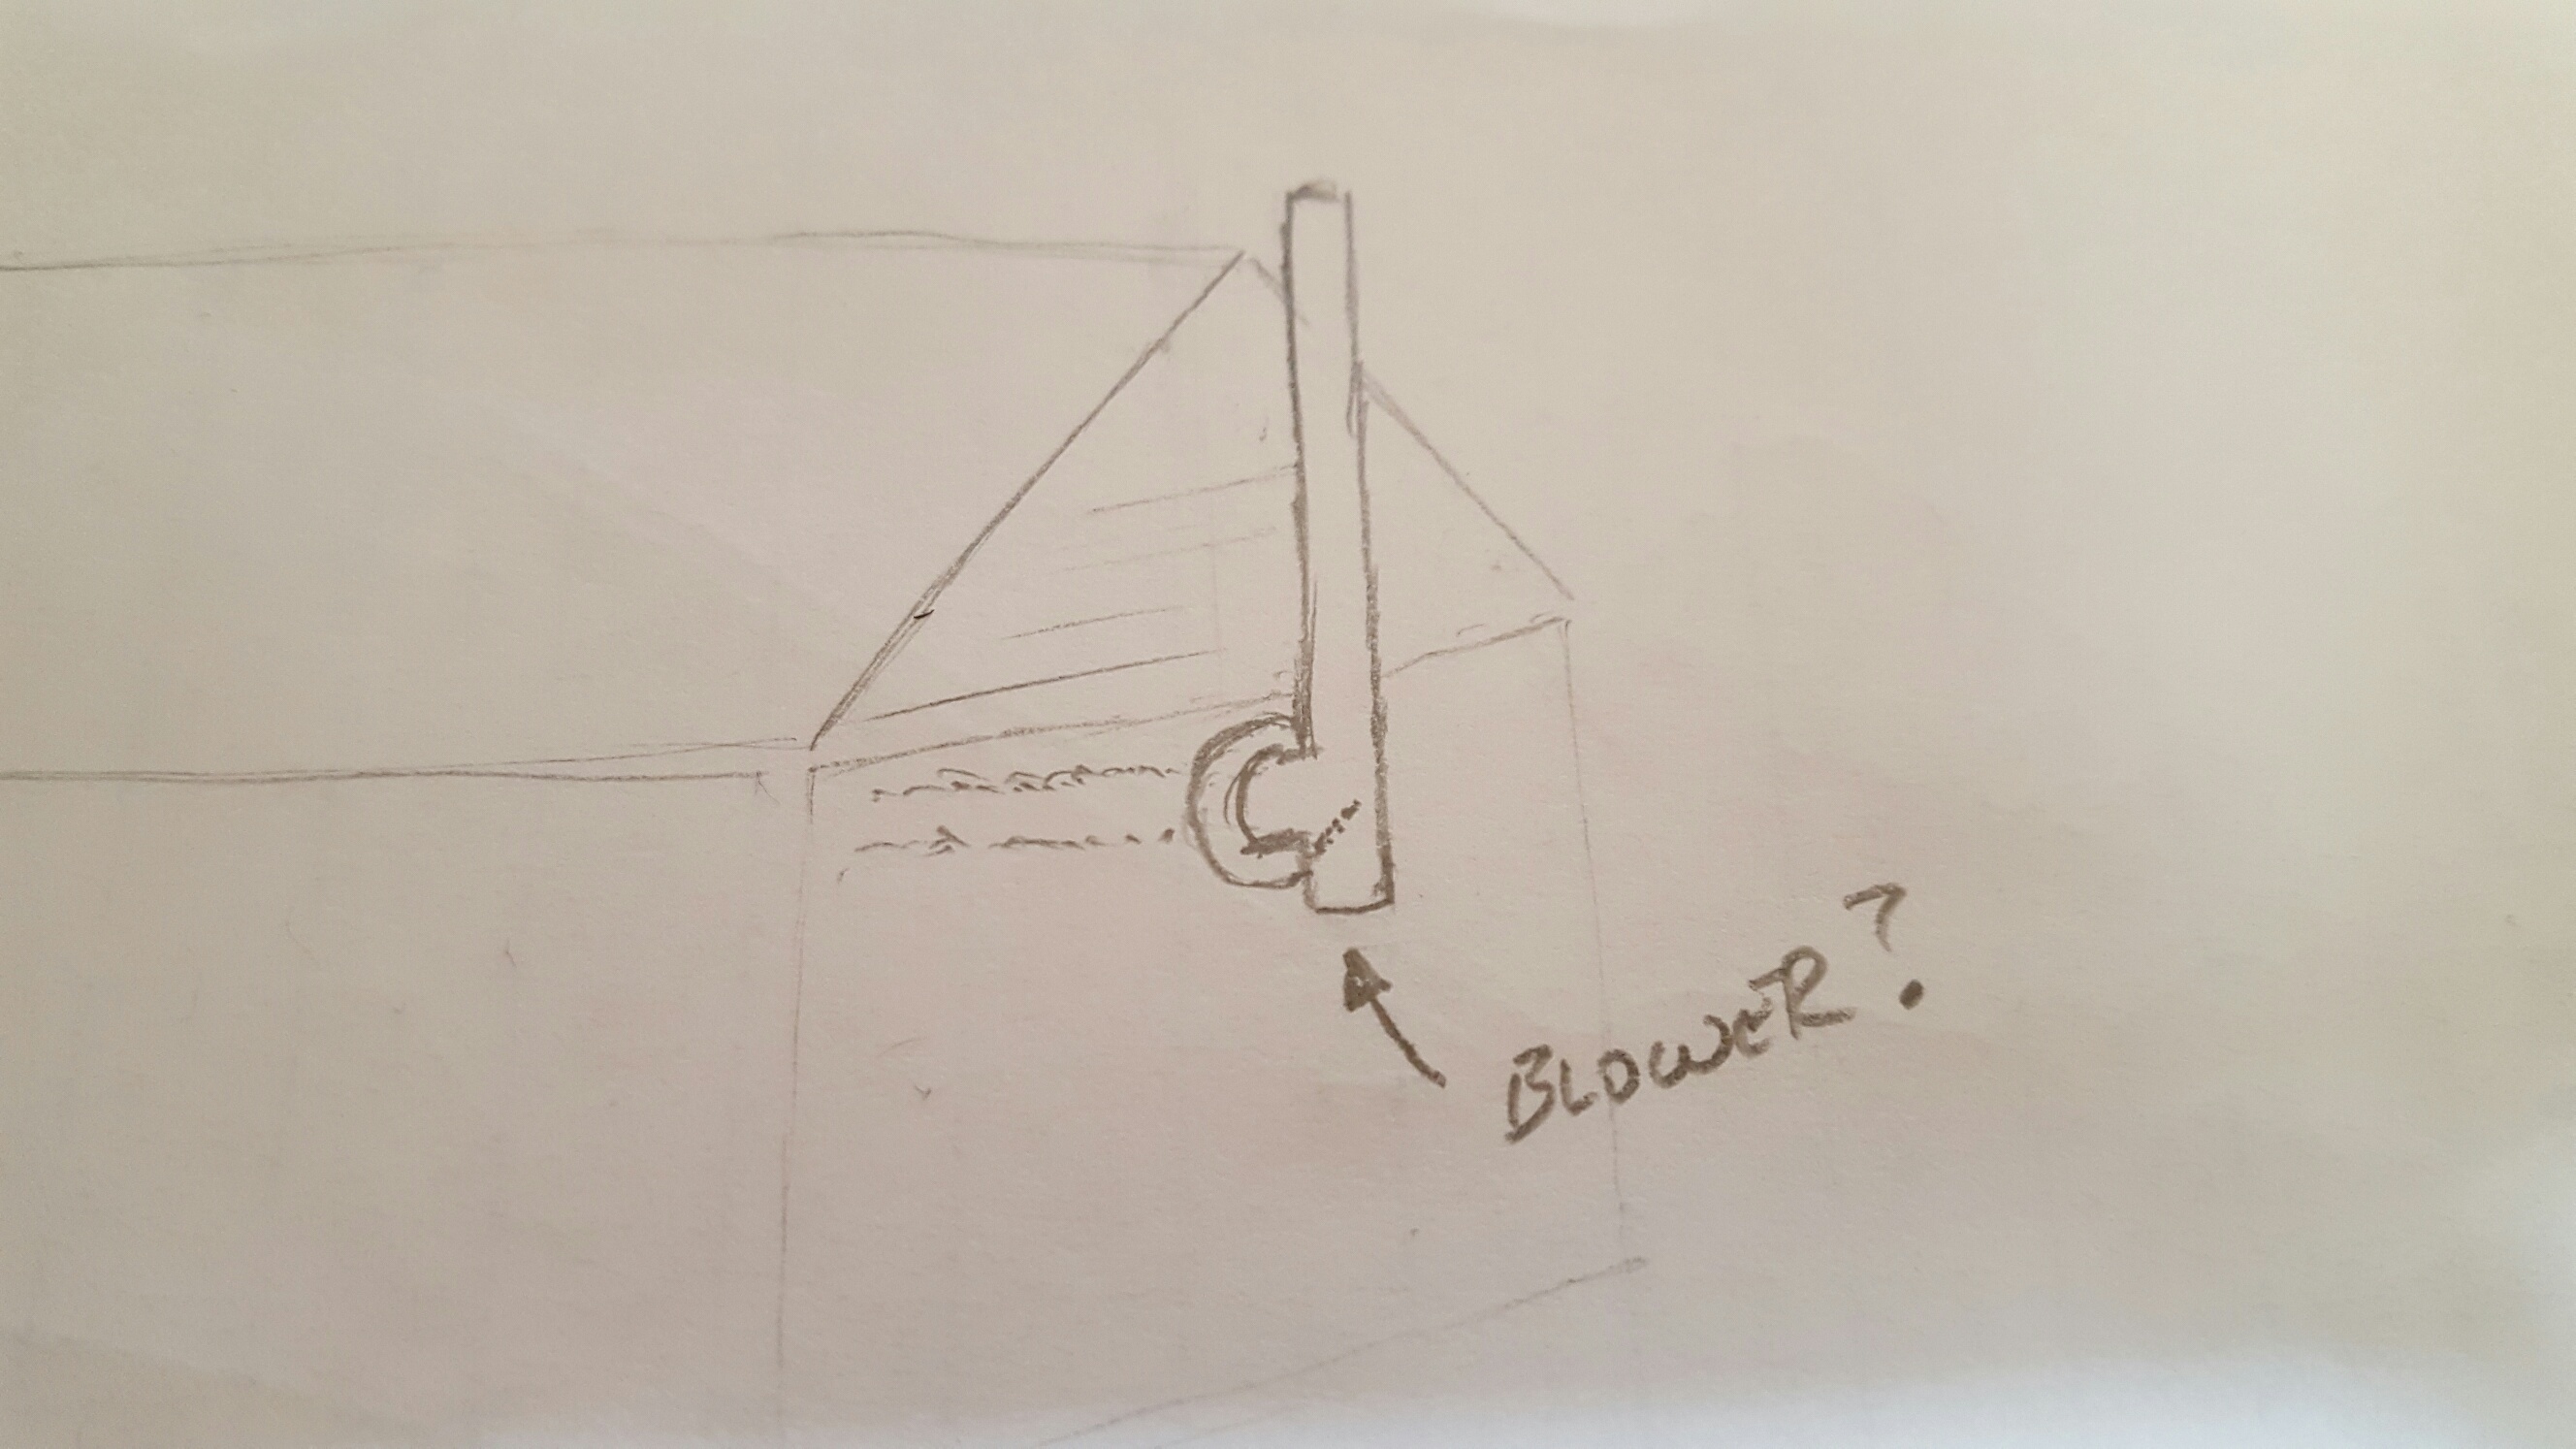
Gote, do mean something like this where the blower would be mounted outside blowing up through the vertical stack ?
-
I don't follow you on the "extractor" part. I figured that's what it was. It will be placed about 16 linear feet from the forge (10' section of horizontal pipe and 6' down from ceiling) Also, the fan wheel is made from 5/16" plate and the housing is ~12ga. so I'm not at all concerned about heat. the motor is externally mounted from the housing/impeller.
-
Thinking more on Michael's suggestion, I've got an older ceiling fan that I can't give away. I'll do some "testing" on how much torque it has. That might be just the ticket, add a jack shaft and a few pulleys to get a variable low speed setup. More to come, with pics ! Cause I know everyone loves pics !
-
not a bad idea. I'm concerned about the radial load and lack of actual bearings though. that impeller weighs at least 15# I keep thinking a jackshaft on pillow block bearings is the best way.
-
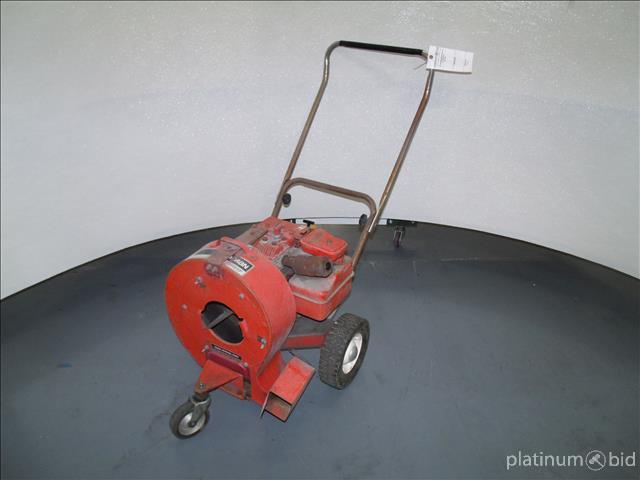
Ok, so I just got back to this one. That Buffalo setup uses an underfloor vacuum system of sorts. basically they all sit atop a pipe like the sewer pipe in a slab which is then connected to a vacuum/blower outside. this is what got me thinking of a vacuum type evac system instead of draft. As it is, I am now working on an overhead version of this. I am using the housing and impeller from an old walk behind leaf blower. no need for a ton of RPM to draw the smoke away which and no need for a filter to protect the works. This is where I'm currently pondering life, ........ I need a LOW rpm electric motor, or to find a cheap but safe way to dial down the speed of a regular one. the other thought is instead of direct drive, use a jackshaft with pulleys and belts, but that becomes too complex and costly. the HP requirement will be very low since the speed will be slow and the fan is pretty well balanced. Thoughts ????? Todd

-
So, I have a nice section of 3" schedule 40 stainless pipe, which is what the above pipe measures based on the chunk I have left and the blower saddle. Me thinks I shall use said pipe and blower to recreate the above forge. Seems the blower is the only real "part" that had to be foundry made, the rest all appears to be basic pipe, wing nuts, bolts, plate etc... If anyone has a real example of this forge, please post pics.
-
how do you folks break/size your coal ?
desmato replied to desmato's topic in Solid Fuels: Coal, Coke, Charcoal, Wood, etc
Dear lord Glen... some of those are practically the size of the drum ! I have to imagine you are getting your supply right from the mine ? -
how do you folks break/size your coal ?
desmato replied to desmato's topic in Solid Fuels: Coal, Coke, Charcoal, Wood, etc
It's not hard, nor a dilemma, I was just more so curious as to how others do it and if anyone has a neato tool or idea really. I keep envisioning a hand cranked meat grinder looking contraption with a few toothed wheels that crush any piece into an x-y sized product. I must be stuck on a gravel mill since I live in Gravel Central Michigan (Northern Oakland county is where the last glacier stopped then melted. We also have 358 lakes (due to the gravel deposits) Todd -
Title is self explanatory but I am curious how others break their coal into smaller bite sized portions.... for years, I have just smacked the larger sized pieces with my hammer when I come across them but I recently acquired 150# of some rather large lumped stuff (for free) which takes too much time and makes quite the mess to break up. some have been like a large orange/small grapefruit but most are raw walnut sized. What devices do you guys use ? I was thinking that a size adjustable hand grinder type crushing tool would be great for this but have never seen one. Todd
-
Yep, same results I got as well. Here's the patent https://www.google.com/patents/US386771. And here's a pic of the complete portable forge. "Made almost entirely of wrought iron and steel, and is practically proof against breakage" Would be great to see a complete working example if anyone has or knows of one.

-
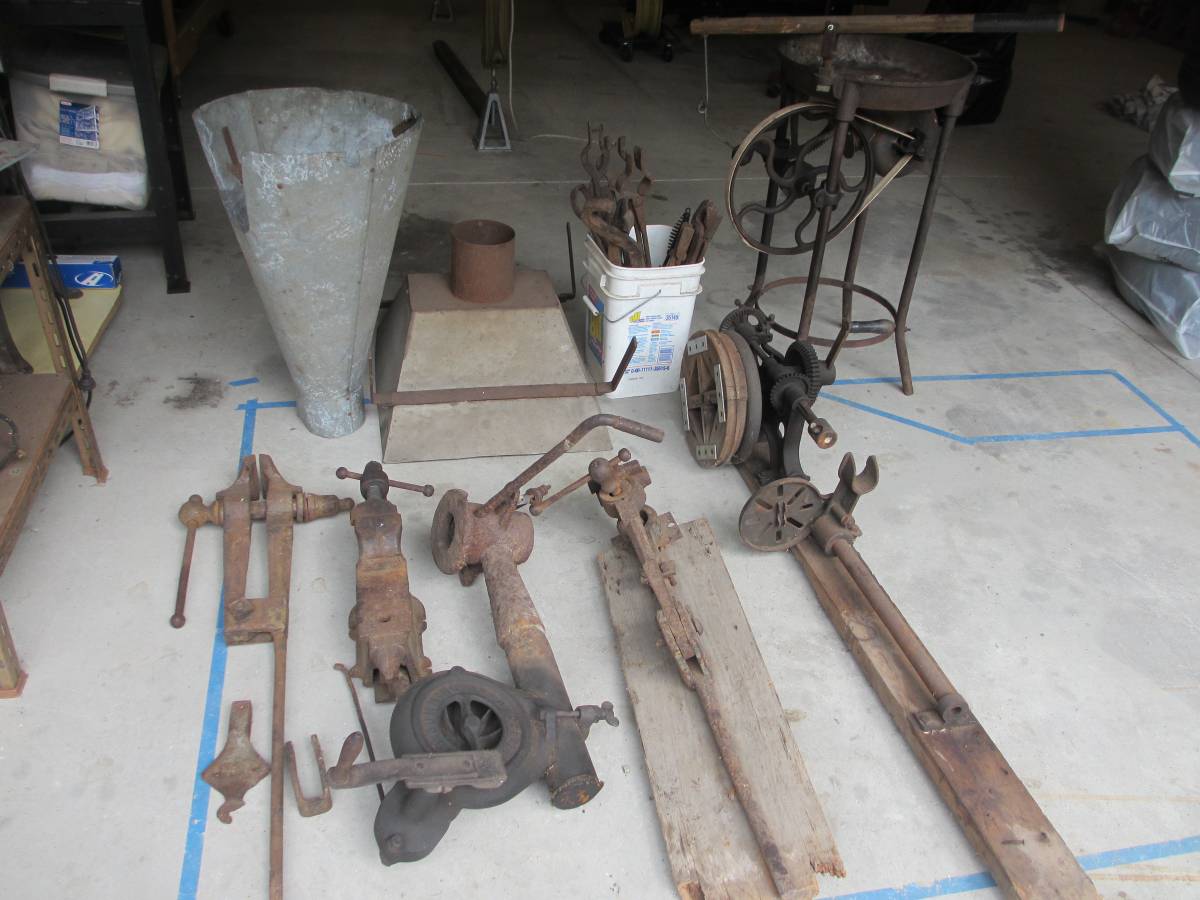
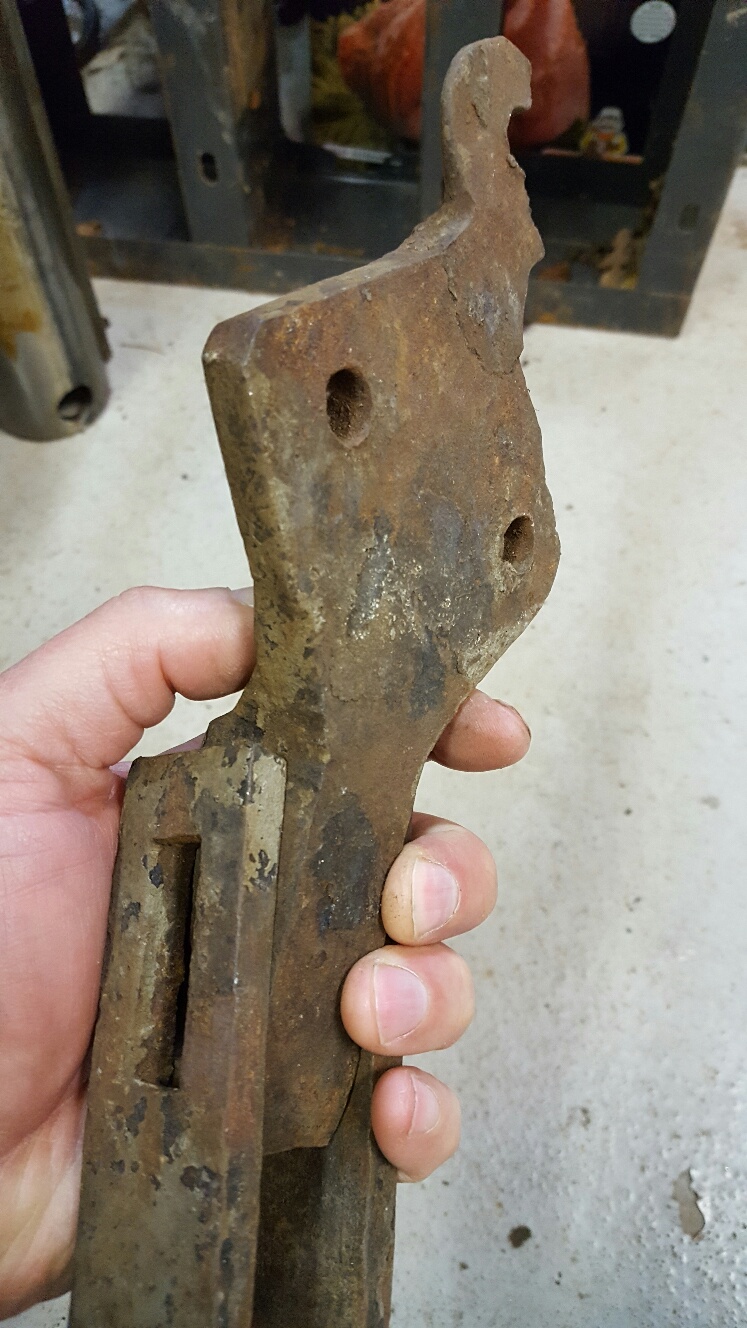
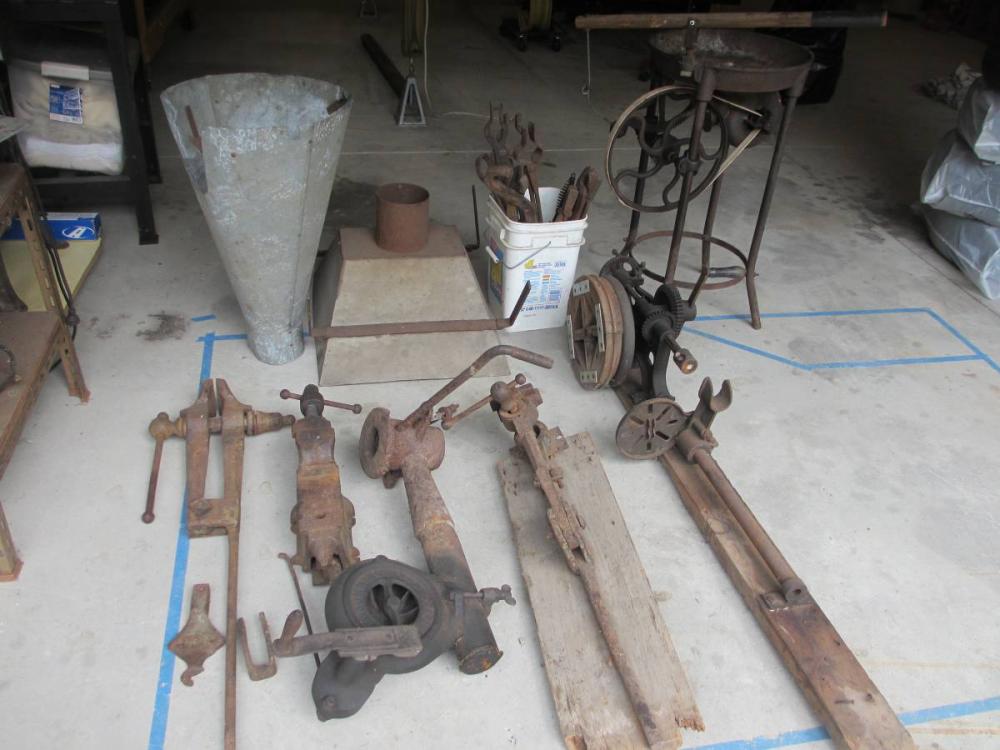
I bought a bunch of smithing stuff today, one item is a "David Cumming" blower that is attached to a steel pipe, brazed to a clunky tuyere. I've searched for this blower and only come across a few hits on "Worthpoint.com" (wothless.com) of one or two being sold in the past. I am curious about this one as it appears to WANT to be attached to a pipe based on the curved bottom/saddle. Any ideas of what this would have been attached to and how ? plus, can anyone ID that Tuyere ? (It's about 8" dia and 1" thick at the flange. all cast) Thanks, Todd (Not visible is the 125# Hay Budden and somewhat visible Rivet forge)
-
by the looks of the open box, I'd venture to guess it's an Arthur O'Leary. (just like mine) and it's gotta be a coil spring.
-
Nice shop !!! I was in Armada most of the day today (34 mile / Armada ridge) nice to hear of local fellow smiths.
-
This is a great topic and I'm glad I've read all of it. I have been forging outside for the entirety but have wanted to move my operations inside as many would, but haven't due to the nature of my available structure (detached 1400sq ft mechanics garage). I use Coal & Charcoal and am currently building a single atmospheric burner (Riel style) propane forge the size of a 30 lb. L.P. tank so ALL this awesome info is being absorbed into my noggin right now. I have the ability and space to build a new structure but it will need to be small-ish comparatively @ ~ 15' x 20' x 8' max. It will also have to be viewed as a non-permanent structure since I am maxed out based on my lot size. I think I could safely erect a post framed, structure with mostly closed walls and "complete" it as time goes by. The township allows the use of those concrete pyramid foundation blocks, so it would be viewed as a shed by them (non permanent) but look like a small closed in pavilion. I can say from experience that those blocks are pretty good for a properly braced structure. I have an 8' x 10' roofed clubhouse/deer blind sitting 6' in the air on 4 of those right now and it's pretty darned sturdy. Todd
-
First, that is a NICE hammer, and for a 14 year old to have forged it proves that age means nothing. GREAT WORK ! Joe, Alec, Daniel are all GREAT young-ish smiths that are keeping the faith and carrying on the tradition. I think we need to add "Smitse" to that list. As for the hammer, I use a flap disc on my 4-1/2" angle grinder to profile my rounding "dies". I find the center then with a compass, draw circles on the face and work the wheel in those starting from the edge to create the primary steps so, the outer circle would have the most material removed and at the steepest angle, then move in to the next etc. After I have that all done, I work in multiple directions across the face. draw lines across top like the face of a clock and work the disc across in those directions to take the steps out. Really hard to explain what I mean but I hope you get the idea. Todd
-
Alan, i get it now. thanks for the smack on the back of my head.... DOH. (Nice artwork btw) I agree Frosty, whoda think my simple need for a regular item would yield so much great info ! Currently I have a strap of 1" flat stock marked off with chisel marks in 1/4" increments that I lay across the face of my anvil for quick-n-dirty stuff. It works, but....
-
Thanks Glen and Alan ! Though all I can't really visualize "The hook is in plane with the ruler rather than at right angles to it as per the steel tape." I guess the standard tape style end should work as well.