

mcraigl
-
Posts
518 -
Joined
-
Last visited
Content Type
Profiles
Forums
Articles
Gallery
Downloads
Events
Everything posted by mcraigl
-
Sorry about that..
-
So I forged my second blade ever the other night. It's cablemascus. Kind of a small caping style with a blade that's only 1 1/2" long or so. Full tang, and pretty short maybe 4 - 4 1/2" oal. I was thinking about putting a small brass guard on it, then put stag scales on. Only problem is, I don't know what the muriatic acid is going to do to the brass. Also on any pattern welded steel knife, what is the procedure for properly shaping the scales to meet the blad exactly since you have to etch it? Here's what I had figured... - braze rough shaped piece of brass on for guard. -drill tang and scales for rivet. Insert rivets (or screws the same diameter maybe with nuts). grind sand so that scales and tang are flush. Remove scales. -heat treat blade (kind of sucks that I already did this and sanded, but I can do it over again I guess) -glue up and rivet scales -grind / sand guard to be flush with sides of scales and finish profile guard and polish. Does this sound about right? I'm thinking for a pattern welded blade I should have done a half tang or whatever you call it where you epoxy the tang into a hole in the handle? Still would've had an issue with the guard I guess. Anyway, thanks in advance for any advice you can offer. ML
-
Ah yes... Well according to Einstien, "E" (let's call it work done) is equal to "M" (Mass) times "C" (Velocity) Squared. Say you swing a 2lb hammer at 2units of velocity, you get 8 units of work. Now if you double the weight at the same velociy you get 16 units of work. But if you double the velocity of the original 2lb hammer, you get 32 units of work. Or... If you can swing the 4lb hammer at 4units of velocity, you get 64 units of work!
-
I forged / ground ball punches with the profiles I wanted my rivet heads to be out of pieces of crowbar. Then I punched that profile into another piece of crowbar. That's my heading tool for that rivet size. Then I took a piece of ag. shafting (4140-ish) that's just under 1" square about 8" long and fullered the center 1 1/2" to a depth of 3/4" leaving me with 1/4" shoulders. Then on one end I sunk one size of ball punch and a different one on the other end. The shoulders on this make is "stick" in the leg vise and it makes a great bottom bolster tool. I also made a "holder" (don't know what else to call it at the moment) similar to what CQ was talking about above. Basically I took two pieces of 3/4" bar stock drilled matching 1/4" holes through them, then stuck a pin in the holes to keep them aligned. Then I put a couple thicknesses of notebook paper between them and centered up in the drill press on the seam. Then I drilled holes of my common rivet sizes through the joint. Also welded some 3/8 bar stock along the top edge of each of the 3/4" pieces to act as catches on the top of the vise jaws similar to the bottom bolster described above. The paper strips add just enough space so that when you remove the paper, the 1/4" hole will really get a grip on a 1/4" round bar without marring it up much. So to make a rivet out of 1/4" round stock, get it hot, then stick 3/8" up out of the "holder" in the vise. I usually take a couple of blows with the face of my hammer, then use the pien to upset a little more. Once the mass is close to the shape I want, I use the heading tool and give it a few good raps while rotating the heading tool (just helps get a more symmetrical head). Then to attach say the two tong halves together, take the "holder" out of the vise and put the bottom bolster in the vise. Get the rivet hot, and cut it off leaving the thickness of the peices to be joined plus 3/8" assemble the whole thing, support the already formed head on the rivet in the bottom bolster and do the same setting routine on the new end of the rivet. I guarantee you this is not the most efficient or expedient way to make rivet heads. It's just how I do it, and I can make some pretty passable rivets this way. It would obviously fall apart on a larger piece that I couldn't hold in one hand up to the tool in the leg vise. I'd have to modify. My advice, just keep practicing, eventually your rivets will start looking better. don't be afraid to spend some time making nice heading tools. They'll last forever and the better they work for you the better your rivets will look.
-
-
-
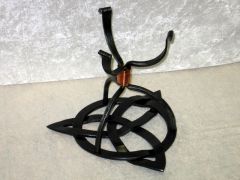
From the album: Sept art
-
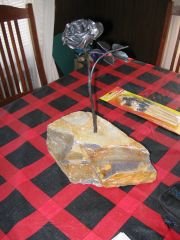
From the album: Sept art
-
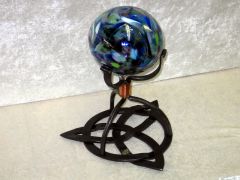
From the album: Sept art
-
Anvil and Forge question for newbie smith....
mcraigl replied to newbiesmith's topic in Anvils, Swage Blocks, and Mandrels
Newbiesmith, where do you hail from? Like mentioned above, there's probably a guild or club somewhere near you that will make the learning and acquisition parts easier on you. -
insurance, demo's, shop?
mcraigl replied to Candidquality's topic in Blacksmithing, General Discussion
Is that the norm? I had thought that my homeowner's policy covered everything, but now I guess I need to go talk to my agent. I'd sleep better if I thought that the contents were covered too. -
So maybe none of us get to call ourselves blacksmiths, but only get to be called blacksmith by others who deem us worthy? We don't have all the worshipful company type stuff over here. My club has three levels of curriculum, and I've passed the first and have also been asked to instruct the first level. I'm working on the second level, but all three of our levels are called "basic" (ie. basic 1, basic 2, basic 3). I enjoy this stuff so much that it really don't matter to me what it's called. I have the benefit of not having to rely on my art to make a living. The other side of that coin is that I don't get to spend as much time in the shop as I'd like. Dan, thanks for sharing your thoughts. We did manage to rabbit trail Don A's original post a bit, and I'm sorry for that. I really do enjoy the discussion. I'd love to be able to visit europe some day and see how a real blacksmith would do some of the things I've been cheating to get done. Hey, I did punch the hole for the last pair of tongs I made rather than drilling, that ought to count for something shouldn't it?
-
insurance, demo's, shop?
mcraigl replied to Candidquality's topic in Blacksmithing, General Discussion
My shop is definately a "hobby shop". Is having a friend over while I'm forging any different than letting the neighborhood kids come over and jump on the trampoline with my kids? Maybe I shouldn't let them do it either. And Leah, how can your tools not be covered by your homeowner's insurance? I was in a rental when I framed houses for a living and my renter's insurance covered most of my tools when my garage got robbed. -
EV, Why don't you just send that 3a to me. I'll take care of it for you. Or... Actually, my wife will. She uses that same torch for lampwork and beads. Maybe save me from having to buy her another one since she hates changing the tips... ML
-
I get to take his Leafwork class in Nov. down in Pasadena. I'm really looking forward to that. I took a pattern welding class from him last year that was quite good. I've been around Mark at several hammer-in's and he's a great guy. I'll have to forward a link to this thread so he can see that folks are enjoying the book.
-
Dan, that there is one nice bit of poetry. Hope you don't mind, but I'm stealing that for my tag line! I feel where you're coming from on the topic. Remember, I was forthwrite about not having all the skills. My mentor "makes" me do forge welds without flux. He feels that flux is a crutch (cheat), and having flux residue leach out of your nice piece of work over time is worth learning how to do without. Let me give you a scenario. I was approached by a local taxidermist to make him a cattail. His plan was to mount a green wing teal on the tip of it to take to the semi-annual World Taxidermist Competition. I'd shown him some cattails I'd made in the past and he though it'd be better than his normal painted clay and wire affair. Problem was that he needed it in 5 days. The stem of this cat-tail was about 5/16" textured round bar. The leaves wrap around this like a sheath, with the leafy parts coming away from the stem at various distances from the base. Now "traditionally" We would neck down a bit of pipe for the head of the cattail until the 5/16" bar fits snuggly at each end, then forge weld it all closed. I made two attempts and couldn't get the thing to forge weld. It just kept pinching off the rod. So I necked the tube 'til closed, then chucked it in the lathe and bored a perfect 5/16 hole in each end to pass the rod through then mig'd at the top. Then I chucked the whole thing in the lathe again and bored a 1/8" hole in the center of the stem so he had a point to mount the bird via a wire coming out of its toe. I drilled holes in the back side of the leaves were they are like sheats and mig'd to the stem / each other. I blended the welds and scaled and brushed and you cannot see where they were welded. Bottom line is Charly won the world competition with that mount this spring, and I think it would be fair to say that it was examined with a fairly critical eye. I don't currently have the skill to pull those things off purely in the fire, but feel like I have enough artistic vision, imagination, and ingenuity to put out some nice pieces. Do I want to continue to develop my skills so that I might be able to do more stuff "in the fire"? Heck yes. But I'd get bored and quit smithing all together if I was only allowed to practice forge welds every time I light the forge. Sorry I'm so long winded. You can really tell when I'm bored at work huh?
-
Dan, I'm not touchy about it at all. To put it point blank, straight up, all out truth. I'm not that good at forge welding. My forge welding abilities are far behind the rest of my forging abilities. I do try to do at least one practice weld each time I light the forge (don't hold me hard and fast to that, but I do try). Would you have me not create pieces that require a weld until I'm an expert at forge welding? I guess to me, in the artistic part of this equation, the form, composition, and balance of the piece are more visually important that method of joinery unless the joint is so horrible looking that it draws your eye away from the rest of the elements in the piece. Which is what would happen much of the time if I restricted myself to forge welds only. Now if I was doing demonsrtations at a historic park or something of the like I wouldn't drag my MIG out. But I'd probably limit the scope of the pieces I demonstrated to those that either required no welds, or only required welds that I'm good at in the fire. I hear ya on the traditional vs. contemporary thing. I use a handcranked coal forge, that ought to count for something shouldn't it? My Peter Wright is nearly a century old now. I guess what I'm saying is that I feel like many people confuse the terms when speaking of traditional vs. contemporary and speak as though they feel that "traditional" and "authentic" are the same. I live in one of the newer "colonies" and so I would argue your point about "people" being able to recognize the difference between an electric weld or a fire weld. Blacksmiths and welders might be able to see the difference, but the average shmoe wouldn't. they might recognize a difference, but they wouldn't interpret the difference in the same way you and I would. Just look at all the chinese made junk that's sold in Walmarts etc. Anyway, there. I broke the ice for ya. As long as a person keeps their language civil, there's no reason not to voice your opinion, newbie or not. Newbie on this forum doesn't equate to newbie in smithin'. I'd love to hear you opinions, and see what your techniques would be. Sorry for the long rant. Hopefully no-one will take it as any sort of assault. Mostly I wanted to demonstrate to Dan that not only is it OK to voice your opinion, but in fact it's what this place is for. ML
-
Don, Why call it "cheating"? If blacksmiths of old had a mig, you can bet your butt they'd have used it. I guess it depends on what you're selling the customer whether it's cheating or not. Anyway, I have no problem using the MIG. I haven't tried blending stick, but mig and ox/ac are both pretty easy to deal with. As Thomas said, you just gotta keep it hot. One other bit of advice/suggestion. If you don't have a right angle die grinder go get one. Then get one of the egg shaped carbide burrs for it. Those little jewels are really good for blending the weld, then about all you gotta do is get it hot enough to scale, then brush the scale off to get rid of the grinder marks. Then a very small amount of hammer work, and it's indestinguishable from a really good forge weld. Good luck. Show us some pix of what you're working on...
-
Gosh. I feel so un-authentic, like I've been hiding behind my moniker all this time. Maybe I'm just a poser, know-it-all kid making life difficult for everyone. The name my father gave me at birth is Michael Craig Limb. There's lotsa mikes and michaels in the virtual worls, so I concatenated to first initial, middle name, last initial. I kind of like it. Sounds exotic. Maybe even Scottish or Irish or something. All english on the one side and german on the other though.
-
That's a tough one Glenn. Japan turns out some fine tools. Mitutoyu calipers are as nice or very close to as nice as Starrett for instance. I'm using chinese angle grinders HF & Ryobi because I can afford to have 4 of them so I never have to change wheels unless they're worn out. All for the price of one US made one. My new Makita cordless drill will kick the pants off any made in america and it's made in Japan. 'Course it costs as much as any of the US ones too. Most of my handtools are US, and for those I'd pay quite a bit more. Be interesting to see what others think about this.
-
Good point Thomas. forgot about jph's books. Haven't got one myself yet. Greg, there's all sorts of data about forging temp, hardening temp, tempering temp, annealing process, etc. etc. for most alloys in the machinerys handbook.
-
Greg, You ought to pick up a copy of Machinery's Handbook. It'll answer some questions for you.
-
I've used Roto-zip, and own a DeWalt. I feel like my DeWalt has a bit beefier motor, but my brother's Roto-zip has oh-so-many more attachments available. There are none for the DeWalt (at least when I bought mine a few years ago). My recommendation to you is that unless the tool is going to be for a one time use AND you are strapped for cash stay away from the Ryobi. I had a few of their earlier tools and they were pretty good, but the ones I've bought over the last couple of years have all gone to xxxx. I'm in the process of replacing all my Ryobi cordless stuff with the new Makita lithium battery stuff. How much room to the sides of the circular cole in the OSB do you have? The hole in the plywood doesn't have to be perfectly round. Mark an octagon, then set your circular saw to the depth of the OSB, and plunge cut in for each of the 8 sides and voila you're done with that part. ML
-
While you're at the forge why don't you perk some coffee?
-
Why not put a flue IN the garage?
-
My 14 year old golden to be put down soon.
mcraigl replied to Work-In-Progress's topic in Prayer List
My heart aches for you my friend. As Glenn said, it's never easy. Go buy that boy a fat T-bone this week.