mcraigl
-
Posts
518 -
Joined
-
Last visited
Content Type
Profiles
Forums
Articles
Gallery
Downloads
Events
Everything posted by mcraigl
-
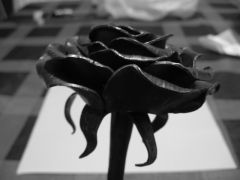
From the album: Rose
-
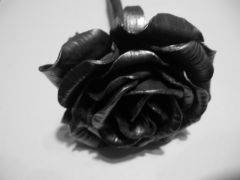
From the album: Rose
-
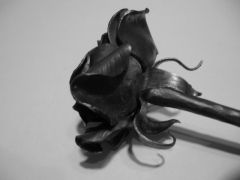
From the album: Rose
-

-
-
-
-
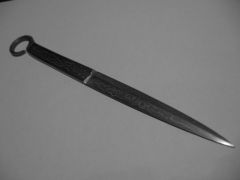
From the album: pattern welded letter opener
-
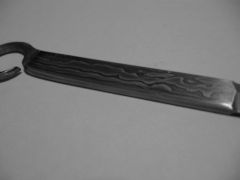
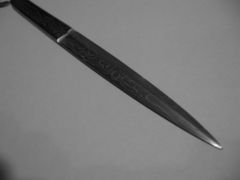
From the album: pattern welded letter opener
-
Sven, I'd love to see a "blueprint" on the Mokume Gane. Put one together for us and present it on a tuesday night BP's. I'm thinking that it would be great for furnature/hardware on knifes.
-
Ron, All good advice so far, and similar to what I do. I agree that a bit depends on the type/shape of your fire pot. Mine is fairly deep, and the cave seems to work well. I too feed the fire from the sides. I also tend to make a "coke bank" so that I always have some good coke in reserve. One thing you didn't mention is what is the consistency of the coal you're starting from. Mike-hr has some Lazzari coal that is really small peices with a LOT of fines in it. We get the fire going with coke left over from last time, then spend a bit of time making a slurry out of the fine coal, then packing it onthe sides of the fire. It forms beautiful coke, but has to be a mushy/pasty slurry to get decent size pieces of coke which are then no problem to work with. I too had a problem with be "stingy" with my coal and have finally learned MY FORGE. It likes a 5 gallon bucket of coal. In the end I'm pretty sure I burn less coal because that extra amount banked around the sides keeps the heat in and I get a lot hotter fire with much less air. It was nearly impossible to weld succesfully before I figured that out. Now I can build a welding fire in my forge pretty easy.
-
Welcome aboard Sven. Don't worry about your "bad english". Show us some pix of what you're working on.
-
Ron, It seems like every one of the two dozen or so blacksmithing books I've got have pix of scarfs. The basic concept of most is that the two surfaces are somewhat convex. I think this is to help "squirt" the flux and scale out when you strike the joint. The top piece (however they're placed on the anvil for the initial welding) could be a little bit narrower than the bottom piece since it's going to flatten a little bit more than the bottom piece too. Sometimes there's a bit of a shoulder forged into the scarf also to provide a mechanical stop to help locate the two pieces together in the right spot when you come out at a welding heat and can't see the joint so clearly. My .02$, and worth every penny you paid :-)
-
I don't really see an "advantage" except when there's no power. There is the "cool factor", and I really like to use my post drill. The kids love to crank the handle for ya. I'd be too scared to let 'em close to the vert. mill though.
-
Diablo, Check out the Cal. Blacksmiths Assoc. www.calsmith.org. I'm not sure where Tustin is, but there are quite a few events in S. Cal since that's where the majority of the membership lives. I'm sure some of the folks down there can help you get started out toolwise as well as instruction wise.
-
Ron, Two things I'd add. Gotta brush like heck, and keep brushing til the piece is below a scaling heat. If you need it cleaner than that, pickle it. I use white vinegar because I got little kids around and I don't worry so much about them spilling it or getting hurt. I know there's other faster acids out there, but good old white vinegar works good for me and it's cheap. You can usually get the no-name brand at the super market for a buck and a half a gallon. Then when it's picked for a day or so I use a stainless steel soft bristled brush on it, then neutralize in a baking soda wash, then rinse with clean water.
-
Welcome aboard Dave.
-
Torin, Count me among those that've been hit by the shrapnel. When I was younger I was driving a geologist's hammer into a tree with a 3lb engineer's hammer when the head of the geologists hammer exploded sending about a 1/4" chunk through my coveralls, jeans, and about an inch into my thigh. Wasn't any fun having pops pull that thing out of there with hemostats and needle nose pliers. Anyway, another thing that I saw wrong with their test is that their "apparatus" struck the faces together too perfectly centered. The average joe out there isn't going to hit them that perfect. Also as to the comment that they had "measured the force a human can hit with"... I remember watching those jokers swinging wildly trying to drive a 16 penny nail in one blow. Are you kidding me? I framed for a living for some time and my hammer only touched each nail twice. Once to set it, once to drive it. They should've measured the "force" while they were visiting Scott Thomas and seen the force from someone who is used to manual labor... Anyway, that's my .02 cents. McL
-
JWB, Would love to see pix of your trailer. Did you design/build it yourself? I've been contemplating building one because the ones at the trailer dealer seem kind of cheesy for the price you pay.
-
Mother in Law?
-
I have a friend who wants to cast some 50cal. balls for a muzzle-loader using silver. The worry we have is that the Lee mold has aluminum mold blocks. Melting point for aluminum is 1200ish, while silver is 1700ish. Will we destroy the mold, or will the aluminum sink the heat out of the molten silver before it melts deforms? Additionally, he'd like to NOT destroy the mold, he'd like to be able to use it for casting useable balls in the future. He's not afraid of werewolves and vampires. Its for a going-away gift for a colleague. THX, McL
-
Tom My 204lb Peter Wright looked about like yours when I got it. Except some moron used it as a cutting table at one time and pitted the center of the face a bit. I too wanted to immediately repair it, but my mentor encouraged me to just radius the chipped edges with an angle grinder and use it. He predicted I'd find a use for most of the different radii created from smoothing the chipped out sections. He was right. I'd still like to have at least one small section of the near edge and the far edge that is square, and fill the gouge in the center of the face. But I do in fact use most of the radius for different things. I'd say use it as is for now.
-
Yea, Mike-hr and I built a new handle for it. The handle that was on it when I got it wasn't original and did work very well. Good luck with it. McR
-
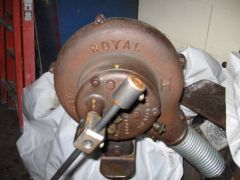
Ron, I can't remember if I "had" to take the fan off or not. My unit was pretty crusty with old congealed oil etc. and I wanted to wire brush every inch of the outside and degrease the entire inside so I took 'er down to the smallest part. No ball bearings in mine, just brass bushing type bearings. Here's a couple of pix of mine. Sorry they're not the best, it's dark and cold. ML
-
-
-
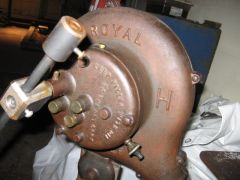
From the album: Royal H - Western Cheif