zeeko
Members
-
Joined
-
Last visited
Everything posted by zeeko
-
I bought a burned-up LG 50# about 5 years ago. I re-bushed the pivot arms, cleaned everything up, did a bunch of research on pouring babbits, and then ran out of gas on the project and sold it on to the next affecionado. There are good Youtube videos out there on pouring the babbit - the clutch pour looks a little tricky. You'll probably need to heat-treat the dies.
-
Probably, but I don't have the material, and think my lathe skills are up to it.
-
I'm looking for replacement plastic oiler domes. The lift pump in the oiler on the 88# just needed some cleanup and new o-rings, and the oiler sight glasses are 1" pipe thread, so finding replacements was easy, but I am striking out so far on the domes. They look like they are 7/8" or 22mm fine thread. Anyone have any ideas of places that might stock something like this? This image isn't an exact match, but I am looking for similar domes.
-
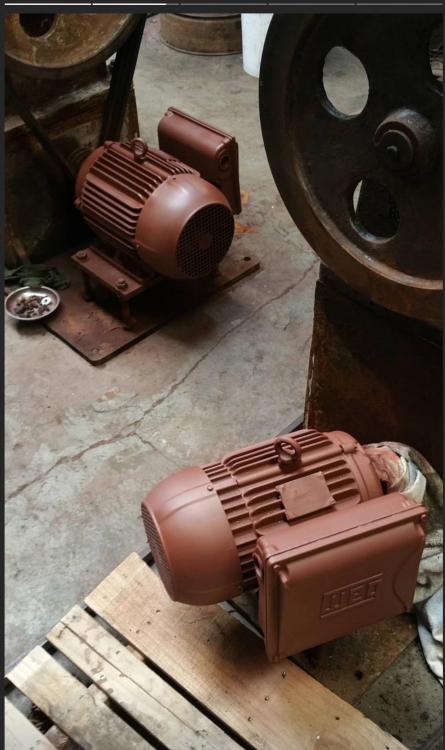
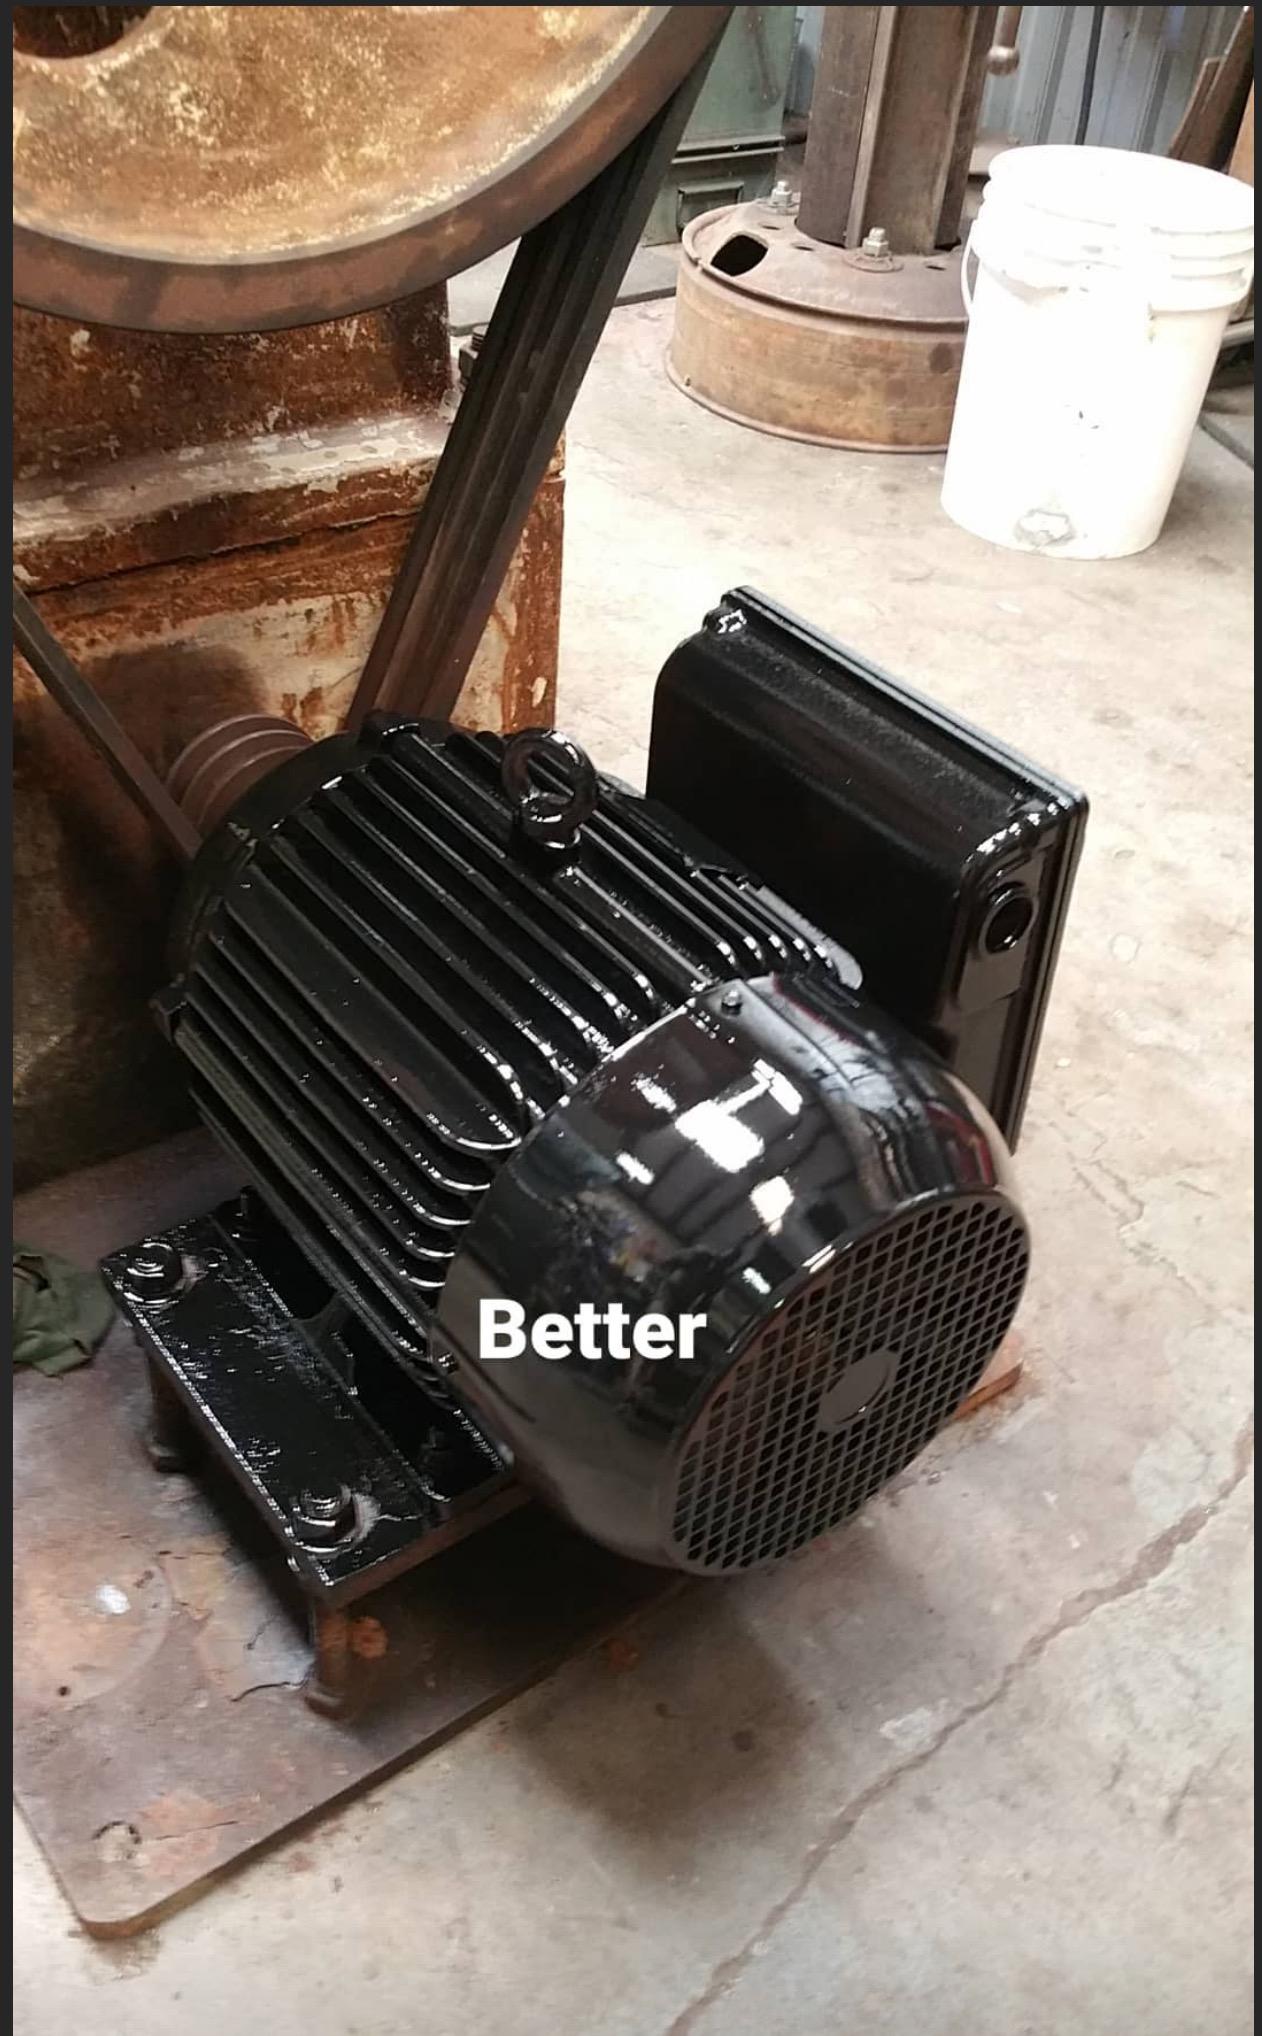
Found a place in the Bay Area that'll heat treat the dies - Byington Steel, so I spent some time regrinding/polishing them. I primered and painted the motors to go better with the rust color of the hammers.

-
I agree. These hammers were brand new before the fire, so not much has worn.
-
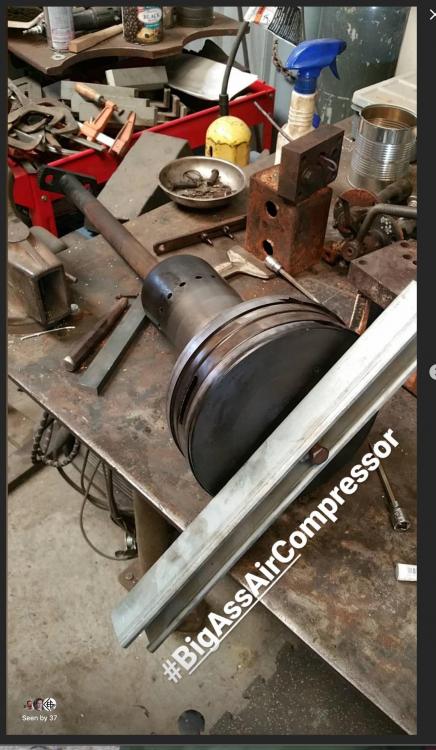
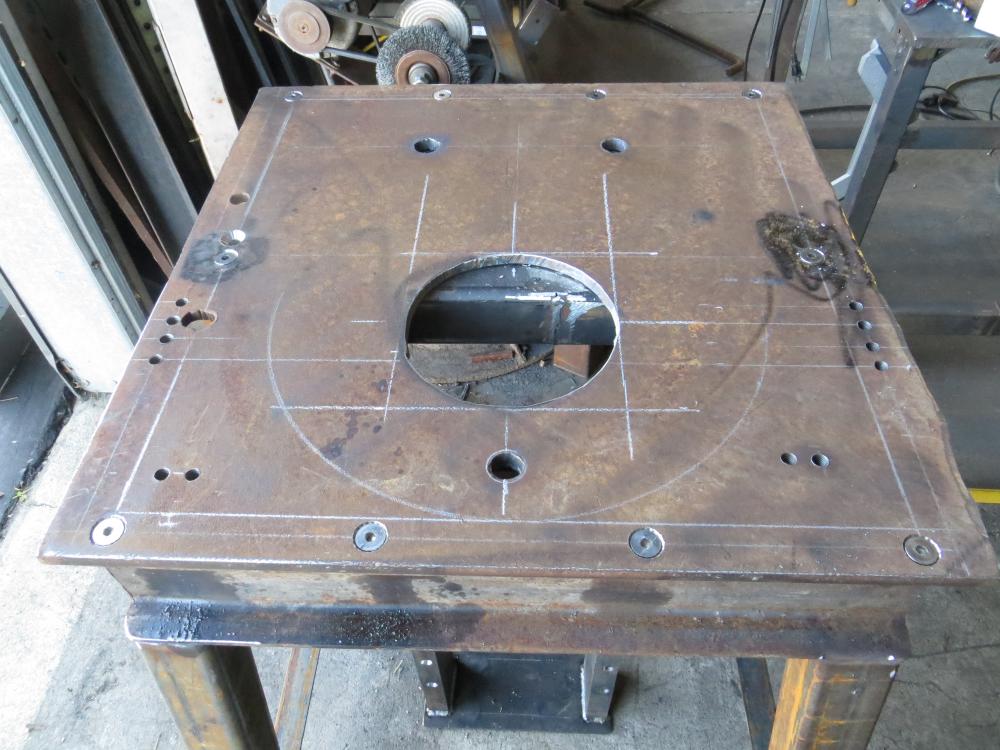
Pulled the piston out today - I had to wire-wheel the old gasket off of the cap, and needed to clean the bore after that. It was really easy to pull it - I moved the piston to TDC, threaded a metric bolt into a bolt hole in the center of the piston, put a piece of unistrut onto the bolt to support the piston, then undid 2 bolts on the connecting rod and turned the crank until it was at the bottom of the stroke, and used the unistrut to pull the piston up and out. It doesn't look like the rings got very hot - not much of a heat patina on them, or on the wipers in the stuffing box, below. There was some burnt-on oil on the lower part of the piston that goes thru the wipers, so I polished it up with a ScotchBrite pad and oiled it. In other developments, I got the plunger on the oiler freed-up, replaced the little rubber o-ring on the plunger, and put a fresh ball-bearing into the bottom of the plunger. Looking for sight glasses and oil domes for the oiler...
-
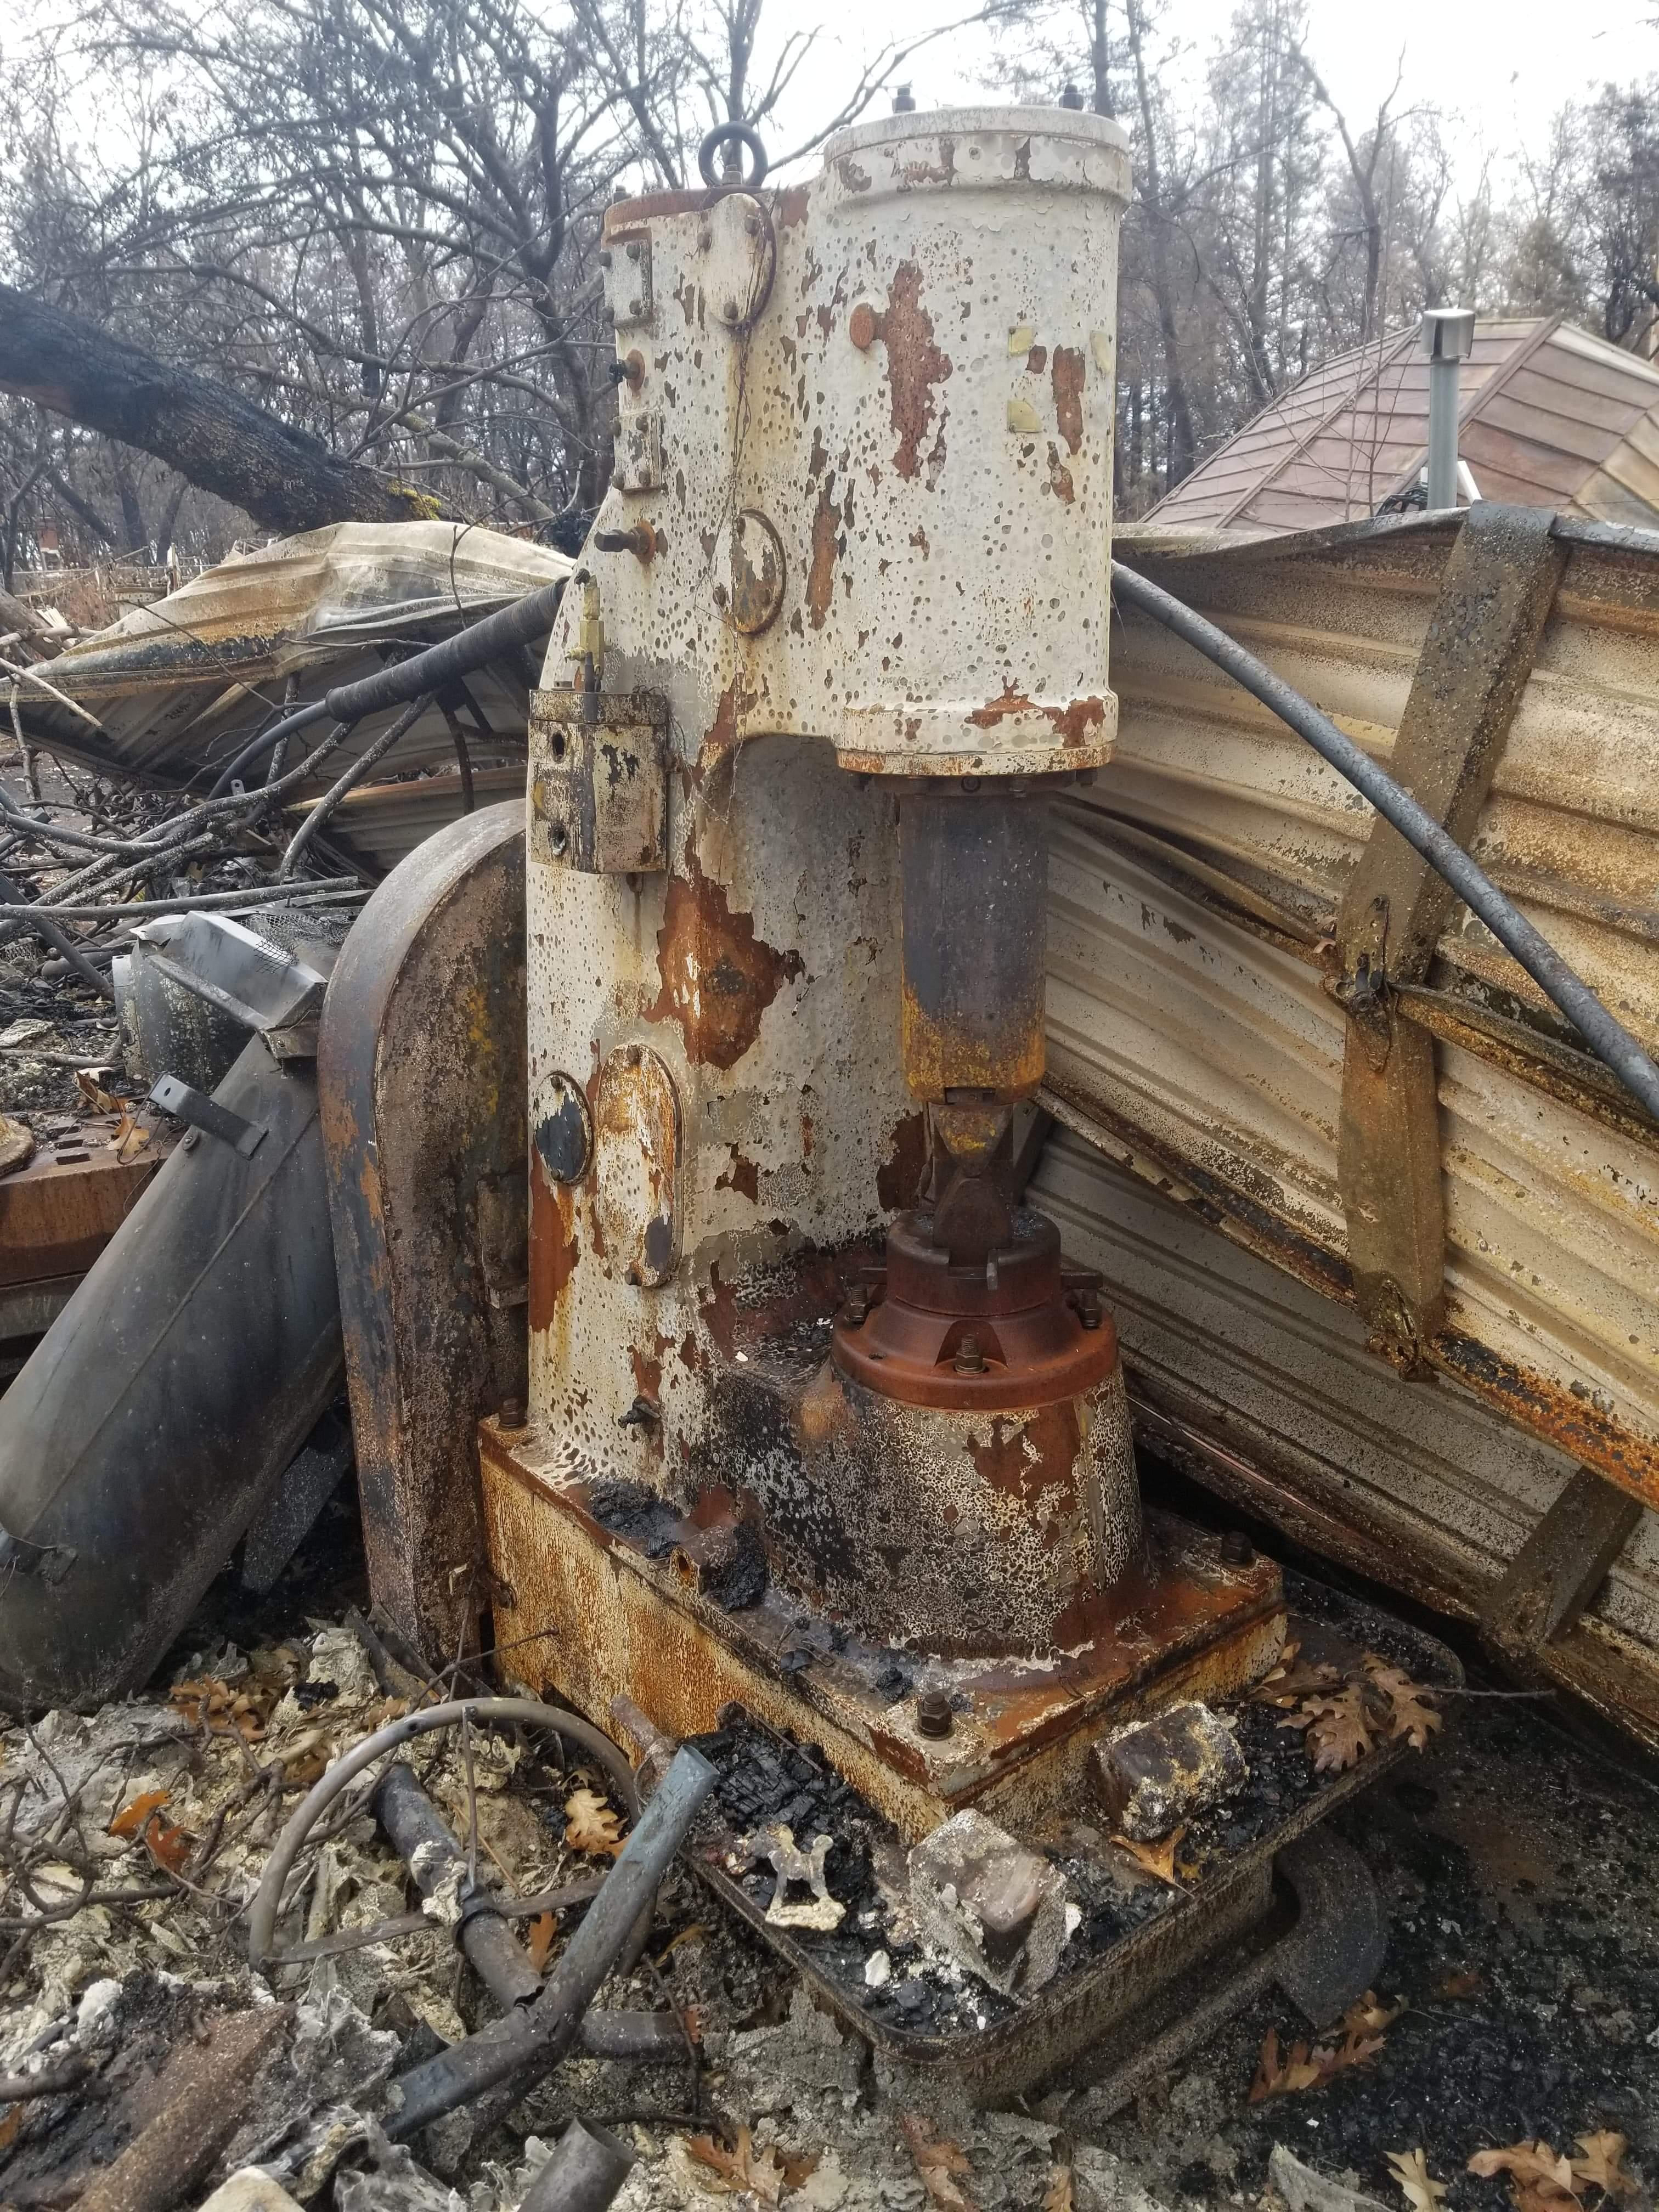
We moved the hammer off the hill a couple weeks ago, and I was able to also pick up a burned-over Anyang 33#. So far we've scraped off some paint, removed all the covers, pulled the valves, and used a wire wheel to remove a lot of melted gasket residue. The oilers are pretty toast, and the motors are ruined, but the main bearings on both seem undamaged, and the piston movement on both is smooth. There is some heat patina on the connecting arms, but not on the valves. I've got new motors, we cut new gaskets, and belts are on the way. I need to heat treat the dies, which were annealed by the fire and really soft. I soaked them in a bucket of vinegar and wire wheeled them, got all of the scale off. James Johnson says the dies are 5CrMnMo. Planning to send them off to a heat treat shop, but they also hadn't heard of the material. Has anyone ever heat treated this material?
.thumb.jpg.d1f453b65f047286262c54e90ffa1729.jpg)
.thumb.jpg.0498386c07c83f9c9d9f60a2ae29383d.jpg)
-
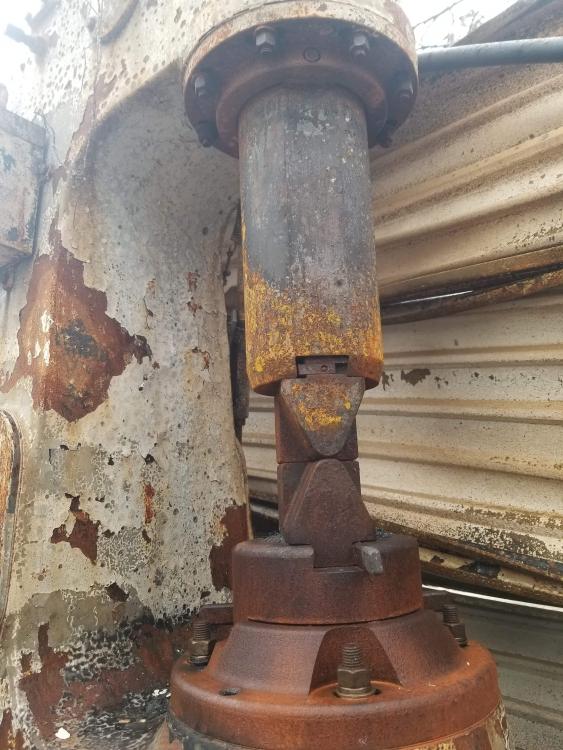
We opened up the machine today. The crankshaft turns really smoothly, and the front and rear cylinders are both clean inside and rust free. The ram appears to be rust-free where it was oiled before the fire. The valve lever moves smoothly thru its range. The brass tag on the front of the machine melted off in the fire, but the side tags did not. Thinking we are going to give it a go. Thanks for the great videos on your YouTube channel, James Johnson!
-
Thanks for the info, everyone. I am going to take a trip up the hill and see it in person. The Camp Fire wiped out so many workshops. A lot of the people who had retired to Paradise in the last fifty years were engineers, mechanics, and other crafty folk who packed millions of pounds of beautiful old machinery up the hill with them. It would be great to be able to keep a few thousand pounds of that iron out of the scrap yard.
-
My buddy did, and James seemed to think it was doable, I'm just looking for info from people who have taken it on.

-
I have an opportunity to buy a friend's Anyang 88 that was damaged when his shop burned during the 2018 Camp Fire, in Paradise, Ca. The hammer was basically new when it burned. I have not had a look at it yet, but am wondering if anyone who has restored a fire-damaged air hammer has any advice. I'll post photos if I get a chance to look at it. Thanks!
-
I scrapped some tines from a big industrial Taylor forklift last year. They tested as 1144 stress proof steel. I treat it like 1045 for heat treating.
-
It's not hand hammering, but in the space between a hammer and a hydraulic press or power hammer, I've been having good luck doing Damascus with a fly press and a propane forge. I make the billets about 1.25"x1.25"x6-8", and use a combo die for drawing out. Still takes a couple hours for a twisted billet, but the press sets the welds with a nice even pressure, and you can use the depth stop to flatten the billet to pretty precise thicknesses (+/- .020). You can get into the fly press game for under $1,500 around here...
-
I just chiseled and stamped mine cold into a piece of 3/4" mild steel plate. Then got a 3/4" bearing yellow hot and smooshed it into the design with the fly press. Welded to smooshed bearing to a 1" shaft, and heat treated it in oil. Now I have a touch mark fly press tool.

-
I'd think 4x4x.125 would be fine if you add some good cross-bracing so the legs can't twist, especially if it will be bolted to the floor. It's all about the torsional load.
-
-
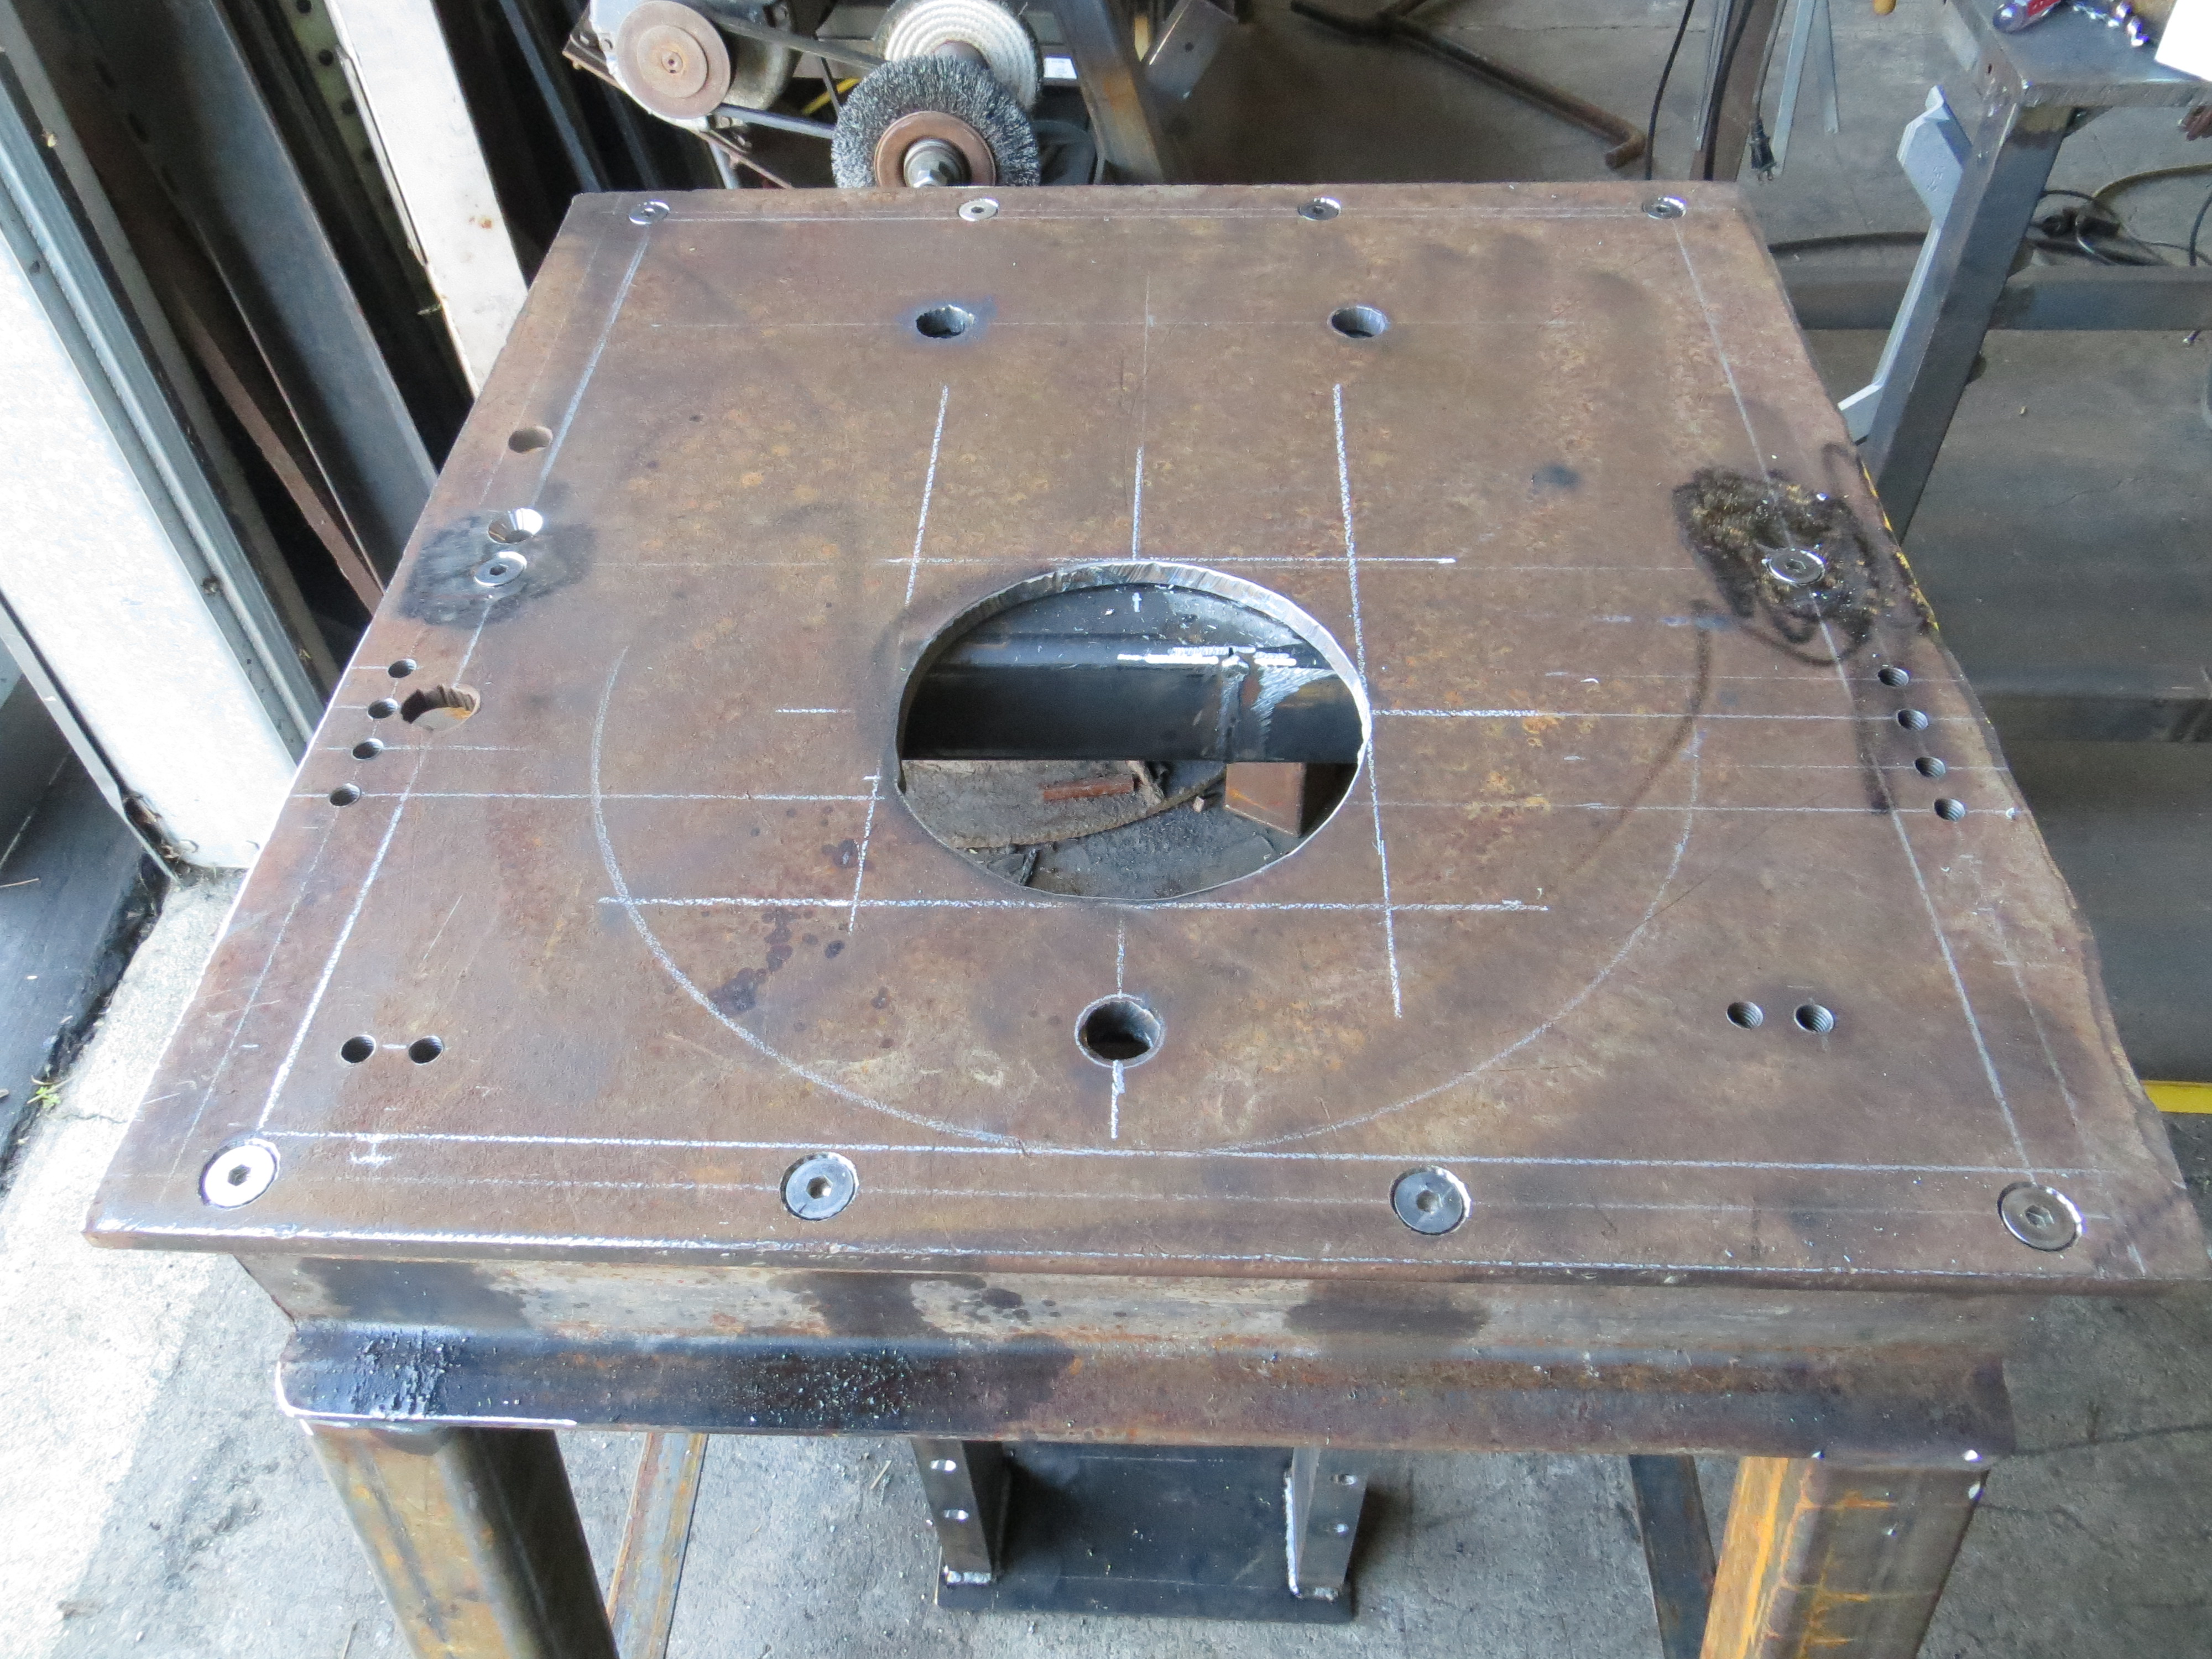
Made mine with 3" thick-wall tubing legs and I-beam top frame. 1/2" plate top with tapped holes for jigs - haven't seemed to use any of them so far. I left a wide hole under the center and added an adjustable platform underneath to use it as a traditional press. Has been great for pressing hammer handles, bearings, etc.
-
Collecting really is part of this craft, isn't it? I pass on large cold chisels if they are over $5, small chisels over $1. Don't want to pay over $10 for a good hammer head or top tool. I don't buy anything from someone who is selling fancy bike parts or fancy bikes, and usually won't buy from someone who doesn't know the value of what they have - e.g. quality USA tools at China junk prices - I usually figure they are just fencing stuff that they or someone else stole.
-
Thanks for the die making tips, really like the one you shared, too.
-
Here are links to some photos of texturing dies I have been making out of 1045 1" bar. Quenching in brine and drawing to bronze. https://zeekosalvage.wordpress.com https://www.facebook.com/zeeko.salvage
-
I went for a number 8 and have found that the advice that others give about a #8 being more of a two-man press are valid. It handles small pieces and delicate pressure well, but the body mechanics of positioning the work and then pulling the handle can be awkward, especially if you are continually changing tooling and not bothering to reposition the timing of the pull-bar (rotating the handle to be in the optimum pulling position). You end up chasing the handle all over the place and using bad body mechanics to push, pull, and generally whang on it. As far as wearing your body out, I disagree that no press will wear you out! It may be easy to pull the handle on a larger press, but unless you pay good attention to your posture, and be careful not to hold on tight when the ram hits the piece, I am finding that my fly press has the potential to really screw up my shoulders and back, transferring a lot of shock into my joints. I like the #8 a lot, and now am using it a bit with a helper, the two-man approach is great!
-
I have the carbide Makita chop saw. I use it for everything from 3/8" angle iron to 2" rounds of mild steel. Have also cut quite a bit of mystery carbon steel on it. It is great for cutting accurate thin sections off of 1/2-3/4" plate. Blades hold up for a surprisingly long time, but the vise on the table is pretty cheapo, and though you can adjust the backing plate for angles, it creeps a little, needs to be squared occasionally. I like the bandsaw for heavier or odd-shaped pieces that are hard to clamp on the chop saw, but for general fabrication with pipe and tubing, the chopsaw is much faster, easier to set stops on, cleaner, and ergonomic to use (sits above counter-height. Loud, but not dusty - it makes a lot of chips. I'd never go back to an abrasive saw.
-
I am a big fan of ferrules, too. I like to use a section of old shovel handle or other straight-grained hardwood. For the ferrule, I cut a 1" section of 3/4" electrical conduit, flare one end a little on anvil horn, and then whittle the handle down with a sharp hatchet to fit into the pipe. I drive the ferrule on until the flared end bottoms out at the end of the whittled section, then drill a 1/4" hole in the end, insert the file, and rap the handle on the anvil until the file is set. A 2 minute job.
-
I have had good luck whittling down yard sale and thrift store bats. I use a sharp hatchet to rough the shape out, and a block plane to smooth it after that.
-
Add me to the list of people who have learned this the hard way - yesterday, trying to clean up an s-hook, rushing to finish some gifts. The wire wheel grabbed it, took it once around, and whanged it off the middle my forehead at about 100 MPH. Had good safety glasses and respirator on, but it was sharpened, and could have been much worse. No stitches, but a big knot, and that shaky feeling that comes from getting bit. Worst part is that a good friend had a similar accident last year and had warned me not to do it that way. Ow!


.jpg.b63dbce92f9c4986dea52cde2ea8a2ac.jpg)
.jpg.37c42c178a3abfda9d52724fa6860cbc.jpg)