beammeupscotty
-
Posts
337 -
Joined
-
Last visited
Content Type
Profiles
Forums
Articles
Gallery
Downloads
Events
Everything posted by beammeupscotty
-
First video demonstration for school
beammeupscotty replied to Nick O's topic in Blacksmithing, General Discussion
I imagine it is possible to see people who call themselves blacksmiths doing all sorts of crazy things. That doesn't mean it is correct procedure. I can tell you that traditionally, any smith who regularly wasted material as you describe, during what is likely the most common procedure in blacksmithing, drawing a taper, would not have been considered much of a smith. Not all that long ago decent iron was expensive and was never wasted in the way you suggest. Furthermore, if you know what you are doing, any supposed loss of heat is irrelevant. In fact, maintaining the maximum amount of mass adjacent to where you are forging the point actually helps retain heat in the small section area, as oppose to thinning that area down before you forge the point. Less mass means less heat retention. I could very easily forge the point and taper that the OP did, in a single heat and perhaps even have heat left over for bending. Unlike yourself, I have never seen a competent smith forge a point and taper any other way that point first, taper second which is exactly the way the ABANA training indicates it should be done. The OP's technique is not only inefficient, but he appears to have left a lot of hammer marks on the work and his 90 degree bend for the drive end of the hook is not really square enough to work very well. It seems to me that it behooves those of us with more experience to point out issues with technique when we see them, which is what I was trying to do. -
First video demonstration for school
beammeupscotty replied to Nick O's topic in Blacksmithing, General Discussion
Proper technique for forging a point and taper is to forge the point first, then draw out the taper to the desired length. -
Show me your Bottle Openers!
beammeupscotty replied to Arbalist's topic in Blacksmithing, General Discussion
Special small Xmas crafts fair. I did about the same there last year. -
Show me your Bottle Openers!
beammeupscotty replied to Arbalist's topic in Blacksmithing, General Discussion
I sold some bottle openers this weekend...about $1000.00 worth in fact.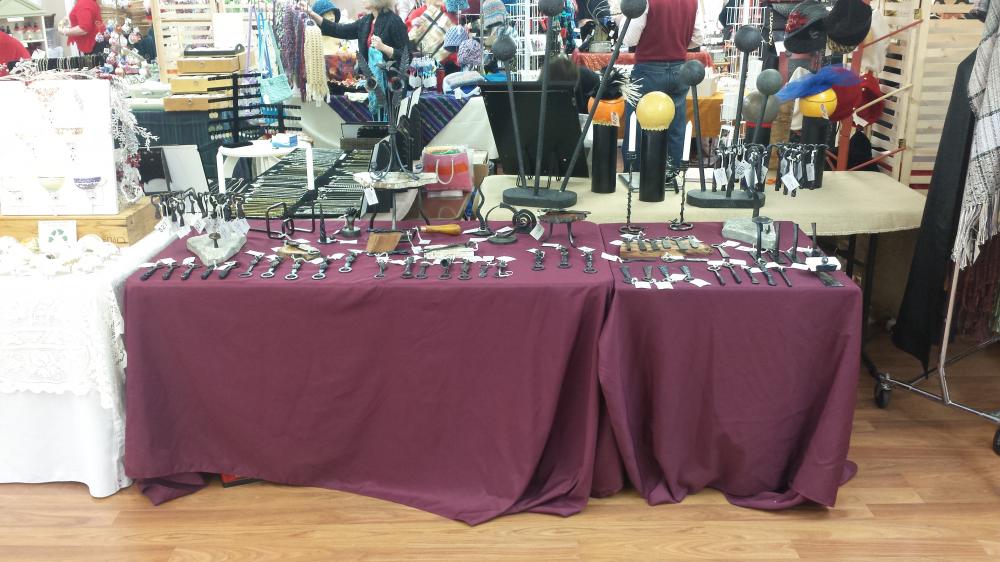
-
Show me your Bottle Openers!
beammeupscotty replied to Arbalist's topic in Blacksmithing, General Discussion
Among others, I sold two today for $73.00 each. Assuming they are executed very well, I think one should charge what they are worth in terms of time, though even those $73.00 openers only netted me about thirty bucks an hour for my time after show expenses. -
Morchang making video
beammeupscotty replied to Broadus's topic in Blacksmithing, General Discussion
Very nice video. Thanks for posting it. -
Another interpretation of a bonsai tree...
beammeupscotty replied to beammeupscotty's topic in Metal Sculpture & Carvings
Thanks gents. On the taller one I also included a snail crawling under the mushroom. I hope these end up helping sales. I am doing a crafts fair the first weekend in December, which I did last year as well. The woman who runs it gave me a ration about my "poor merchandising skills", so I hope to avoid the grief this year. -
I did a pair of these, this one to display keychain bottle openers and another larger one for full size openers. This is the smaller of the two.


-
Making some hinges, material choice
beammeupscotty replied to Seek's topic in Blacksmithing, General Discussion
For light duty hinges such as what would be put on a small cabinet, welding them closed is not really necessary if you make them from thick enough material. The dimensions and material of the door you will be attaching will determine whether or not you need to forge weld the barrel closed. For a small door, something like up to 18" square, I would not bother with the weld if you make them out of at least 1/8" thick material. -
Show me your Bottle Openers!
beammeupscotty replied to Arbalist's topic in Blacksmithing, General Discussion
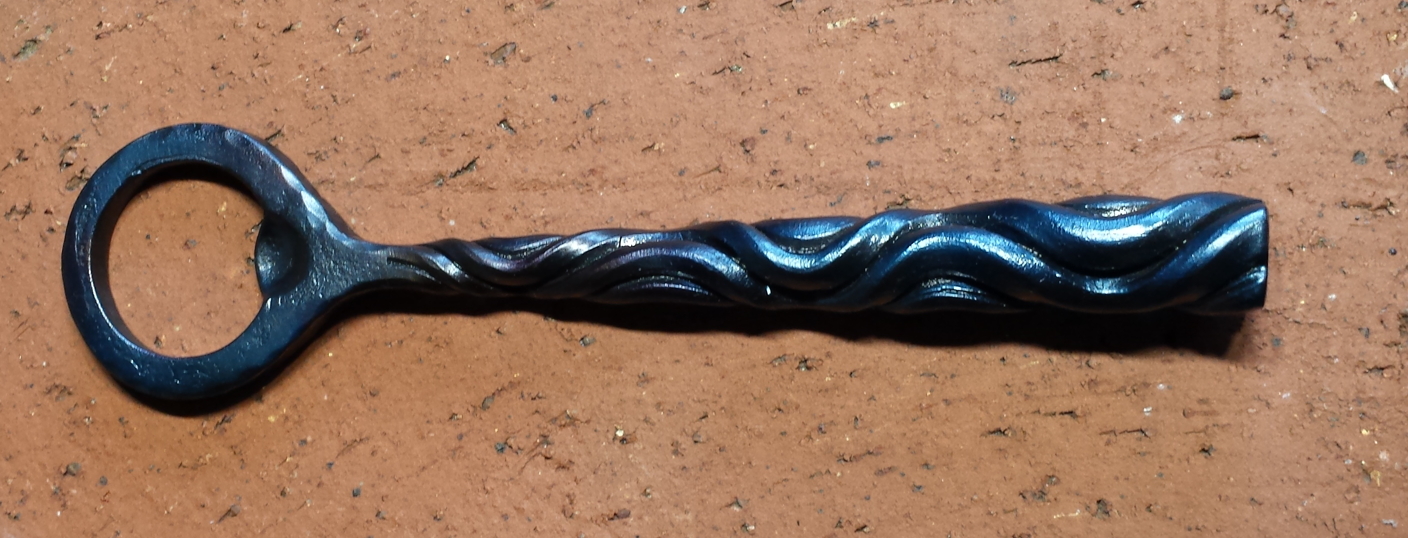
Is this the twist you are describing? I had my doubts about how it would look from your description but I think it is actually pretty nice. Thanks, I'll use it.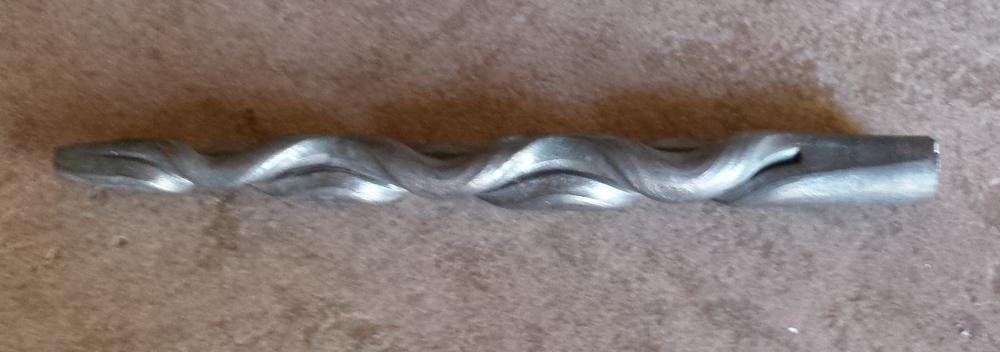
-
Show me your Bottle Openers!
beammeupscotty replied to Arbalist's topic in Blacksmithing, General Discussion
I've been doing it on and off for 24 years now and I am really still just a hobbyist. A fairly competent one, but just a hobbyist. Stick with it and you'll get there. -
Show me your Bottle Openers!
beammeupscotty replied to Arbalist's topic in Blacksmithing, General Discussion
The latter. Forging the rounds in would tend to compress the v-grooves making the finished product less defined. Also it is easier to get a smoother finish if you grind and sand and this makes the final product more attractive, IMO and nicer to hold in your hand. -
Show me your Bottle Openers!
beammeupscotty replied to Arbalist's topic in Blacksmithing, General Discussion
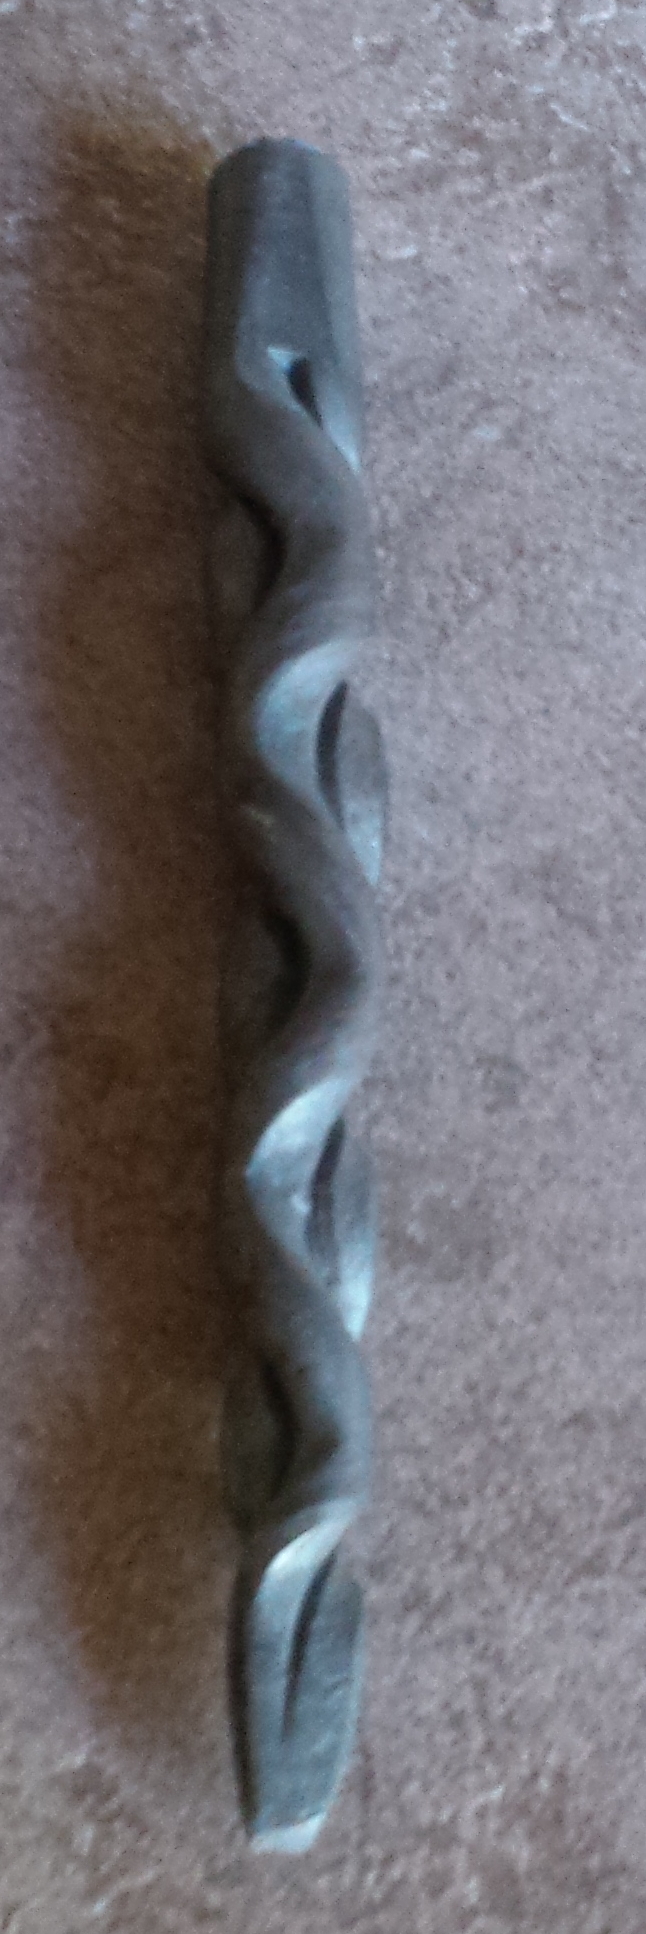
After re-reading your post I have to say you are essentially there. After forging the taper you chisel the sides down the length. Making sure it is very straight, you then round the corners with a side grinder and flap wheel. I also hand sand the corners to a finer grit then do the twist with a torch. Using a torch is much easier than using a forge and quenching. -
Show me your Bottle Openers!
beammeupscotty replied to Arbalist's topic in Blacksmithing, General Discussion
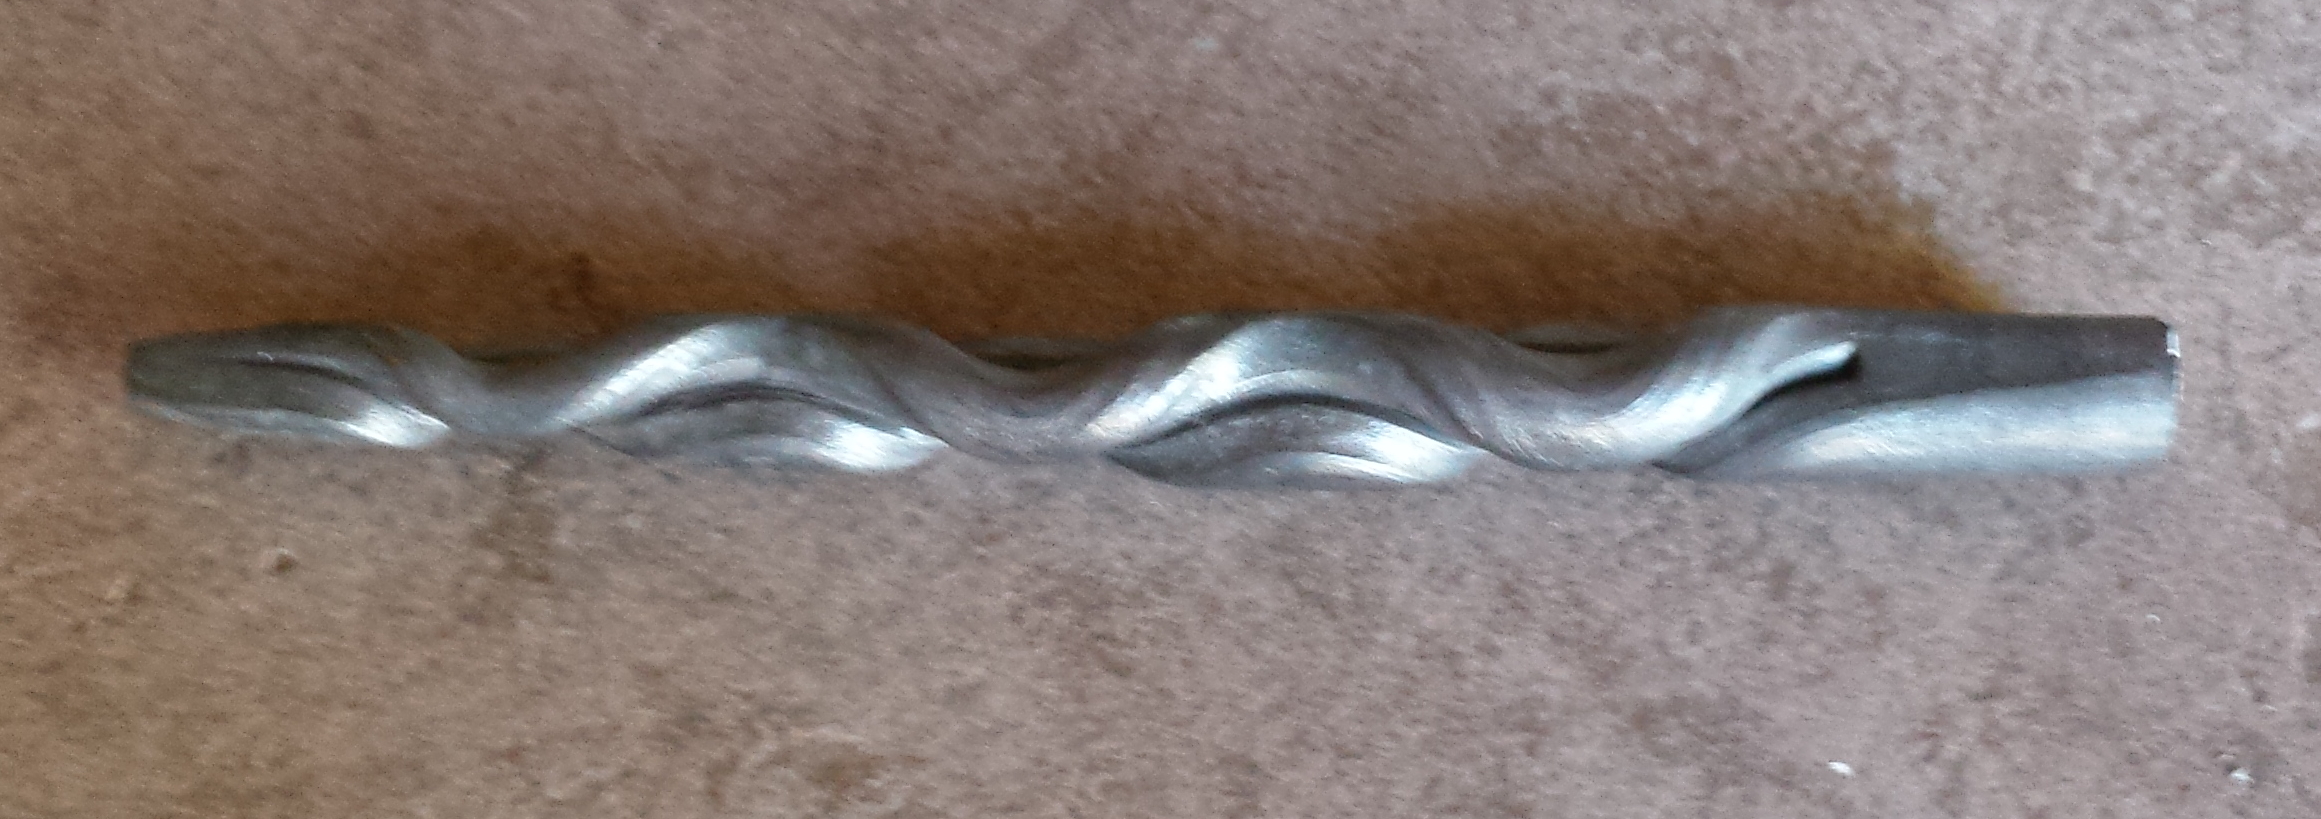
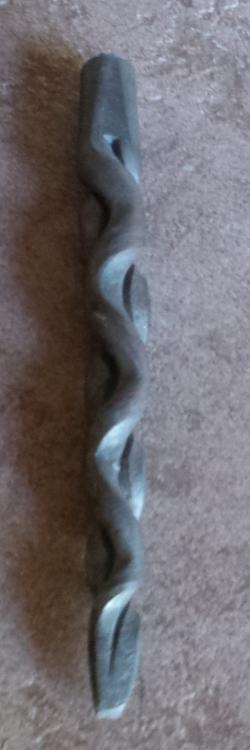
Yes, but you have missed the entire preparation stage. How do you think the impression of rounded tapered cylinders in the twist are produced? This twist is not, by the way, original in design. As I indicated in my initial post, I saw this twist on an unrelated item made by someone else. I did, however, very quickly figure out how it was done and replicated it in the piece shown here. A couple of day later, incorporating in to the handle of a bottle opener suddenly came to me. I think it is going to sell very well this Xmas and has quickly become one of my favorite openers among the ones I make and sell. I am not playing coy with how this twist is accomplished because I am trying to be a dick. I just thought it might be fun for some of the people newer to blacksmithing to stretch themselves a bit to try to figure it out.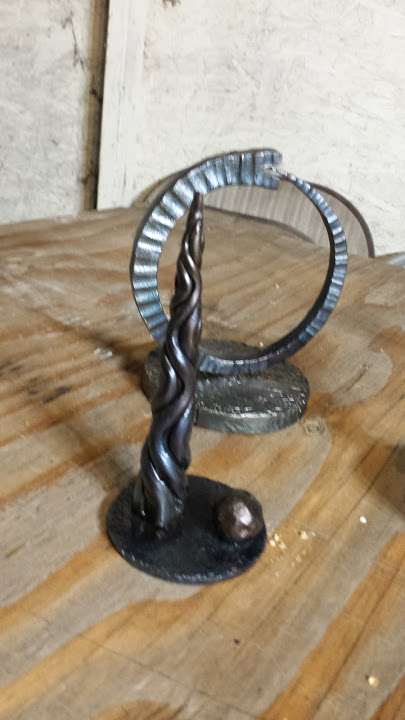
-
Show me your Bottle Openers!
beammeupscotty replied to Arbalist's topic in Blacksmithing, General Discussion
I'll bet if you think about it for a bit you can figure it out. -
Show me your Bottle Openers!
beammeupscotty replied to Arbalist's topic in Blacksmithing, General Discussion
Time to get ready for Xmas crafts fairs and when I am going to be selling at venues that I sold at last year, I like to have new stuff to offer. I came up with this bottle opener a couple days ago, based on a twist that "someone-in-the-rye" posted on the r/blacksmith.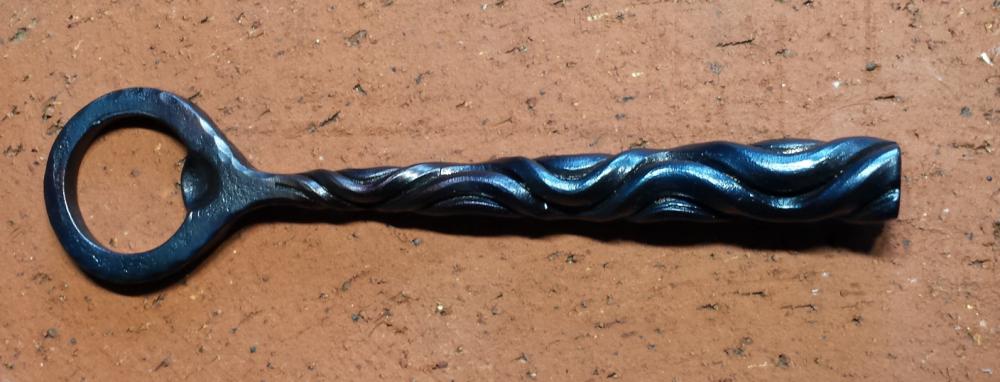
-
Basics video series
beammeupscotty replied to Everything Mac's topic in Blacksmithing, General Discussion
The audio is not real good and you should provide actual dimensions. I understand that on something like this an experienced smith can just judge things but a beginner needs to know how long a piece of stock they need, how much goes into the eye and how much goes into the rake. -
This is the stuff you should be doing: https://www.abana.org/resources/chf.shtml Scroll down for PDF documents detailing basic blacksmithing skills. There is more to the craft than just heating up a piece of steel and smashing it flat. Learn this stuff and you will be well on your way to becoming a blacksmith.
-
Hi all. I have a couple of students that I teach basic smithing to. I will probably be doing a class in the next few days and I want to teach the making of tenons in this particular session, but I would like to have some fairly simple project to actually use them in. I don't do tenons much in my own work so I just can't seem to think of anything for my students to make utilizing tenons. Does anyone have any suggestions?
-
Made my first Hardy Tool! w00t!
beammeupscotty replied to John Galt's topic in Tools, general discussion
Not sure I understand the combination of the Xtian cross with the Hebrew Star of David. -
I first started when...
beammeupscotty replied to JamesH's topic in Blacksmithing, General Discussion
I have been a "crafts guy" my entire life and had always been fascinated with blacksmithing. I used to watch the smiths for hours at the local, and I think original RenFaire in Novato CA. In '91 I was working as a marine machinist on mothballed ships, helping to get them operational to carry supplies to the first Gulf War. One of the welders there mentioned an old guy teaching blacksmithing out in the Sunset District in San Francisco. I got in touch, signed up and as many say, was hooked in the first 5 minutes. I was selling a LOT of work in local craft galleries within six months. My main gig now is as a General Contractor but I still produce and sell a fair amount of work each year. I have learned over the years to hate summer because it is too hot in my shop to do much work during those months. During winter months I forge almost every day. -
Which ones have you seen that you don't like? I do a fairly stylized one for keychain bottle openers.

-
Show me your Bottle Openers!
beammeupscotty replied to Arbalist's topic in Blacksmithing, General Discussion
In the future, just go down to your local supermarket. They still sell paraffin. It is used as a traditional seal for jam and jelly jars. -
My Work for the last few nights.
beammeupscotty replied to scottyp74's topic in Blacksmithing, General Discussion
Rather than chopping at the small pieces of wood needed to start up a coal or coke fire with a hatchet, I'd suggest using your hot cut hardy instead. I used to use a hatchet, but found it to be very easy to miss those small pieces of wood and come dangerously close to damaging a finger or the anvil surface. With a hardy you just put the small block on top and hit it with a hammer. I have a commercially made hardy which is forged at an angle similar to a splitting wedge and it works very well, much better than any hatchet. -
Trying to Find blacksmith class in my area
beammeupscotty replied to Sean Turner's topic in Blacksmithing, General Discussion
Anyone else feeling trolled?