beammeupscotty
-
Posts
337 -
Joined
-
Last visited
Content Type
Profiles
Forums
Articles
Gallery
Downloads
Events
Everything posted by beammeupscotty
-
Show Me Your Hooks!
beammeupscotty replied to EJRailRoadTrack's topic in Blacksmithing, General Discussion
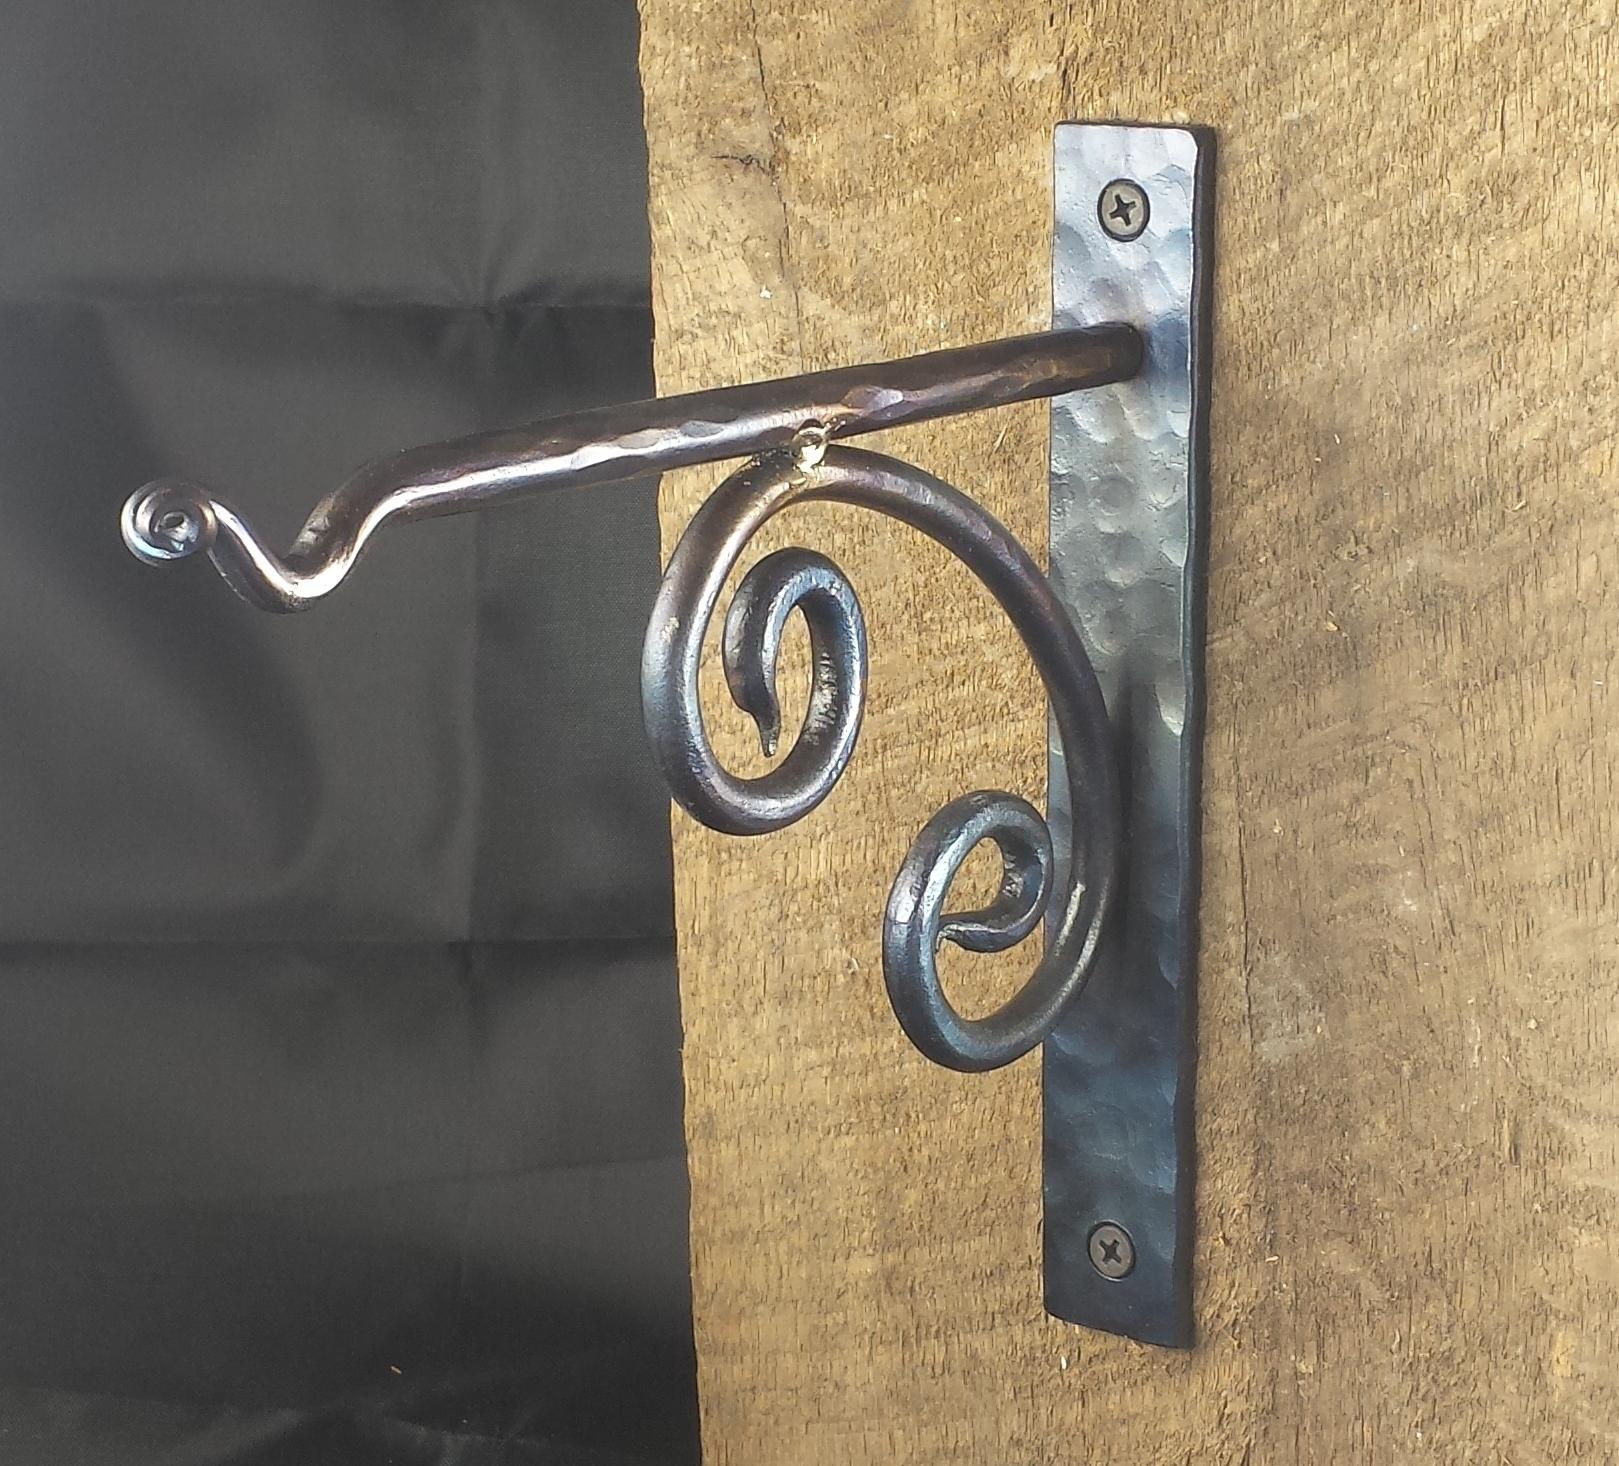
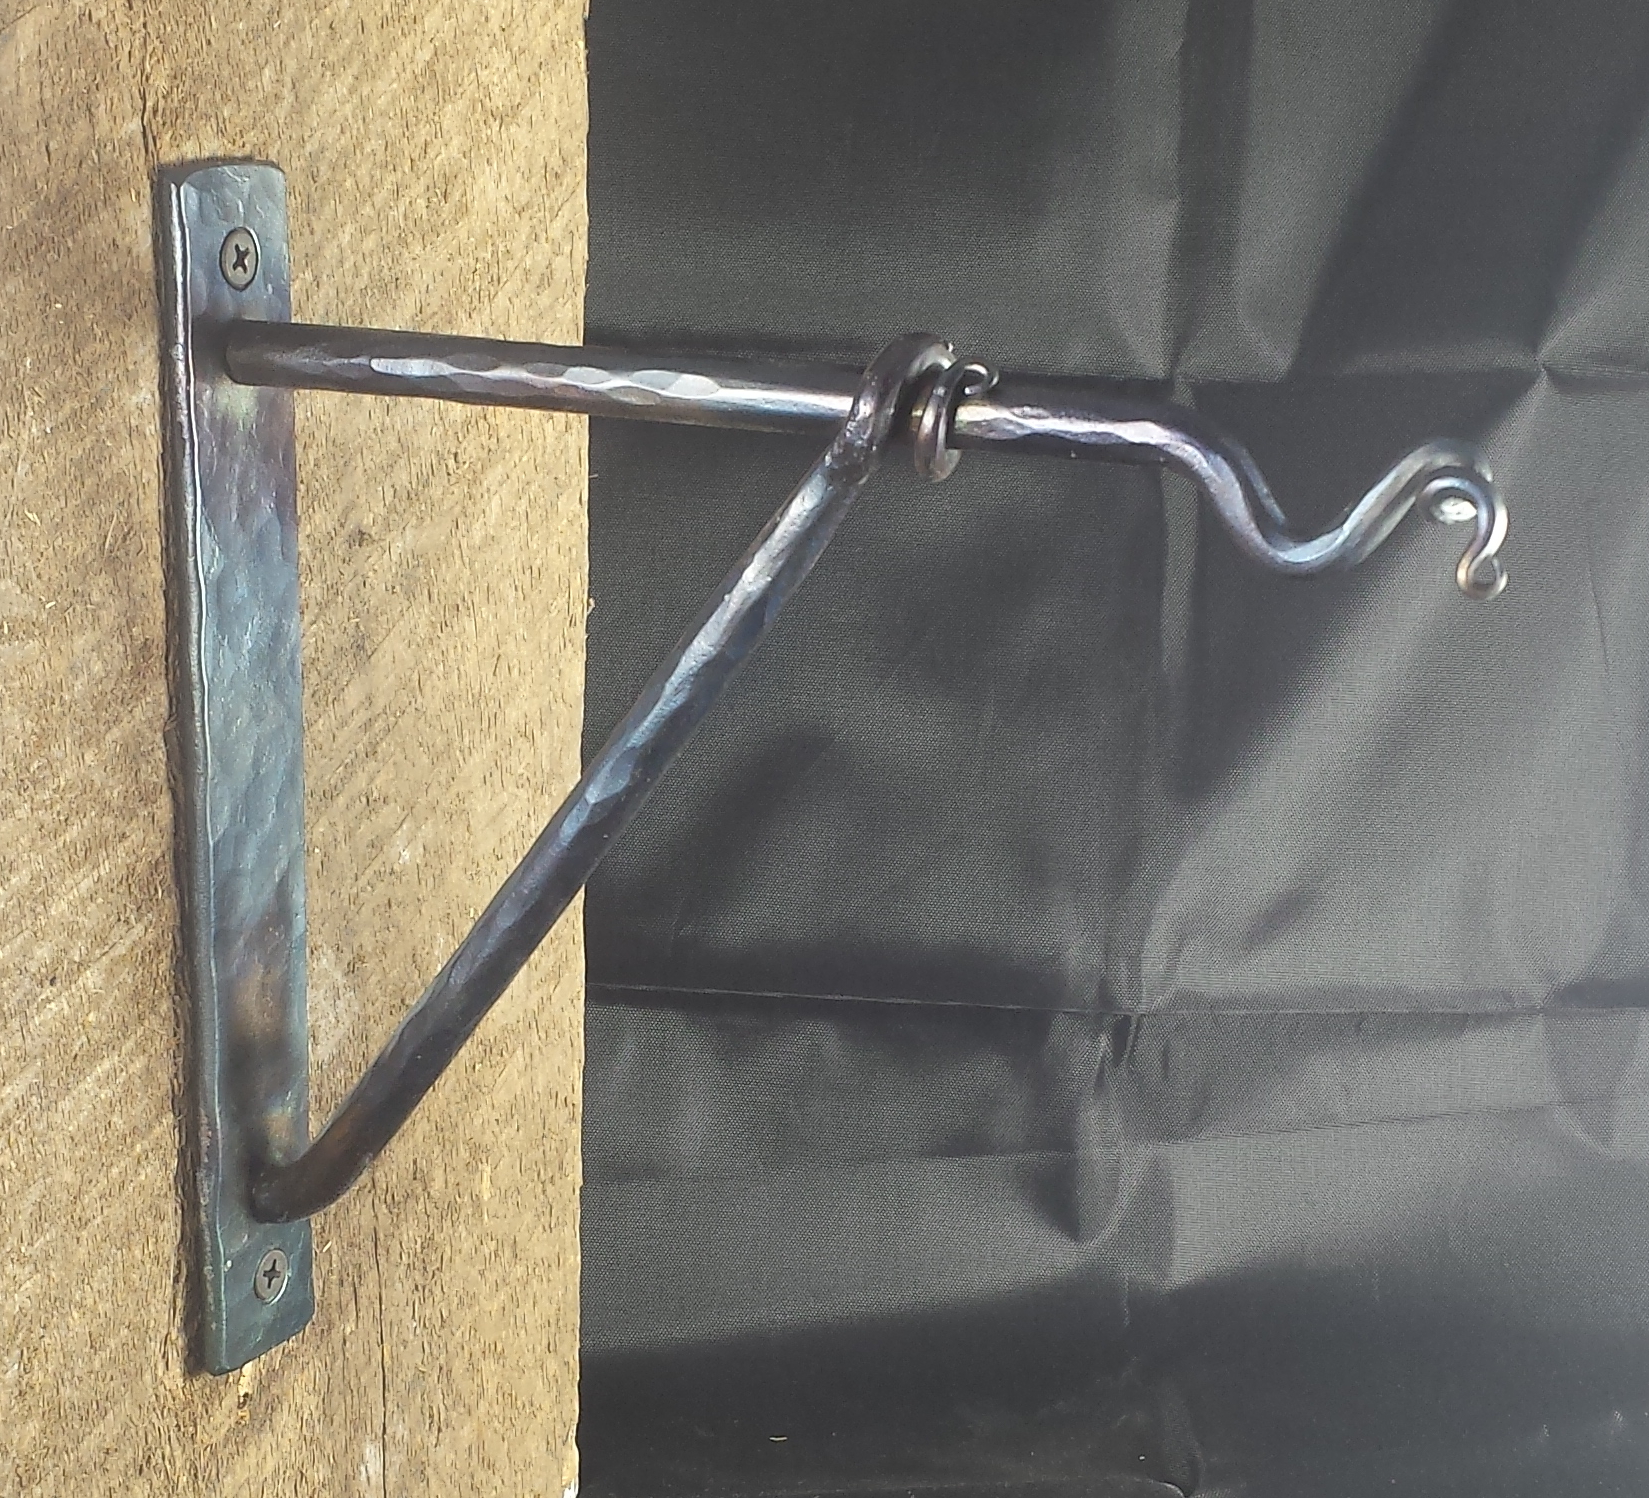
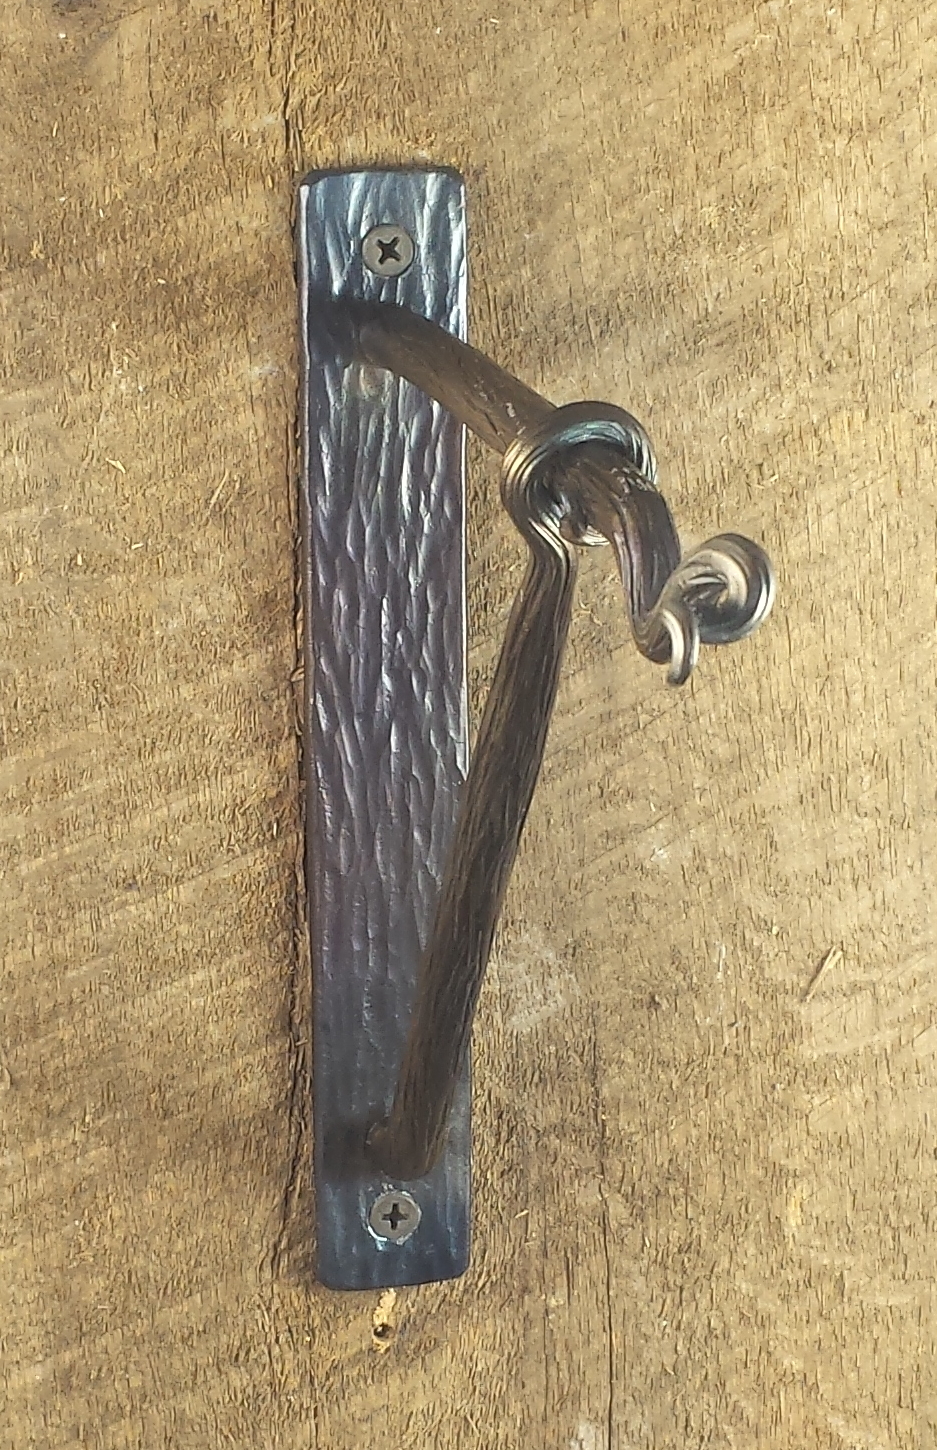
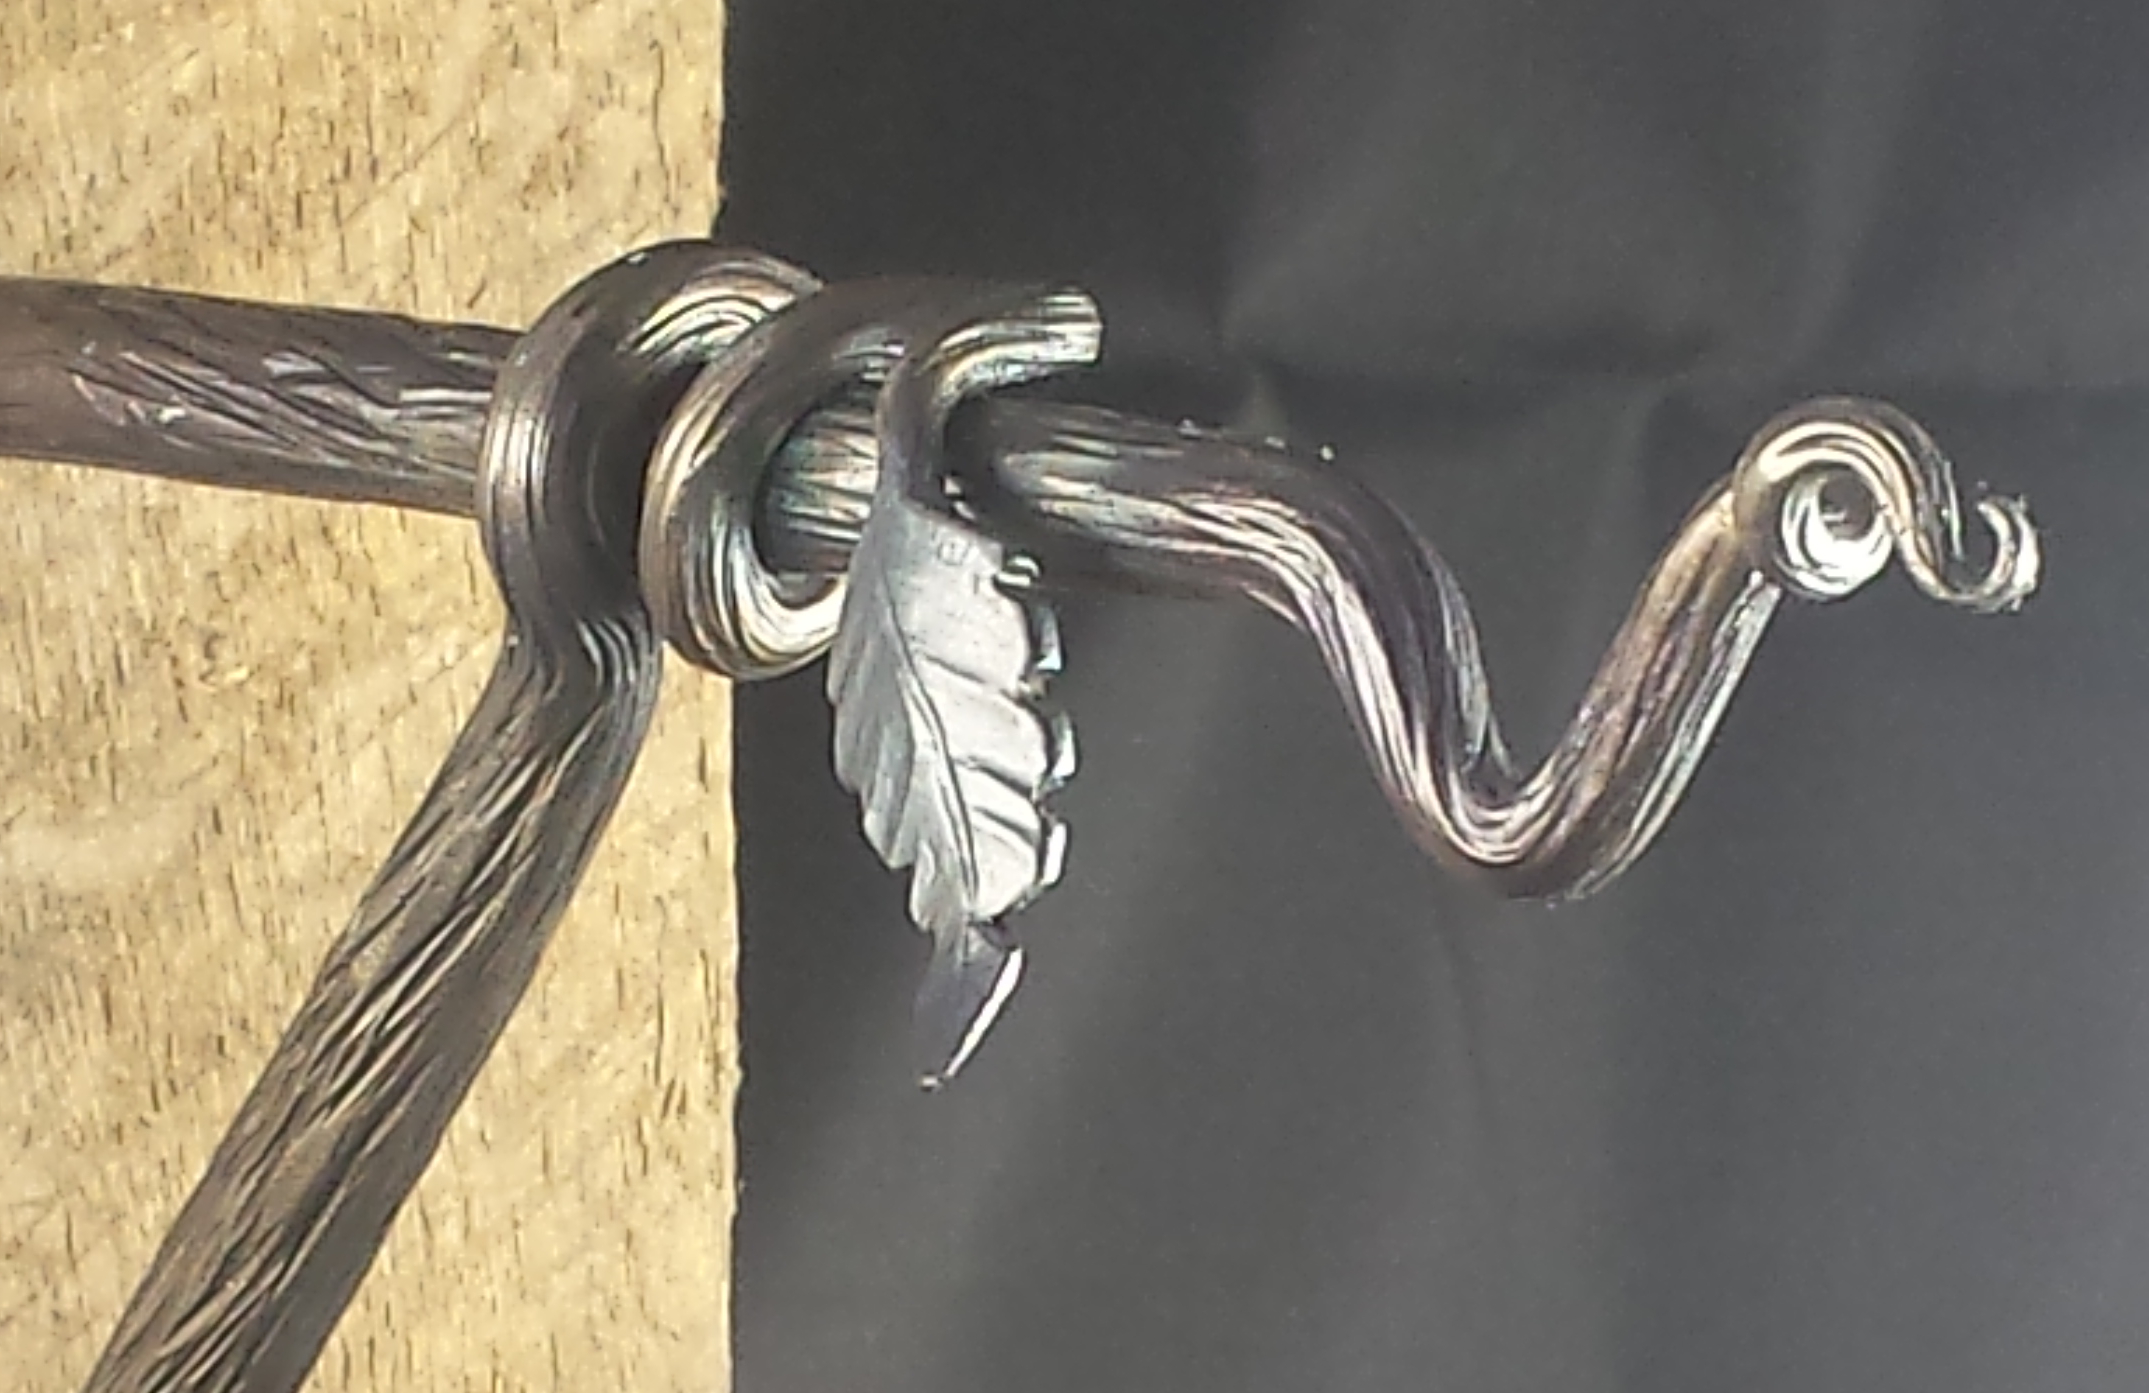
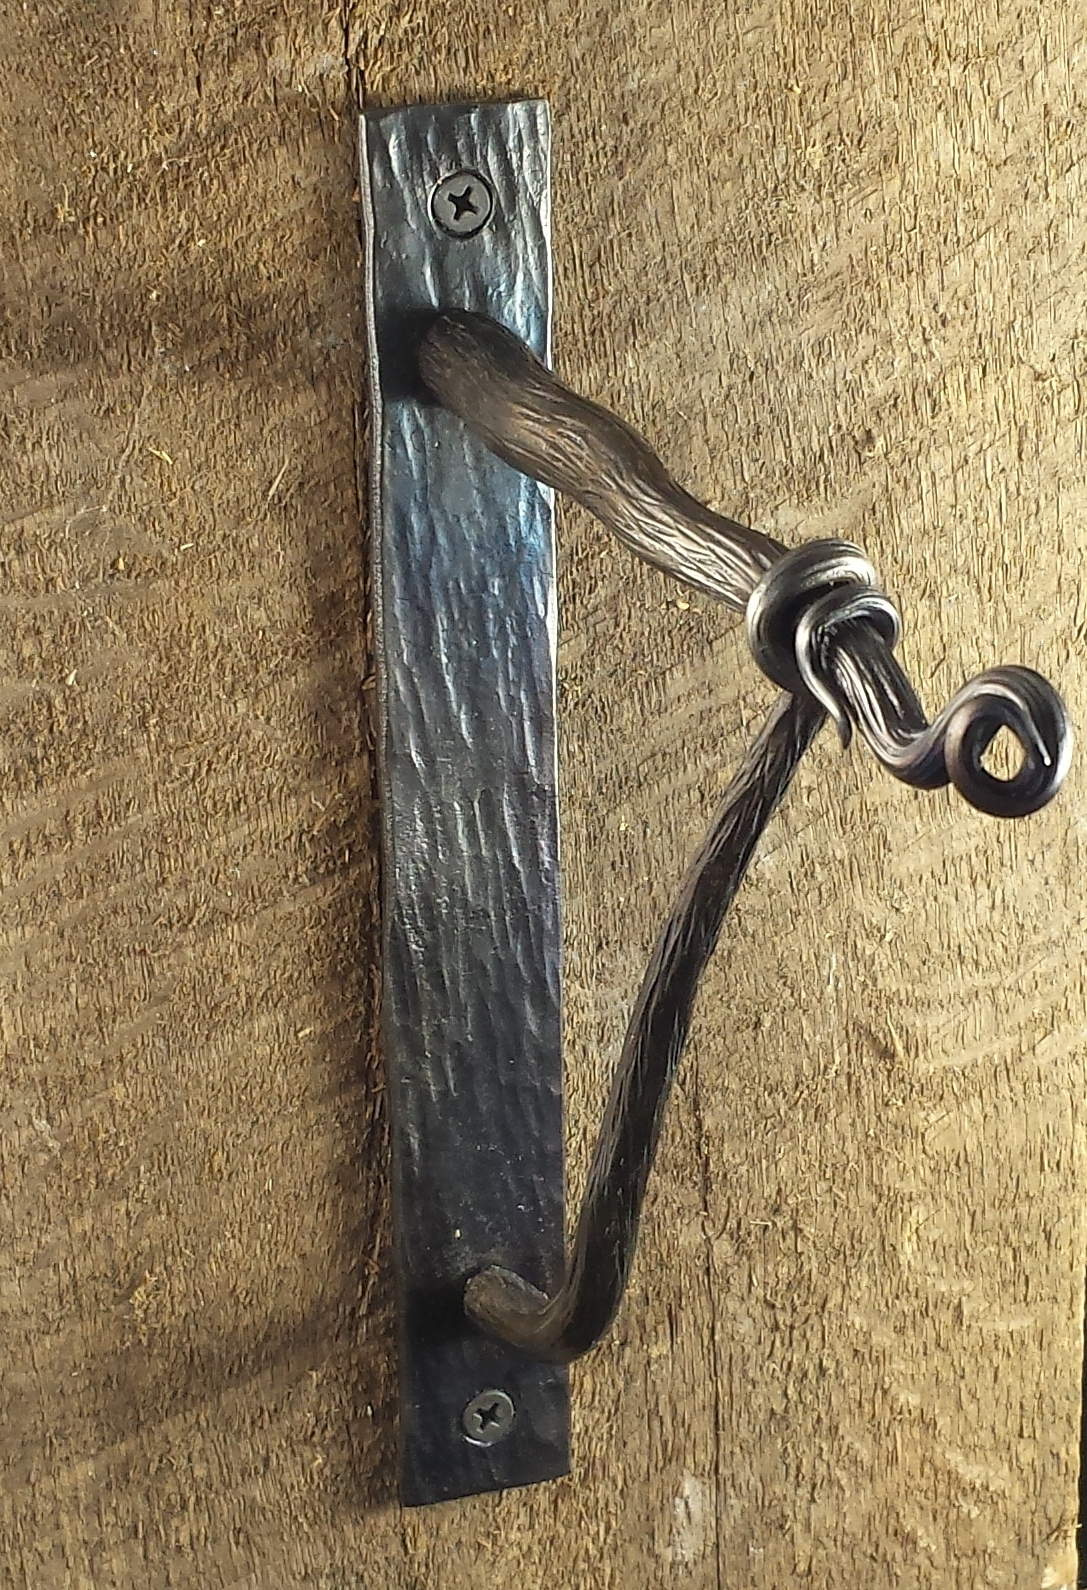
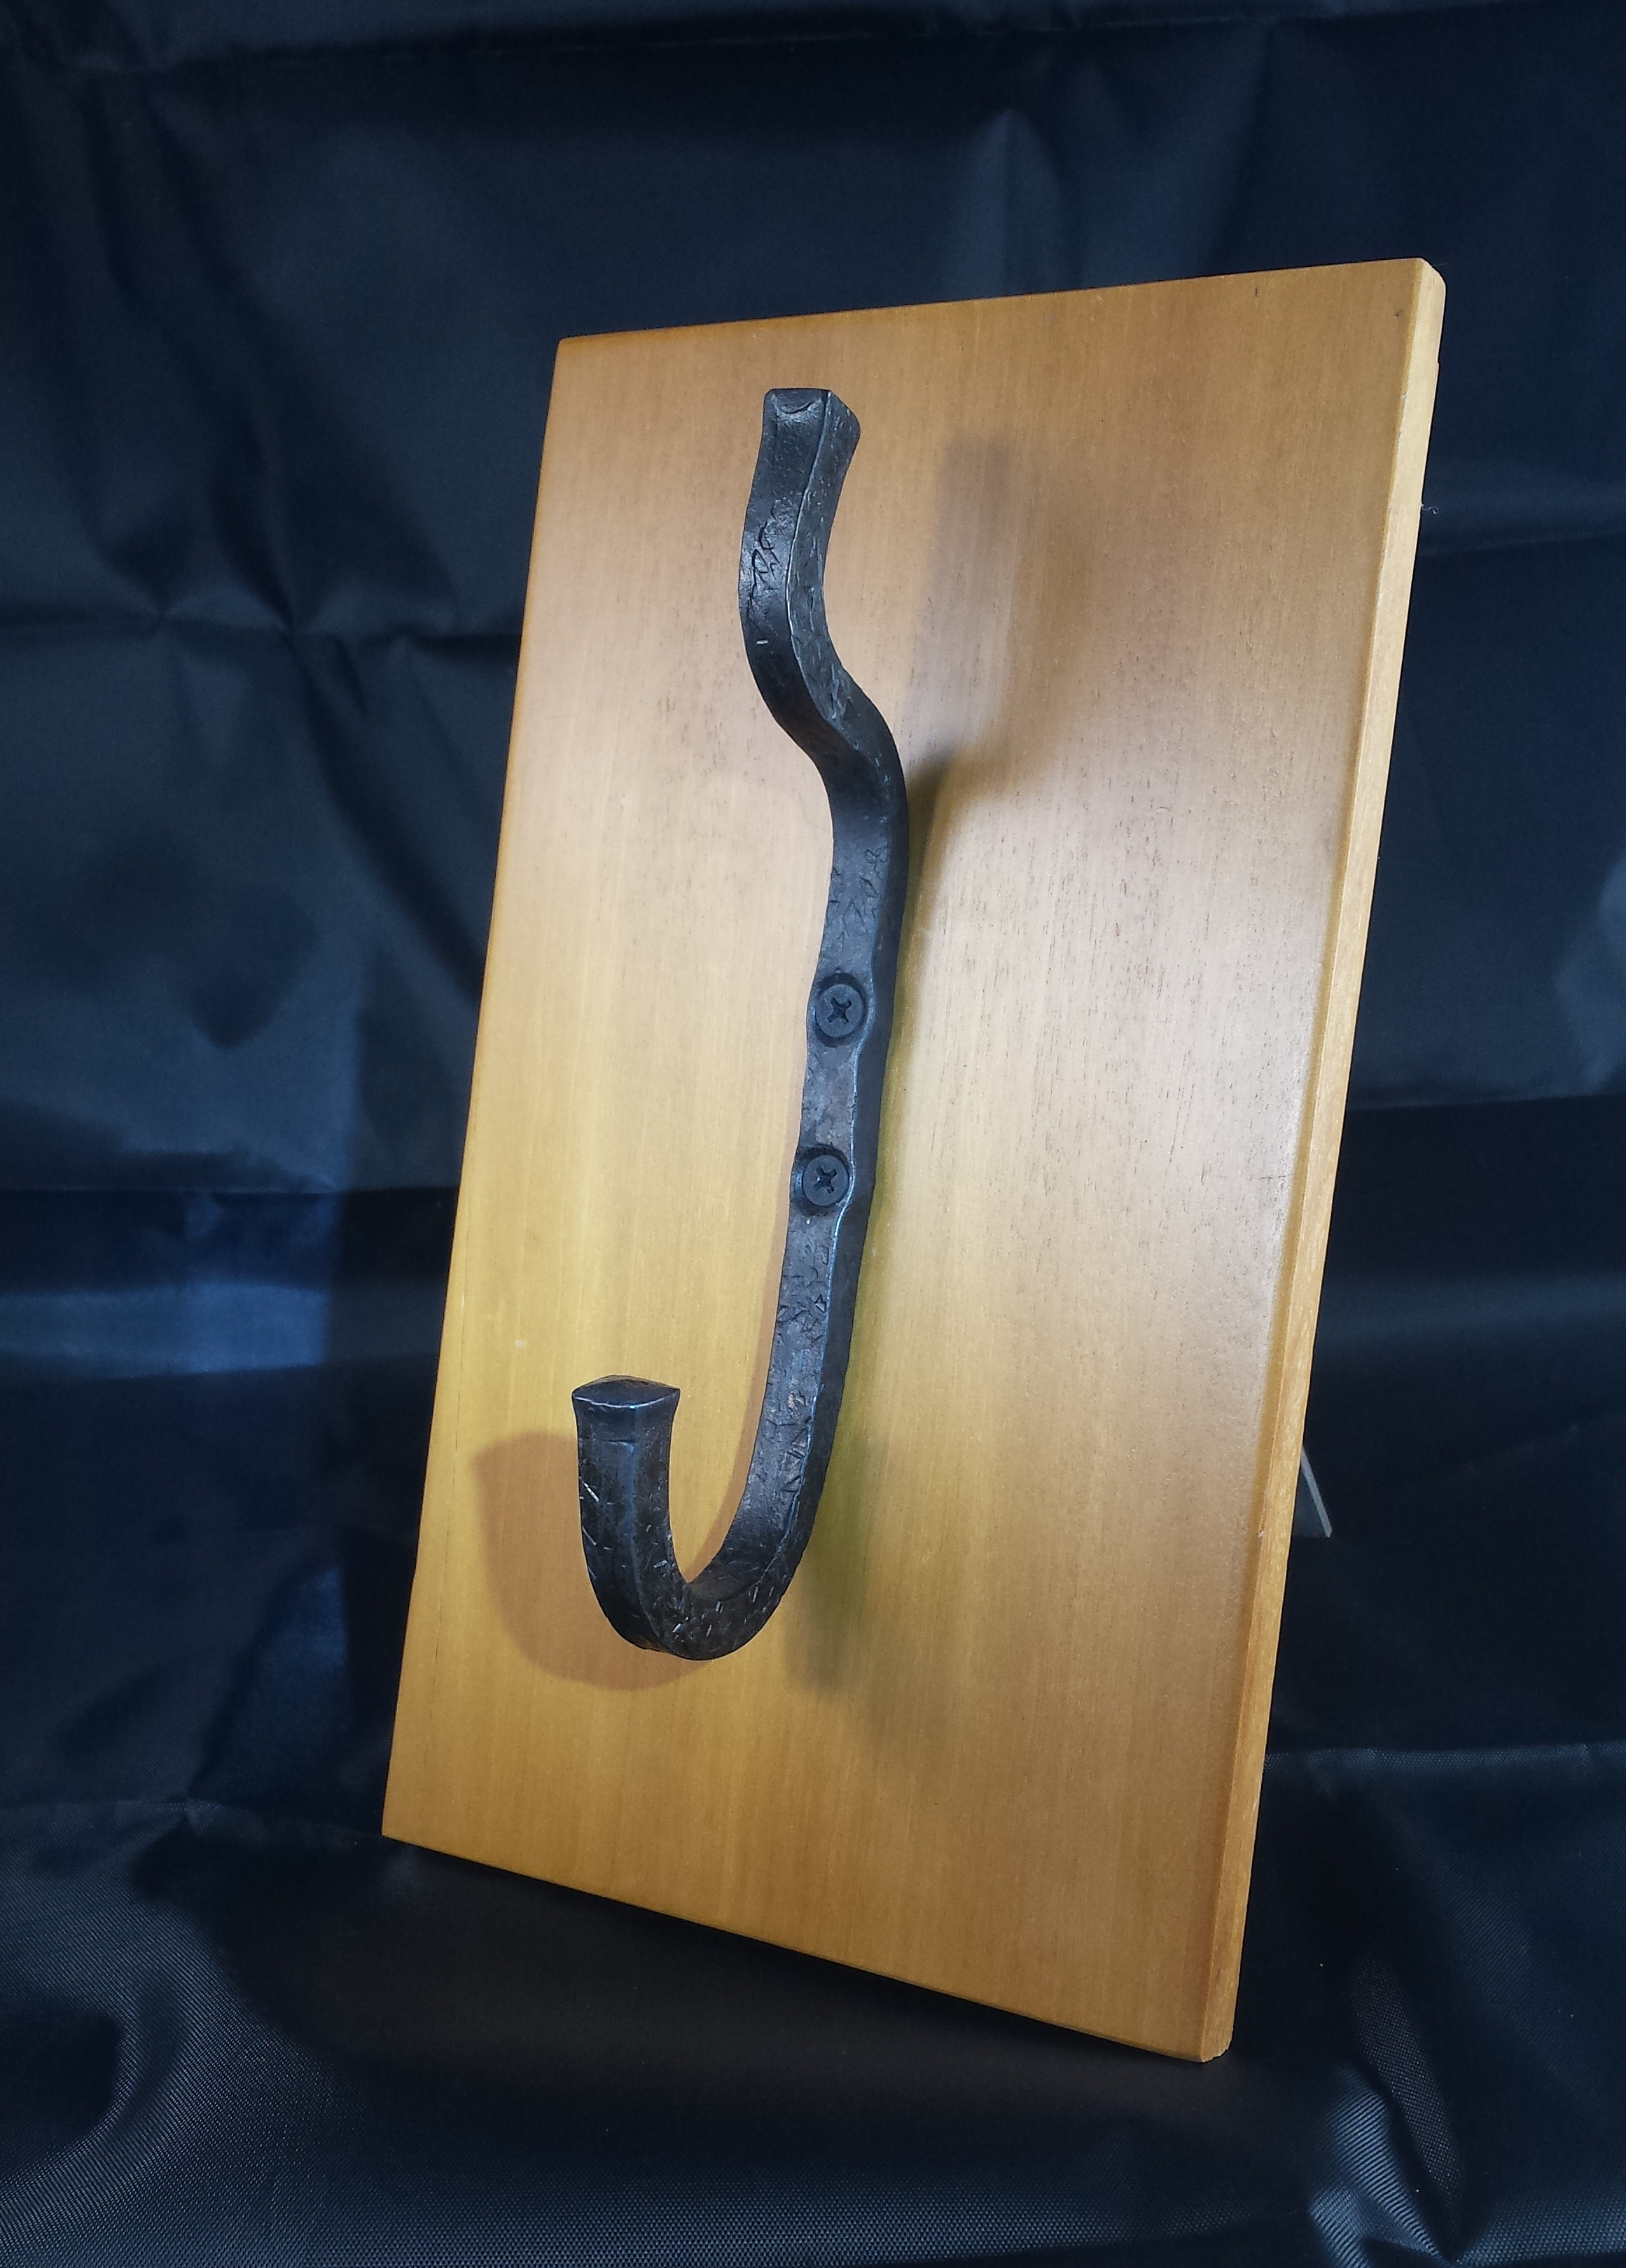
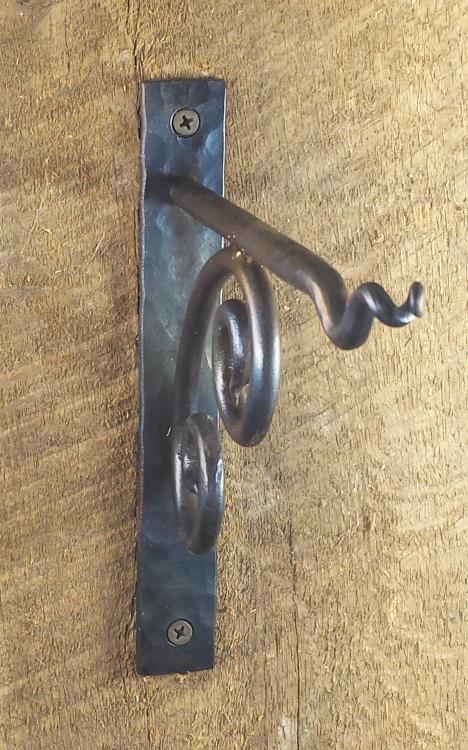
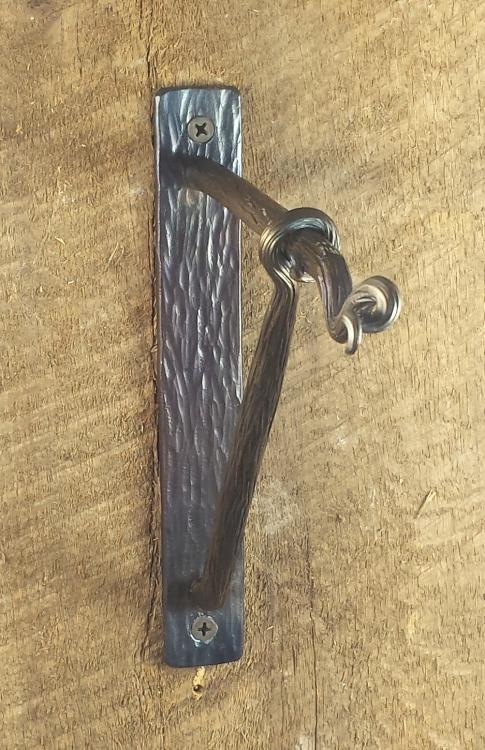
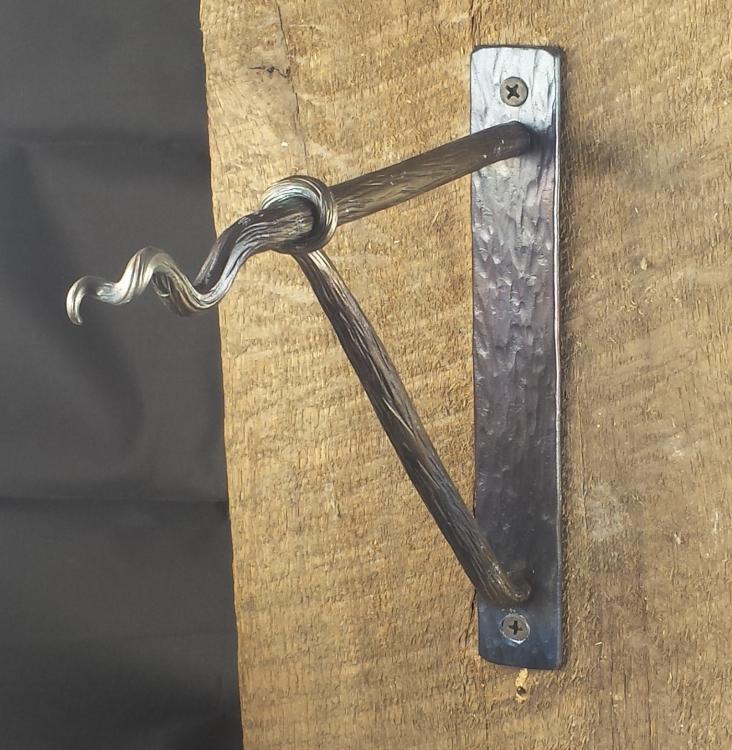
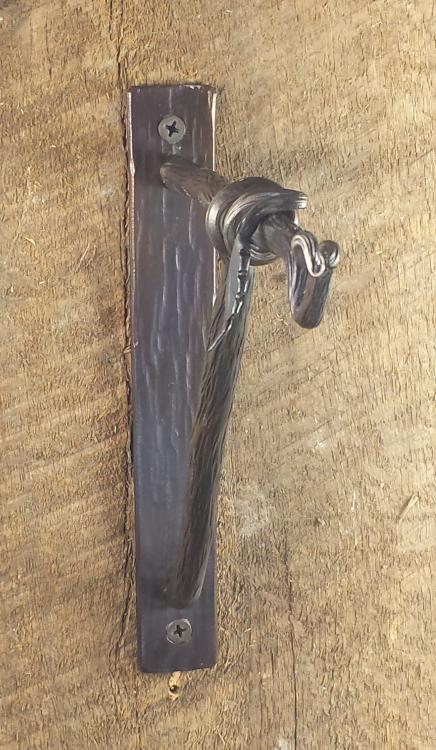
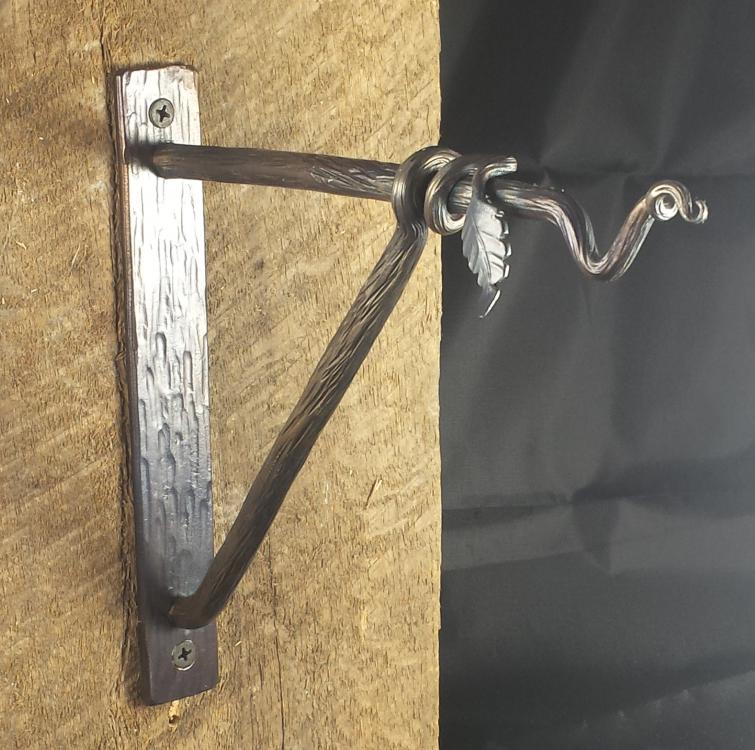
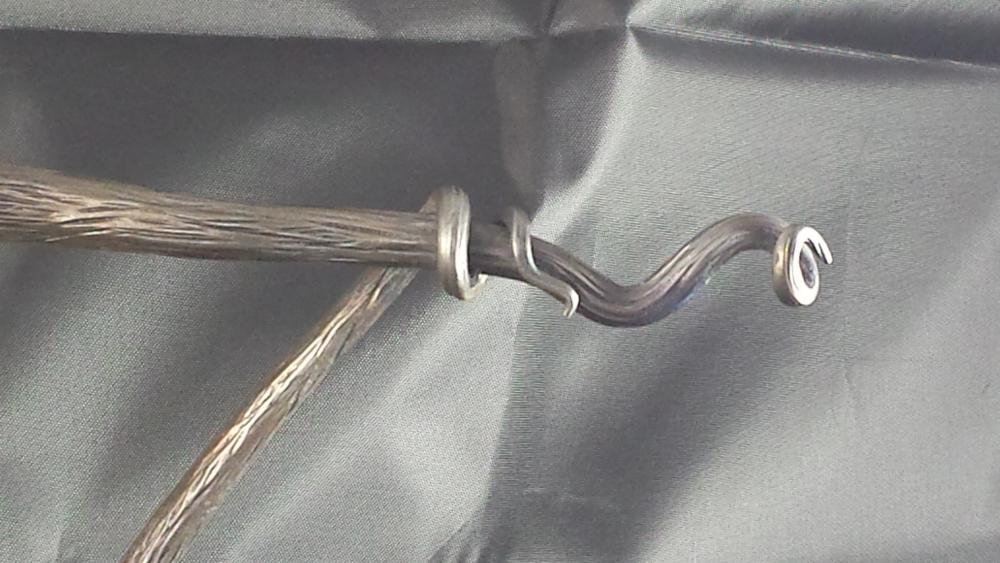
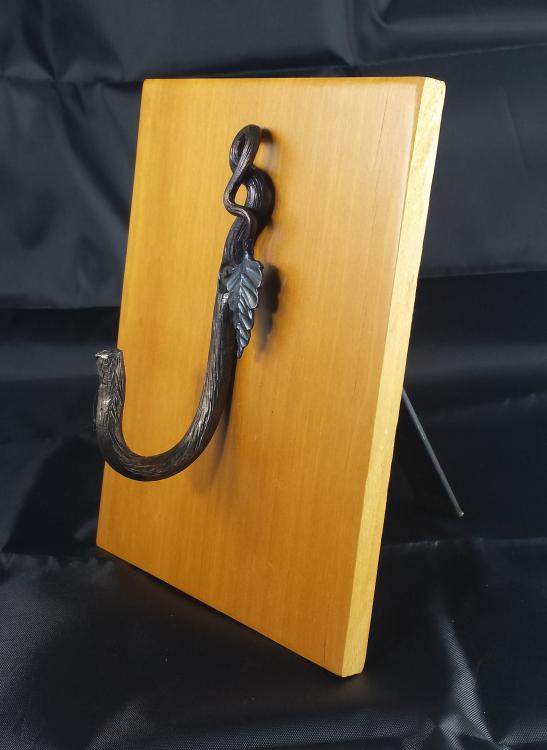
It is entirely coincidental that this thread was posted at a time when i was working on developing hook designs. I did a crafts fair over the Xmas holidays and the woman who runs it asked me to attend her show in October in Fresno, and also asked me to come up with some different hooks to offer for sale. The last one I posted here was a plant/feeder hanger and I have been continuing that last theme in a few different ways. Essentially I am starting out with more or less the same stock for each hanger and seeing what different approaches I can come up with. Here are the latest. I think the one with the scroll brace is nice, but I am not really a scroll kind of guy. I am not sure I will be doing any more of them. The next one has just a peined surface to both the back plate and to the arm and brace. I like this one a bit more. Then I have a different iteration of the bark textured hanger, this time with straight elements rather than curved. I think I like the straight approach a little better, but would welcome other opinions. Finally, there is a bark texture with leaf detail. I think I like this one the best of all but am not sure it will be cost effective to sell. That one takes a hour and a half to two hours to make. Any opinions are welcome. As I said, I am developing some styles for sale and any input as to which seemed the most marketable would be appreciated. Sorry the pics are out of order. I couldn't figure out how to correct that.


-
Show Me Your Hooks!
beammeupscotty replied to EJRailRoadTrack's topic in Blacksmithing, General Discussion
I think this is really nice. I hope you don't mind my making a suggestion. I think the re-bar you used really comes across as rope and I'd love to see you explore that direction. Leave the bottom section hook ends blunt as if they were cut rope and at the top form some sort of lariat. Go full Cowboy. My sister would eat that up! -
Show Me Your Hooks!
beammeupscotty replied to EJRailRoadTrack's topic in Blacksmithing, General Discussion
I just use a hand held propane torch, however, I have been doing it for 25 years so I have become pretty adept at it. -
Show Me Your Hooks!
beammeupscotty replied to EJRailRoadTrack's topic in Blacksmithing, General Discussion
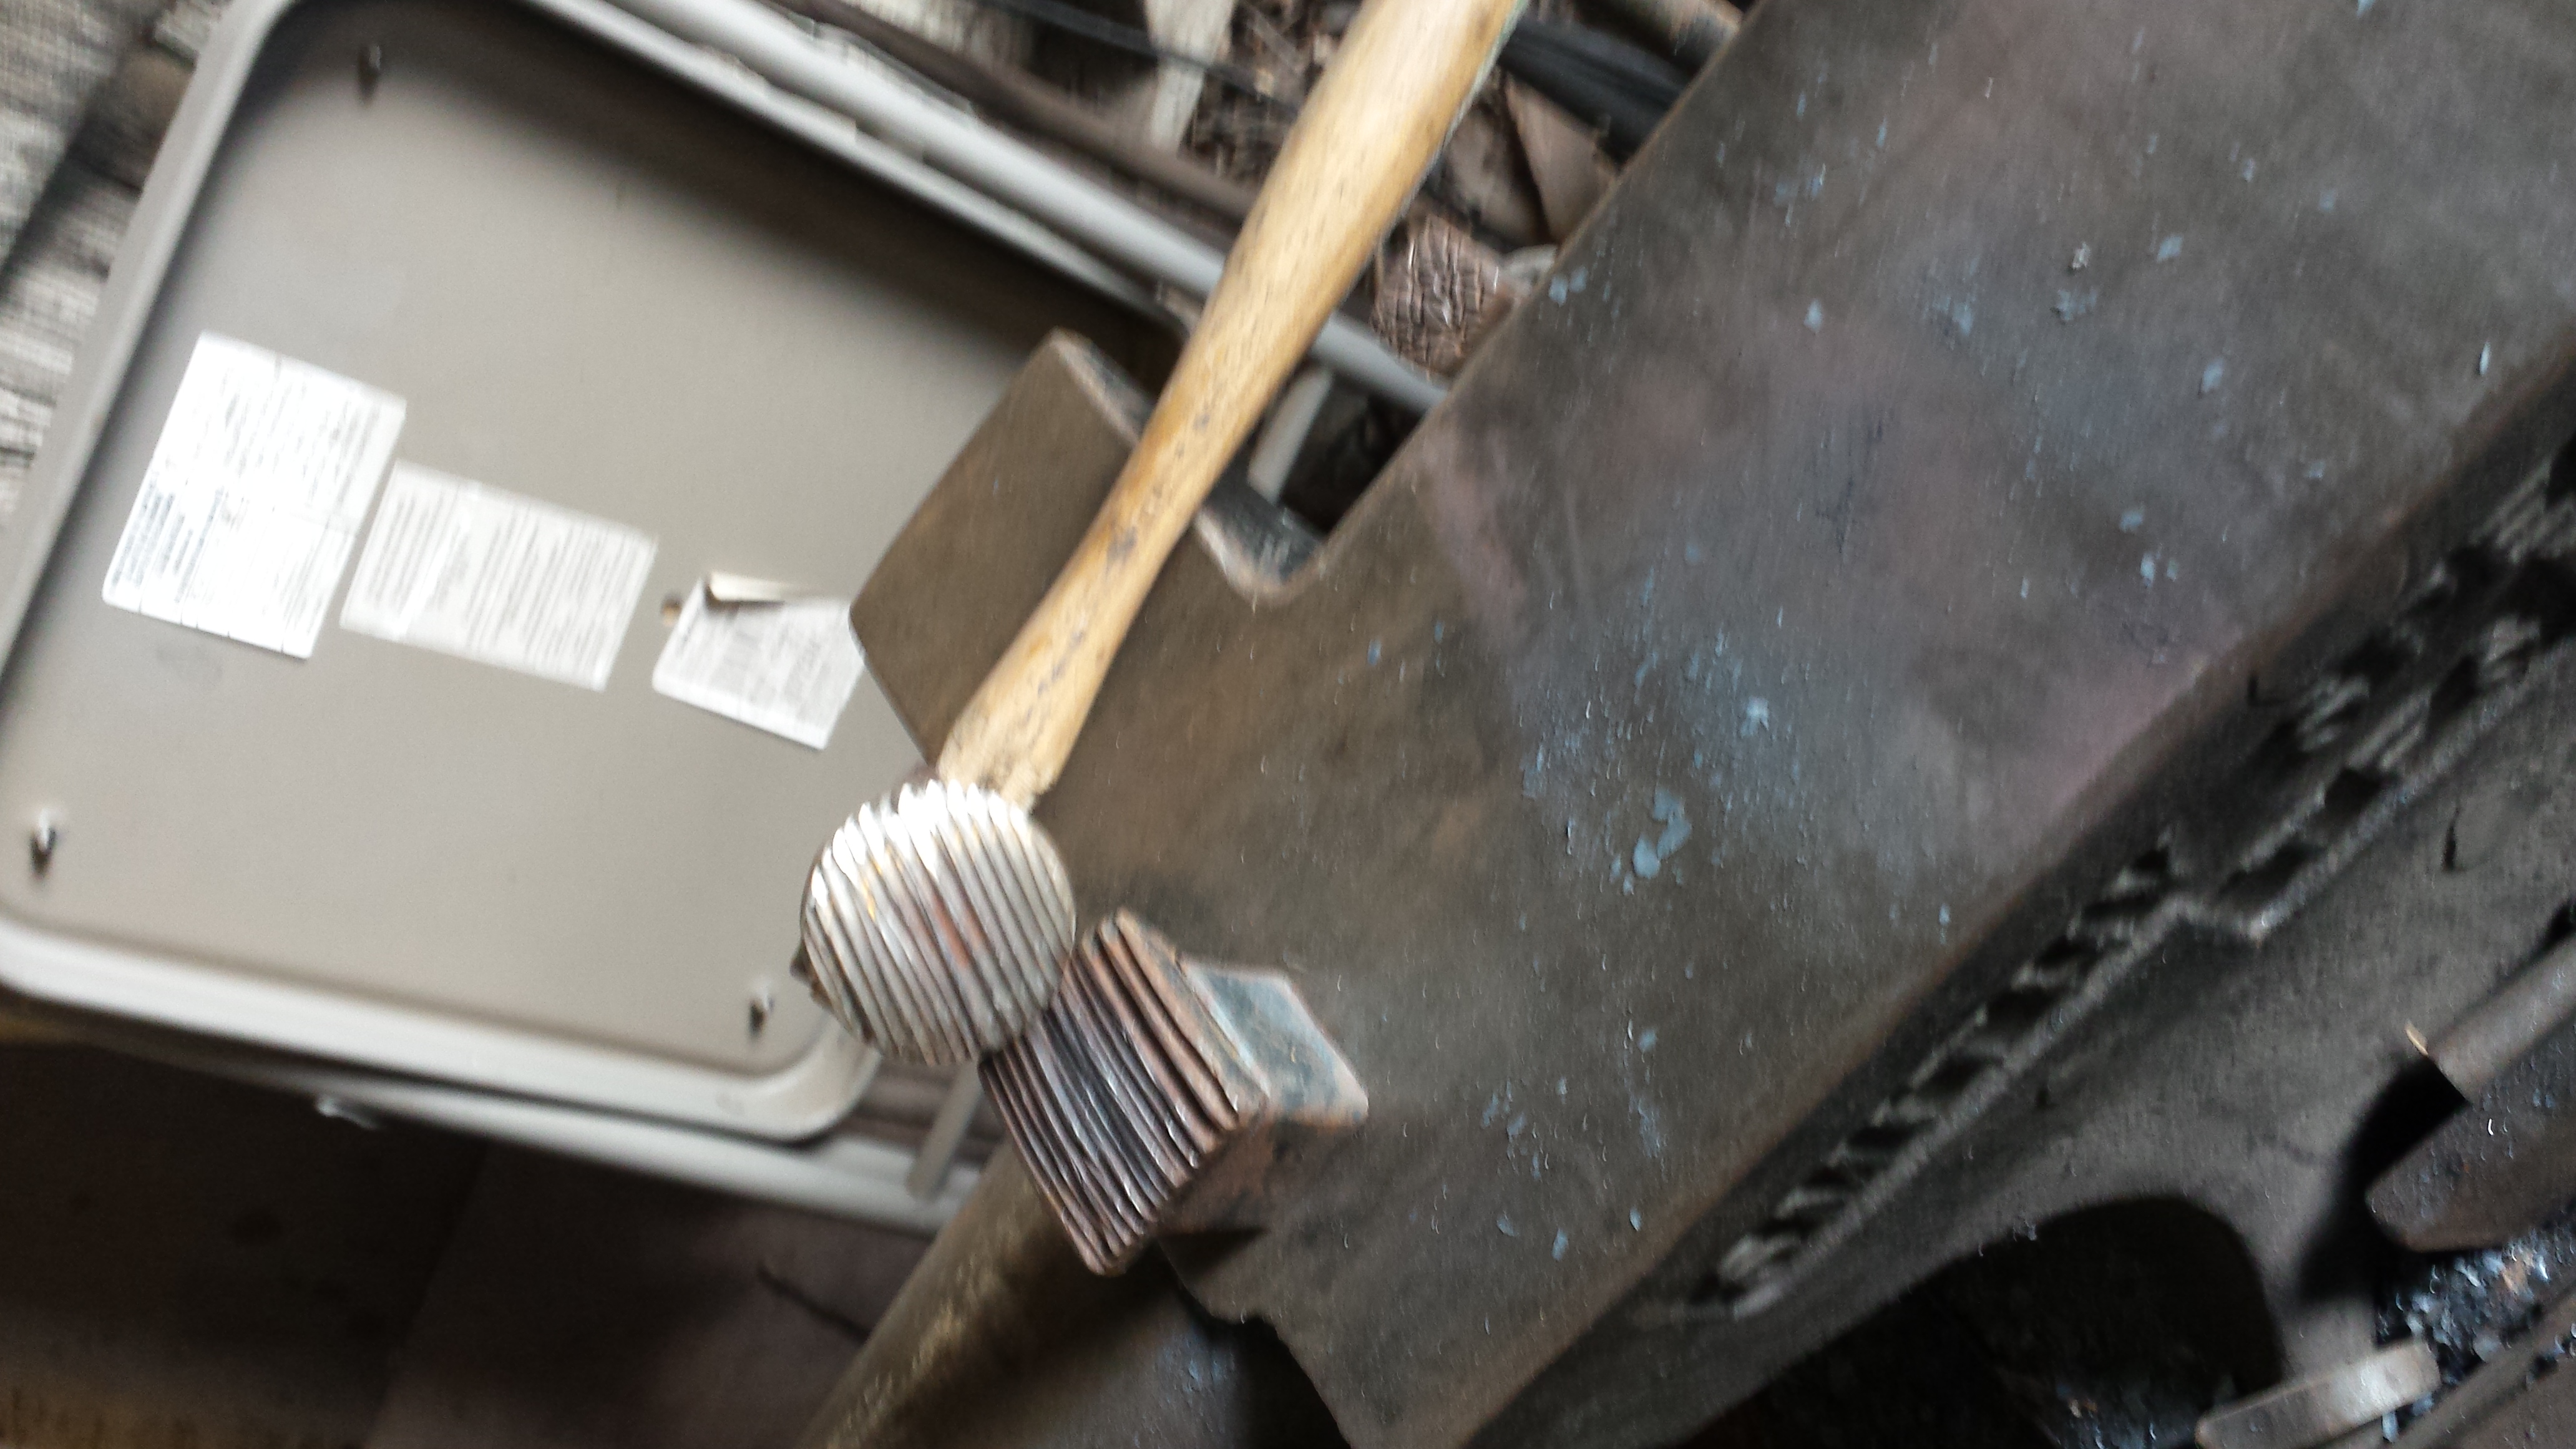
Not brass brushing...heat coloring. Back plate done with a top fuller used like a hammer. The only difference between it and a straight pein is the size and shape of the pein. -
Show Me Your Hooks!
beammeupscotty replied to EJRailRoadTrack's topic in Blacksmithing, General Discussion
One more, just made this yesterday. Plant hanger.
-
Show Me Your Hooks!
beammeupscotty replied to EJRailRoadTrack's topic in Blacksmithing, General Discussion
More hooks, these inspired by work done by someone_in_the_rye on Reddit. These were also previously posted.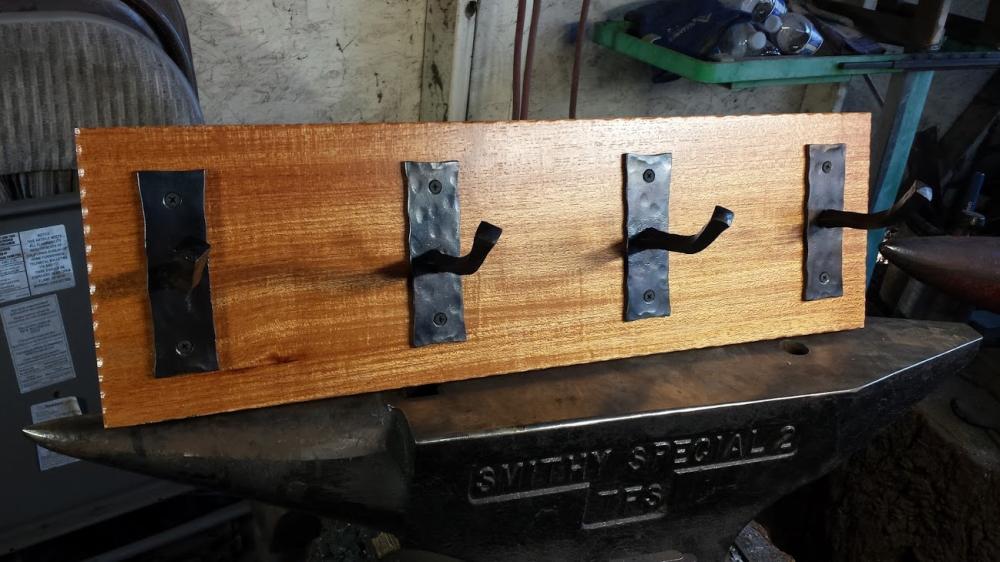
-
Show Me Your Hooks!
beammeupscotty replied to EJRailRoadTrack's topic in Blacksmithing, General Discussion
Much easier than that....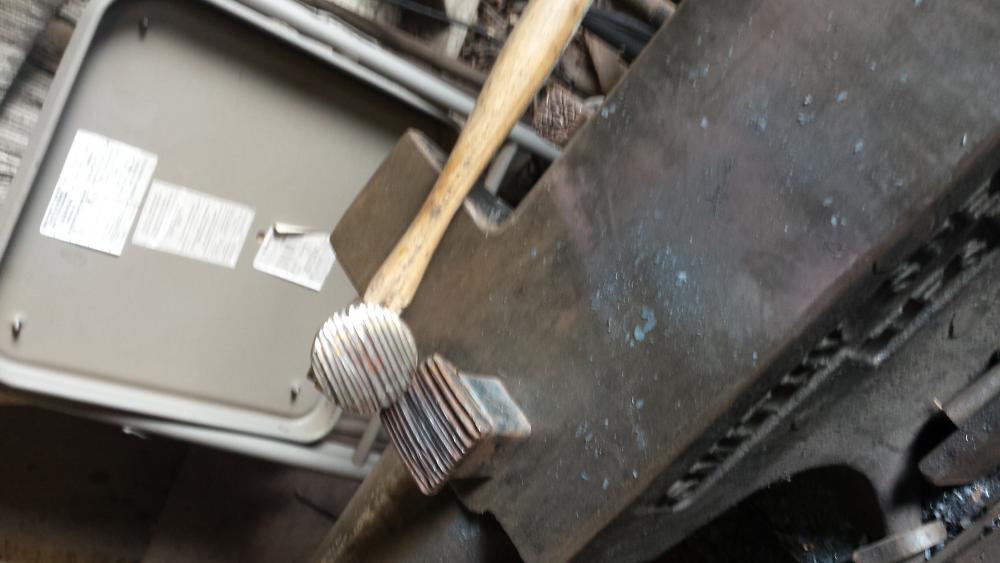
-
Show Me Your Hooks!
beammeupscotty replied to EJRailRoadTrack's topic in Blacksmithing, General Discussion
I posted these elsewhere on the forum recently but I will post them again here.


-
Pretty much a standard "traditional" justification for bad behavior by failed conservative ideology. Go Bernie!
-
Thanks so much for turning a discussion about equipment into an insult toward those on the opposite side of the political fence.
-
There are hobby smiths who do it because they like to make stuff and there are hobby smiths who may also be makers, but who like to pretend they are makers in a previous time. I personally don't hang out with the latter type.
-
Large Gear ideas
beammeupscotty replied to Richard Furrer's topic in Blacksmithing, General Discussion
I like this idea. A gear that large is truly impressive. I remember back in the early '90s when I was working bringing ships out of mothballs to ship material to Desert Storm. One ship had to have the reduction gear housing opened and the gears checked for cracks. People flew in from all over the country, just to see a reduction gear casing opened, exposing the massive gears for inspection. It apparently rarely happens. A bit of heavy industry like the OP's gear can essentially be looked at as a work of art, especially considering that we may not even have the capacity to make such a thing here in this country anymore. -
New to smithing. looking for help 74848
beammeupscotty replied to codyrwilliams's topic in Introduce Yourself
Saltfork Craftsmen is on Oaklahoma. I would suggest you get in touch with them as to where they get supplies. -
curved firescreen
beammeupscotty replied to canada goose's topic in Blacksmithing, General Discussion
Were I to make a screen like the one shown above I would probably do it in two pieces. A large lower one with a radius on each edge and a much thinner upper section. I wonder also if it might be possible to cold form it over just a male wooden form using a soft mallet of some kind. The form needed would be pretty easy to make. It could probably be done in less than an hour. -
Curious about what you all do with projects.
beammeupscotty replied to MAD MAX's topic in Blacksmithing, General Discussion
I eat mine. I don't like to share.... -
curved firescreen
beammeupscotty replied to canada goose's topic in Blacksmithing, General Discussion
I suspect that you can form heavy gauge screen with the same tools as you would use for sheet metal which means that you can use a slip roller for a radius and a box pan brake if you want to do angles. I actually had some heavy stainless screen bent 90 degrees on opposite edges to lay over stainless frames for a dehydrator I built for a customer some years back. The fabricator just used a brake. -
Help making 30 spoons
beammeupscotty replied to Blacksmithing Blueberry's topic in Blacksmithing, General Discussion
I expect that any cafe trying to serve food with carbon steel spoons and forks will quickly regret that decision and I doubt that the OP has the capacity to forge from stainless while retaining the stainless characteristics. -
Home anvil hardness
beammeupscotty replied to Ernie42141's topic in Anvils, Swage Blocks, and Mandrels
It is highly unlikely that you have the equipment required to bring a 300 lb. block of steel up to a temperature that would allow for case harding to do anything and I am not sure that case hardening would even do anything positive for your block of steel in terms of improving it for use as an anvil. I would just use it as is. You might possibly look in to the feasibility of welding a higher carbon, tougher steel plate to the top...maybe something air hardening to make it easier to deal with. -
Can't get my propane forge up to welding temp
beammeupscotty replied to wildvortex's topic in Gas Forges
Just how much refractory cement did you use in your forge? If you only used it for a rigidizer and put it on thin then it is probably o.k. but if you cast a thick wall of it that might be part of your problem. -
If there is such a thing as a "quench bucket", it seems it is necessarily something dedicated to hardening and tempering. I don't have one. What I have is a slack tub. Contrary to what some people here seem to think, I have never seen a professional blacksmith shop without one. They are particularly essential if you are forging with gas because forges running that fuel seem to heat up everything. You need a slack tub to isolate the heat to the area you want to work on. Even something as simple as forging a point is made easier if the entire piece of stock is not flopping around because 12 inches of it are red hot, when all you need is one inch. When using coal or coke, my preferred fuels, it is still often necessary to use it to isolate heat, cool tongs and tools and to control the spread of the fire. Although I understand that the carbon content of A36 can vary, I have never encountered a problem with quenching it. If brittleness is a concern, you just let your work normalize at ambient temperature after your last heat. I've been using it for 25 years without any trouble.
-
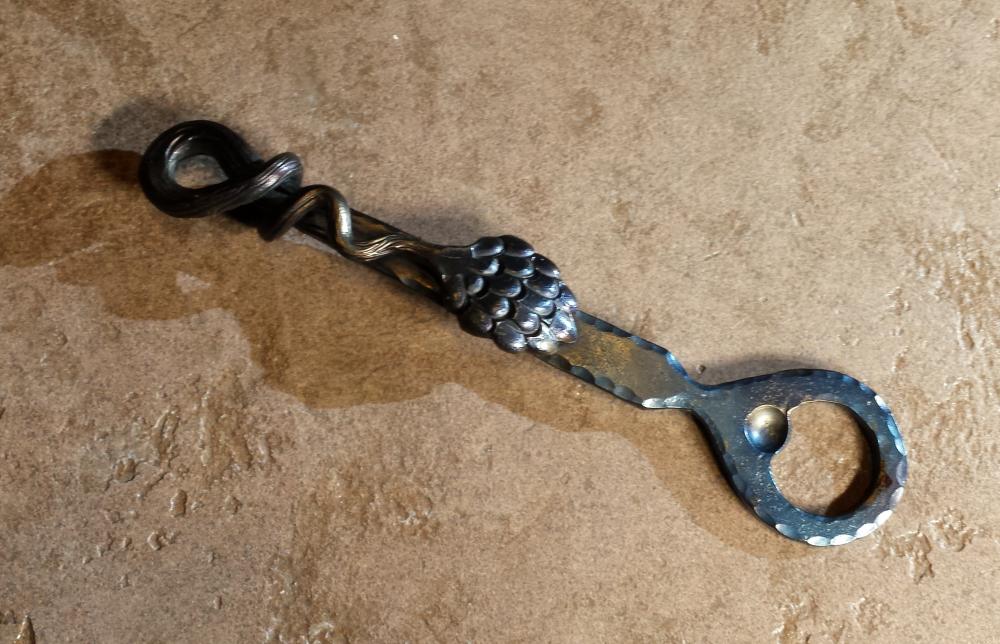
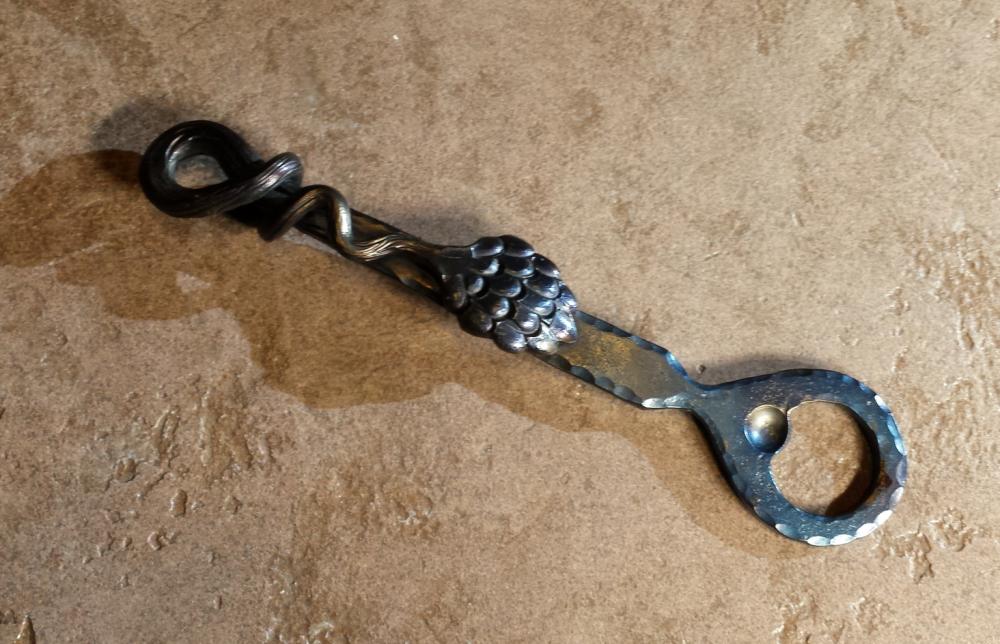
Show me your Bottle Openers!
beammeupscotty replied to Arbalist's topic in Blacksmithing, General Discussion
Selling to a friend who may well have never seen a hand made bottle opener before is one thing. Selling on the open market where far more competent smiths are selling much better made openers for the same or lower prices is another. It is the latter context in which I was voicing an opinion on the value of his opener. -
Show me your Bottle Openers!
beammeupscotty replied to Arbalist's topic in Blacksmithing, General Discussion
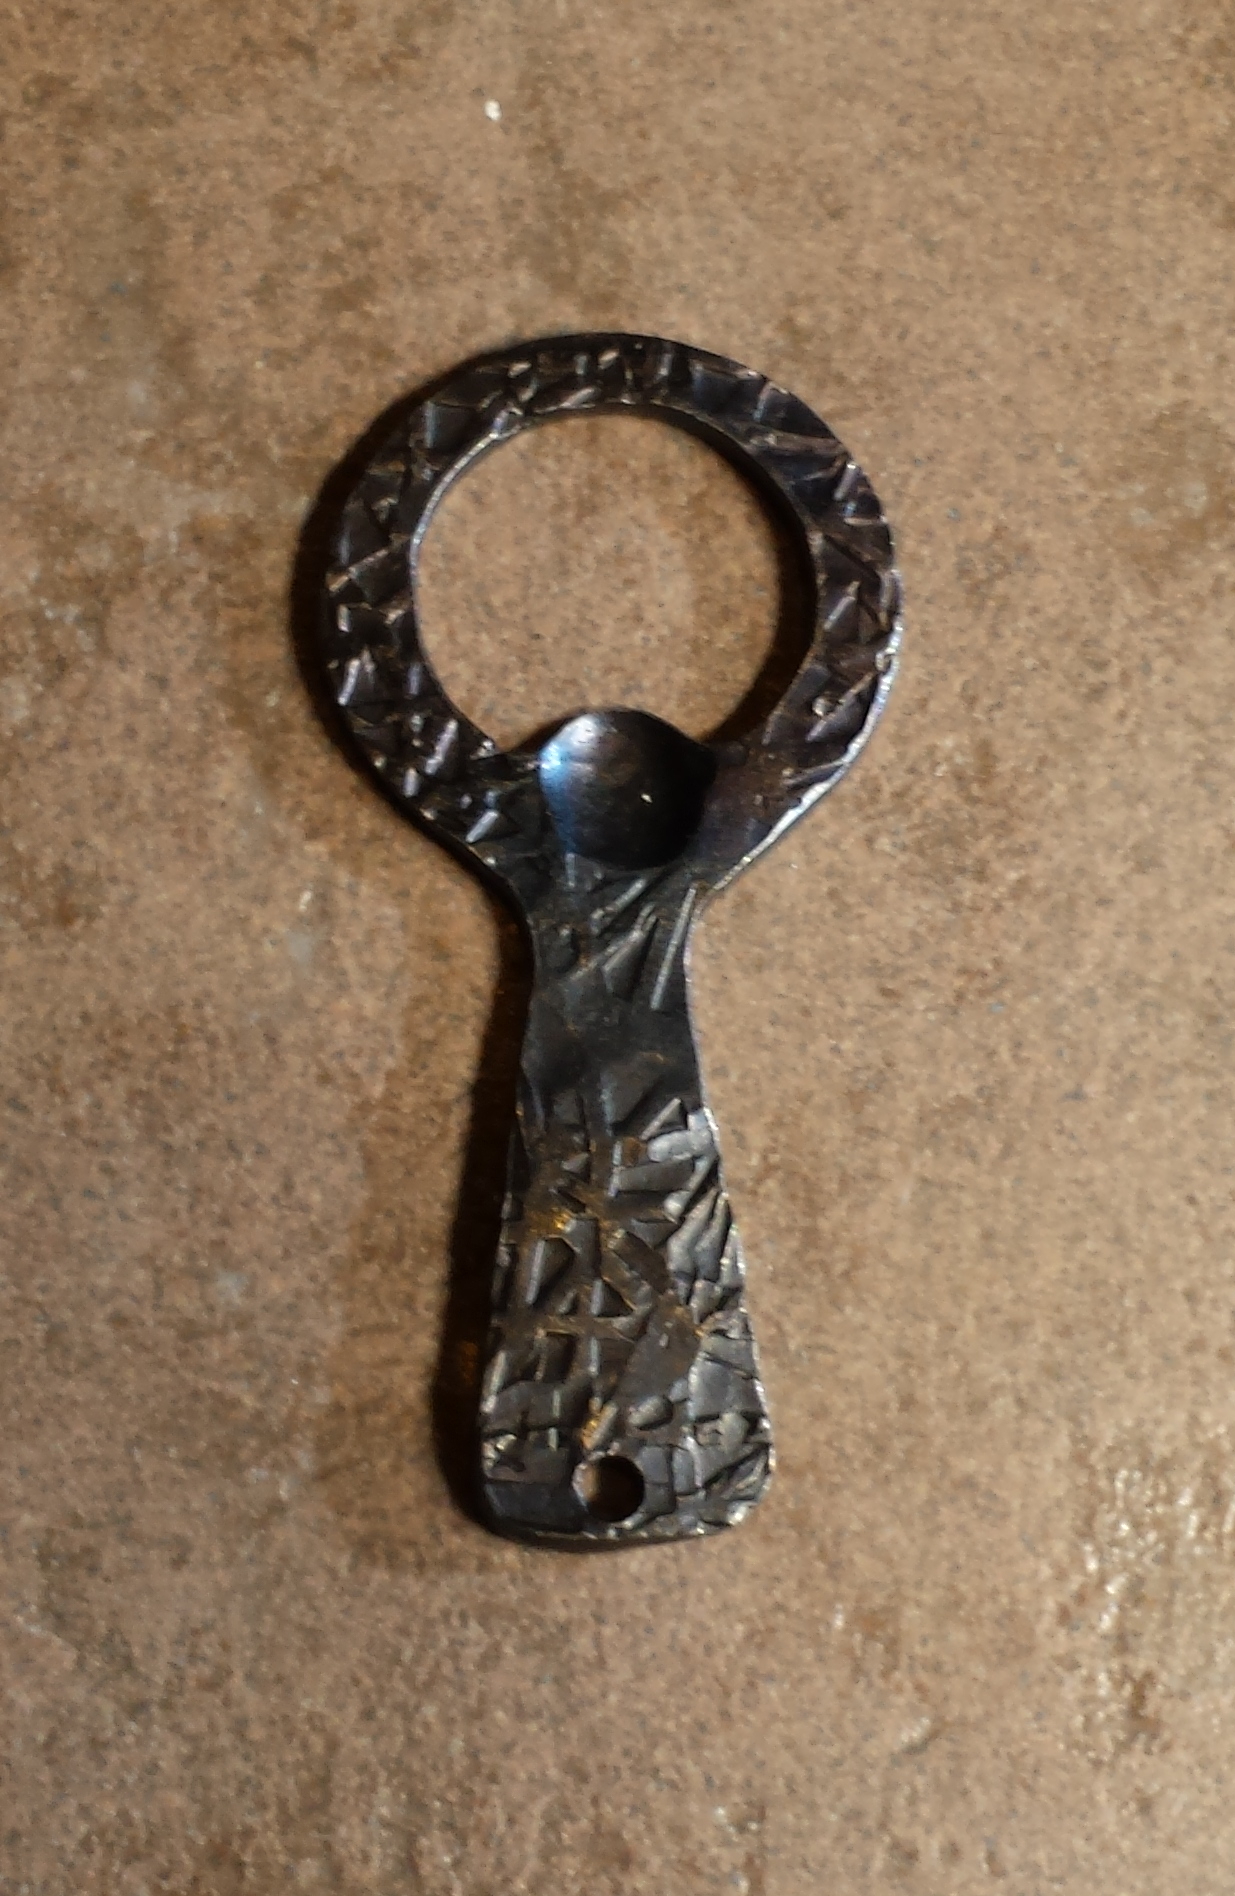
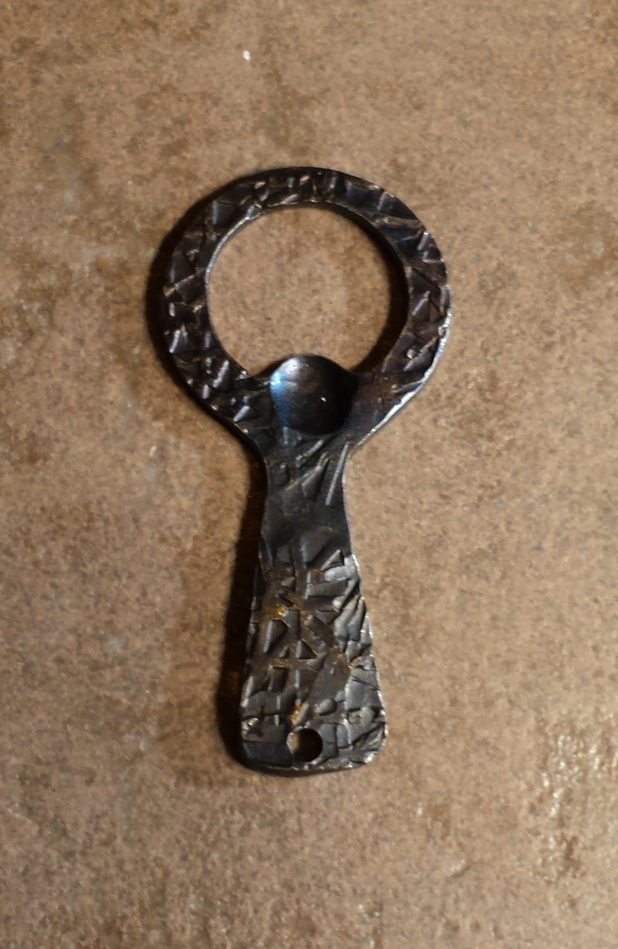
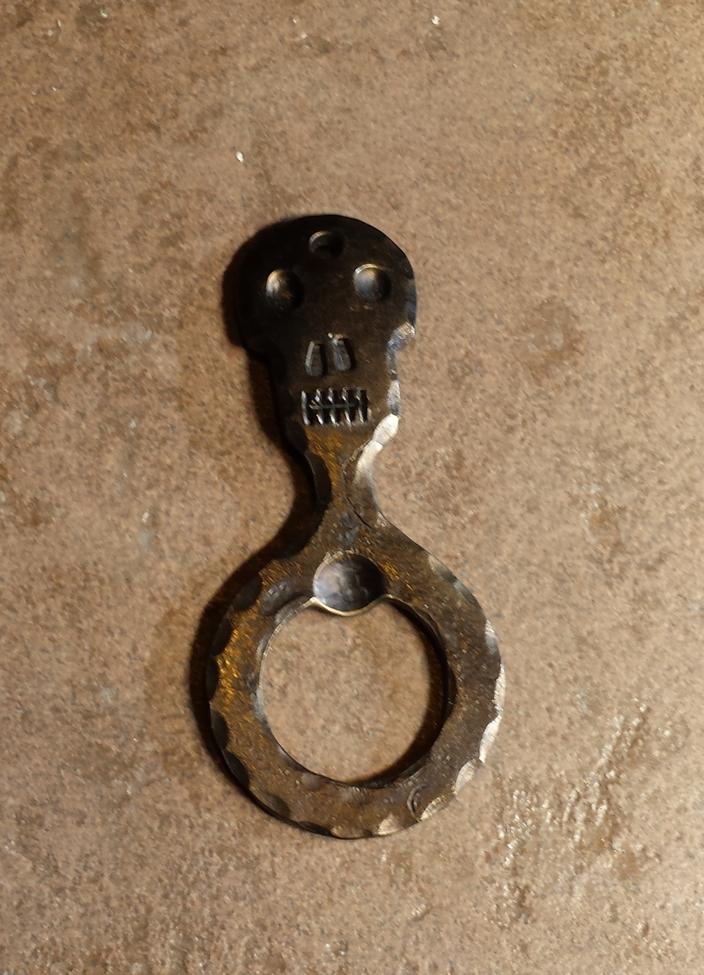
At the risk of sounding like a complete XXXXXXX, I feel compelled to let you know that there are far better executed bottle openers selling for $25.00 on Etsy. I would refrain from posting yours for sale until you actually master the process of making them. The one you have posted here is very crude and IMO, not worth $25.00. With proper tooling and more experience you should be able to make a much more refined opener from a spike in about 30 minutes max. Just for comparison, I sell my basic keychain opener for $25.00 at shows and a slightly more difficult and time consuming skull themed keychain opener for $30.00. My most expensive opener has a hops cone detail and sells for $75.00. I recently sold 4 of them in one day at a local crafts show. The hops opener takes me about 1 1/2 hours to make compared to about a half hour for the keychain openers. I make more per hour on the keychain ones, but still make the hops opener simply because I like it. On my most lucrative openers I make close to a dollar a minute for my time. On the least lucrative, about half that. My comments are not meant to discourage you from making things. I hope you continue to do so. I just think you need a realistic understanding of where your work fits into the scheme of things and I'd suggest you might want to wait until you achieve a higher level of execution before you start thinking about selling them. Pricing needs to be a function of more than the time it takes you to make an item. It also needs to take into account your market and the workmanship and quality of your items compared to those you will be competing against. I live in the S.F. Bay Area and there is a lot of spendable income here. I can make very time consuming items and expect to be able to sell them for an amount that justifies the time involved in making them. There are many places in the country however, where I would not be able to sell the items I make for even half what I get for them here. Being realistic about your work will help you maintain the enthusiasm needed to reach a higher skill level than you currently enjoy.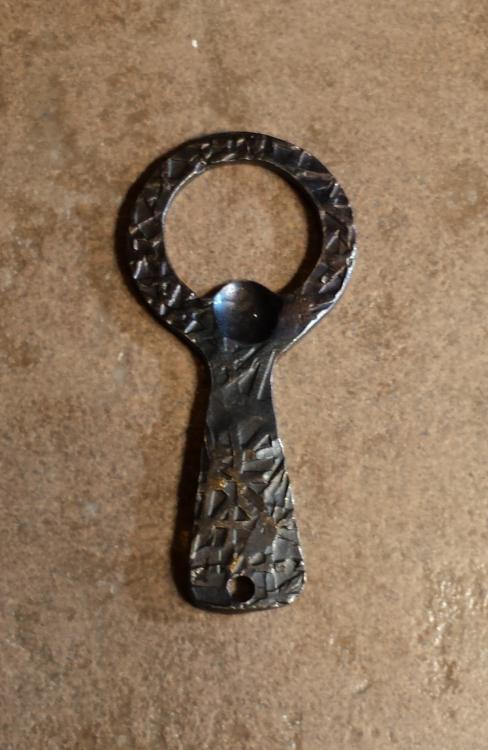


-
Show me your Bottle Openers!
beammeupscotty replied to Arbalist's topic in Blacksmithing, General Discussion
I would not go larger. I use either a 1/2" diameter or a 5/8" diameter. Bigger than that is probably not a good idea. -
Show me your Bottle Openers!
beammeupscotty replied to Arbalist's topic in Blacksmithing, General Discussion
Then my work is done, Grasshopper.... The key part of Ausfire's suggestion is that you will probably get better results from using a ball end tool as opposed to a flat bottom tool. I personally use bob punches (round ended) that I made from re-bar. For this sort of application re-bar works fine for me. Here is an image of a set I pirated off google images. I find it easier to line up a long punch like these as opposed to a modified ball pein though the latter should work just fine too.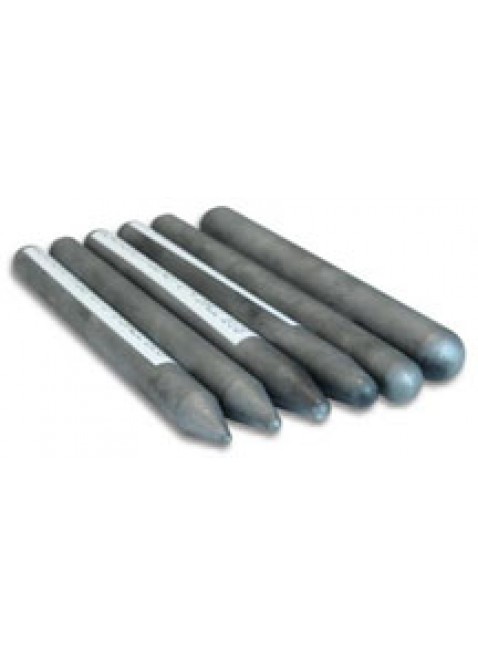
-
I am not sure I understand the difference between "deleting" and "hiding from public view."