

FieryFurnace
-
Posts
2,106 -
Joined
-
Last visited
Content Type
Profiles
Forums
Articles
Gallery
Downloads
Events
Everything posted by FieryFurnace
-
-
-
-
-
-
-
-
-
-
Dave's demo trailer
FieryFurnace replied to FieryFurnace's topic in Blacksmithing, General Discussion
Pictures are being uploaded now! We got quite a bit of work done today, and I think all of the welding is done.:D -
Interesting idea! I'll have to try that out. I'd be nice if it'd be that simple!
-
That can't be made out of a mild steel block can it? And be expected to last? Good idea though! Thanks!
-
Dave's demo trailer
FieryFurnace replied to FieryFurnace's topic in Blacksmithing, General Discussion
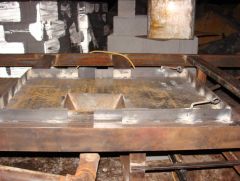
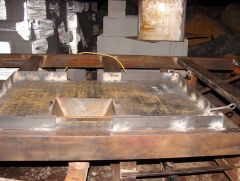
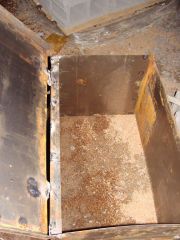
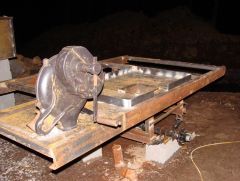
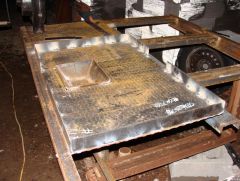
Forge from the other side. You can see I got the blower mounted finally. Almost embarassed to post that one! Aint pretty but they work! Does go against my shop motto though! "Everything practical must also be pretty"! There is the inside of one of the boxes. I welded a piece of angle in the inside (on the lid side) to help keep the water out. All the rest of the edges have the angle on the outside overlapping the sides of the box when the lid is closed. Was that too confusing??? I started drilling the holes for the bolts that will attach the wood floor. I've got about 8-10 done out of aprox 70 total so I still have a little of drilling to do. I'm getting close to the long hours of grinding and wire wheeling (Like four wheeling with a screw gun and wire wheel!!!) that is needfull as paint prep. Not lookin' forward to that part. Thoughts??? Thanks!!! -
Dave's demo trailer
FieryFurnace replied to FieryFurnace's topic in Blacksmithing, General Discussion
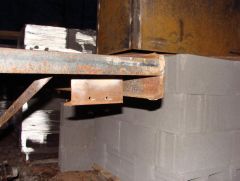
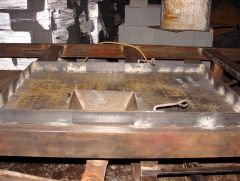
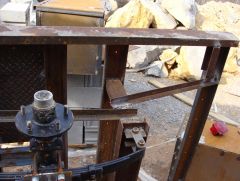
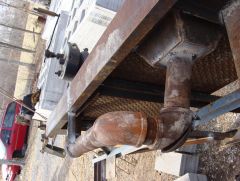
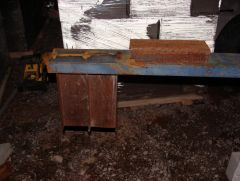
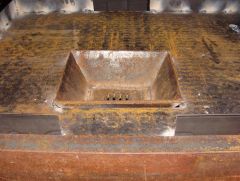
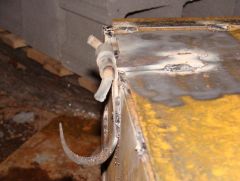
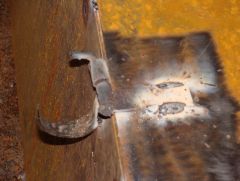
This is the tongue! The I-beam pieces are there to lower the actually hook up system to the hight of the truck hitch. A piece of 3x1 1/2 channel will be welded to the bottom (flat side down) with a hole to except the tow pin. The I-beam pieces are 4" tall x 3" wide x 1/8th" thick. (Actually I think it may be a tad bigger) This is the firepot! I welded the 2 x 1/8th flat bar aroudnd the edges of the forge today. I left an ample space open for longer pieces of steel. (I will have a sort of sliding door to close that gap when working with smaller pieces or towing) Forge! As in the picture, 3 feet long x 2 feet wide. I could have made it slightly longer but I figured that was plenty. -
Dave's demo trailer
FieryFurnace replied to FieryFurnace's topic in Blacksmithing, General Discussion
Hey, and I wasn't even in reenactment! That was just drill time! I have another picture similar to that one on another computer, pretty much the same pose but in the middle of an actually reenactment charge. The picture was taken at just the right moment because we were charging up a wet creek bank and the second after she (my sister) took it I was eating dirt! I went from the hed of the charge to the back of the charge REALY quick! Where did chat go? Can't seem to find it. All I have is a bunch of google adds. Trailer pixs comin' right up. -
-
-
-
-
-
-
-
Dave's demo trailer
FieryFurnace replied to FieryFurnace's topic in Blacksmithing, General Discussion
I FINALLY figured out how to put me an avatar picture on my name thing!!!! That's "Charge Bayonets" by the way! -
How do you texture your branches? I was thinking of making a couple for our house. Our living room is kind of divided in two by a post/beam that runs through the middle. (Where we added on) This forms four corners, one on each end of the room, and one on either side of the post. I was thinking a branch for either side of the post and some scrolls on the ends. Anyway, I don't realy have a "texturing" tool. The only tool I have is a chizel and a splitter. Would it look textured enough with just the hammer, leaving the tapers less rounded than normall? Thoughts??? Thanks!!!
-
Dave's demo trailer
FieryFurnace replied to FieryFurnace's topic in Blacksmithing, General Discussion
Don't know how much those are but the 2 lb flux core .35 is about $19.oo=Napa, and $21.oo=Ace. I'll check that sight over Mr Eddie. Supposed to work on the trailer some tomorrow but Friday we are going to put down one of our hogs so I won't do any work then most likely. Thanks!!!