

FieryFurnace
-
Posts
2,106 -
Joined
-
Last visited
Content Type
Profiles
Forums
Articles
Gallery
Downloads
Events
Posts posted by FieryFurnace
-
-
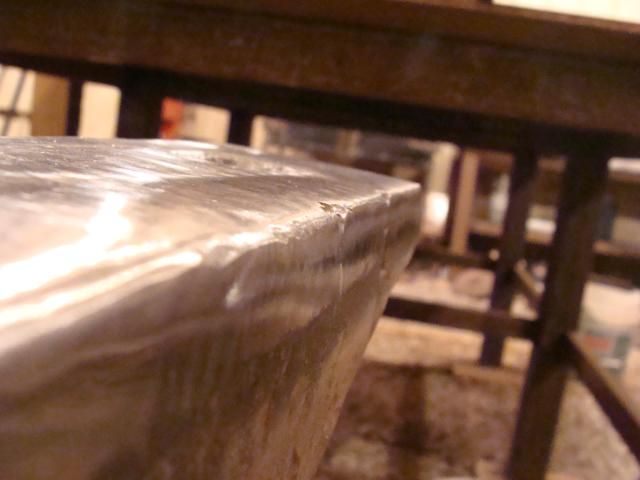
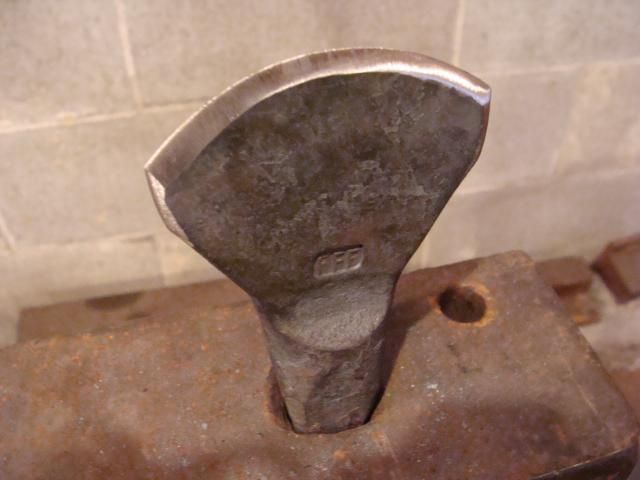
The axle was forged to shap, and the ground down smooth. No lathe, no machining. The key wedge holds it firmly to the anvil so there is no wobble.
An edge of the anvil tool is in order for both of my anvils.
A small quench tank next to the anvil will serve the purpose of a water can. -
I edited the info in the description box below the video. In the future I'll put it on the video because if most viewers are like me, the don't read the descriptions. :D
The only reason I didn't put that information in the video is I didn't want to say "THIS IS BRIAN BRAZEAL'S TECHNIQUE" and you come on and say "WHAT??? that's not how I did it!" LOL
I am trying to work to implement the techniques I learned from you and to do them correctly. -
Yeah I did! There isn't enough overhang though. I'd have to grind past 90 degrees to get a sharp corner.
-
Maybe this will be of some help to beginners.
http://www.youtube.com/watch?v=Q7jJX_fZbm8&feature=g-all-lik&context=G2c9d7f7FAAAAAAAABAA -
The scale build up in the pipes is a good point, but a total of two minutes to unbolt the anvil, invert the stand, and reattach the anvil every six months, isn't too bad.
Uhhh didn't mean to come off as sarcastic there boys! Sorry!
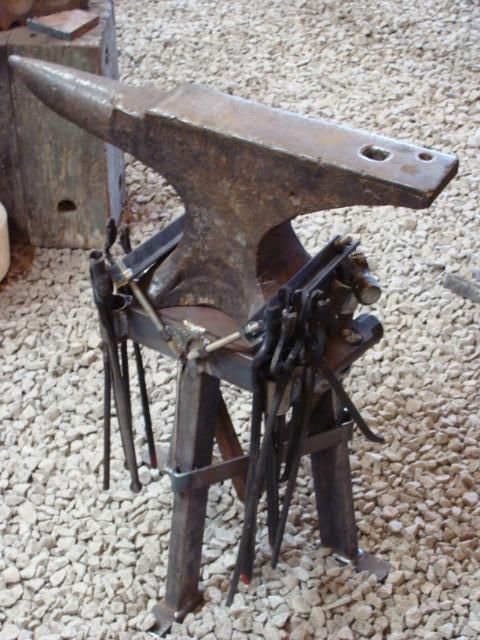
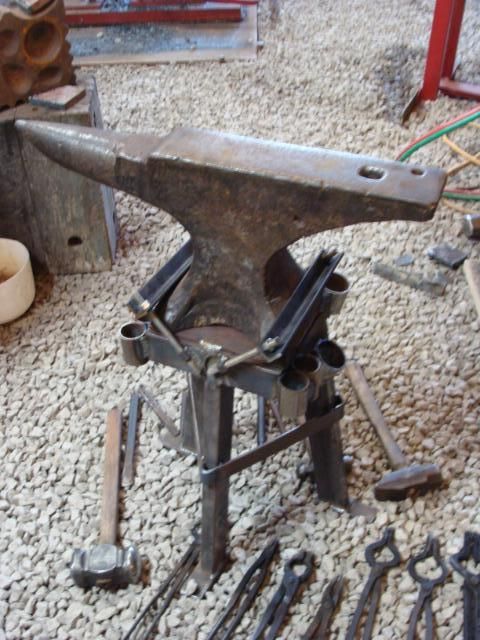
Well it's finished except for paint.
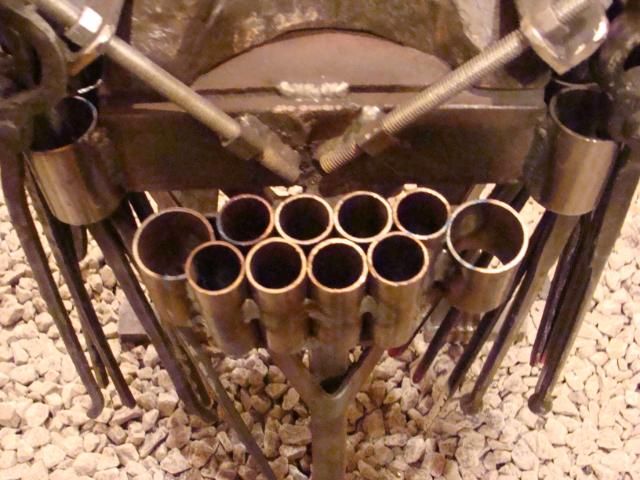
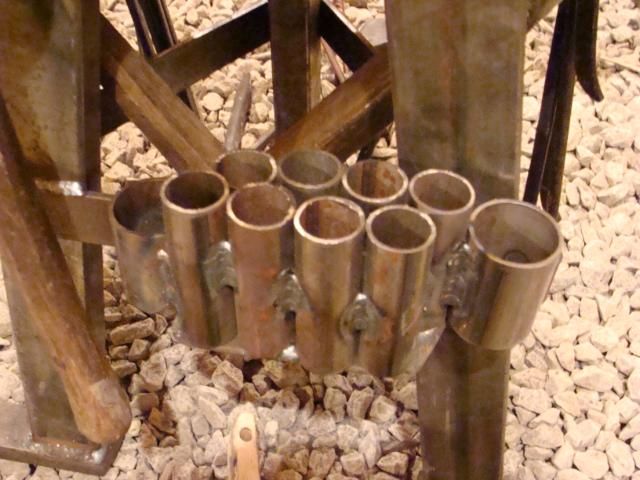
I added a tool holder to the far side of the anvil. Eight or more short tools go in here and there is a place on either side to put hardy tools. What's neat about it is I can put my small handled tools in these too.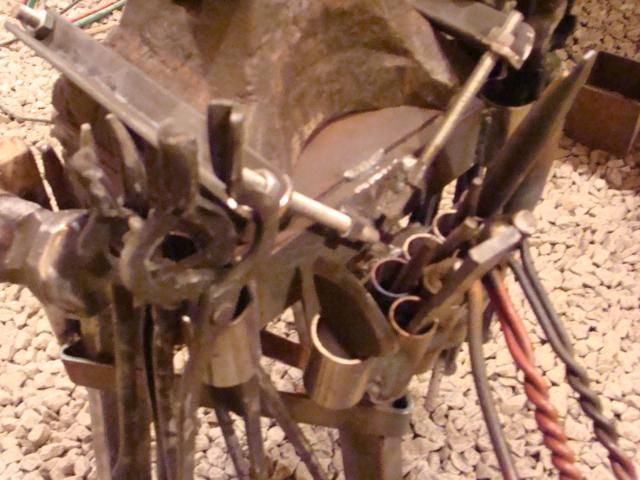
Here is the tool holder on the near side. This holds the longer hand tools lower down so that they are out of the way. My wire brushes (brass and steel) go on either side of this holder.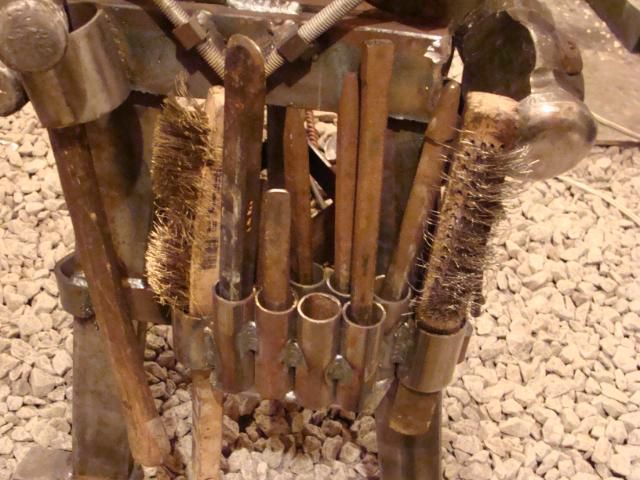
Near side!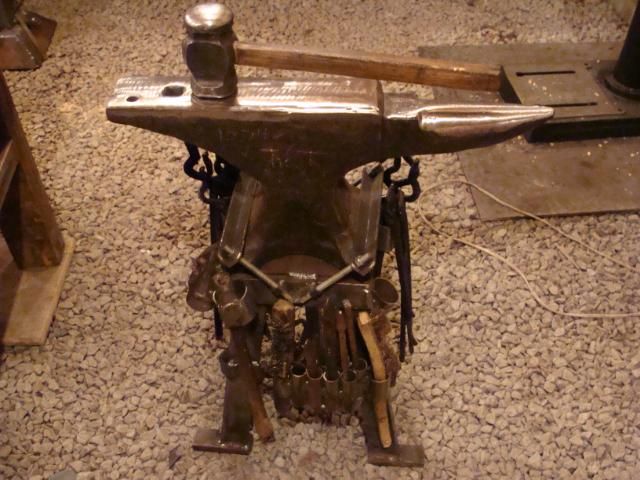
Far side!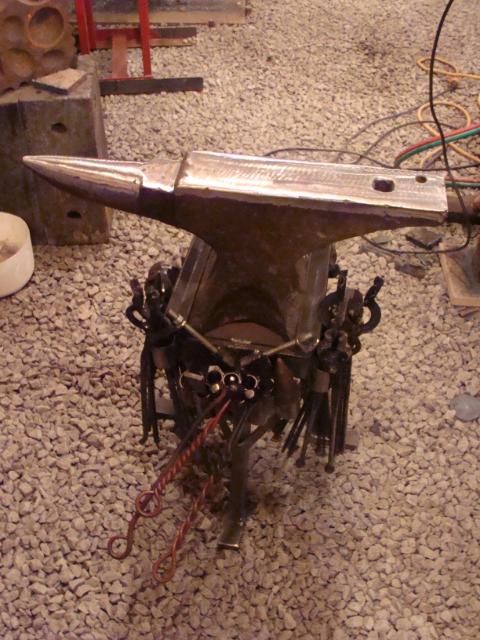
I also tried dressing up my old trenton anvil a bit. The edges are worn down pretty good though, so it was hard to get sharp edges. I've got good forging radius edges but not really any good hard edges.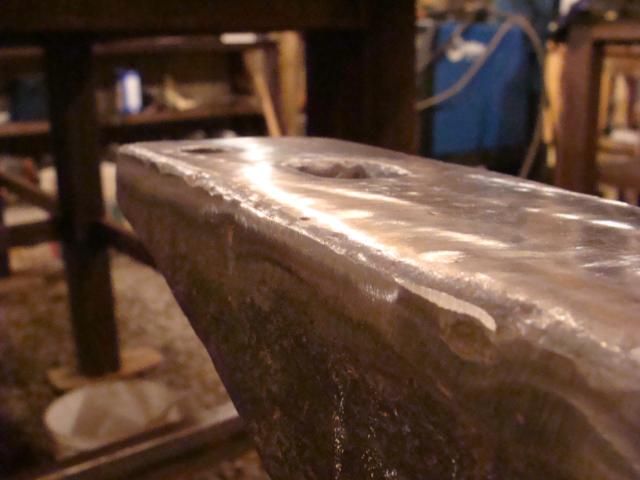
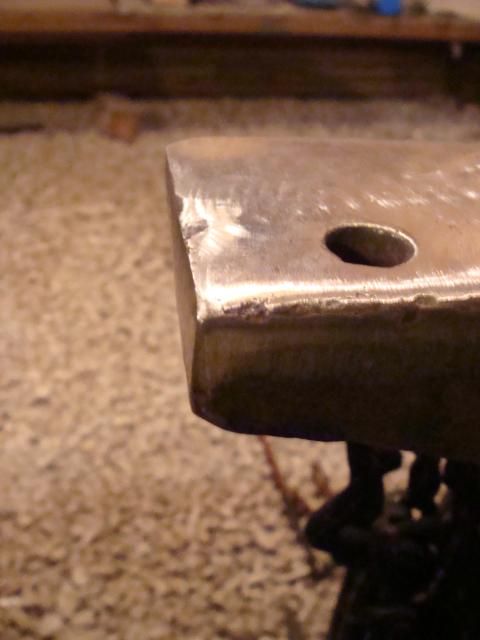
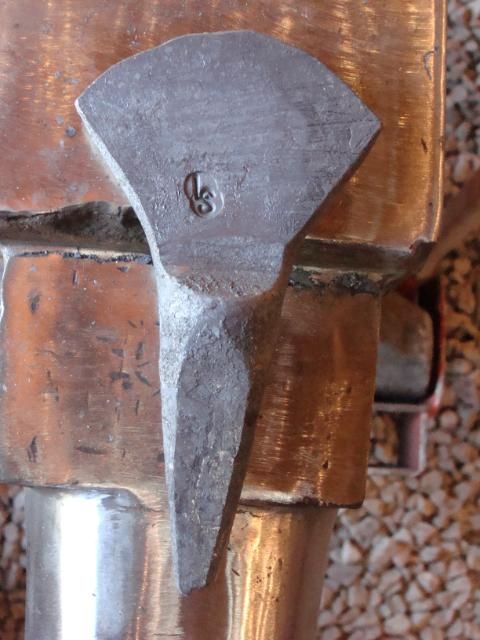
And finally here is the one-piece key-wedge cone mandrel I made the other day. The horn on this anvil doesn't go down really small, so I use the cone mandrel for when I need a small horn. It's made from race car axle and works good.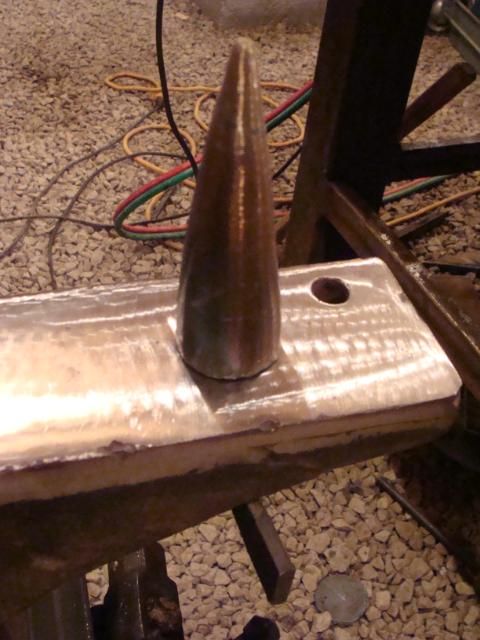
-
Hmm, what if...a person used that design with these changes.
Where the head is on the top photo was a roller guide (rusty type arrangement) attached to the post with side plates so the tie-rod could pass through to mount on a leaf spring above. The leaf spring arrangement would be something along the lines of sam's compact rusty. If it had a shackle on the back like gearhartironwerks kinyon, one wouldnt need the rollers in the front like the rusty needs. Say about a 28-30 inch leaf spring with eyes both ends.
It would be the same layout otherwise. Maybe with some adjustability built in for hammer travel and such. Could be able to reposition the shackle on the post.
Now, since I like making multifunction tools, I want a small power hammer too. So, it would have a motor to spin a flywheel, and figure in the jackshafts and pulleys in there between the anvil and the post.
When I want to change over from treadle mode, I'd disconnect the spring and the tie rod at the bottom, the tie rod would bolt to the powered crank, and the treadle would drop down into a lower position and operate the idler pulley.
See what happens when you ask for thoughts? I'll stop now before I get myself in trouble, and have to build another contraption.
The combination of a treadle and power hammer would be a good idea for the serious hobbiest. Doing it to this particular hammer might not be the greatest idea in the world.
This hammer is designed specifically for ultra smooth function for TONS of light repeat blows used in chasing and reppousee. When you start adding pivot points, points of contacts, attachments, and weight, you are going to decrease the function of the hammer as a chasing hammer. If you aren't looking for a chasing hammer, no problem.
I've not bailed out on the BP or anything, I have just not had time to do it right. It's a lot of measurements, a lot of drawings, a lot of pictures, and a lot of writing. I've been really busy in the shop, and also been working a little part time at the local saw mill to help them out. I'll get to it! -
I don't normally work on Sundays at all. I'm at church in the morning and evening and pretty much take a break on Sunday afternoon.
However I've only got three days to forge this week before my first show and I've got to get some stuff made. This afternoon I spent about an hour and finished up the stand.
It can hold three hammers, two wire brushes, two hardy tools, at least 16 hand tools, and at least eight pairs of tongs. It is very compact and very portable. The total footprint of the stand is about 14 inches square.
I probably won't have time to get it painted before this next weekend.
Pictures later! -
The weight isn't really an issue...maybe 150 pounds or so all total without the tools in it. It can unbolt in a matter of a few seconds though. Portability, and compactness was the goal.
Welds and corners will be ground down for safety and for a good finish look.
The scale build up in the pipes is a good point, but a total of two minutes to unbolt the anvil, invert the stand, and reattach the anvil every six months, isn't too bad.
The placement of the legs and bracing was done so that my legs cleared all hard objects. The legs on the working side of the anvil go straight down in one plane, and angle out in the other plane. This allows me to "belly up" to the anvil without hitting anything. The placement of the hand tool pipes on the near side of the anvil is so that they can be reached and identified easily. The placement of that tool holder is between my legs when I am in my normal work stance. -
I built this today for demonstrations. It holds the anvil more securely than my last stand, via a screw down clamp system. I've got places to hold hammers, hand tools, and tongs. I still have to add a few more pipes for hand tools and a few for hardy tools. Pretty compact little stand and very stout and very stable.
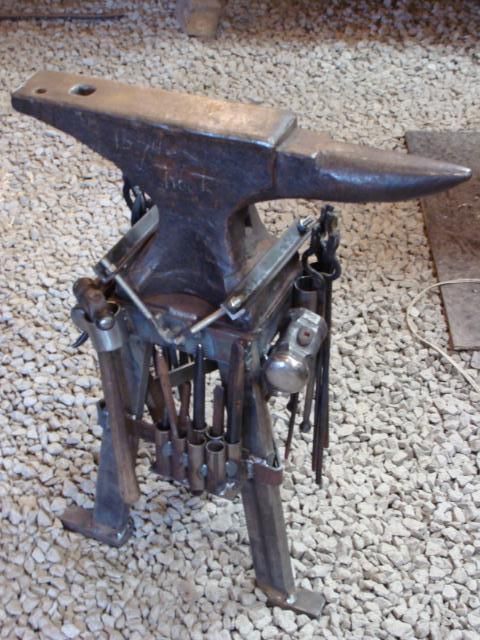
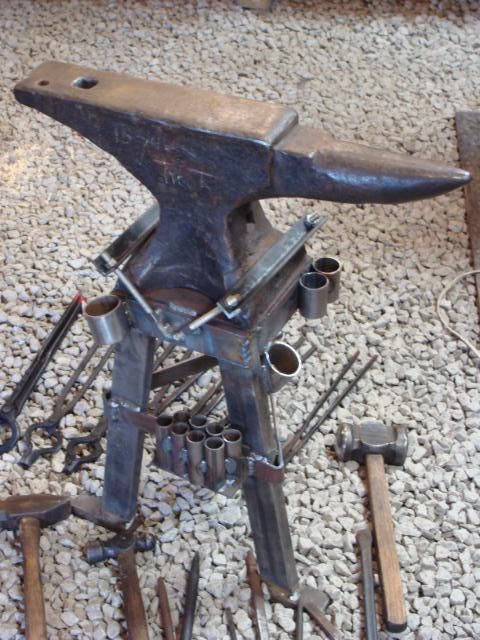

I also put tabs on the feet so that I can put large staples in the ground over the tabs whenever I'm not on concrete or gravel. -
I've shown this anvil on this thread before but I thought this was a worthy picture.
My 280 pound Fisher anvil crowned with my 4.5 pound Brian Brazeal hammer that I forged with Brian a few weeks ago.
-
I'm not really sure where to put this, so I hope this is ok, as I suppose it is a general blacksmithing topic.
There is a small Civil War reenactment being held in Westmoreland Tn. May 4th-6th of this year. The coordinator wanted me to come and demo but it's at least two hours from me, and would cost me too much to go. If someone local wanted to do a little demoing for school kids and such, that would be great.
The lady's name is Deloris Garrison and her email address is westmorelandexpo@gmail.com . Shoot her an email if you are interested in doing some demonstrations for her Civil War event. -
I try to always keep safety in mind. I've done quite a bit of demoing in the public and particularly to school kids, many of whom are the height of my anvil. That teaches you to be safe and be aware. I do slip up occasionaly, but safety glasses are required in my shop and ear plugs recommended. I always wear plugs.
After four visits to the eye doctor to get stuff removed from my eye (3 out of the four with safety glasses equiped with sideshields on,) I have purchases some full goggles that I always wear when grinding.
To me, doing what you love in an unsafe manner is an awfully dumb way to go blind or loose your hearing.
The steel is car axle. No tempering, just let it air harden. You don't want your hardy hard.
Thanks for the compliments everyone!
"Trip" it won't be the last time either! LOL -
I'm glad that I have not had the oportunity to teach until after Brian's class. When Brian was talking about smithing and techniques, it just all makes sense. It's not that it's the method I like or he like or anyone else likes, it's that it makes sense. I'm glad that I am now in a position (granted I still have a lot of learning to do,) to teach PROPER forging methods.
-
The flux is 50% each by weight of borac acid (roach killer from the dollar store,) and red iron oxide. (Pick it up from a potter's supply store.)
The impure wax is going to melt those lumps onto your iron work. You can try using it and wiping any left over lumps off. Good luck!
At $5.00 a pound I'd just use the pure stuff though. You'll still need to wipe excess off with a rag though.........gives a better finish that way. -
What is this here "bolster" plate yer talkin about????
A bolster plate is a mild steel plate or flat bar with various sized holes in it. You choose the correct sized hole in the plate for the size hole you're punching. The prichel hole CAN be used as a bolster plate for a LARGE punch, however if you miss the hole, you could take a chunk out of the edge with the punch. That's why a mild plate that can be scrapped and quickly remade is used.
I know how much you HATE punching, but we need to go over that some time. Most punching can be done without a bolster plate if the correct style punch and the correct method is used. -
LOL thanks! I need to post a picture of my hammer! :D LOL But like I said, with the tools I have, better the hammer take the beating than the anvil.
-
I had a guy contact me a few weeks ago, just after I got back from Brian Brazeal's place. He came over and saw the shop and wanted to come back some time and take a class.
He came over yesterday evening for four hours. He's done a bit of smithing before but hasn't had much real instruction so I started basic. We started off on fire starting (Brian Brazeal method,) then I discussed forging with him using the chalk board in the shop. I showed him the dies used for forging, the advantages of hit and rotate, and the importance of reducing surface area contact.
Basically I echoed Brian's instruction.
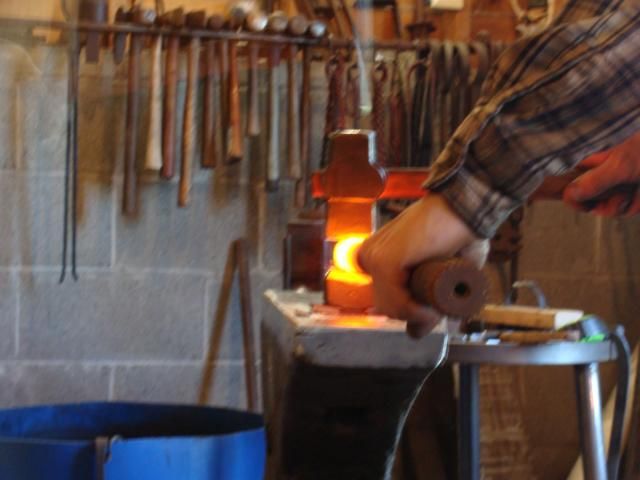
Anyway, I'm not Brian, and my camera isn't anywhere near Lyle's, but I thought everyone might enjoy some pictures. We made a hardy tool and it turned out quite well.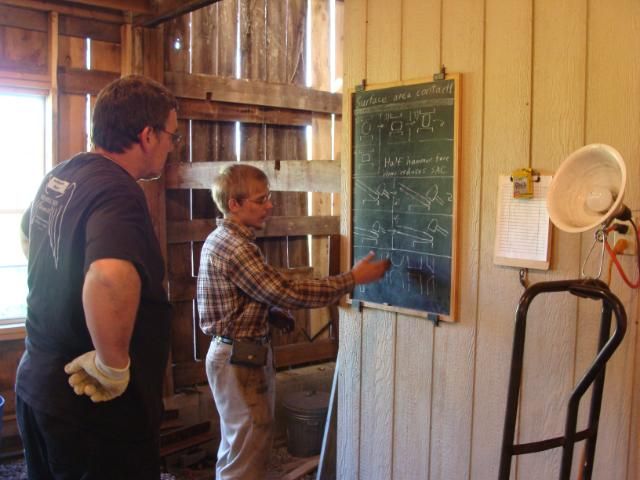
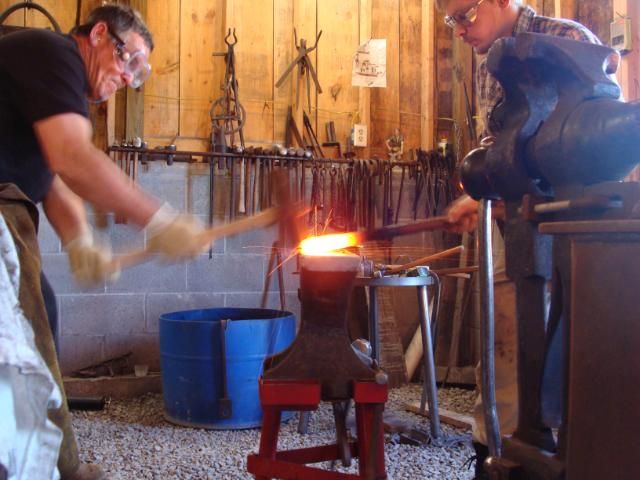
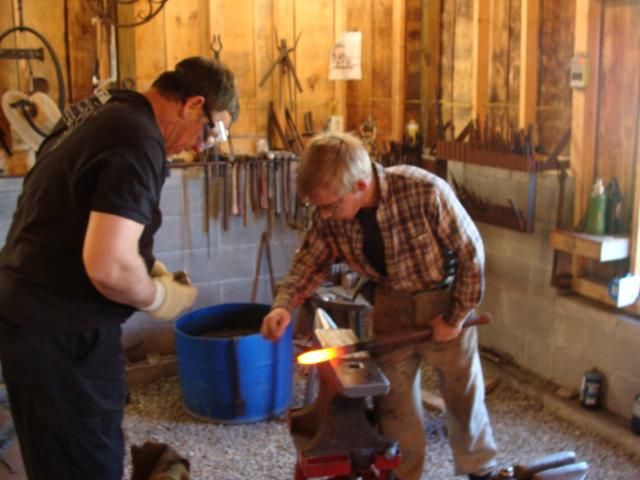
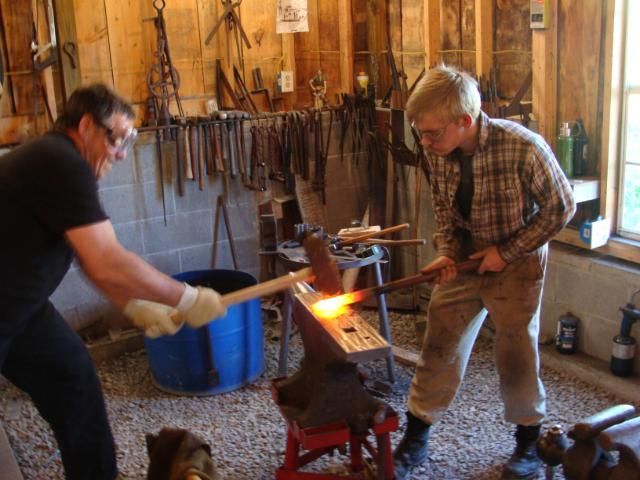
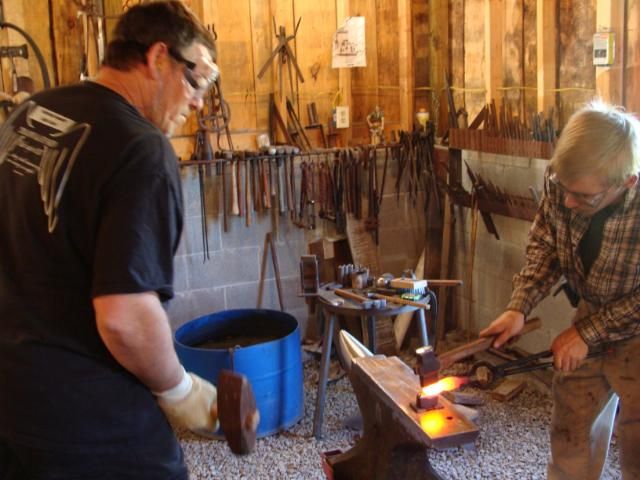
Now I know some of you guys are dying because I'm letting a beginner use a 12 pound sledge hammer on my ANVIL!
I took my anvil over to "Trip's" place the other day and let him strike on it too. He missed a BIG blow and cut my anvil edge straight on with the sledge. I almost exploded when he did! However, my anvil was completely unscathed. The hammer face had a deep gouge in it though. My hammer face is extremely soft. Not sure if it was forged of cheap steel or maybe went through a fire or something, but it is SOFT. For me, not having a cheap striking anvil, soft is GREAT. I just have to regrind my striking hammer after a student takes a class. I like Brian's striking anvil made of mild steel, and will probably make one eventually, but for now, this hammer allows me to use my anvil without worrying too much about it.
So anyway, that's the first class I've ever taught on blacksmithing. -
Hi Trip,
If you are going to make video on making those heart hooks, consider using a bolster when you punch through, you won't have the same trouble as Dave has in the video with the metal bending and holding on the punch,
Happy Easter to all !
Yesw I'll be lodging a complaint with Blacksmith of the Bluegrass for their lack of a bolster plate! LOL Actually I was the moron who packed a punch without packing a bolster plate! LOL A thin slitter and drift would have made a cleaner hole. -
Hey Francis,
No, not really.
The transfer of heat in the fire to the stock is mainly via radiant and conductive processes.
The amount of radiant heat produced in the fire is much more dependent on the surface are to volume ratios of the fuel. This comes down to the size of the chunks of fuel in the fire.
Smaller chunks will have a much greater surface area for the same volume of fuel and thusly be able to combine with the air much more rapidly. It will also have a much greater contact with the work in the fire, thusly increasing the conductive heat transfer.
Charcoal is much more open then coal, and thusly the charcoal allows the air to pass more freely through it. The coals greater inner matrix also consumes more air for a given volume of fuel. This explains why one requires a deeper bed of charcoal and a lighter blast then with coal.
If it is any indication, for my second forge I made the firepot out of about 1/16" thick sheet. I noticed that with charcoal the firepot was much hotter then with coal. The firepot was thin enough that it would glow in use. I used it for about two years and it didn't burn through, just in case anyone is wondering.
Caleb Ramsby
That's a pretty interesting view. What you are saying about air mixture and surface area contact makes sense. I would also think that smaller coal is going to pack more tightly and therefore insulate better, keeping more heat inside the fire. My coal is large, almost as big as charcoal and does not clump up like blacksmithing coal. I've also used good coal and charcoal so I follow what you are saying.
"Trip": proper forum manners and good character is, when a point of difference arises, for both parties to post their sources and let everyone else make their own decision. In the end, if someone gets mad, they can only get mad at your source, not at you or anyone else. If something is taken the wrong way or someone is proven wrong, a kind apology is in order. Thomas challenged you for a source, and you delivered an adiquate one so he apologized and you on your part apologized for any missunderstandings, in your post. If anyone is mad now, they can only be mad at your source.
Apologies accepted and forgiveness distributed here! :D -
UMM is a lot better than "you know", good go guys!
LOL
Both Trip's and Thomas's sources are interesting. I feel a lot better about having said that on the video after reading Trip's source. -
Maybe if you guys add in a bit at the begining of your video where you say, "Once upon a time, in a land far, far away. . . " you will be freed from a great deal of criticism! HA!!!
As an aside, what do you think about your new hammer?
Caleb Ramsby
LOL maybe that is a good idea! Pretty neat info about charcoal and Europe too! Thanks!
The new hammer is AWESOME! Just the change in hammers makes an amazing difference, and combining that with using the right techniques with that hammer, is lethal to metal! :D
Trip: As a word of caution! You are a newish, youngish member, and a certain amount of respect is due to smiths who have been at this longer than you or I have been alive, and who have traveled the WORLD studying smithing and the history of smithing. Thomas has helped hundreds if not thousands of people get started on here, and I'd say that the "certain ammount of respect due to him" is a very LARGE amount of respect. I'd take the word of someone like that over a few hours of internet searching, ANY day of the week. Take it from someone that has been on the forum for four or five years with 1200 posts and hasn't made (to my knowledge,) a single enemy on here! Tone it down! -
OK! interesting and unknown (to me) info for the most part. I never touch on pre-revelutionary war history when demoing, so I am completely in the dark about any smithing history prior to that time.
As far as who if anyone was here 20,000 years ago, I think that is a subject disconnected from smithing, so we need not go there!
Once again, whether or not the Vikings were or were not the first smiths here is not something that I've studied on. Trip did the research there and conveyed the information he gathered to me. That seemed like the logical source to me....seemed to make sense!
OK so being that charcoal is less dense than coal, does that translate into coal has a more concentrated fire? Would this then mean that, even though the temperatures are about the same, a coal fire will heat faster because of more heat concentration?
LOL Trip was the one that told me about the wedding stuff as well! I had my doubts which is why I said "as story has it...." I'll have to give him a hard time now! LOL
Trip, sounds like you need to do some more editing, so we don't look like two complete morons! :D -
This is interesting information! The bible mentions blacksmithis in the fourth chapter of Genesis. (Genesis 4:22.)
WOW Thomas! I'll be working on my new demo spill now! LOL -
Thomas: The videos we took were done to compile them into a 15 minute video for 8th grade school kids. (Trip had someone ask to do the video so he asked me to come help out.) It's not a history of smiths for smiths. We kept it SUPER basic. I gave some of my normal spill that I do at craft shows about what blacksmiths made for the colonial homestead, but Trip did some research and we used the info he came up with to try to fill in the gaps. Not in depth at all.
Also, I do craft shows all the time and I am used to talking to large numbers of people saying the same thing over and over and over. I've got my spill down like the back of my hand. Trip, on the other hand does not do a lot of public demos and so therefore does not get the same practice talking about smiths and smithing. Hence the ummms and all. That'll wear off over time! I was like when I started!
Copy and paste the following link into your address box. That should work!
youtube.com/watch?v=FBmC0Mfcs1A
Slitter punch, opener, and drift video
in Tools, ID, and pictorial reference
Posted
I couldn't agree more, only I do use caution about crediting someone before I know that I am doing justice to their teaching. I personally wouldn't want a student to come and learn something from me, then show a video where he butchers the technique, and then credit me with the technique. Then, anyone watching the video, thinks that I'm some sorry blacksmith teaching improper technique.
If I post a video showing a technique I learned from Brian and I execute the technique improperly and credit Brian in the video, then in the eyes of the viewer, Brian's technique is flawed. In actuallity it's my fault, but Brian gets credited for a sorry technique.
I credit everyone I've learned from or been inspired by over the years.