MooseRidge
Members
-
Joined
-
Last visited
Everything posted by MooseRidge
-
I tried it last night and downloaded the mods that was earlier in the thread... Looks like it should be easier than what I've been doing.... certainly do NOT want to do another scale mockup.....
-
-
Insanity happens
-
I've downloaded it but not had time to try it out yet... Regarding its 3D capabilities versus flat renderings, many of the people I have done work for have big problems visualizing things from drawings, pictures work better for them. I can sketch and draft, but only copy something with enough accuracy to really show the detail. I'm hoping that this program will help in that department.... The way I look at computers is as just another tool.... very specialized and only useful in a limited number of applications, but anything that saves time and money is worth the trouble.... I look at it as another form of jig, useful for making repetitive items.....
-
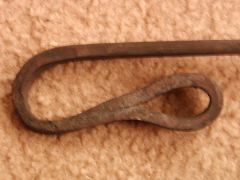
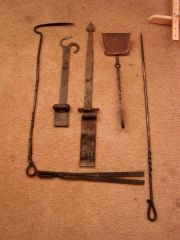
I think they were more of an inspection item... The slot with the angle on one side was to check the gripper bar alignment (many got twisted) and that would be what the straight slot was for, to torgue the bar back to true..... The local chicken rancher in Windsor, ME was not set up with auto feeders, but I've seen similiar tools used for moving belts....
-
I took mine apart and sanded the blades and the interior casing as well. Because of a slight wobble in the bearings, I took a pair of tongs and twisted each fan blade about .25 inches. It gave the walls that much more clearance and now its almost whisper quiet (unless you REALLY start to crank, then the air blast is very loud!)
-
Going along with the chain tool idea.... Big Dutchman makes chain-driven feeders for poultry farms.....
-
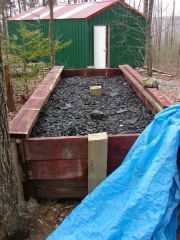
Mine's gravel over plastic sheet......Gives good support, but doesn't hurt my back and knees the way concrete or brick does....
-
Due to other commitments, John Wayne will not be able to host workshop until maybe October/November. Clay is hoping to have workshop at his new shop late summer. If interested, please contact Clay.....
-
:(Due to other commitments, John Wayne will not be able to host workshop until maybe October/November. Clay is hoping to have workshop at his new shop late summer. If interested, please contact Clay.....
-
Something I learned at a JCCFS class.... Make an all metal tool handle similar to one used for a hot cut for a treadle hammer. Thread some clean cotton strips through the eye until the eye is fully wrapped. Dip the cotton into the heated wax/linseed/turpentine mixture until a large egg covers the end of the tool. Let both cool then keep them covered to prevent dust contamination. (They had an old ammo can 3/4 full, kept the tool inside as well). This way, your finish material is in a usable/mobile form, enough for a number of applications as well as minimizing the flash fire problem with the liquid "fuel" in the can.... Important Safety reminder: ALWAYS reheat the mixture in another pot (i.e. double-boiler) with plenty of water.... NEVER apply direct heat (saw a guy try to melt a puddle in a can of this stuff with a O/A torch - lost his mustache, eyebrows, and most of his hair! Though beating him about the head and shoulders WAS fun, he was very lucky no permanent damage!)
-
Probably chained to that "gas" bulldozer....:D
-
I've always found that any coal makes ash and clinker, however, "good" coal makes less clinker than "bad".... The stuff I've been using for years is technically "bad" coal, some sulfur, tends to clinker if not run hot, medium ash... however, puts out some major BTUs... and it was free! Sadly, I'm down to less than a ton, so I'll be coal shopping soon... Wagonmaster, if you are using charcoal, there is no problem especially just starting out. You'll have to watch if and when you switch to another fuel (as any of us do when we get "new" coal, each load acts slightly different than the last!) or if switch to or add a propane forge. Heating times will change, etc. I'm over in Dunlap if you ever happen to be in this neck of the woods....
-
Actually, its 4 pieces of .25" plate.... problem is, the group cutting out the sheets are not doing exacting cuts, so I will need to clamp and grind to true up the edges. The plan is to drill holes to grid a jig/welding table (approx. 3'x6'x 1"thick). Problem is, I have no way to lift the finished product, so I'm building up the table with pieces I can lift. I pick up the sheets today. Am currently looking at .5" holes centered every 1.5", so LOTS of holes. I am also getting an additional 3'x6' sheet (cut into 2'x3' pieces) to use as a cover for welding and layout.....
-
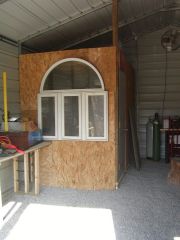
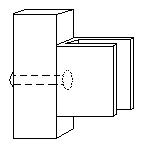
One of the methods I've been working on for holding glass in metal frames is a form of bracket. It's a simple "U" of steel riveted through the center to the outside frame. The walls of the "U" are dependent on the weight of the glass to secure (12ga or 16ga usually) and can be bent cold. A thin slice of close-cell foam protects the glass. I would bend the back tab using a torch (to prevent strain) to a 90 degree angle and the front tab to a 45-60 degree angle. Insert the foam and the glass, then bend the front tab to secure.
-
 One of the methods I've been working on for holding glass in metal frames is a form of bracket. It's a simple "U" of steel riveted through the center to the outside frame. The walls of the "U" are dependent on the weight of the glass to secure (12ga or 16ga usually) and can be bent cold. A thin slice of close-cell foam protects the glass. I would bend the back tab using a torch (to prevent strain) to a 90 degree angle and the front tab to a 45-60 degree angle. Insert the foam and the glass, then bend the front tab to secure.
 -
Joe H, How is that machine on holes? Need a LOT of holes drilled in a stack of 4 1/4" plates...... Located in Dunlap, work Downtown Chattanooga.....
-
I think you may want to contact your local group first... get some experience forging... Discuss with them your plans... many groups have members that will let newcomers tour their shops to see what they have and use... Very helpful in figuring out what YOU need based on what YOU want to do... getting a small propane forge when you eventually want to make structural pieces like gates, or swords, might cause you a major pain.... Take time to plan out your equipment, it's type, and placement... Make contacts in your local area as a way to network, learn, and share your ideas....
-
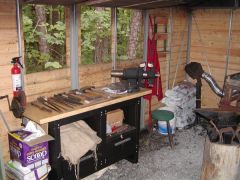
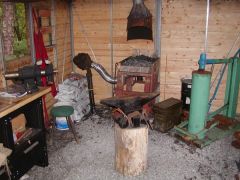
MooseRidge Moose Ridge Studios is my wife and I's "business" name... covers blacksmithing, stained/fused/flameworked glass, bookmaking, polymer clay, and rubber stamped art.... In the process of building a new house with "studios" for each of us and updating the forge (4X the size of the previous and adding power!)....
-
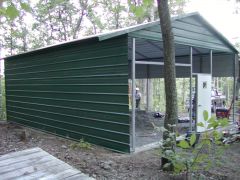
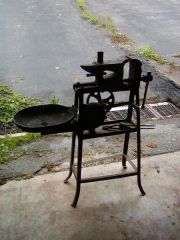
Or saw it down the middle..... May have to beef up the porch before you place and use it though....
-
Dodge.... If you had 2 you could make 1 heck of a rocking chair! Spacing looks about right....:D
-
I agree with Thomas.... dry gloves are a must. Most of the welding I do is in the field, so no jigs or big clamps. Usually just hold the piece in position and weld away.... used both 100 and 225 amp welders (the 225 may tingle occasionly):D
-
Two of the biggest items to watch is the attachment point on the roof and the depth/location of the grounding strap.... If the rod is attched to the roof so that the anchors are close to any metal (flashing does not appear to have enough mass to matter) such as sprinkler systems, I-beams, cranes, etc. , lightning may ignor the grounding strap and arc to this metal. Same situation with the grounding rod. Watch out for buried electrical lines and water mains as the lightning with jump to them. Usually, the strap is attached to a 6' rod hammered into the ground with only 2" or 3" showing....
-
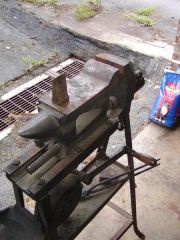
THAT is some serious metal.... Be interesting to see what it (and you) can do....
-
174# Euroanvil - Feb 2003 - New - $340 110# ASO (Anvil Shaped Object) - Mar 2006 - New - $110 ASO purchased for sledge hammer work outdoors (Not worth much else...)