Syd Partridge
Members
-
Joined
-
Last visited
Everything posted by Syd Partridge
-
Thank you basher. I have been very liberal with oil lately, due to it thinning and running out with the hot weather we've had. Perhaps, now it's gone cooler I need to go back to just a small amount. The clutch engagement ring is sloppy. I assumed this was used solely for engagement and centrifugal force threw the clutch out but from what you say it also disengages the clutch?
-
Thank you, it worked. Brass rod seemed to absorb the impact so I ended up using some mild steel bar and a copper hammer and it just popped apart. Really appreciate your help I'd anticipated having to strip the top down and using some serious heat with a puller. Yes, clutch was seized but free now. I did check after you commented as I hadn't considered that it may have stuck on the shaft. Thank you for the thought, I shall bear that in mind for the future.
-
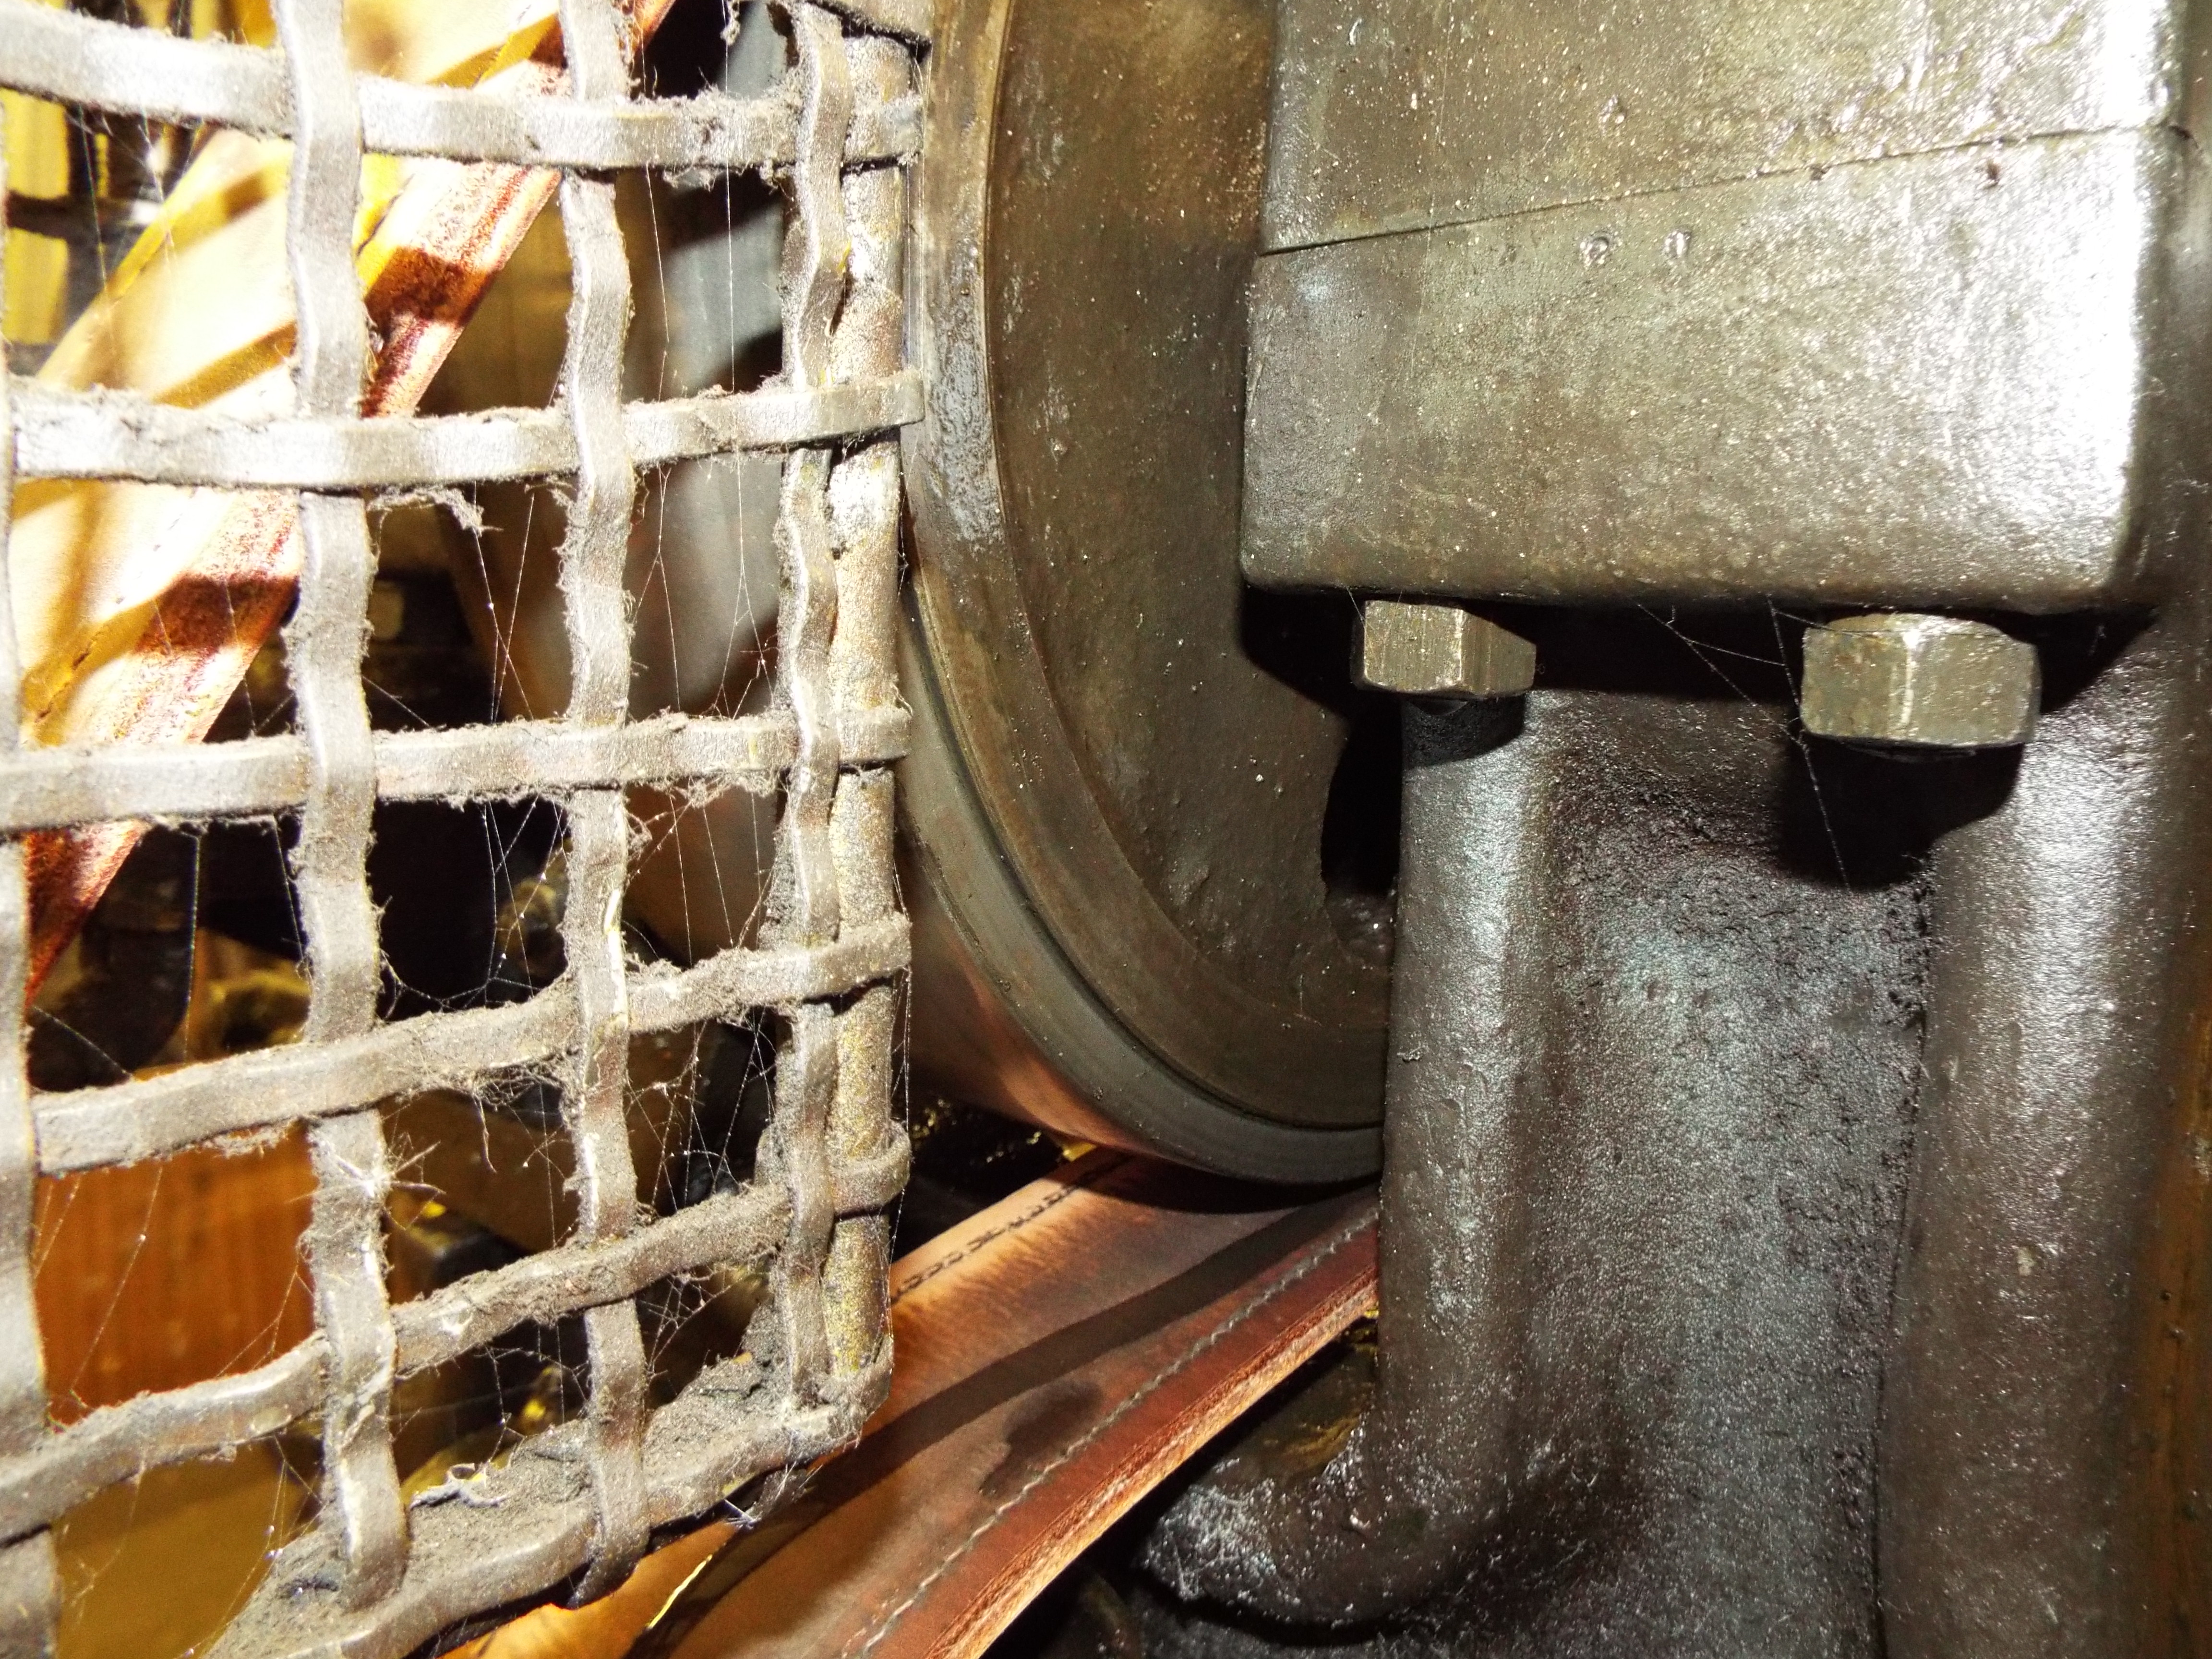
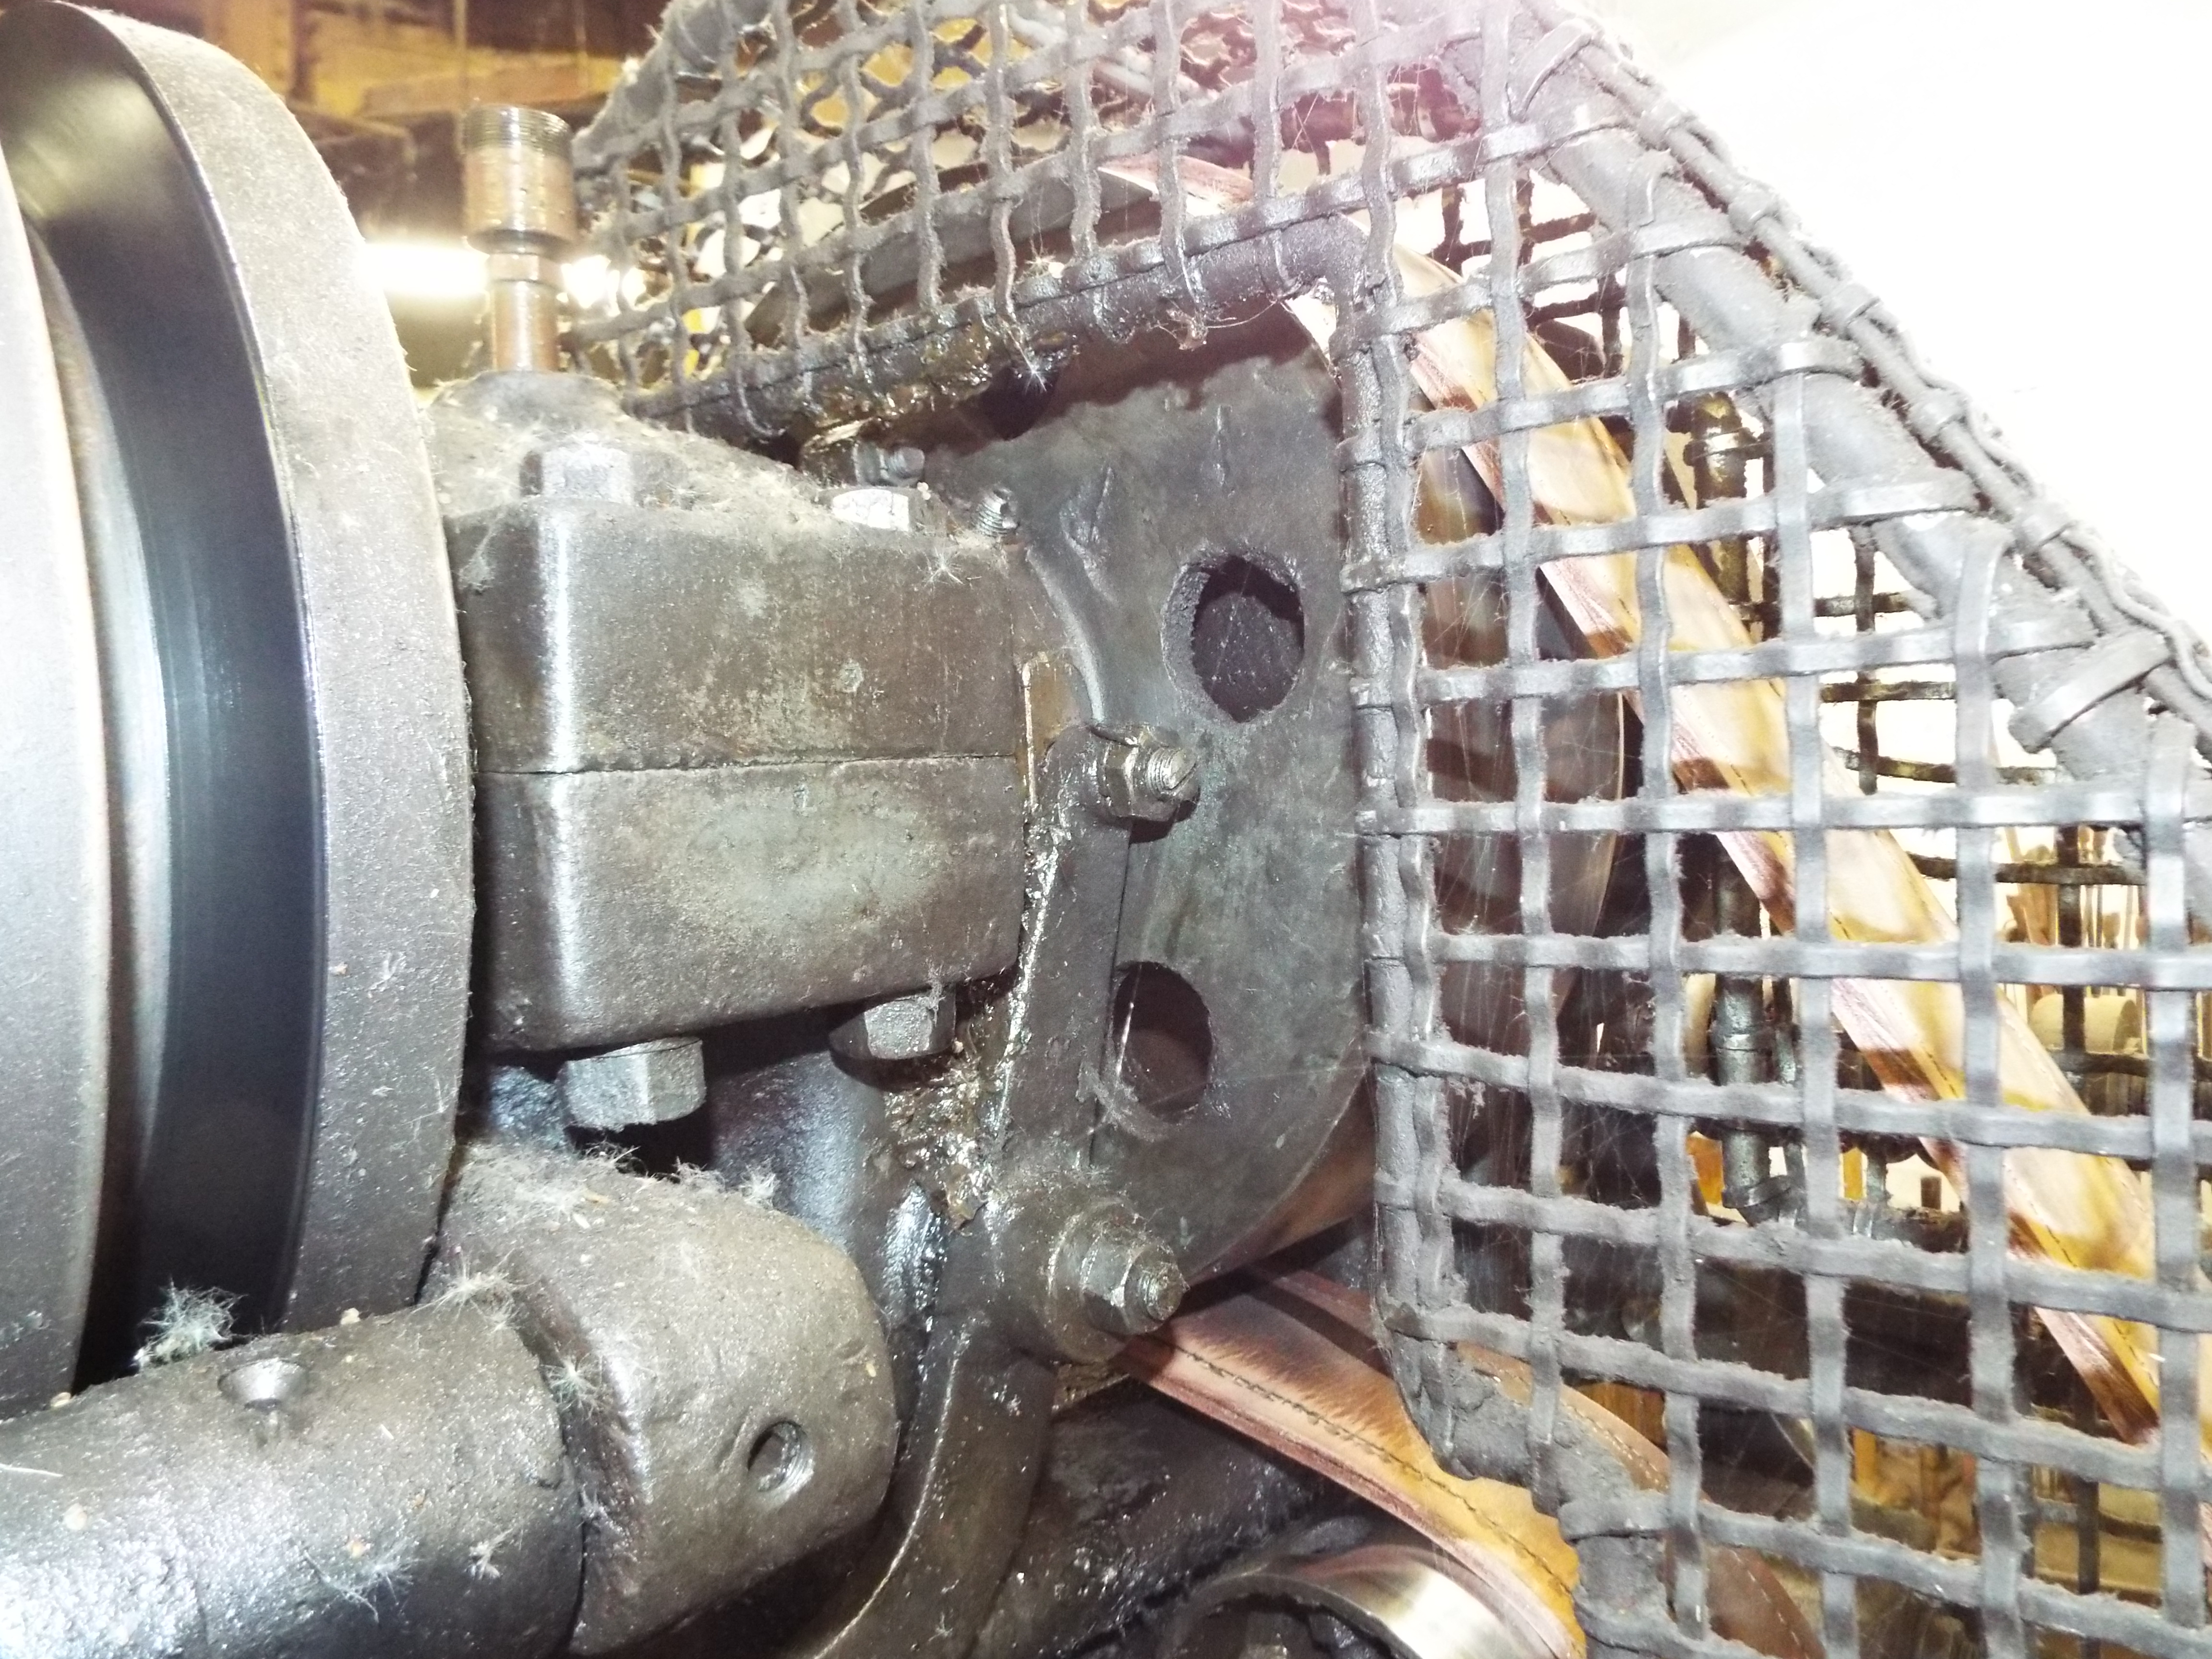
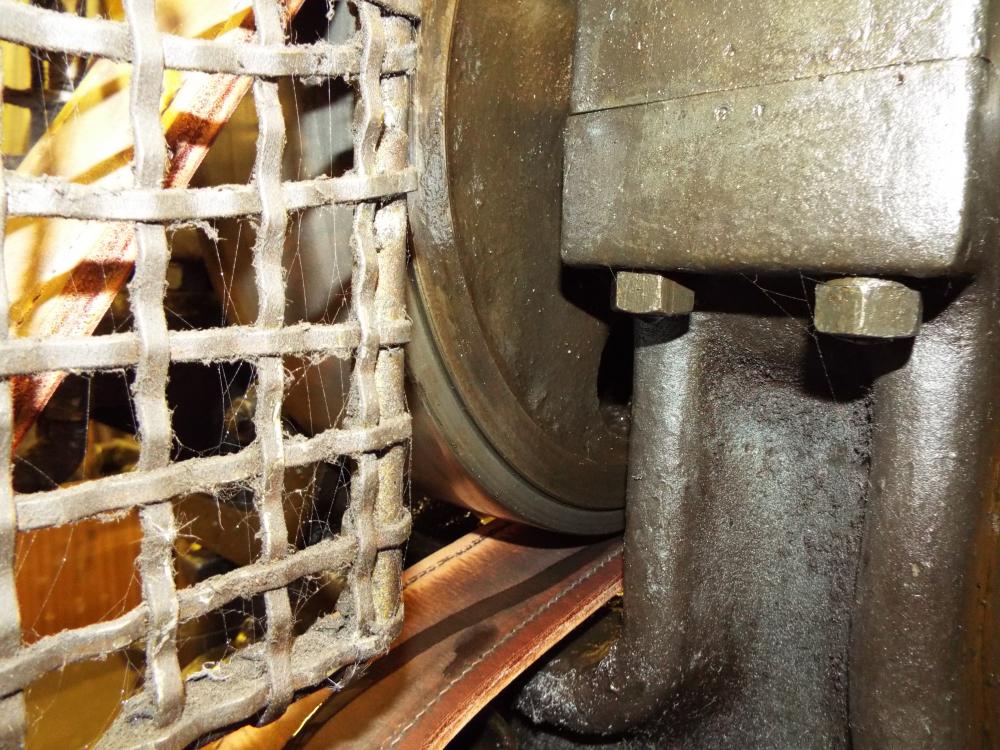
I hope I'm in the right part of the forum. I have a belt driven Samuel Platt Goliath. Had a few days off, came in this morning, pressed the starter - belt not moving but Motor running fine then I noticed the clutch was fully engaged and I cannot seem to shift it. Don't want to be too heavy handed as it's cast iron. Any ideas please. I've added a couple of images showing front and rear.

-
Thank you all for your help. Definitely oil but not too much. Excess runs down onto the tools and throws the job out - quite painful! The problem with the single speed seems to be that the clutch also needs oil on the plates. I was told about this and couldn't believe it, but it works. Hammer now working like a dream. Thanks again.
-
May be too late now, but I second what basher said. Also check for cracks on top flywheel/clutch.
-
Hi Tom, Lovely work. Enjoyed your tutorials with the help of Google translator and that's a really nice patina you achieve. Is the method described anywhere on your site?
-
I adjusted the dovetails and now have new keys. This has solved the problem of the tool moving. However, in my wisdom I thought while I was on the job it might be an idea to clean all the bushes & pins and replace the leather belt - wish I hadn't. Previously I could adjust the speed using the treadle. Now I have one speed - about 300 strokes per minute and I can't keep up with it! Now I'm going to try grease and see if this will slow it down.
-
-
If you intend trying your hypothetical question: When you have poured your first cast allow it to cool slightly, then push steel rods into the aluminum with half of the rod showing proud and allow to cool (you may have to support the rods to stop them falling over). The rods should be nicked so that the aluminum has some purchase and warmed before use to ensure they are perfectly dry (remember that rust holds moisture so ideally use bright steel). Before making the second pour, warm your first casting to just below its melting point. This will ensure both the mold and casting are absolutely dry and will reduce the draw of heat from the next pour. The second pour can now be made. If the second melt of aluminum is hot enough it, will slightly melt the base, allowing the two pours to melt into each other. This will only happen at the interface. However, I don't advise using this technique for anything you are going to hammer on, as the adhesion between the faces will not be good. We used to make aluminum 'off the wall' paperweights by pouring a small amount of aluminum onto a flat plate, allowing to cool a little, then pouring a small amount on top of this and then repeating numerous times until it looked like something that could be displayed in the Tate Modern. With regard to pouring copper onto aluminum, it is unlikely that you will get any bonding between the two materials as the aluminium will draw the heat from the copper causing it to cool before any intermetalic bonding can take place. As a note; full safety protection should be used when working with molten aluminum. In fact I prefer a full face visor in preference to safety glasses. Aluminium and moisture can be an explosive mixture and is extremely painful when it burns.
-
I use a farriers forge with no pressure gauge only an adjustable regulator with no problem. I'm not familiar with this model of forge but I add the following comments for what they're worth. With the new fire bricks you've put on the floor, have you increased the height of the floor? If so you will have reduced the size of the combustion chamber which could affect the flame and also, if the floor is higher than the original your work may be sitting in the cooler part of the flame.
-
That's impressive. I know competent patternmakers who would struggle at a fraction of that size.
-
Blacksmith's Prayer - Seth Lakeman I spend my day praying I'm going to get this job right!
-
iron Quake, thank you for your suggestion. However I'm unable to find a supplier of Chevron Way Oils in the UK. I will investigate to see if there is a similar product available. Interesting that they protect cast iron and bronze surfaces from rust and corrosion. I've also found, like you, that molybdenum grease works very well on bearing surfaces. I also like a mixture of plumbago (graphite) and oil.
-
This looks a really good job. Would love to see more pictures as the build goes on. Where did you find the cast iron tuyere from?
-
Thank you for the welcome. I look forward to learning here and will give back what I can. Beth - Tipton is in the heart of the Black Country not far from Cradley where all the chains were made. These days we are just a part of the West Midlands.
-
Hello, I am the last in our family to work with a forge. Two years ago my Father retired and closed the business but I was lucky enough to be offered the Blacksmiths’ shop (for a fee!). I had been forging copper soldering irons and bits for them during the last 12 years and this is what I continue to do now. I now want to learn blacksmithing not just because it’s fascinating but because I need to - my tools are beginning to wear! This is a great site. I’ve already had some really good suggestions.
-
Thank you for the link to the thread on keys and center pins. Really useful info.
-
Thank you for all your comments. It seems I now need to address a number of issues. Having again looked at the slide, I noticed there is a lot of movement between the dovetails and slide. I will adjust this. Basher - Originally there were pegs on the underside of the tools but these have long gone so I will have a look at making a peg. JNewman and Peacock I think this may be the key (excuse the pun). The keys got mixed up when we moved the hammer and I relied on memory as to which key fitted which tool. Also as the keys are old I have to rely on shims as well as the key. This may be compounding the issue - I will make some new ones. Basher Thank you for the comment on guarding the springs. They've been on 36 years to my knowledge so it might be as well to cover them before they finally fail. With regards to oil or grease; I work with copper so the scale is light and does tend to lift so it may cause a problem mixing with grease. I will carry on with oil as per many of your suggestions and see if the other adjustments cure the problem.
-
I have a Platt Goliath power hammer with a dovetail slide. Currently I use oil to lubricate the slide but I have a problem with my top tool moving sideways, although it is held tight. When I remove the tool the rear dovetails are covered with oil and I'm wondering if this is what is causing the tool to slide. I don't have this problem for a while if I clean off the oil and re-position the tool. Are there any thoughts on whether grease might be a better lubricant for the slide?
-
If you can obtain a portable farriers horseshoe forge this can be used for heating soldering irons. I would make a carrier to lift the copper off the refractory floor to give an even heat over the copper. Alternately you could make up something. If you make a base and place a hood over this, with an opening in the front to take the irons and a narrow flue/chimney. The base wants to sit off the floor with a hole in the bottom to take a propane burner. Ideally the inside should be lined with refractory and the iron placed to the side of the flame so that it is heated by radiation rather than the direct flame. Again the copper should be raised from the floor. Hope this helps.