Mikey98118 Posted May 17, 2018 Share Posted May 17, 2018 You also need to replace your MIG tips with much longer tapered tips, and then slide the burners further down on their gas tubes, until the ends of the MIG tips are about 3/8" short of the ends of your burner's air openings. I can see you are trying hard to make your burners correct, so here's the bottom line: Induction is the only force sucking air into those burners. That air movement is about as weak as a baby's breath. So your burners need all the smoothing of gas flow and airflow they can get. Your flame photos show weak burner performance, and the reason for this is gas and air still being impeded by the remaining problems in your burner design. Hang in there just a little longer and your efforts will be amply rewarded. In fact, you will have trouble believing your eyes. Quote Link to comment Share on other sites More sharing options...
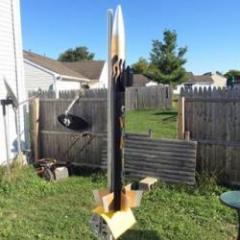
SwampFox Rocketry Posted May 17, 2018 Author Share Posted May 17, 2018 Thanks mikey i think i know the tips u speak of the ones shaped like a pencil ill look into getting them and you say i should slide to 3/8 of an inch to air slot opening ends. Will do mikey appreciate it. I brought the tubes to work and im working more on bevels with a hand file appreciate all your help. I will continue to improve it thanks. Made air slots wider to see if I can adjust a little more from the choke, and filed down my contact tip a bit until i cam order some that are tapered. Slots still ruff will smooth them out when i get back to the house. Quote Link to comment Share on other sites More sharing options...
Frosty Posted May 20, 2018 Share Posted May 20, 2018 If you have to taper the mig tips chuck them up in a hand drill and use it like a lathe to file near perfect tapers. Frosty The Lucky. Quote Link to comment Share on other sites More sharing options...
Mikey98118 Posted May 20, 2018 Share Posted May 20, 2018 The tapered tip is only long enough if the gas tube is 1/8" schedule #80 pipe. The three air openings are good, but need finishing; grind their forward ends square, and then bevel their inside surfaces, so that their knife edges are on the outside. Grind the back of the air openings square; grind them up even with the protruding lip of the reducer fitting. Then unscrew the reducer, and grind away the protrusion from its lip. Next, grind a bevel into the end of the reducer, so that when it is screwed back onto the mixing tube air will flow past it and into the tube smoothly. Quote Link to comment Share on other sites More sharing options...
SwampFox Rocketry Posted May 20, 2018 Author Share Posted May 20, 2018 Made air slots wider to see if I can adjust a little more from the choke, and filed down my contact tip a bit until i cam order some that are tapered. Slots still ruff will smooth them out when i get back to the house. Ok will do. Thanks guys Quote Link to comment Share on other sites More sharing options...
Recommended Posts
Join the conversation
You can post now and register later. If you have an account, sign in now to post with your account.