February 22, 201610 yr Author On 2/15/2016 at 1:15 AM, Mikey98118 said: Twodogzz, I really enjoyed your forge build video on YouTube, and hope the outcome doesn't discourage you. I won't add anymore advice than you've already recieved about the forge, other than to encourage you to keep tweaking. If you want to use so much less gas that your tanks don't freeze up, build a different burner. The Frosty "T" burner is as easy a build as you'll ever run across, and isn't a gas hog. On 2/16/2016 at 9:33 AM, Forging Carver said: What I would do is use this one, make some cash with it, and then make another one with the cash you made if your not happy with it. That is what I plan to do with my little freon forge I am building. You learn from the first build and get better on the next. I'm not discouraged with the outcome. I've done very few tweaks and it's running like a scalded dog now. I haven't yet attempted welding temps for this one but for general forging I think I have it a lot better dialed in now and it didn't really take as much adjustment as I expected. Once it's up and running the heat evens out a lot more than before, plus, shielding it from wind made a much larger difference than I expected. I didn't go in with high expectations for welding, but we'll see. I think I can get there. I have a coal forge I'm restoring for the next one and then doing a ribbon burner. I think I'll keep this one as a back-up, or secondary unit. Or I may sell it after the ribbon burner forge is done. Regardless, I'm way ahead of where I was the first day I fired it up and a lot of it is thanks to info you guys posted in this thread. It mostly just needed some tweaking. The first thing has been forged from it (actually the first 3 things, because I forged a punch and drift to be able to forge the bottle opener):
February 22, 201610 yr Twodogzz, I hope you'll post WIP pics of your ribbon burner project. During the cold months I've been working on designs for my next propane forge venture and I'm waffling between a blown burner and a ribbon burner setup. Ultimately I plan to use a thermocouple and PID/solenoid setup to provide accurate temperature control in the forge, but I am curious as to how far either of those can be turned down and still function properly. Of course now that the weather is warming up again that build may be put on hold for a while since I'd rather spend my time hitting the hot steel than building a new way to heat it up. Anyway, I'd love to see the pics of your ribbon burner project in progress.
February 22, 201610 yr That's a nice opener! I'm not sure if that is your first, but is pretty darn good if it was. That is good even if it weren't your first!
February 22, 201610 yr Also, do you have hinges on both sides or just one? I couldn't tell on waynes instructions, but maybe you understood better than me. Also, did you weld or screw them on? Thanks
February 26, 201610 yr Author On 2/22/2016 at 1:09 PM, Buzzkill said: Twodogzz, I hope you'll post WIP pics of your ribbon burner project. During the cold months I've been working on designs for my next propane forge venture and I'm waffling between a blown burner and a ribbon burner setup. Ultimately I plan to use a thermocouple and PID/solenoid setup to provide accurate temperature control in the forge, but I am curious as to how far either of those can be turned down and still function properly. Of course now that the weather is warming up again that build may be put on hold for a while since I'd rather spend my time hitting the hot steel than building a new way to heat it up. Anyway, I'd love to see the pics of your ribbon burner project in progress. I'm in no hurry to build the ribbon burner forge. I've got an old coal forge I need to restore first. Next gas forge will be a ribbon burner for sure, though. However long this one lasts may change the schedule, though. When I do, I'll do a build thread. I know nothing of thermocouples and such, but others here should be able to comment. On 2/22/2016 at 2:31 PM, Forging Carver said: That's a nice opener! I'm not sure if that is your first, but is pretty darn good if it was. That is good even if it weren't your first! Thanks. It is actually my first bottle opener. I've been smithing for a few years on a very occasional schedule at other people's forges. This forge is my first for smithing at home. The only technique new to me on the opener was the punch and drift. You'll see some epic fail in my latest attempt to punch and drift. Pictures to come... On 2/22/2016 at 2:46 PM, Forging Carver said: Also, do you have hinges on both sides or just one? I couldn't tell on waynes instructions, but maybe you understood better than me. Also, did you weld or screw them on? Thanks Hinges are on both sides. The entire top can separate from the bottom. Just knock the pins out of the hinges and Bob's yer uncle. This way you can raise the entire top by setting it on fire brick for large pieces. I reckon the only time I'll probably ever use that is if I uncoil a coil spring, or something like that. The hinges are standard door hinges from Home Depot with screw holes. I suppose they could be screwed on, no problem. I needed a welder to weld the burner pipe on, so he did the welding on the hinges as well. He did plug welds in the existing screw holes. Works great.
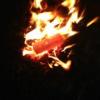
February 26, 201610 yr Author Day 1 was still mostly for tweaking the forge and getting familiar with it and learning how it behaved. After forging a slot punch and drift out of some mystery steel, which, of course, turned out to be 5% iron, 95% butter, I forged the bottle opener: Wire wheeled it and set it back in the forge, which was off but still pretty hot. I was only doing that to take a picture, but when I went to take it out I could see the colors running. Yanked it out with this nice blue temper to it. Dumb luck but noted for later. I didn't have the proper tools to forge a horse head. So I forged a horse head. After building up a modicum of confidence, it was time to get serious with a sucker rod knuckle. Holy crap, I need a power hammer. Day 2 was in the books. The horse head was supposed to be a bottle opener too, but the punch was a disaster. Never got to the drift. The slot punch was a fail, so I forged a round punch which I think will work better. Day 3. Forged a hand fuller and chisel out of a crowbar. No pictures as they are soaking in vinegar at the moment. The round punch does work better, but my technique must be lacking. I screwed up another bottle opener and then decided to go with the crane. I've seen them done and Alec Steele has a nice how-to on youtube, so I went for it. The proportions are all wrong and the drifted hole got distorted along with various other little failures, but it got made. Lessons were learned.
February 26, 201610 yr Nice looking stuff. That's te kind of stuff I am looking to make. Brazeal inspired. That's what I need to do, get a welder to weld the pipe for me. I will ask him to weld the hinges on too. Did you get the hinges welded and then knock out the pins to cast? How much did it cost you to get it welded too? Thanks
February 26, 201610 yr Author Yes I cut the tank and had the welding done before casting. I then lined it in 2 pieces. Be warned that cutting the tank kind of bumfuzzles the structure and you have to clamp everything back into place to line it up. Will post more later. Welder did the pipe, hinges, and a handle in about 40 minutes and charged me 60 bucks. Find the right shop and you might get it done for a case of beer.
March 1, 201610 yr One last thing. Is your burner mount made of schedule 80 or is it just regular sized pipe? Thanks
March 2, 201610 yr Author Schedule 40, I think. Picked it up at a plumbing supply. You may not need it if you are building the T-burner. I'm not sure. Check with Frosty's design and go with that rather than mine of that's the case.
March 2, 201610 yr I don't talk about mounting the burner to the forge in the plans, just building the burner seemed confusing enough. Frosty The Lucky.
March 3, 201610 yr On March 2, 2016 at 9:16 PM, Frosty said: I don't talk about mounting the burner to the forge in the plans, just building the burner seemed confusing enough. Frosty The Lucky. No the burner plans were very straight forward, I just had difficulty finding the right parts and had no idea what they look like. You did a very good job at explaining it.
March 4, 201610 yr Were your hinges zinc plated? I am not sure if it will be a safety hazard for me. All hinges I can find are either zinc plated or brass, which could be toxic too. Thanks
March 4, 201610 yr 7 minutes ago, Forging Carver said: Were your hinges zinc plated? I am not sure if it will be a safety hazard for me. All hinges I can find are either zinc plated or brass, which could be toxic too. Thanks Soak the zinc plated stuff in vinegar. Cleans it off safely.
March 4, 201610 yr 15 minutes ago, arkie said: Soak the zinc plated stuff in vinegar. Cleans it off safely. Yep that's what I was thinking about doing. Any idea how long? I don't want to overdue it.
March 4, 201610 yr Author The hinges I got at home depot were steel with a "brushed nickel" finish. Welded on with no prep. A farm supply or industrial supply place would probably have plain steel weld-on hinges. On 3/2/2016 at 8:16 PM, Frosty said: I don't talk about mounting the burner to the forge in the plans, just building the burner seemed confusing enough. Frosty The Lucky. Yes, but by referring to your directions and pictures he can easily see the difference in the way the Dave Hammer burner that I have mounts as opposed to the way the t burner mounts. There's a big difference.
March 5, 201610 yr On 3/4/2016 at 7:36 PM, Forging Carver said: Yep that's what I was thinking about doing. Any idea how long? I don't want to overdue it. On a coating like a hinge, the zinc may be gone in 2 to 3 hours, longer if the zinc is thick. Watch the bubbles and shift the location of the item so all surfaces get exposed. When the bubbles stop pick out the pieces and neutralize the vinegar to stop any flash rusting. Buff with a wire brush. You can't overdo it. I have left pieces of hot galvanized pipe and fittings in the vinegar for a couple of days.
Join the conversation
You can post now and register later. If you have an account, sign in now to post with your account.