Krown Kustoms Posted March 7, 2014 Share Posted March 7, 2014 Hey everyone. I am new to this but have been playing around with different setups for my propane forge. I built a forge using a 10 gallon air tank and some fire brick. The burners (2 burners) are 1" pipe about 10" long into a 1" to 1.5" reducer with 1/8 90's into the center. I believe the 90's are restricting too much air flow. It heats the garage like you wouldnt believe but not hot enough to weld. I found this today. I originaly built this to heat knives for hardening and it works great but I found today not efficiant at all due to the gas usage. I have a few pics but not on computer yet..Ill post them soon. I went ahead today and bought the parts to build the "T" burner. I think its Frostys design but not too sure. Looks promising though. I will give credit where its due when I have time to find the author of the build. I bought enough parts to build 3 burners. Before I do I was wondering how many would be best for the 10 gallon tank forge. I assume 3 would be ok due to the 2 I have now leave a cool spot between the two on the bricks. Thanks for any input. Quote Link to comment Share on other sites More sharing options...
Frosty Posted March 7, 2014 Share Posted March 7, 2014 Put up some pics of what you have and the dimensions of the inside of your forge. We'll get you up and running in no time. It's almost impossible to give specific answers to vague questions. A 10gl. tank is just the shell, the volume and dimensions that count are the fire chamber. fire brick refractory has it's problems too, they have a pretty high specific heat and a LOT of mass so it requires quite a bit of fuel and time to get up to heat. That said however once up to heat the recovery time when you put a cold piece of steel in will be very good. The flame doesn't really heat the work, it heats the inside of the forge which then transfers heat via radiation to the stock. So, the higher the specific heat and thermal mass the liner has the faster it can heat the stock. Unfortunately the higher the specific heat and higher the mass the fore fuel it takes to get the liner hot. It's also a poorer insulator so you lose more heat out through the liner and shell. Anyway, post some pics and specifics of the forge and we'll get you going. Frosty The Lucky. Quote Link to comment Share on other sites More sharing options...
windancer Posted March 7, 2014 Share Posted March 7, 2014 Only two pieces to the magic forge formula- Gas and air. Play with those two settings for a bit before you spend any more money/effortn another set-up that may not work either. More air. More gas. Less air. Less gas. Adjust, adjust, adjust. Dave Quote Link to comment Share on other sites More sharing options...
Krown Kustoms Posted March 7, 2014 Author Share Posted March 7, 2014 K here goes....I added air holes to the burner tubes cause the flame was orange (rich right?) flame got blue. The back burner wah huffing. Opened holes more and increased the pressure...up tp about 25psi. Only burns on the forge floor. Not out of the tube like the front one. 25psi seem a bit excessive. I want to be around 10psi. I have roughly 720 cubic inches inside. 20 deep x 4.5 wide x 8 high. There is no insulation in the top so I know Im loosing heat. Kinda nice for winter time though. gotta figure out how to insert pictures. Quote Link to comment Share on other sites More sharing options...
Krown Kustoms Posted March 7, 2014 Author Share Posted March 7, 2014 ahaa! found it. The last pic I think is the problem. Too much air restriction. Oh yeah. These are the burners first at 10psi second at 25psi I working on these now. Hope 3 isnt too much. Quote Link to comment Share on other sites More sharing options...
Dodge Posted March 7, 2014 Share Posted March 7, 2014 Yeah I think you may be on the right track. Your second pic; the high pressure one, is clearly burning rich. Use a smaller diam gas supply tube or a bigger bell. That seems pretty small anyway. Reil type burners use a 1.5" reducer on 3/4" pipe. You would probably see marked increase in performance by going to a 2" bell or even look at Frosty's T design (what I use). Highly tune-able, easy to make. Tube length is another concern. 8.5 or 9:1 seems to be a good ratio. e.g.1" pipe wants to be 8.5 - 9 inches long for a good air fuel mix without compromising good flow due to friction in too long a pipe Edit: This post relates to the op burners You were posting as I was typing. I believe you will still only need 2. One 3/4" burner will heat 300 - 350 cubic inches. Welding temp at the lower end. You having 720 cubic inches should have no problem welding with two 1" burners Quote Link to comment Share on other sites More sharing options...
Frosty Posted March 7, 2014 Share Posted March 7, 2014 The pipe 90 you're using to hold the jet is seriously restricting the air intake, that's why you have to crank it so high to get what you do. Replace the 90's with a smaller dia nipple that goes all the way across and drill it for the gas jet. That's how Ron makes his and it works. At 720 cu/in you'll be able to get away with two 3/4" burners but it's a little much volume but close enough. Two 1" burners is a LOT of burner and will probably start melting the refractory. Those three "T" burners aught to be a goodly dollop of too much burner. Of course my philosophy is, it's better to have it and not need it than need it and not have it. If the forge is too hot, turn it down, that's a problem everybody should have. Frosty The Lucky. Quote Link to comment Share on other sites More sharing options...
Krown Kustoms Posted March 8, 2014 Author Share Posted March 8, 2014 I share the same philosophy. I built the "t" burners and get a beautiful blue bud at the tips but no umph to them. When I jack the pressure they go out. I gotta play with them a little cause I know the work...I have seen a lot of people here so far that use them. Quote Link to comment Share on other sites More sharing options...
gearhartironwerks Posted March 8, 2014 Share Posted March 8, 2014 I think your refractory is detrimental to getting to a welding temp, and not having an insulated overhead and door will never get you to welding temp. Hard bricks absorb heat and should be used for the forge floor only. Kaowool is the best insulation to reflect heat. Kaowool can be coated with Matrikote from Budget Casting Supply to seal it with a ceramic coating. Matrikote is about 1/2 the cost of ITC 100, which is a little better, but a whole lot more expensive. So, you're on the right track with the burners, but need to rethink your forge body. John Quote Link to comment Share on other sites More sharing options...
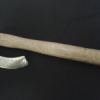
Krown Kustoms Posted March 10, 2014 Author Share Posted March 10, 2014 Gunna have to buy some wool. I am about to give up on the "T" burner...Im not sure what Im doing wrong. Cant get them to stay lit under pressure. Any tips? Does this look correct? Was just in the chat room and Marcus suggested I try them in the forge . Some reason i didnt think about that. Ill give them another try. Quote Link to comment Share on other sites More sharing options...
Frosty Posted March 10, 2014 Share Posted March 10, 2014 Yeah, they much prefer to burn inside a forge. I don't recall (much) did you say what the jet diameter is on the 3/4" burners? I find the primary flame cone isn't a "bud" it's a cone about 1.5-2x the diameter of the tube or around 1 18" - 1 1/2" long and they roar like a jet engine. It's the thing I like least about NA burners, they're LOUD. Remember when you're trouble shooting things, don't get in a hurry, change ONE thing at a time and test it or you'll never know what did what or why. Frosty The Lucky. Quote Link to comment Share on other sites More sharing options...
Dodge Posted March 11, 2014 Share Posted March 11, 2014 Maybe its optics but the mig tip looks a bit crooked. Correct me, anyone, if I am wrong but you get a much more uniform flame if you have the tip as closely aligned to the pipe centerline as possible. Ron Reil, iirc, speaks of pumping water down the gas tube when setting up to insure the gas flow is straight as possible. My understanding is that a crooked gas tip causes a fuel starved condition on one side of the pipe and a fuel rich condition on the other, never really mixing very well thus resulting in an erratic flame. Scott Quote Link to comment Share on other sites More sharing options...
Rich Hale Posted March 11, 2014 Share Posted March 11, 2014 This thread reminds me why I always suggest that when building a gasser..select a proven design and follow the instructions exactly..do not change anything.......Buiild acoording to cu ft needs and select numbers of burners for that size...it is really so easy I did it. Quote Link to comment Share on other sites More sharing options...
Krown Kustoms Posted March 11, 2014 Author Share Posted March 11, 2014 I havnt had time yet but Ill run water through it and check the tip. Its a .030 in it now. I have .035 for it too. I might get a chance today to put them in forge and try them. Quote Link to comment Share on other sites More sharing options...
Krown Kustoms Posted March 11, 2014 Author Share Posted March 11, 2014 I used plans from here. '?do=embed' frameborder='0' data-embedContent>> Quote Link to comment Share on other sites More sharing options...
Rich Hale Posted March 11, 2014 Share Posted March 11, 2014 And did you do your burners exactly as the plans say? or did you change things? Quote Link to comment Share on other sites More sharing options...
Frosty Posted March 12, 2014 Share Posted March 12, 2014 To be fair Rich, I don't think there is an exact plan for the "T", I never made a good one. I believe I rationalized not making exact plans by saying a person would have to tweak it for whatever components were available locally anyway. It may just be the angle Scott, the pic is at just the right angle my eye says both. It's off or it's really on. What you say is exactly right, having the jet aimed as straight down the center of the tube is really critical. Having it off center makes for a poor flame and worse induction so what you do have is unstable. Ron's water trick works very well, just aim the burner straight down or mean old Mr. Gravity will skew the results. Just a little practice and you can just sight up the tube and see how it's centered. Take the fitting off the other end and light will shine through it, then it's just a little gentle prying with a screw driver and it's golden. Frosty The Lucky. Quote Link to comment Share on other sites More sharing options...
Krown Kustoms Posted March 13, 2014 Author Share Posted March 13, 2014 I did the water jet test. Both are spot on now. Still havnt had time to put them in forge. I did manage to heat the couplers and flare them out a little bit today. I hope I have time later tonight to finish up. Ill post pics when I get going on it again. Quote Link to comment Share on other sites More sharing options...
Krown Kustoms Posted March 14, 2014 Author Share Posted March 14, 2014 Put it all together today and works great. Time to get some wool. Thanks for everyones help. Ill put up a pic when I have a few minutes. Quote Link to comment Share on other sites More sharing options...
Frosty Posted March 14, 2014 Share Posted March 14, 2014 Excellent! Post pics of it at heat. We LOVE pics you know. Frosty The Lucky. Quote Link to comment Share on other sites More sharing options...
Recommended Posts
Join the conversation
You can post now and register later. If you have an account, sign in now to post with your account.