philb86
Members
-
Joined
-
Last visited
Everything posted by philb86
-
Noted, no AT signs. I have heard of cases like that, never experienced it though myself. I dont disagree with it being good insurance, as I said almost always I temper after reaching ambient after being quenched, just my routine. Was your students blade forged, or stock removal?
-
Thanks all! I really have to turn my notifications on so I know when there is a reply. I will start by answering ThomasPowers. You are correct, I forged the billet and then profiled the billet that I had made. The make up is 1095 sandwiched between two pieces of 410SS. I am planning on forging the bevels in once I get myself a little more consistent on making the billets as my second attempt tonight to make another billet of the same make up above, I found a spot where one side of the stainless did not weld to the high carbon. I started to grind it out and it got to the point that I needed to come in for the evening, a little disappointed. It is a fully hardened blade, however I did an edge quench, to ensure that I did not split the billet. I have seen a good bit of cases where when the whole entire blade is quenched and the stainless actually rips the high carbon apart right down the middle. After I finished grinding out the unwelded portion on the current billet I made this afternoon, I may end up cutting in a preform and then forging bevels into a finished knife profile. All depends on how much more I have to grind out of the billet, as the majority was welded. Bob Brandi, as long as you thermocycle the blade properly, there is really no need to rush it off to tempering after quench. I do however do that immediately after for any knife that I make. I have blades that were quenched and not put in into temper until a few days later, and there has been no ill effect.
-
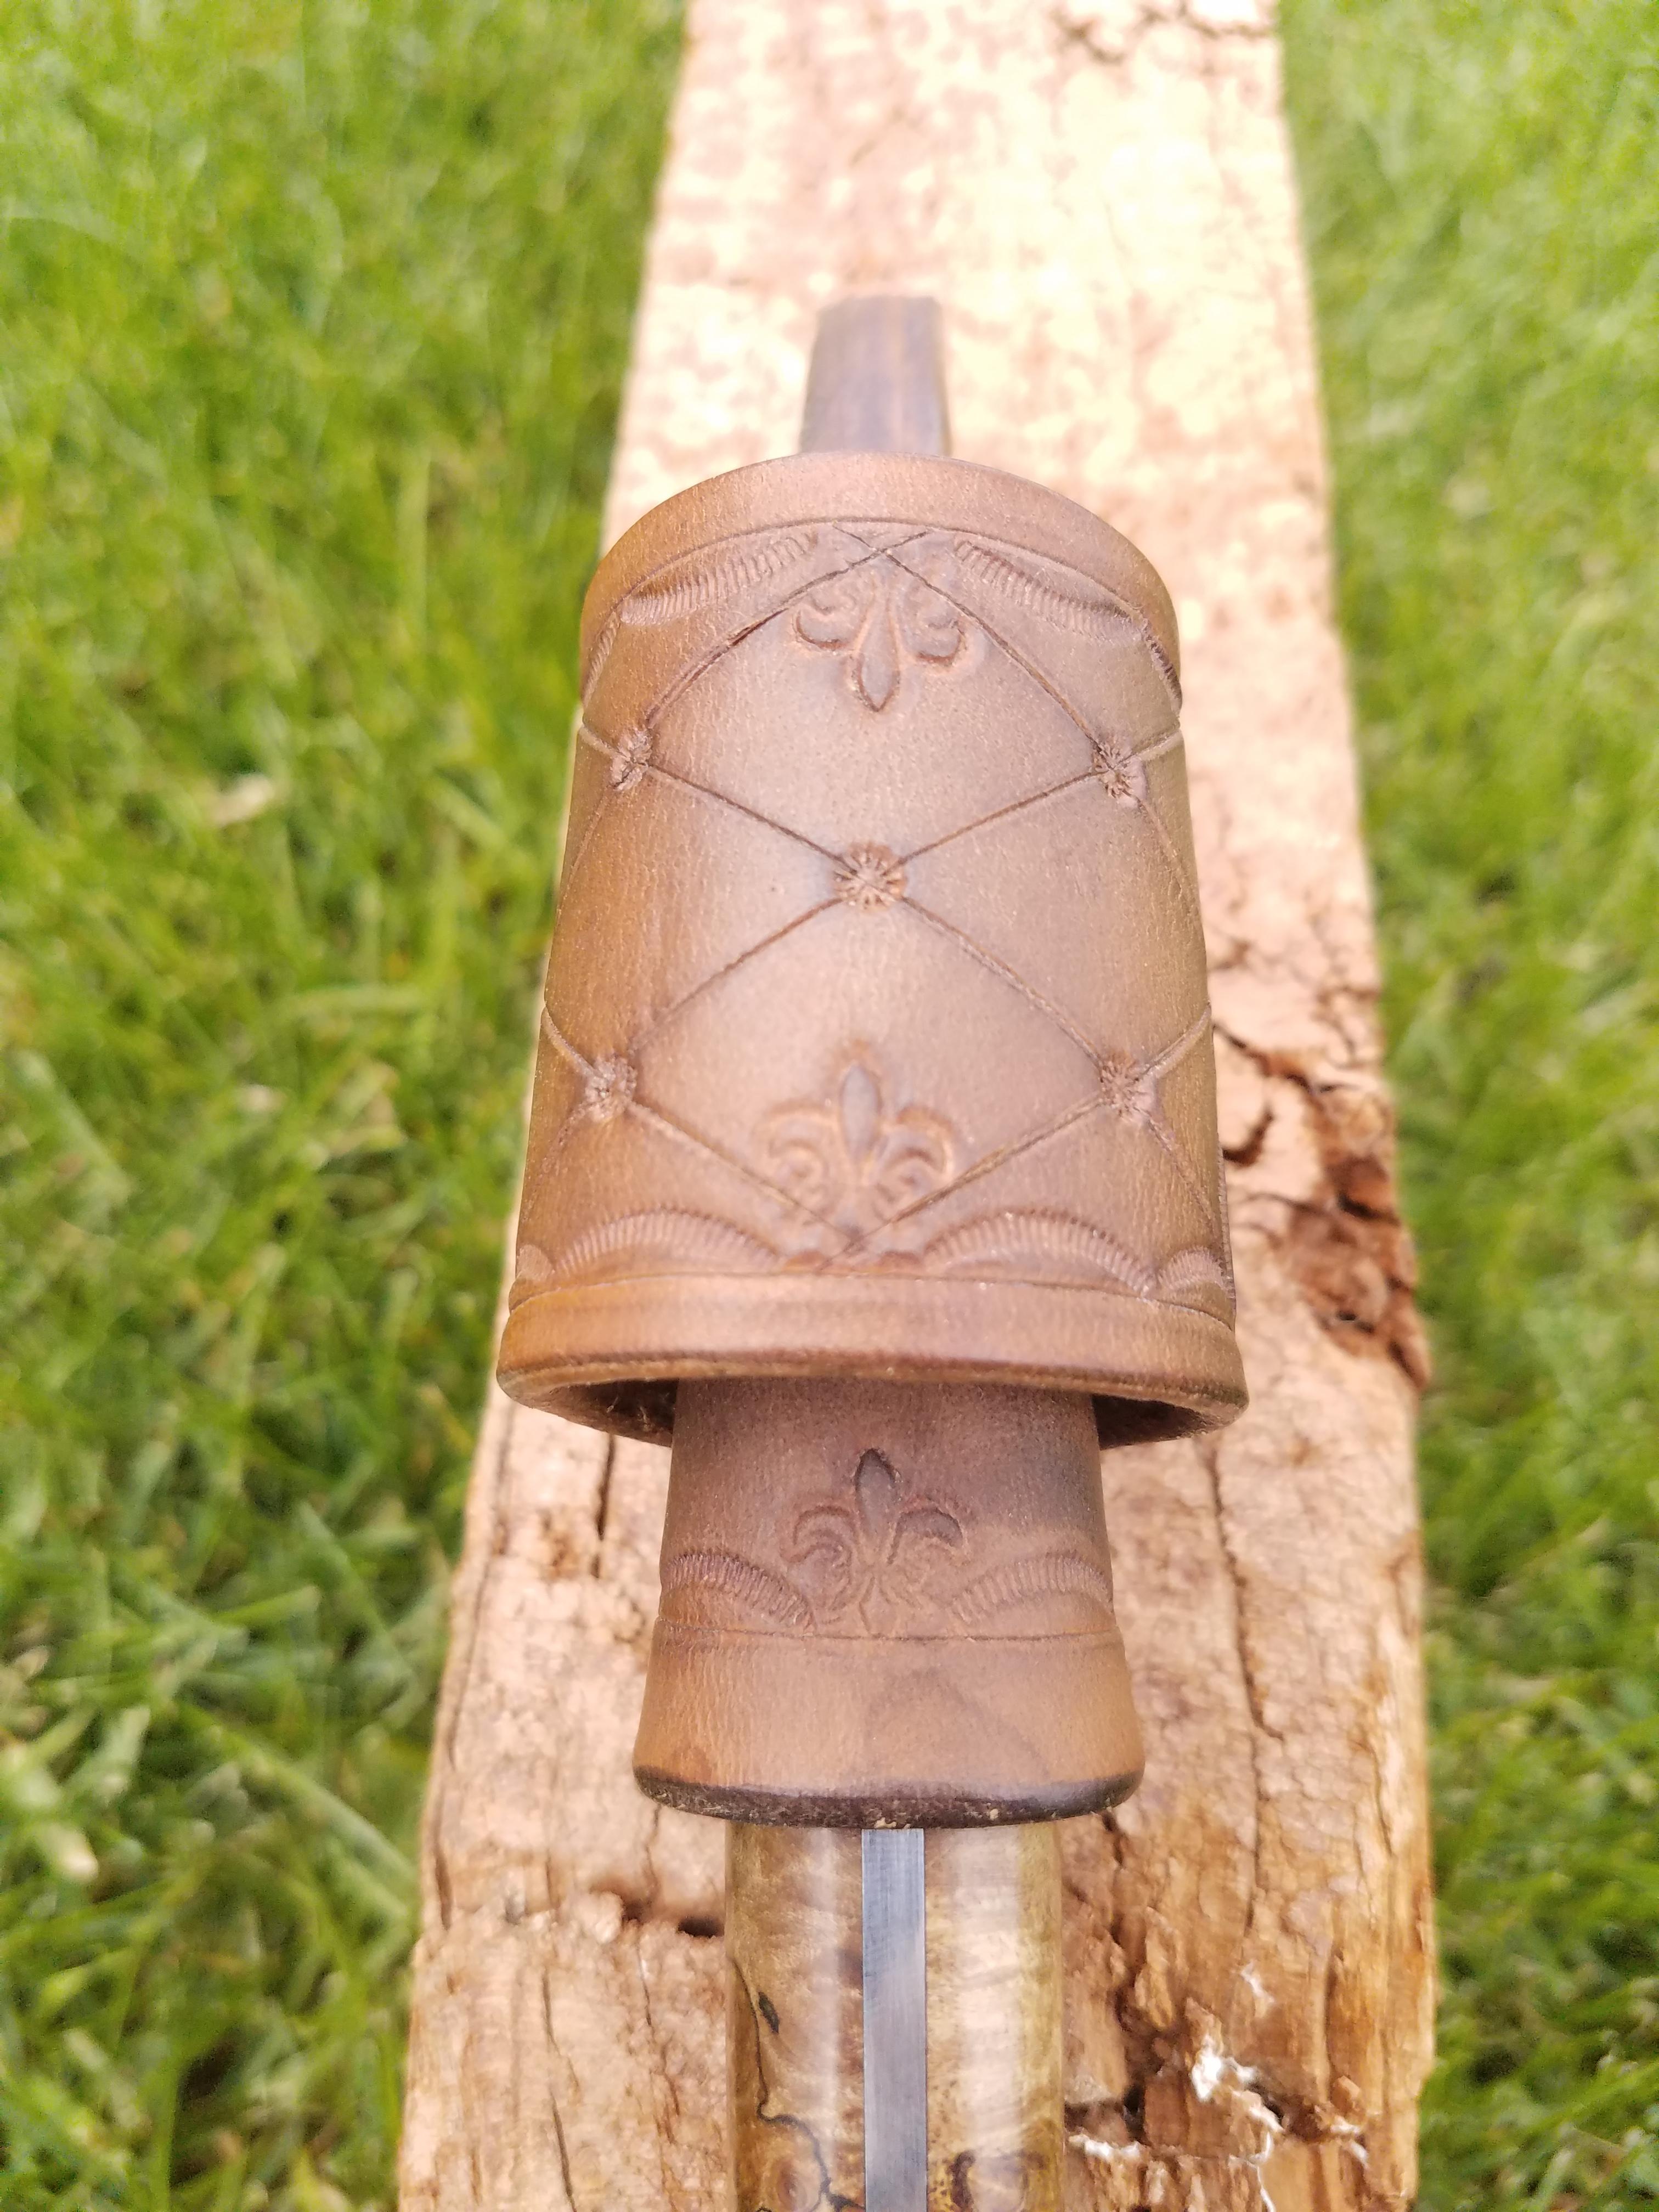
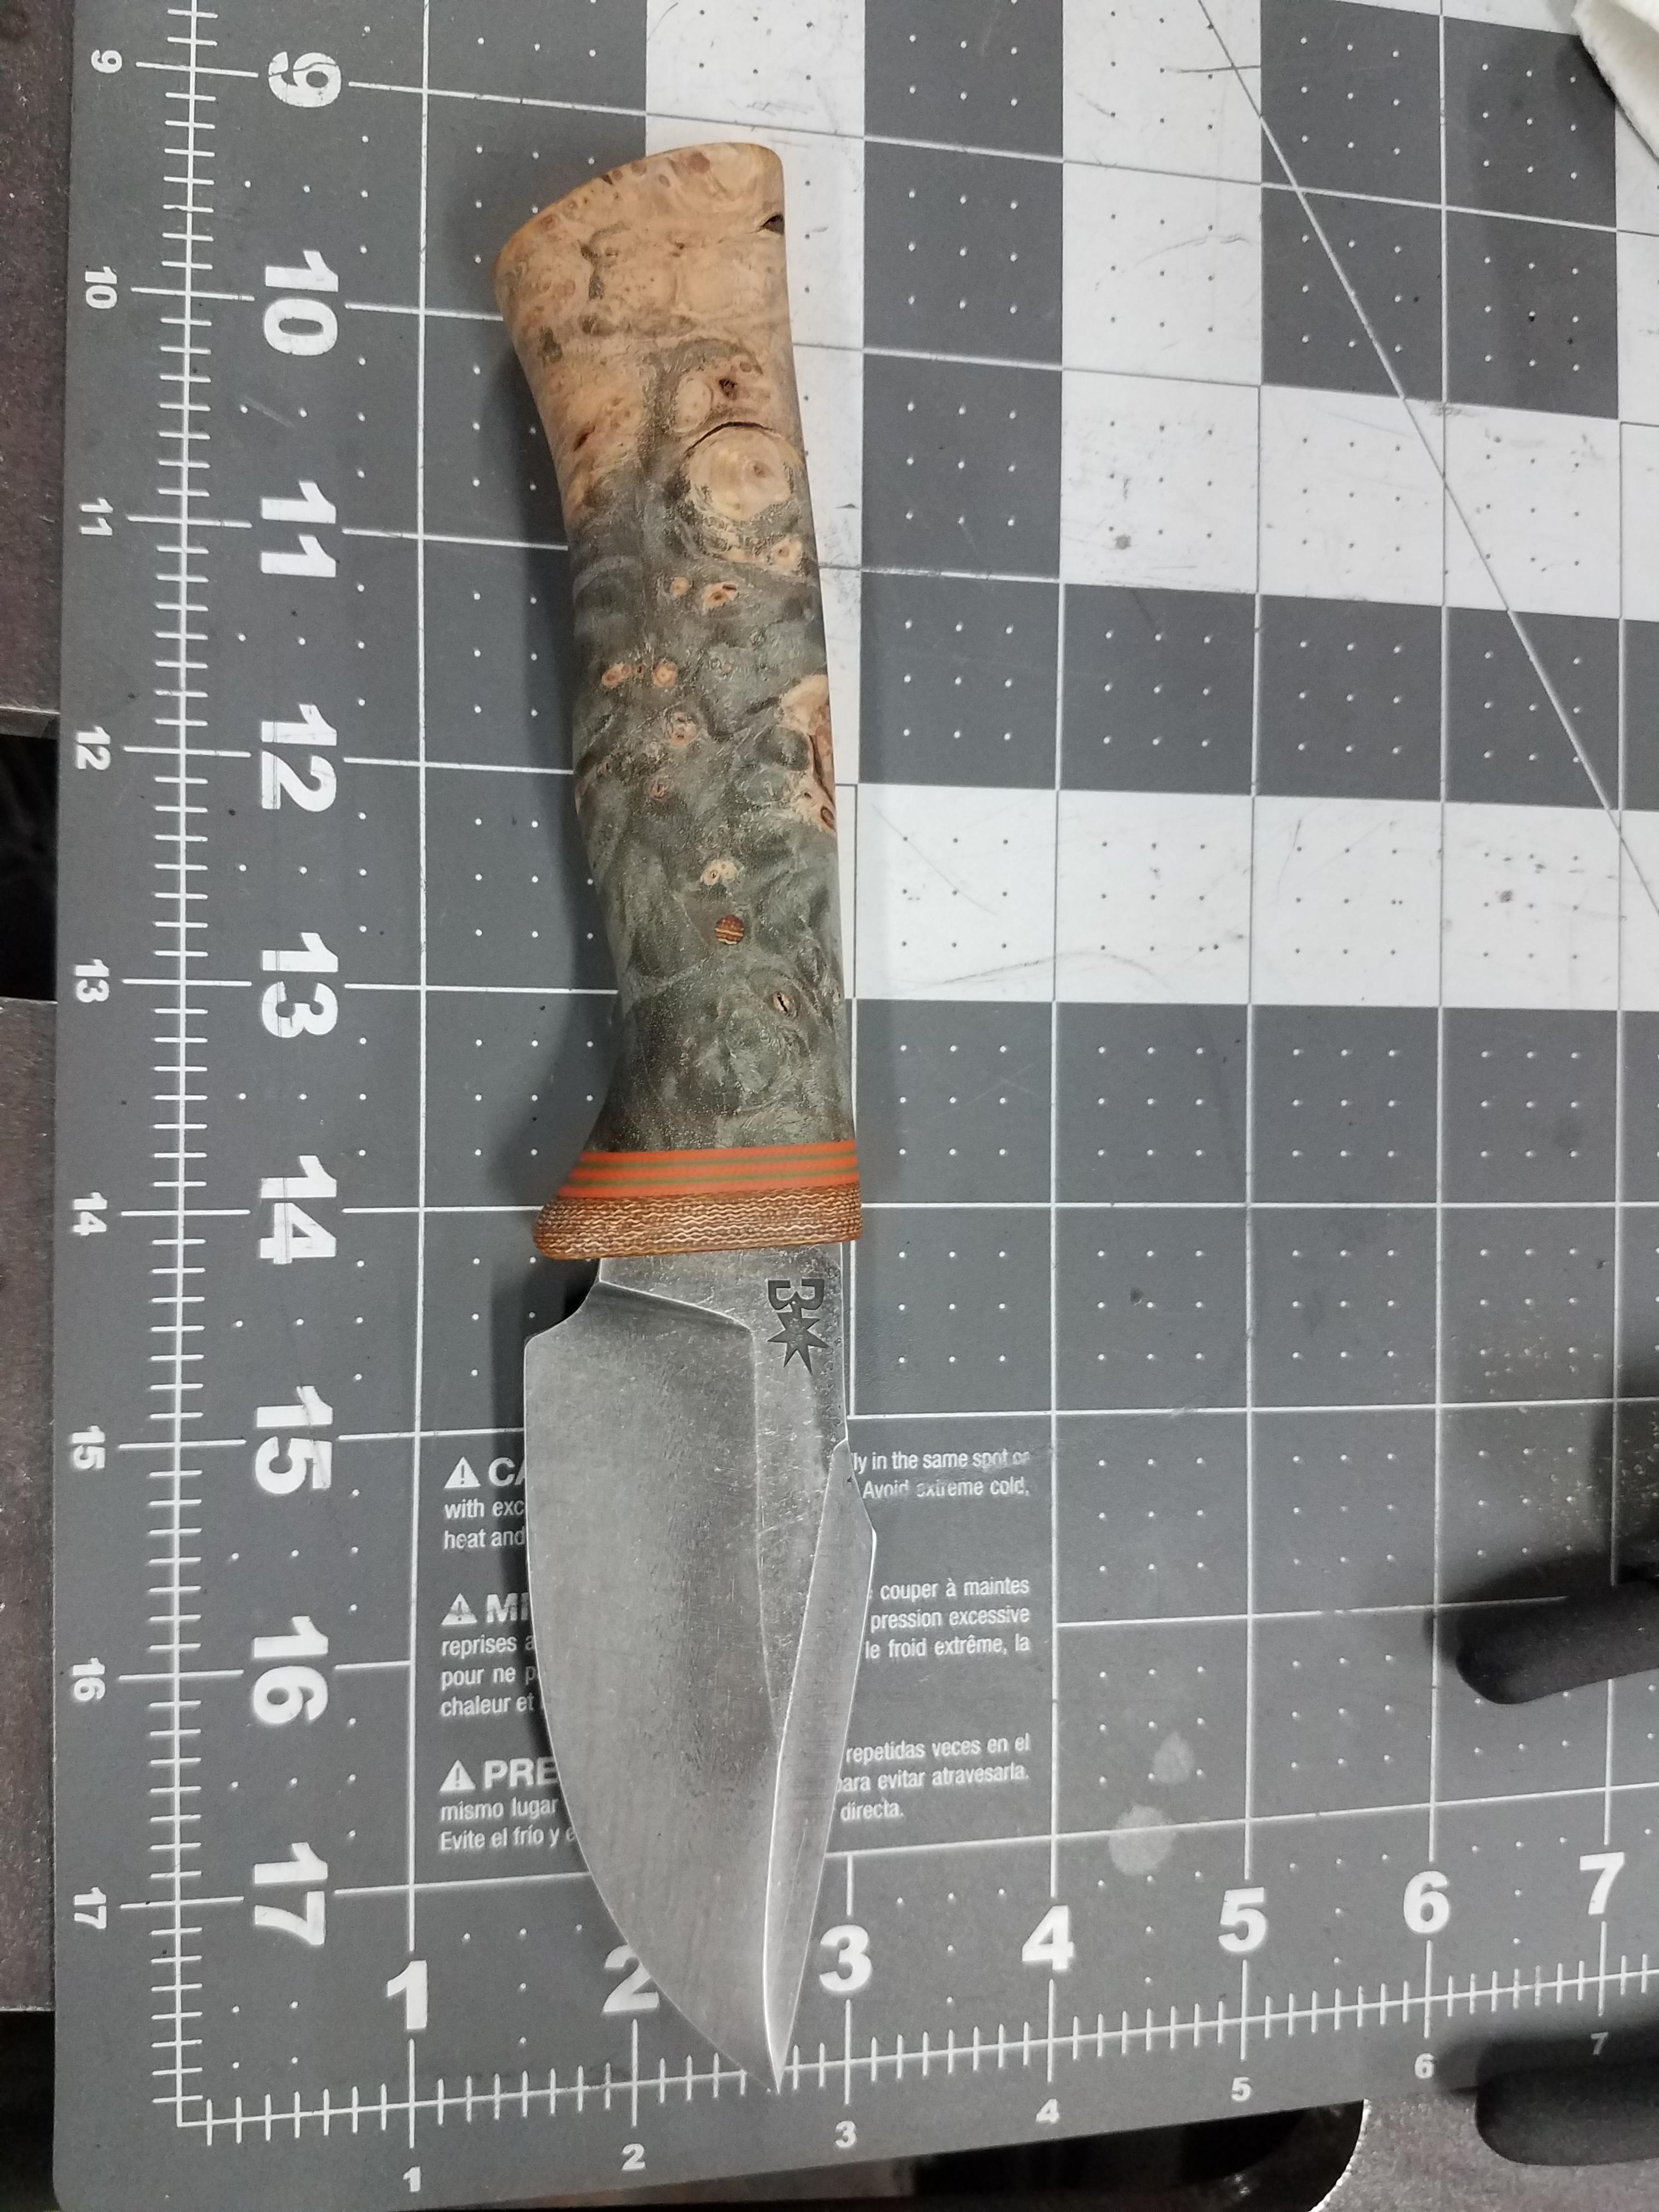
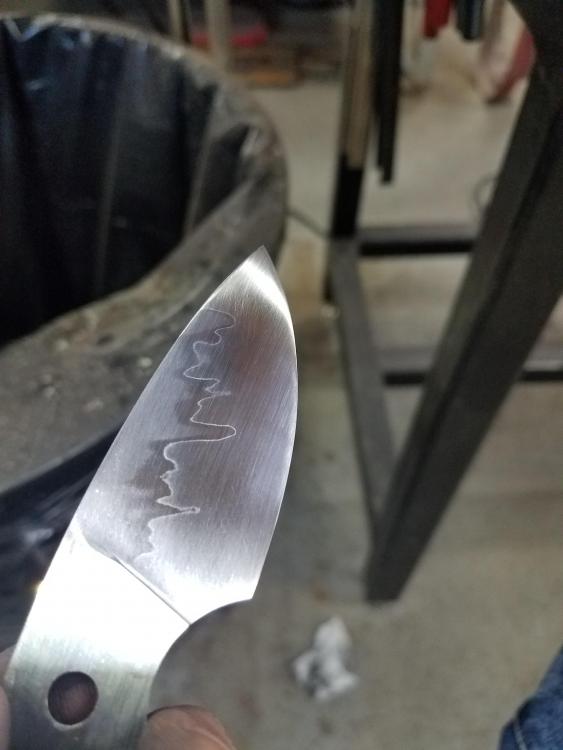
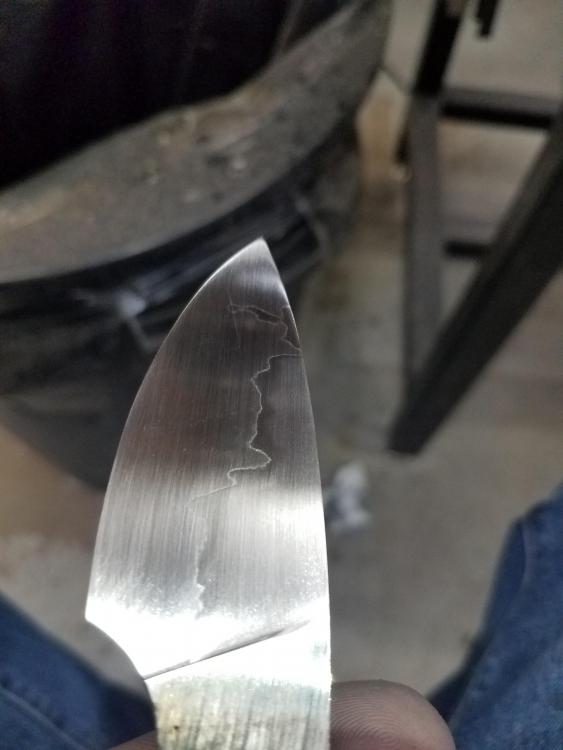
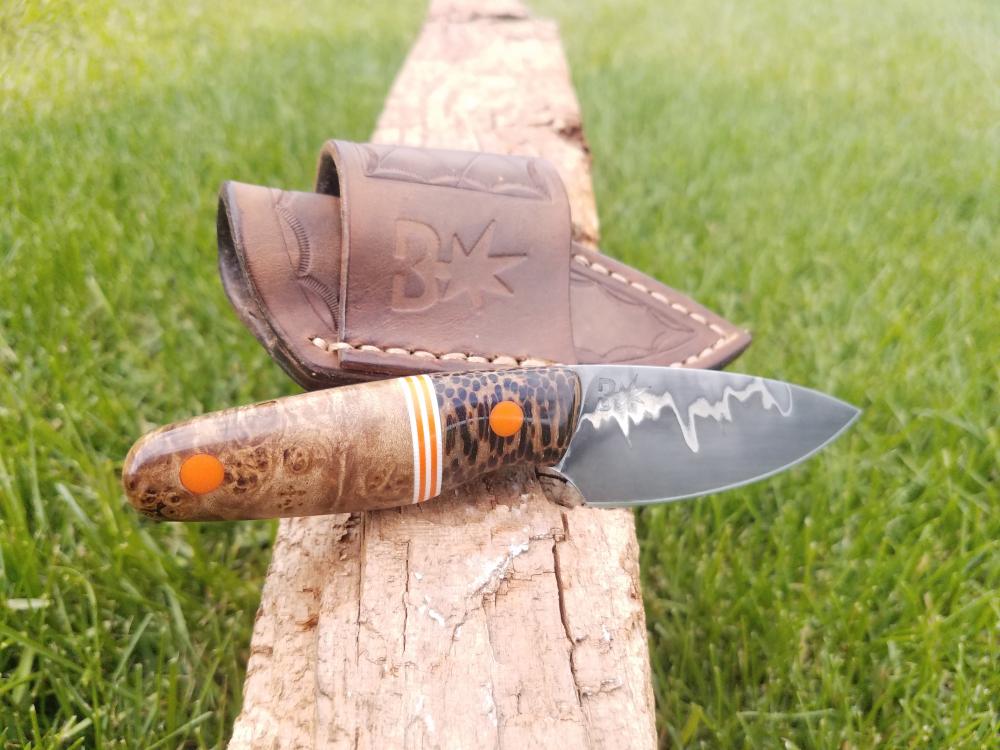
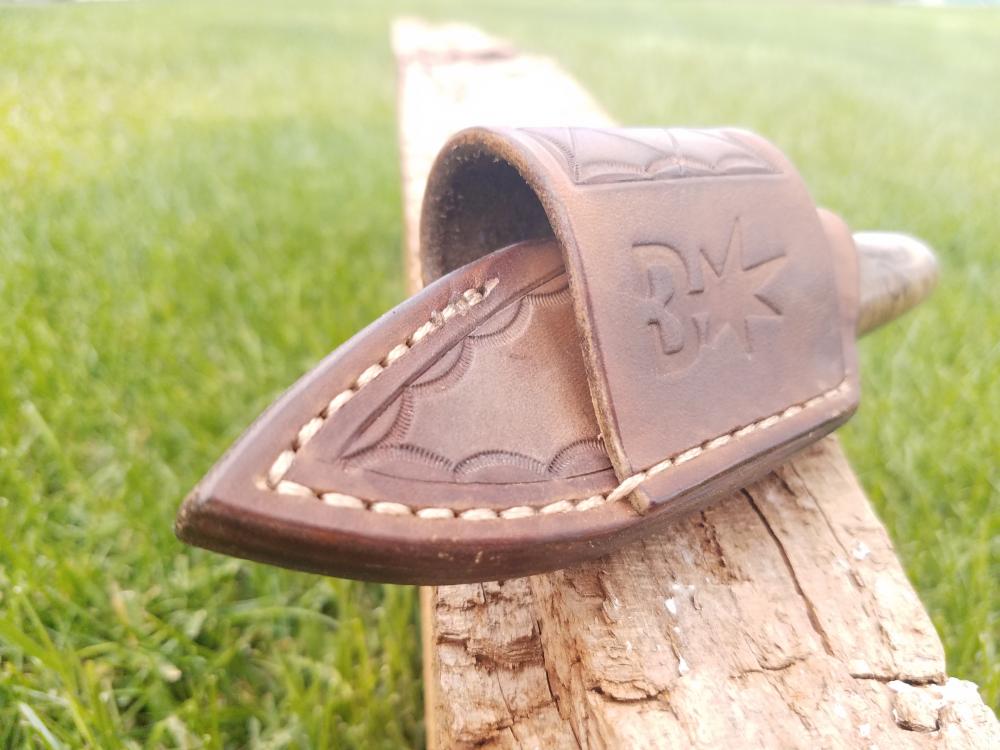
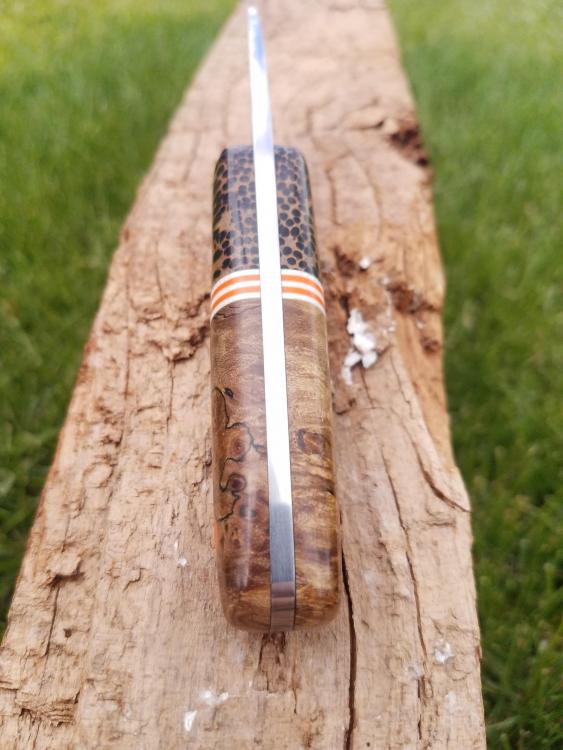
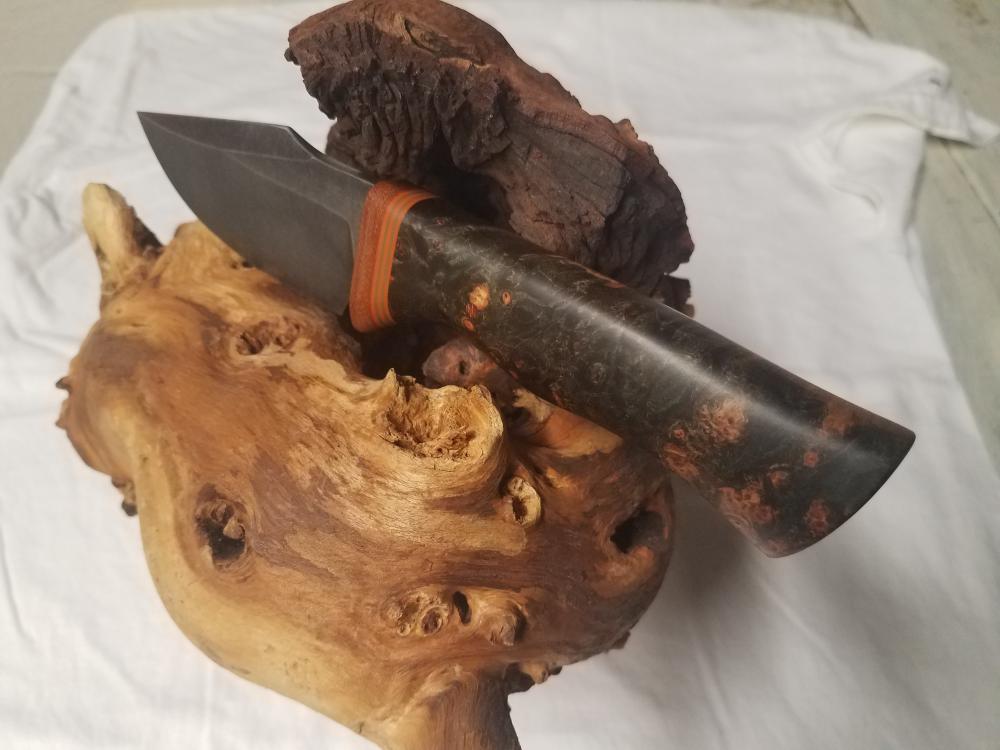
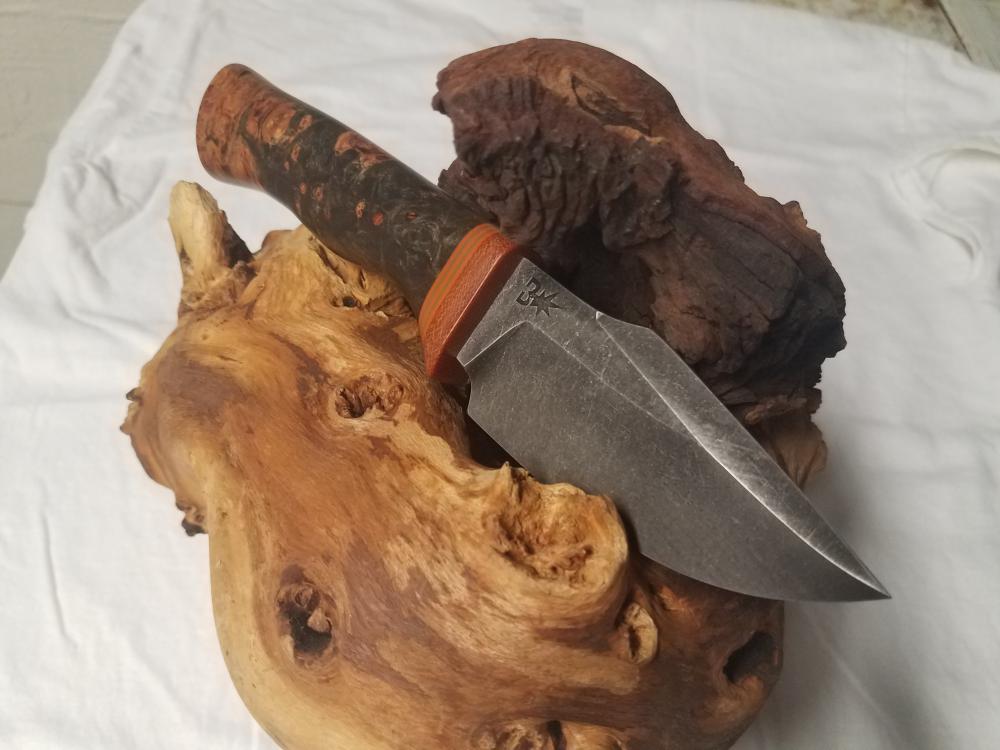
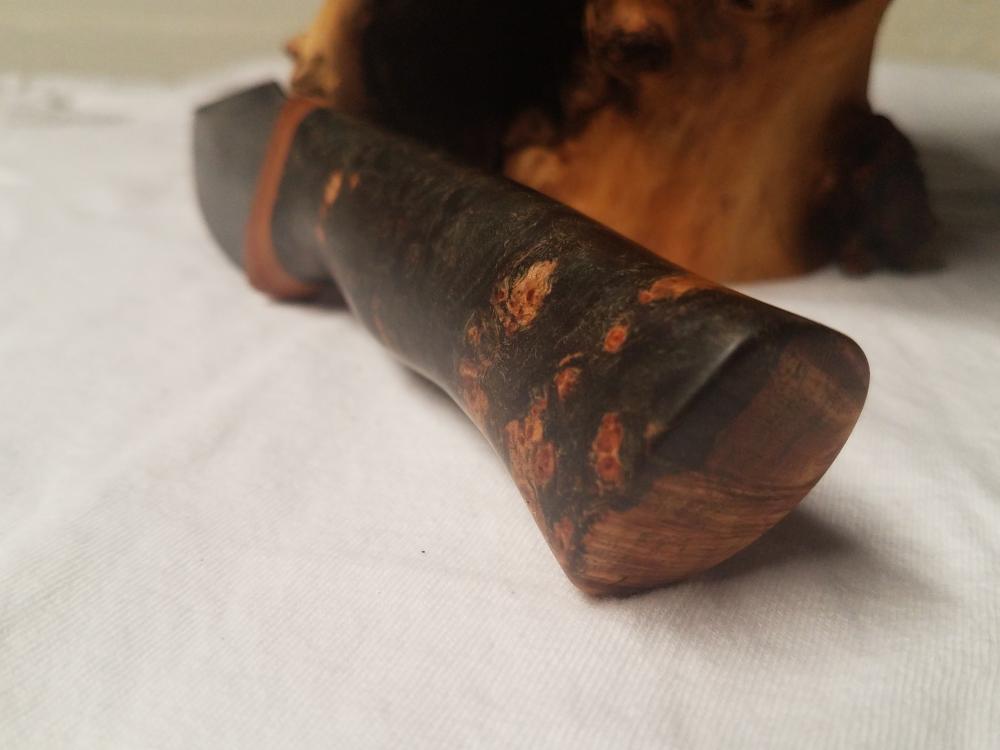
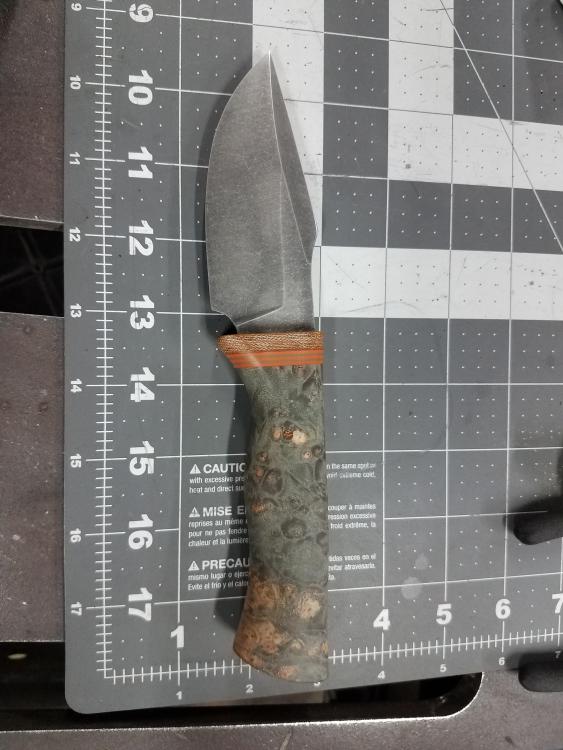
I started a journey into learning how to forge, and decided it was time I give forging a knife a try. I have done many stock removal knives, but want to take my knife making business to the next level and start learning more. As usual, I jump feet first into things and thought to myself, I want to do a stainless san mai. I dont know if I got lucky, or all the steps of the initial prep work led to have a first successful forge welding experience, let alone stainless to high carbon. Once I had the billet finished I cut out and ground the profile, and finished the knife, and made a leather sheath to go along with it. 410 Stainless and 1095 HC Maple burl and black palm scales with orange and white G10 liners and orange G10 pins. 8-9oz leather sheath made in house as well. Let me know what you all think.


-
The leveling bolts are only to take a little wobble out due to my concrete floor when I move it to different positions. I have pieces of hdpe that slip on the end of those bolts to absorb any shock from the actual bolts contacting the floor. Same idea I have used on equipment I have installed in the field that has shock loading or high vibration. So far, only one out of those 4 bolts need to contact the floor to take the extremely small wobble it may have out. I will definately keep an eye out on them though to see if I get any issues with concrete spalling or chipping out due to the contact of the bolts with the concrete floor. I know all you guys have probably extensive experience in what works and doesnt. Thanks for the insight, it is much appreciated.
-
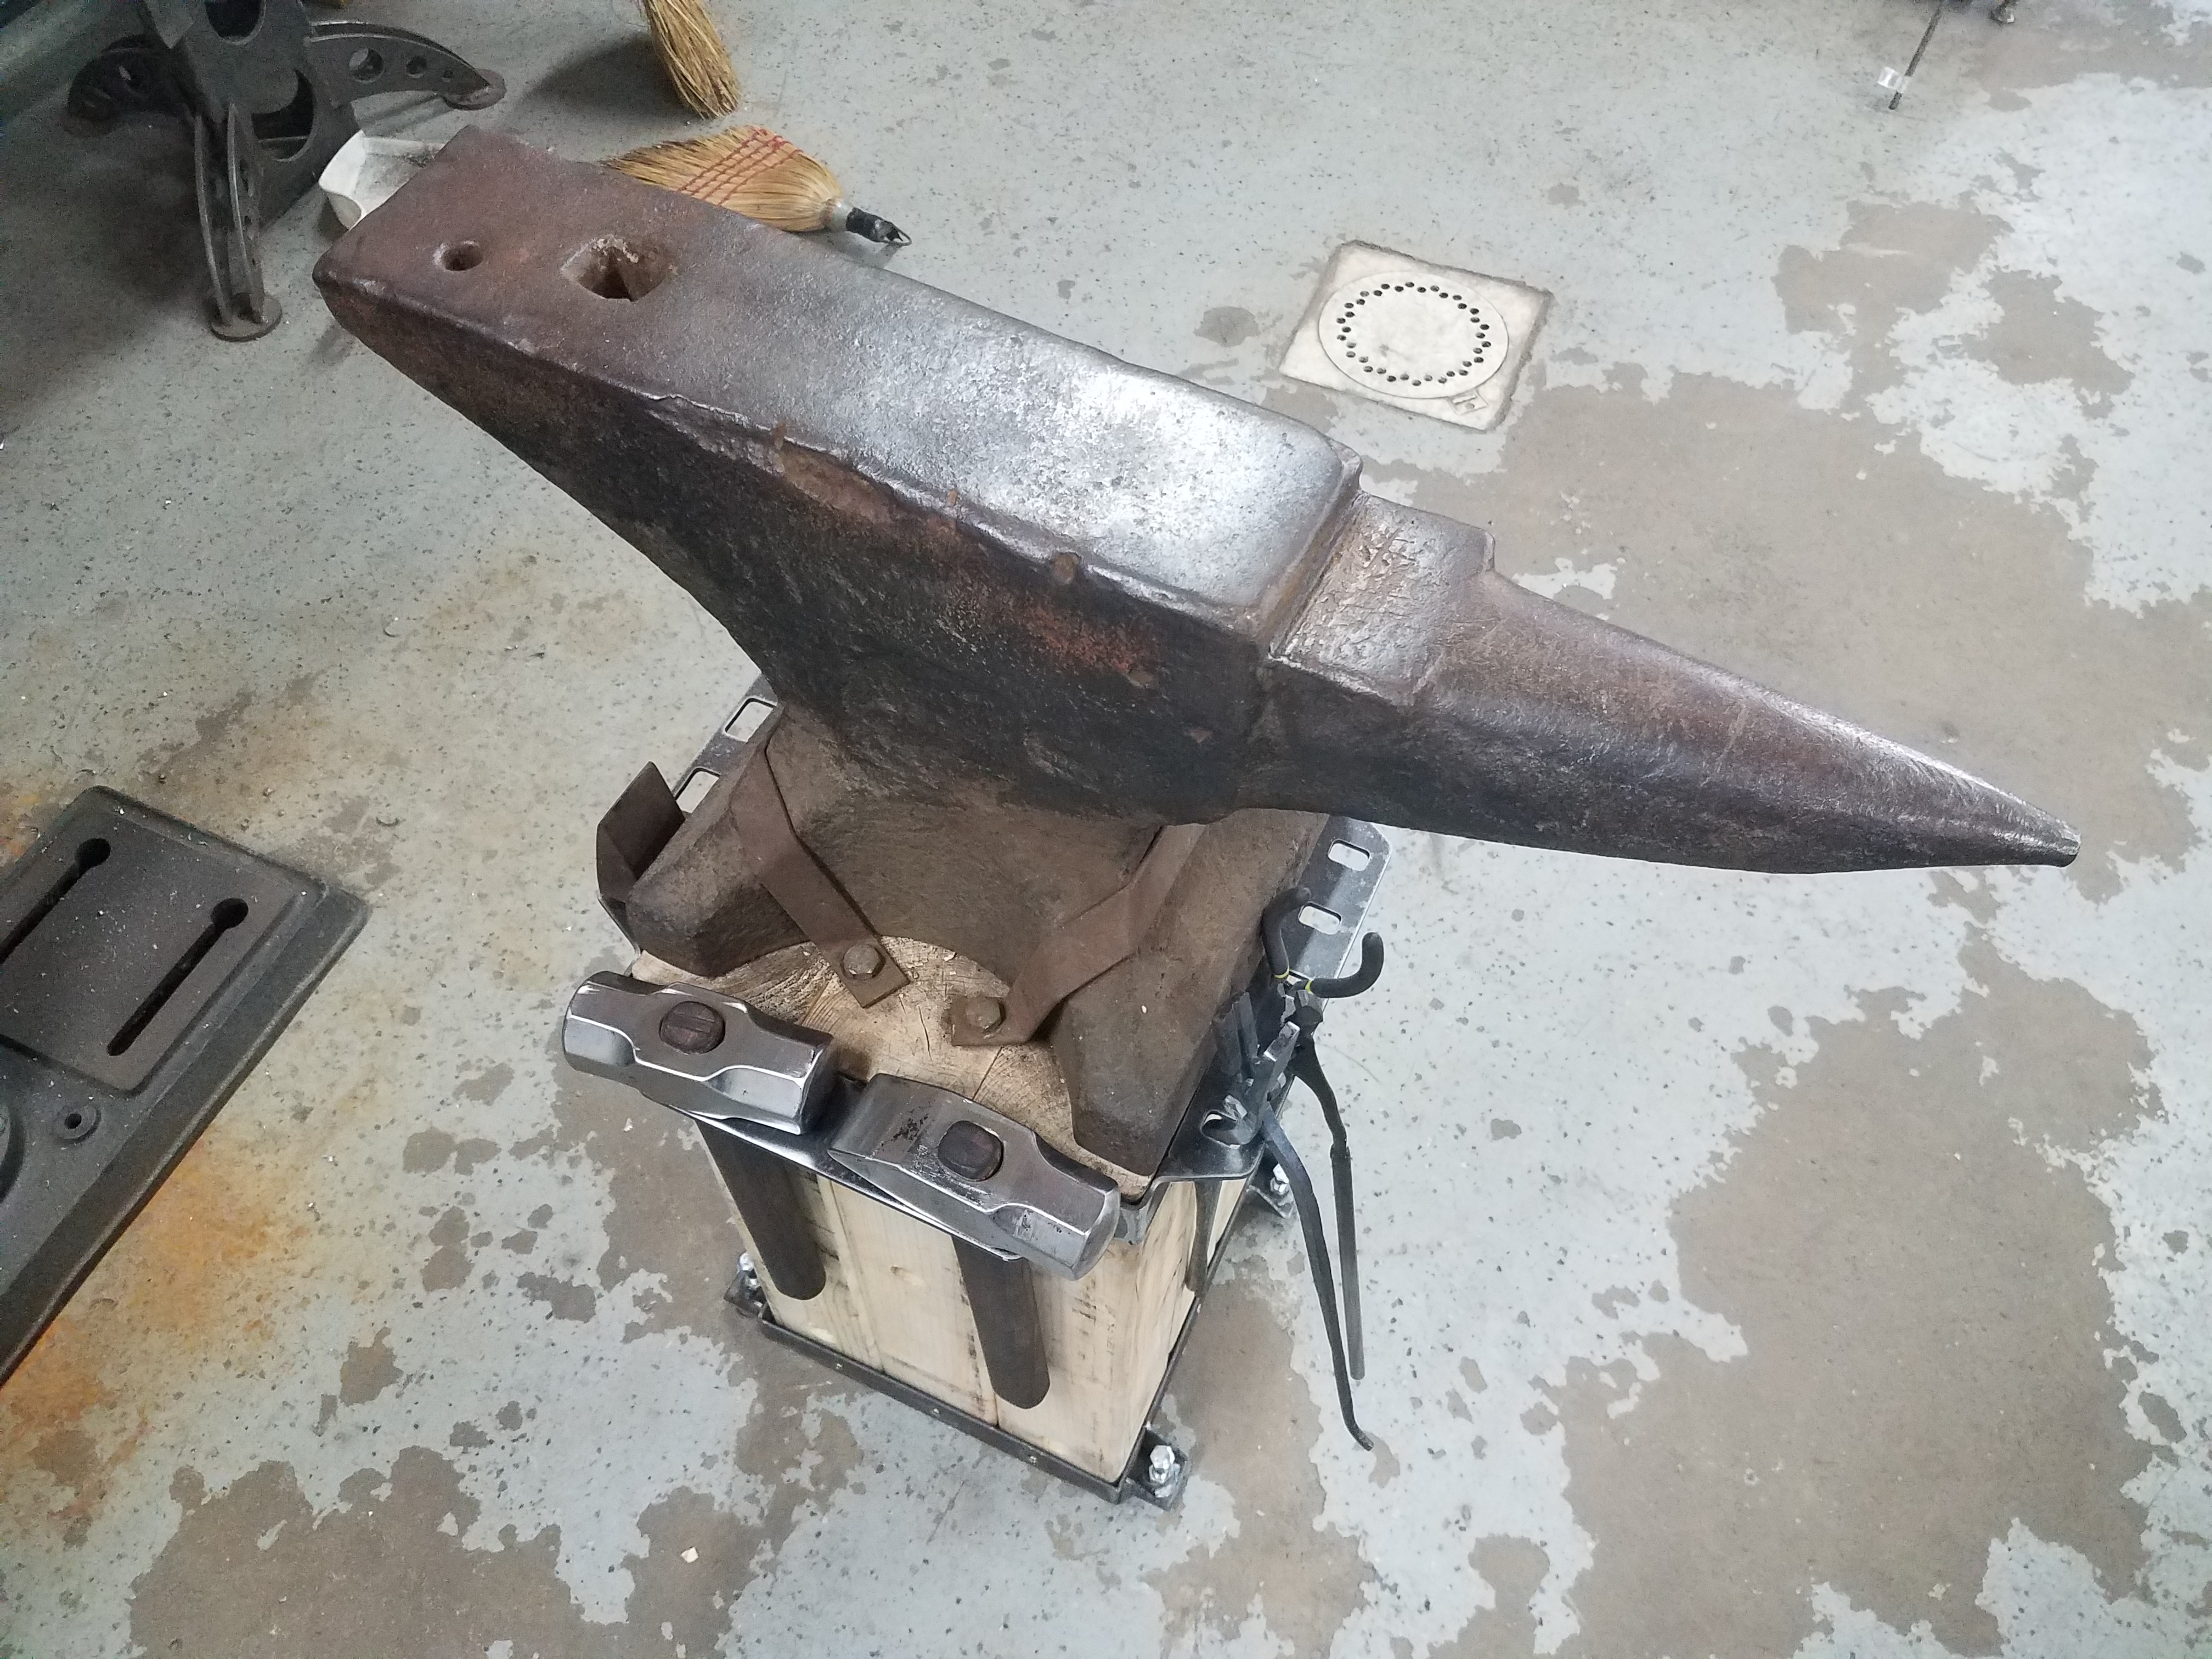
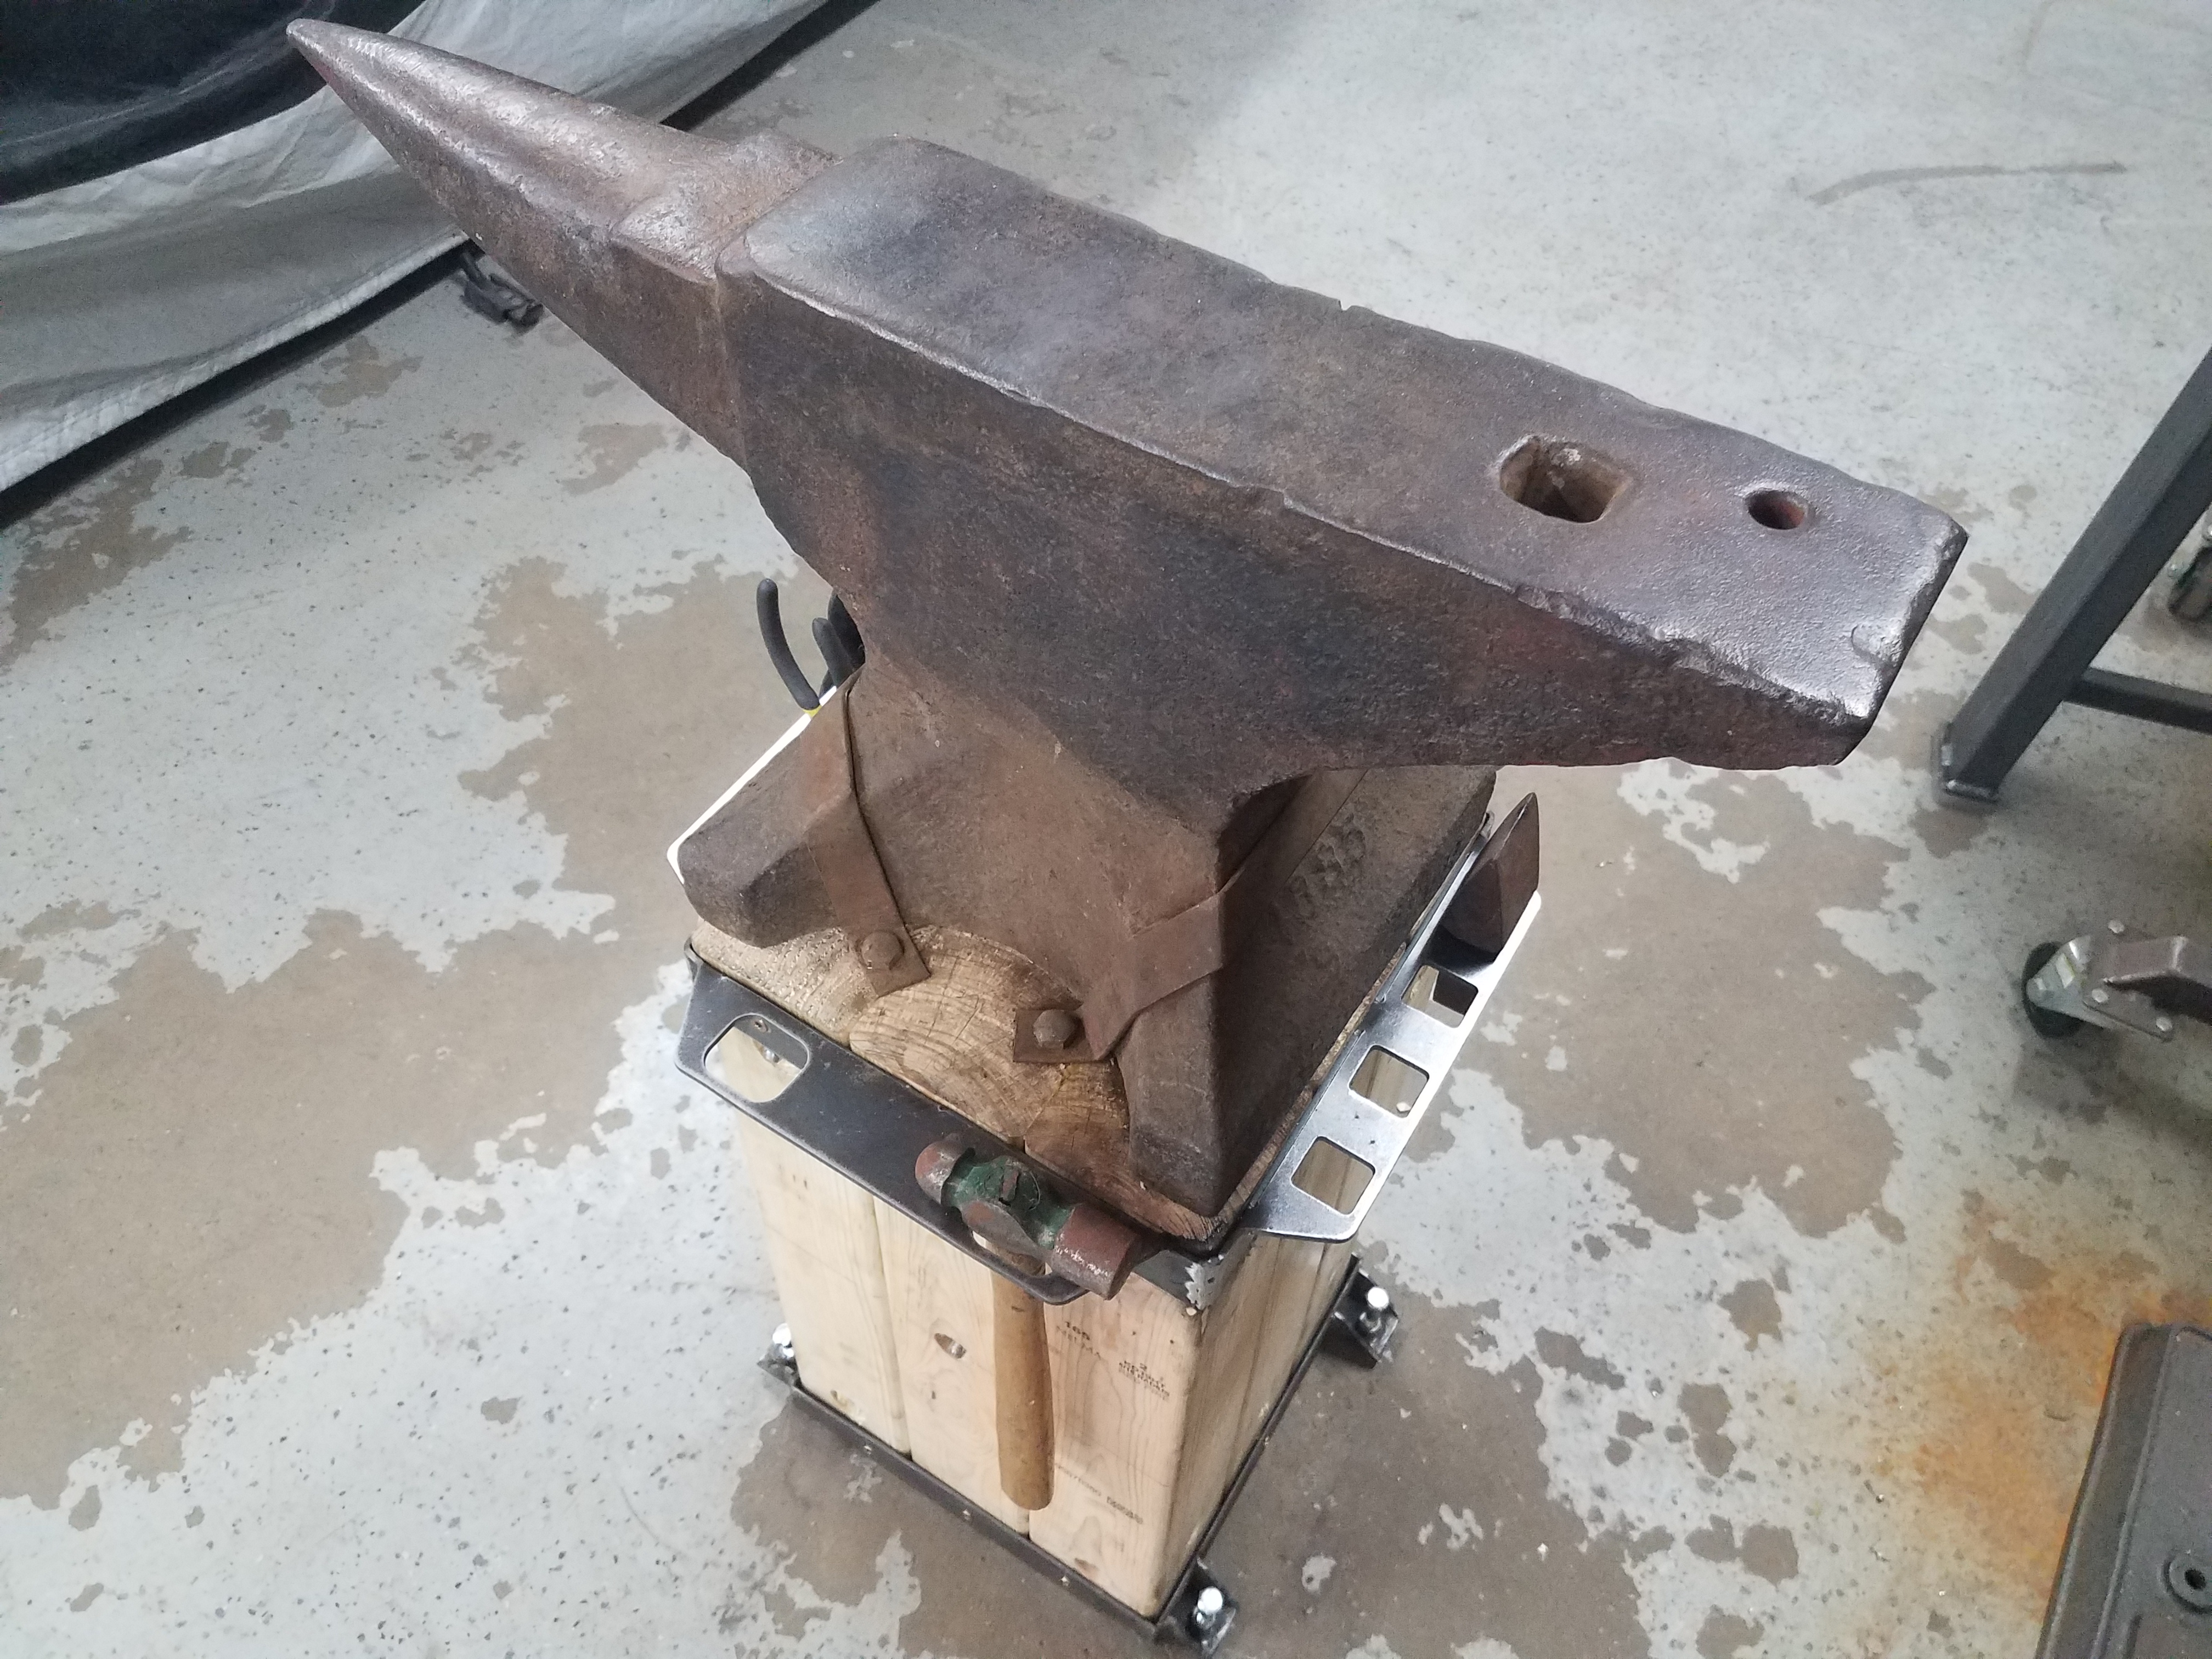
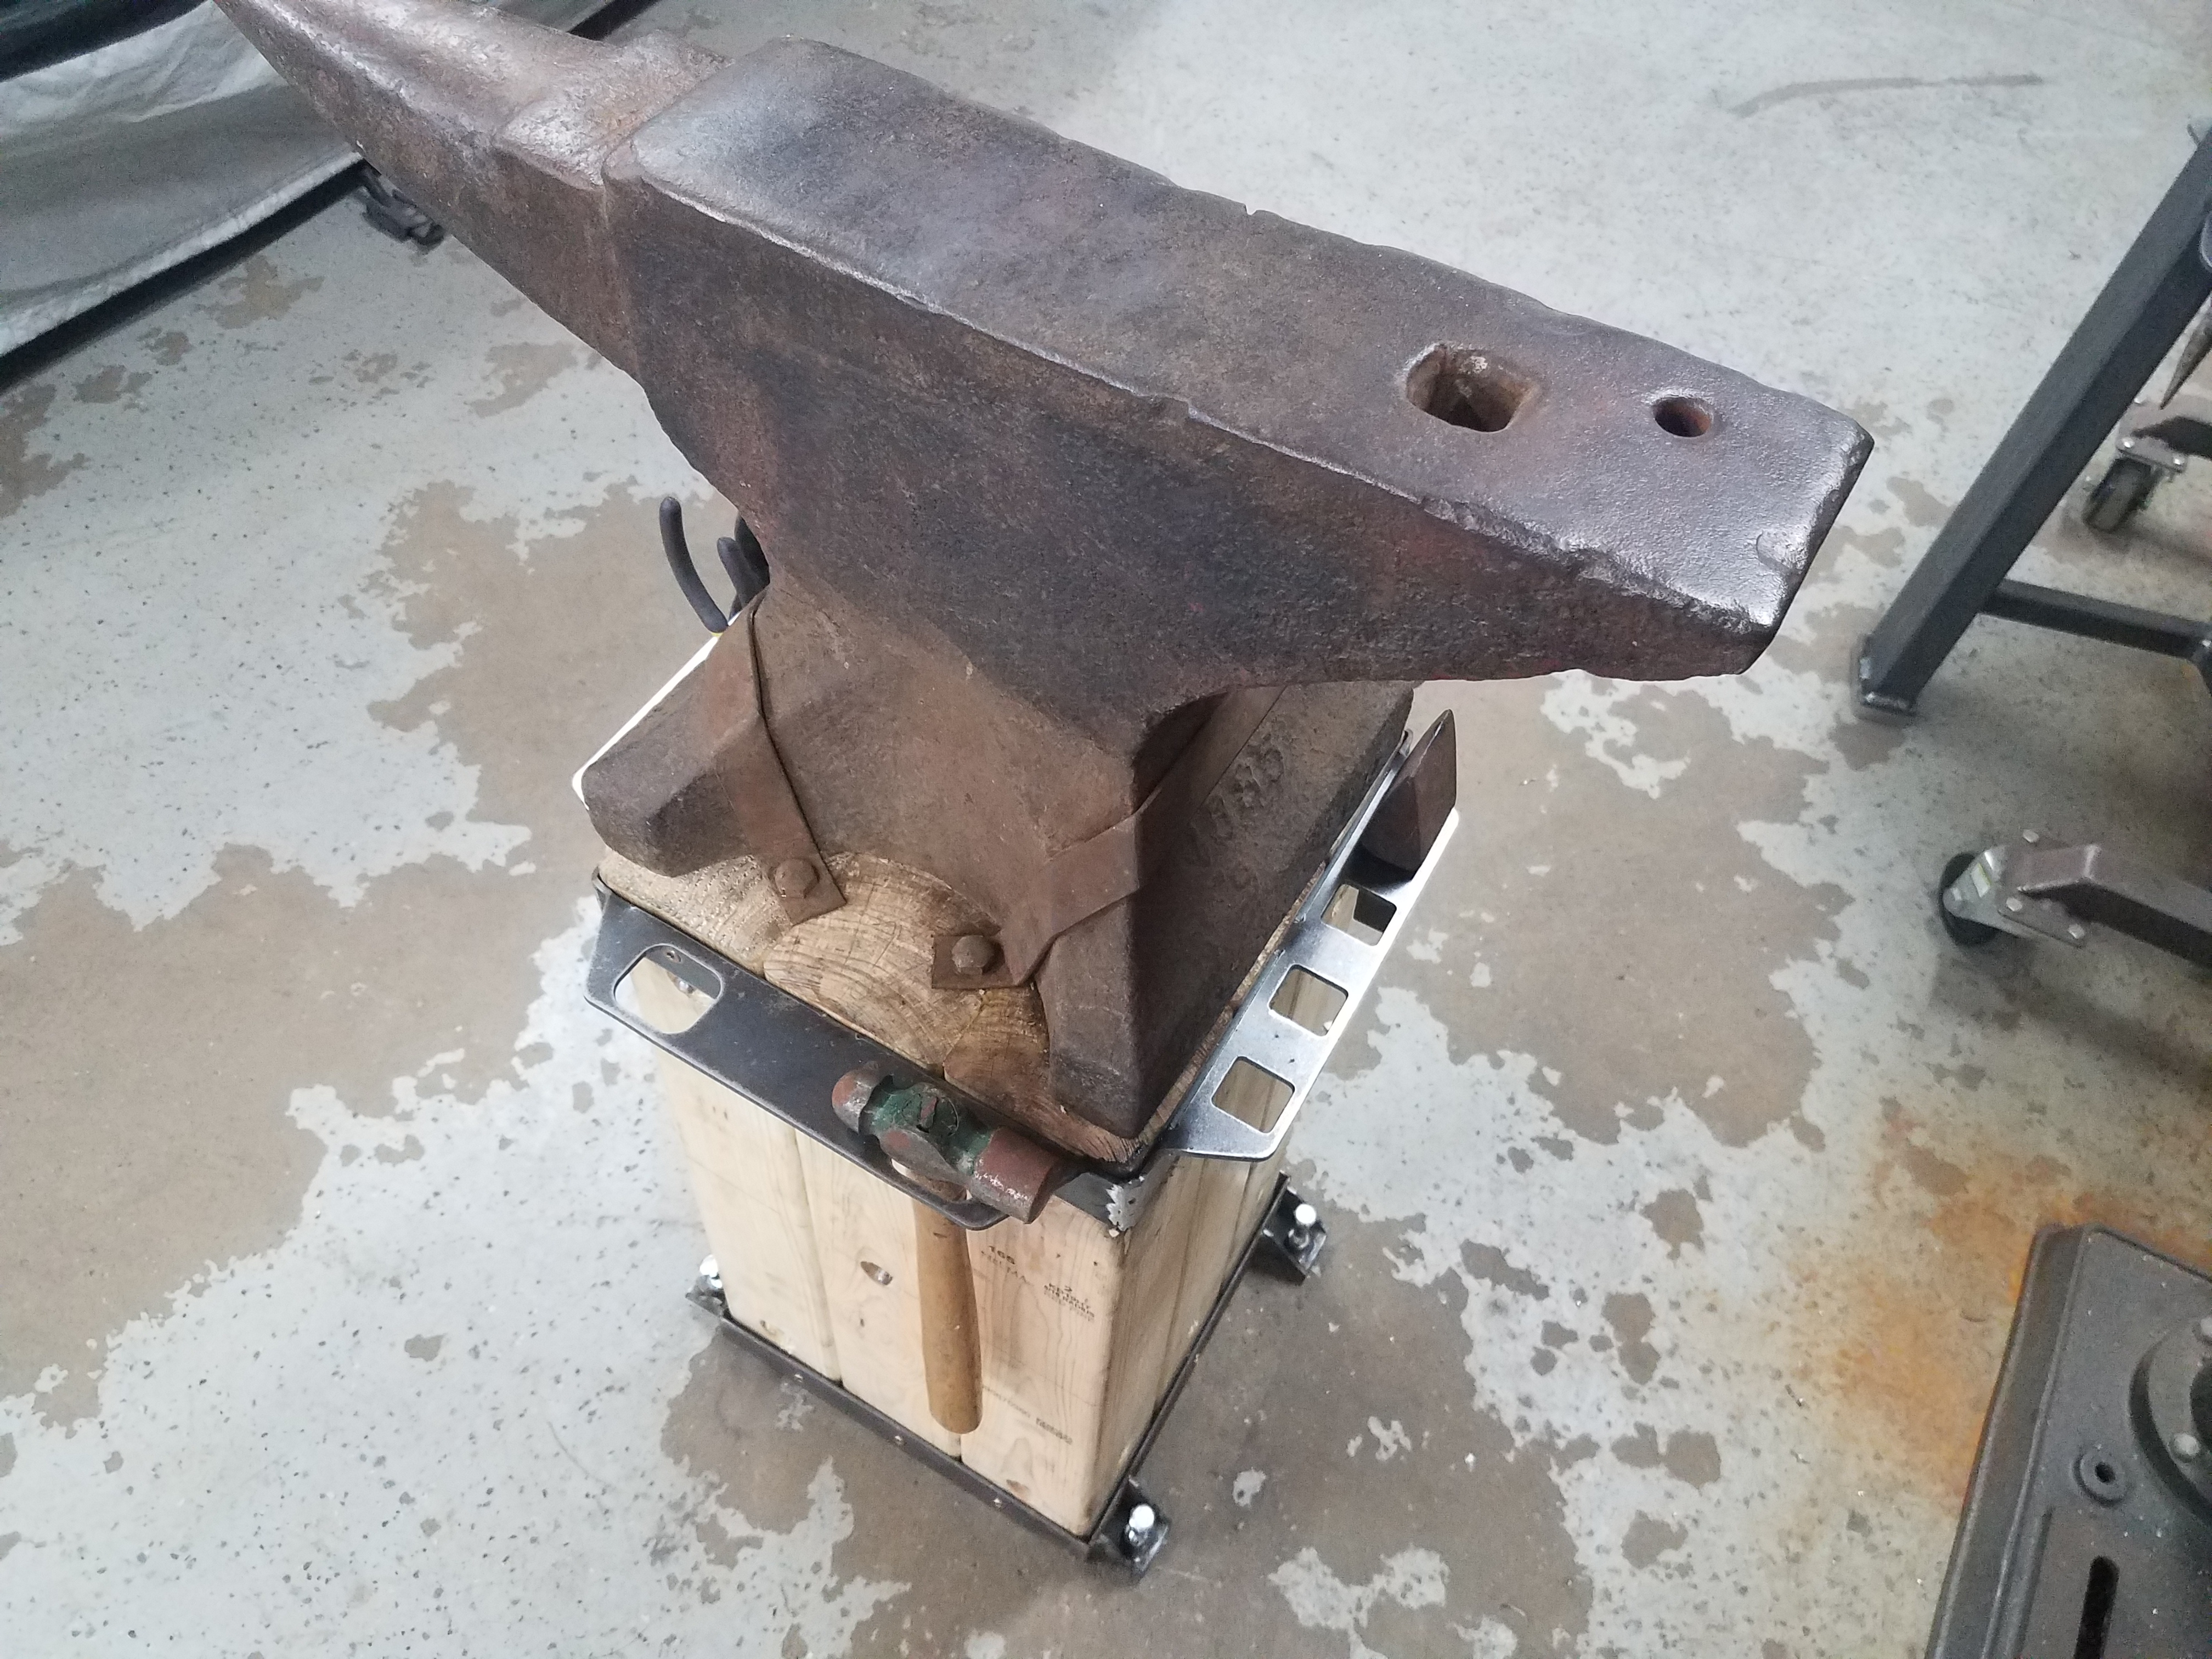
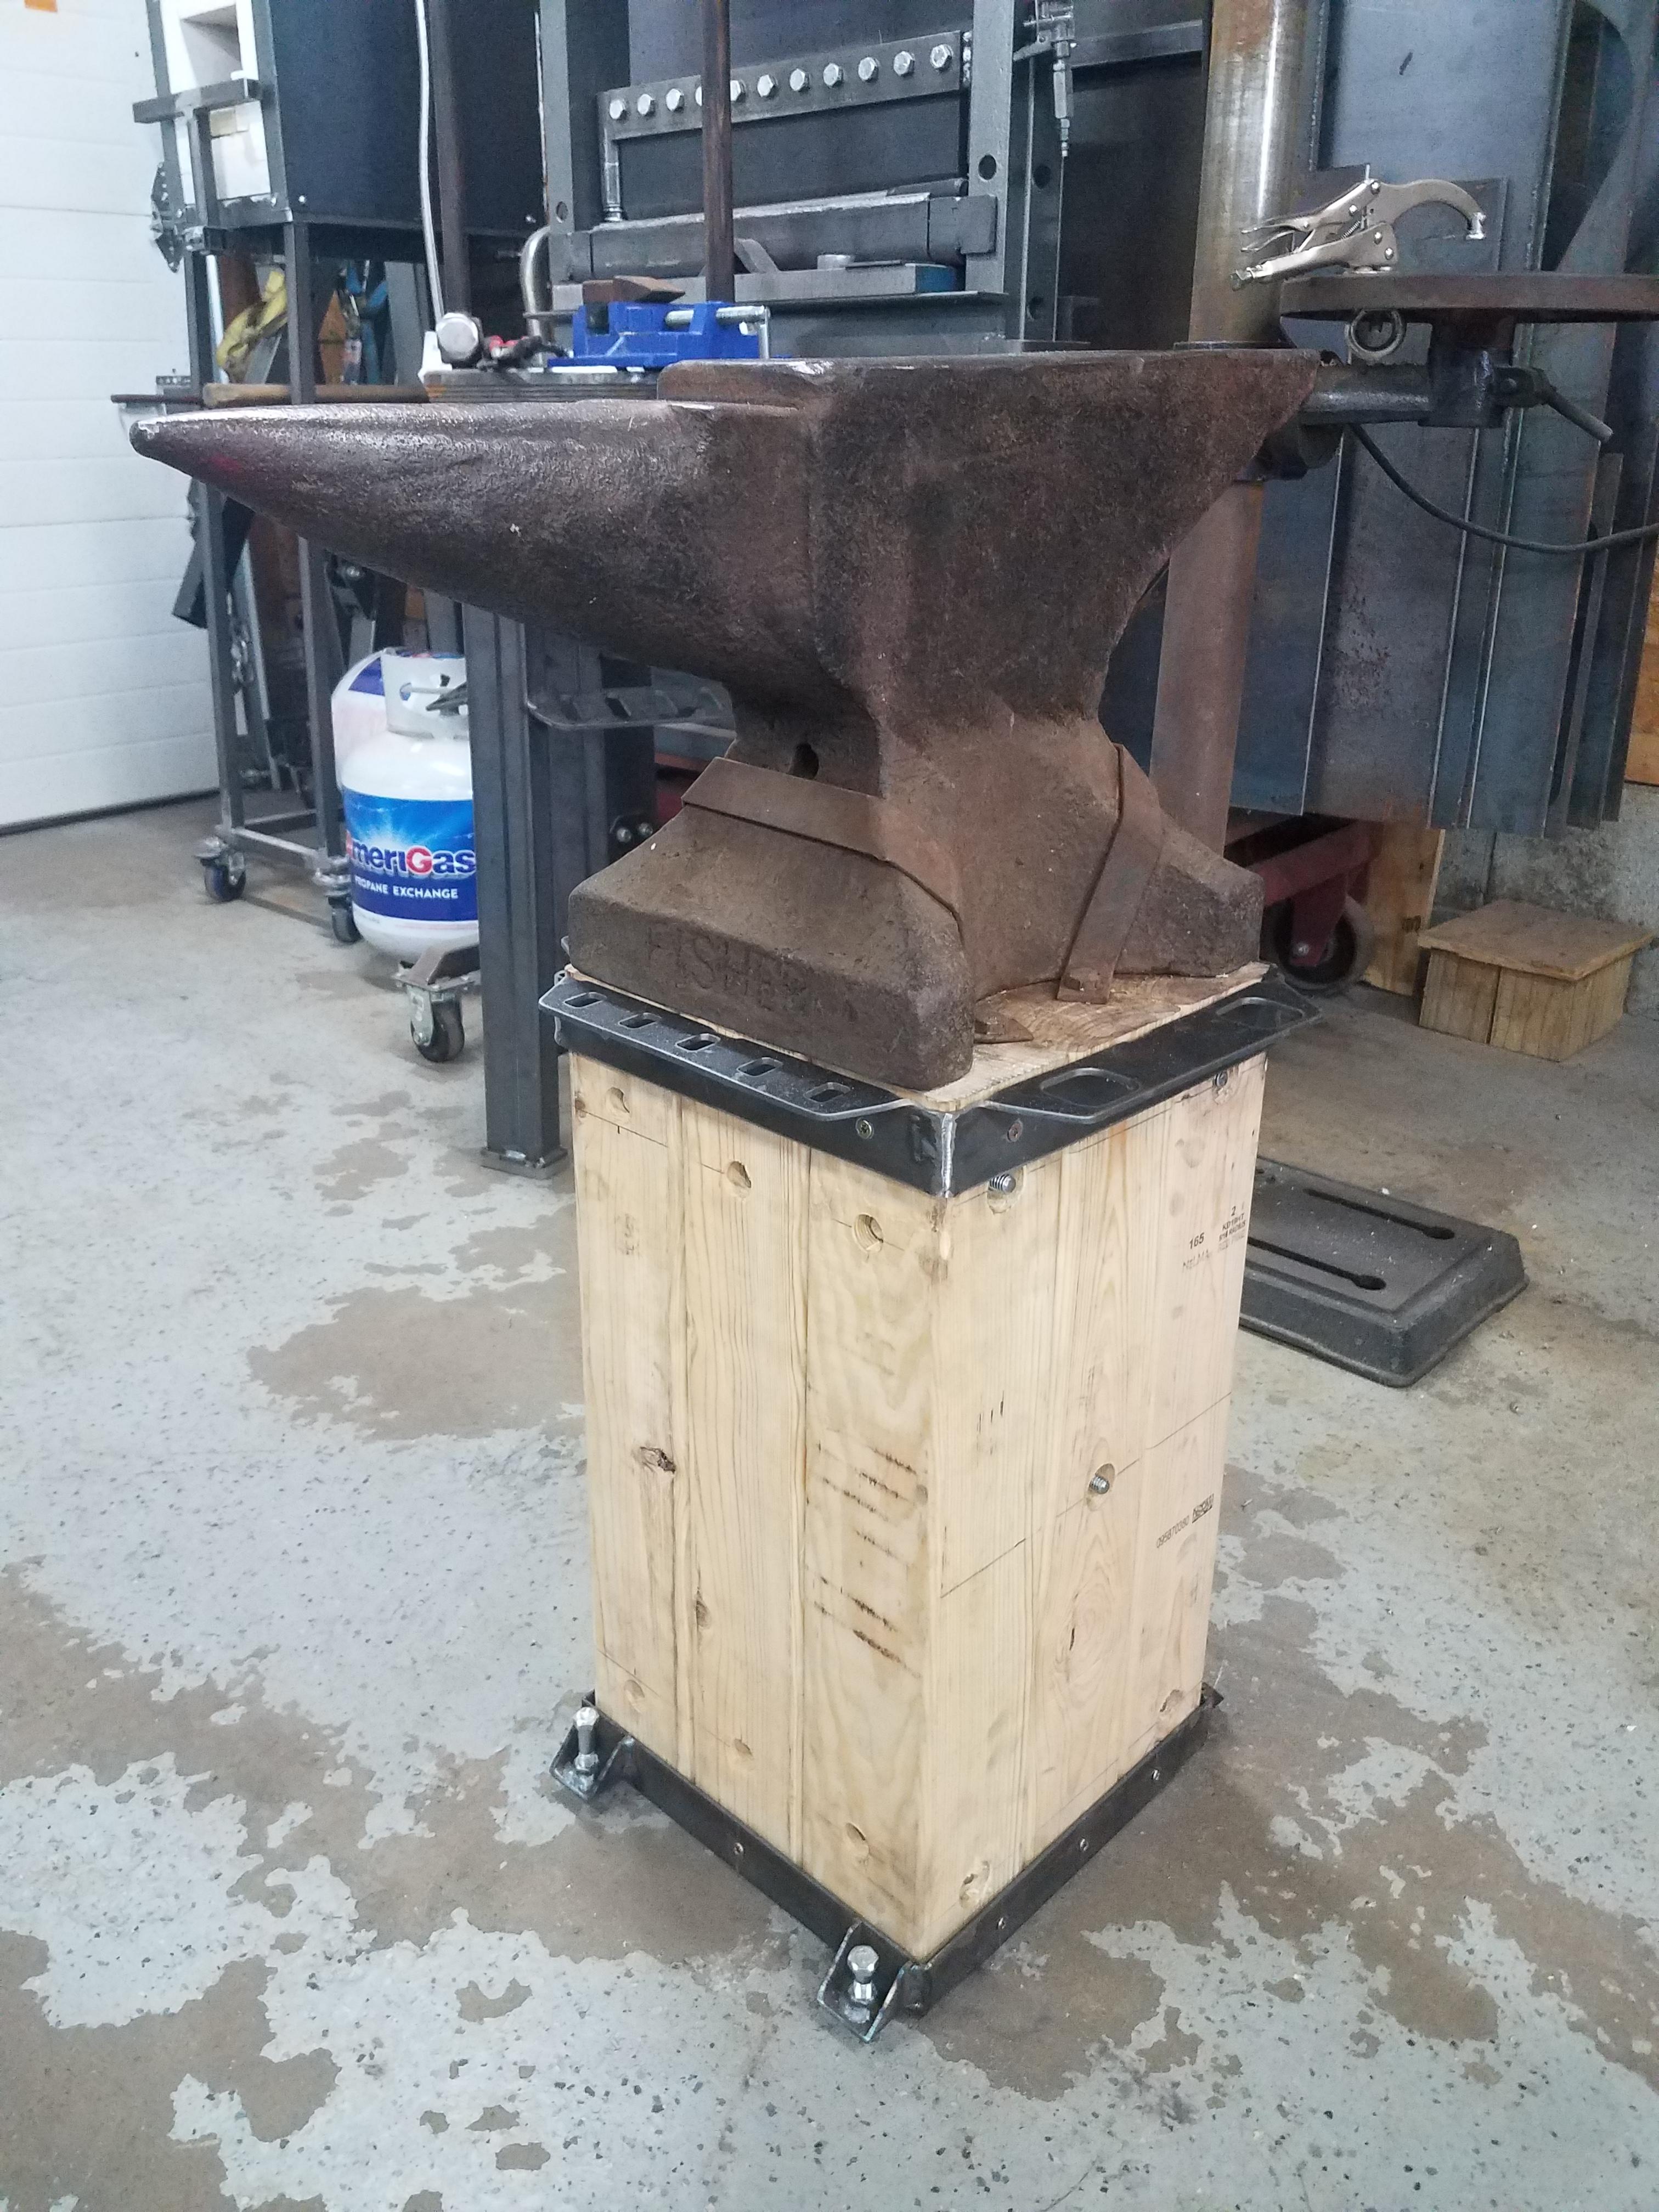
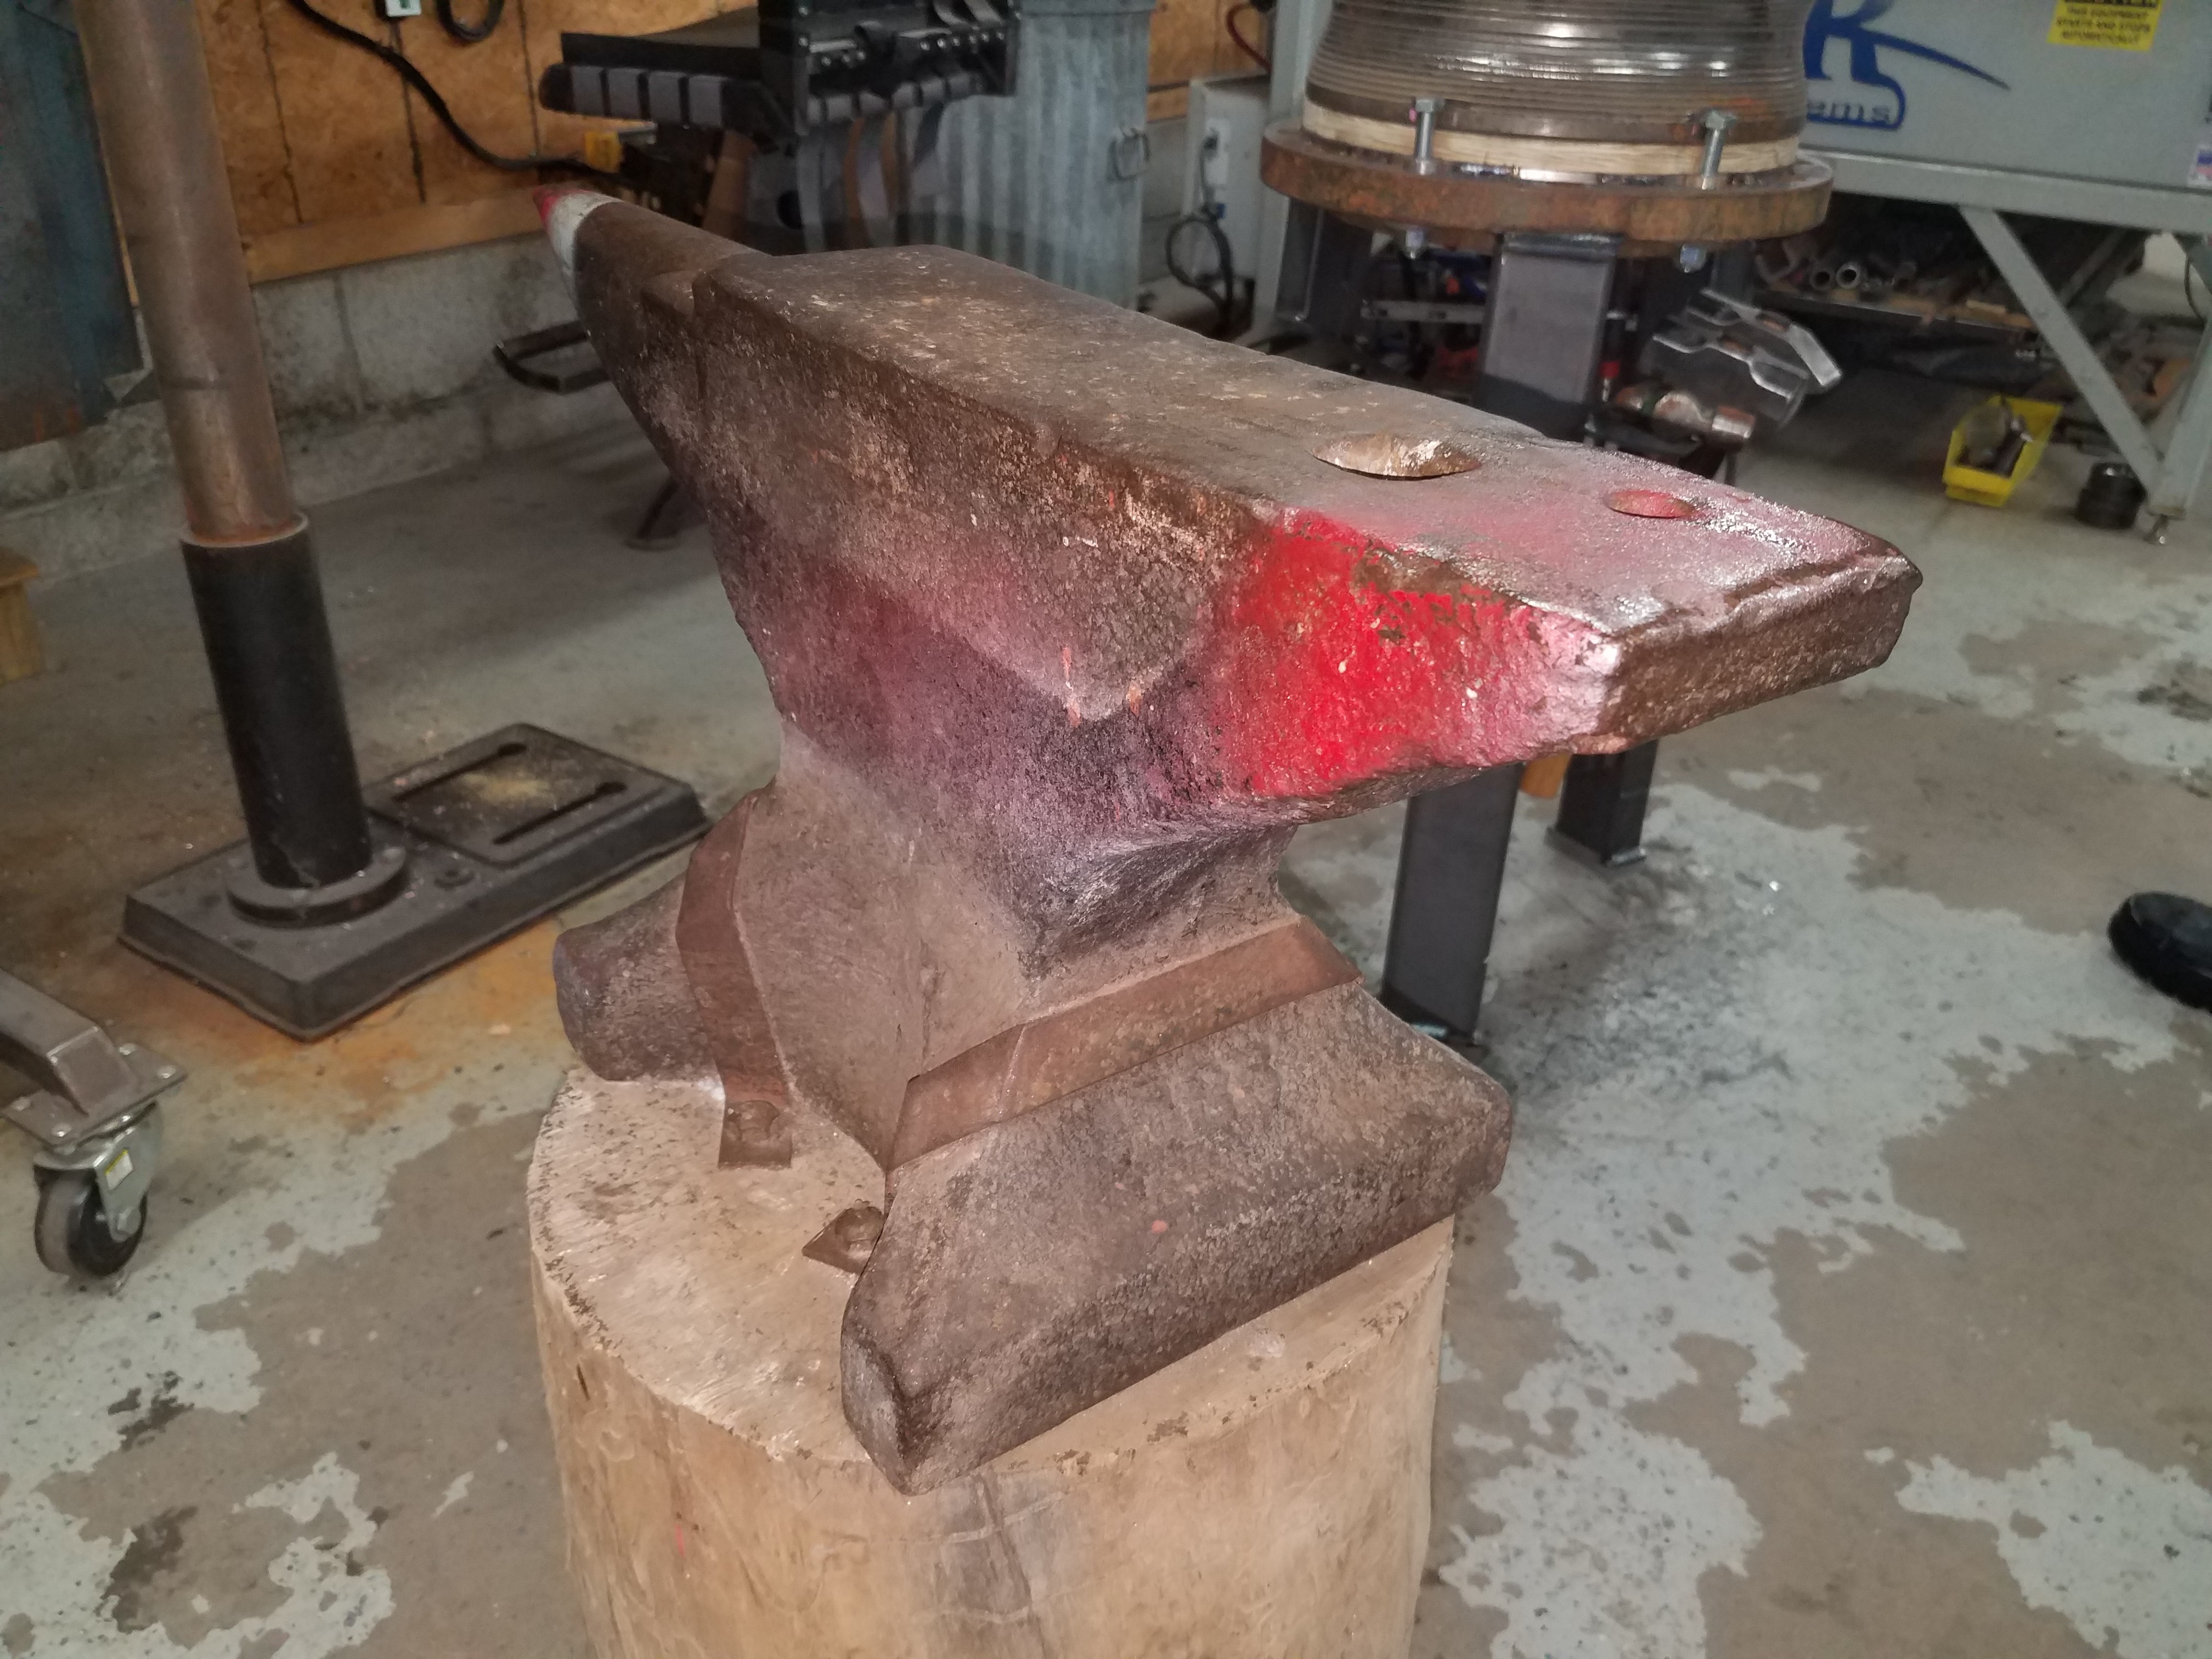
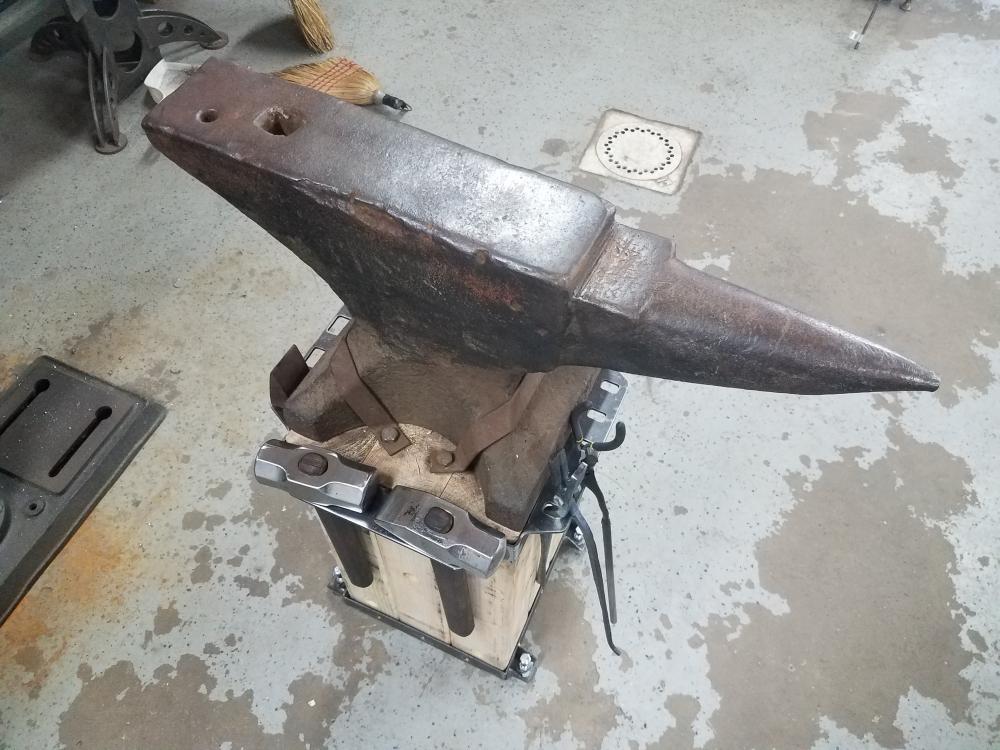
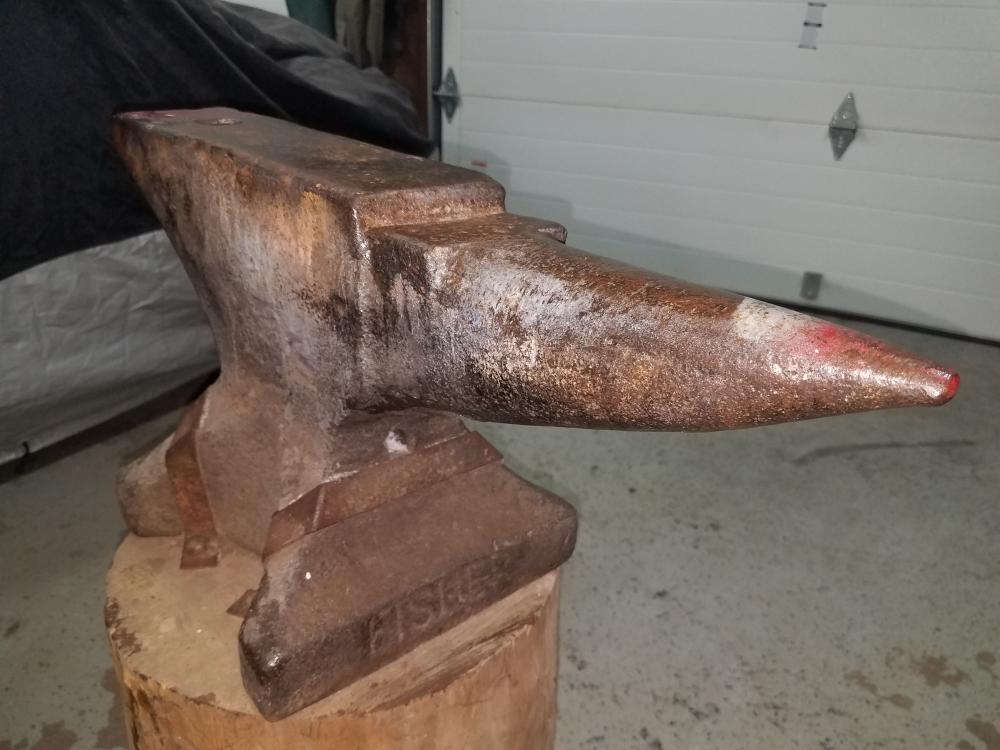
New stand I just finished up for my Fisher anvil. 4 x 4's glued and lagged together in groups of threes, then those 3 groups glued and bolted together with 3/8" all thread. Cut out holders on the plasma for some hammers, tongs, pliers and hard hole tools for the top, and and an angle iron frame for the bottom with 4 corner bolts to take any wobble out due to my concrete floor.


-
I believe it is right around 150#, cannot remember off hand the exact weight. Frosty, its 1 1/8", I do plan on welding in the remain sides to make a hardy hole on that as well.
-
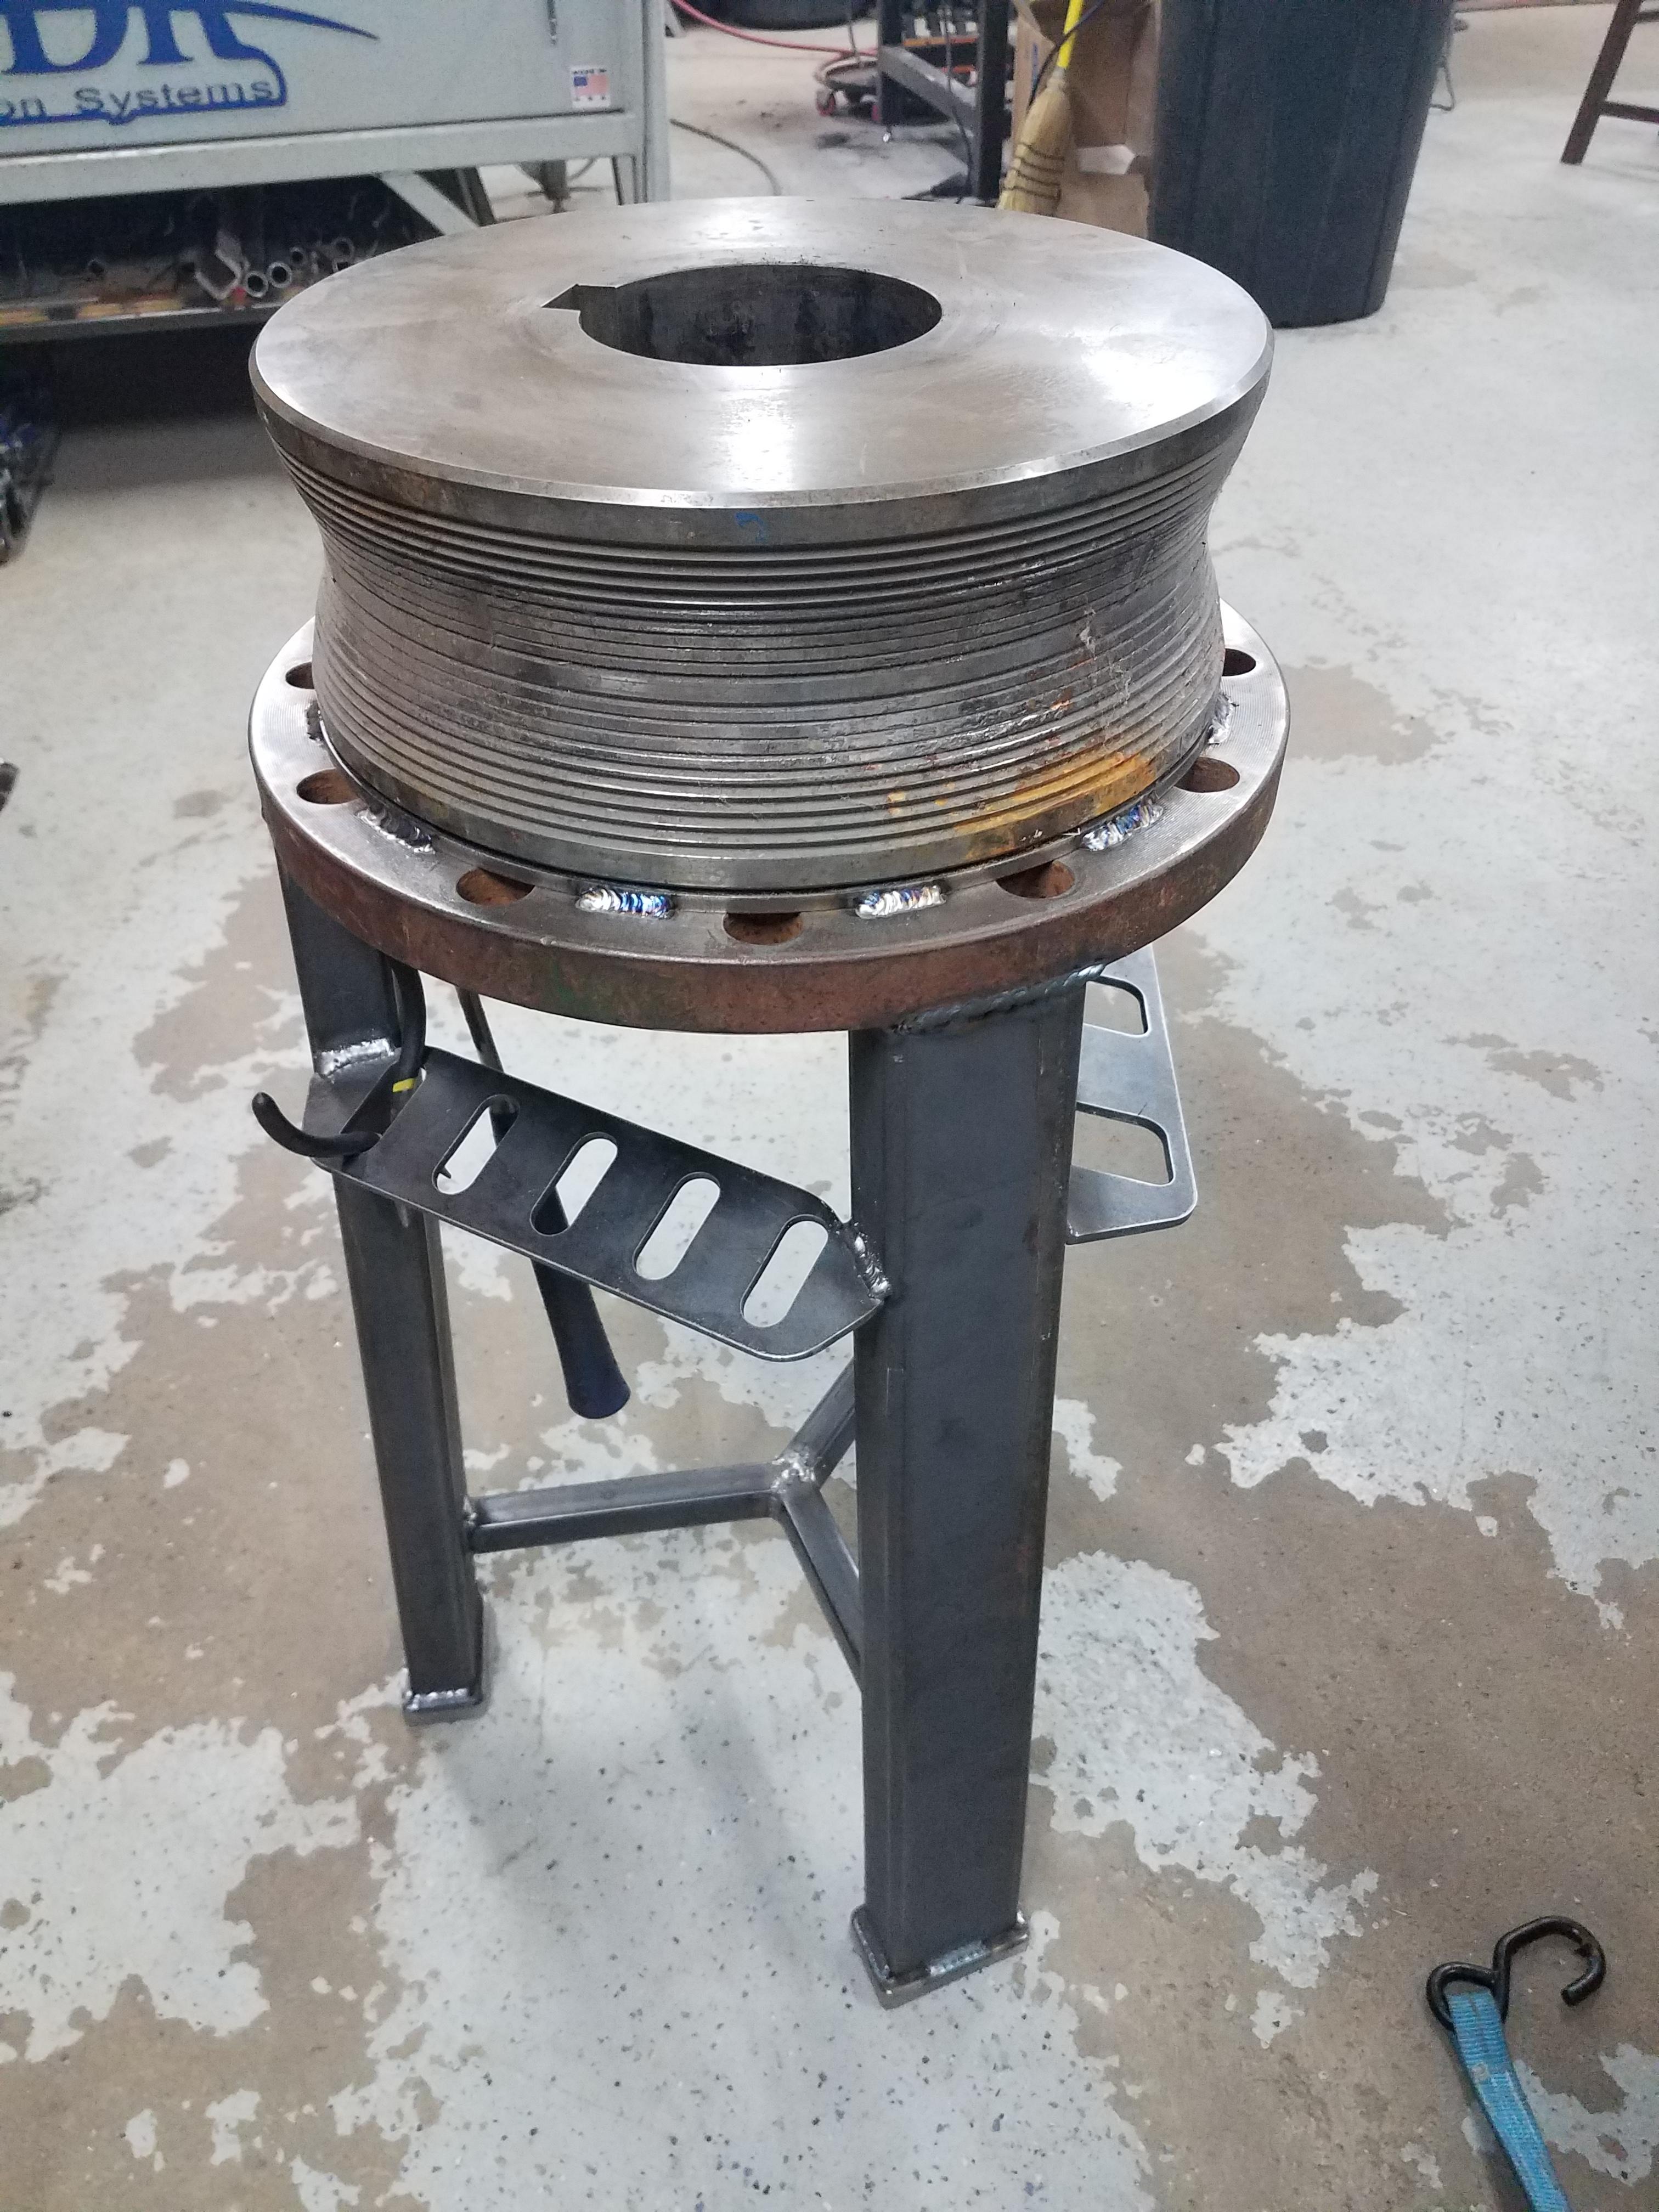
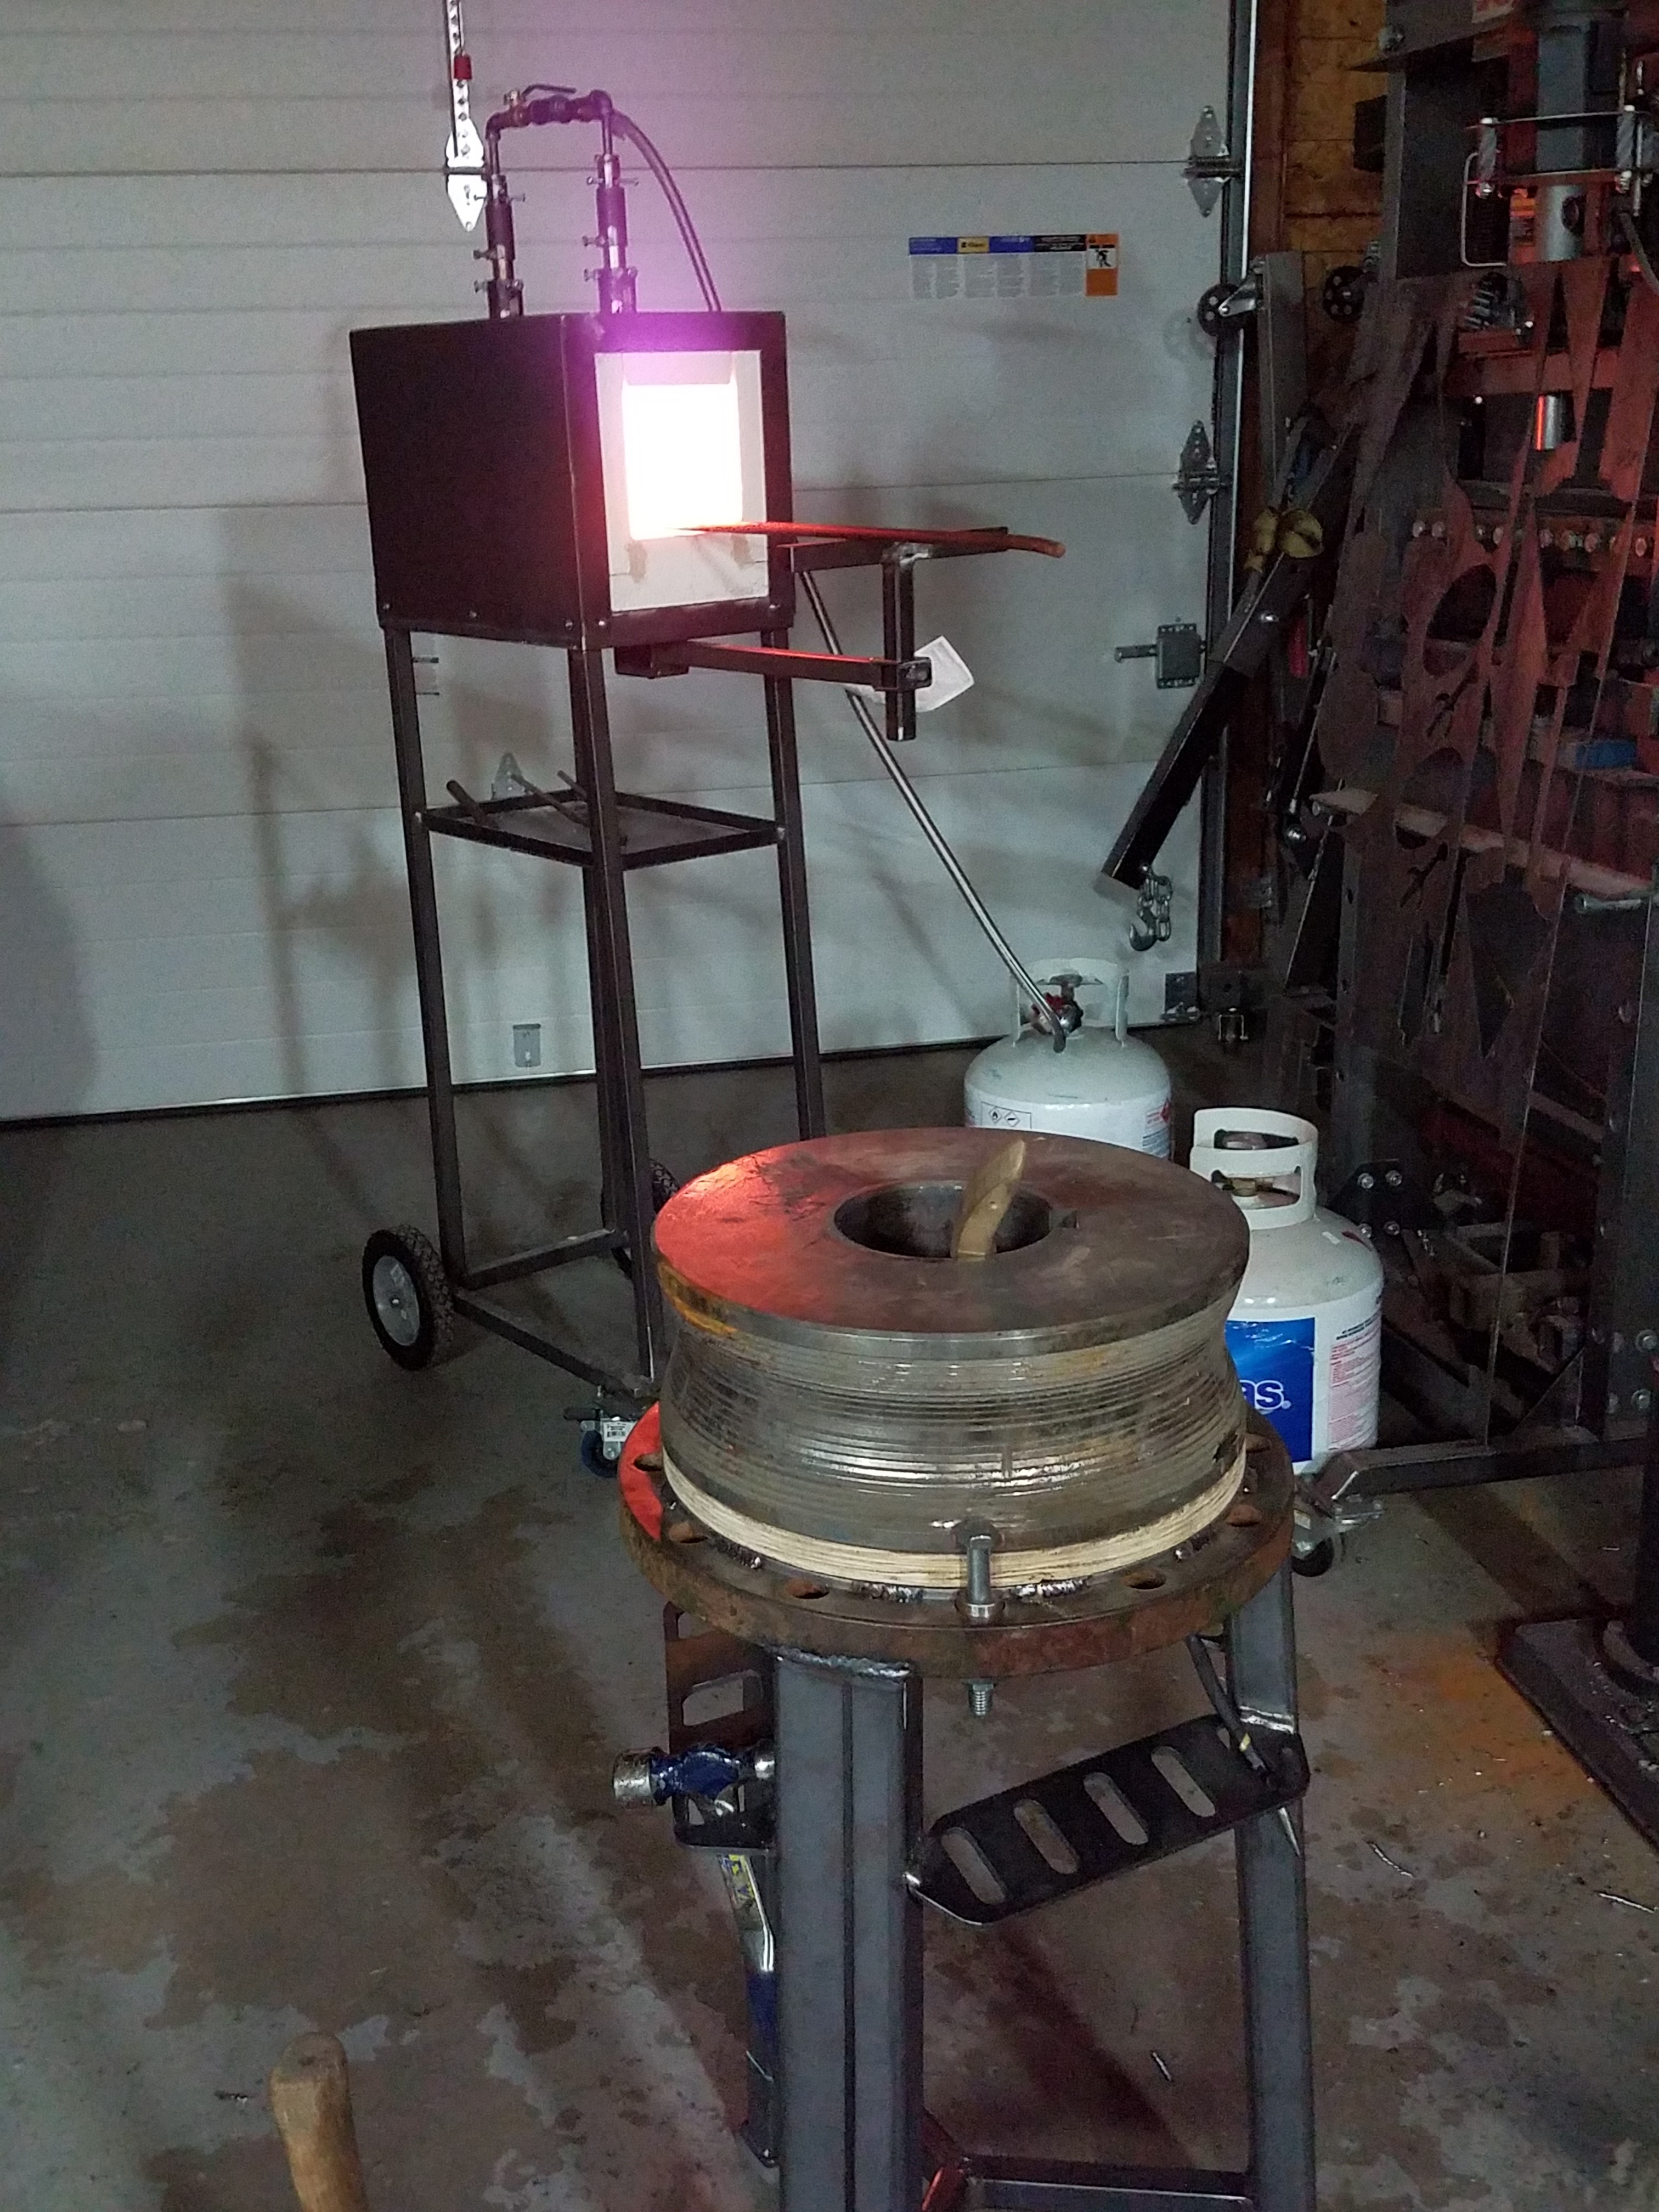
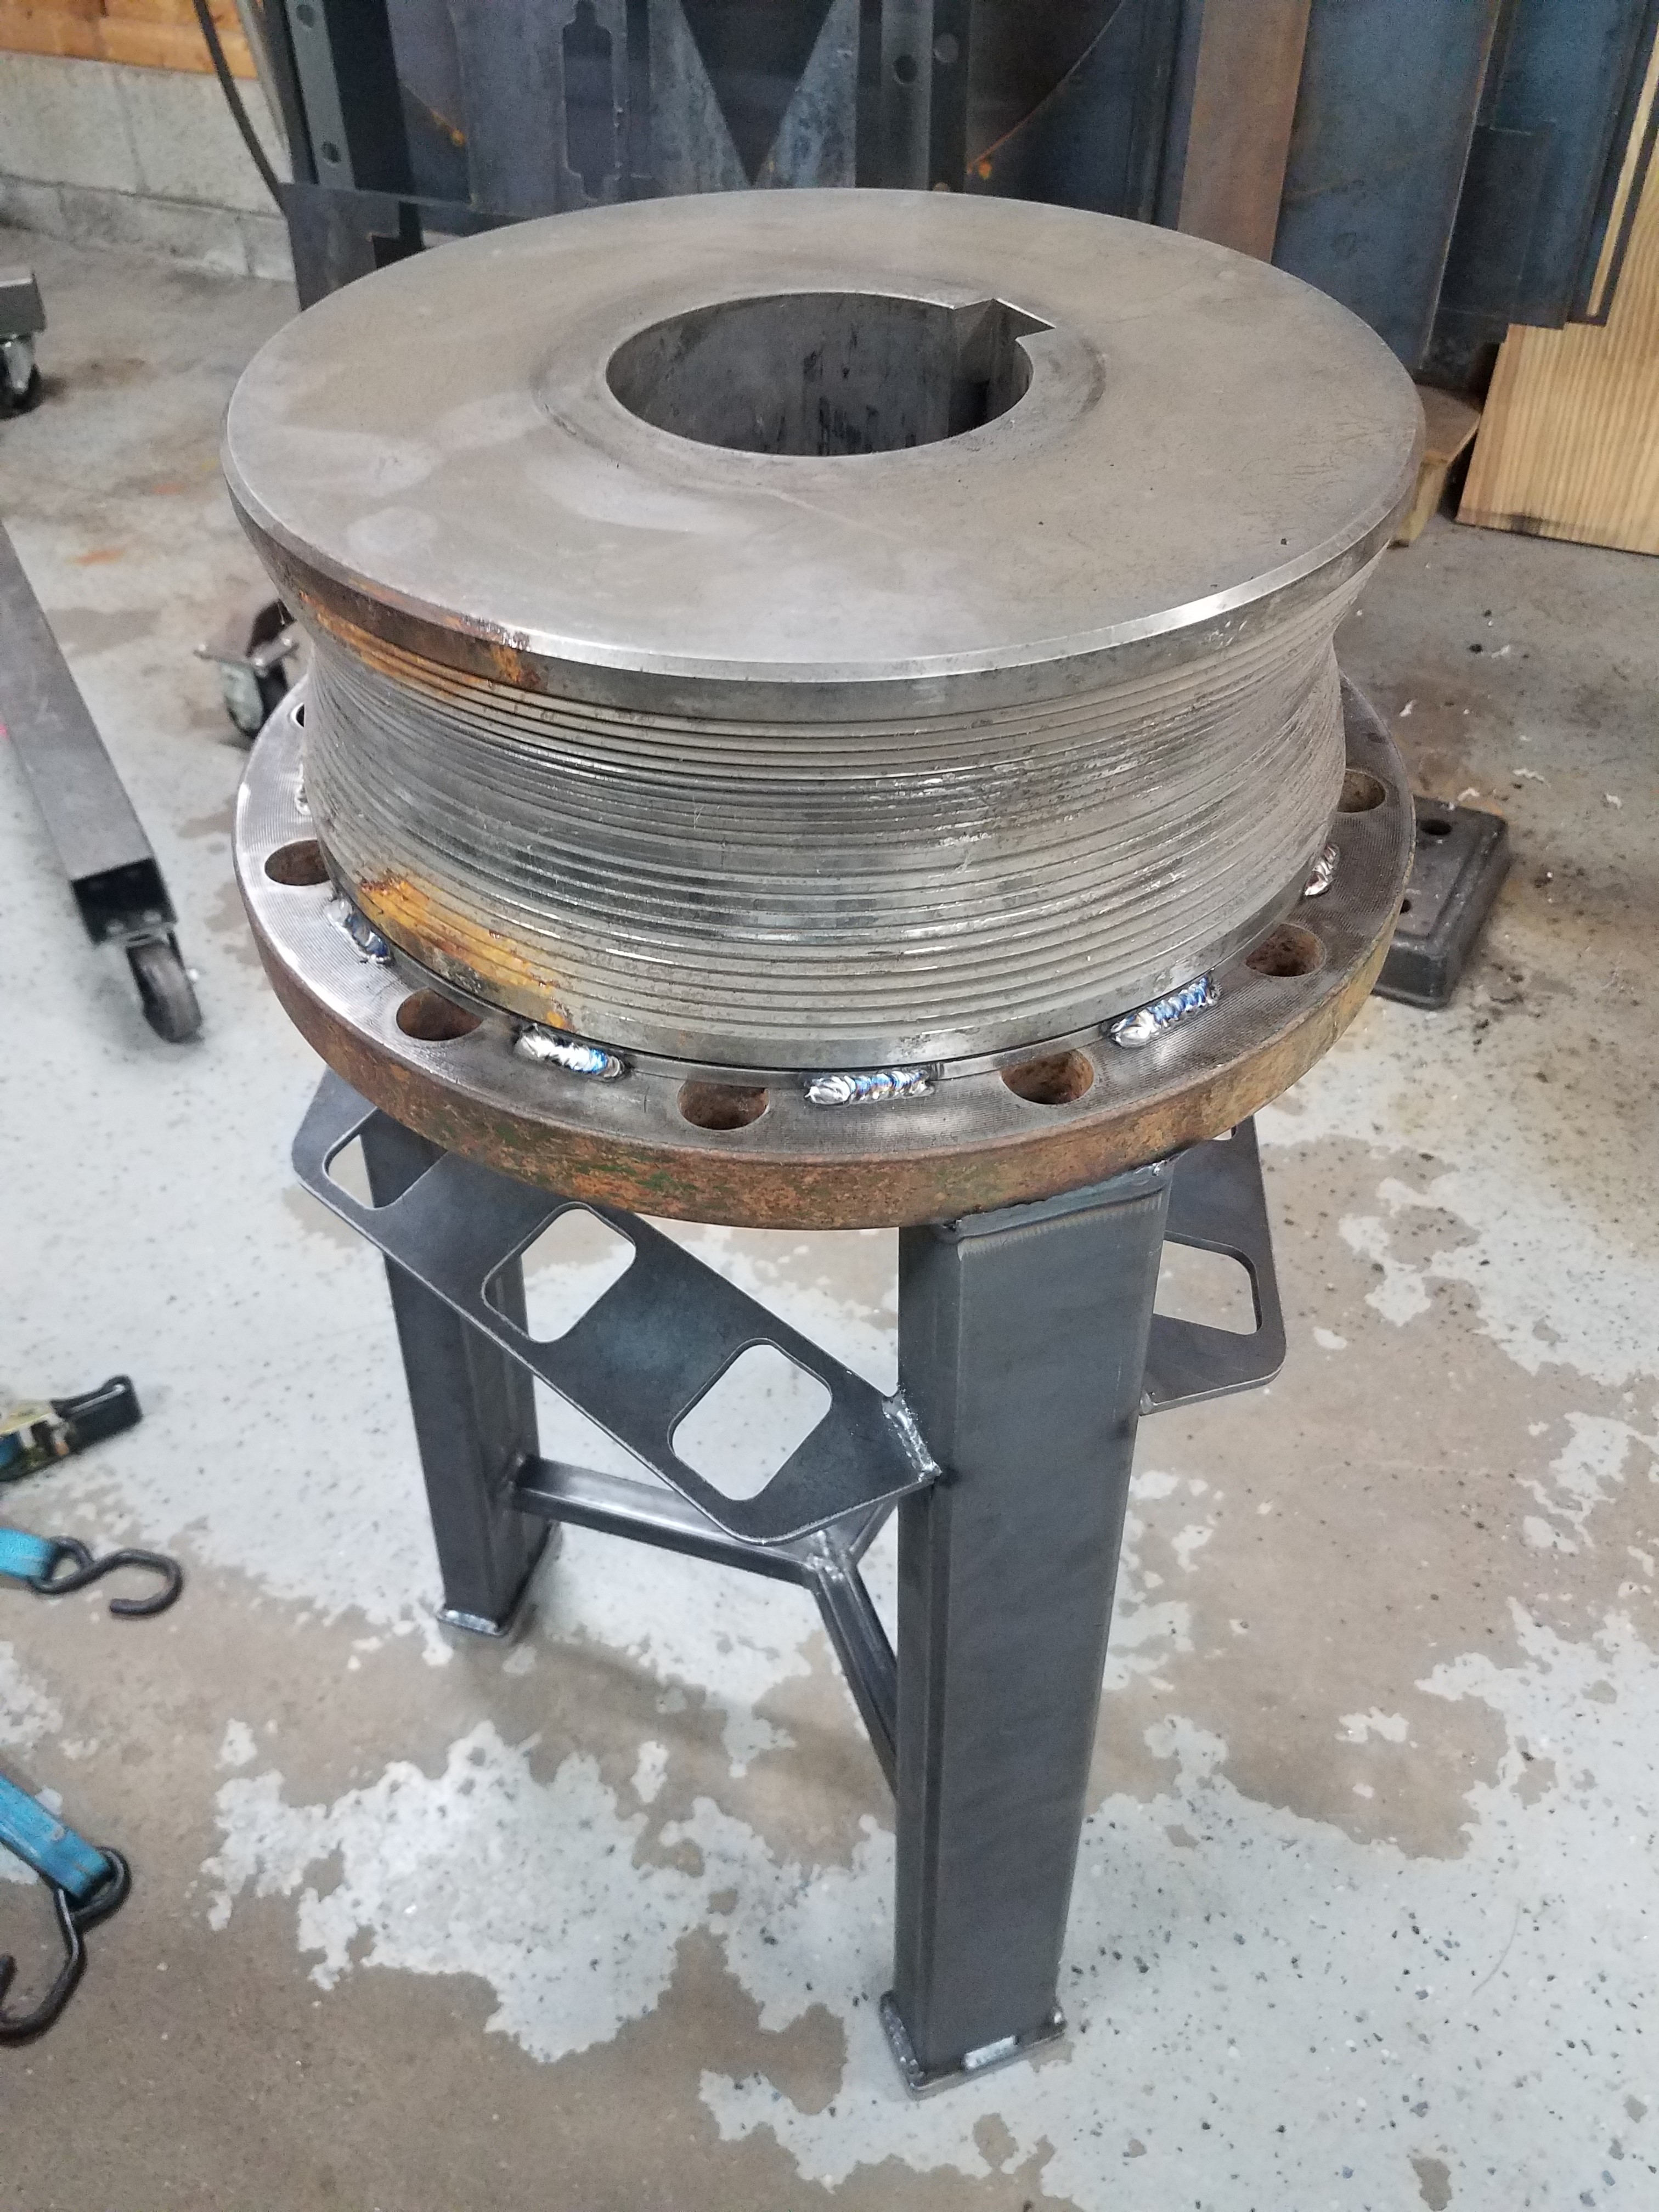
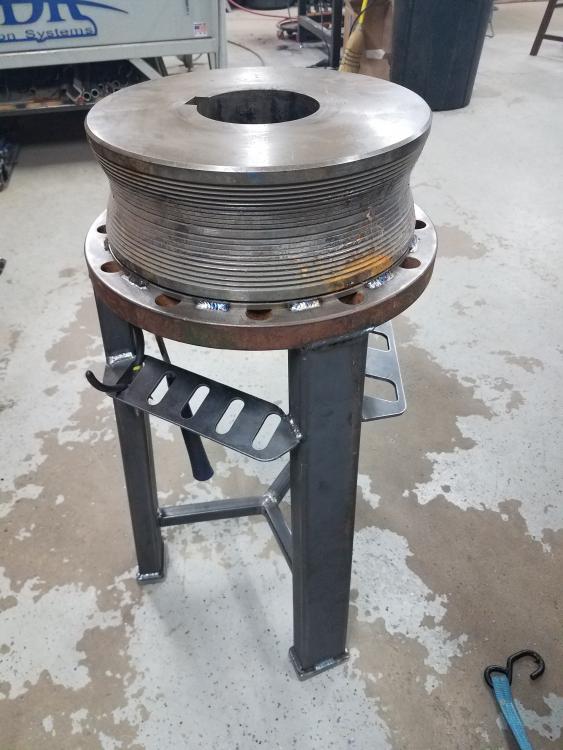
This is my improvised anvil that I just recently started forging with. Built a steel stand with hammer and tong holders built into it. It is a large roll for a turning machine from a job I had previously had that they were tossing because it had a crack in it at the corner of the keyway slot. It is hardened 4140.


-
I'll look that one up and post it up there. It sure is heavy and has great rebound without any ring.
-
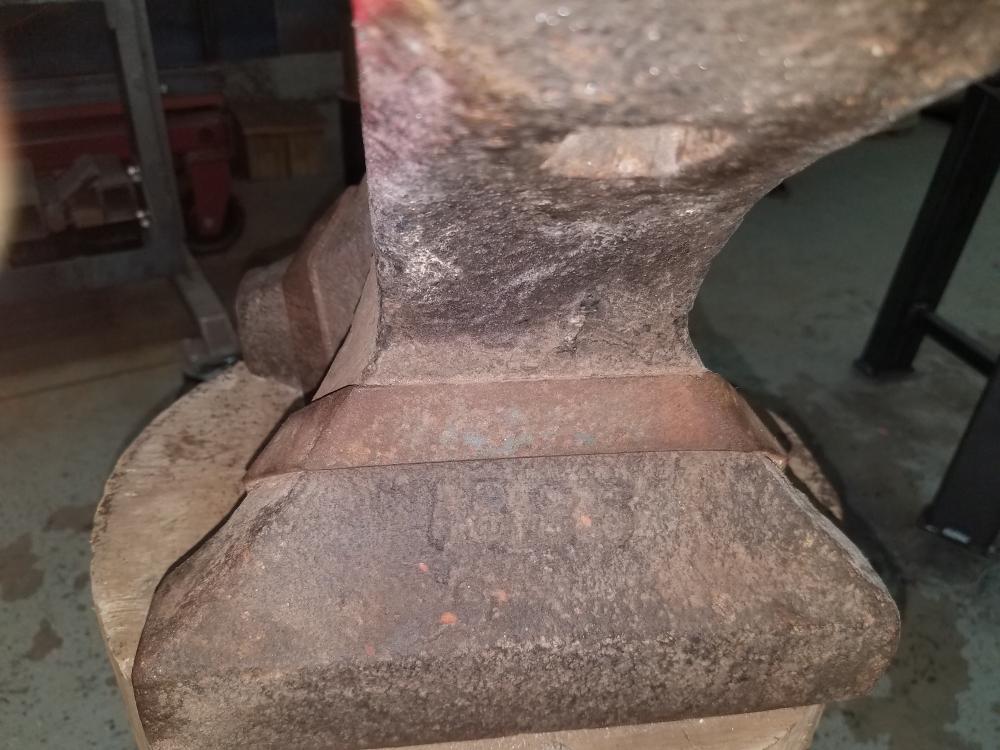
Frosty, It definitely works well. Great rebound and no ring! Its 1 1/8" key way, and that has been my plan to may a nice hardy hole out of it. I kind of got distracted last week when I was gifted an 1885 Fisher anvil, now my focus has been on getting a new stand built for it since the log it was on was really soft and un level on the bottom. Going for wood for this stand.
-
Red, heres a couple pictures of the knife once oiled up. Pictures arent the best, tlmy wife excels on the camera.

-
SLAG and Thomas The handle is dyed and stabilized maple burl wood. My absolute favorite handle material with so many curls and eyes everywhere. I know exactly what you mean about the torment of lost souls, it is not the first time I have heard someone say something similar. The blade material is 1095. Thanks Daswulf. Gotta get over to my shop to check it out and try out my ASO and the newly acquired free Fisher anvil. Feel like I need to watch you forge some more so I can learn. Red, I appreciate the kind words. I have been doing this for about 2 years, maybe a little bit longer, sold maybe 20 blades total, given away alot. This knife here was stock removal, not forged. Still working on perfecting my forge of knives, first few looked like complete trash, but I will definately post the first forge one up once Im happy. Ill get some pictures up possible later this evening as I just oiled it up earlier, I have to get my wife to get the pictures taken for our business page on facebook. She takes much better photos than I do.
-
Just finished this one up this evening. Just need to oil the handle and finishing sealing it, and oil the blade. Oddly enough this is my first hidden tang that wasnt a Wa style handled kitchen knife.

-
They make something called a Multi Tool Grinder for bench grinders. I started out making knives with one of them before I built my 2 x 72 grinder, and it did quite well. I think they are reasonably price IIRC and come in different sizes, I used the 2 x 36 and still have it.
-
Three leg stand for my ASO. I built in 6 hammer holders and 5 tong or plier holders inbetween the legs. The holes on the base plate work well for holders of different things as well.

-
That is a feed roll for a turning machine that turned 4" diameter titanium. Think the reverse of a lathe, bar was fed into machine with a rotating head that removed the material. Its hardened 4140, 5" thick and 13.5" diameter. The place I worked at before I got laid off due to the pandemic was tossing it due to a crack at the keyway slot. I asked if I could have it and they said yes. It sat on my floor for about a year, and when I couldnt find a decent anvil, I got the bright idea to use it as my anvil. Works quite well, has crazy rebound and doesnt ring.
-
Hey ummmm, nope, nothing here. Nothing but gratitude for your help getting my burners optimized to the best they could be. Been awhile since I posted, but I did however drop down to the .023 nozzles, and I cannot say how nice the burners work now. I forgot to post the results, since the burners are now in the forge, and most my time has been spent learning to forge things. Thanks again Mikey, I really appreciate the help and patience while working through the issues I had with me.

-
Just got a great deal on a Fisher. A gentleman that my daughter is in Taekwondo with his son knows I make knives and have recently gotten into forging, approached me and asked if I wanted an anvil. I said of course Im interested, how much would you like for it. Says nothing, Its sitting in my sisters basement and was fathers and Id rather give it to someone who can use it and will use it, but he also said I have no idea what kind it is. Low and behold when I go to pick it up, its a Fisher. I myself have not figured out what its weight is or when it is from, but its a little beat up, but Im not complaining. Still need to build a new base, the stump its on is too short and wobbles terribly. Any one have any idea how old and how much it weighs? The second one is my ASO that I just recently started forging with. Built a steel stand with hammer and tong holders built into it. It is a large roll for a turning machine from a job I had previously had that they were tossing because it had a crack in it. It is hardened 4140.


-
I most likely will step down one more, definitely seems to be less of an intense flame ( not sure if that means anything), and oddly much quieter than when I first started. Im going to get my hands on some .023 MIG tips, but the weld ship did not have any for some reason, smallest they had was .025. going to focus on finishing my forge and building a stand for my ASO that im going to use as an anvil for the time being. Thanks again Mikey, could not have gotten this far without all of your help. Phil
-
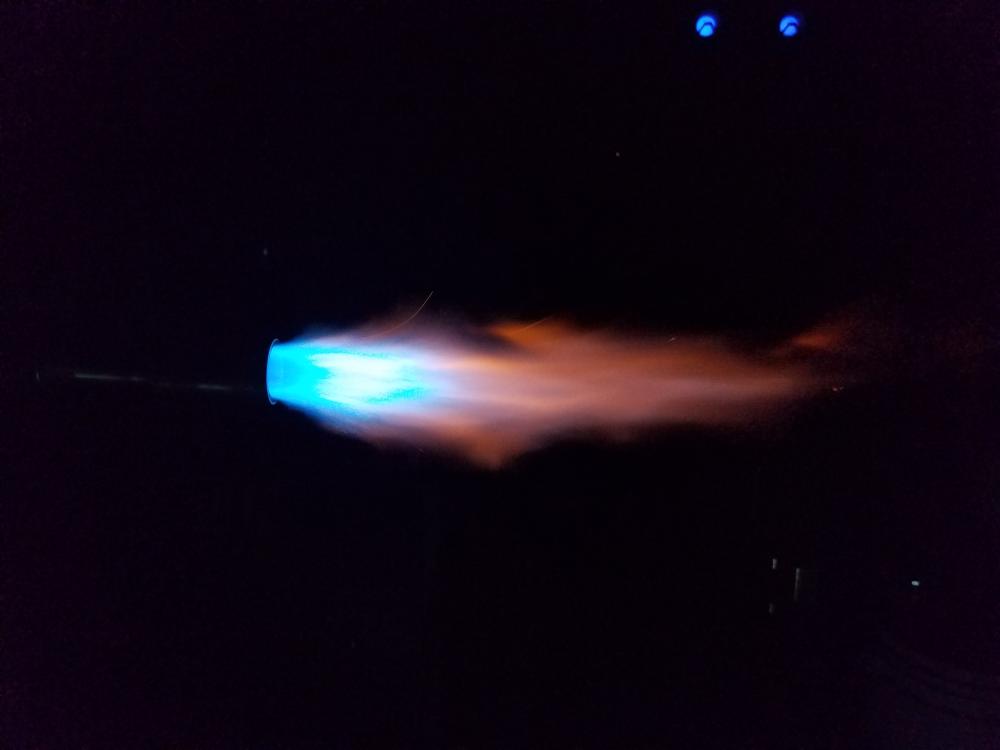
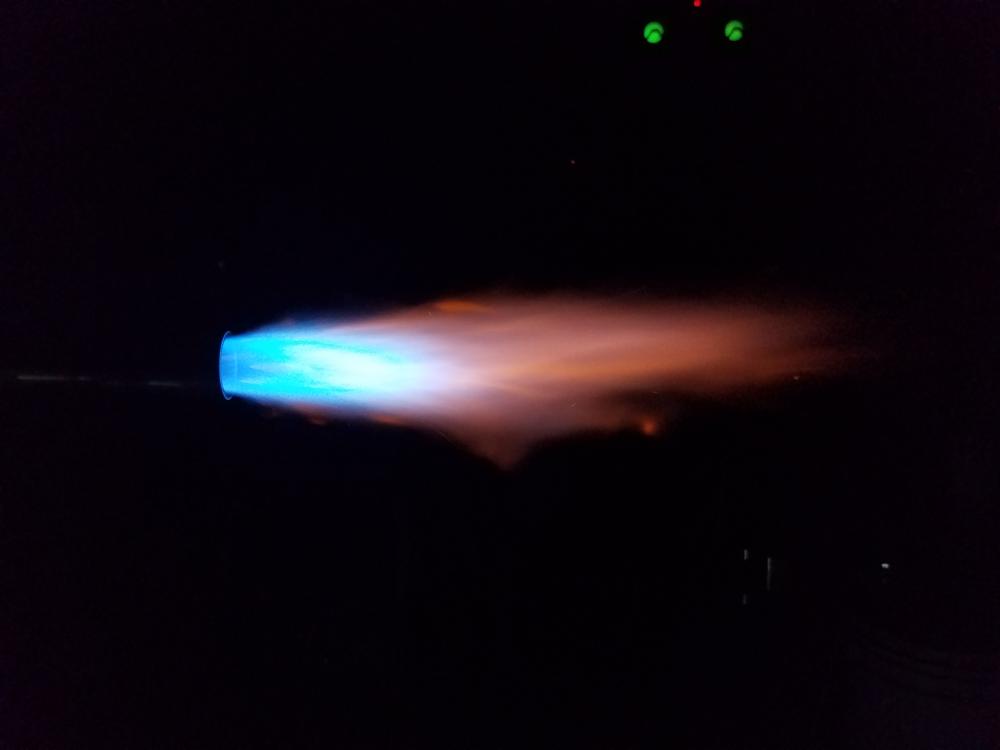
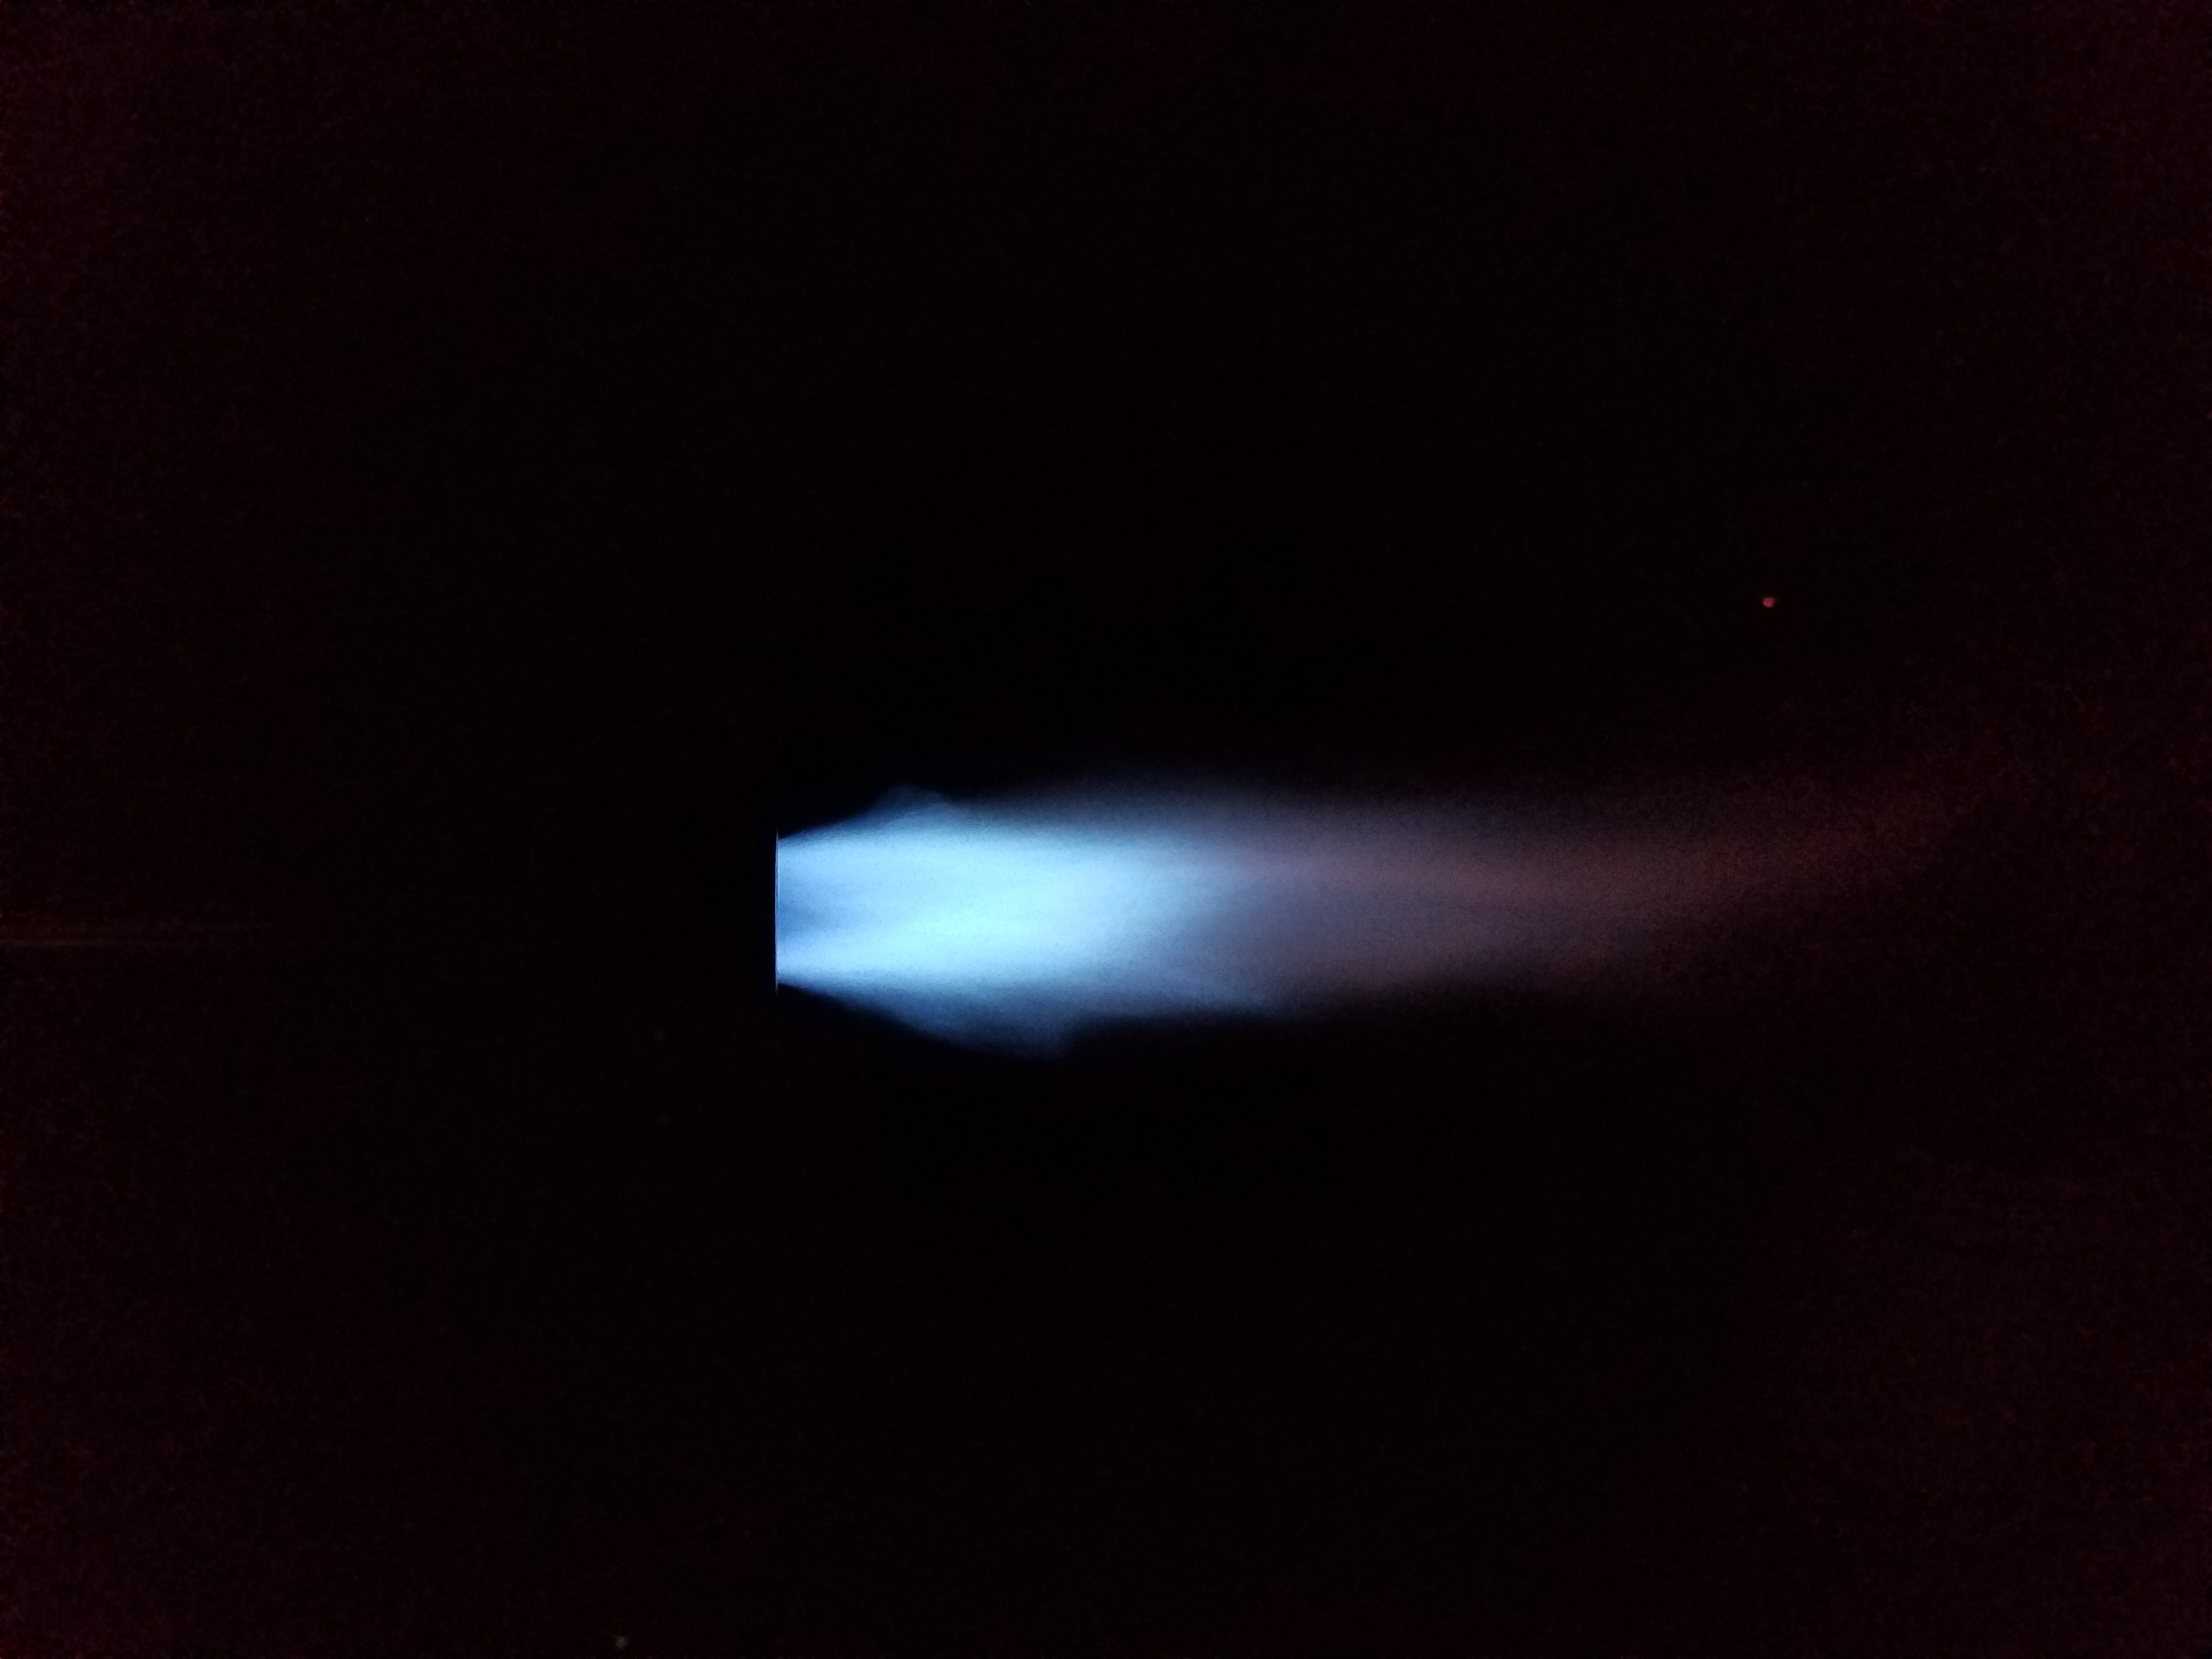
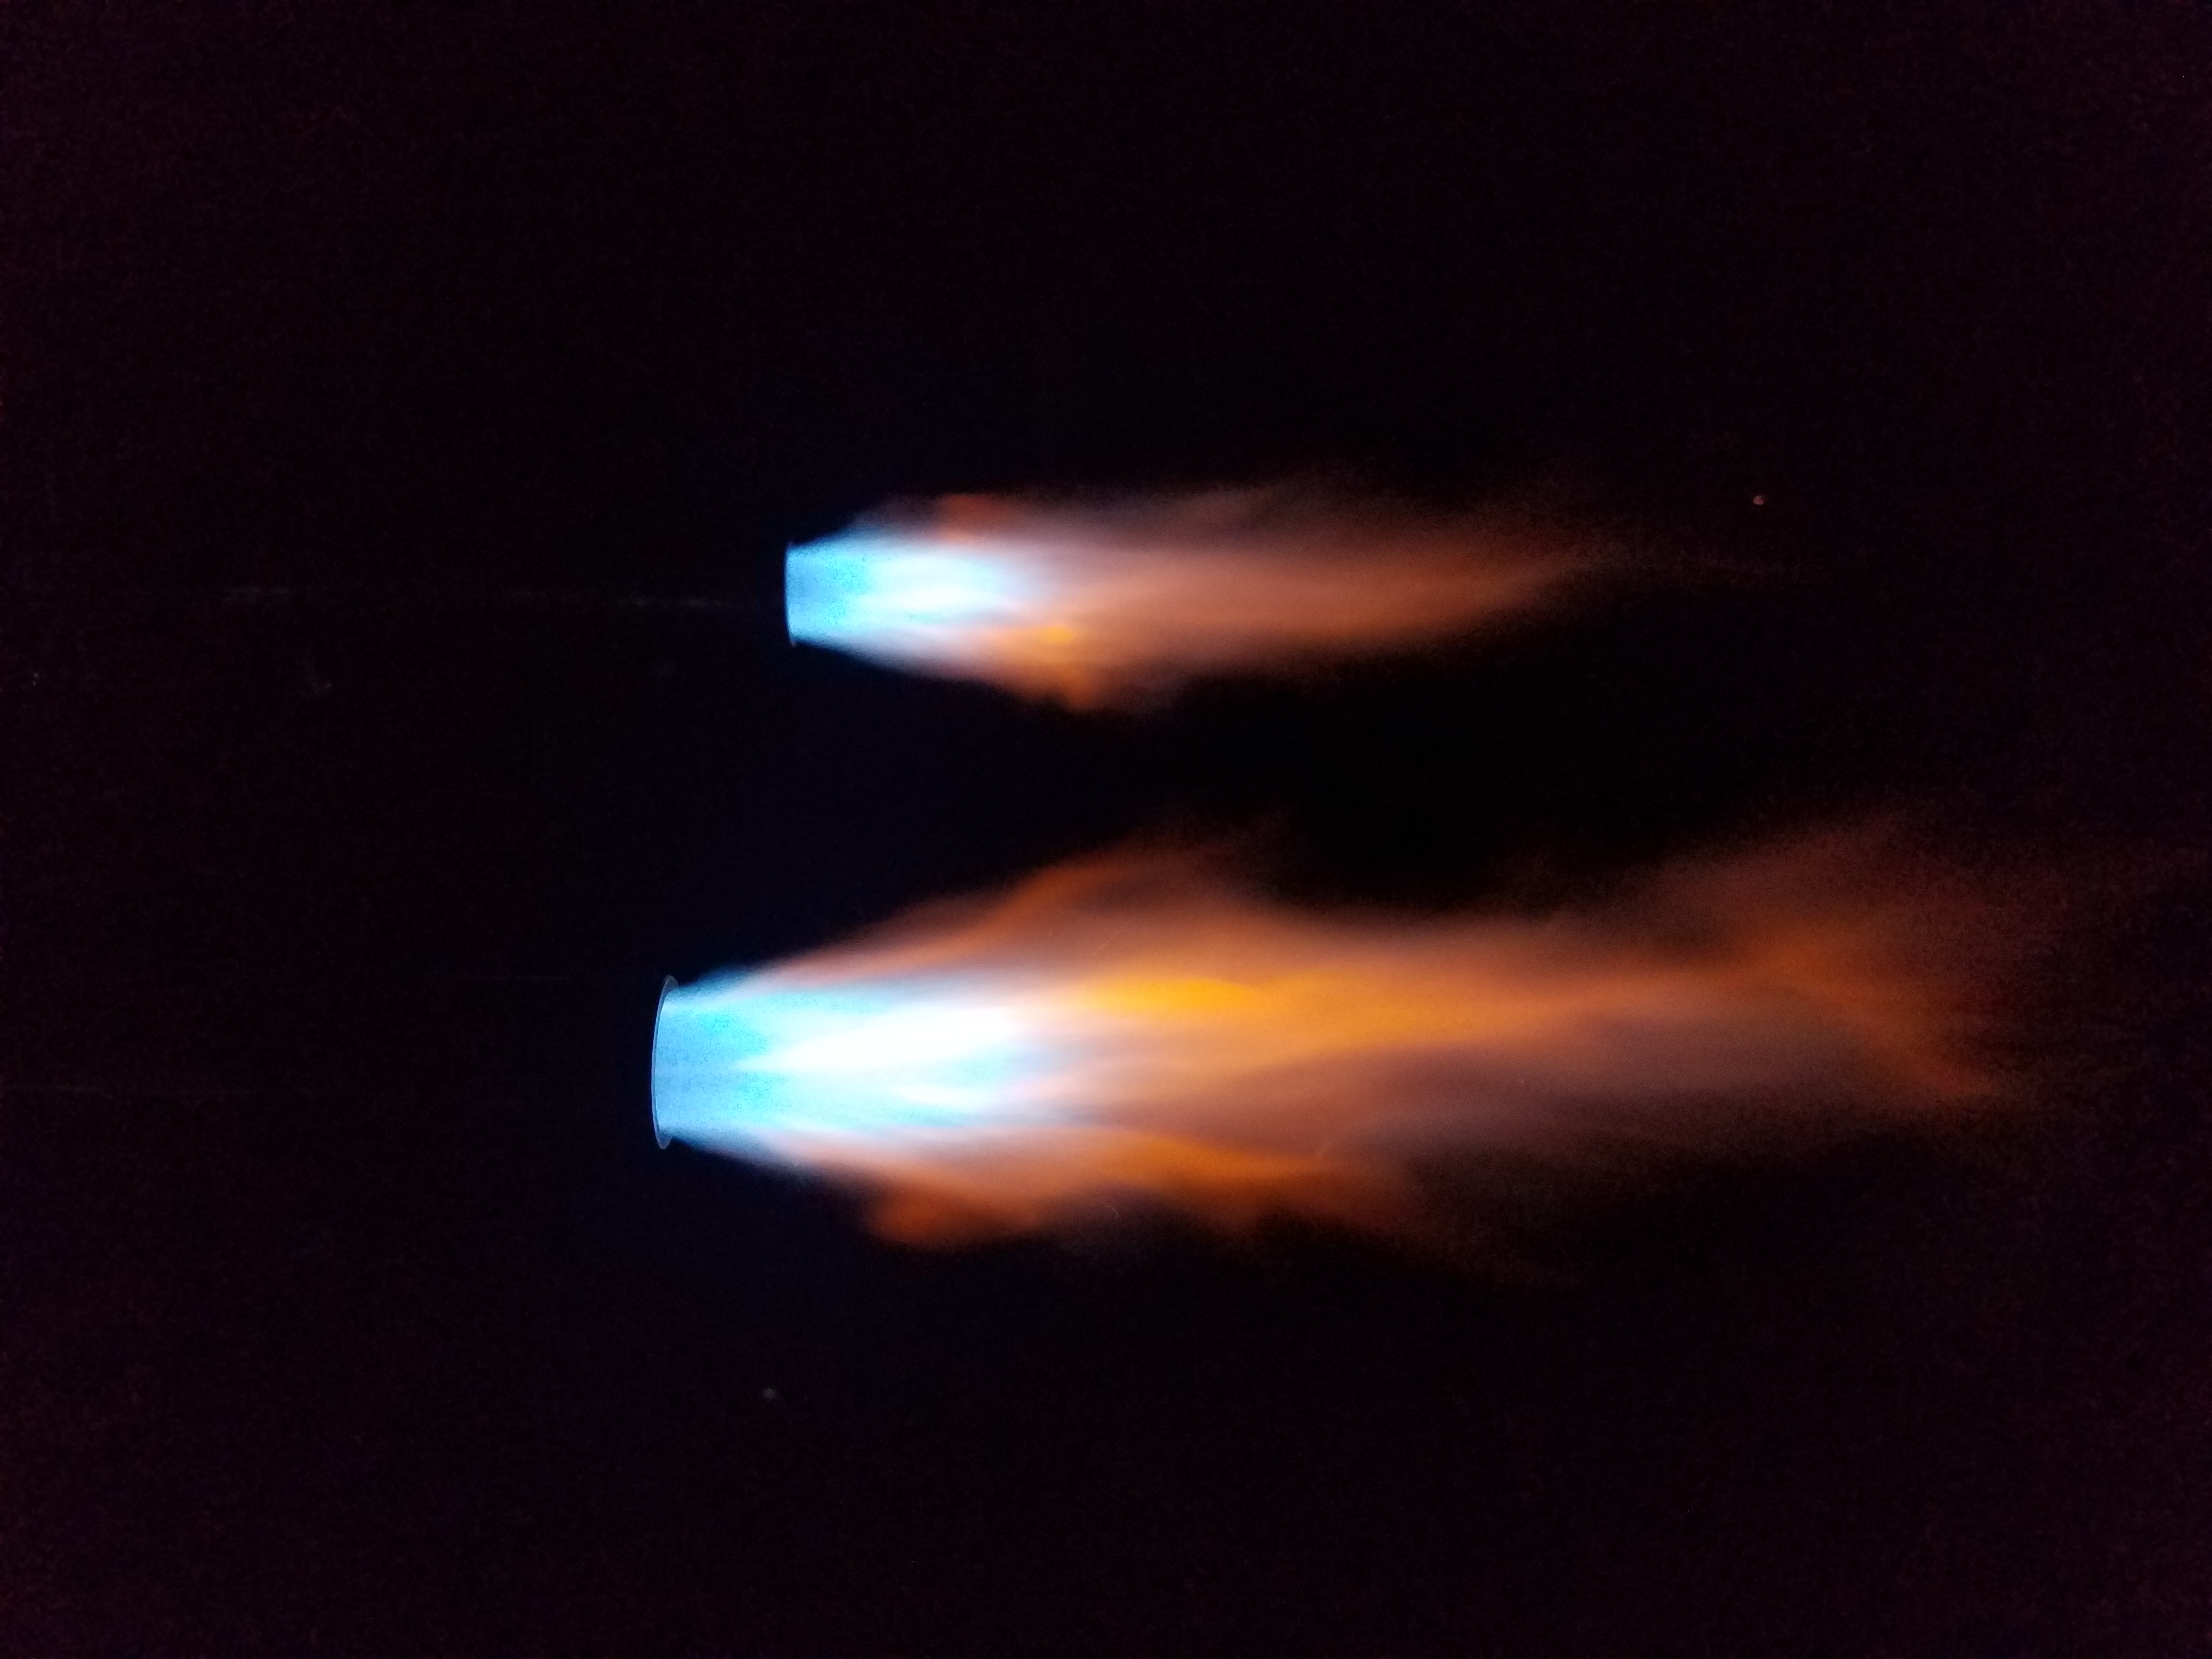
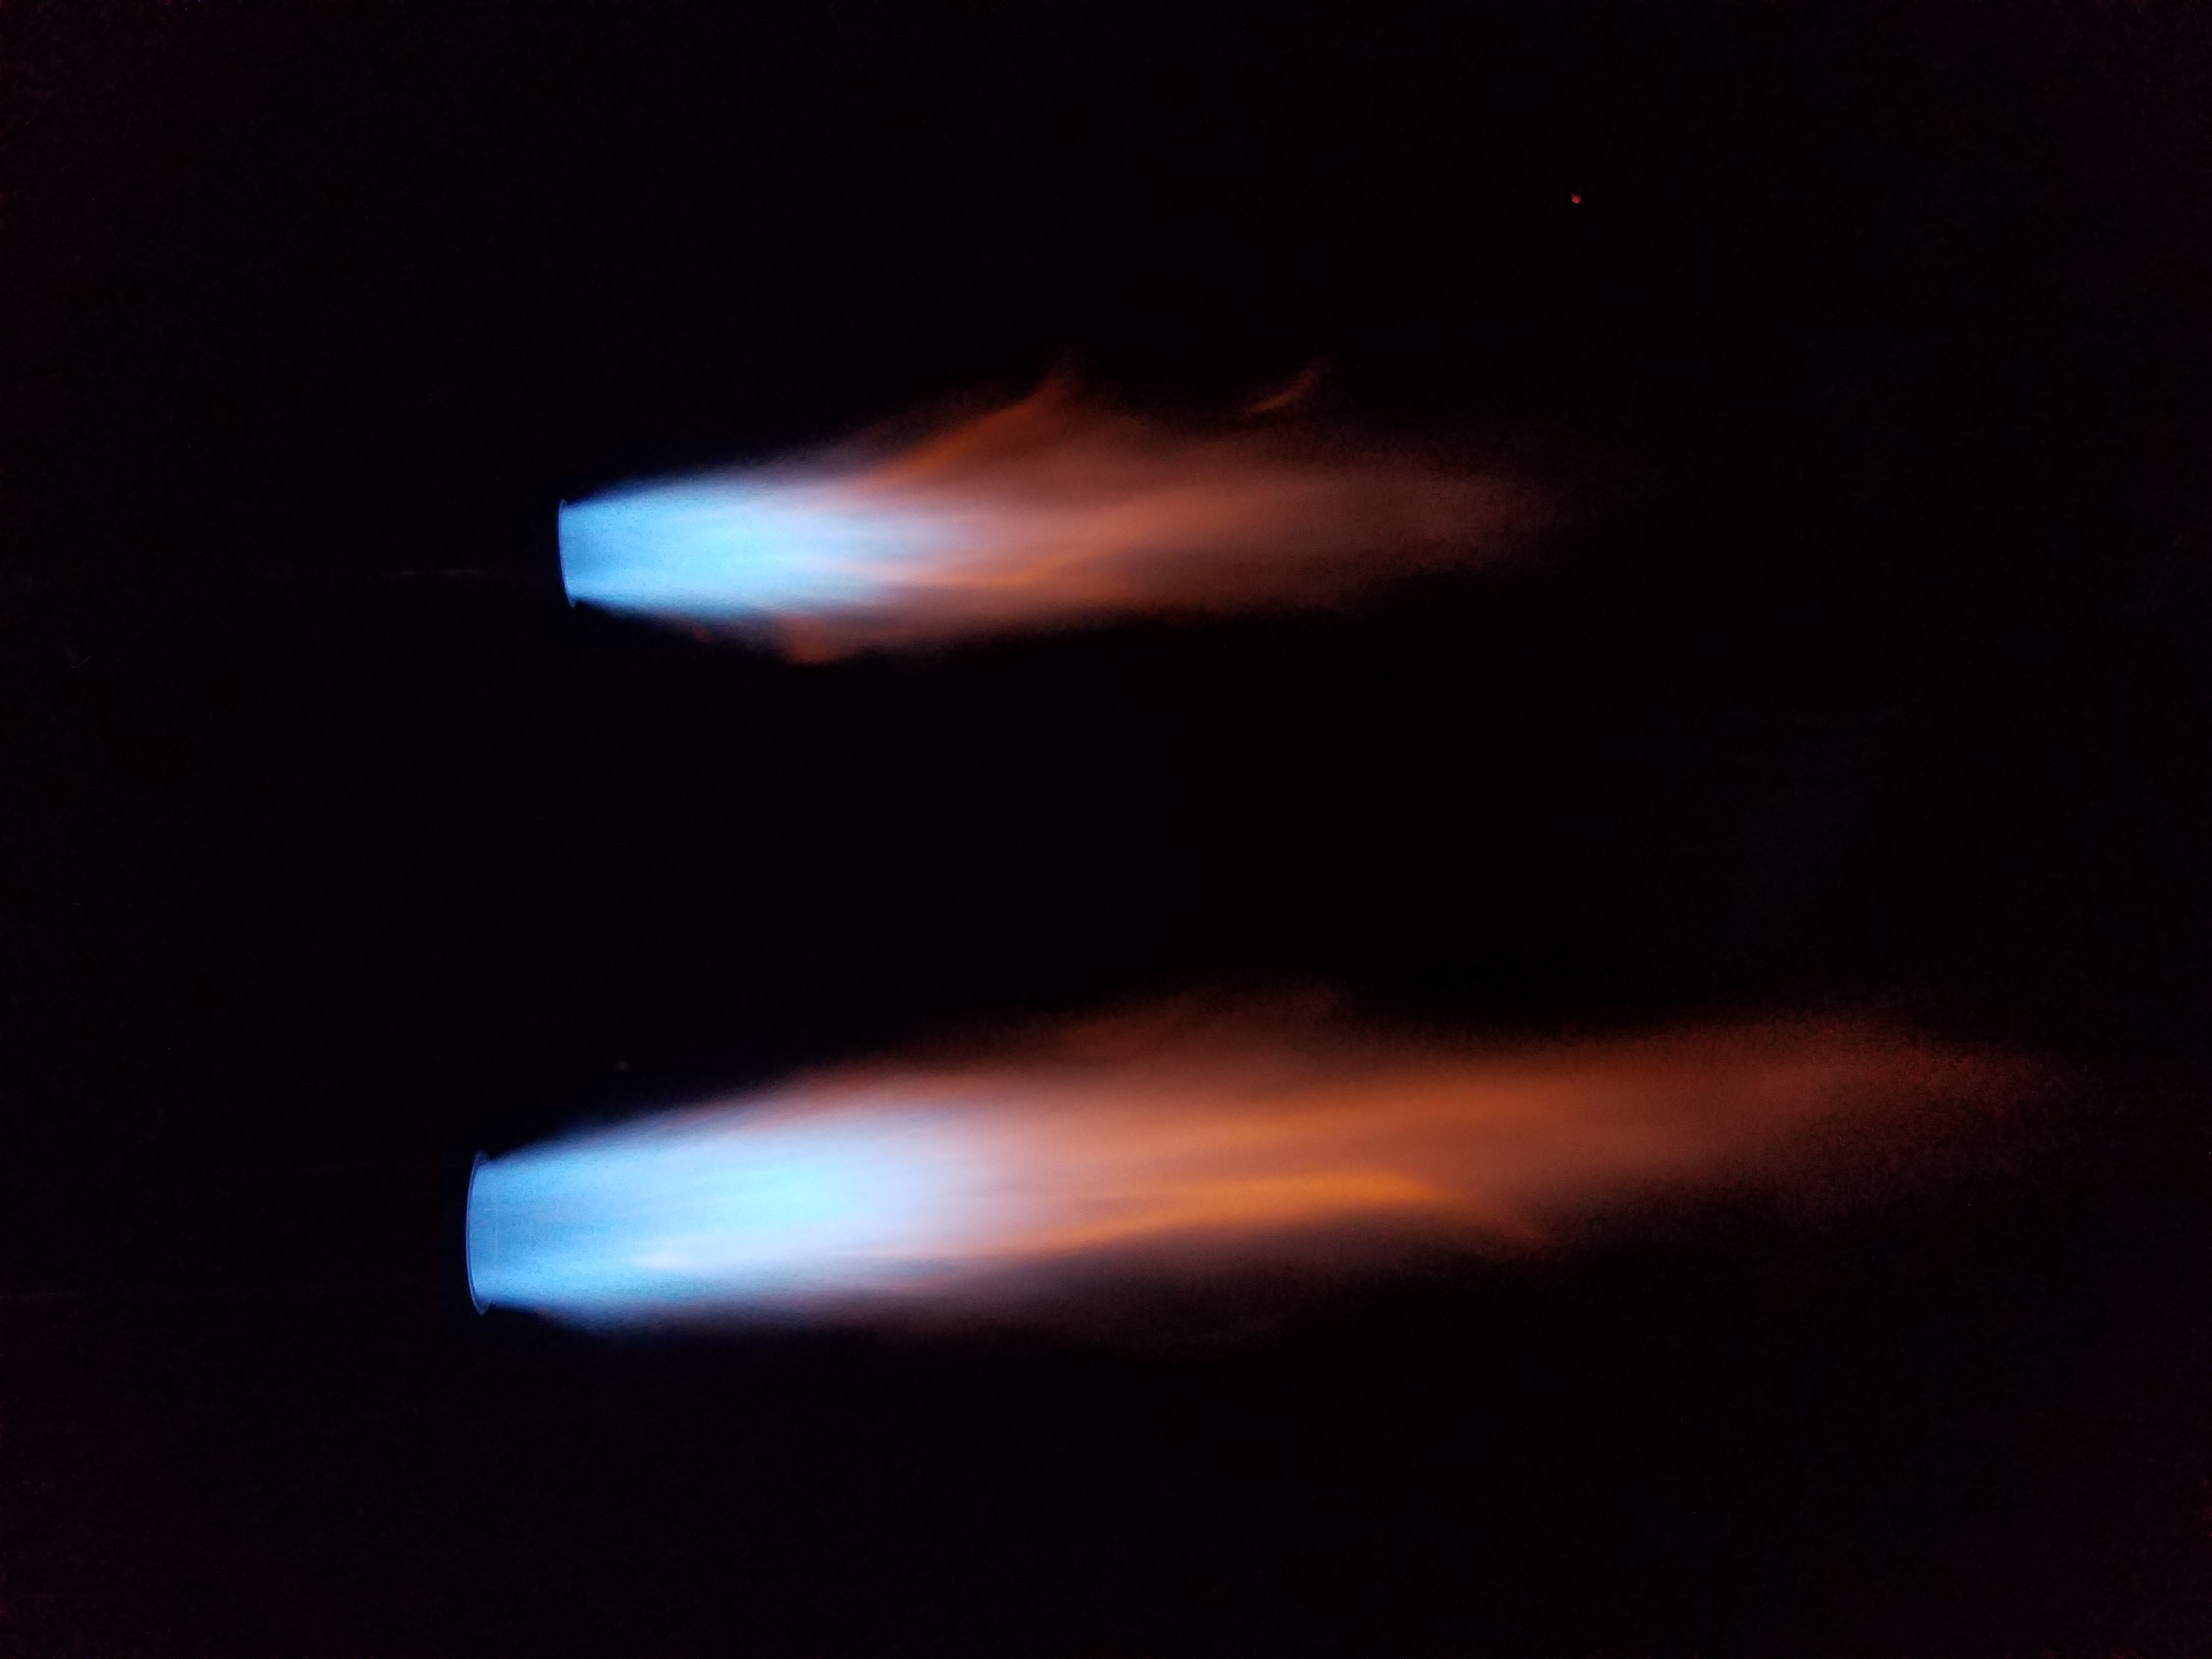
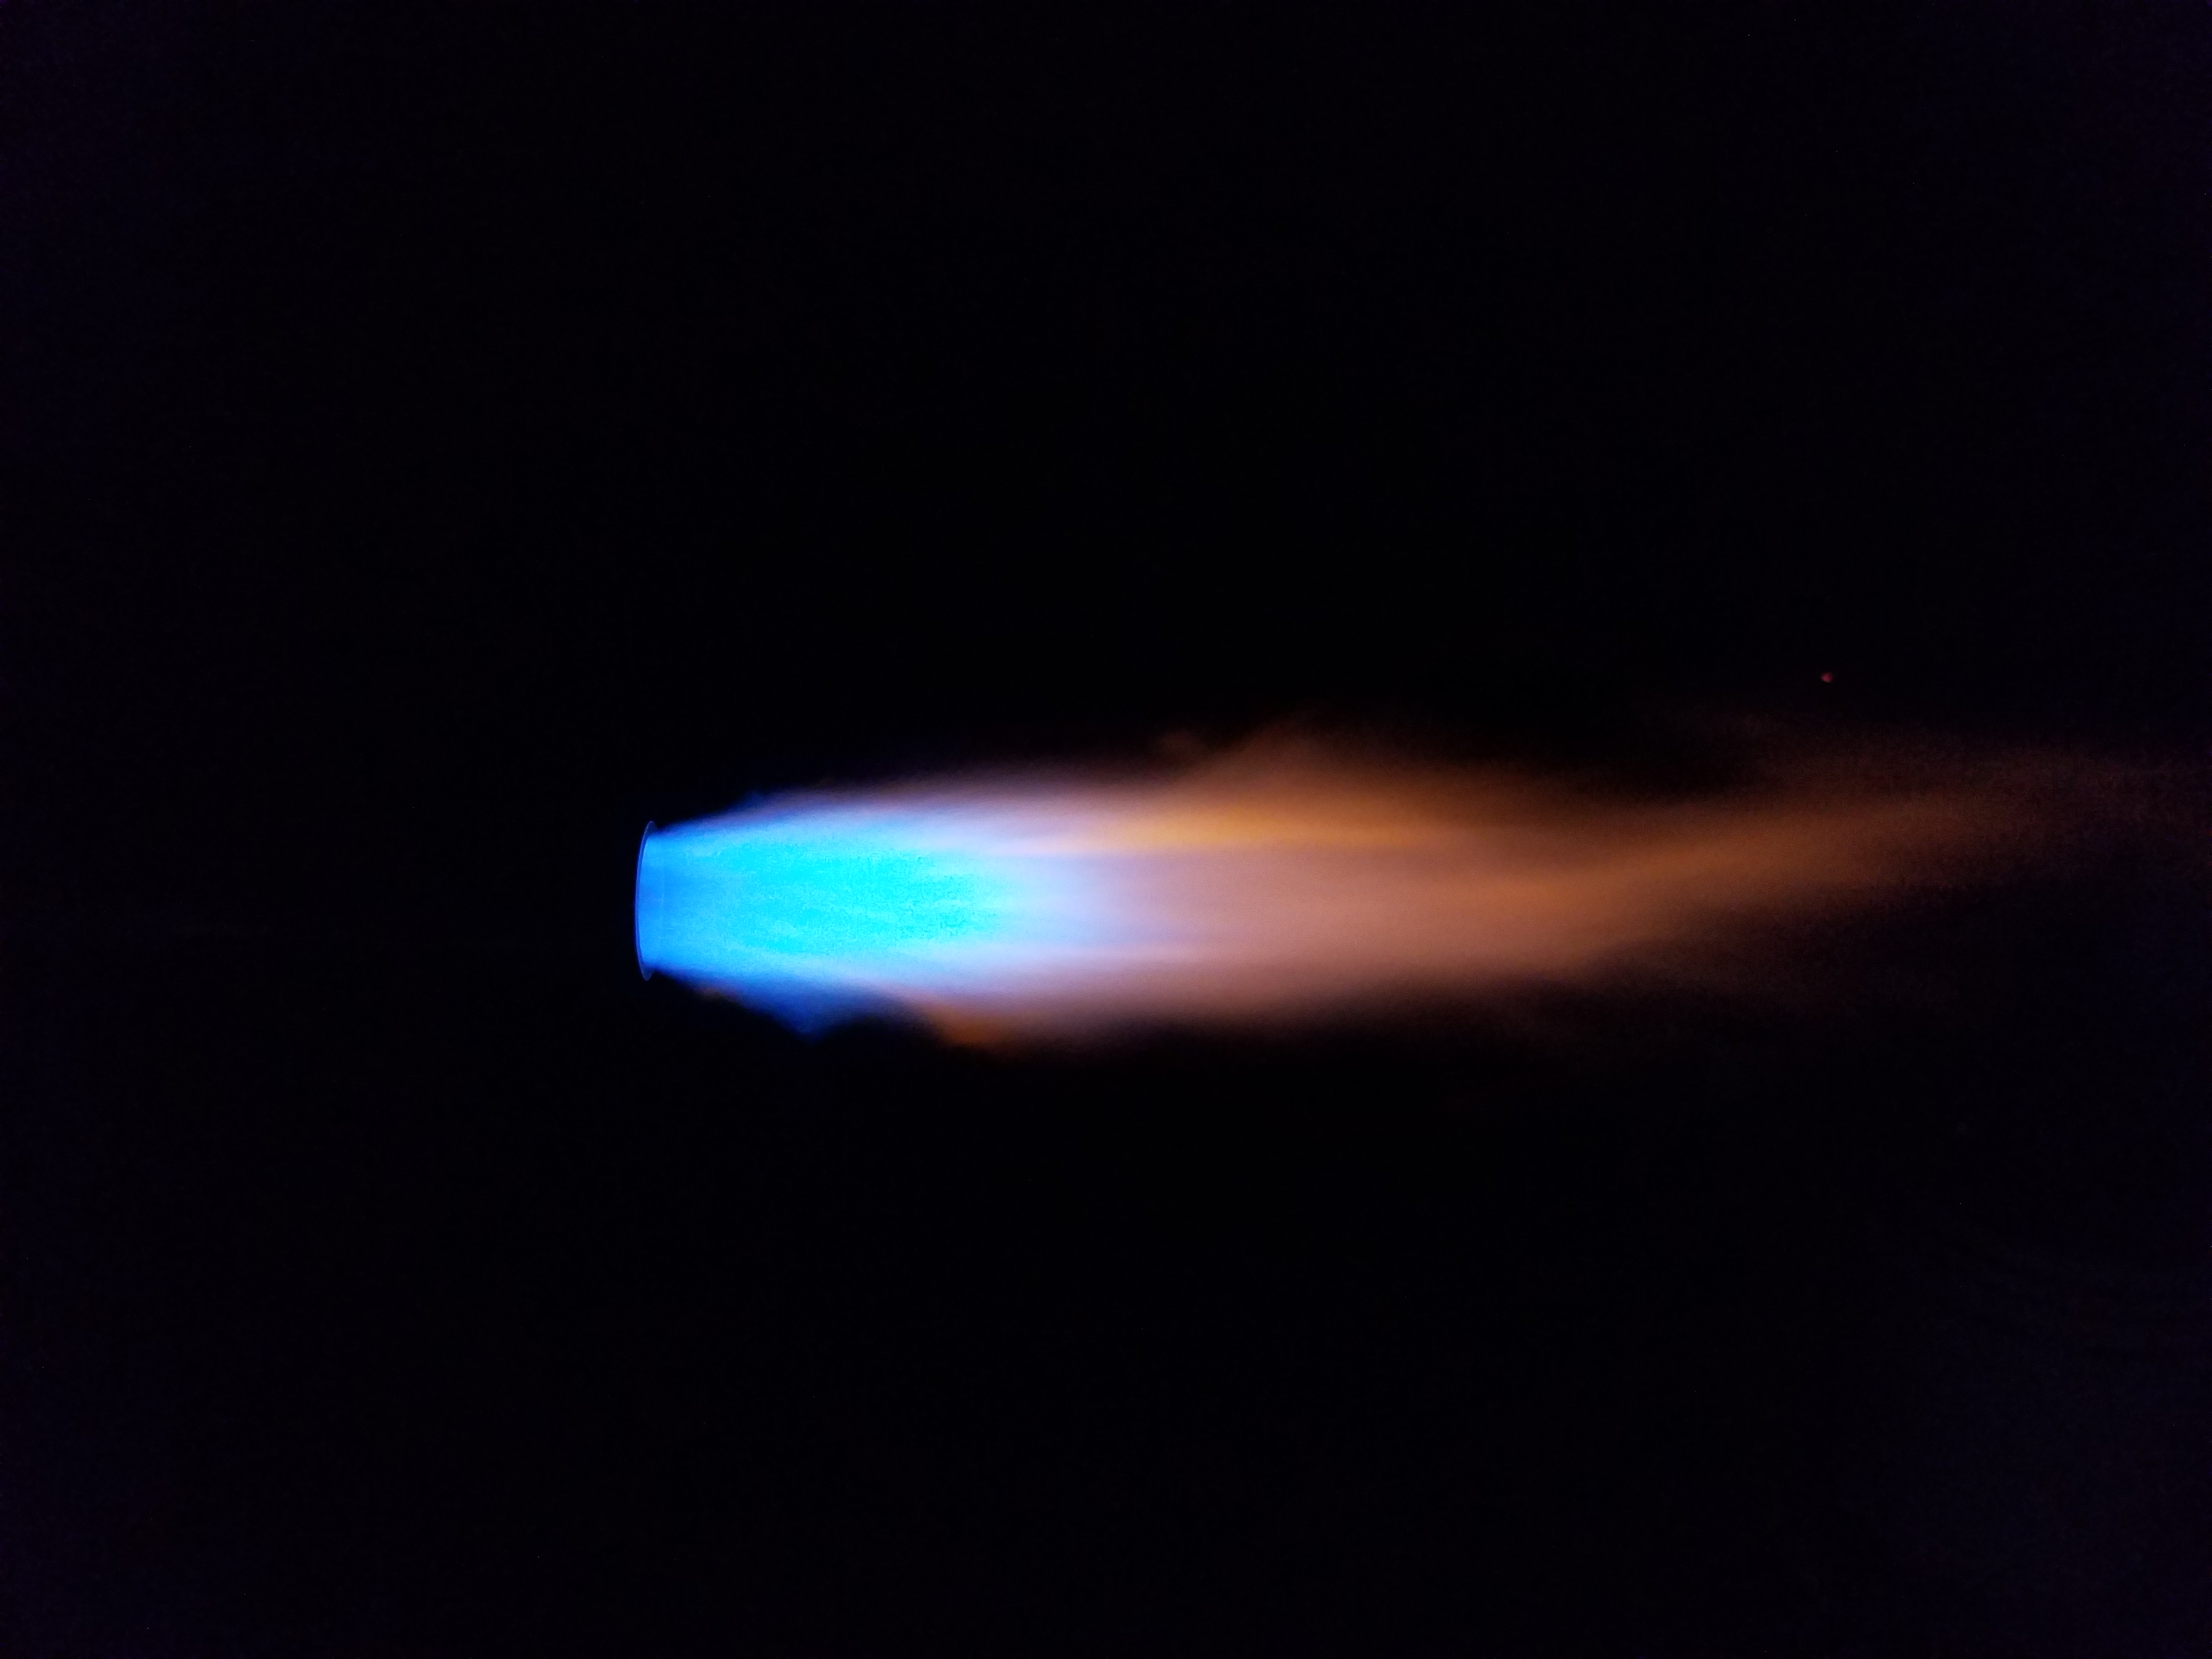
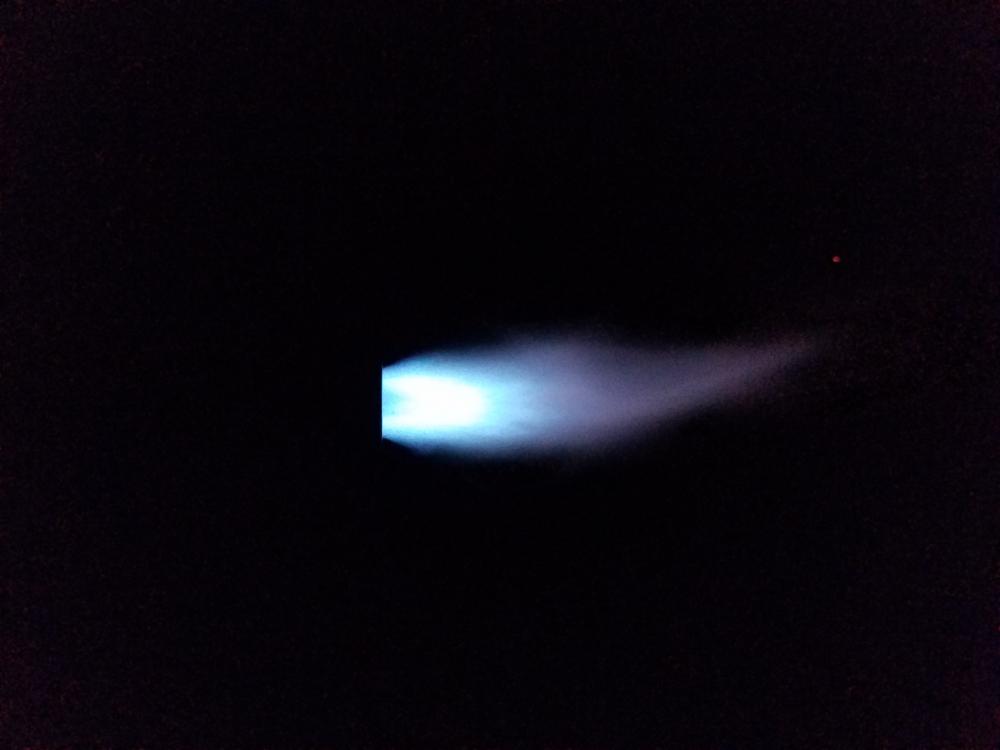
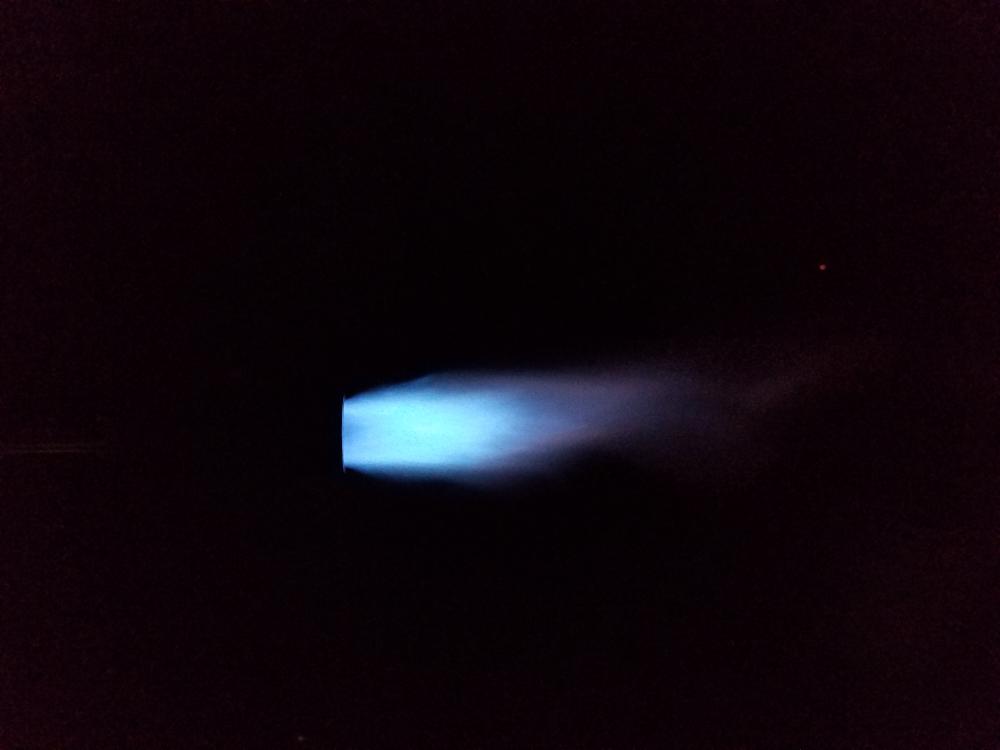
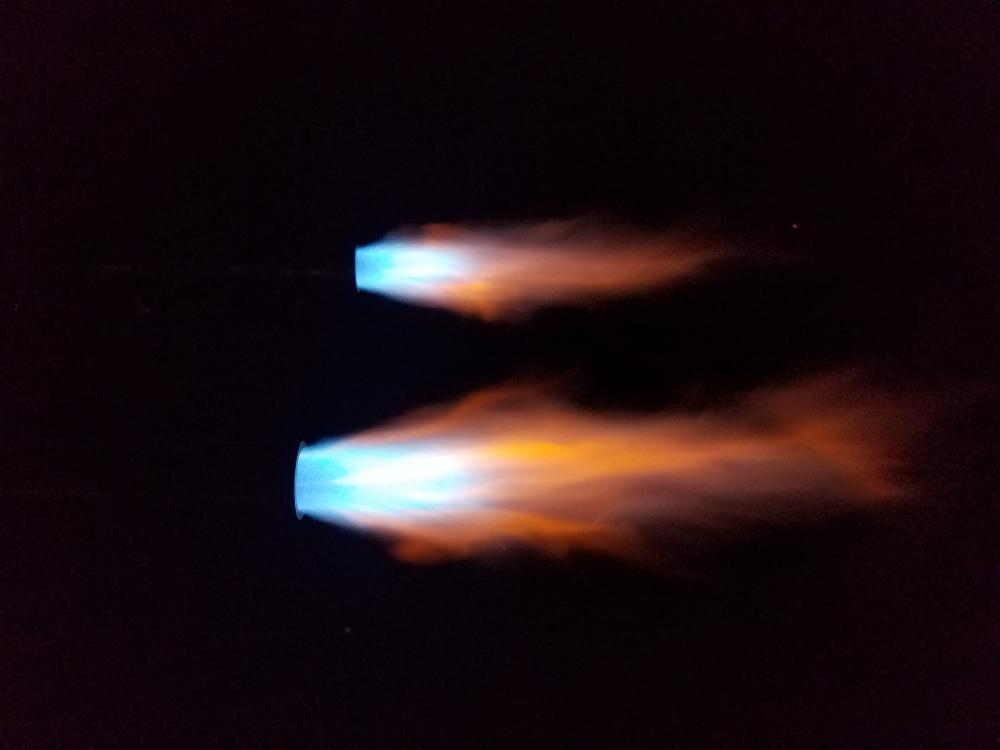
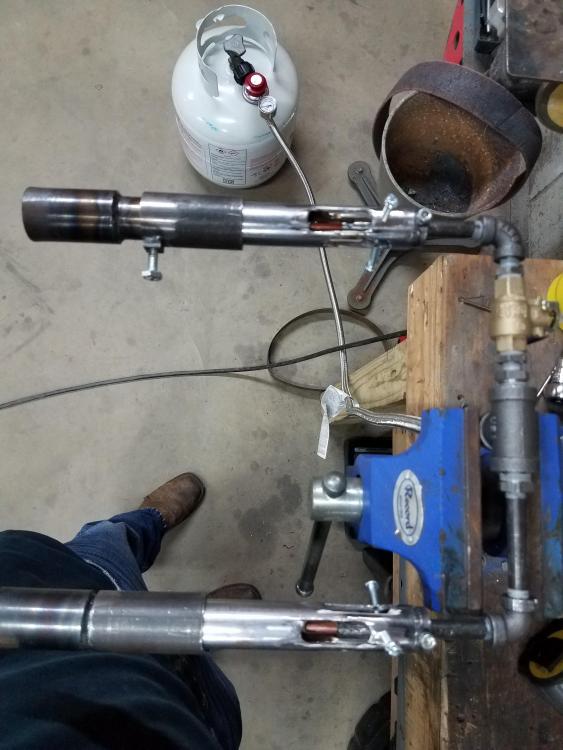
Mikey, Here are the final pictures, with tapered .025 MIG nozzles. 5 PSI 10 PSI 15 PSI 20 PSI Both Burners at 15 PSI


-
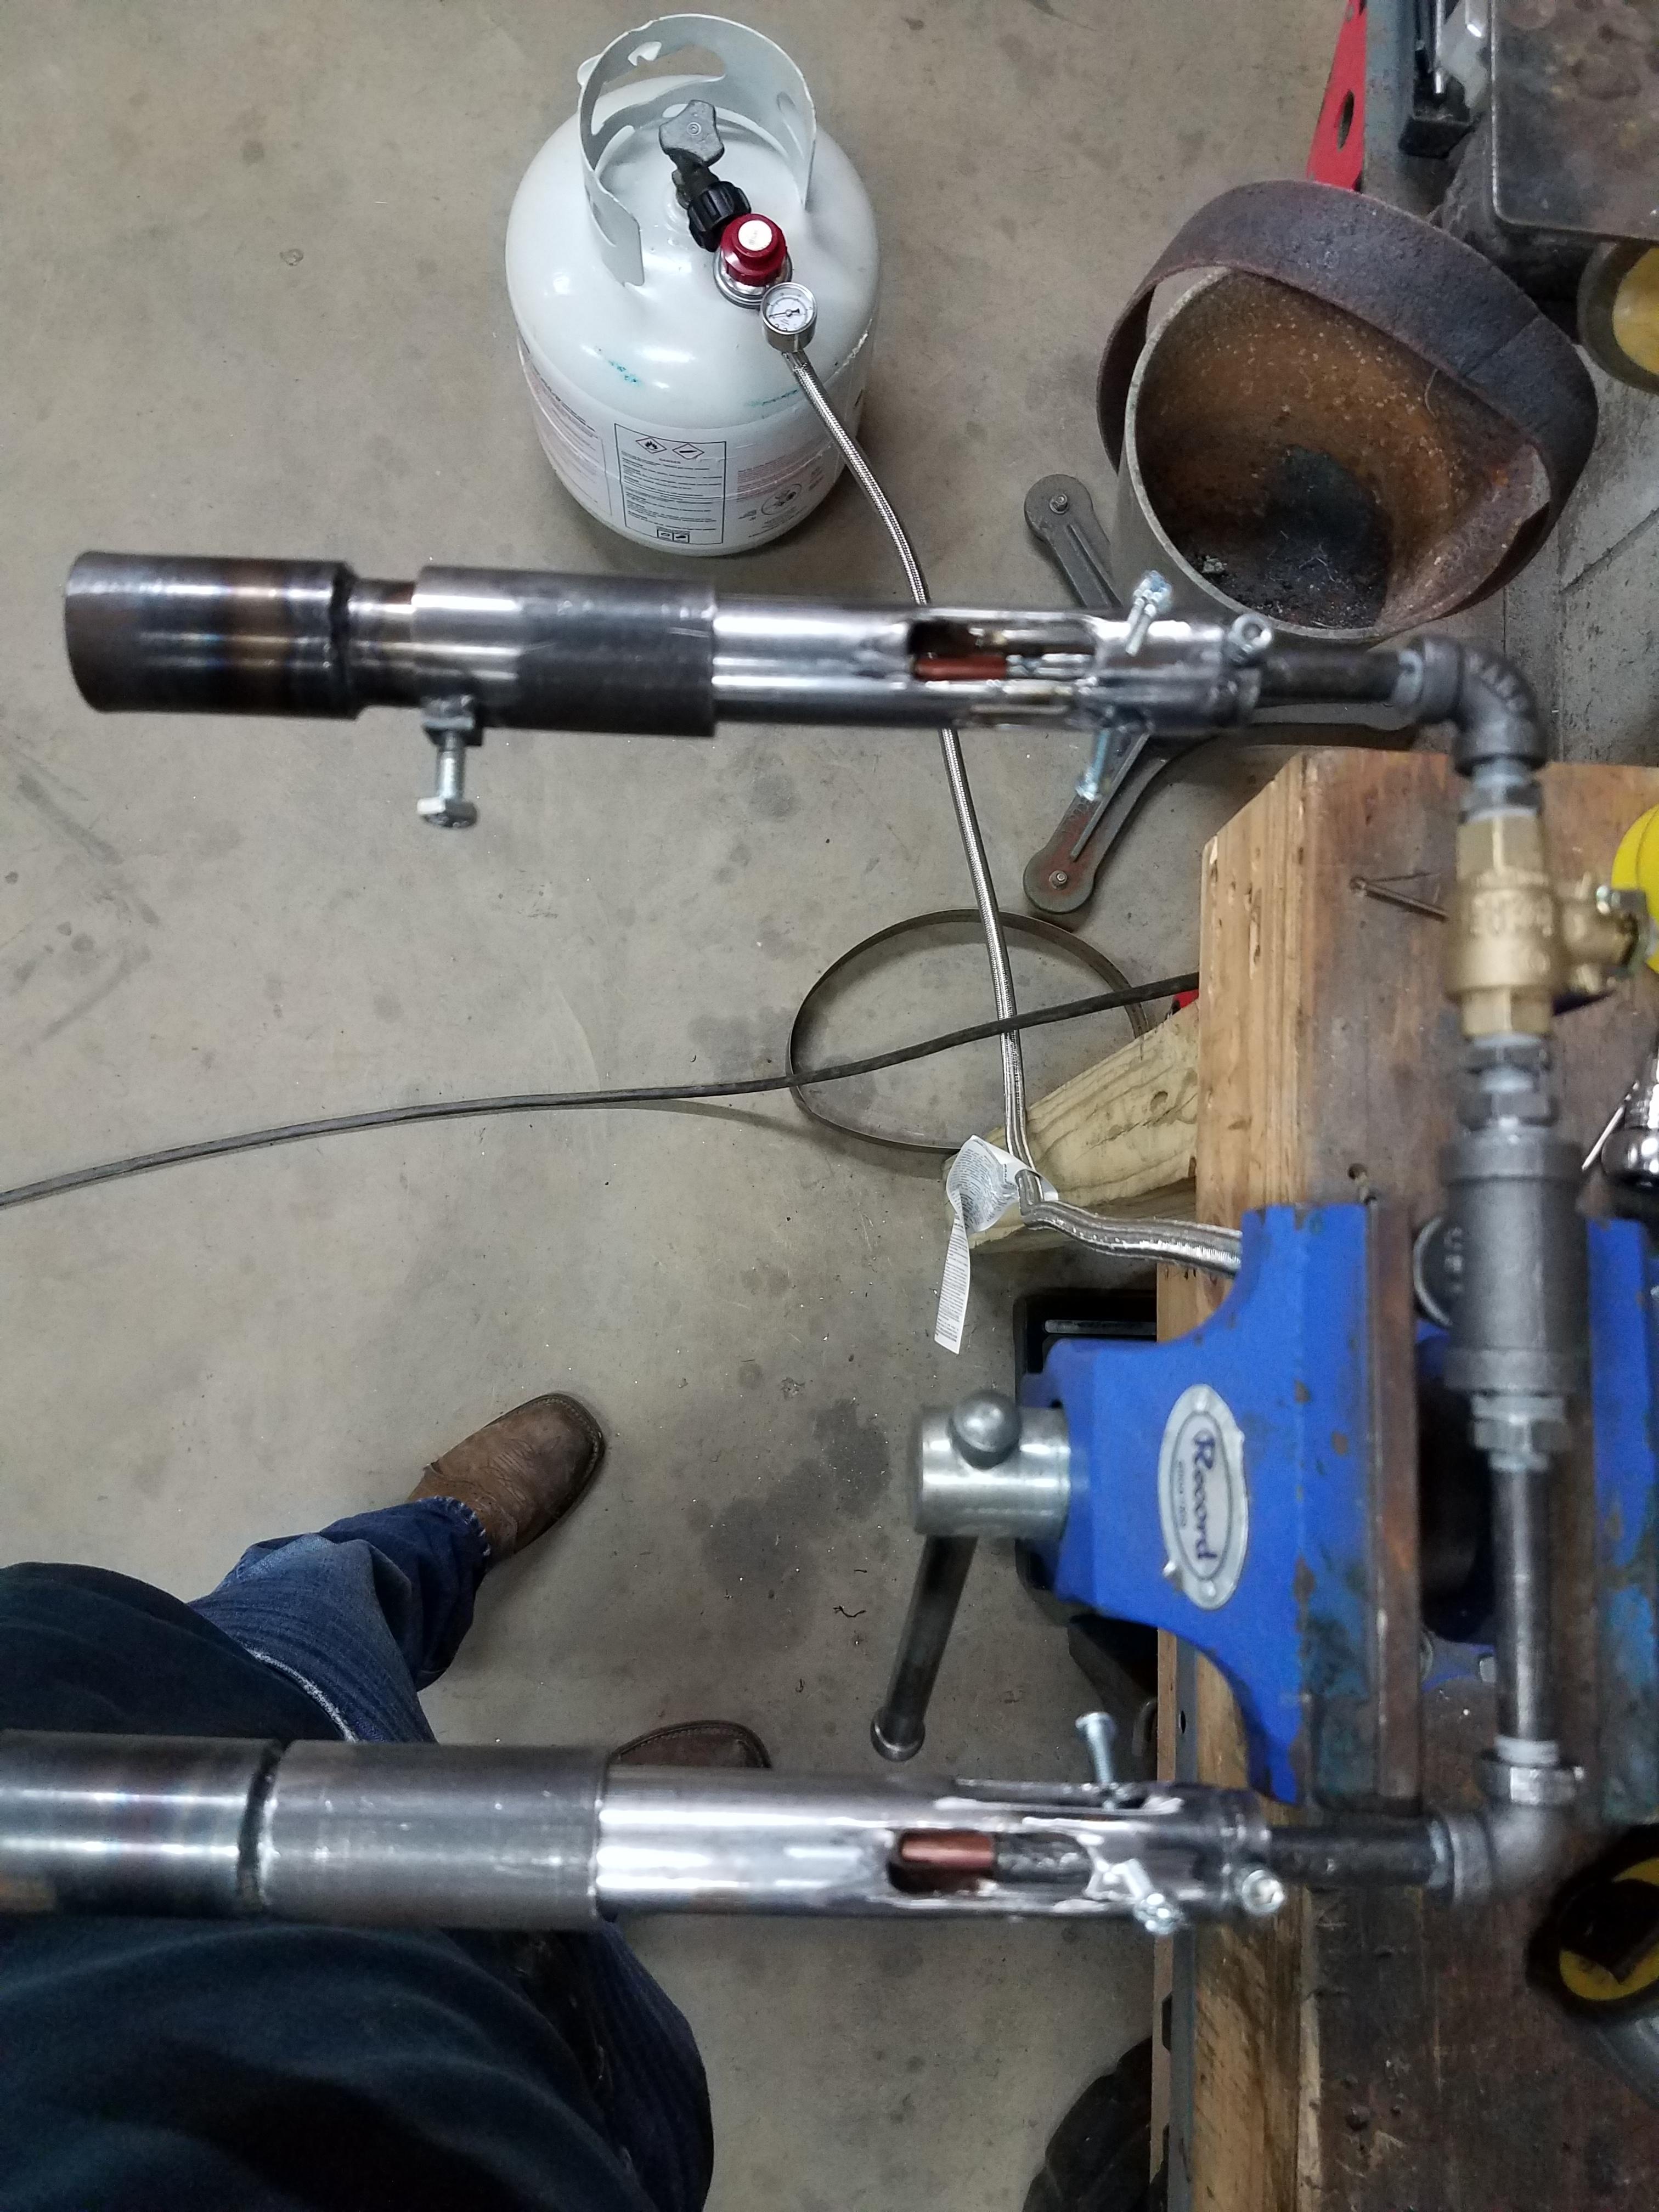
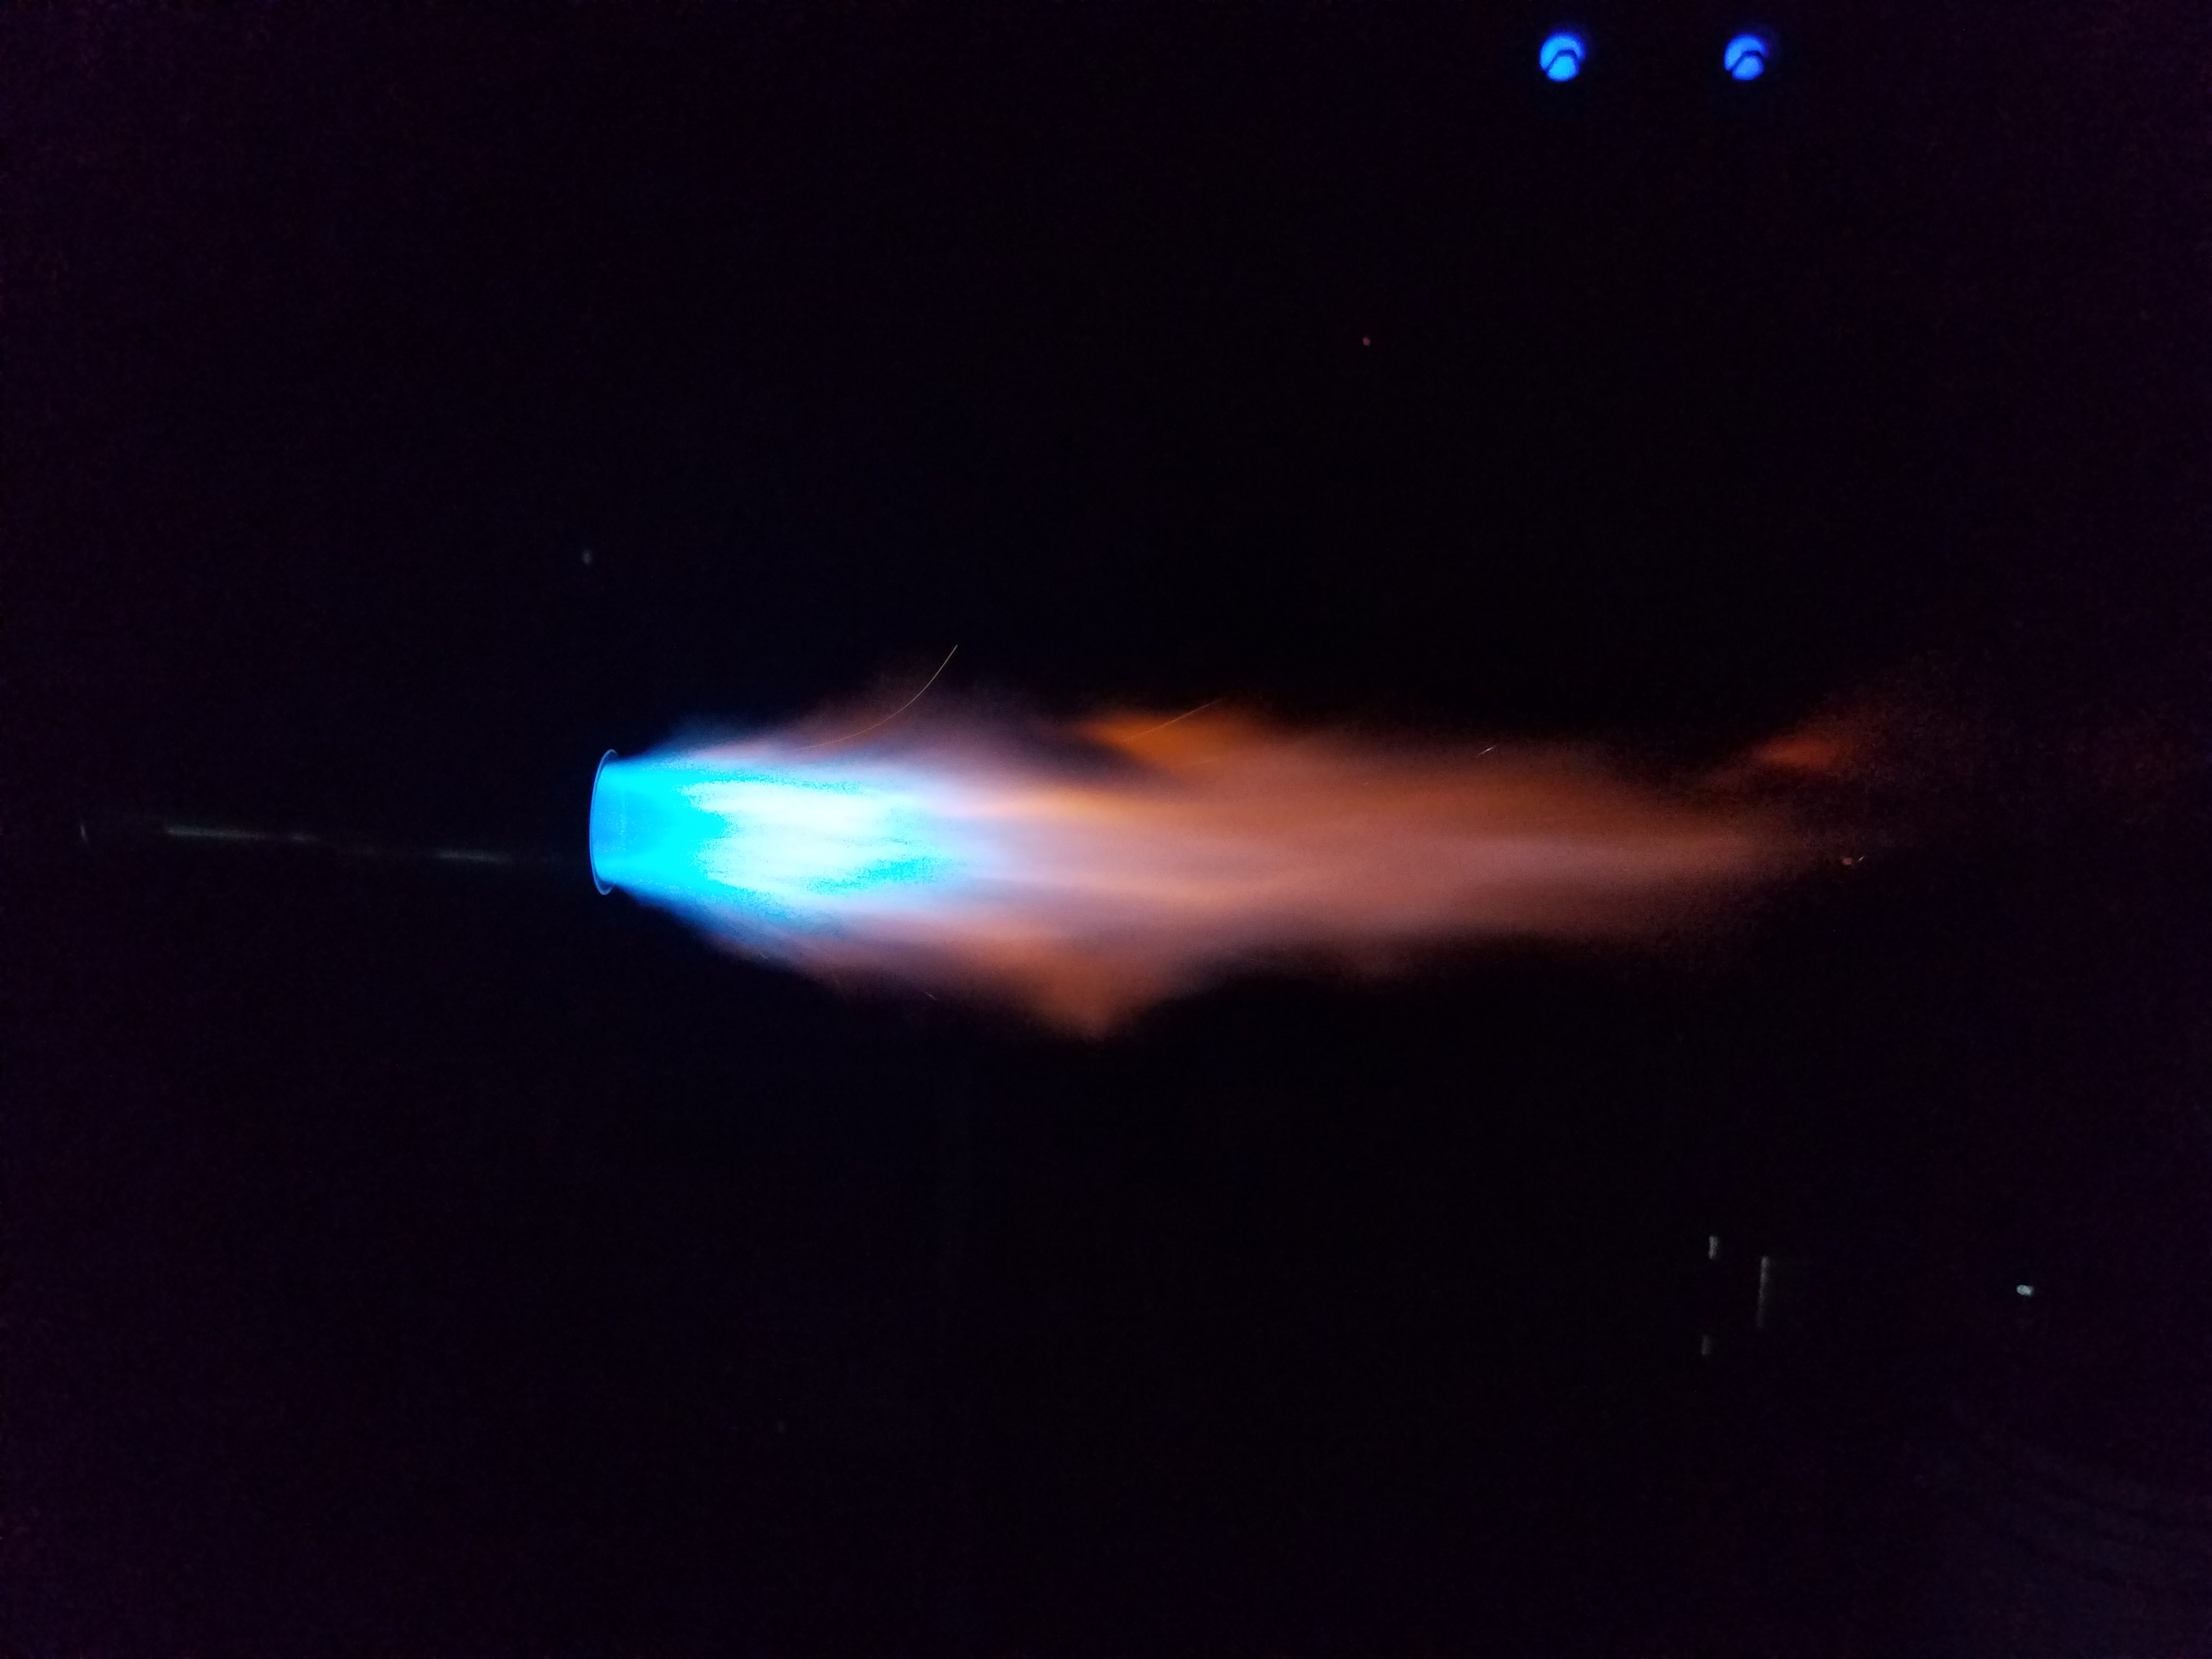
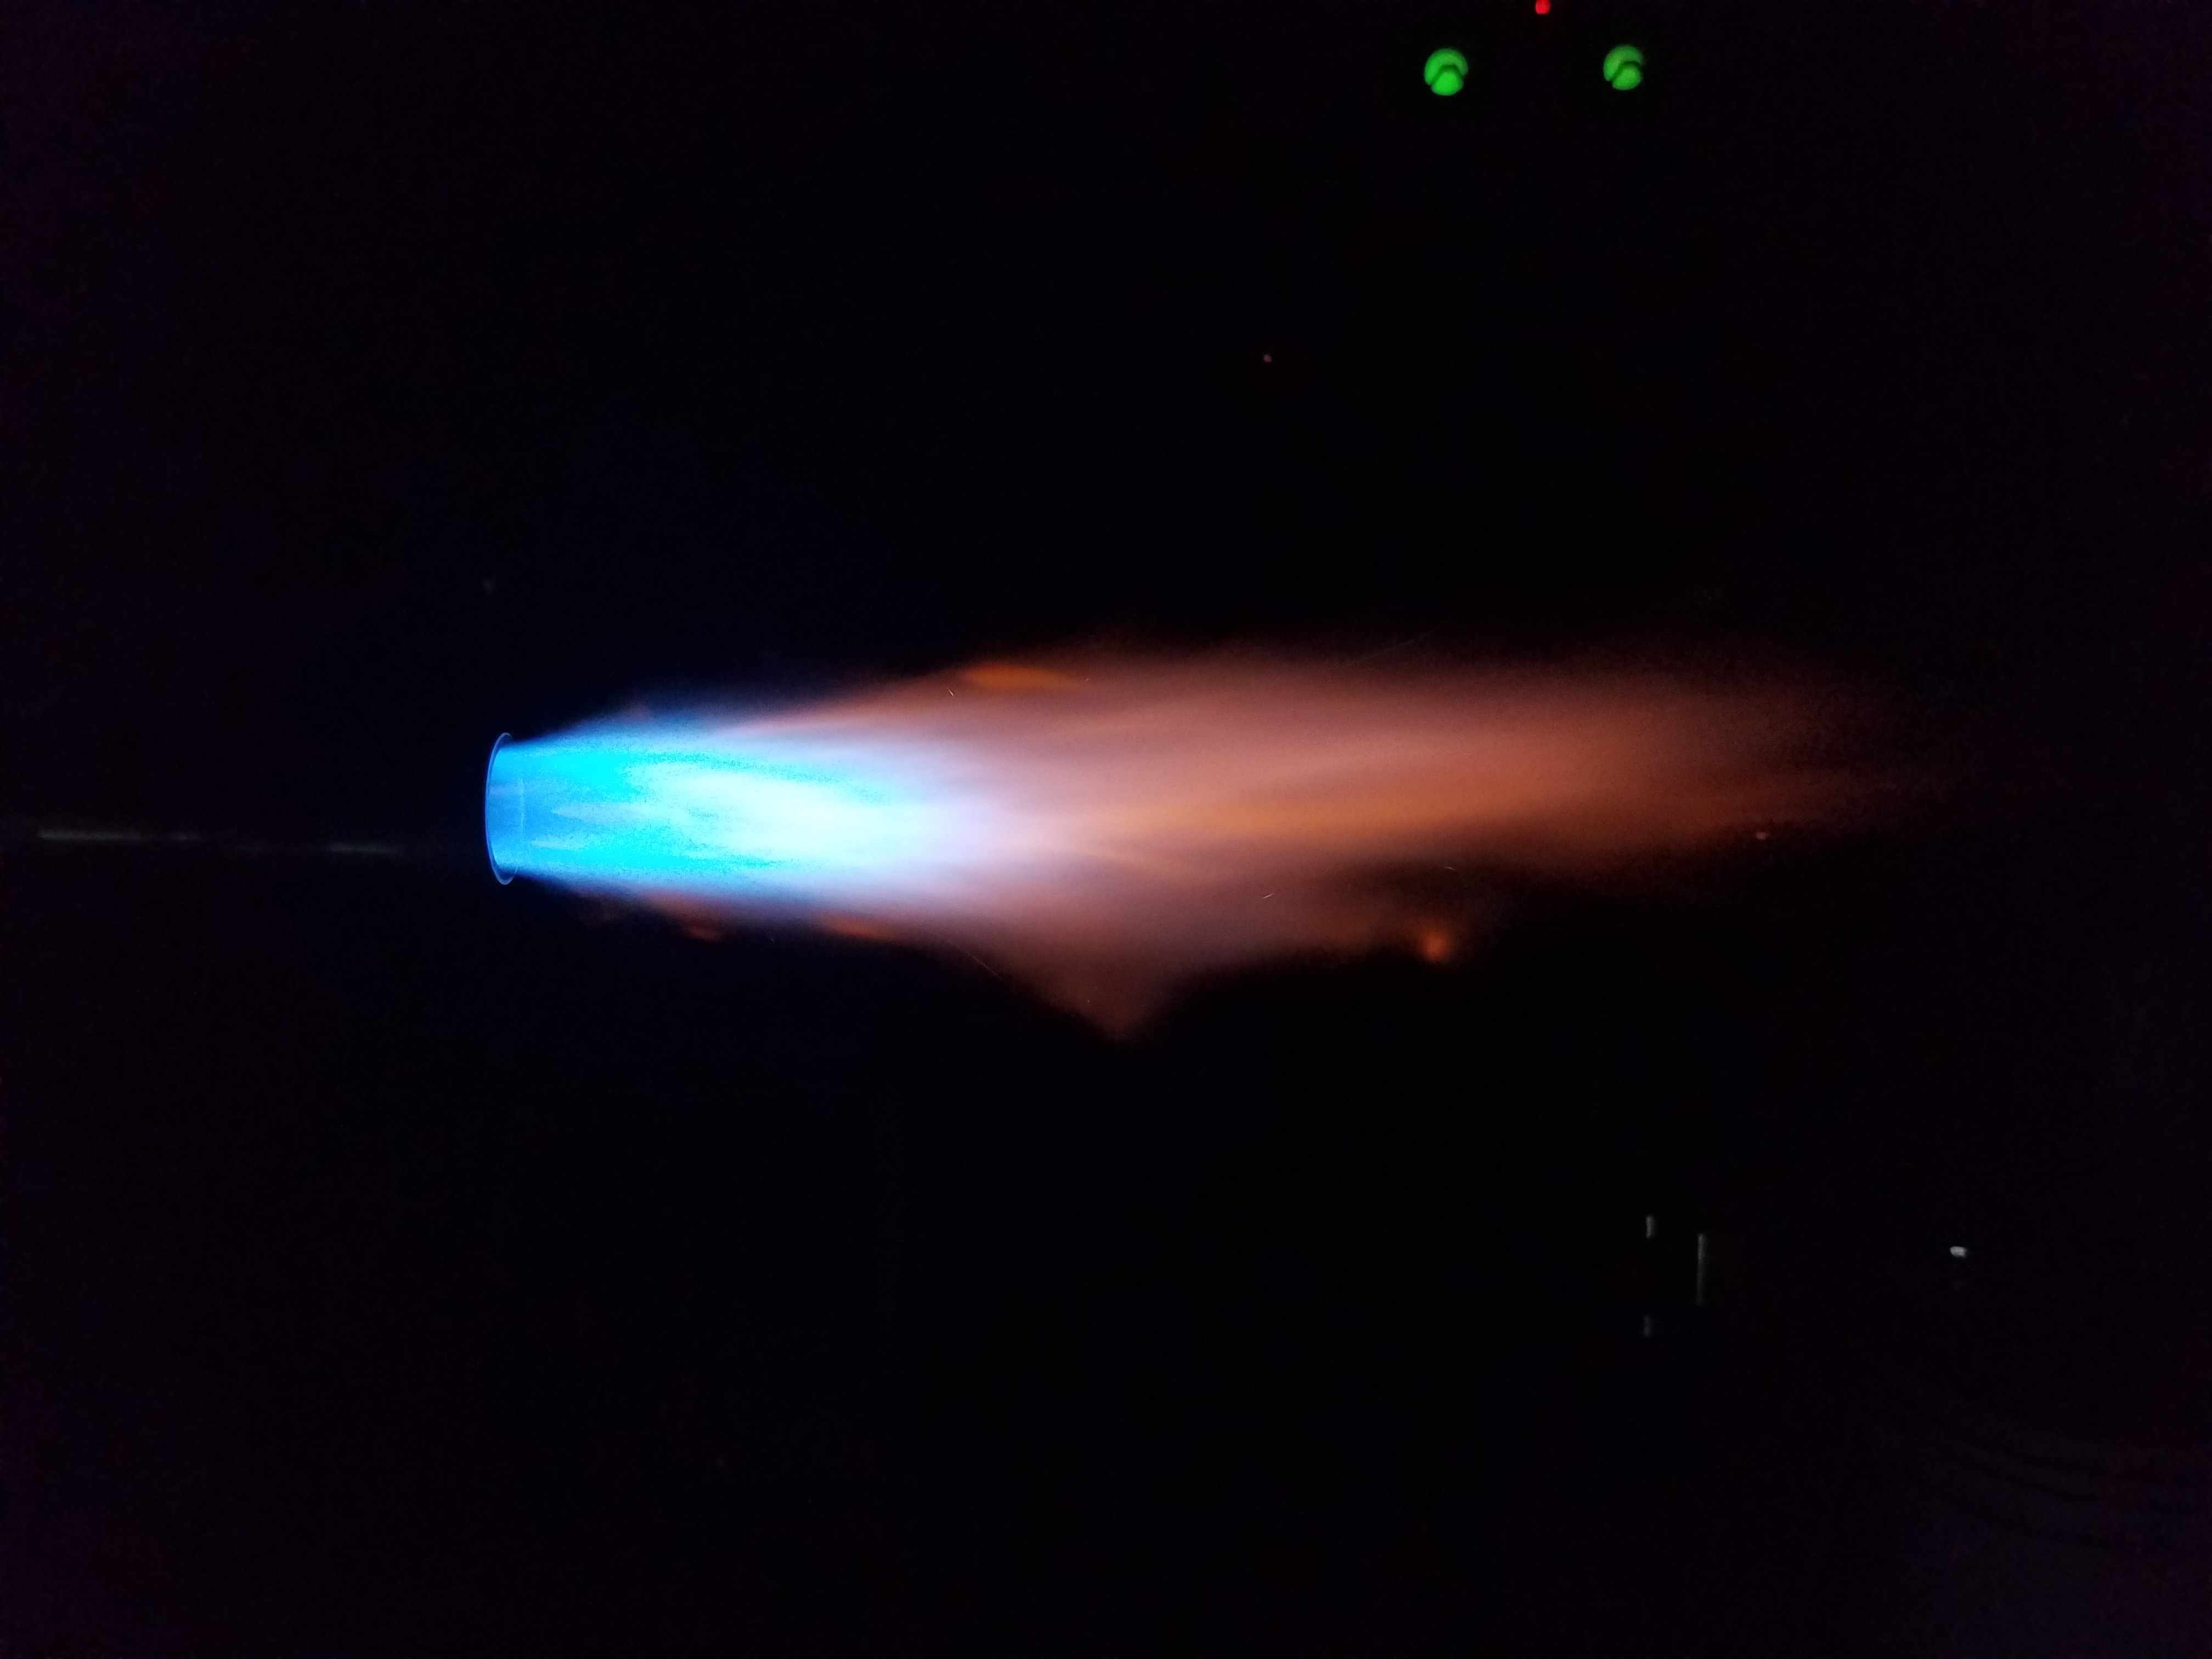
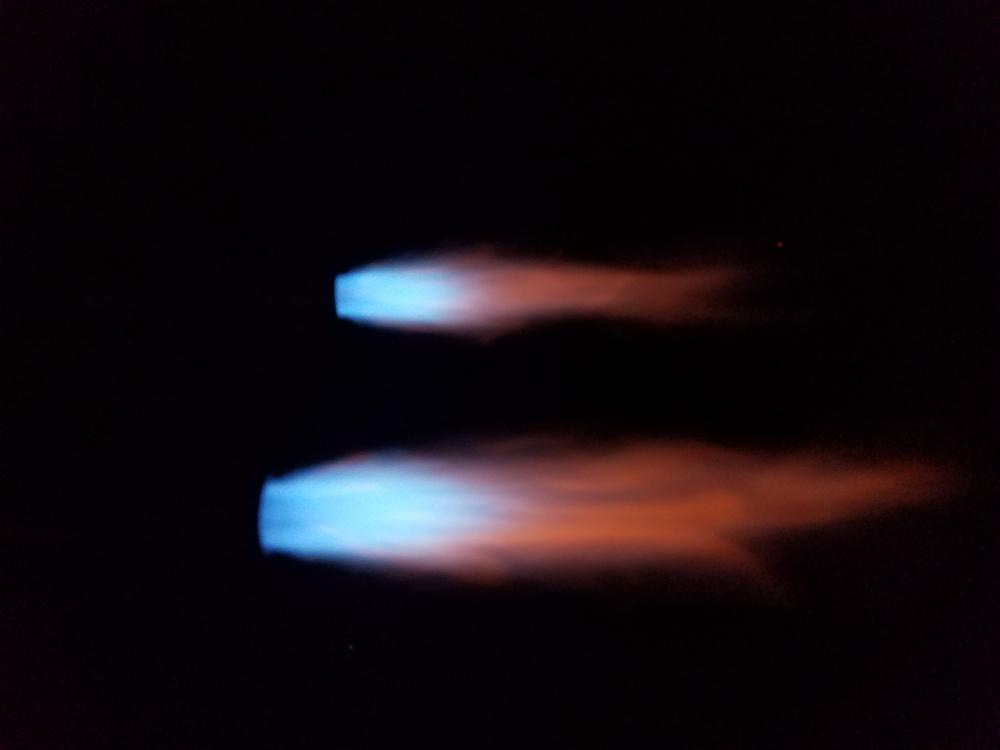
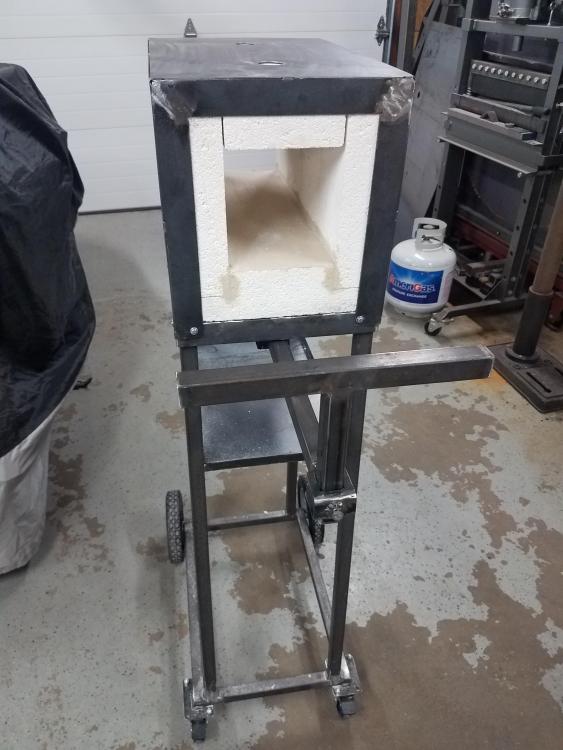
Yes sir, that is my name. Mikey, so I finished up the most recent things that you suggested. Dropped won to a .030 MIG nozzle, and tapered them. Just couldn't get the pictures to focus like I had been getting them to, guessing due to having both burners going at the same time. All the pictures of flame that I posted prior are of the top burner in the picture. I was quite interested in how easily there was a difference on the choke sleeve restricting the inlet ports to get them close to burning the same. Any ways, pictures are below. 5 PSI 10 PSI 15 PSI Just a couple pictures of the plain burners. I will eventually redo these, as I wasnt happy with the slots after having to use the grinder to cut out between the holes. I know that I can get them much more uniform and smoother for air flow if I throw them on the mill and actually mill the slots out. Forge body and cart I built, still not finished yet. The stock holder on the front of the forge is adjustable for distance from the forge and height adjustable as well. Have to weld the top lock collars on to the metal cover to hold the forge burners as well as figure out if I want doors with IFB brick in them, or if Im just going to put angle brackets on the top and bottom to be able to slide two IFB bricks side to side to act as the door on the front and back.


-
Same way I flared mine after it really wasnt moving over a mandrel. Works quite well to flare the end. It happens quick too! Then you realize you just went a tab bit too far, and its stuck. I learned the same when I tested using the ball peen hammer on a scrap piece of pipe.
-
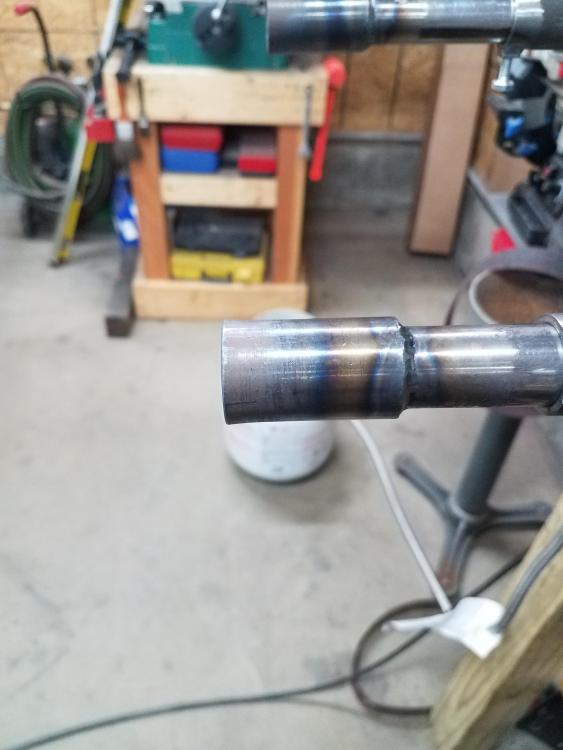
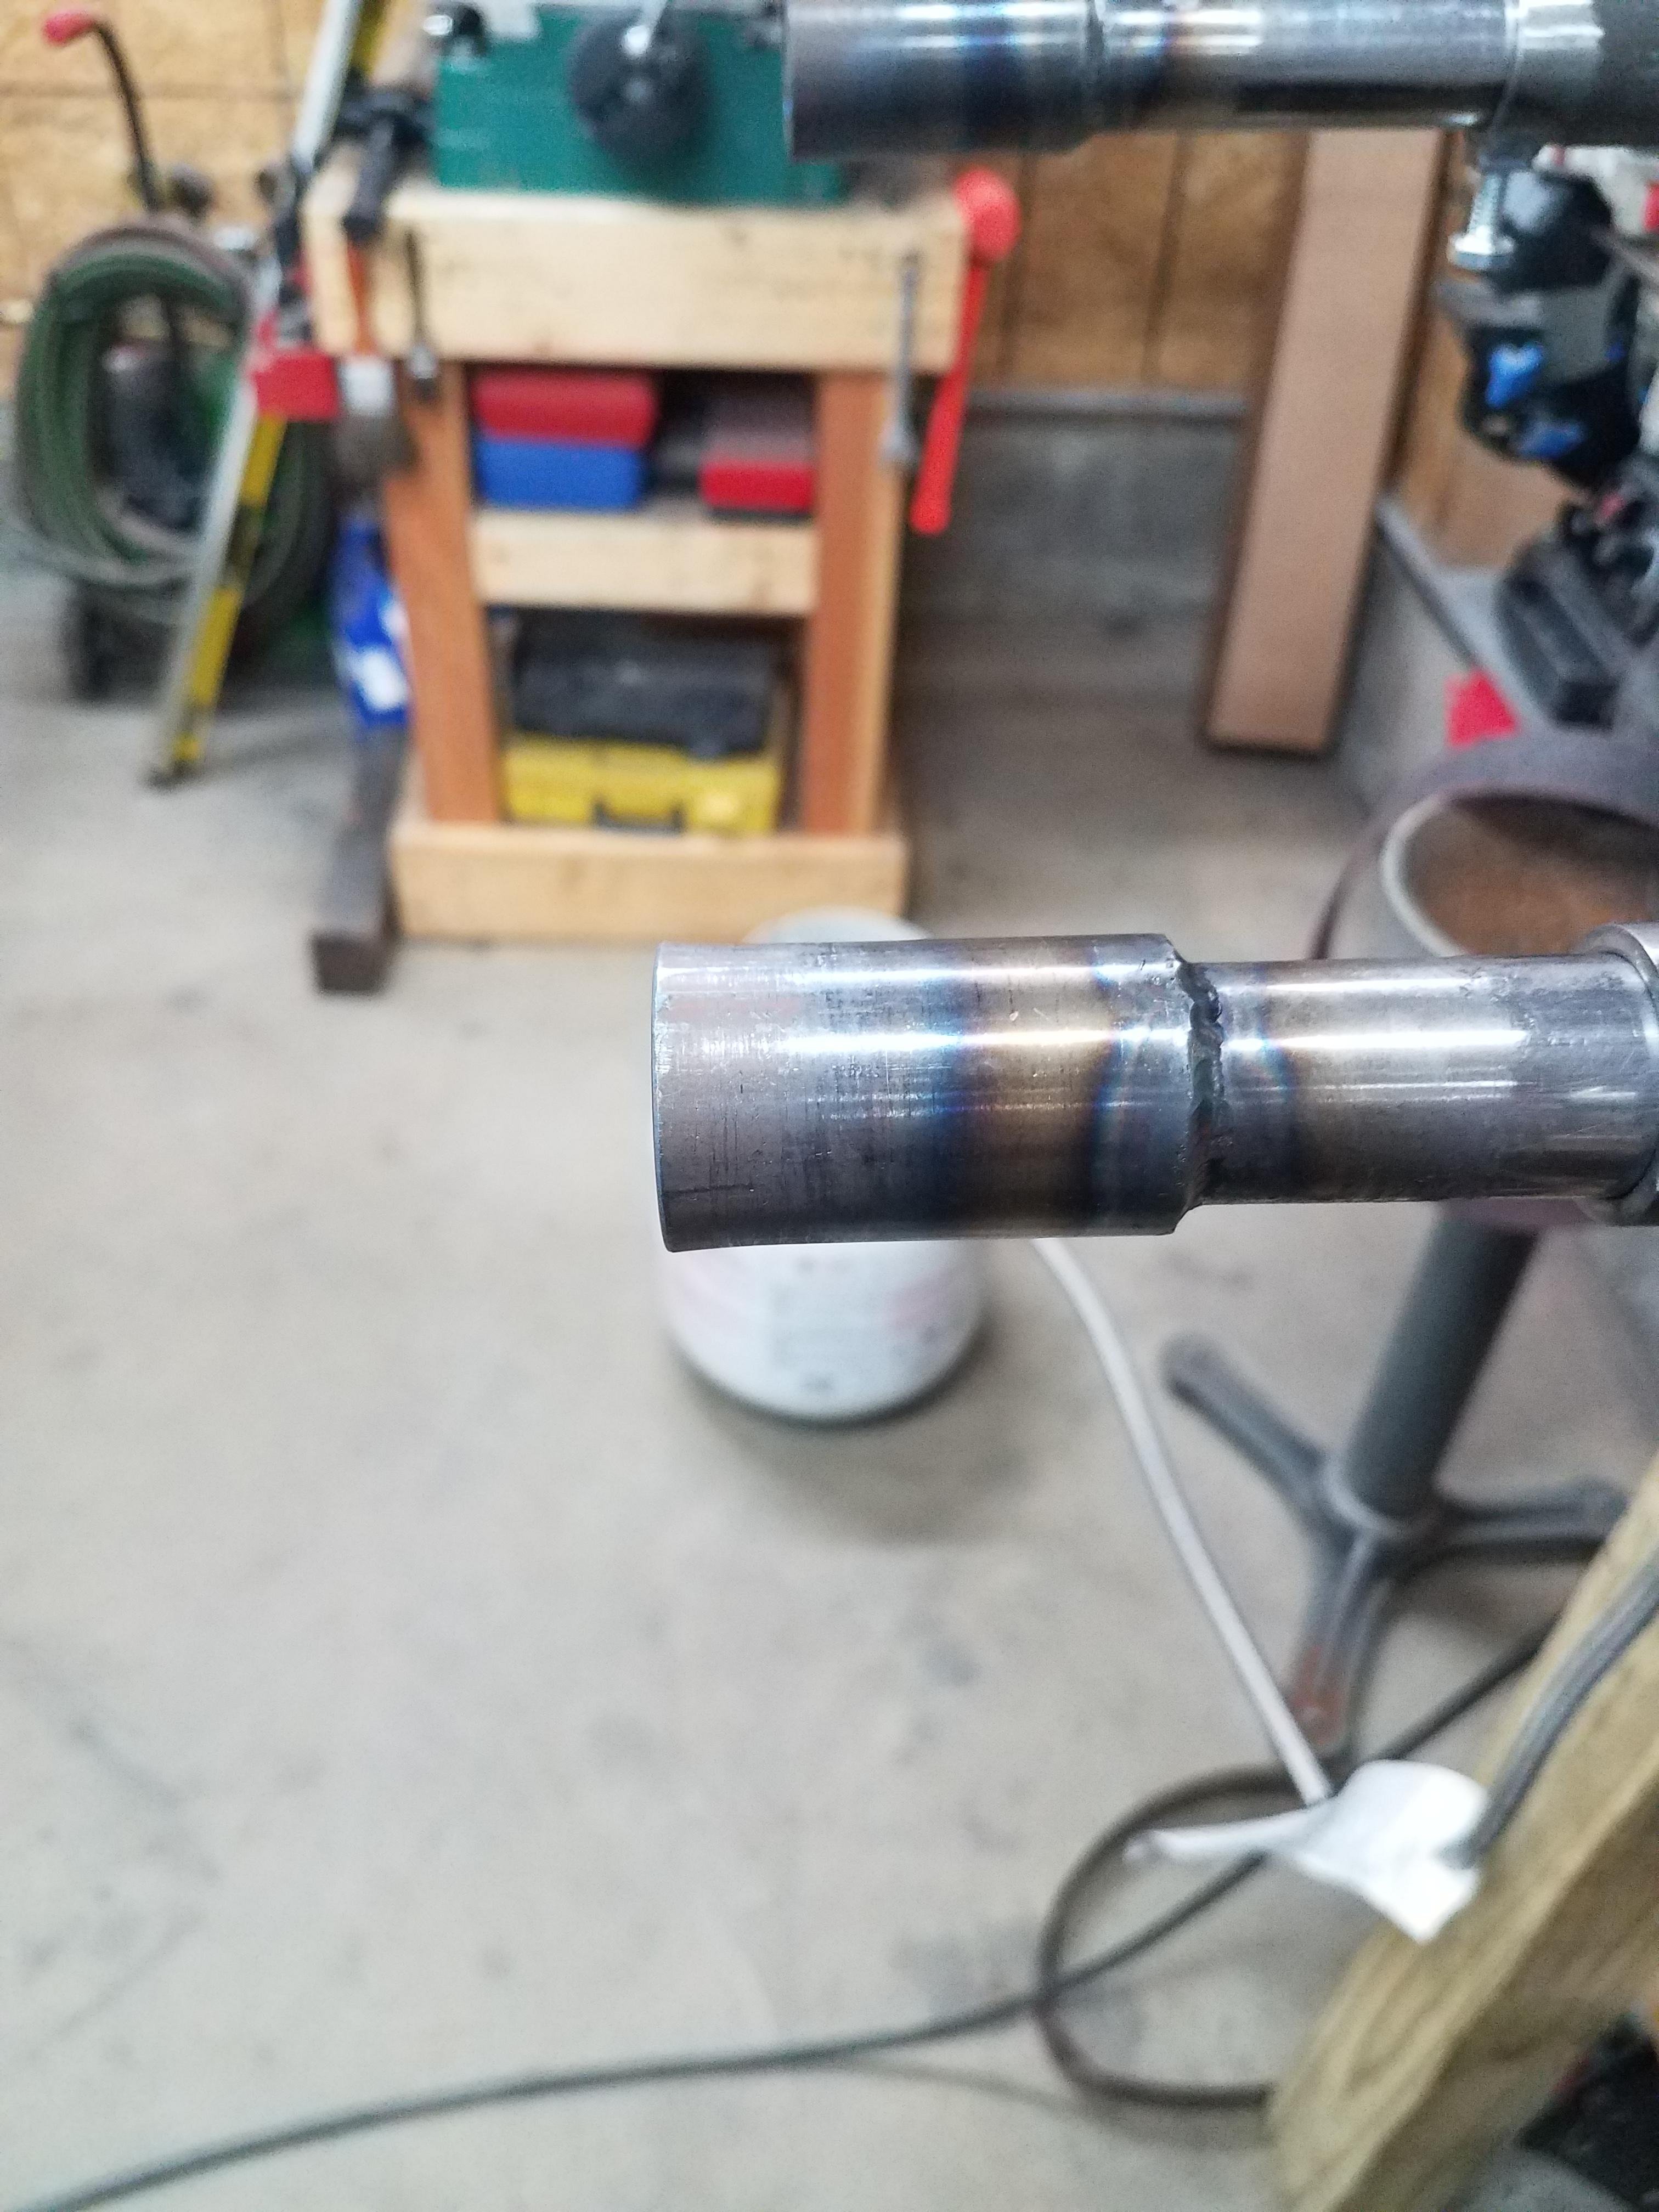
I must have missed that detail in prior posts on tapering the nozzle. Ill throw them in the drill and taper them on the belt grinder, as well as drop down to the .030 nozzles that I had tried way back when I first started and couldnt even get them to burn. The forward most edge of all the slots do have a pretty nice bevel as you suggested. More pictures to come tomorrow with the tapered nozzles. Going to throw in some of the forge body and stand that I will finish up tomorrow as well. It just wont have the final coatings on the IFB brick. Made a mistake not researching the MEEKO refractory cement I used to line the floor of the forge. Did I mention I jump in feet first, and it bit me again. Haha Thanks again for all the help Mikey.
-
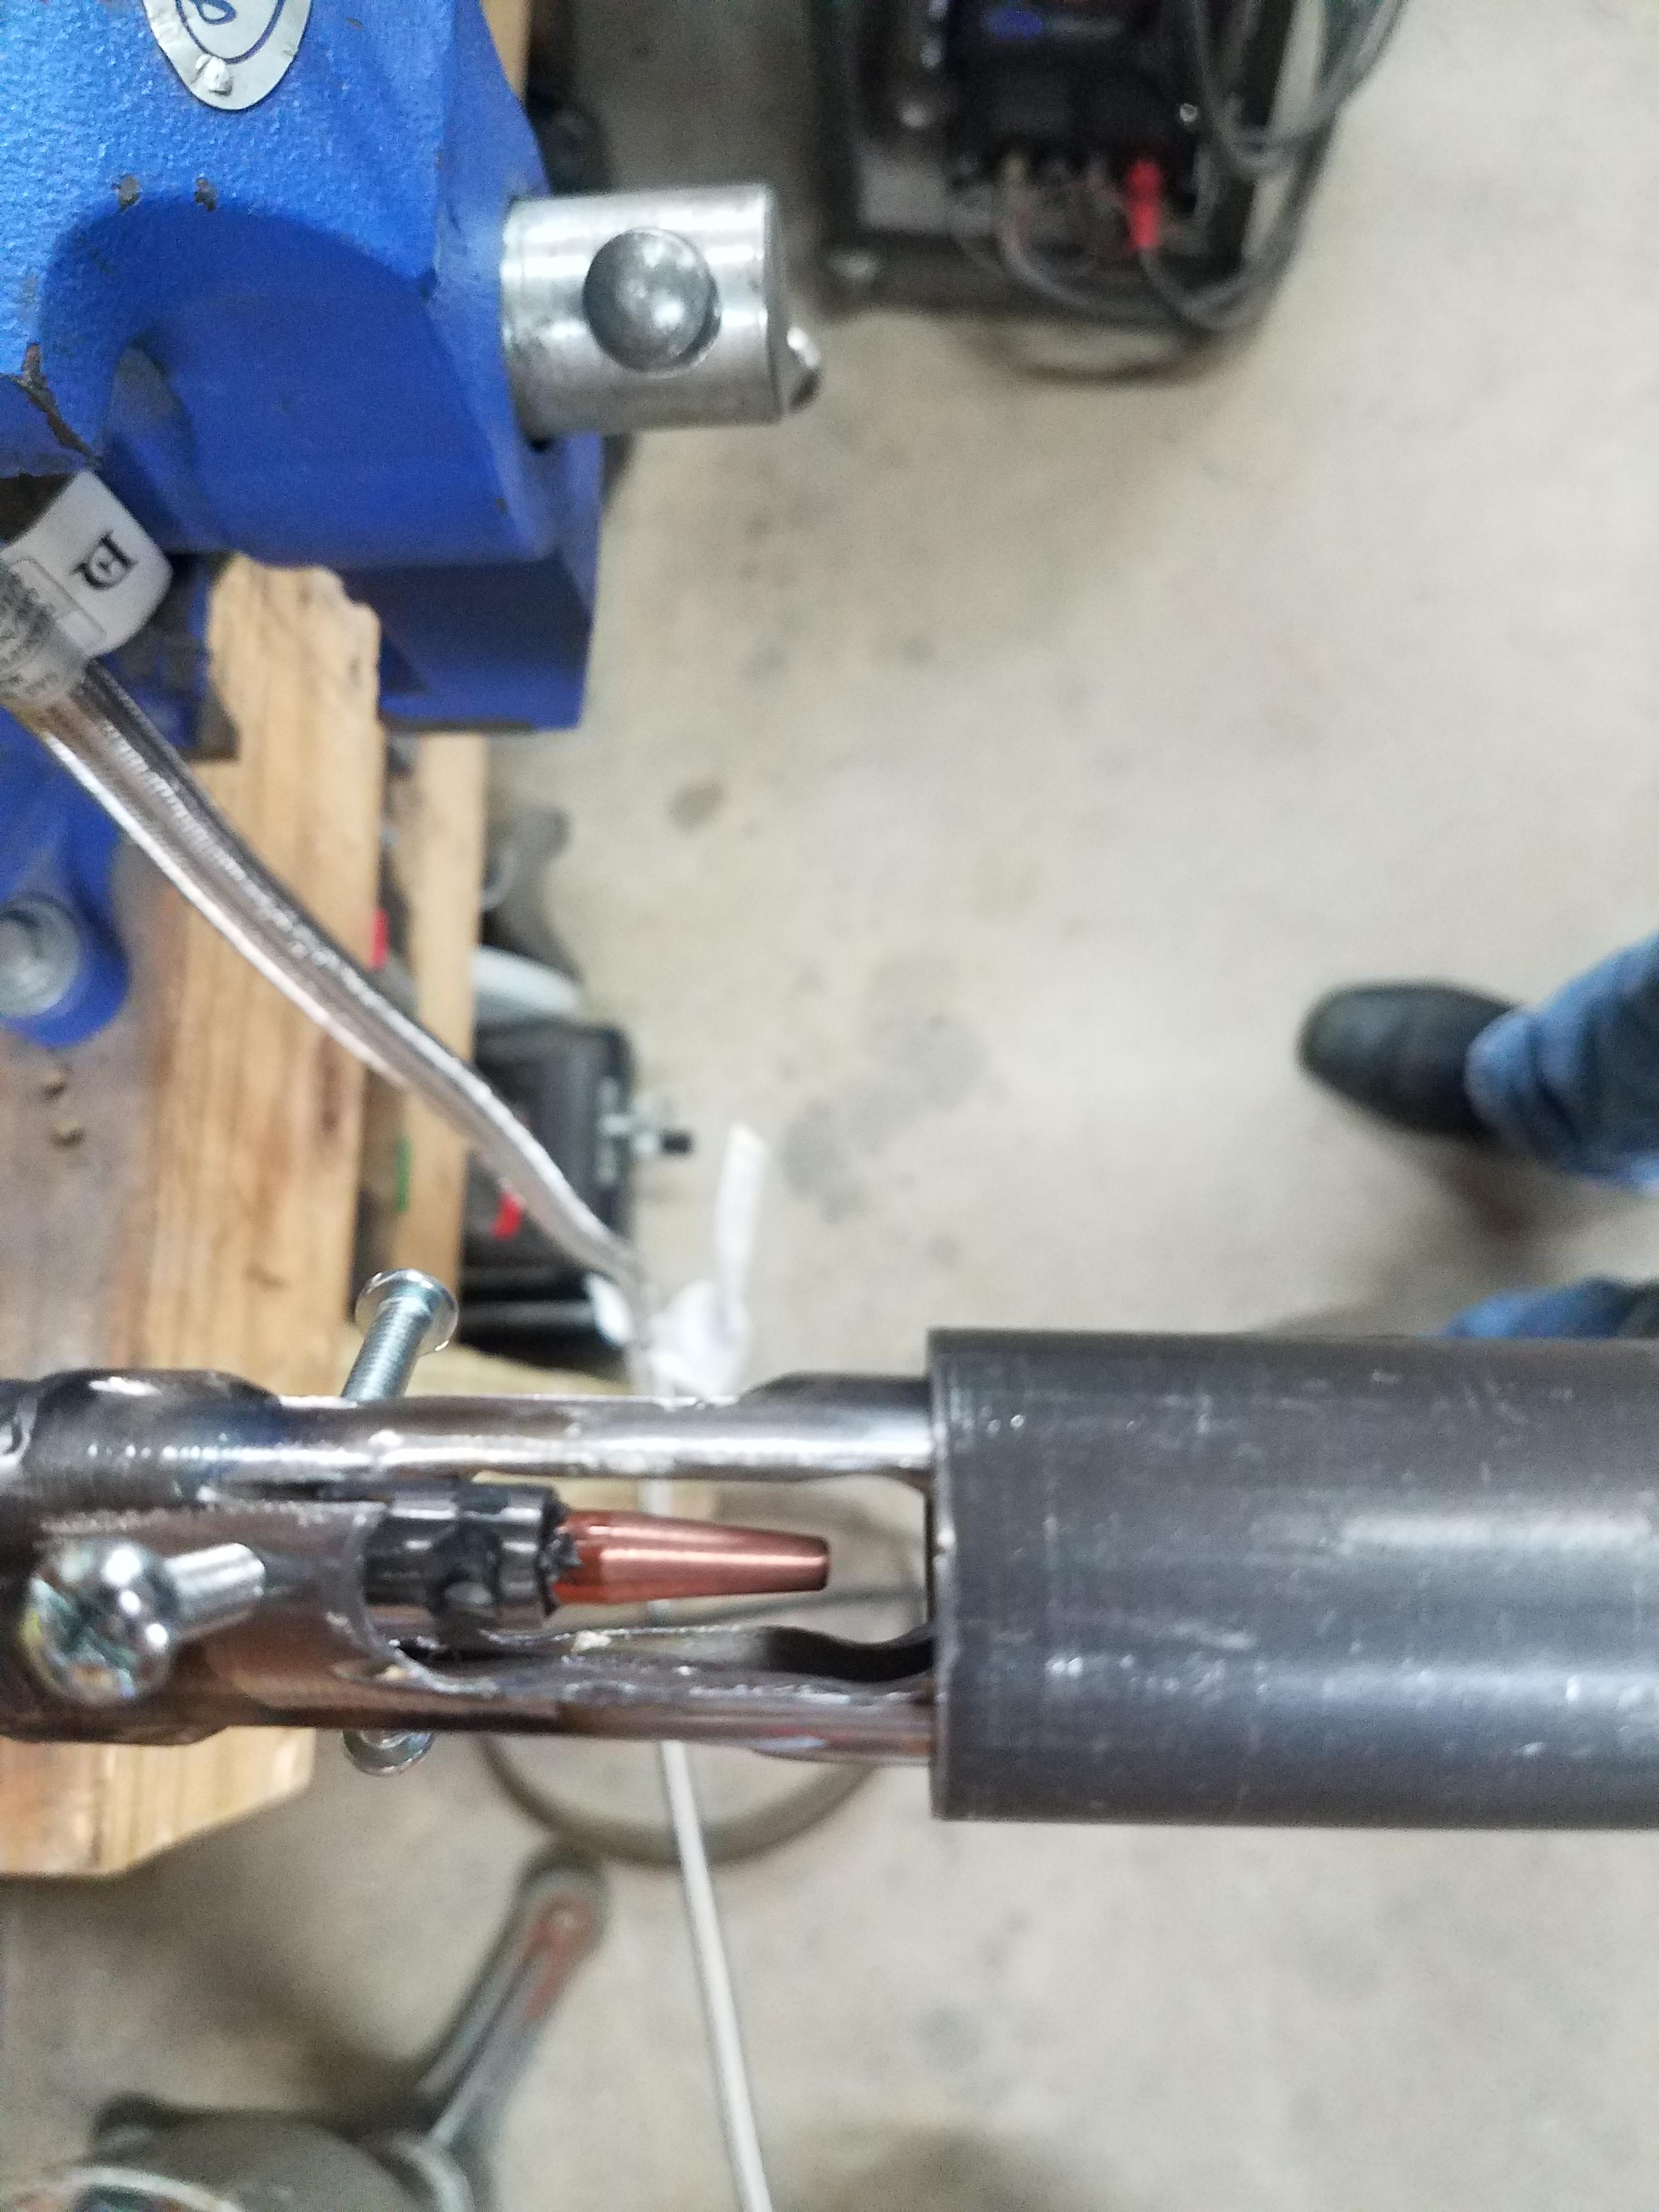
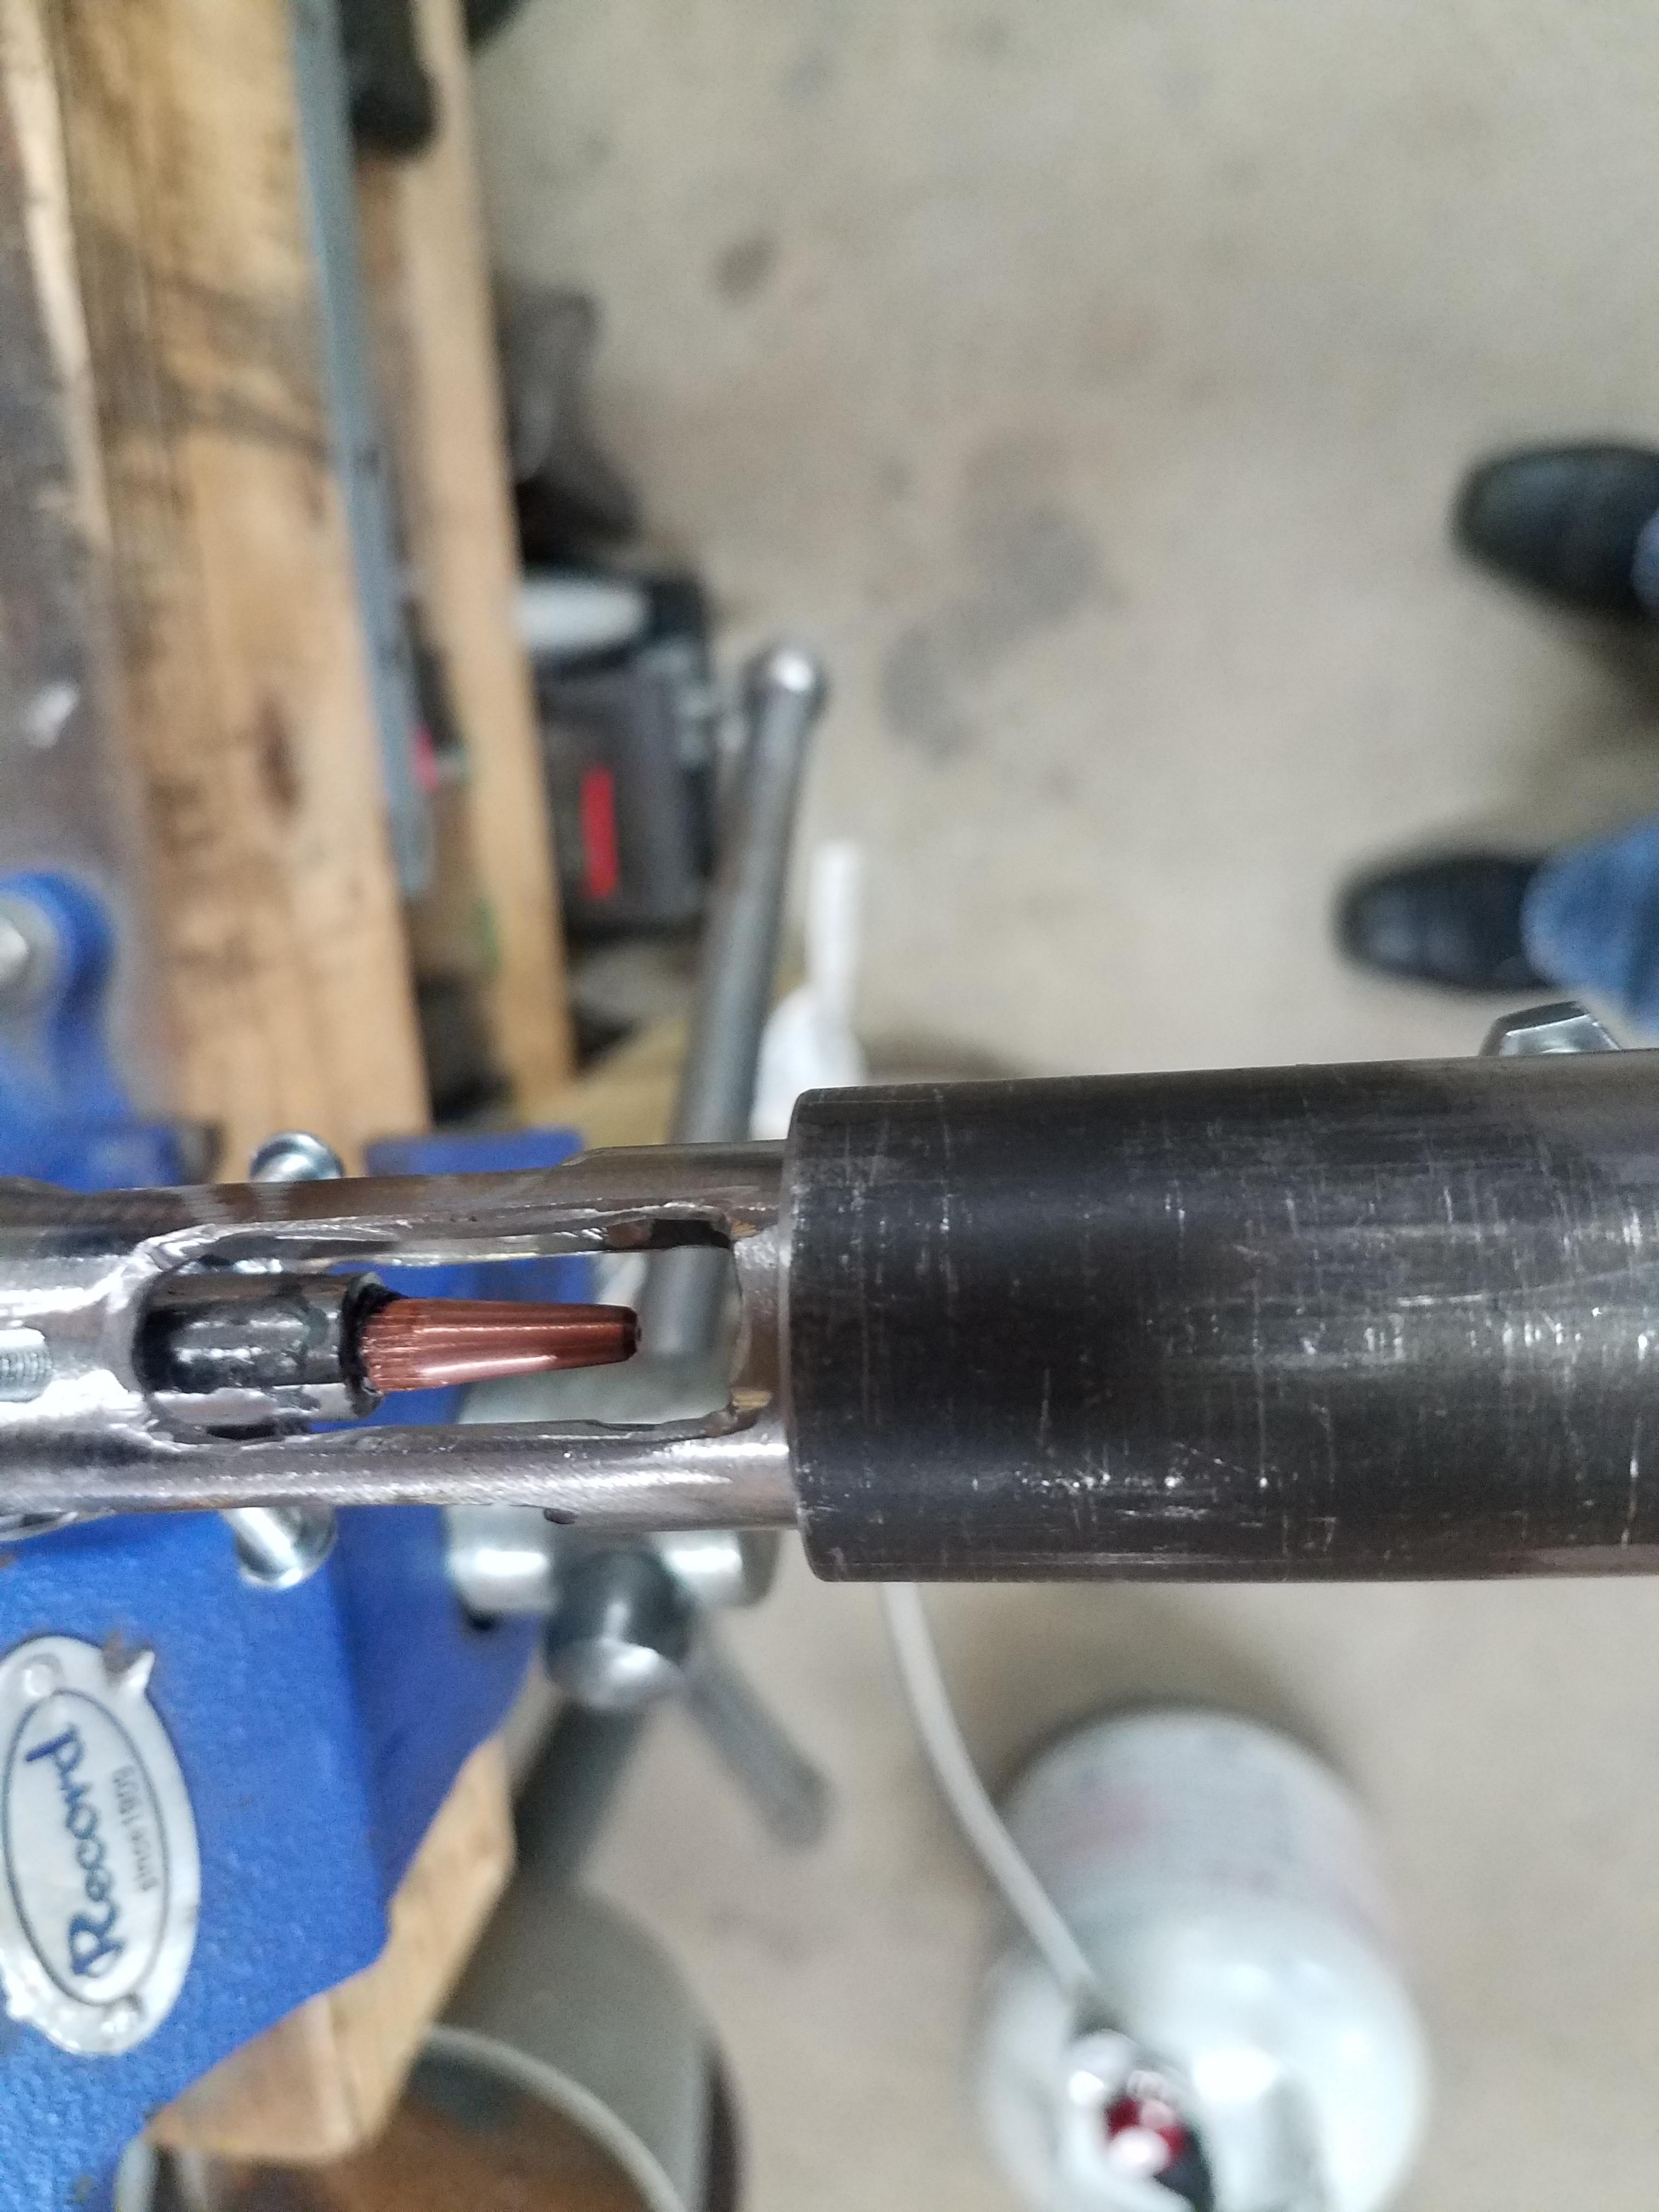
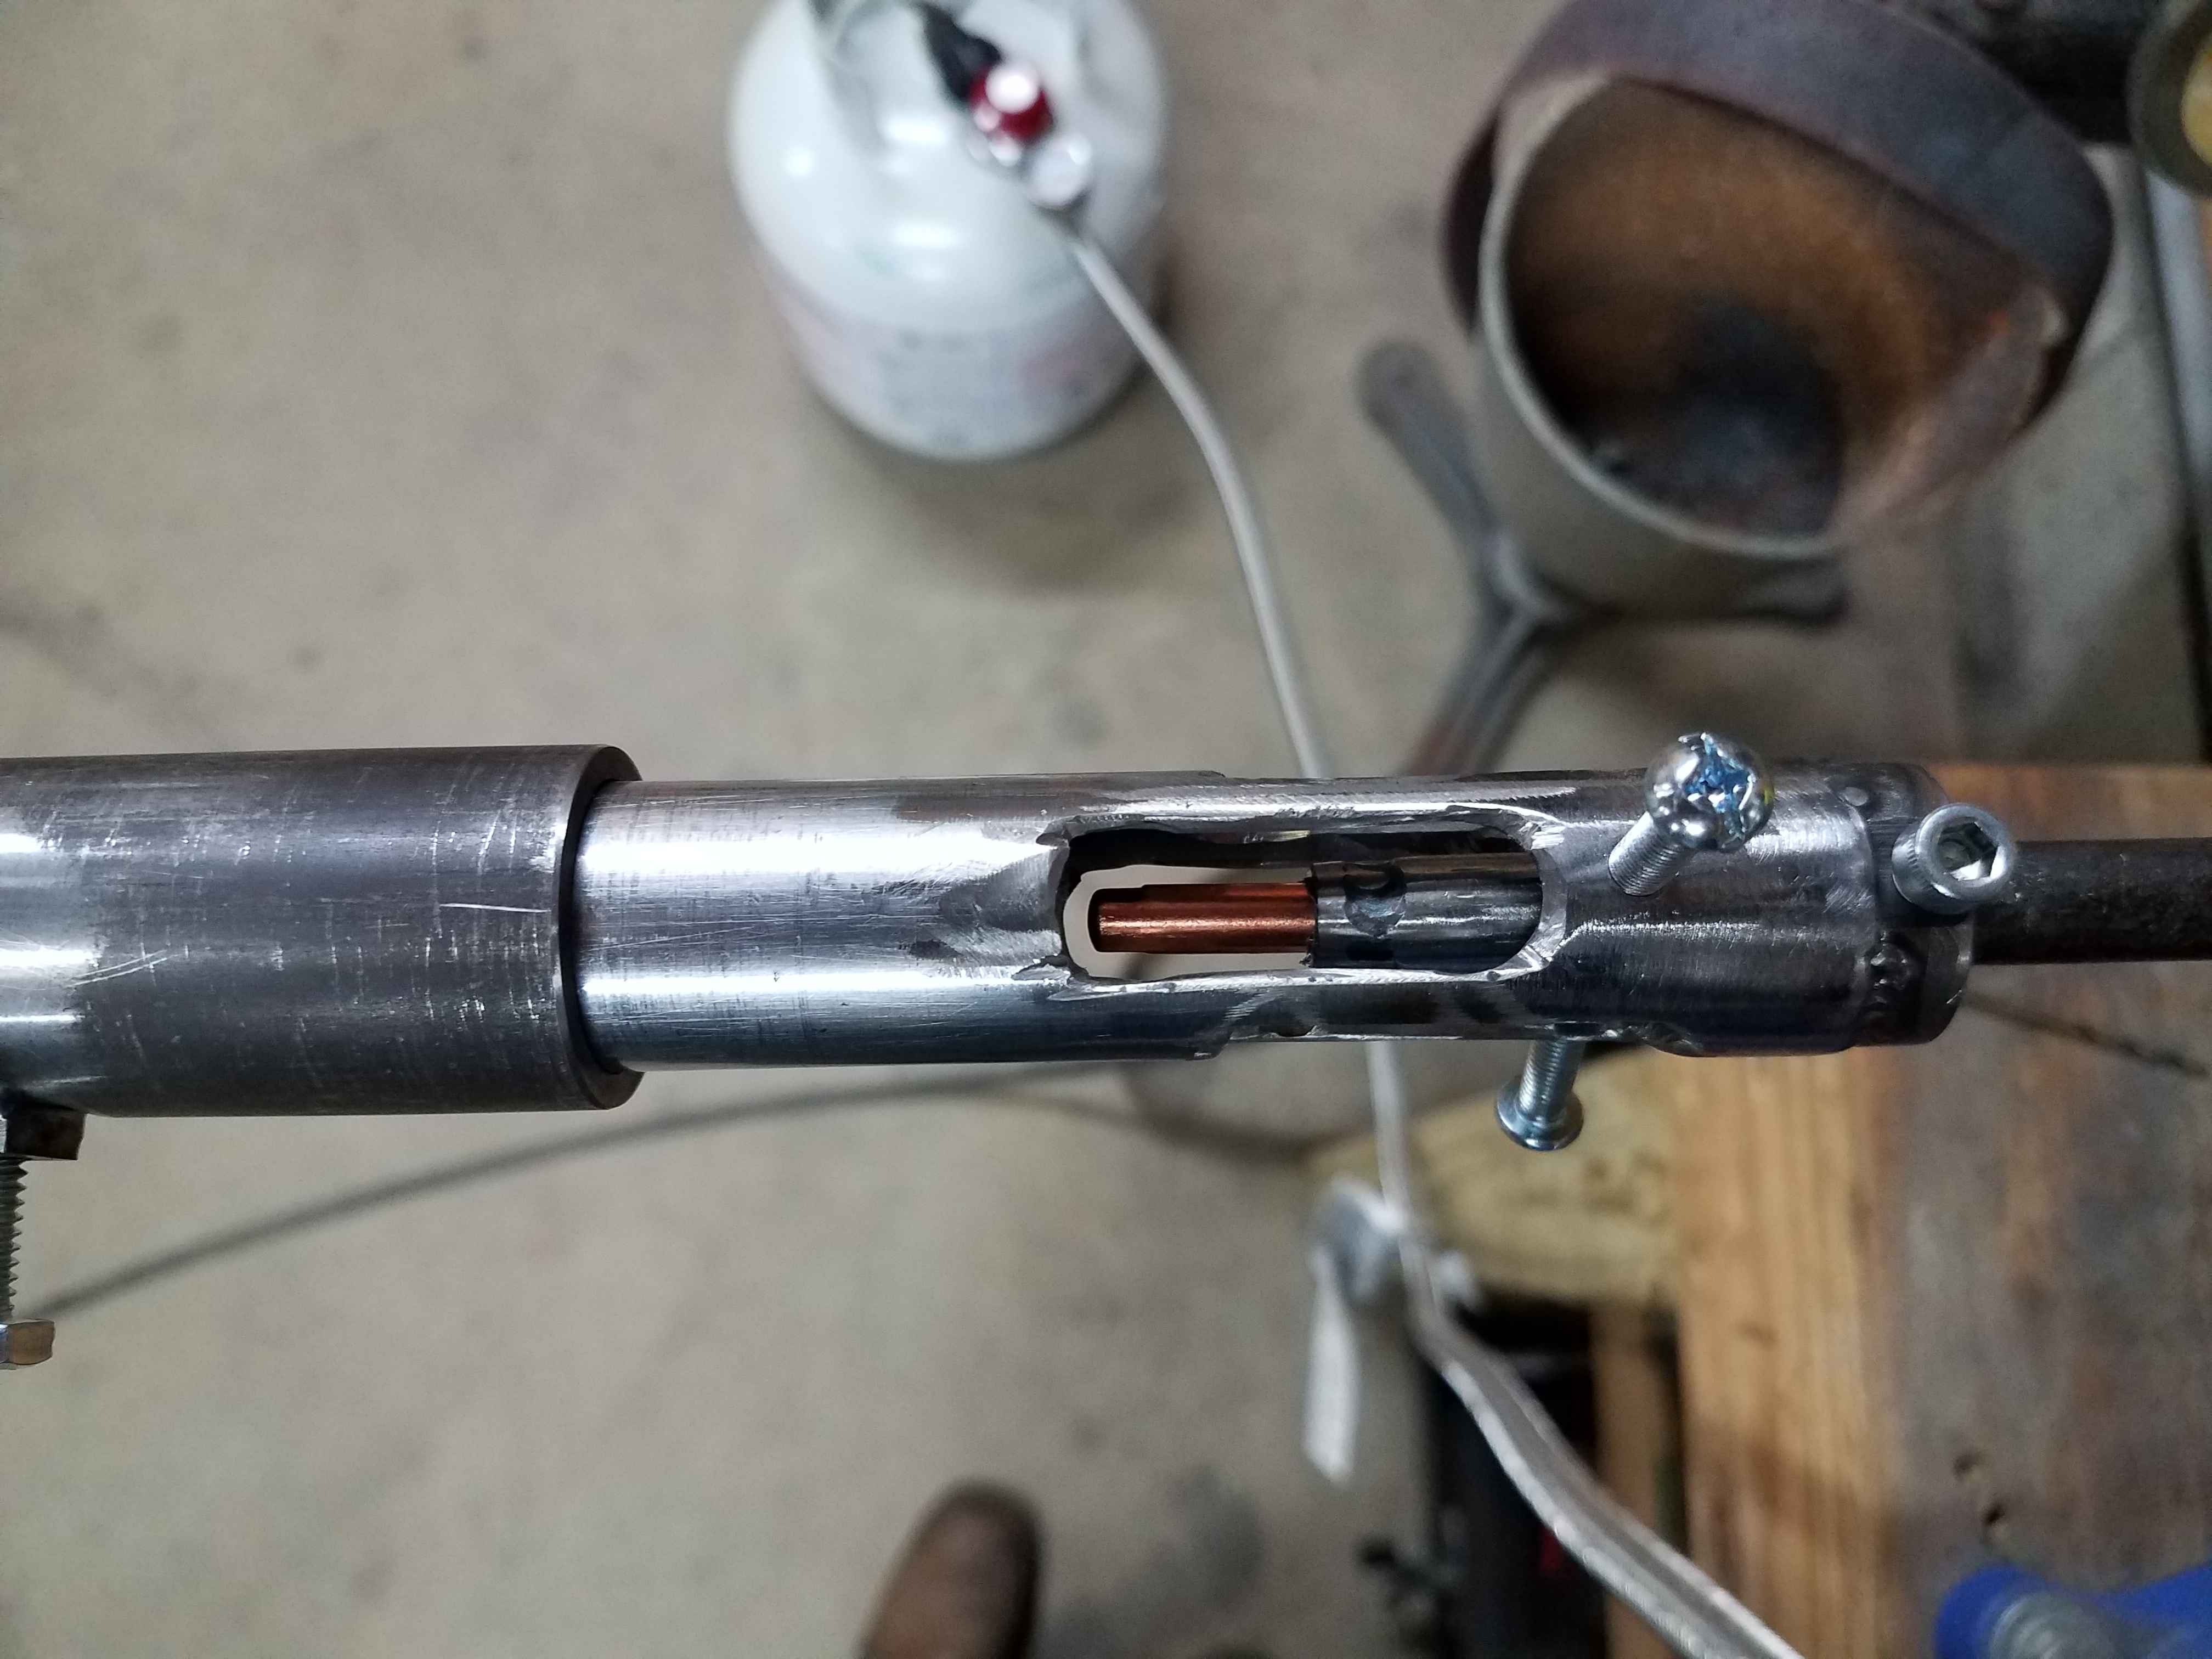
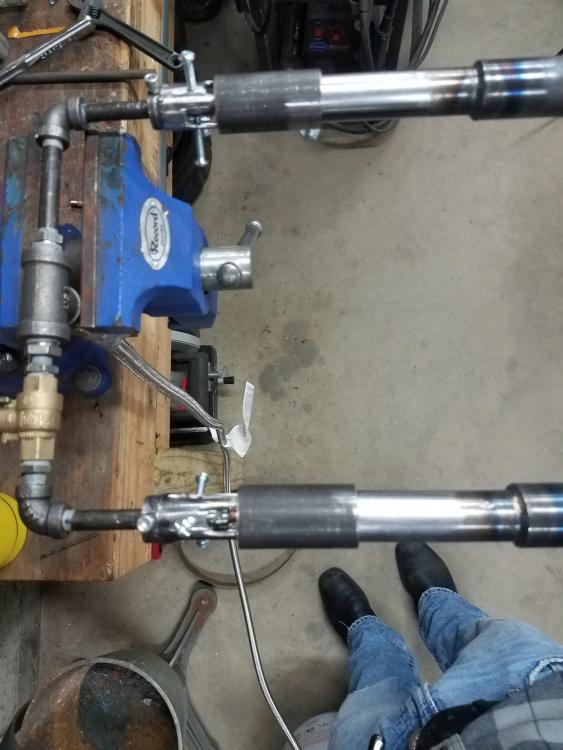
Ok Mikey, made some changes. Cut space inbetween holes to create 4 slots, a little rough but smoothed all edges as best I could. Added 3 set screws to be able to adjust the nozzles within the burner tubes to get them centered as well as possible. Need to hit the hardware store tomorrow to pick up some allen head set screws, only had some phillips head screws in my hardware box. I did notice that I had to choke off some of the air flow to get the burners to stay lit, they are no longer wide open. Burner tip is about 3/8" behind the forward most slot, the picture I am attaching was when it was closer to 1/4", but it seemed to stay lit and burn better at 3/8". Hopefully Im not forgetting anything. but here are the pictures of what my setup looks like. Overall Setup Close up of Air intake and MIG Nozzle 5PSI 10 PSI 15 PSI Just saw your last post, I will try the .030 MIG nozzles I have. Hopefully it still looks better than what it was.


-
Mikey, I will be working on creating the slots, I had not done that yet. I am using an .035 MIG contact tip as my gas orifice. I will plan to get some pictures of all that, as well as drill and tap each burner tube for 3 set screws on each. I will get some pictures of that as well as some burn pictures once I get into the shop this evening and have complete opening the holes up to slots.
-
Ok Mikey, I beveled the air intakes, flared the burners towards the end, just wasnt getting the whole entire pipe to to taper or swell. The orifice is at 1/4" behind the most forward air intake holes. The burners are randomly blowing out though now as well. 5psi 10psi 15psi