
John B
-
Posts
3,598 -
Joined
-
Last visited
Content Type
Profiles
Forums
Articles
Gallery
Downloads
Events
Posts posted by John B
-
-
Hi Frosty I made this tool, for adjusting cages etc as mentioned, made to use some 40 plus years ago as a temporary try this item, maybe one day I'll get round to refining it and doing a proper one, or maybe not , what ain't broke, don't need fixing., It's an idea, run with it.
.thumb.JPG.1b0e5d4ecf241858279fb6bc88ba34c0.JPG)
.thumb.JPG.2c0a2e7a47c6162ec77ed351ece87a0d.JPG)
Also useful for opening split bars and adjusting in many other situations.
-
On 3/4/2019 at 10:44 AM, jlpservicesinc said:
**** this video was in response to a comment from a fellow smith about how plain and not really graceful a 4 rod handle is vs a higher count handle.. While I for the most part agree there are ways to make a lower count handle as graceful and interesting..
Plain and Graceful is subjective, and not at all constructive. You don't need to get into an argument about it.
By using plain round bar most twists and cages look graceful, some more graceful than others.
I would think a comment on a "comfort" grip when in use would be more relevant , but the twisted squared effect gives more of a WOW factor and is certanly a feature.
Personally I think the so called Rubiks cube twist is a pain when used as a handle or key chain or bottle opener handle, particularly for old hands like mine with a delicate skin, not the least to say how abrasive they are when used from and kept in a pocket.
Thank you for your contribution to the site it has helped and inspired many, criticism is easy, putting yourself out there is not.
Respect to you Jennifer.
-
12 blacksmiths in a room, 18 opinions on how it should be done.
There is no proper way, just get to where you want it to be, and so long as you get there safely, what's the problem?
As you progress and see different smiths using different techniques, yet ending up with a similar result, you can make your own mind up and develop your techniques from them.
I think it is good that we can all agree to differ.
As someone who has made his living from traditional blacksmithing for over forty years, and being involved with teaching techniques for over twent five of them (Not for financial gain but to keep the craft alive and promoting other smiths) My observation is that by teaching classes, it is a relatively easier way to make money than doing the so called 'Proper stuff' with all the pressures that entails.
I'm too old to know it all, and there is such a lot more to learn,
-
On 3/2/2019 at 2:04 AM, SFC Snuffy said:
I could use some virtual tutelage and opinions from you more-experienced smiths. I'm using 3/8"-square HR, and aiming for something like the twisted handle John B. showed on page 3 and described on page 4 (and that ausfire put his own excellent spin on, above).
This is what I ended up with:
And while it isn't *bad,* per se, the loop is a bit misshapen. I had trouble getting the punch marks aligned, and real trouble getting the loop into a symmetrical shape. I've got a pretty basic bending jig... maybe my heat wasn't even? Maybe I didn't isolate/freeze the right areas? Do I need different or better tooling? Maybe I just need to do it a dozen more times for practice... sigh.
 Any advice would be greatly appreciated.
Hi Snuffy, Nothing wrong with your loop shape, it's a forging exercise, not a ' make the same' its also from a different sized material so different parameters are in place.
The adage usually is If it looks right, it is right, and then its down to your own standardsperfection is nigh on impossible at this craft.
You used a bender arangement, I don't, just the anvil, hearth, hammer and a leg vise.
Method is
Mark out for end length, mark out for circle circumference dimension and centre punch at these dimensions
Forge the end taper with the punch marks to the side so you can see them when bending.
Take a heat at the centre of the circle dimension and over the anvil, bend into a U lining up the punch marks
If the punch marks are not in alignment, use the leg vise to individually adjust them to align, keeping the U shape,
When they are in alignment, reheat and bring the tip of the taper to touch the long edge. Place in the vise so the punch marks align with the jaw ends and tighten vise to make the pieces come together, this will give you a loop/eye on the end.
You can adjust the shape of the eye by using a soft faced hammer/mallet to make to a rounder shape or whatever shape you like.
(Strike the end to push the sides out reducing the teardrop shape to a fatter one until round or what you like)
Then when you can live with the result, reheat and twist the handle section
The forge the other end to whatever you want there.
Picture shows students work when on a taster day, Log roller with dragon face point and an ash rake and a simple hook for two tools
.
.JPG.3e9982a089e26c21483ba9058ca4f84e.JPG)
Hope this helps
-
The Cosira books are I believe not currently available on line, the website I am informed is being overhauled, and they should be returning, but when that will be I have no idea.
These are some notes from an intensive basic Blacksmithing course I host. They are intended as a reminder of what can be used in various projects and situations that have been dicussed in class.
Joining methods used in metalworking
Welding; Forge welding, oxy acetylene, arc, Mig, Tig, spot
Riveting; Round or square shank, different heads and riveting allowances for different types of head
Studs; Threaded rod, double ended, need a tapped hole or/and nuts
Ball nuts; Round, domed, and other profiles
Collars; Shaped, riveted (Multi parts), cast, need for use of mandrel
Wrapping; Like collars, but from wire/round rod
Brazing; Use of brass, copper, fluxes, cleaning after
Silver soldering; Different grades of solder, use of flux, cleaning after
Threading; Use of taps and dies thread, chasers, tap and die holders, drilling for core diameter/tapping size, clearance sizes, cutting fluids
Nuts and Bolts; Types and uses of threads, different pitches, Identification on heads
Tong with a Slot and Wedge; Leg vice type fitting, can be easily dismantled, use table legs, frames etc
Cotter pins; Like old bicycle pedal fixings, go solid but can be dismantled. Tapered flat on one side to fit against flat on a shaft, secured in place by nut with washer
Split Cotter pins; Made of thin sheet, ( C=== ) fit through a slot and legs bent out to retain glass sheet etc ie lanterns
Taper Pins; Used to secure rings on shafts eg on Blacker hammers, that move, but not rotate or similar situations. (They need a taper ream to form the hole after drilling, pins can be removed if required)
Roll pins and dowels; Used to locate items, and are removable.
Halving joints,
Pass throughs; used to position bars but not necessarily a secured fixing
For sheet metal working other methods are also used, the most common being
Lapped, Spot weld, Seamed, Soft solder, Wired, Hemmed, Flanged
I hope this may be of some use as to what may be available when assembling projects. Enjoy
-
Up to the 70's, coal was the predominant fuel used, then came the "Clean air act" and Mrs Thatchers vendetta against Mr Scargill and the coal miners leading to the closure of many of the pits producing the preferred forging coal.
To continue forging, many switched to industrial coke, this was classed as smokeless and was used in poewr stations to produce electricity, and so became easily available, now due to the global warming reaction, the power stations are switching to alternative sources, gas and oil, and there is little demand for the coke, power stations taking up to 200,000 tonnes a year, blacksmiths only using a fraction of that amount, hence the closure of the coke supplies.
Side blast forges are common in the UK probably becaue most forges certainly the industrial ones were water powered and had water readily available, there were many industrial bottom blast forges in use also but most seemed to have fallen into decline. They seem to be making a revival as most shops hobbiests use are relatively small, so the bonus is the footprint in the workshop when space is at a premium, They can also be easily transported to be used at local craft fairs and events. They are simpler to make than the side blast ones too.
Considering the vastness of the US, it makes sense to have the bottom blast forges, lighter and easier to transport to new regions before railways were available across the continent, no need for water to be used when it could be in short supply, easy to sustain and repair.
By and large we don't use borax for welding, it is an option, It used to be easily available at the local chemist, or other shops, now it is removed from those shelves due to legislation apparently.
Anvils are available but again stupid prices are being asked for them, they went through a phase of avidly being purchased and shipped out to third world countries, then they were in vogue as garden ornaments, and now due to You Tube and popular raising of awareness, prices are ridiculous again .
One thing that does stand out, and I may be wrong is the amount of powered hammers and other machinery that seem readily available and in use in the US workshops.
The space available and equipment some of the US contributors have is enviable.
A lot of us in the UK have old tools around, drills etc, but we also have more modern units too, if you want to be commercially viable you have to,
Belt grinders and linishers are hard to source in the UK, but easy enough to make if you really want one, belts can be sourced relatively easily as there are suppliers who make them to your specs. I would not class them as a blackmiths tool, but more specific to bladesmithing, which in the UK was and should be a specific skills area.
As for metal supplies, there are a number of suppliers in the UK who have a good range of carbon and other alloy steels, but some used in bladesmithing and patternwelding are more difficult to source, they are available but not particularly well known. The other thing is cost, most are expensive and have a delivery charge too.
Training is available in the UK with colleges being mainly responsible as a starting position, usually these are supported by the Worshipful Company of Blacksmiths, they then go forth to develop their skills and hopefully a career in the various smithing related industries.
For those who are not able to attend or enrol at one of the colleges there are other ways to develop and learn skills at your own pace, age and ability is no barrier, they just need the will and determination to succeed, and patience helps too.
At Westpoint we take students with an age range from 7 to 90, and have some success with attendees going on to make a business from what they have learnt in our forging facility..
-
Depending on degree of use and size, O1 (also known in the UK as silver steel) is my preferred choice for beginers and on, It can be purchased in short lengths (12" or 36") in ground finish round bars,
Heat treatment is straightforward, and predictable, especially if making item for a client.
I have sometimes made them from "mild steel" and case hardened them.
-
On 12/18/2018 at 11:26 AM, ausfire said:
Thanks John and TP. I don't do much commission work … these pokers go straight into the shop and they seem to sell well regardless of the alignment of the working end. I think as a general rule, I will make them like the one in the photo, as a small rotation of the wrist either way makes them function well.
The options are there to discuss with clients who want bespoke/commisioned items , and are things to consider when discussing the clients options.
It's part of the service that sets our products apart from store bought items, they are unique and designed to solve the client's problem/requirements whatever they may be.
-
Nice job Aus, often the part the item has to play dictates the relationship of motif to handle eye, and also the working end alignment,
Things to take into consideration are
Is it a seperate item,
If it is to be suspended how and where, it could be vertical on a wall, part of a companion set, laid down or on andirons,
All situations have a bearing on the design being used.
To sum up, position is relative to function, make them to suit
-
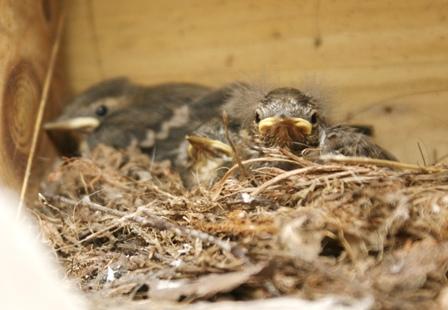
Don't understand this social media stuff, but found these little beggars happily "TWEETING" from my workshop website.
.JPG.d5e729fd6e82996332e63dc34bb77ac6.JPG)

-
10 hours ago, ausfire said:
Tried another John B twist today. This one is 8mm square bar and was a bit easier to twist than the 10mm. I have not shown the side with the alignment punch marks because they didn't line up this time. Nevertheless, I am happy with it. I do a lot of pokers and usually make a leaf wrap handle, but this method is good for getting a wider and more comfortable handle. I thank John for the guidelines on forging these.
No thanks needed, but is appreciated. I cannot claim it as mine, as it is one that used to be in common usage, and has many varients, and is particularly easy to do for newbies to achieve getting an impressive look, with minimum effort.
It is a good way to introduce them to the difference between forging and forming, how to take long and short heats, the use of a vise, and a simple bar toform the twist,and how twists can be affected by heat dissipation making them uneven.
Enjoy and have fun.
-
I don't know if this is still relevant, but investigate the tax situation in France with regard to being registered as a "Blacksmith", or an "Artist Blacksmith".
Apparently the Blacksmith is liable to more taxation and legislation then the Artist is.
This was brought home to me by a student who had gone to France and decided to set up alongside his partners work project as a Blacksmith. When he found out about the Tax situation, he came back and took a crash course in Artistic Blacksmithing, and then rebranded himself back in France.
-
1 hour ago, ausfire said:
A brass marker! Well, that's worth a try. Thanks.
Agree with JLP The Tipp Ex product is what I sometimes use, I understand thay are made with titanium oxide content, hence the heat resistance.
Traditional brass rule used to have steel wear plates rivetted on the ends to reduce the wear and hence inaccuracy over time.
-
7 hours ago, ausfire said:
I had a try using 10mm square bar. I used your punch marks idea and I did get them level. Quite pleased with the result. I thought twisting 10mm bar around itself would be harder than it was. Maybe another half twist or so would have been OK. Another variation for poker handles. Thanks, John.
Looks good, Another half twist , or more are other variations, but I find the one and a half turns are comfortable on the hand.
Punch marks are the traditional way of marking key points when forging as they are visible when meatal is at forging heat. Tend to disappear at welding heat, so other methods required then if accurate location needed.
-
Thanks for all the comments, don't get much time to do bits now I am afraid, bit out of practice.
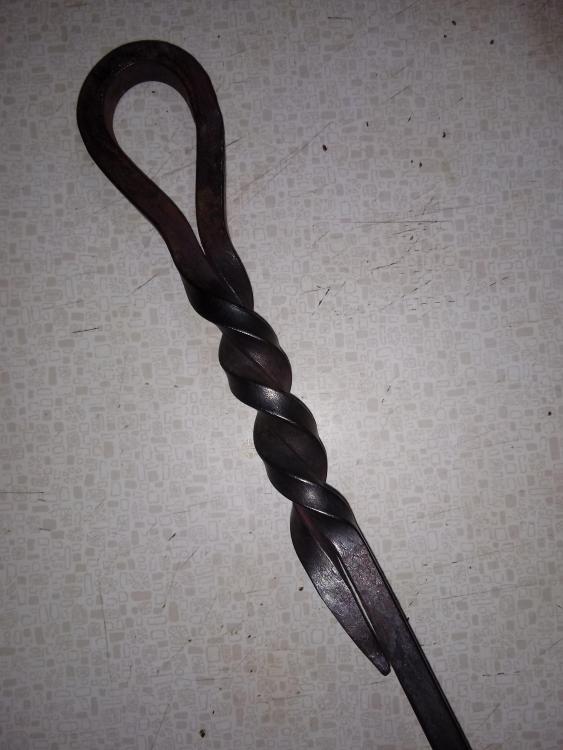
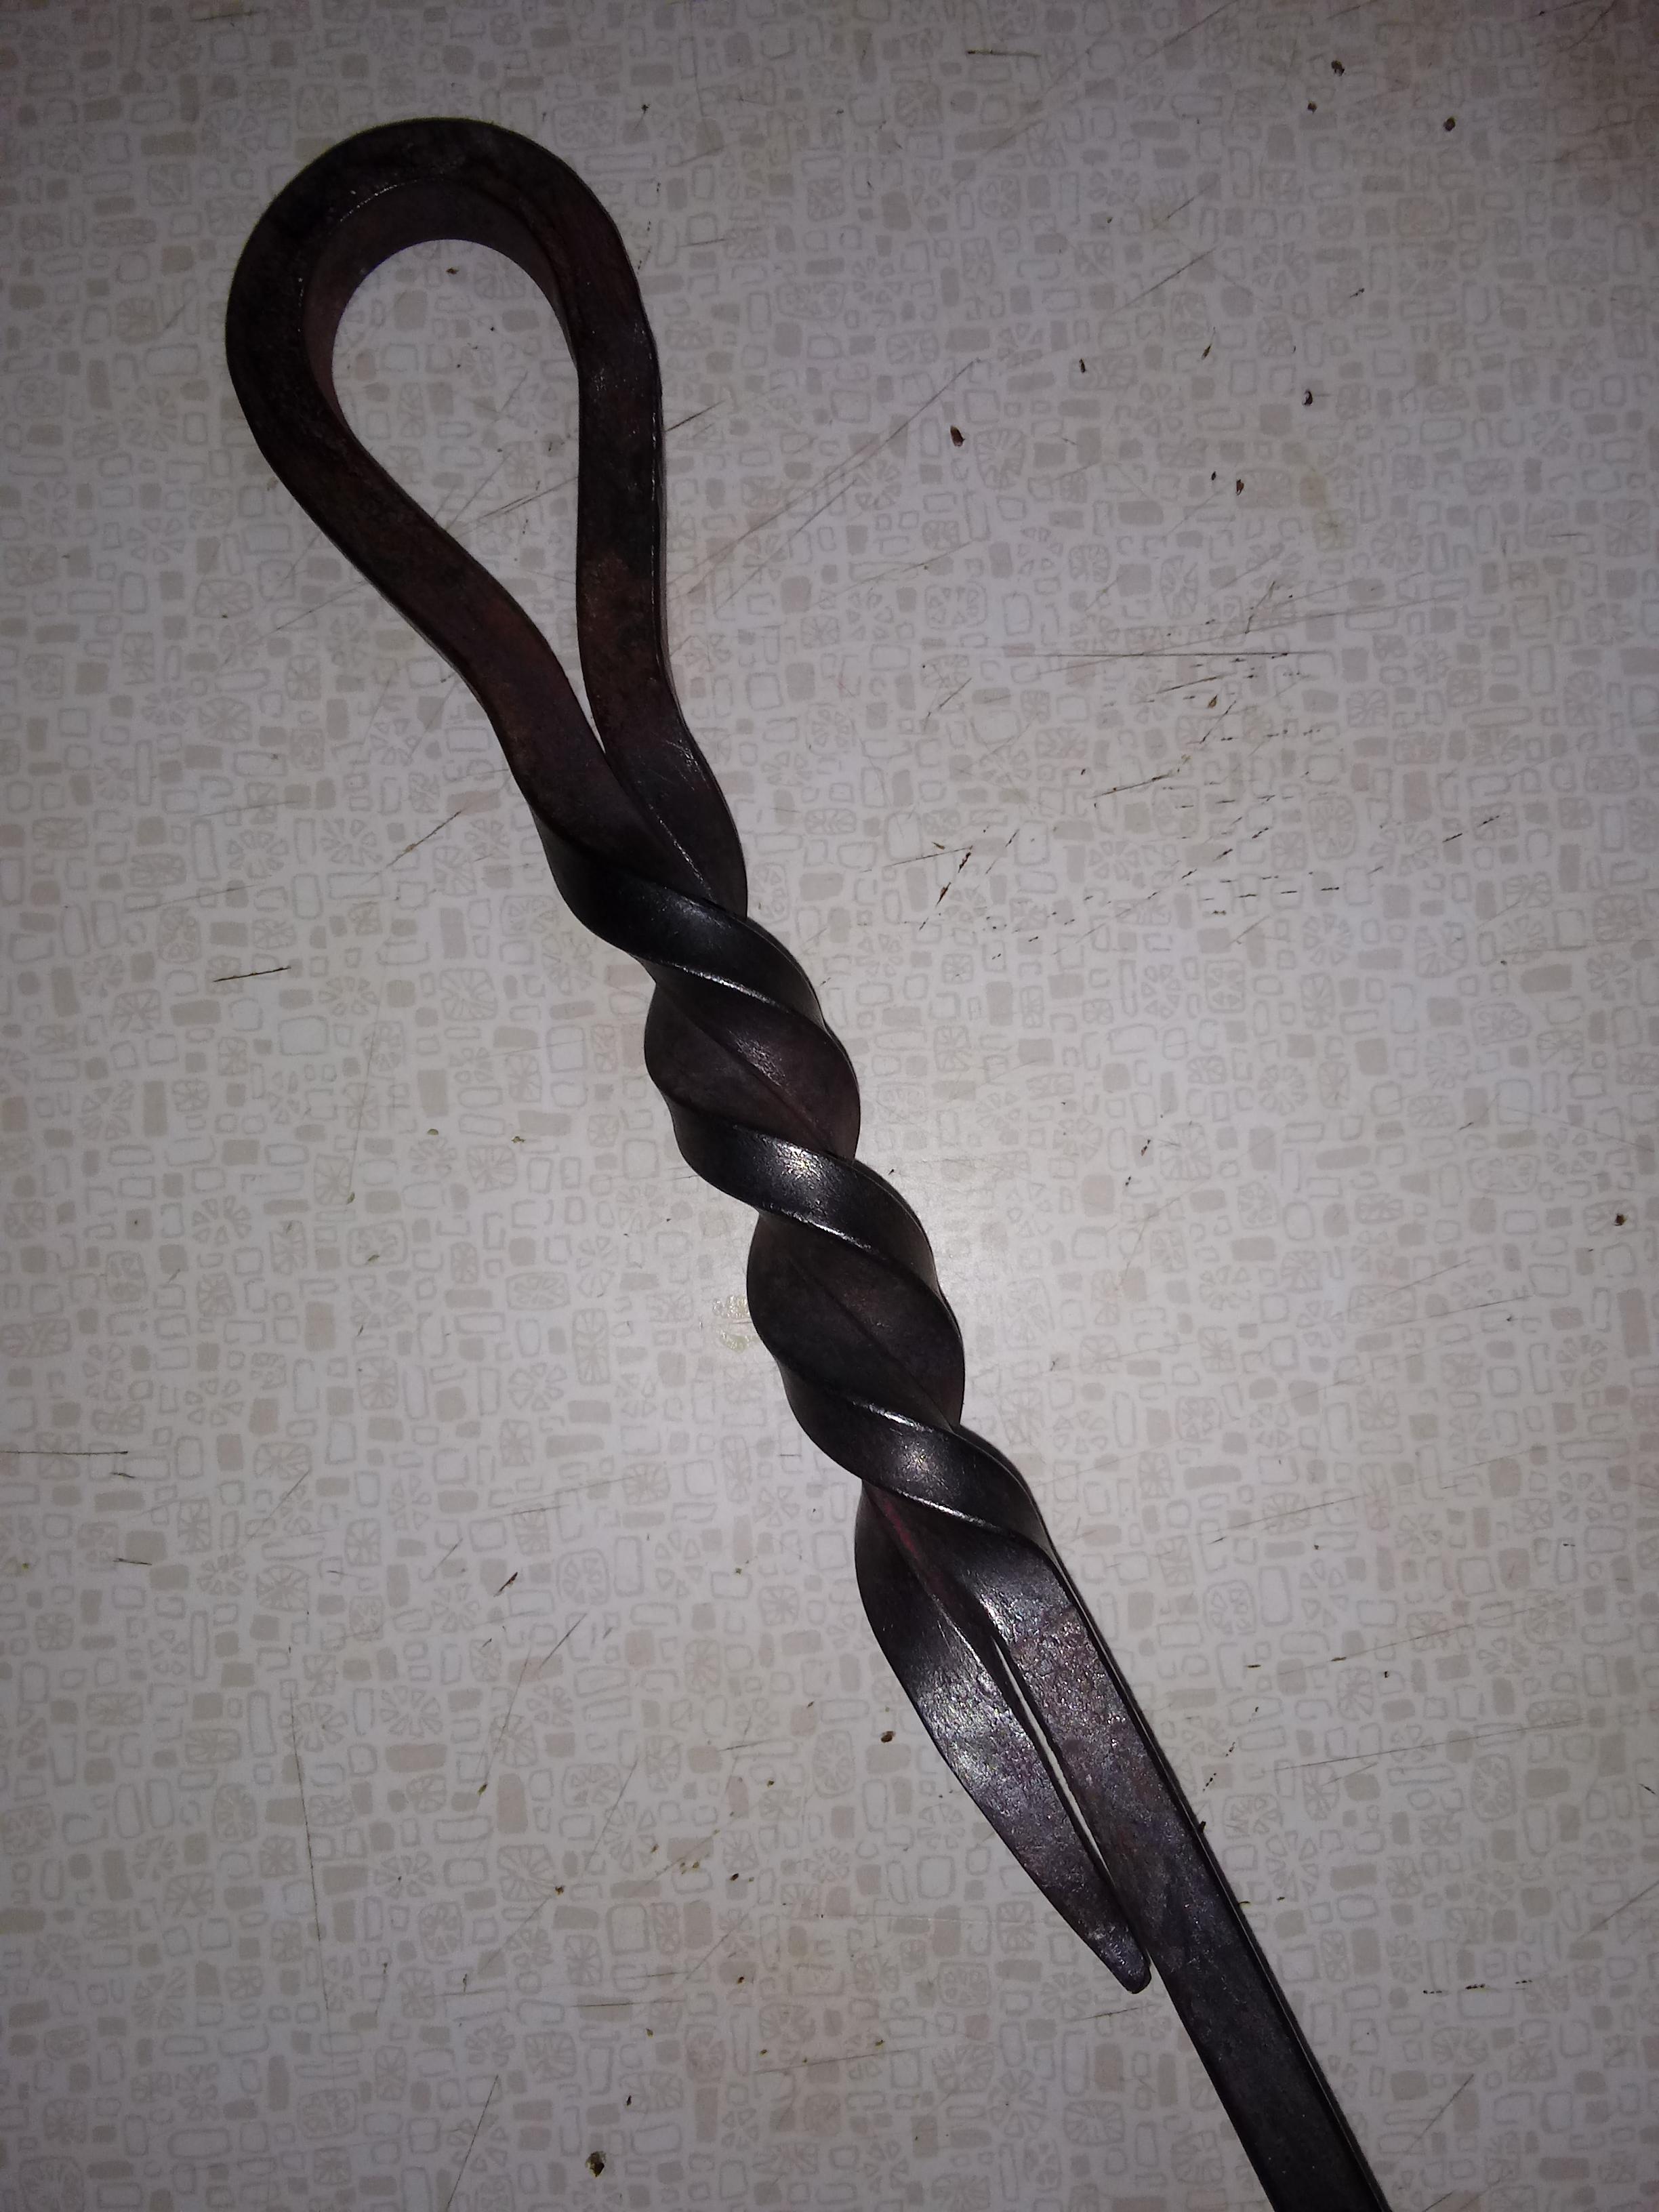
6 hours ago, ausfire said:I'm struggling to see how you managed the twist in the loop handle poker. It's good because it gives more width to the handle. I'm guessing that you tapered the end and bent the steel against itself. You held the lower end in the vice, while twisting with a bar through the loop??? If that's 10mm square bar, it would have to be very hot to achieve the twist. Pray do tell.
Exactly as you describe. You can see the punch marks I use to align the bar when it is bent back on itself.
Bar was marked out at 6" from end and another 6" beyond,
Tapered the end , bent the bar back onto itselfto form a loop, aligned the marks and then closed loop between the vise jaws.
Heated up the portion to be twisted, then chilled the loop in the water bucket to "freeze" it,
Then held it in the vise at an appropriate length with the two bars at 90 degrees to the vise jaws as opposed to holding them side by side within the jaws (as this tend to allow slippage between the bars)
Slipped a round bar into the loop and quickly gave it one and a half twists. and straightened it.
This feels comfy in the hand, you can put more twists in, and another alternative is to then beat it down along the length making the grip diameter smaller and altering the appearance of the twist too.
-
I would possibly class these as pokers
and some details of them for those that like pics

Enjoy
-
58 minutes ago, Dan_the_DJ said:
Ive been fooling around with some mild steel scraps I had lying around. Been trying to make steel out of them, by case hardening I believe its called.
Well, Im not really sure, if its true hardened, could it still be called case hardening??
Anyways, it turned out successful so far, for my need of making a few parts for my percussion lock project, dont know the exact terminology...
Also, when I do indeed make the spring, be it from this project, or from a decent piece of spring steel and quench it, I would need to temper it of course. And since I had, lets say, a few unfortunate situations with the kitchen oven and not the best of luck with color tempering, I wanted to try a different method for my temper on this one.Trying to make steel out of Mild steel ? It is already steel, so what you are doing is starting the process of case hardening (carburising) the existing material by adding carbon to its external surface, you then have to rehat and quench to harden the external surface, and that surface then is normally a wearing prevention surface, and does not make the mild steel into a spring steel.
To temper items you have to first harden them and that usually requires a carbon steel.
If you are going to use a molten bath to uniformly temper that hardened steel, it will depend on the use for the spring.
For watch springs historically we use 48 parts lead to 4 parts tin, and for more heavy duty springs you can use boiling Linseed oil. Both of these methods are highly risky and can be downright dangerous, I would suggest using other methods that can be found elsewhere in the forum as Mr Sells has already suggested, or consult your local blacksmith group
-
On 10/9/2018 at 7:10 PM, anvil said:
I'm pretty sure the formula for collar length to deal with measuring the center line is (perimeter + 2-1/2 times the thickness of the collar). If anyone has Francis Whitaker's "cookbook", check it there. Mine is packed.
I use perimeter plus twice thickness of metal being used for the collar, and find that works successfully
-
On 10/19/2018 at 11:03 PM, ThomasPowers said:
I use a soft wire wheel on my bench grinder, which paradoxically I never have a grindstone on and I use a twisted/knotted cup brush on my angle grinder WITH GREAT CARE AND TREPIDATION AND THE WORKPIECE FIRMLY HELD IN A VISE OR EXCESSIVE LARGE AND MASSIVE!
Hi Thomas, Like yourself, I hate using the angle grinder with a wire wheel and have found a solution I am a lot more happier with.
What I am using looks the same, but in fact is a car bodyshop buffing/polishing machine. The arbor is the same as the angle grinders, but it has a variable speed control between 500 to 3000 rpm.
Still have to treat it with great respect, but not so prone to flying wires.
-
On 10/16/2018 at 9:54 PM, Cincinnatus said:
John - Really nice wreath hanger and ornaments. I have never seen a hanger like that before.
Thanks, inspiration from somewhere on the net, not sure who, with my own spin on them, the snowflake and curlies were quickly snapped up, much to my surprise,
-
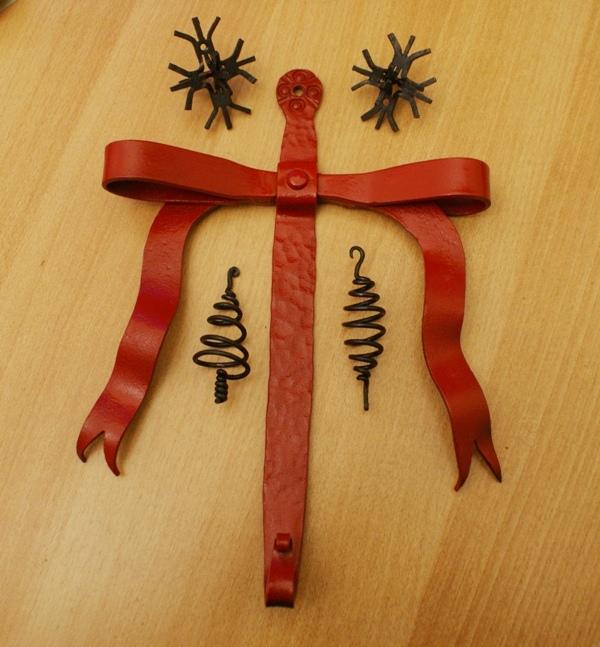
Some from last year, tree ornaments and a wreath hanger.
Wreath hanger can also be made with an extended top piece to fit over the door itself
The hanging s were made from welding rods that had got past their use by date and the coatings were damaged. Easily made and not a lot of heat required.
-
If you want to get to precision engineering on this, then the side of the washer bearing on the handle side is flat, as this is 90 degrees to the thread box, the side bearing on the vice jaw is slightly dished. This radius will depend on the distance between the pivot on the base of the moving leg, and the centreline of the screw thread box.
In practice it should wear in with use. You could always lap it in with grinding paste if you wanted to go that far.
-
On 9/1/2018 at 12:16 AM, GrumpyBiker said:
I'd really appreciate a photo & as many dimensions you could provide for the thrust washer(?) between the handle & the forward jaw.
Mine didn't come with one so I'll have to make one .
Thrust washer dimension will vary depending on vise size, allow a clearance to fit over the threaded sleeve 1/16" will do, and thickness to be about 5/8" , the outside diameter should match the handle boss size. One side is flat, the other is slightly domed to fit to the moving jaw side. (this may have started parallel, but will wear in as the vise is used.)
Here is a picture of a vise I recently obtained, on a suitable mounting post.
Hope this helps.
-Copy.JPG.6546991e696b16f29d84b6e5ea721cce.JPG)
-
8 hours ago, Phantom309 said:
I also notice they have a stainless steel version for a chunk more money (110 euro vs 62 euro for the standard) and was wondering what if anything made a stainless hammer better than a non-stainless one.
While I have your attention, does anyone know of a place in the UK that makes rounding hammers other than farrier supply places?
A hammer is just usually a lump of metal on a stick. Stainless steel is no better in use than a carbon steel one, just more flashy. It's the person wielding it that makes the difference, there is no magic in them.
Farrier supply places are the ones where you are likey to get a rounding hammer from, they don't usually make them, they factor them, just like Angele in Germany does. So don't rule them out
Typical farrier supply suppliers are http://www.cottamhorseshoes.com/49shoeturningham.html
They have a good range of reliable makers and prices.
Or you could come on one of our toolmaking courses at Westpoint and make your own
.JPG.15f0855a4ab26a4a7915fed505ee2335.JPG)
.JPG.cde47547bf2c31e9c15582a38aeca398.JPG)
Let’s see some fire pokers
in Blacksmithing, General Discussion
Posted
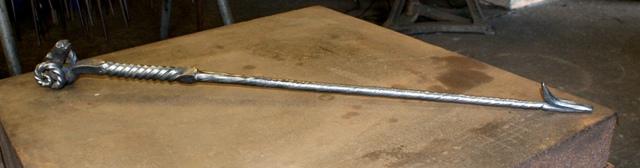
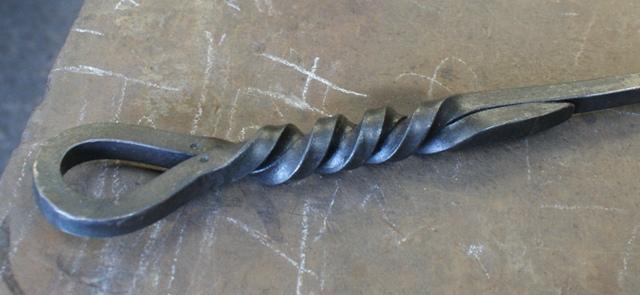
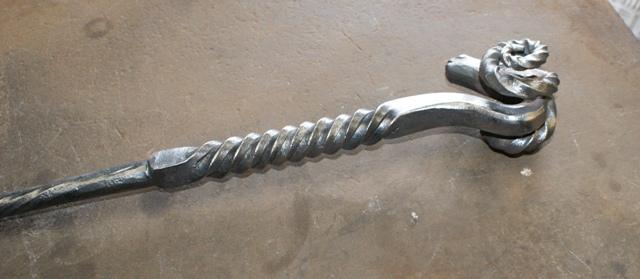
Getting back to the topic, (well part of it) here are some poker handles you may or may not be interested in, all have variations, and most can be opend out into cage type twists.
The top one of these is similar to the one Jlps did, but uses just two twisted square bars, and two round bars, and again could be opened up int a cage.
This is the mid one prior to opening up to a cage.
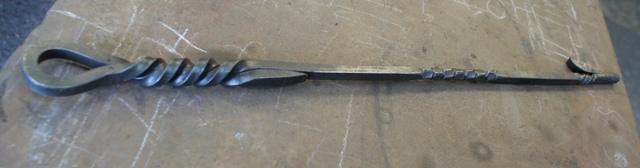
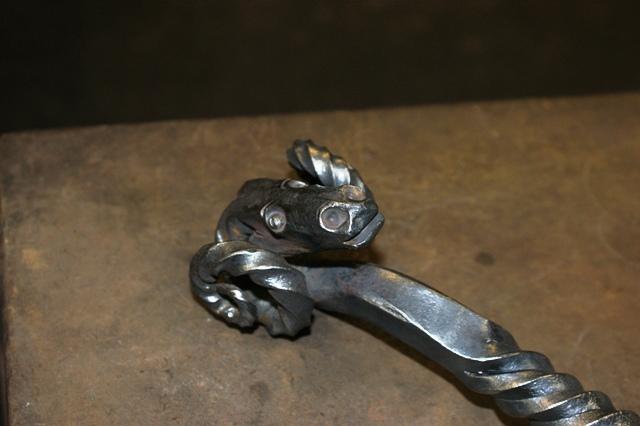
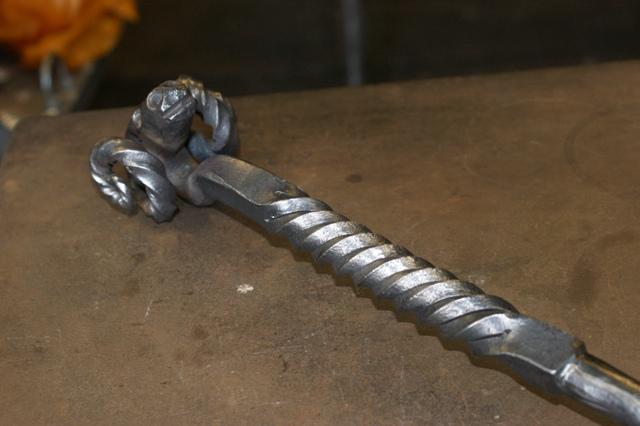
This is a Claydon Knot being used as a poker handle.
Don't know if you would describe this as a poker or a wand?
Then it can develop into,
Drat, going off topic again,
Maybe have to add one on Claydon Knots variations and uses.
Enjoy and stay safe.