LaneSiders
Members
-
Joined
-
Last visited
Everything posted by LaneSiders
-
That's true. Probably will just let it be then. Welding is all done and I don't want to deal with a hazmat incident this month. Buying a ford wrench online is likely not going to happen, since I can make due with this wrench and maybe make a few sizes of the traditional style ones. My wife is still on a day-walker schedule so maybe I will give her a picture of a ford wrench this spring and summer to do hunting while at sales and such. Assuming the plague doesn't keep everything closed for another season.
-
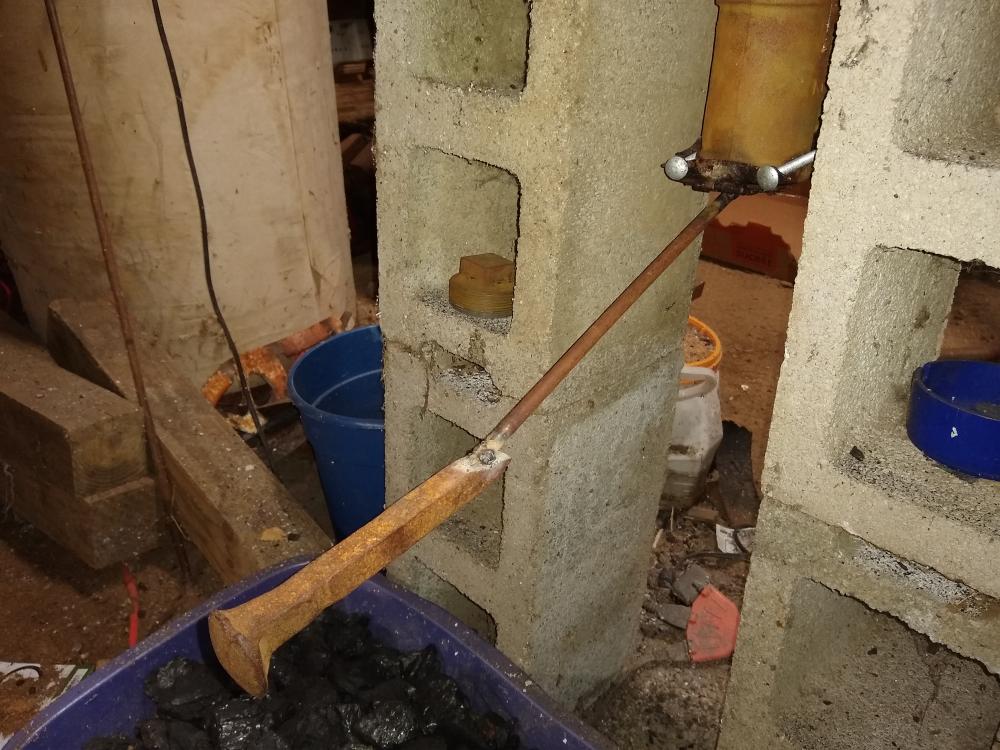
Yeah, I am hoping that letting it set in the vinegar for a week will weaken the underlayer enough to scrub it off. If not I am moving onto a stronger acid! I'm not too worried since any spot that will touch hot steel at this point have been ground or filed clean. I was looking into making one of those traditional two-size twisting wrenches as well, if for no other reason than for something fun to make. I wish I had visited TSC, that wrench would have been a lot easier to make "safe". Although, I looked on Amazon and found the ford wrenches for 20-30 bucks. Might buy one if this one doesn't work as well as I would like.
-
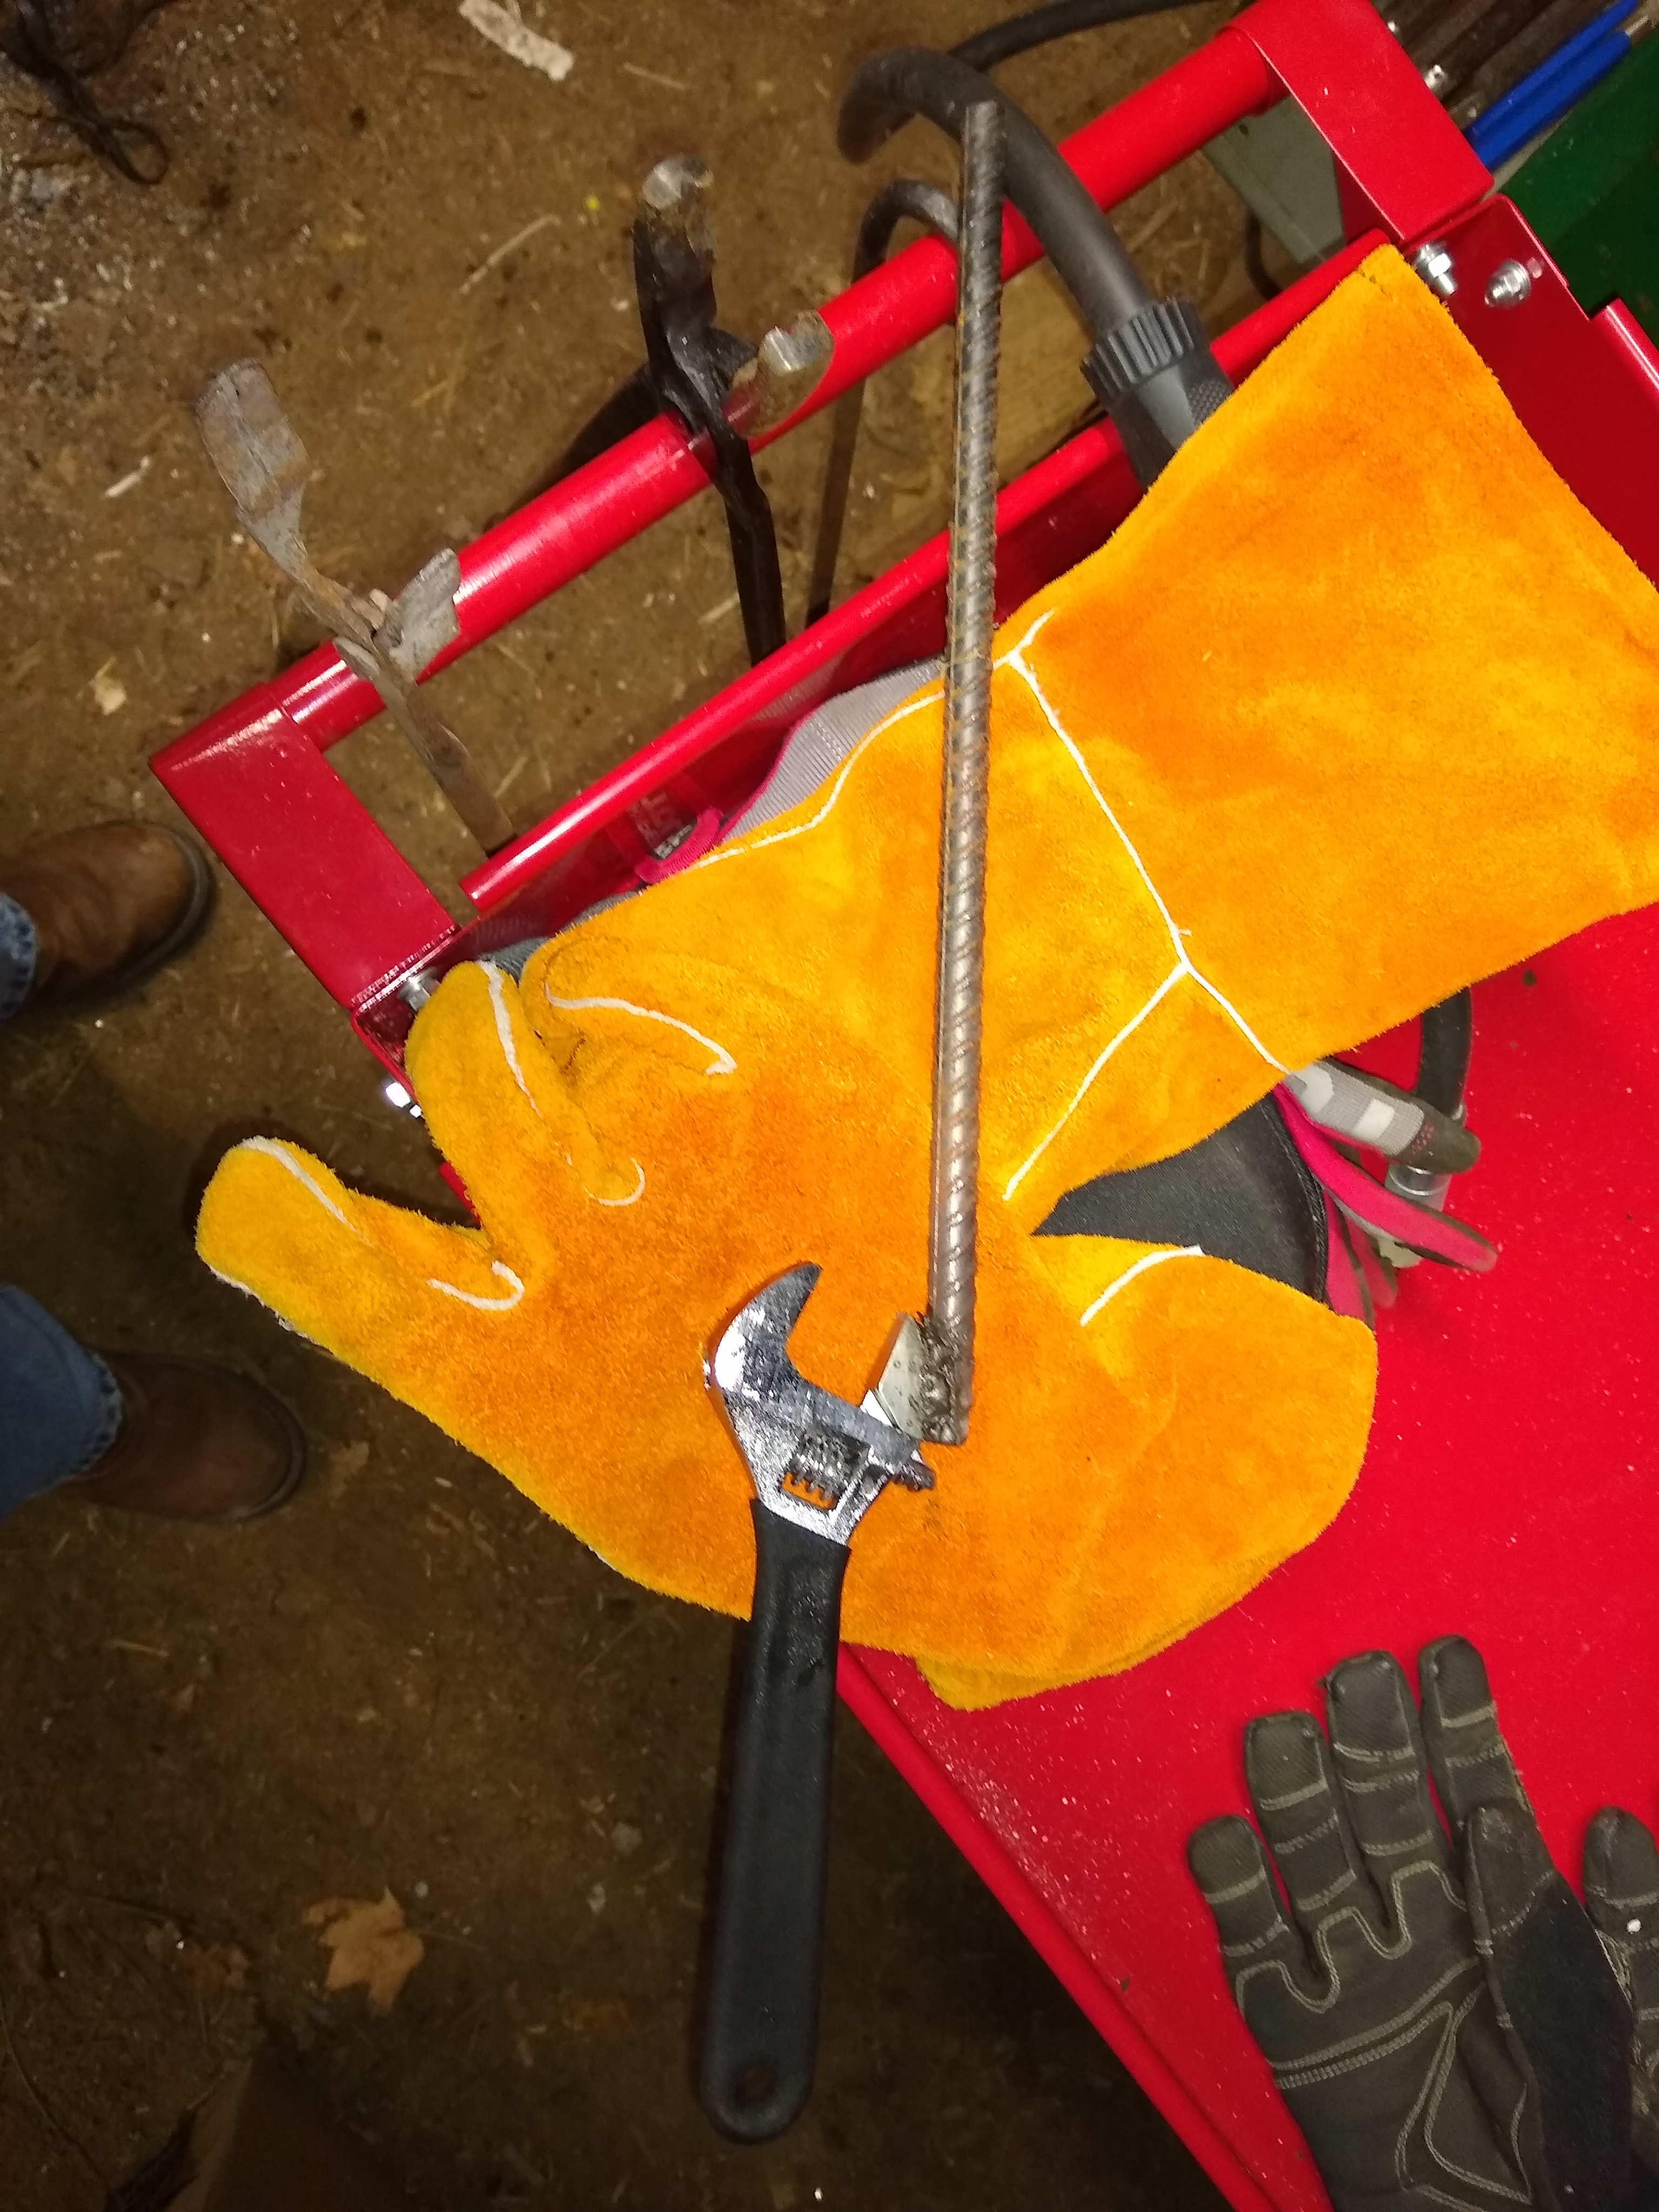
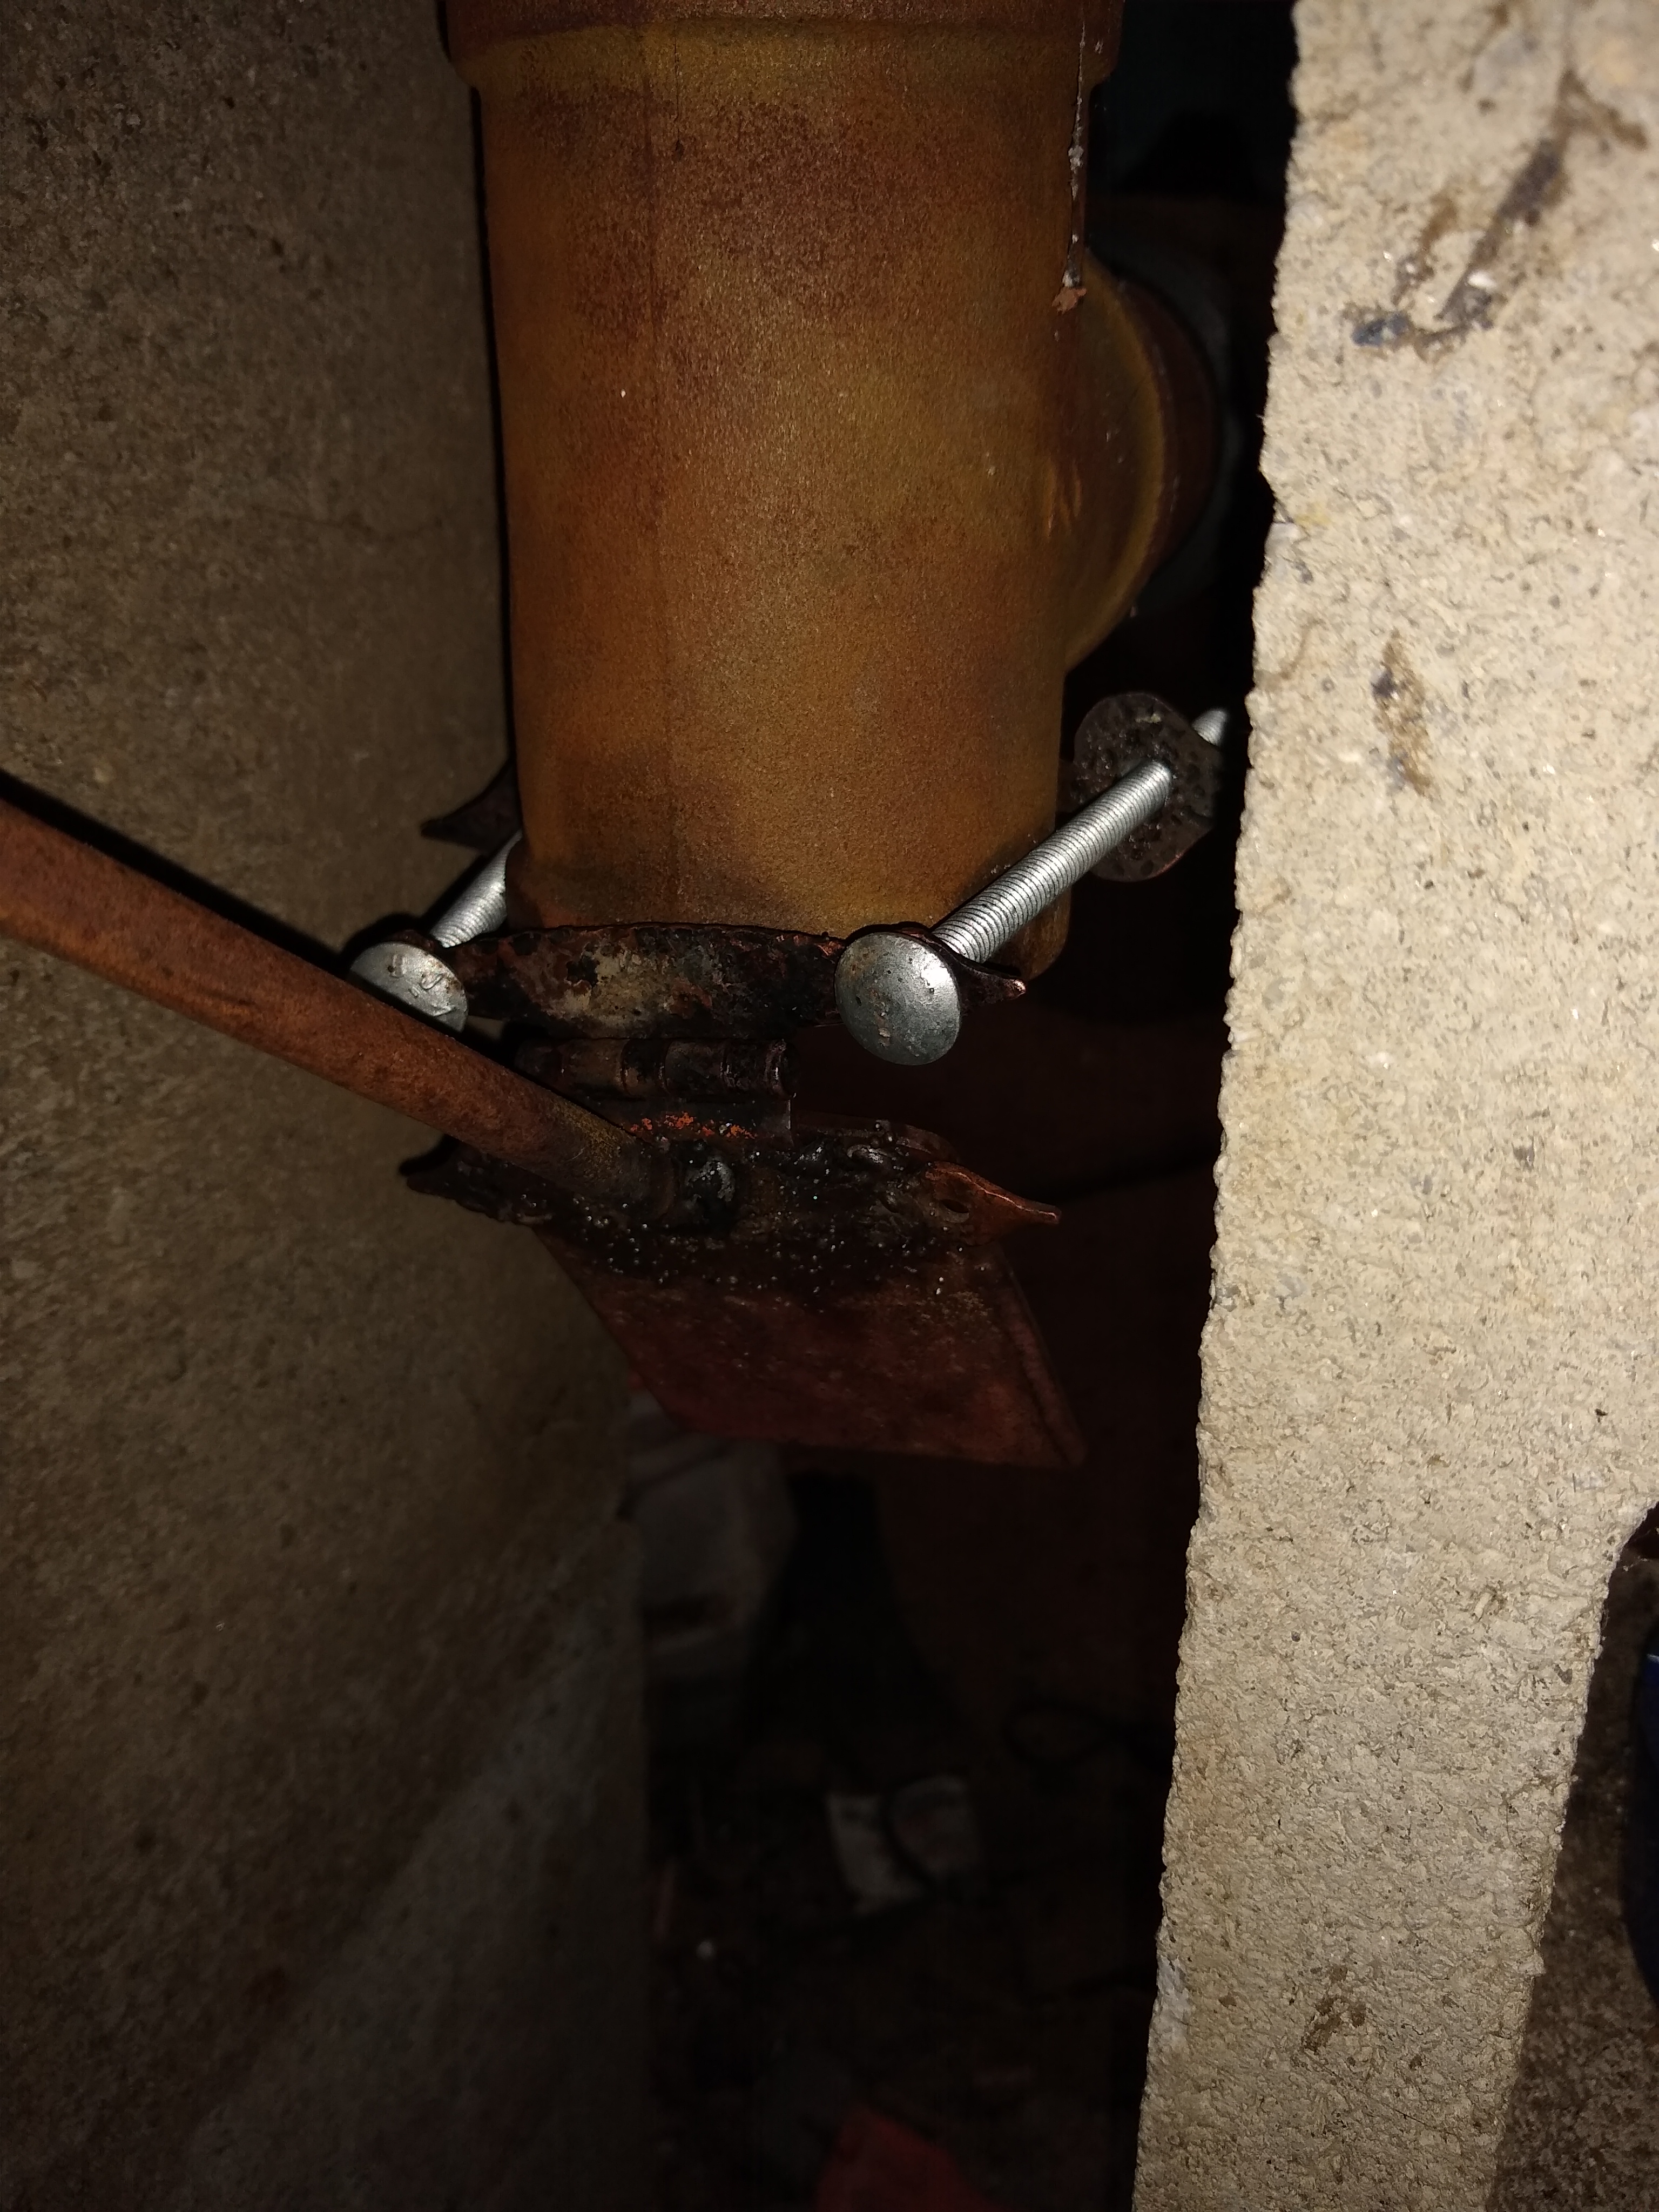
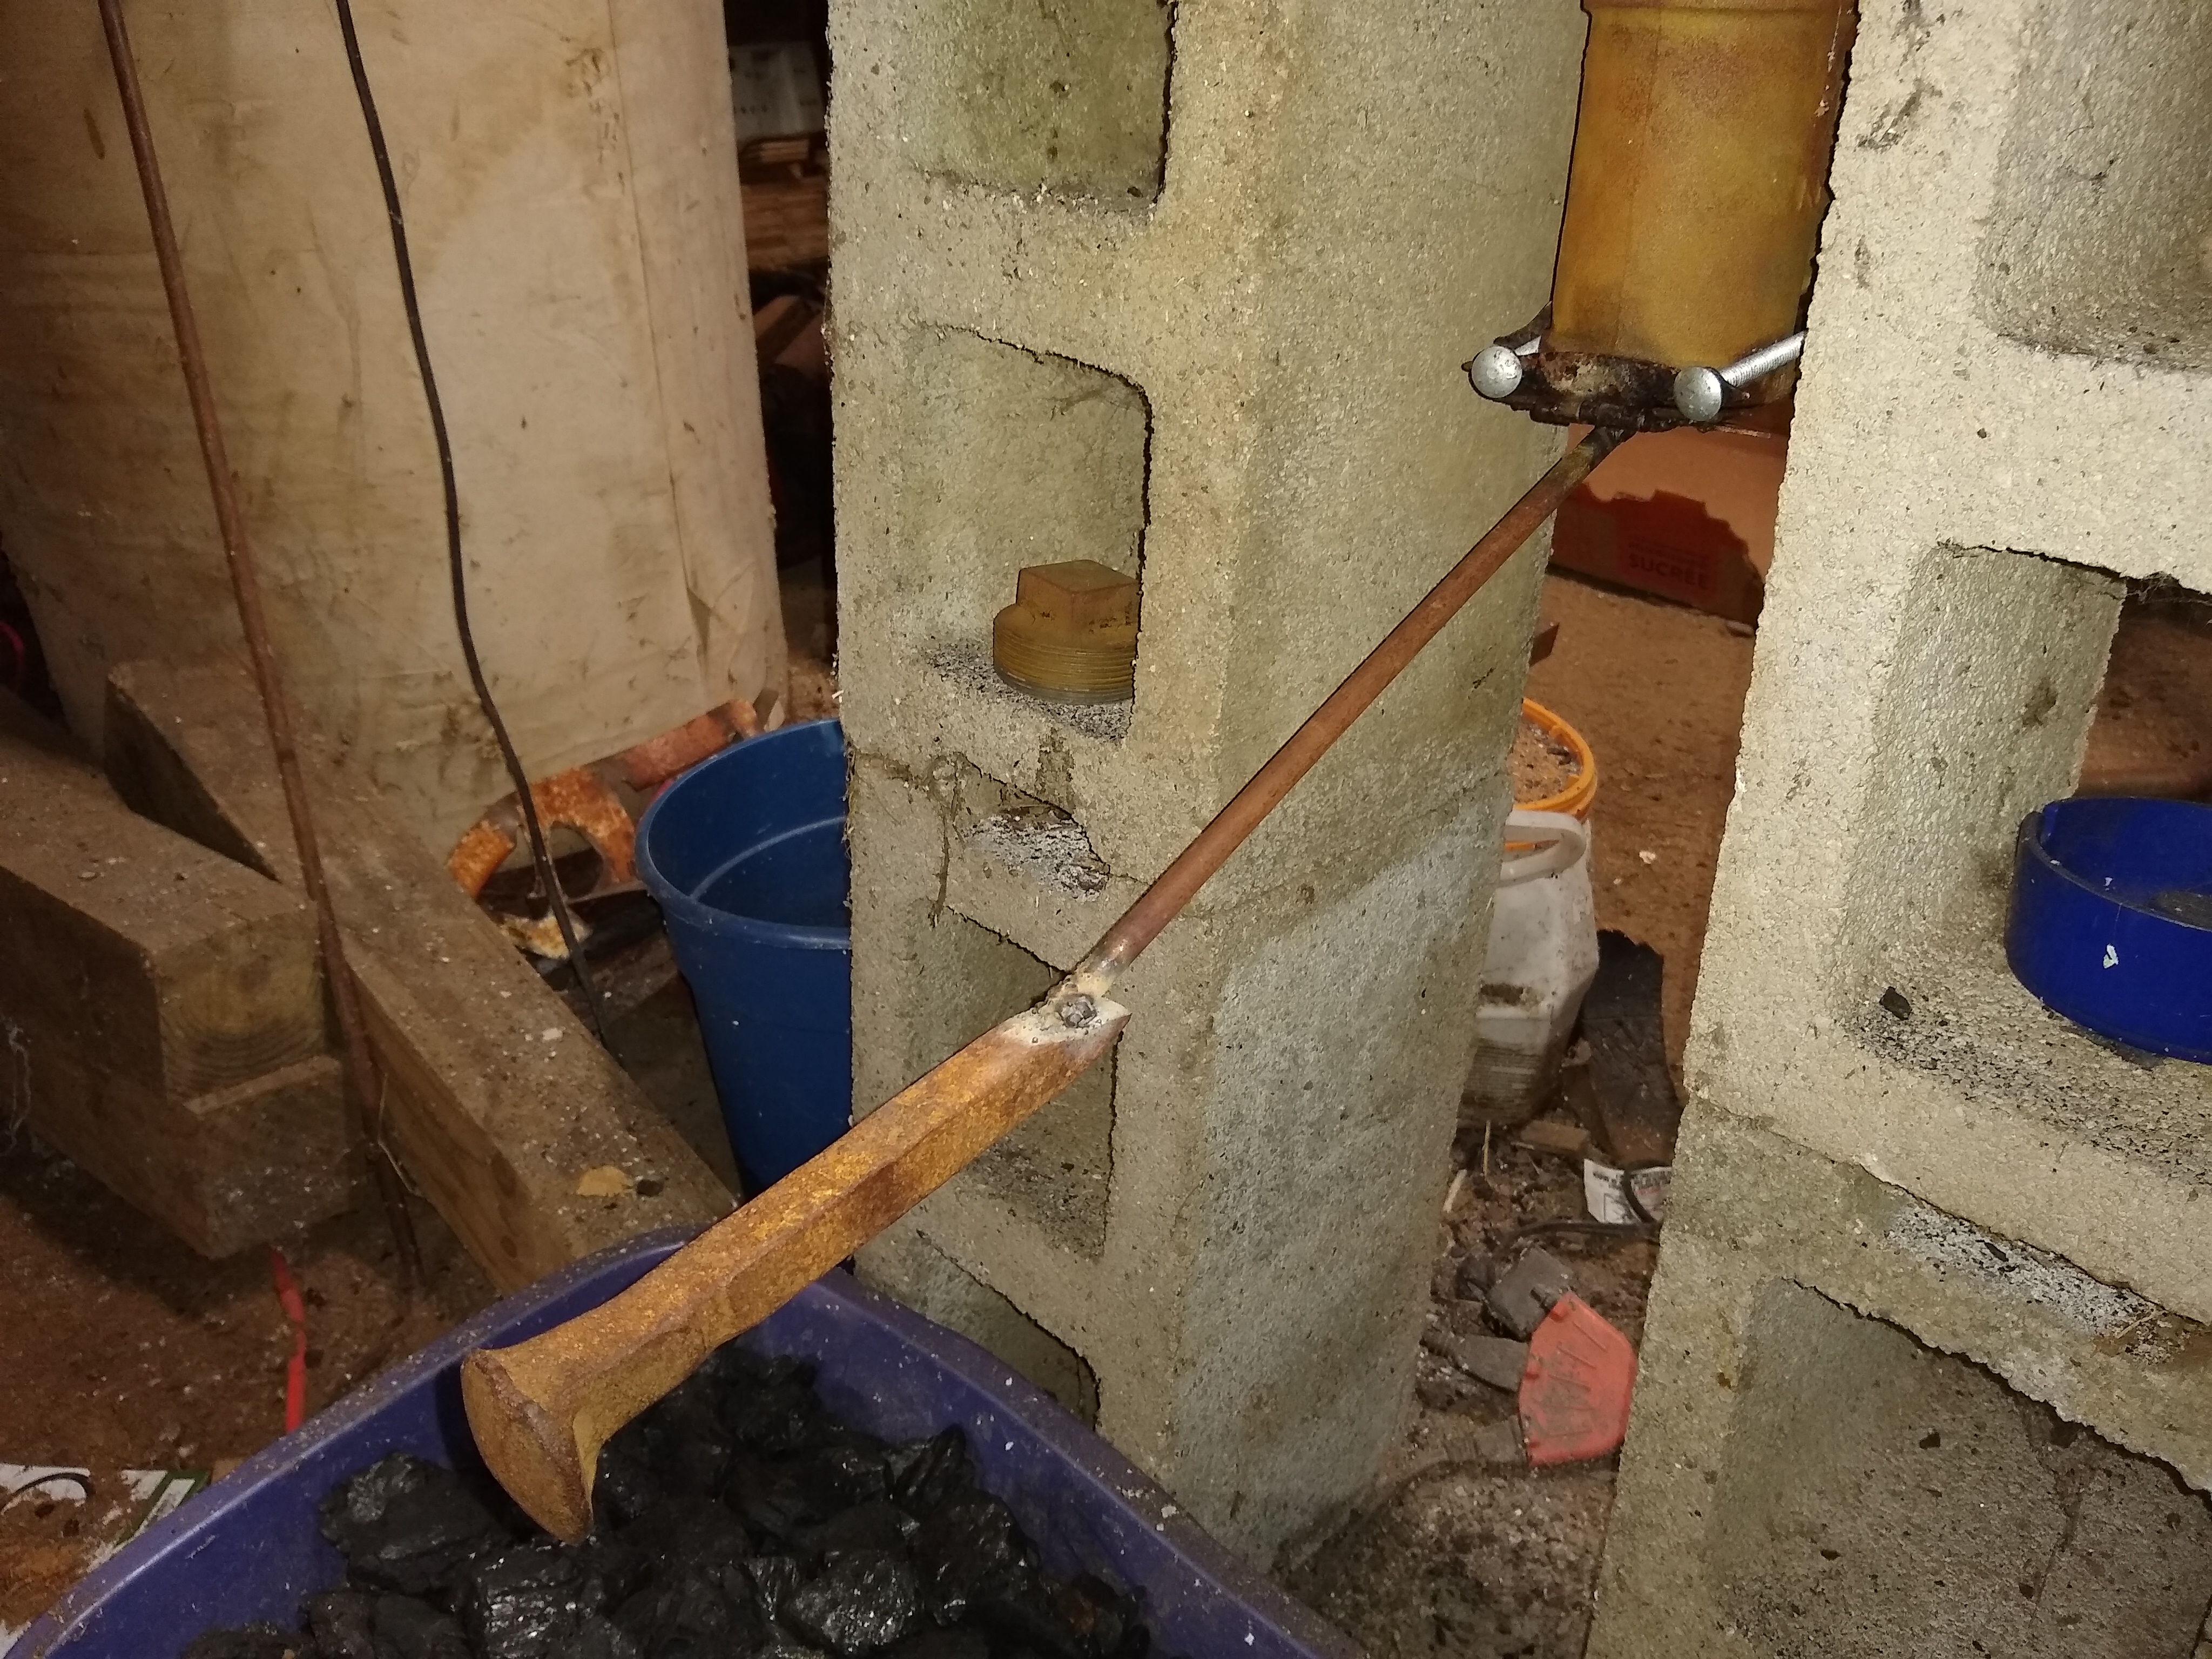
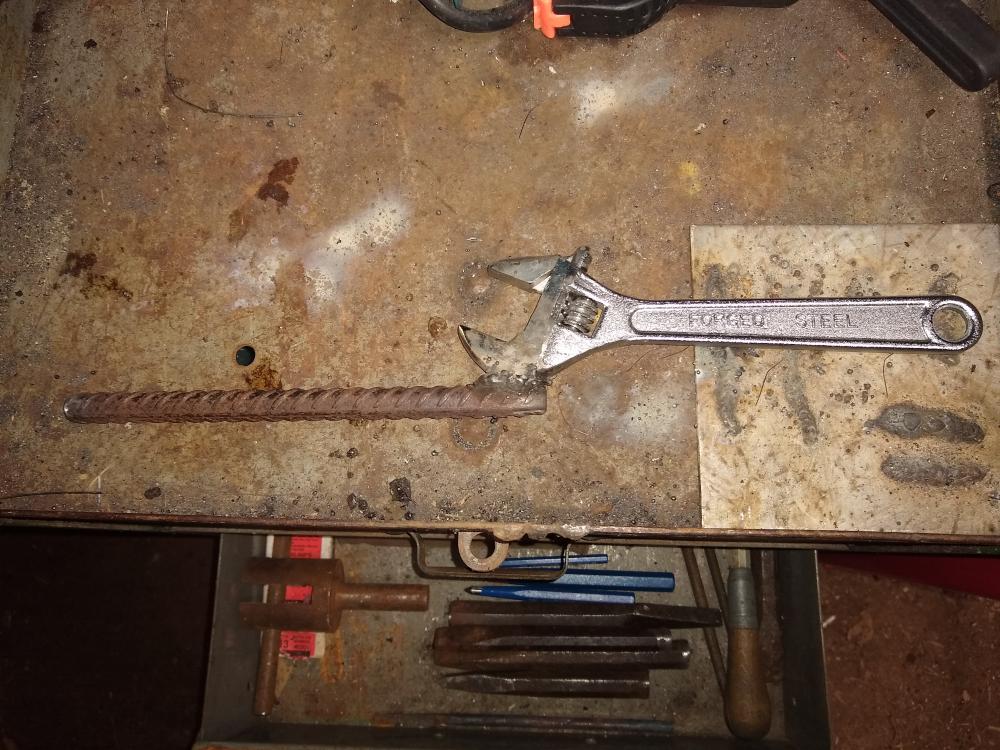
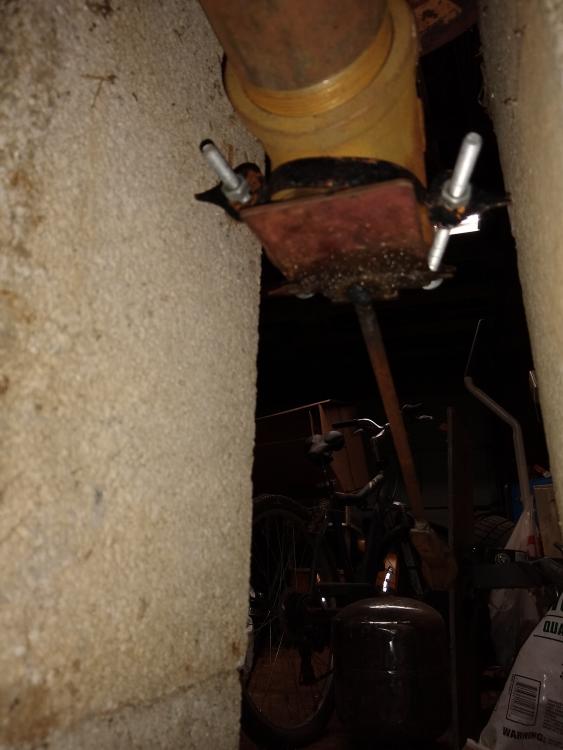
Alrighty, lots of good input. Firstly, you were all totally correct about which side I welded it to. That evening I had been wandering my local Walmart and saw a ~$3 adjustable wrench and thought "I need something to twist with. I wonder if that chunk of rebar is still in the shed?" And away I went with a half thought through plan. My first thought was the galvanized coating. I put on my PPE and ground the area I was planning on welding clean and the area around it. I figured I could worry about the rest later if this worked. I then spent half an hour or more learning that my welding area sucks and I need to do something about that at some point so I can hold my work where I need it. After fumbling with the wrench and steel for a while, I got it welded, snapped the picture, and went inside to post this thread before bed. Didn't get back to the garage till this weekend and when I did I looked at my wrench and realized exactly what y'all pointed out. So, I hacked off the offending end, safely ground the opposite side, swore at my welding area for a while, and now have the wrench sitting in a vinegar bath for a day or so. I also cut the rebar to length, removed the rubber material, and filed all the sharp edges as were suggested. I agree also with using a nice monkey wrench (not pipe) but I have not seen one in a long time outside of full price online. I don't get out to sales like I used to since I went on overnights a couple years ago. However, I feel this one will work for me in the short term. I'm on the early end of the smithing learning curve so I have time to pick up better tools as they become available/essential. Safety first kids!

-
Nothing fancy but I finally got around to making one for myself. Anyone know if I should cut the one end to equal the crescent end?

-
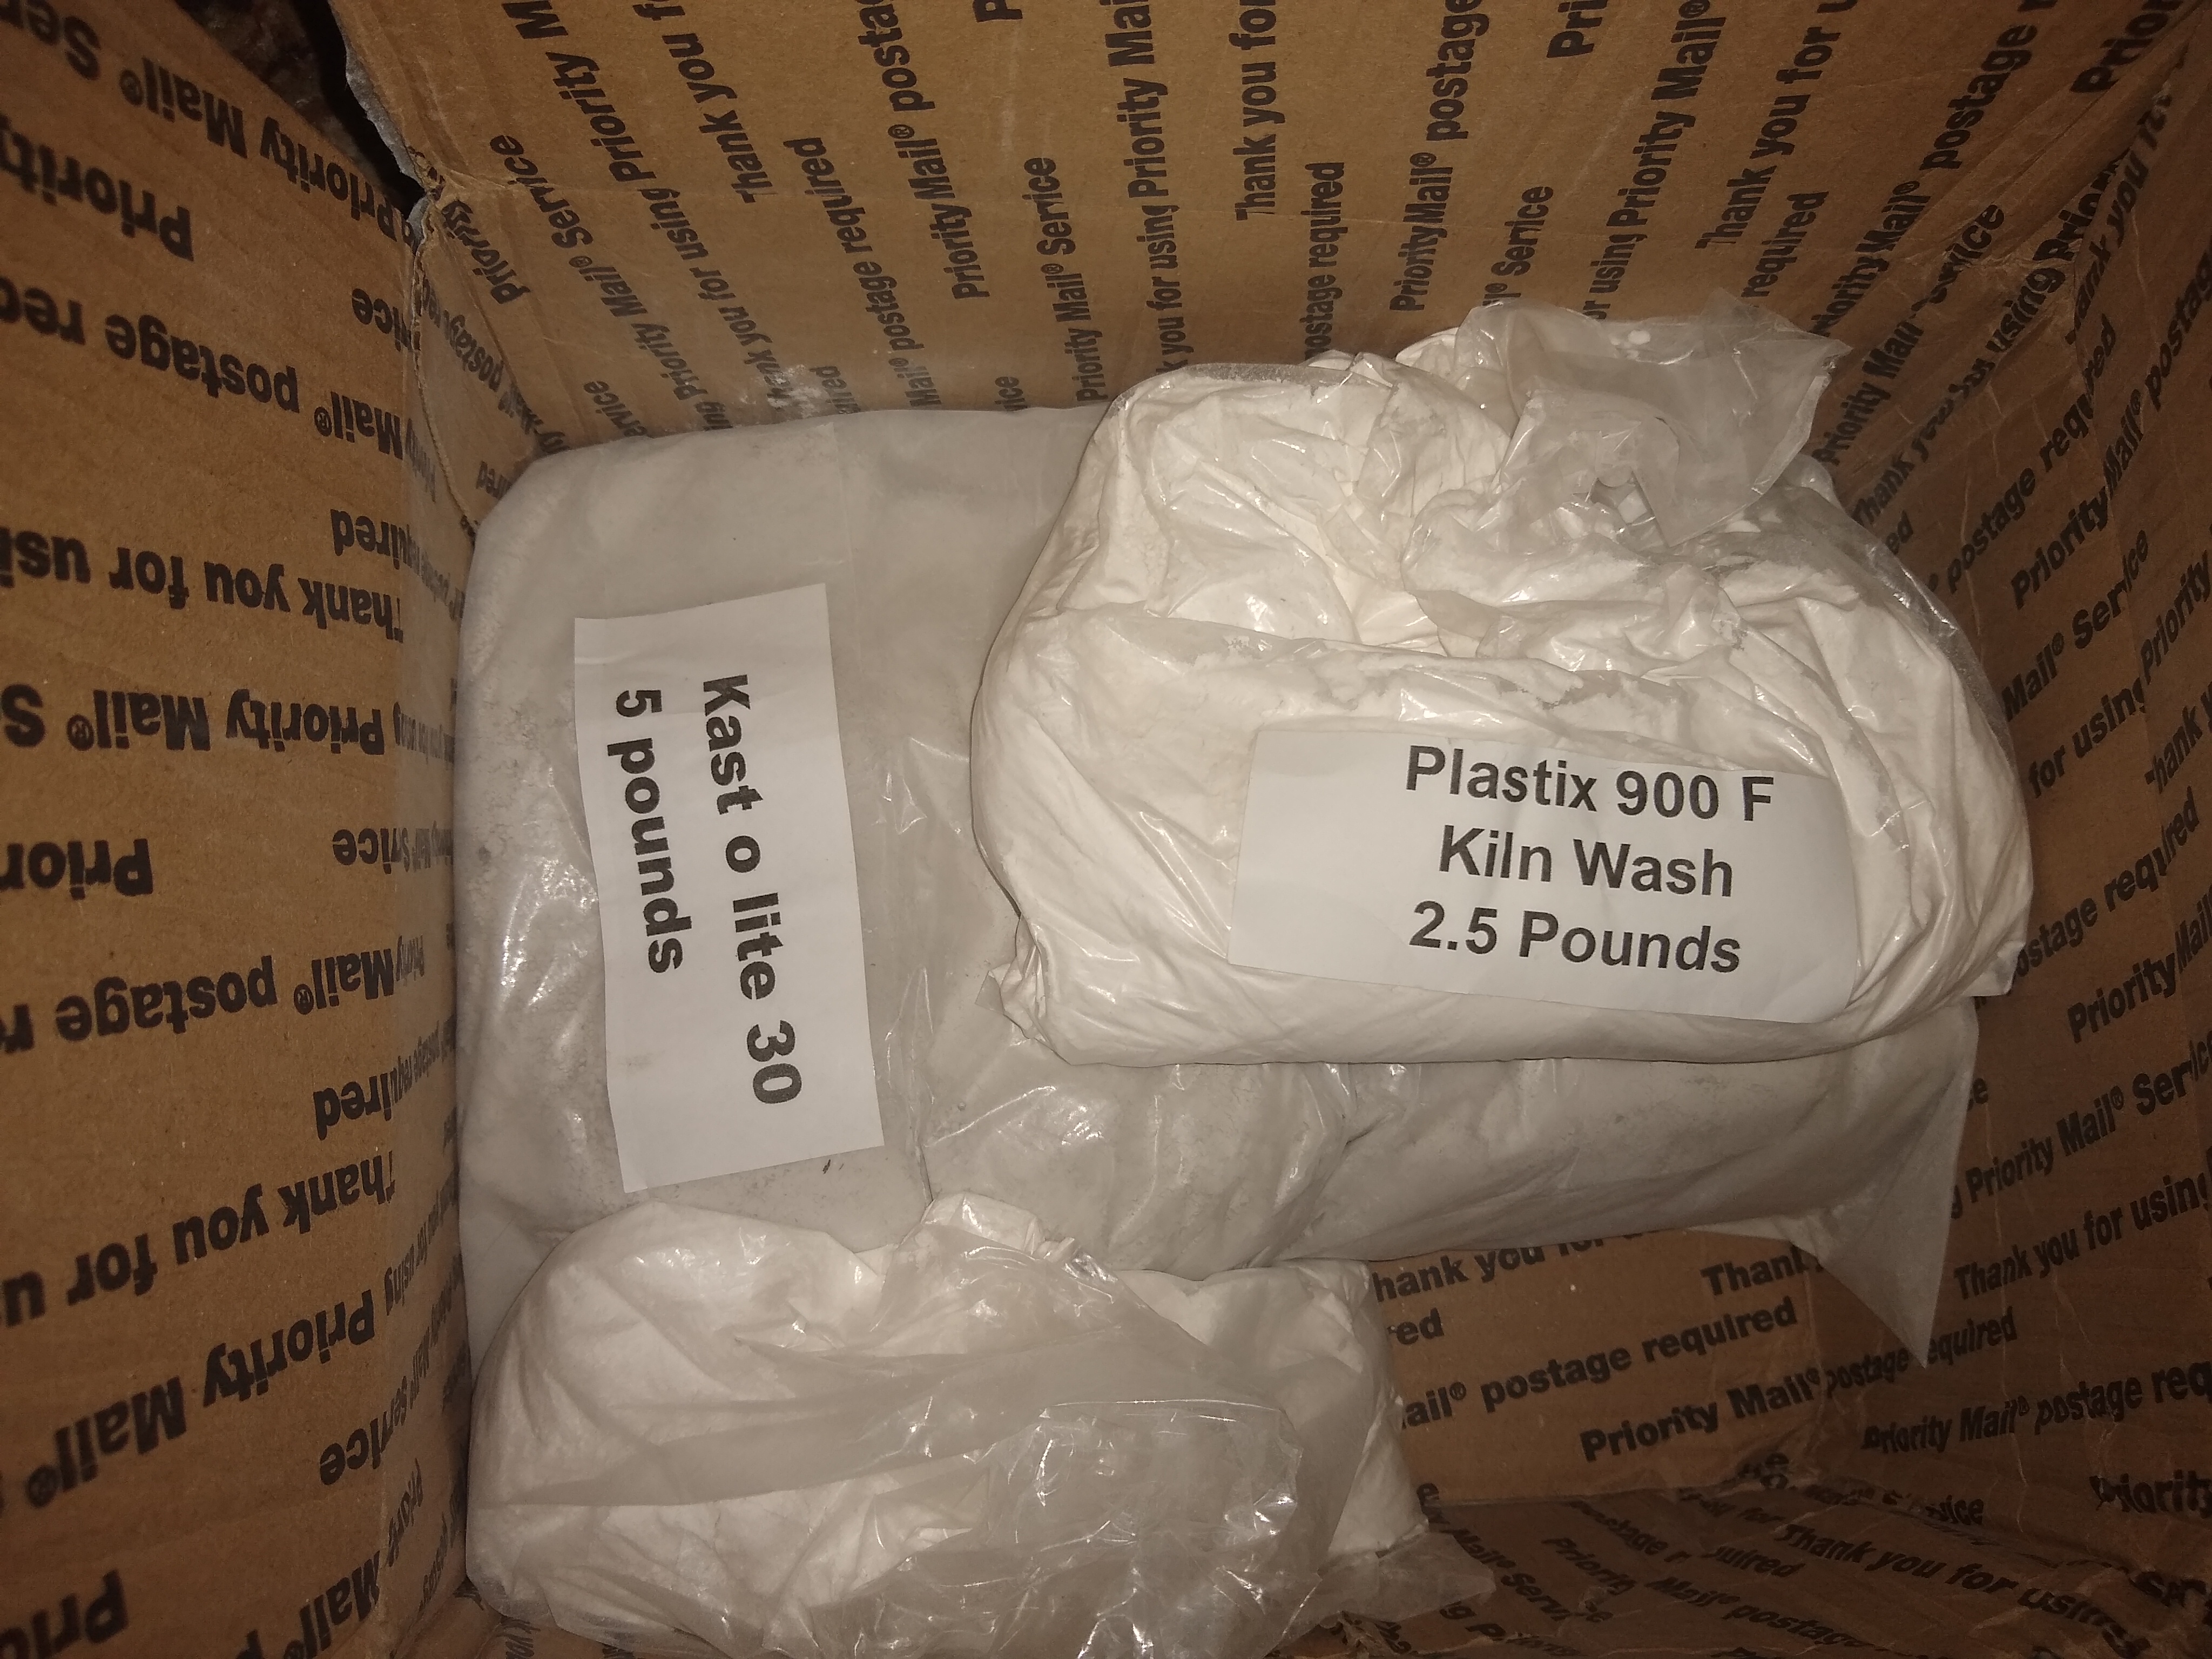
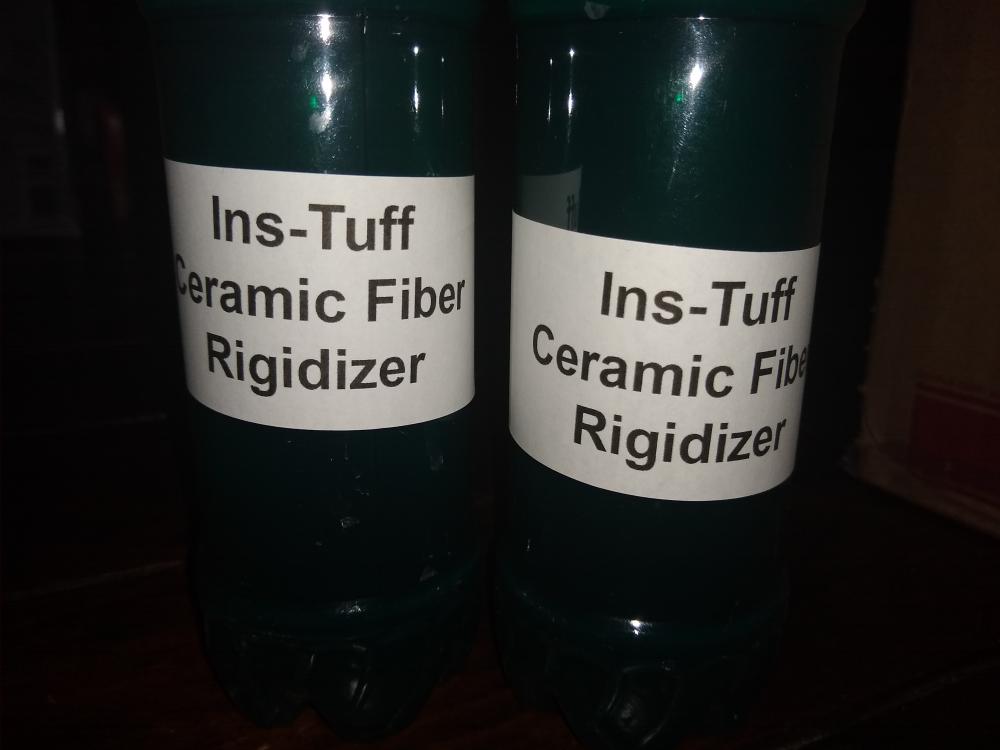
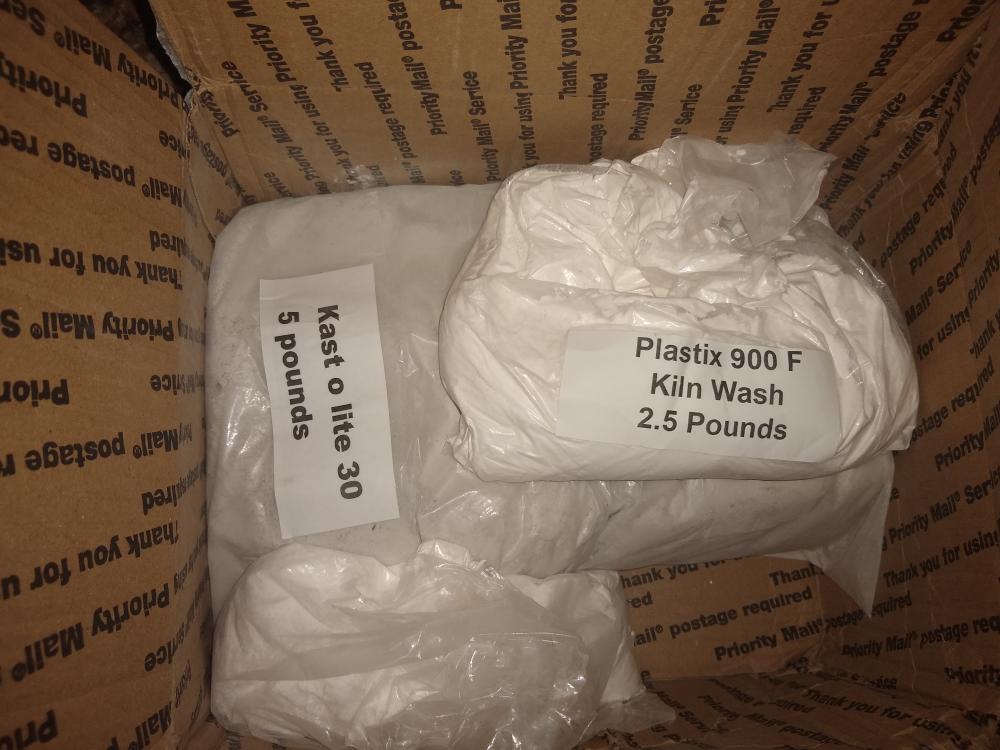
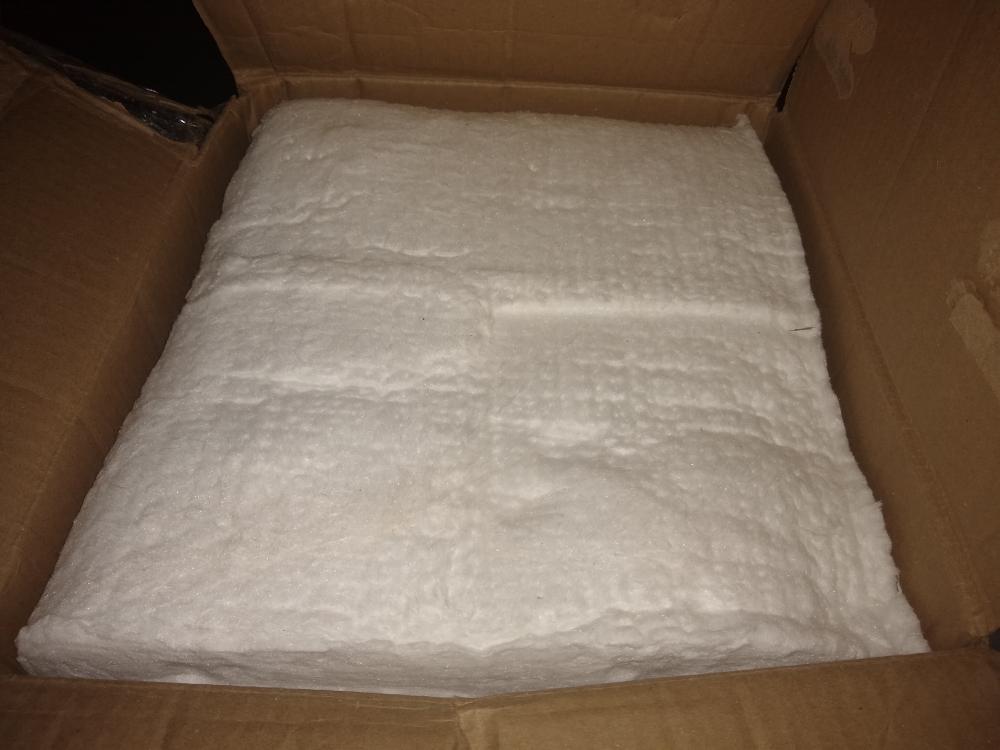
Moving in the right direction. Ordered and received the Inswool, Kast-O-Lite, Plistix, and rigidizer from Glenn over the week. Was fully planning on moving all of it to the garage and getting started but I went and caught a cold (yes, just a cold) and really don't feel like going outside in my unheated garage. I have a ventilator mask for the insulation but I also don't think I should risk my lungs when I'm already a little wheezy. I also wanted to let everyone know that if Glenn is as good at working steel as he is at taping boxes, he must be a master smith of some renown. Scissors were useless, knives were implemented.
-
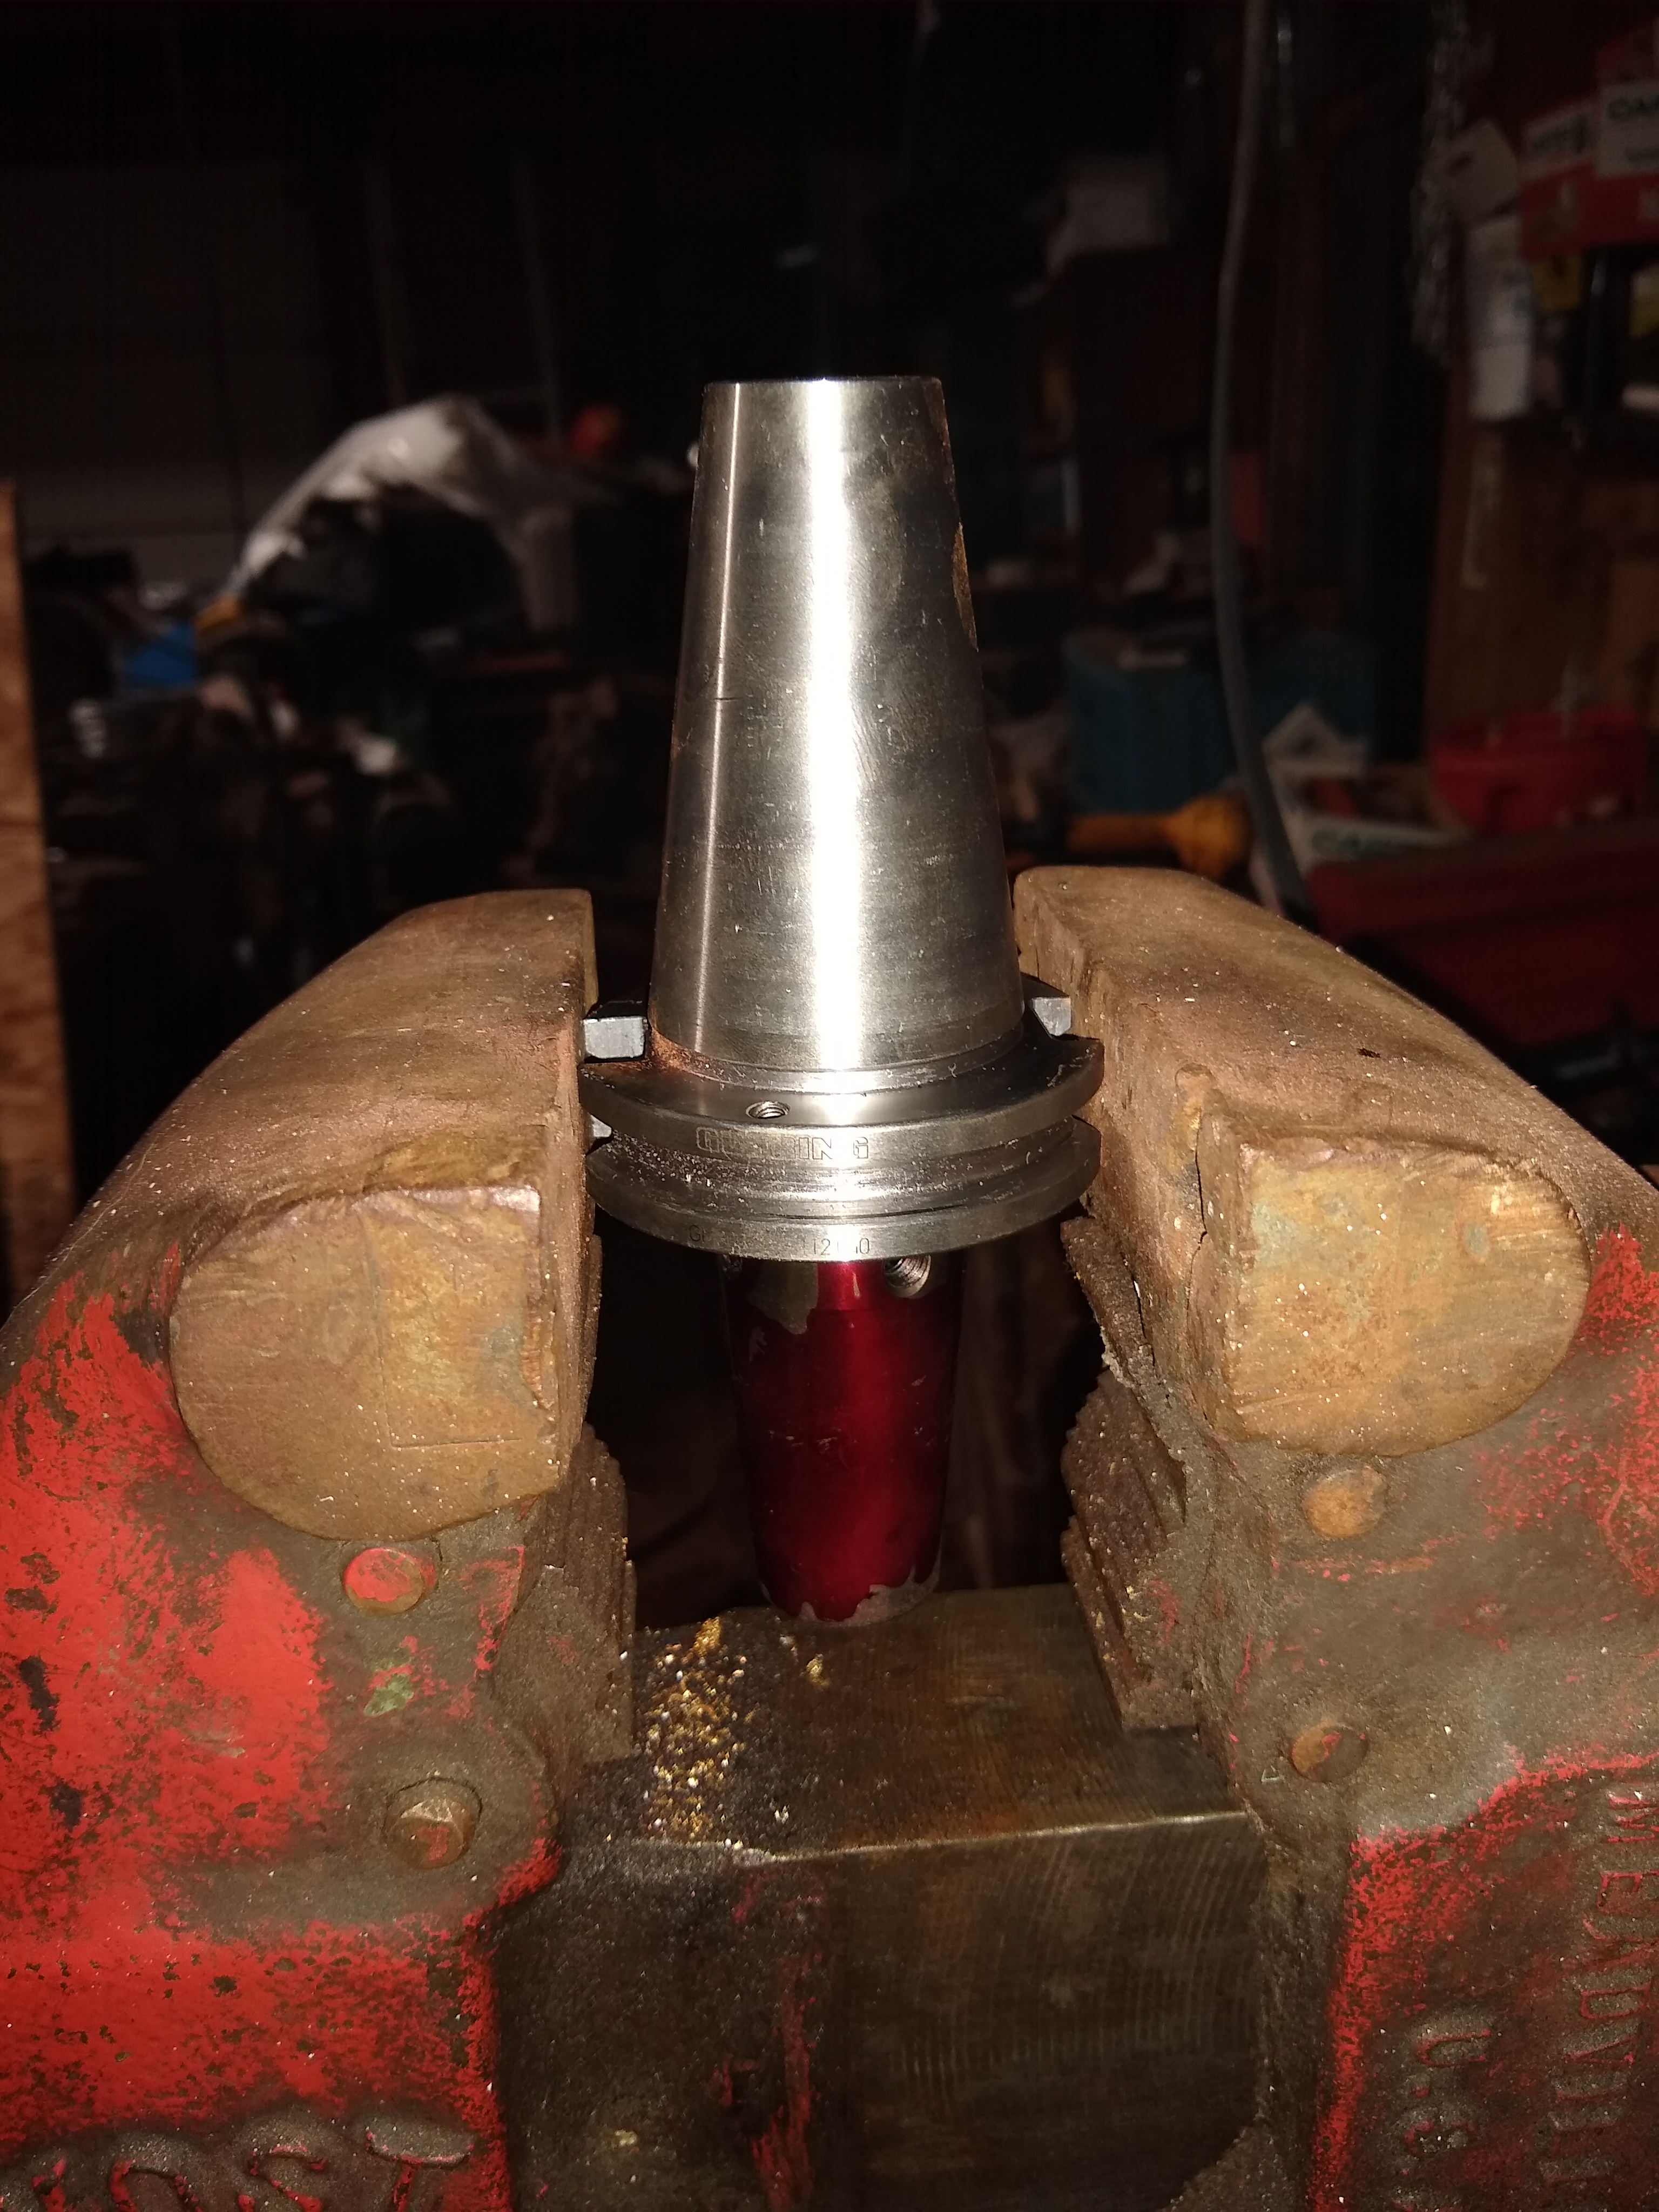
Actually, now that you say that I realize that's exactly what it is. I work in CNC machining but I am a "lathe guy" so I know about mills only from what I pick up by osmosis. And now that I looked back I see you have a very similar item. So thank you for giving me the idea to place the locking grooves into the vise.


-
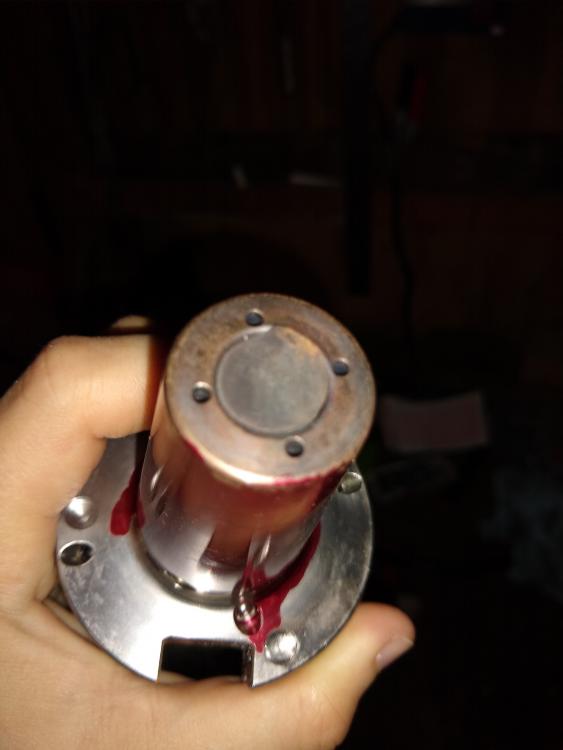
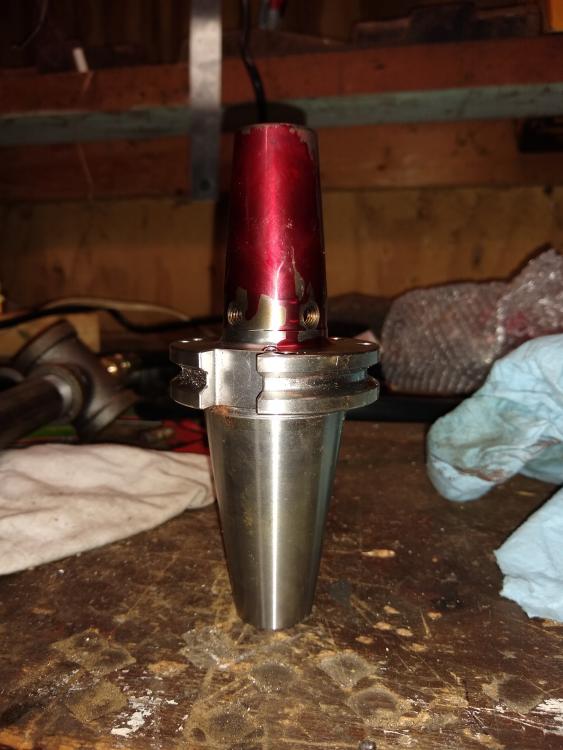
So, I just found this in the scrap bin at work. Some sort of CNC mill fixture with an endmill broken off at the base of the smaller side. I think I can either grind some flats into that side or hammer it square to fit into a hardy hole and have a very fancy mandrel!

-
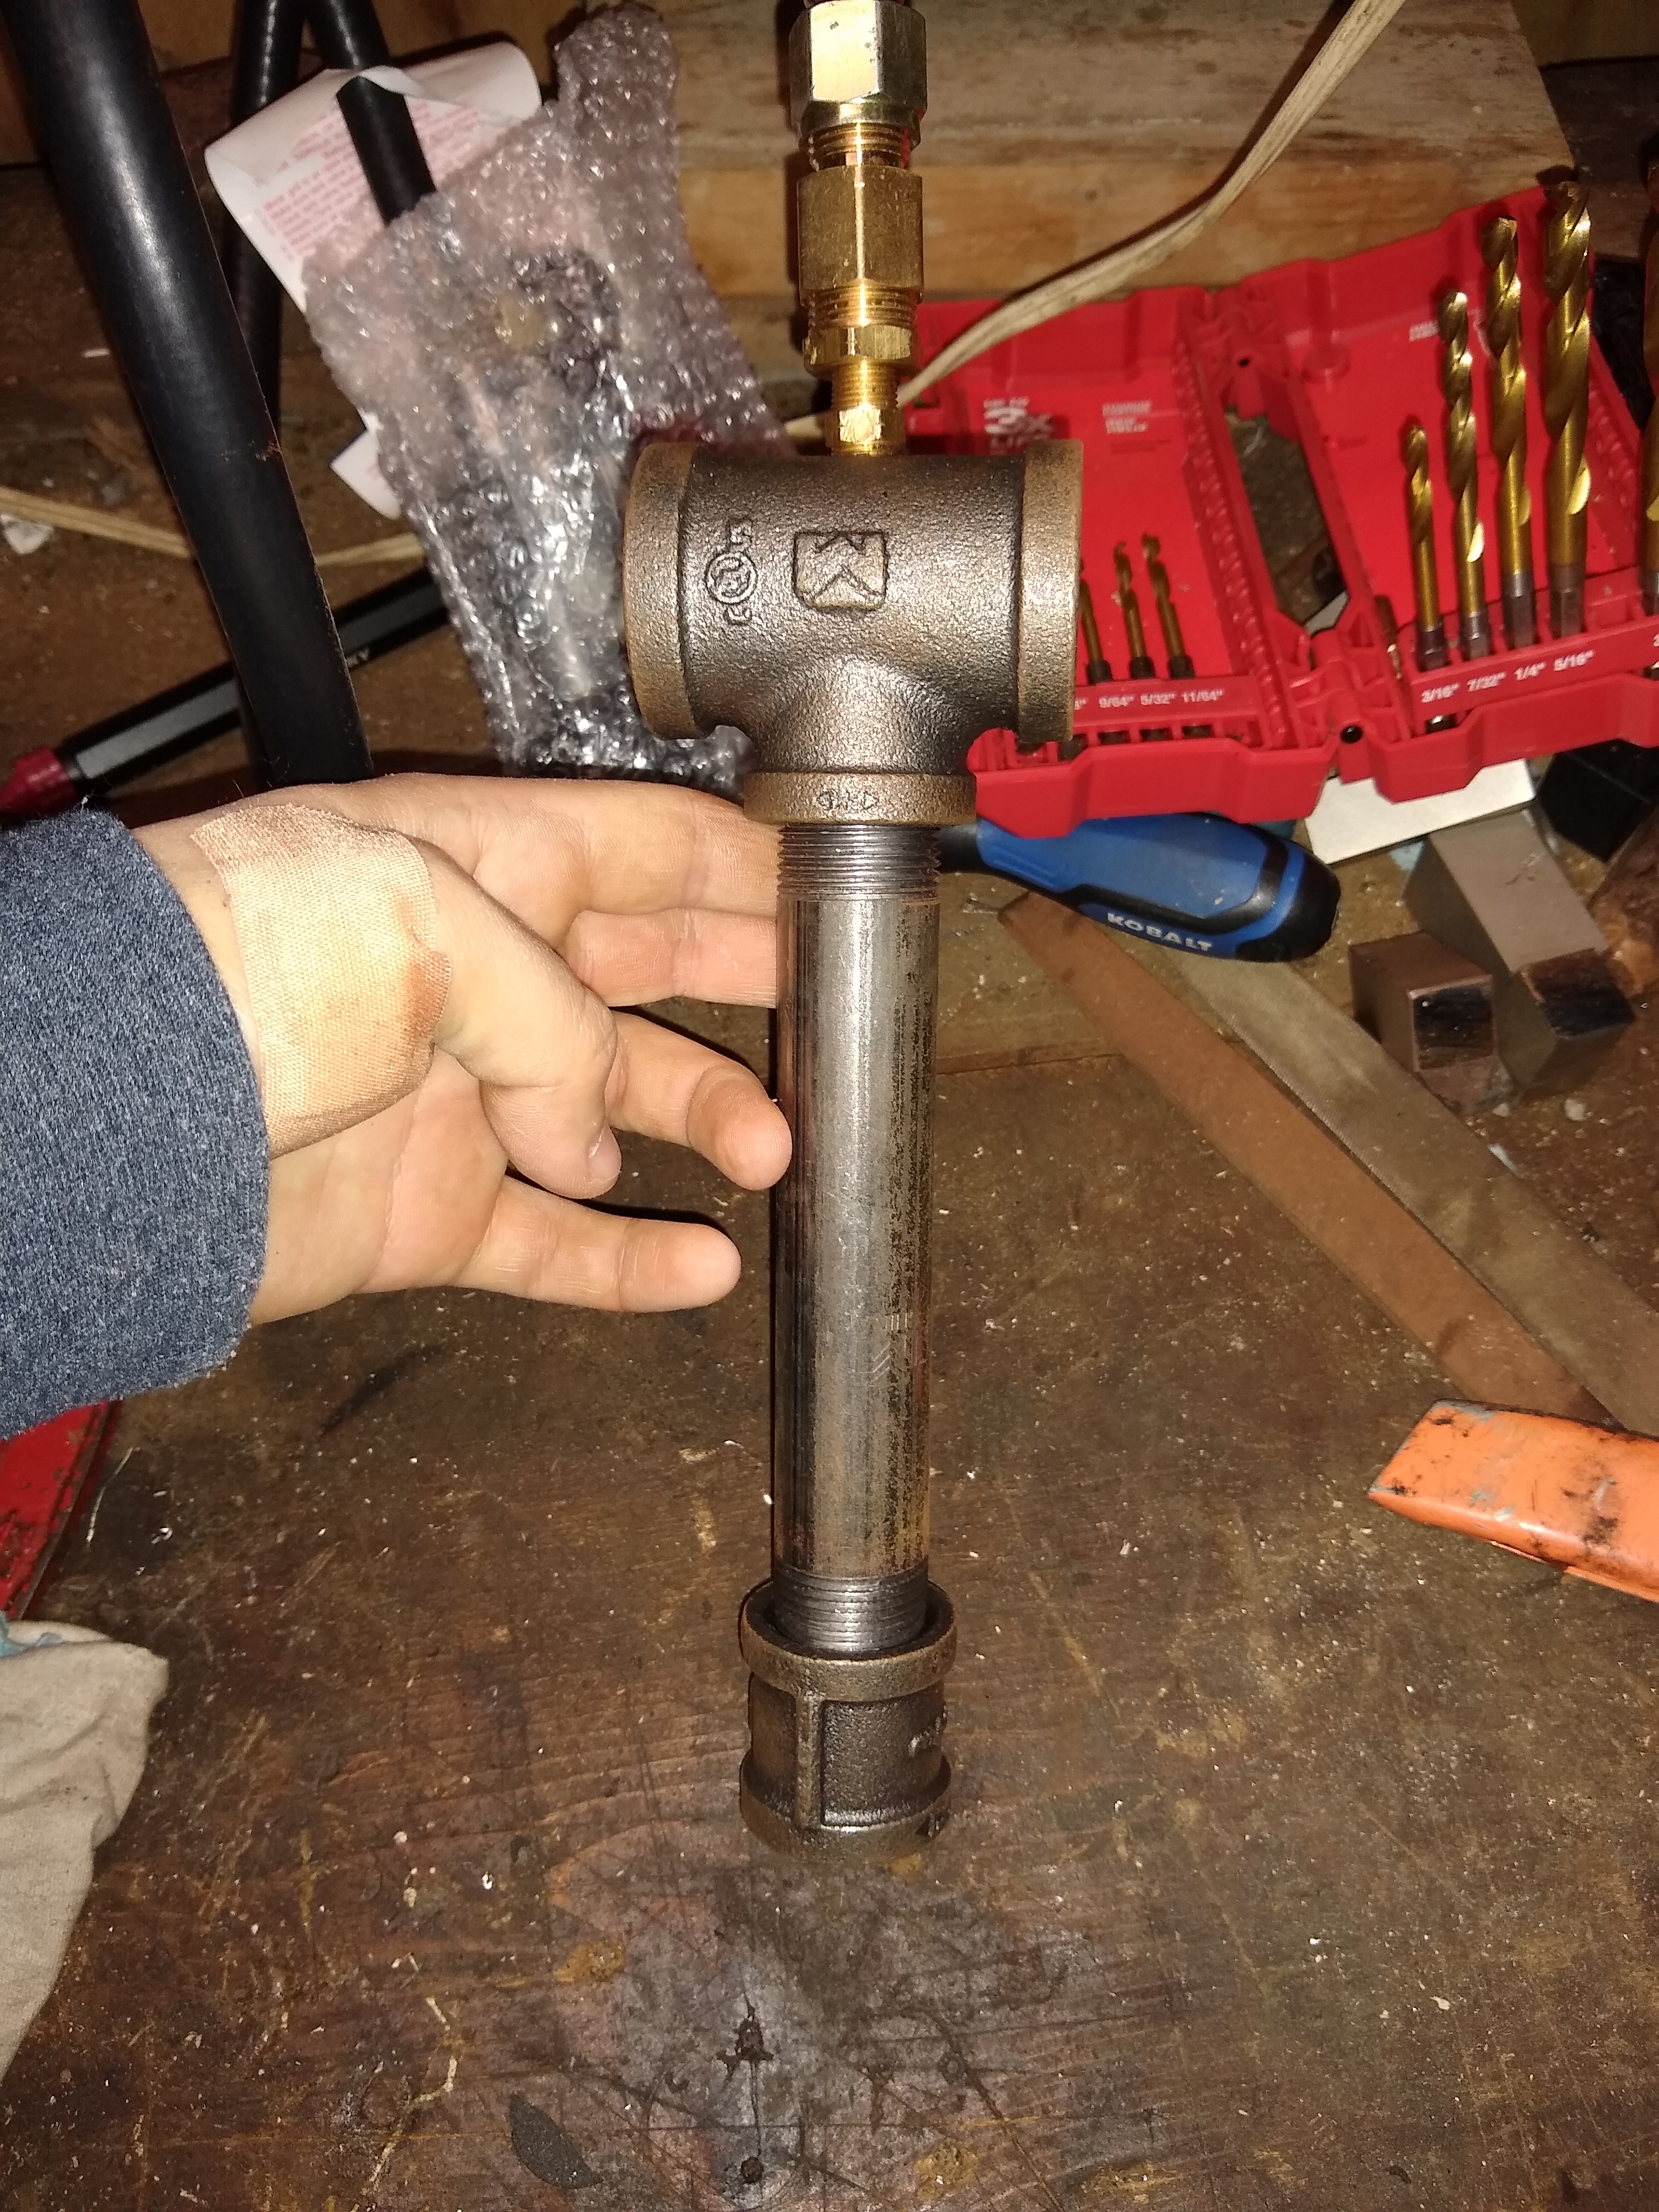
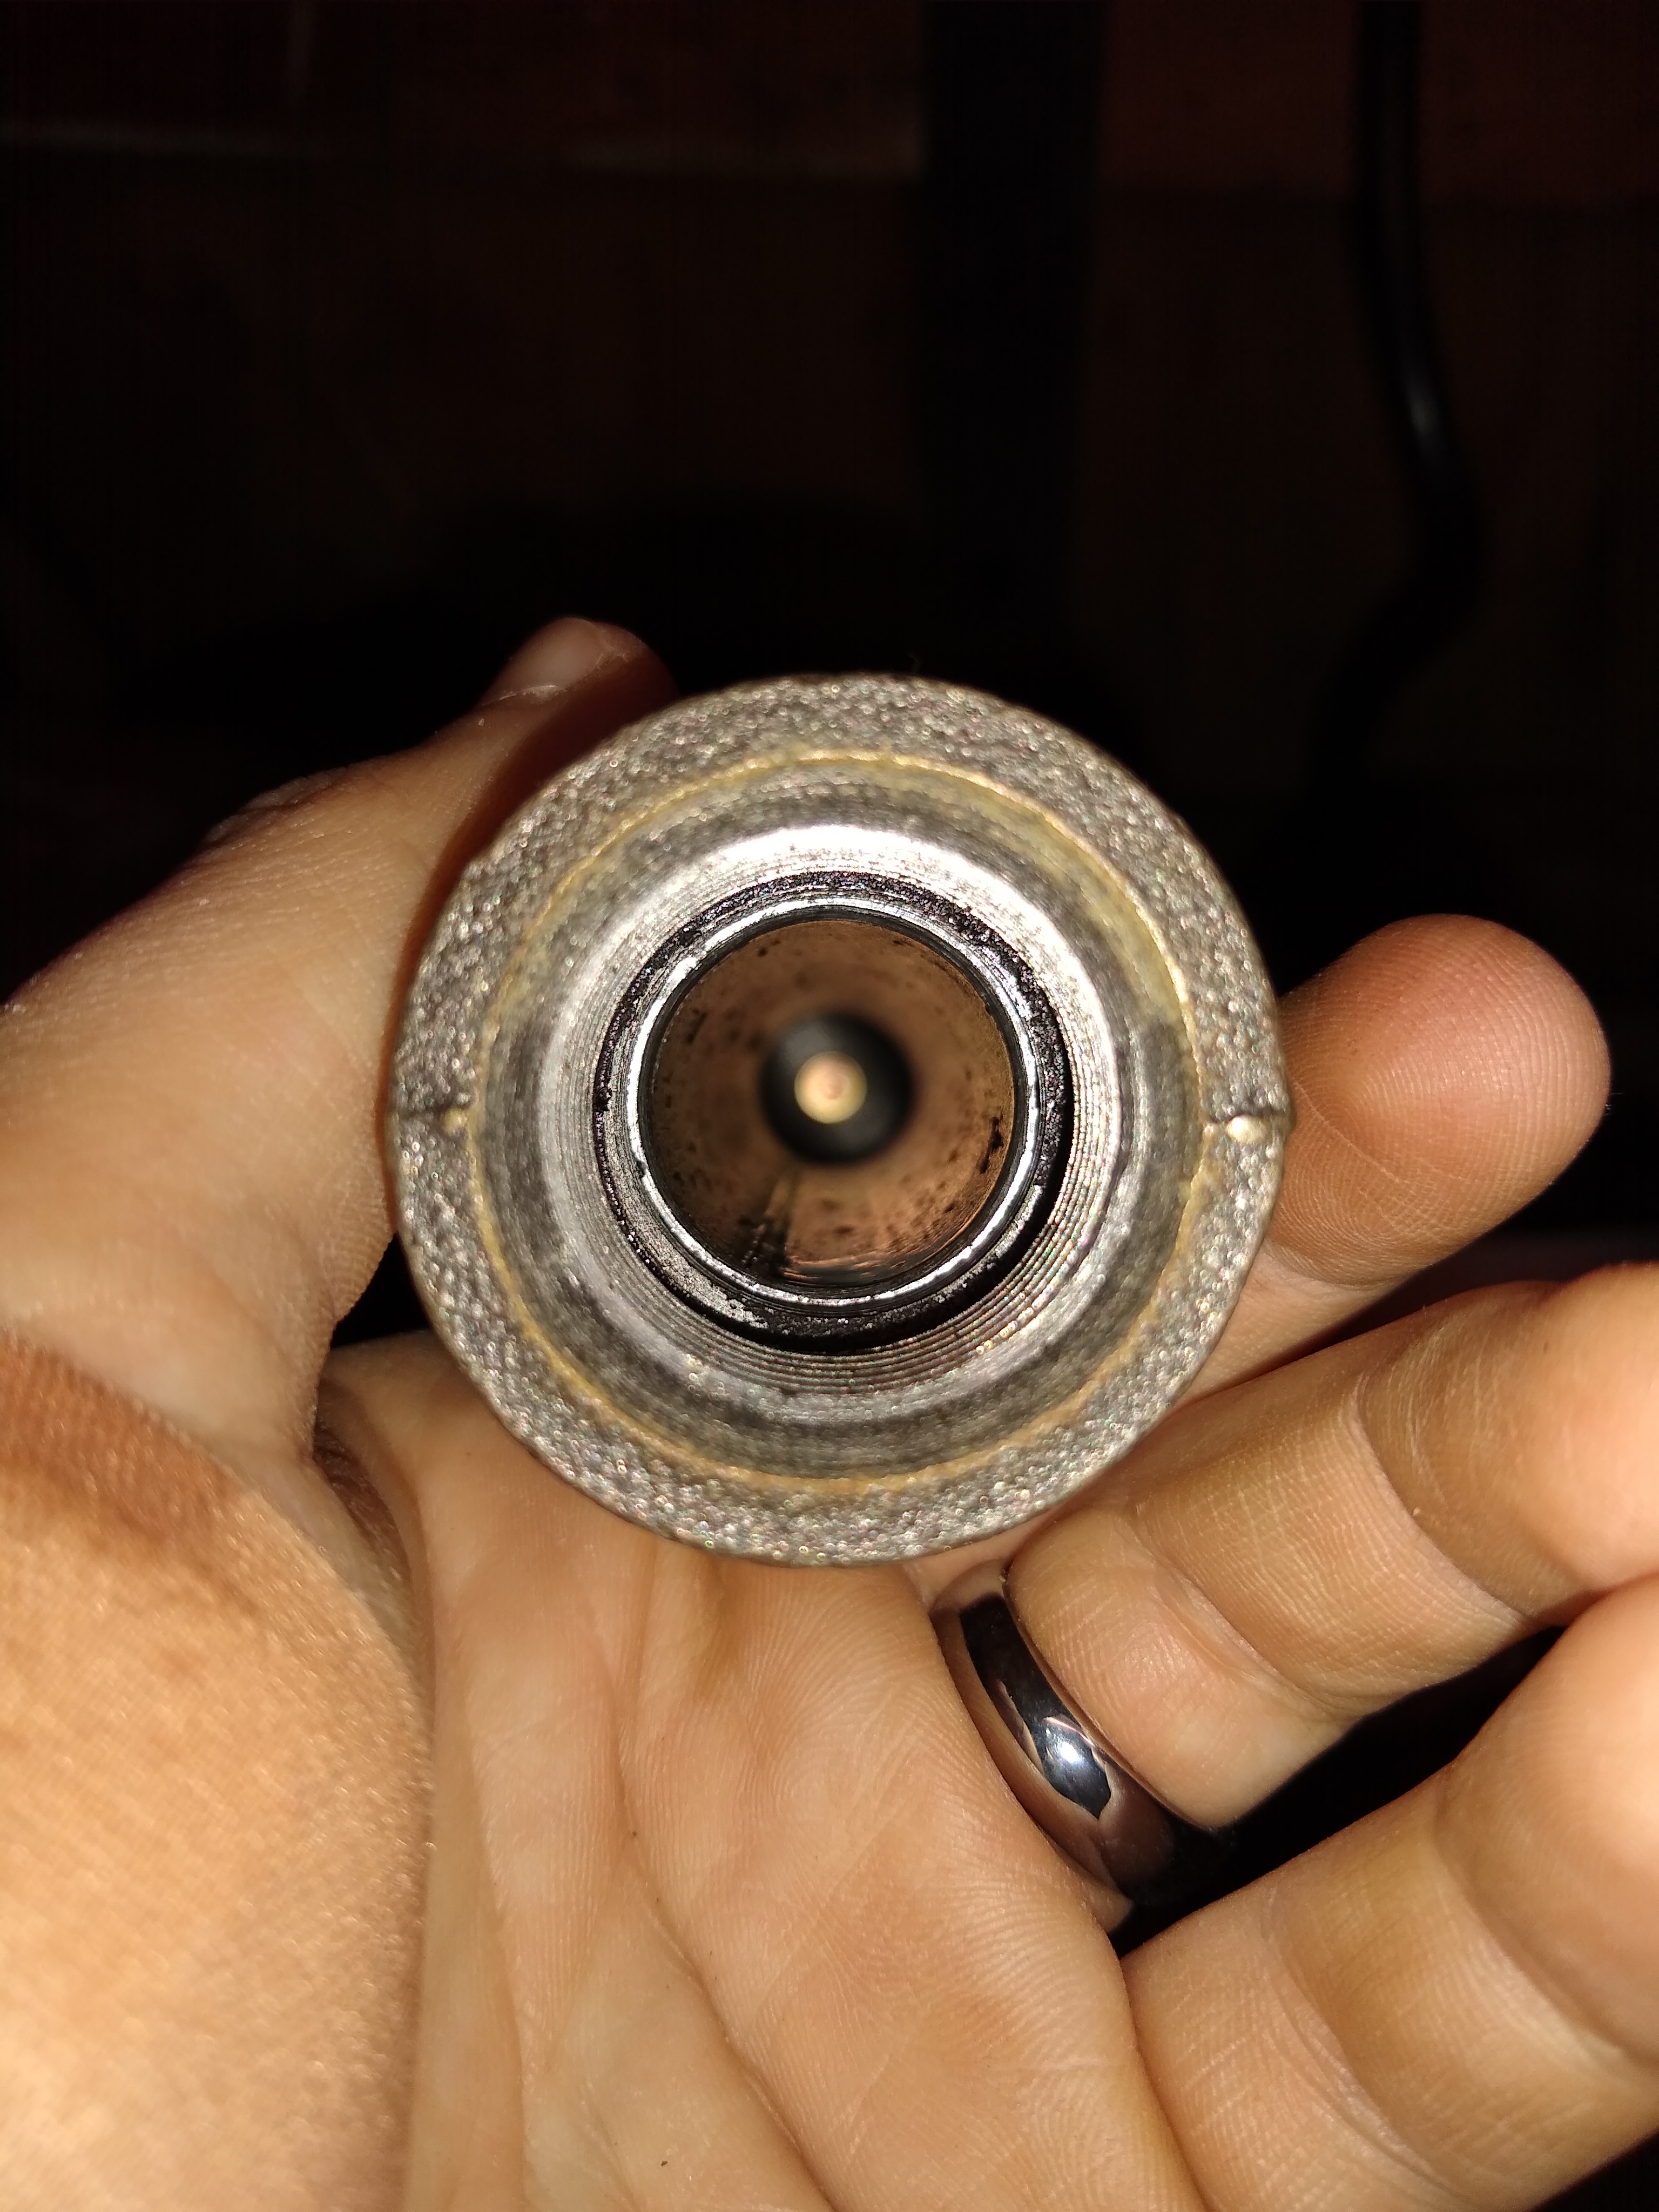
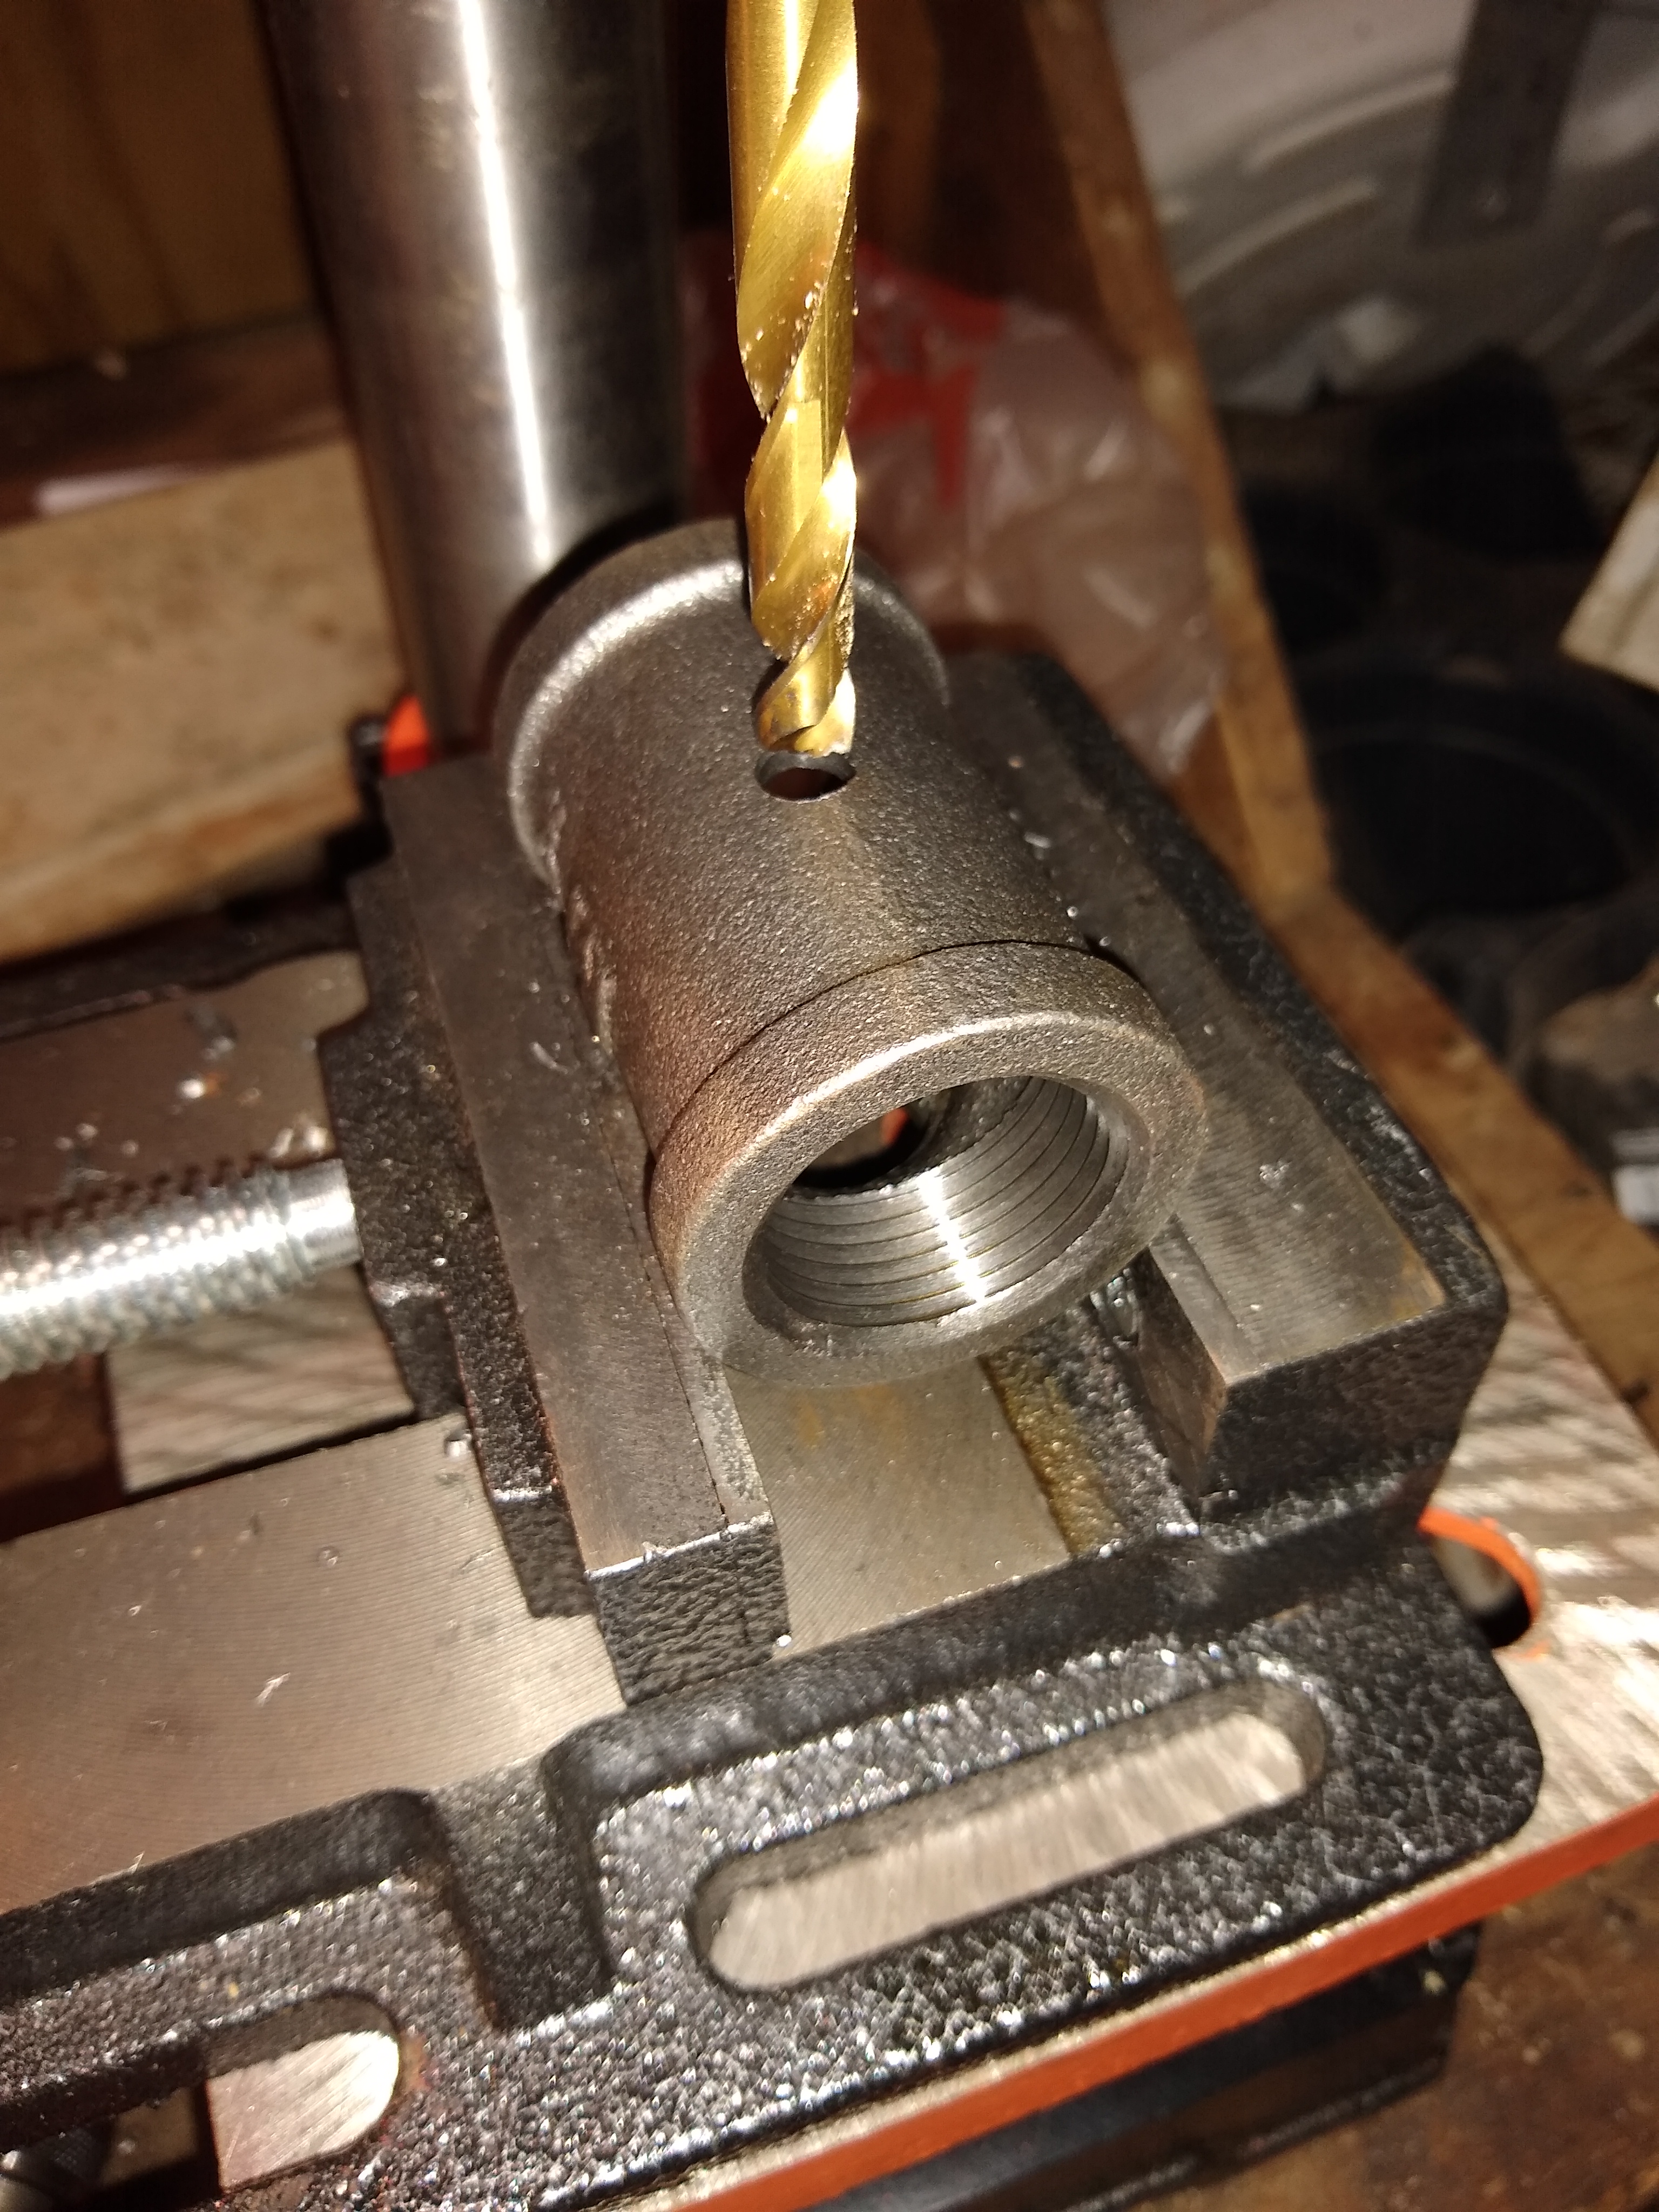
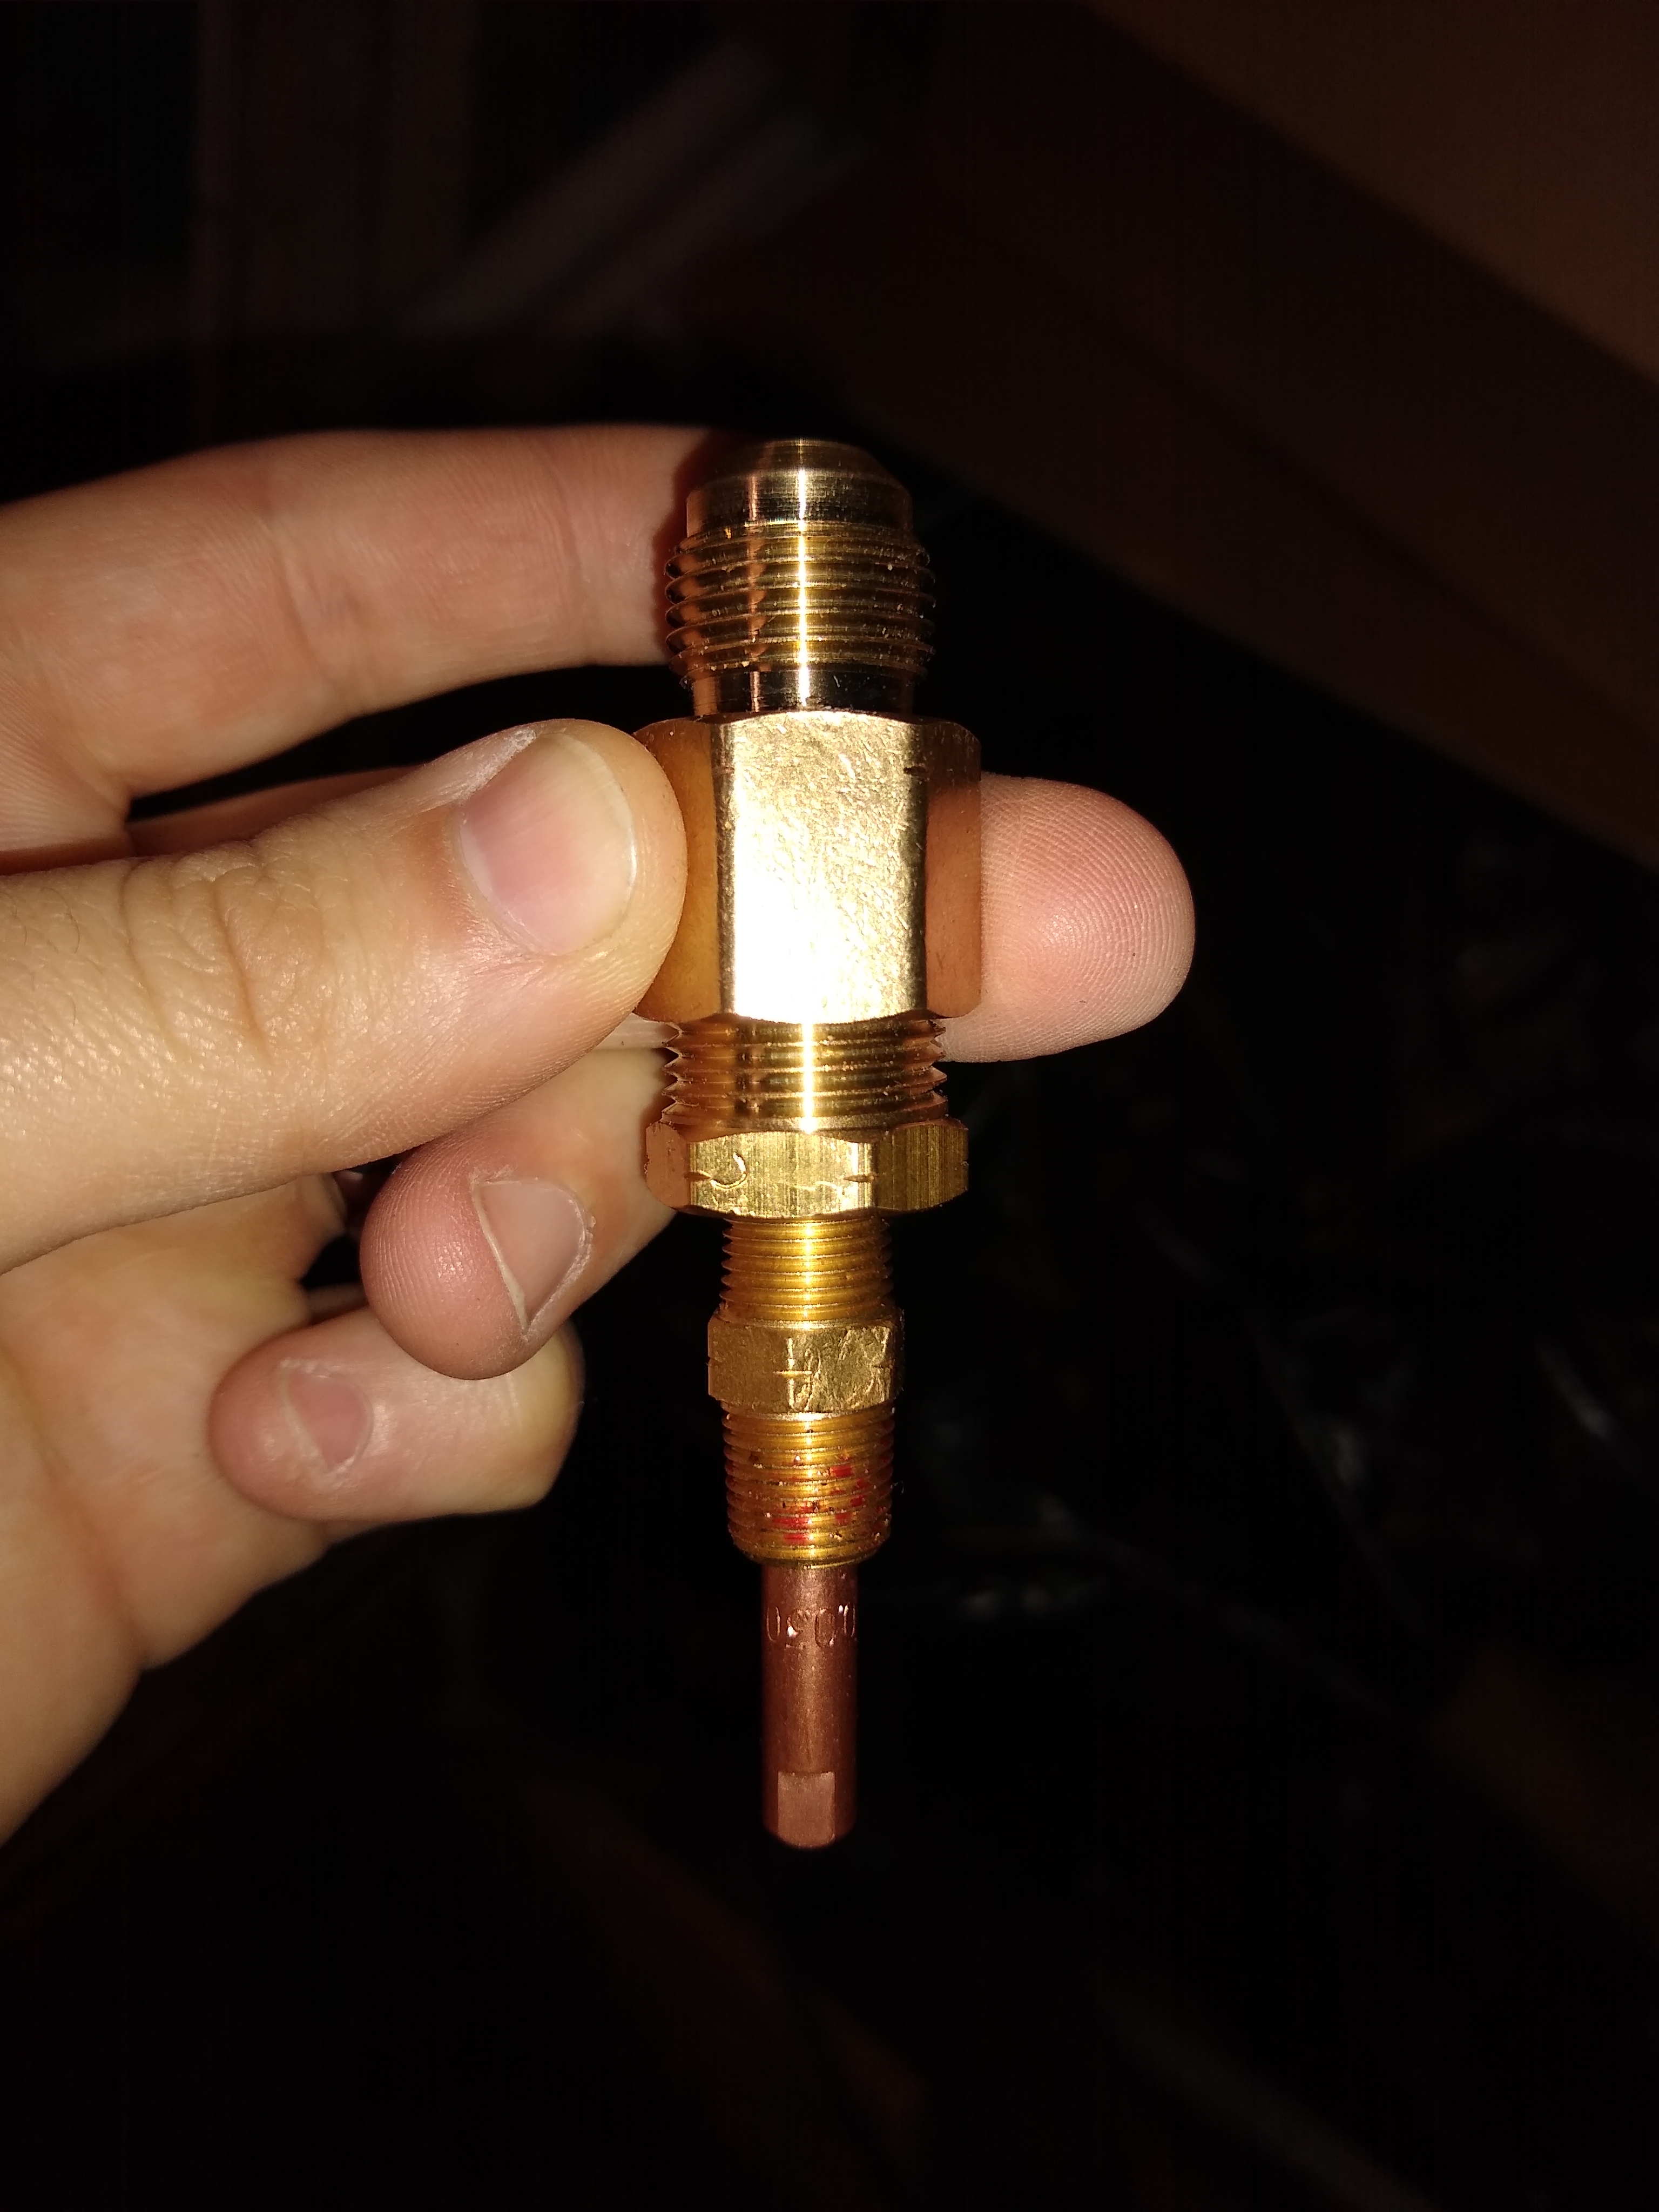
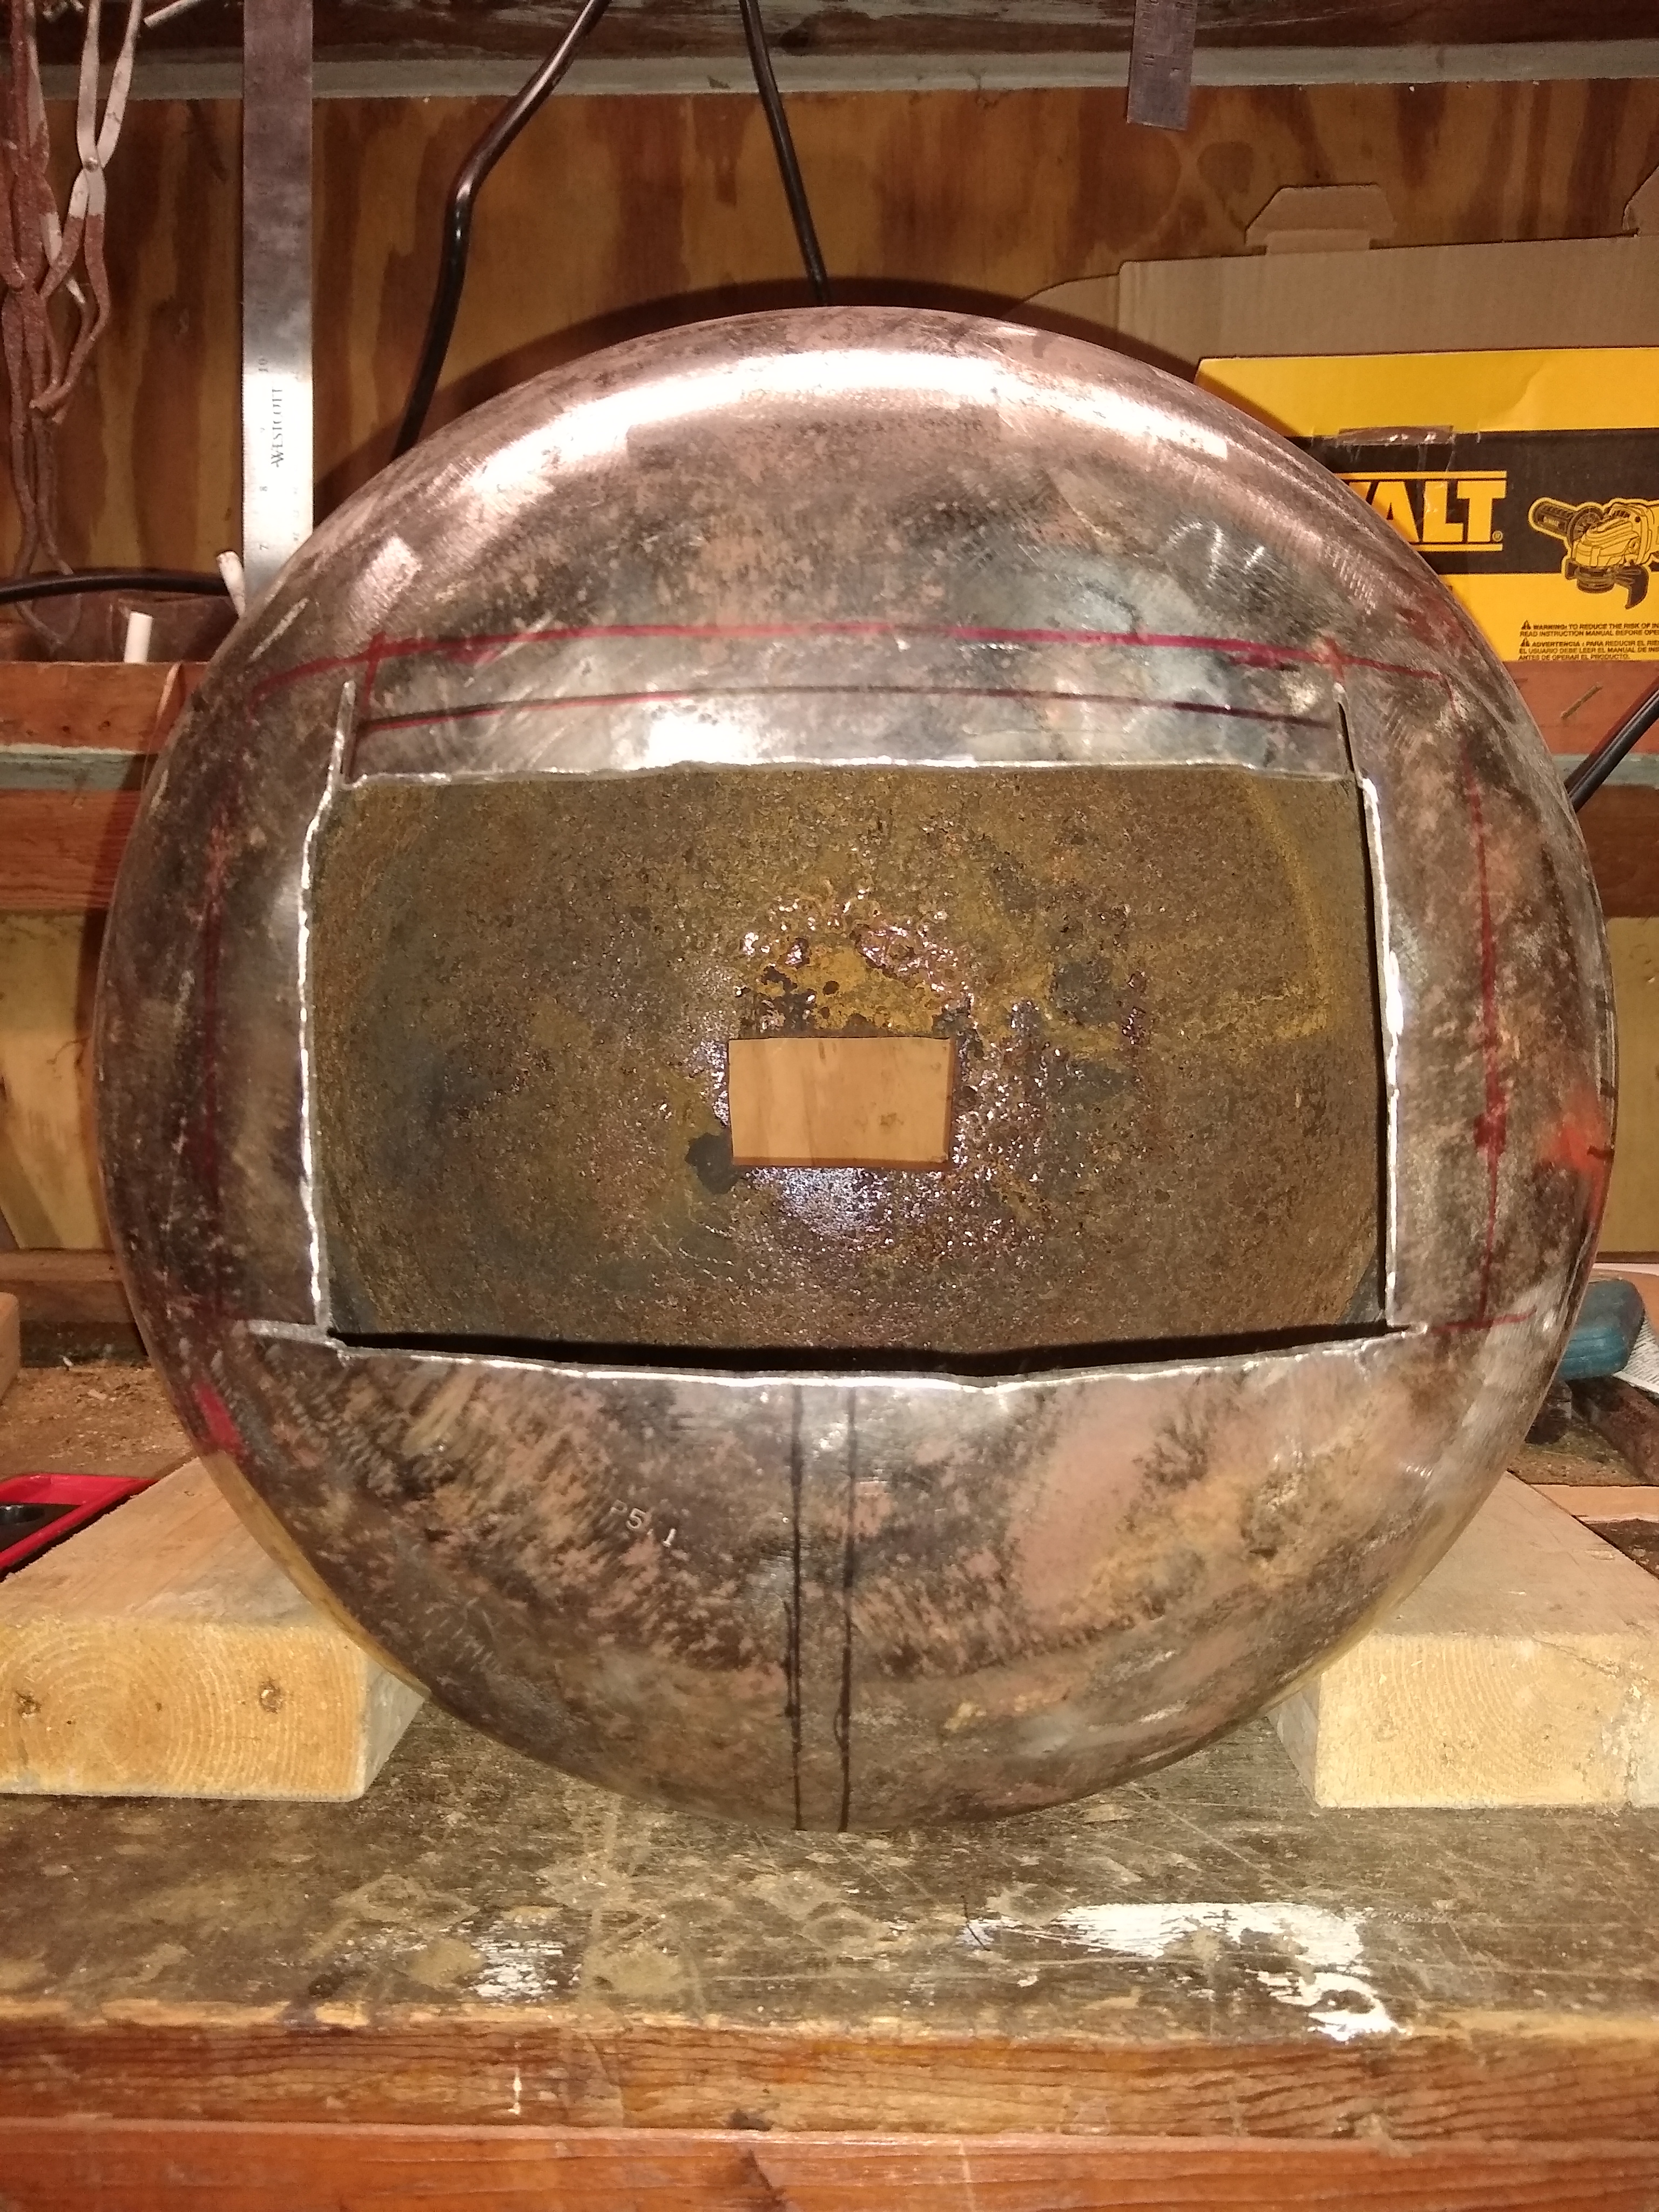
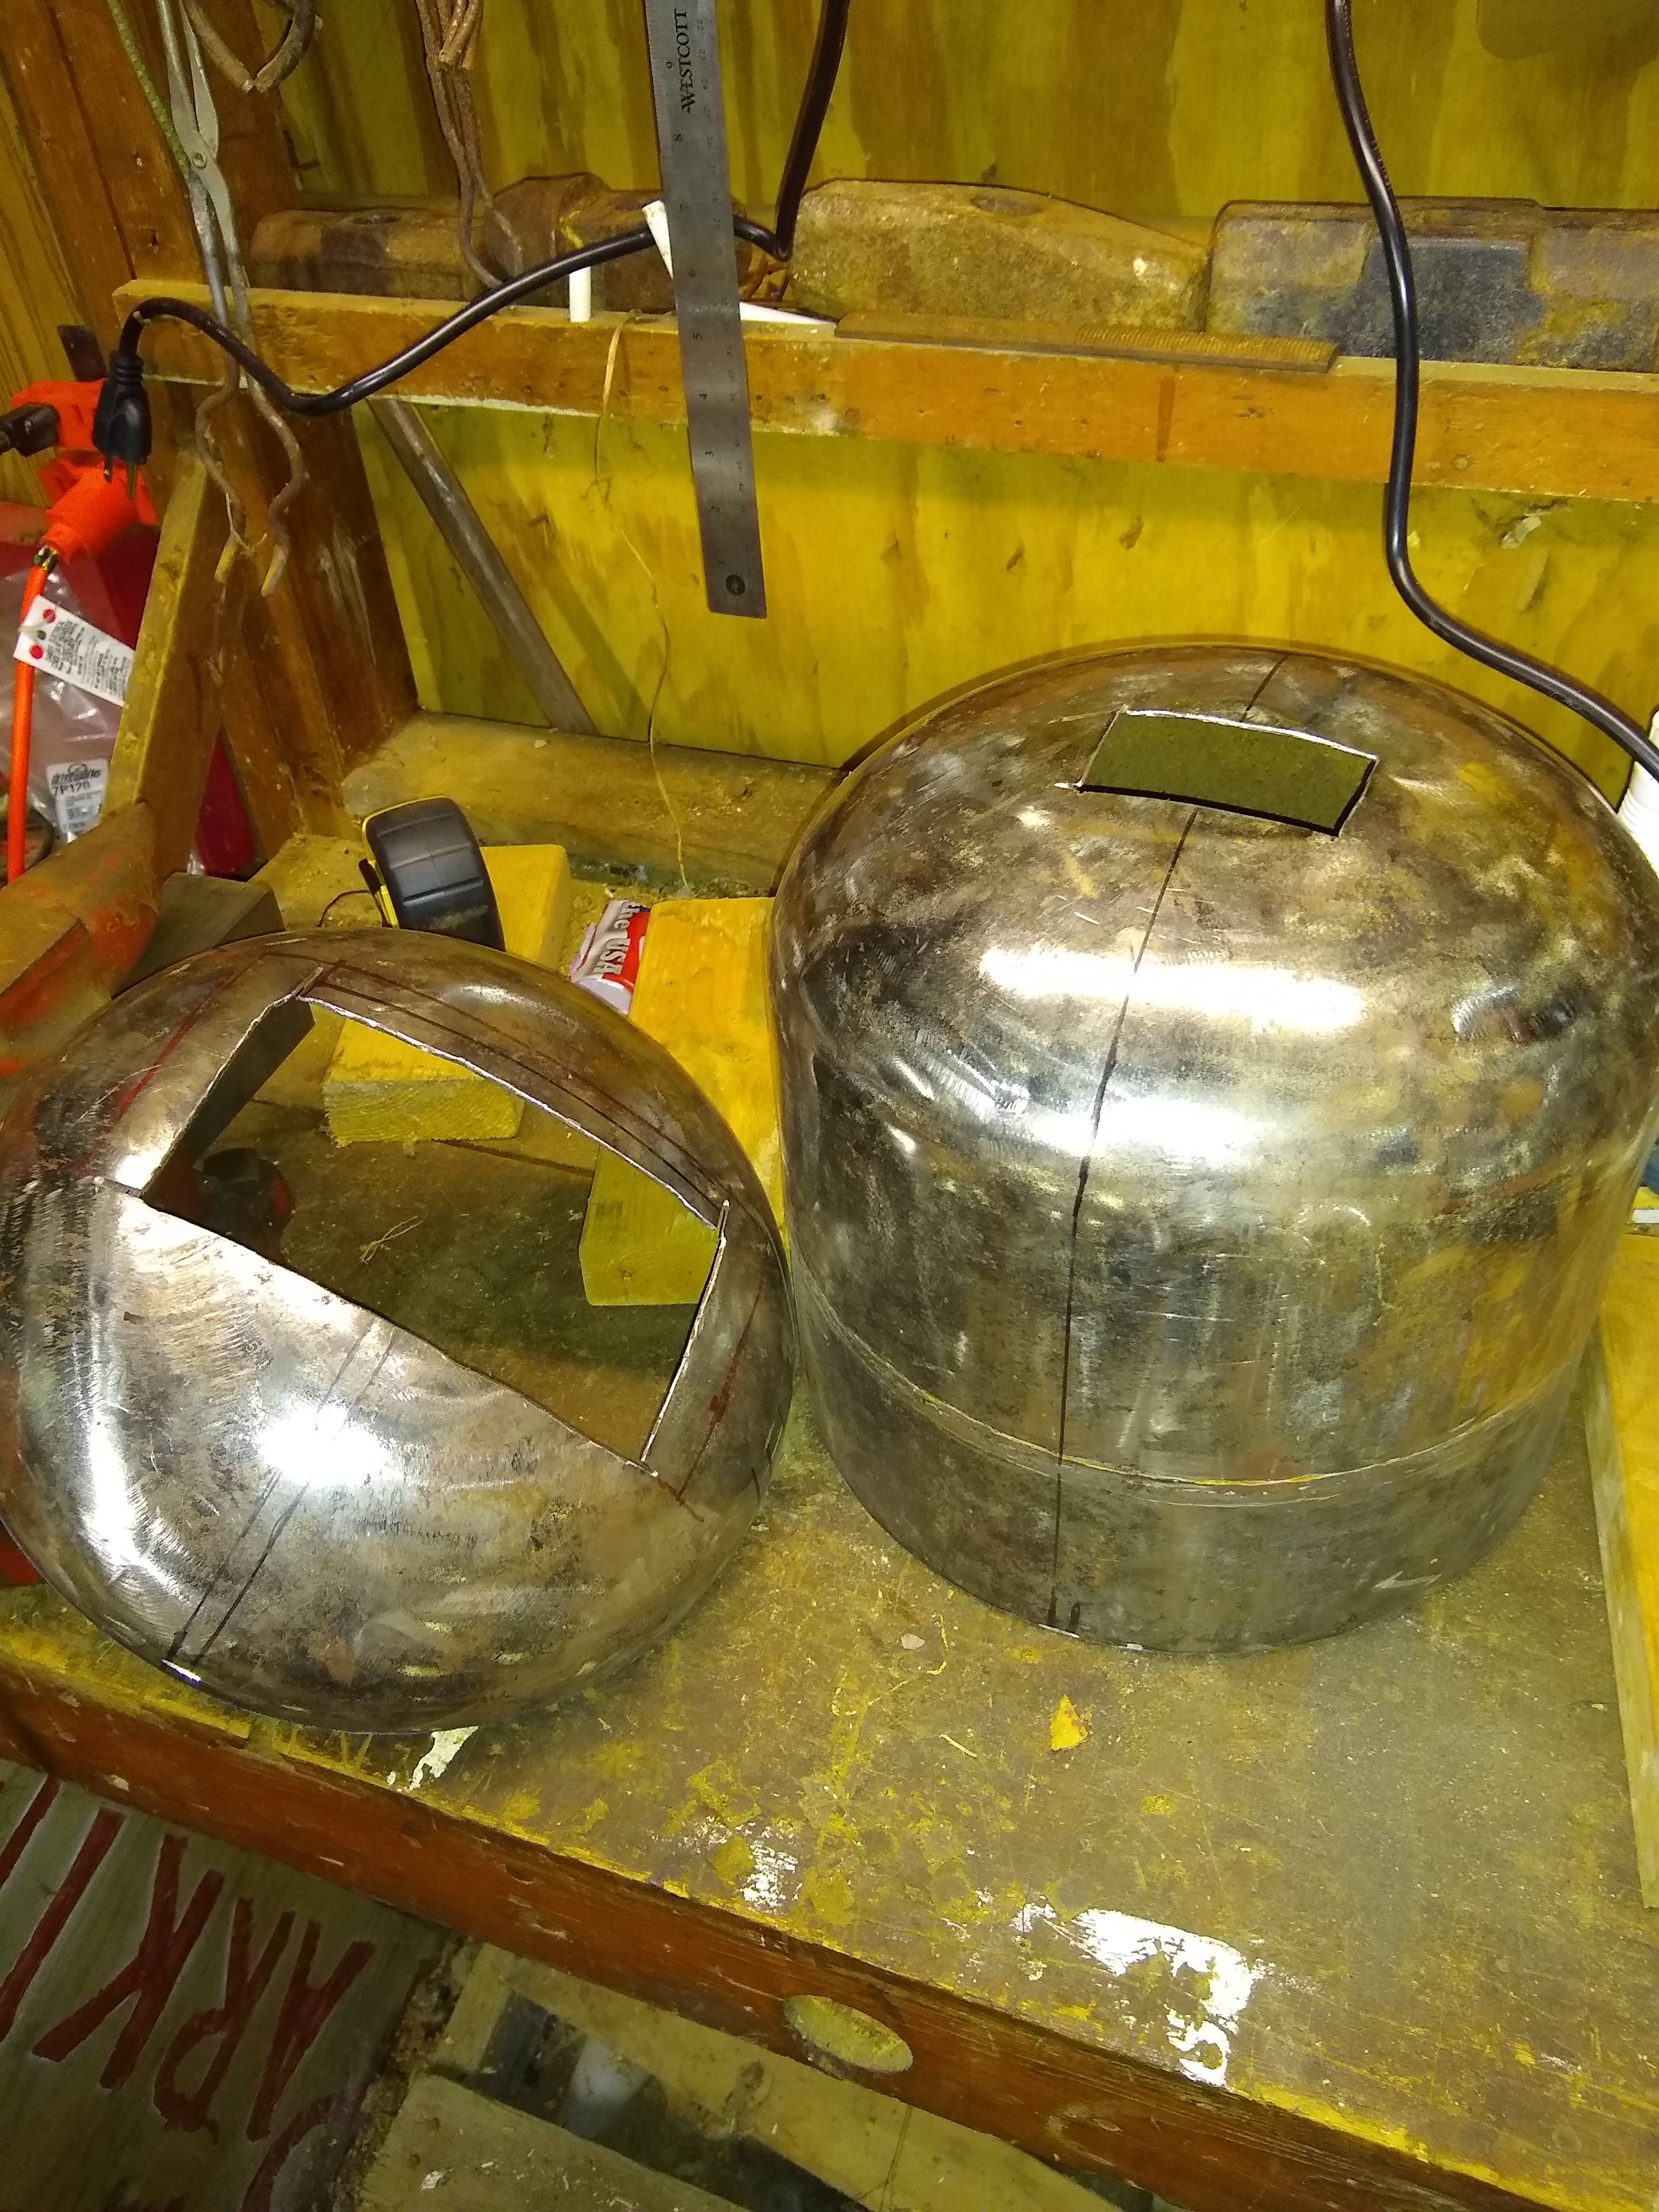
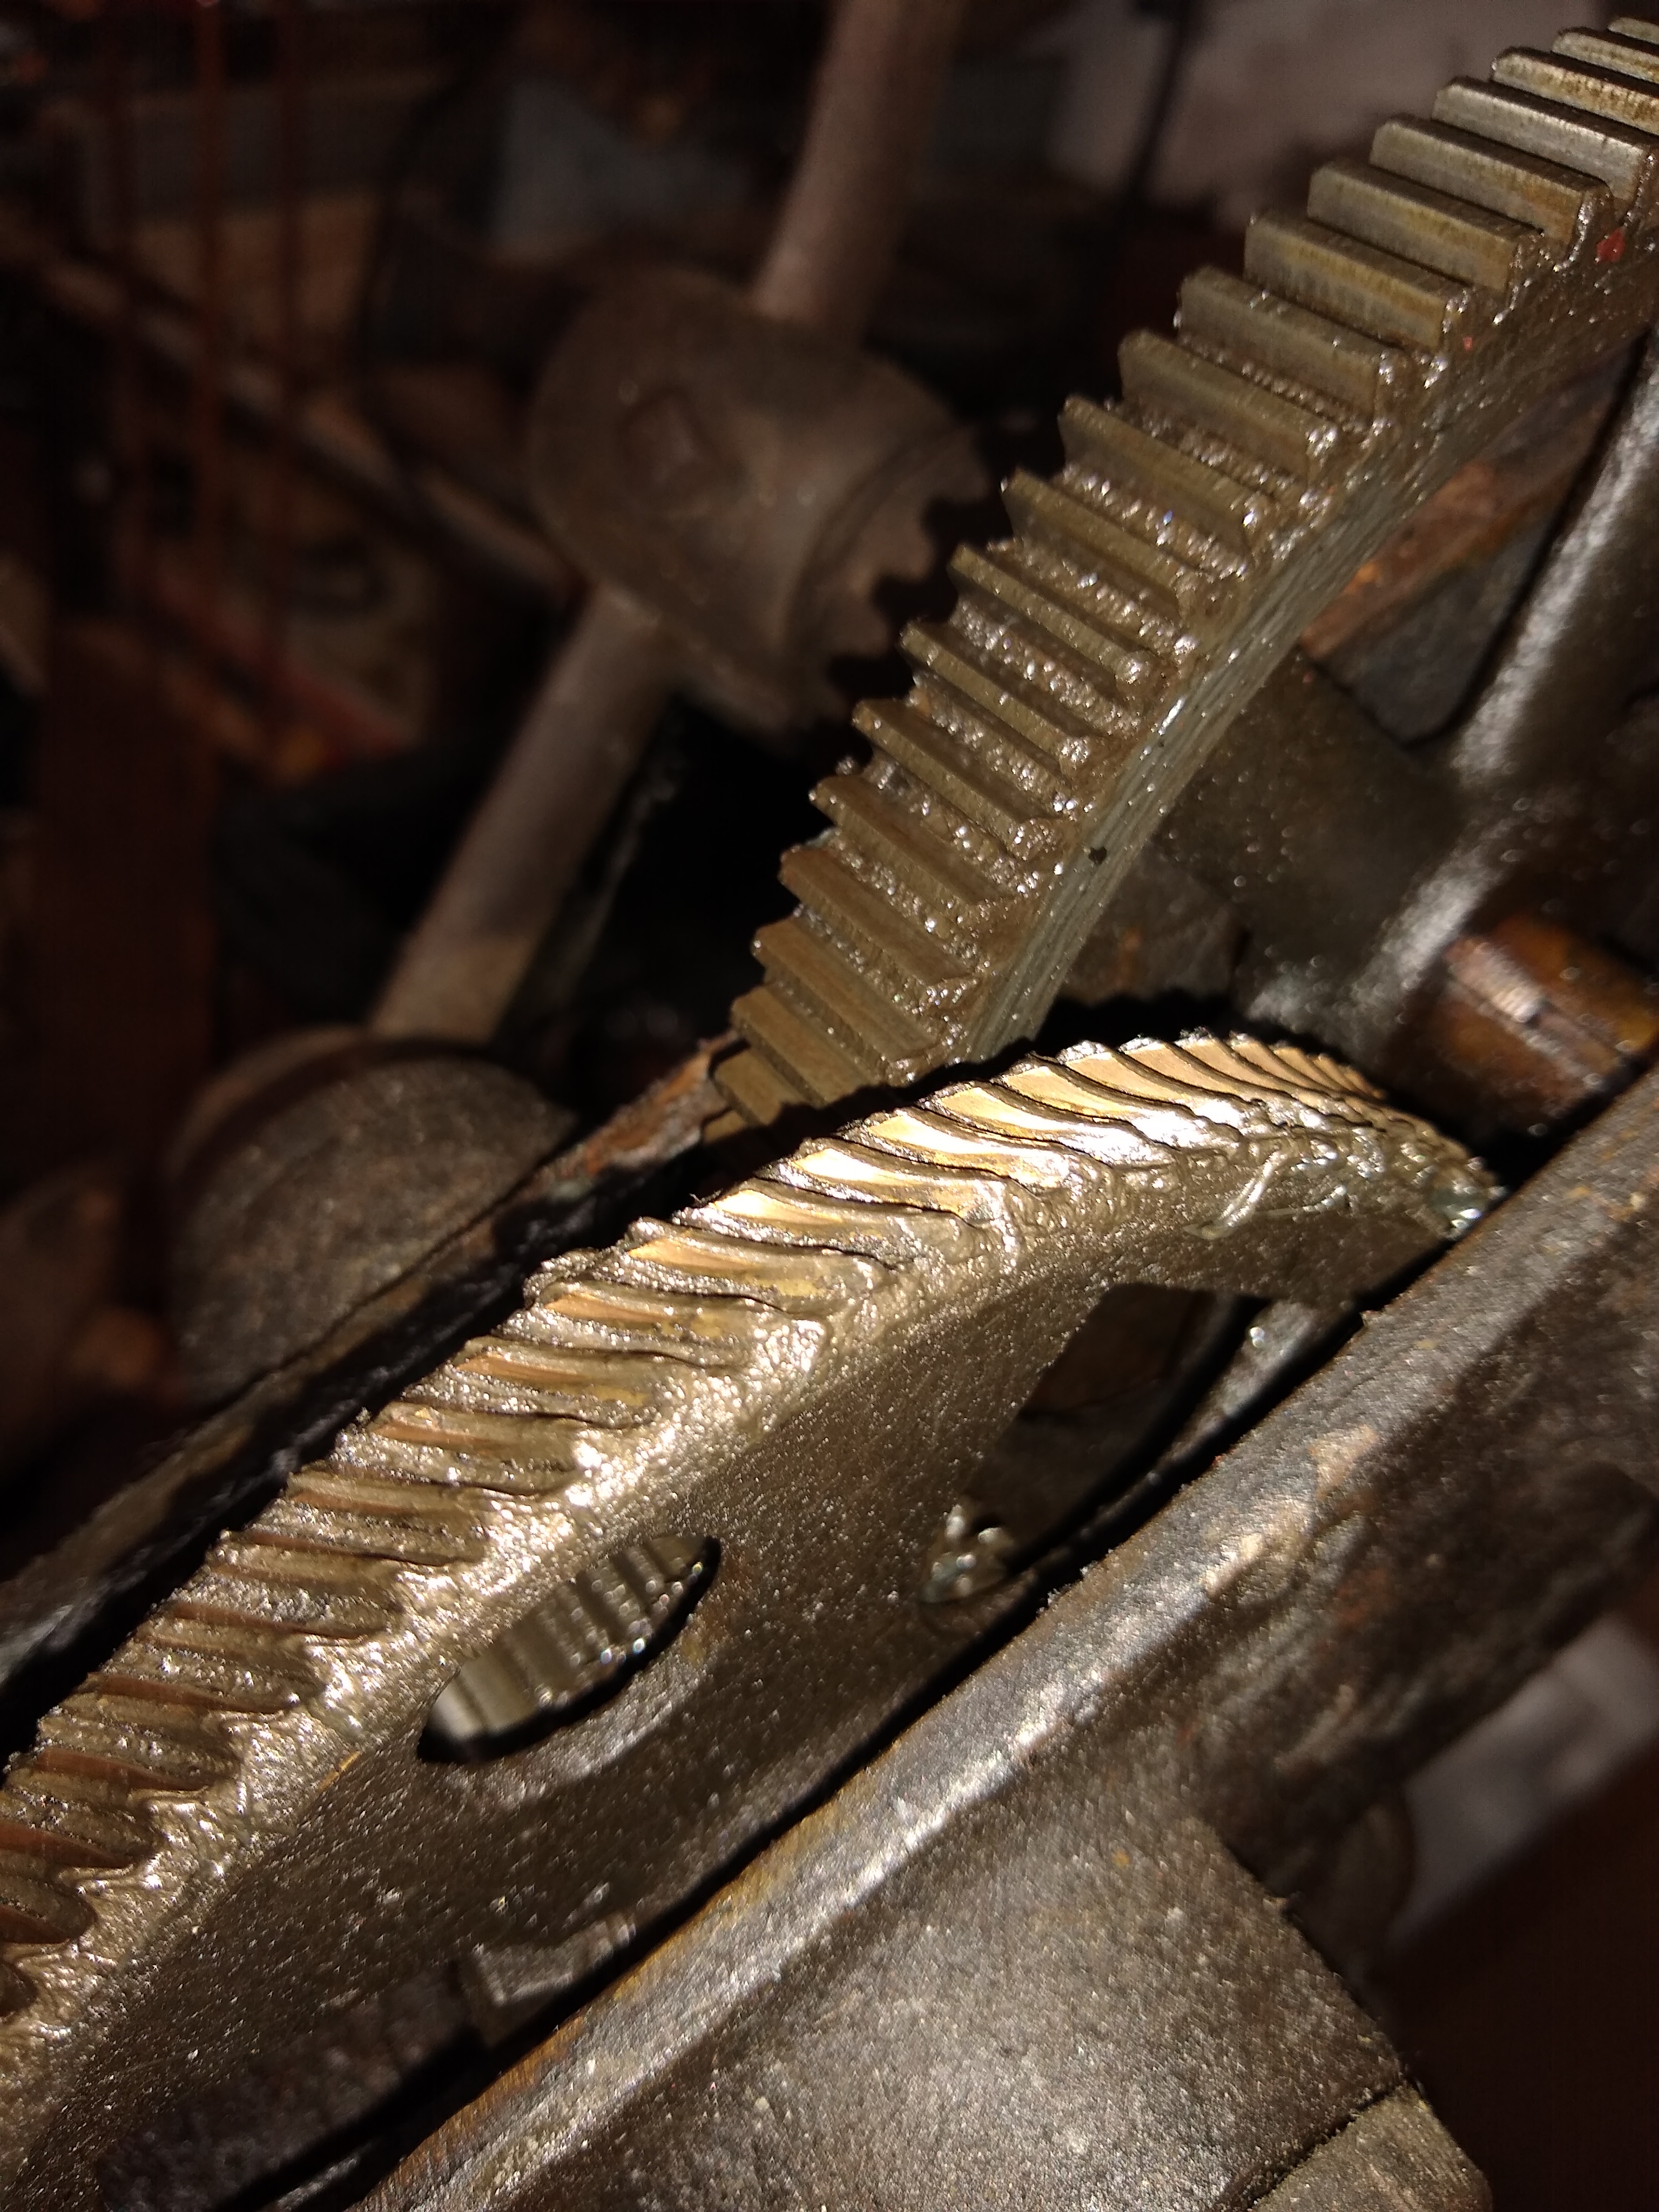
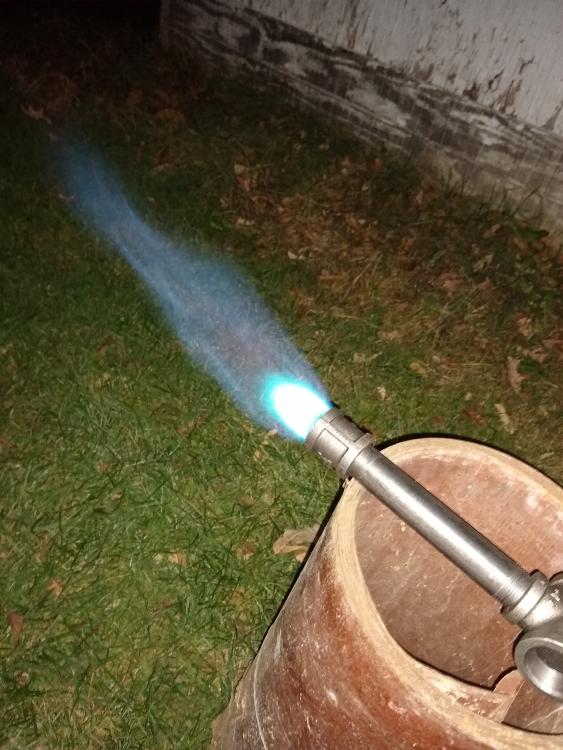
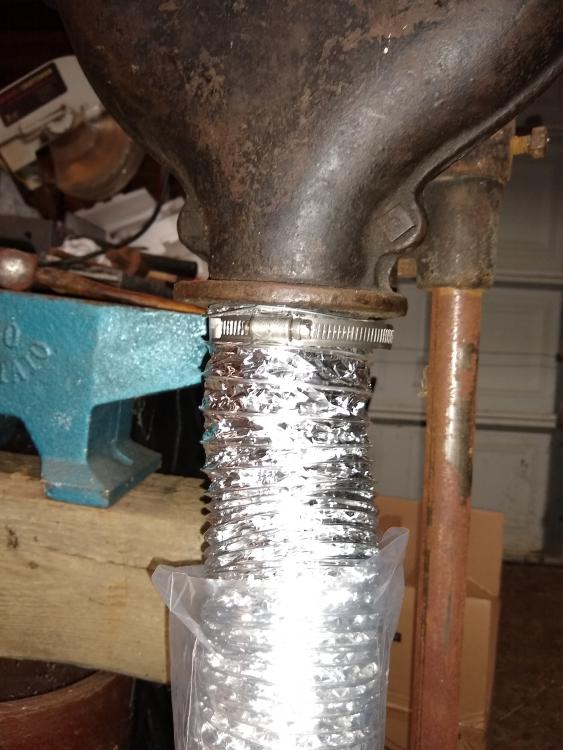
Just posting a couple more pictures and giving some numbers. Did almost exactly how Frosty and Spanky described in the PDF. Just had to do some different things to hook up to the propane. 1" x 1" x 3/4" steel T (found it at Home Depot, surprisingly) 3/4" pipe nipple, 6" long Added a 3/4" coupling at the end because I intend to use it to attach to the forge shell .035" Hobart Mig tip from Tractor Supply (snipped a tiny bit, will do more once it's in the forge) 1/8" MIP Hex Nipple (Everbilt brand from Home Depot, along with all the other brass) 3/8" MIP x 1/8" FIP Hex Bushing 3/8" Flare x 3/8" FIP Coupling 0-30 PSI propane regulator with gauge (Amazon for 20 bucks) Took a little while to get the taps and tap handles before I could start the project. Only issue I ran into is that when I went to drill the hole in the T, I believe I didn't have a large enough punch mark and the drill walked a little bit. It's off just enough that the tap didn't go in as true as I would have liked. I figure next time I will recruit my friend who has a full sized machining lathe to help with that step. That or I will punch it harder, use a smaller drill first for a pilot hole, then try again. The press vise makes it much easier to keep it straight but maybe I will use the floor flange method? Who knows! I also believe that I tapped the T a little too deep. The NPT tap is tapered and I kept going a little deeper, backing it out, and checking with the nipple. It wouldn't even go in for at least five attempts so I think I got a little over-zealous because now to screw it tight the face of the nipple is at least a quarter inch inside the T behind the mig tip... Oops! It's all good, I am having fun toying around with it so I guess that's a plus. I still need to get the forge itself built so it is not a rush job or anything. I have been on cut hours at work because of the downturn in demand for aerospace parts so I have to save my pennies to move from one step to another on this project. I still need to order the lining components from Glenn but I am confident that once I get them I will be able to assemble the forge relatively quickly. I am not going to cut up the cylinder any more, the front that I cut off I am going to attach with a hinge and a latch that I will weld or bolt on. That will be my means of inserting odd shaped stock and replacing the liner when that day arrives. I do have one question though before this ramble ends. How far apart should the burners be from one another? I assume that they should be relatively evenly spaced in the center of the actual cylinder lengthwise, but not sure how far apart to drill the burner holes. I intend to have them mounted facing at a downward angle. I also intend to cut the holes large enough that I can upgrade to a 1" burner if I need to in the future. Anyways, here are some more pictures. I hear you guys and gals like pictures.


-
So, it's been slow going but I am continuing to work on my propane powered propane bottle forge. I haven't done much else with the shell but I have been working on a pair of 3/4" Frosty T-burners. I have been using my coal forge to practice my smithing and making Christmas gifts, so I have not been able to focus on this project as much as I'd like. I only have one fully assembled so far, and it "works" as in it all goes together, connects to a propane tank, produces a flame somewhat, and doesn't explode. I admit that I might need to drill and tap another T for it because I didn't get it quite as straight as I would have liked. The flame at this point is unstable at best. I don't plan to really work on tuning it until I have a forge to put it into. At 3+ PSI the flame just shoots off the end of the burner. I can hold the lighter at the end and it looks nice and sounds good, but as soon as the heat source is gone it's just blowing out propane. If I drop the pressure slowly it will light and stay for a few seconds but with no obvious "oompf" then start to flutter till it goes out. If I drop it low enough the flame backs into the T and I have to shut the valve off. My guess is that it's too rich because I have the mig tip cut back only just so that it's halfway to the mixing tube. Figure I will wait till it actually has back pressure in the shell to tune further. I will give more details about the burners themselves and what I used in another post. I will also get some better pictures but for now this is what I've got. Long weekend will hopefully give me some more time.


-
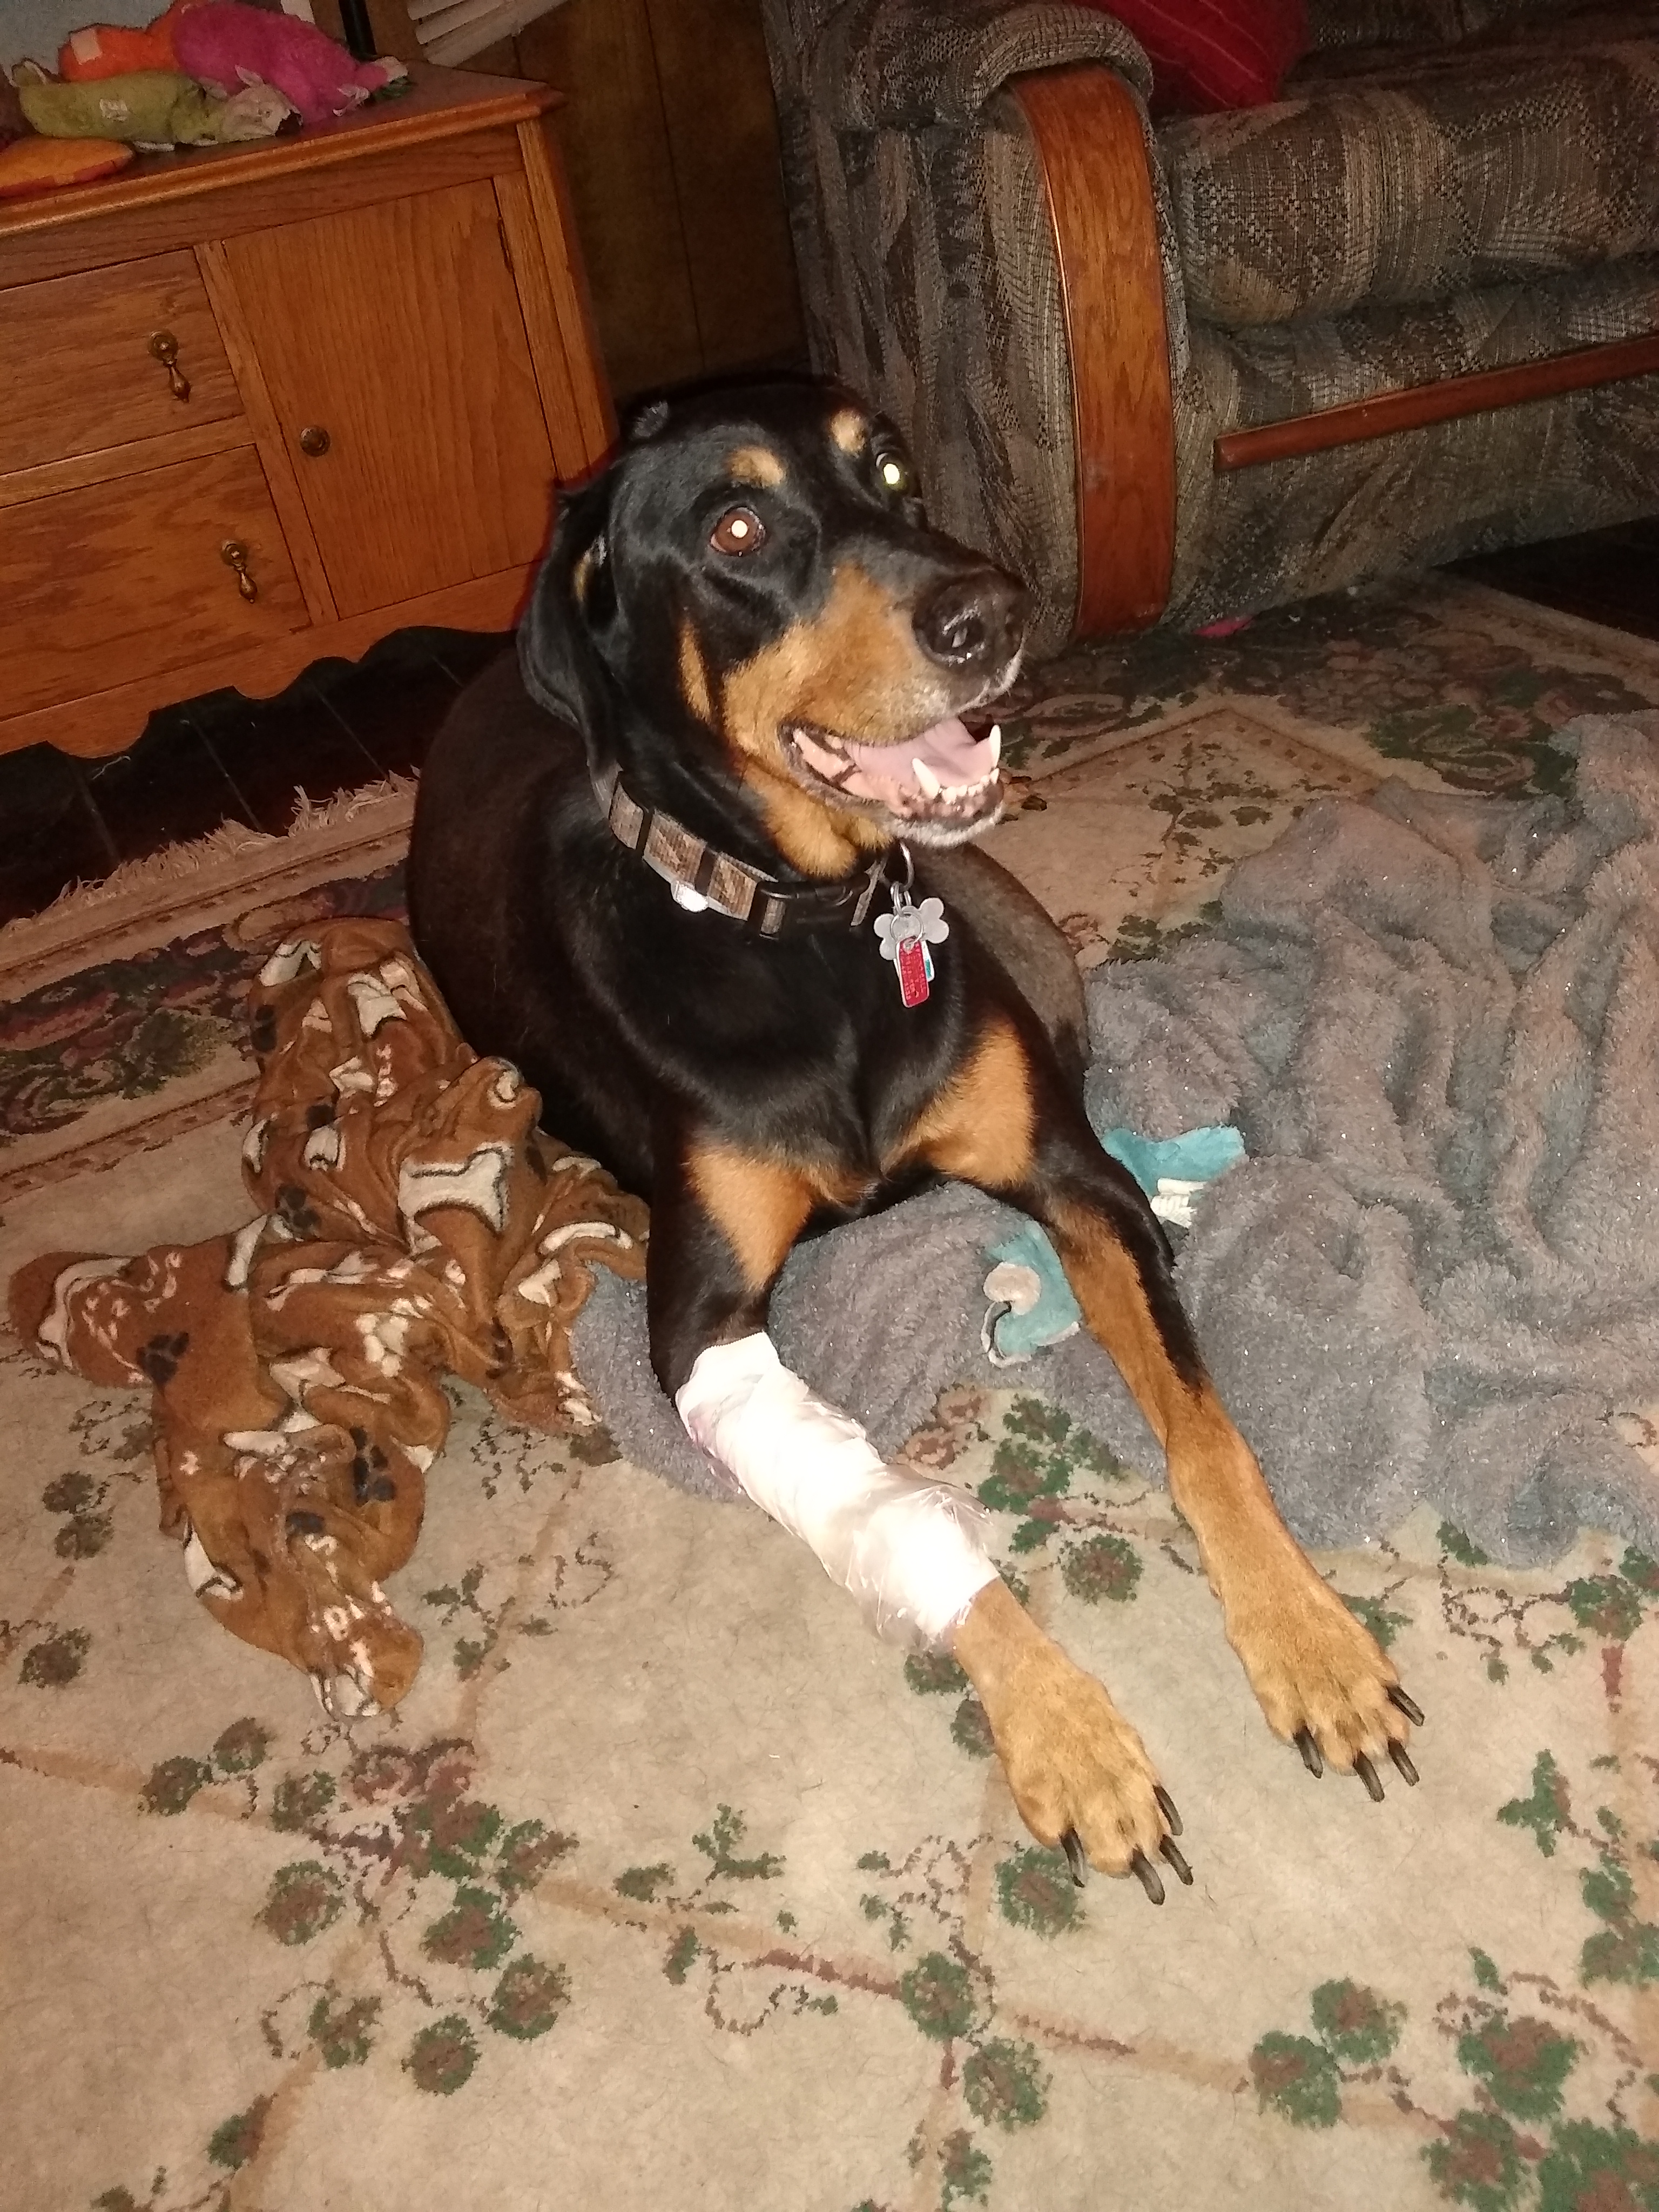
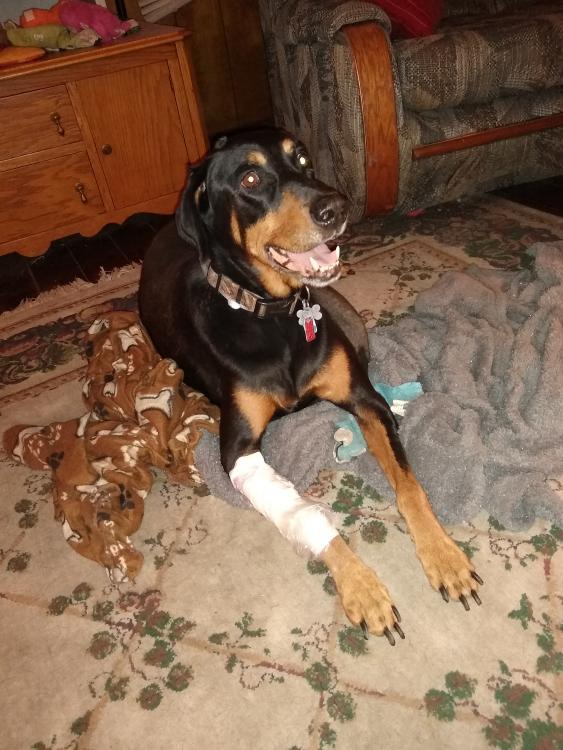
The first one is Dozer, he is a loveable lump of fur that keeps me company sometimes. He is half doberman, half rottweiler, but all sweetheart. He's probably about 12-13 years old. My grandparents adopted him when his prior owner moved to an apartment where they couldn't have pets. His leg is bandaged because he had to get a growth removed a couple weeks ago, but he is doing much better now. The second one is Fred. I also call him Garfield sometimes because he is fat, orange, and sassy. He doesn't come out to the forge like Dozer does but my wife is still upset that our cat yells at her if I spend too much time in the garage.

-
Thanks Jealdi, I think I will check them out this weekend. The prices seem alright from what I found online. I sent a message to the Oil Valley fellows that were the closest ABANA affiliate listed on the site. They don't seem to have a web presence except a Facebook. Which I don't use online social networks so that's out. I asked about coal and just generally about being in contact with them so hopefully I can find some local like-minded individuals to talk with.
-
I truly wish I knew of a place that sold blacksmith coal, but unfortunately Erie Coke shut down last year and that was the only place I knew of that sold it around here. I have had my antenna up but almost everything I have found is almost to Pittsburgh, and also only deals in tons. I don't have room nor ambition for tons, so I will cope with anthracite from Tractor Supply until I find something better. Even the places that sell coal by the ton around here only sell anthracite because it's for heating houses they say. It's really another reason why I would like to have a propane forge, because it is getting harder and harder to get coal of any worth for smithing just based on what I have read and what I have experienced. Also, I am seriously considering opening the cylinder she'll up Wayne style because I really don't want to have to cut it open again in the future just to replace the innards. I do agree that I would prefer tools that will actually be useful in a year. If anyone has a suggestion for a quality tap and die set, or even just a good tap handle and taps I am all ears. I know next to nothing about brands that do those well so help in shopping for that would be appreciated. I primarily just need these to do Frosty's T burners, so a 1/4-28 tap and a 1/8 Pipe tap are all I actually need at the moment.
-
Ha, well the trouble is that I would need to buy the tap wrench, taps, and bits. After looking at prices, buying those listed tools in the directions would have been roughly $40 for the cheapest, plus another $25 for the pipes and fittings. So not an enormous difference, but enough that my cheap-skate-ness kicked in. However, I did some digging in my garage and found the 5/16 drill bit and read that the #3 is only for removing some burrs. I also found a $30 tap set that has the wrench and both taps that are needed. So, for only five dollars more I guess I can swing it. With two persons whom I view as knowledgeable on these things, along with my better judgement, I guess I will go ahead and skip the cheap and easy path. I appreciate the input greatly. I also want to thank Spanky, for organizing quite a bit of information in a very effective package.
-
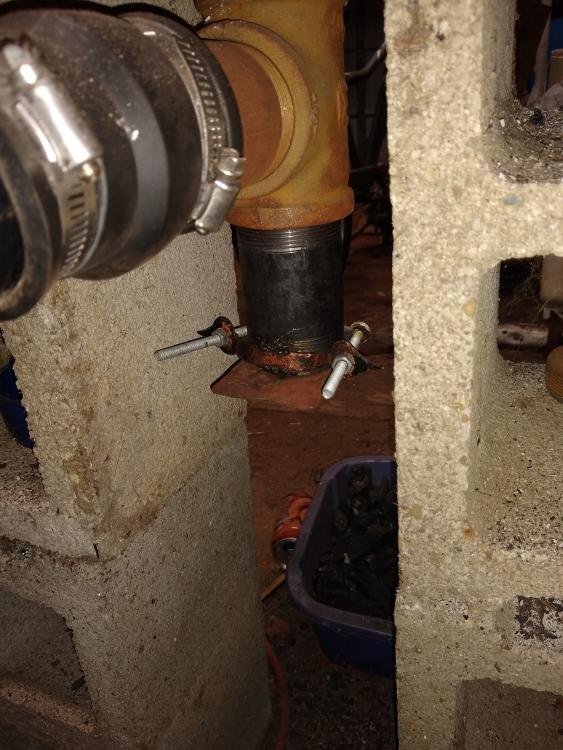
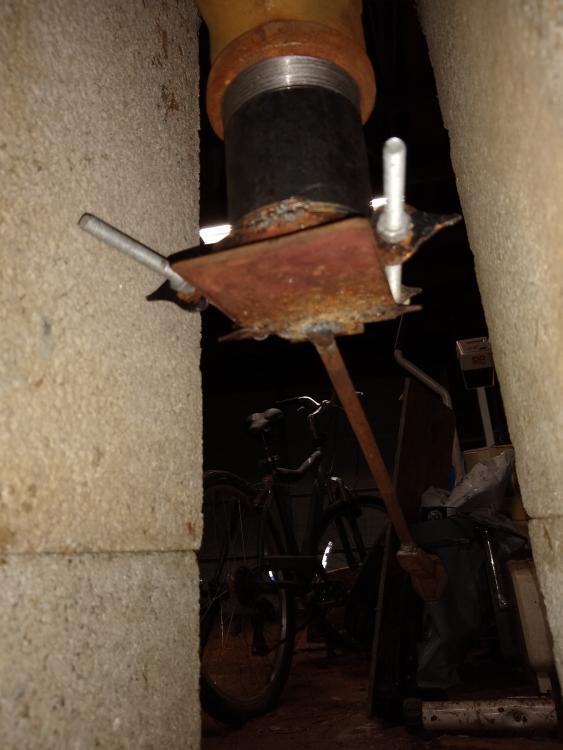
Just because I remembered that a couple different people mentioned it on this thread, I wanted to point out that I added the 4in. pipe nipple that was suggested for ash accumulation. I also welded the flap hinge that I fabricated directly to the nipple so that it is more secure. And I left the railroad spike at the end of my handle only because I think it looks neat. If I am ever hurting for scrap steel I can always hack it off in case of emergency! Also, the vent pipe works great.


-
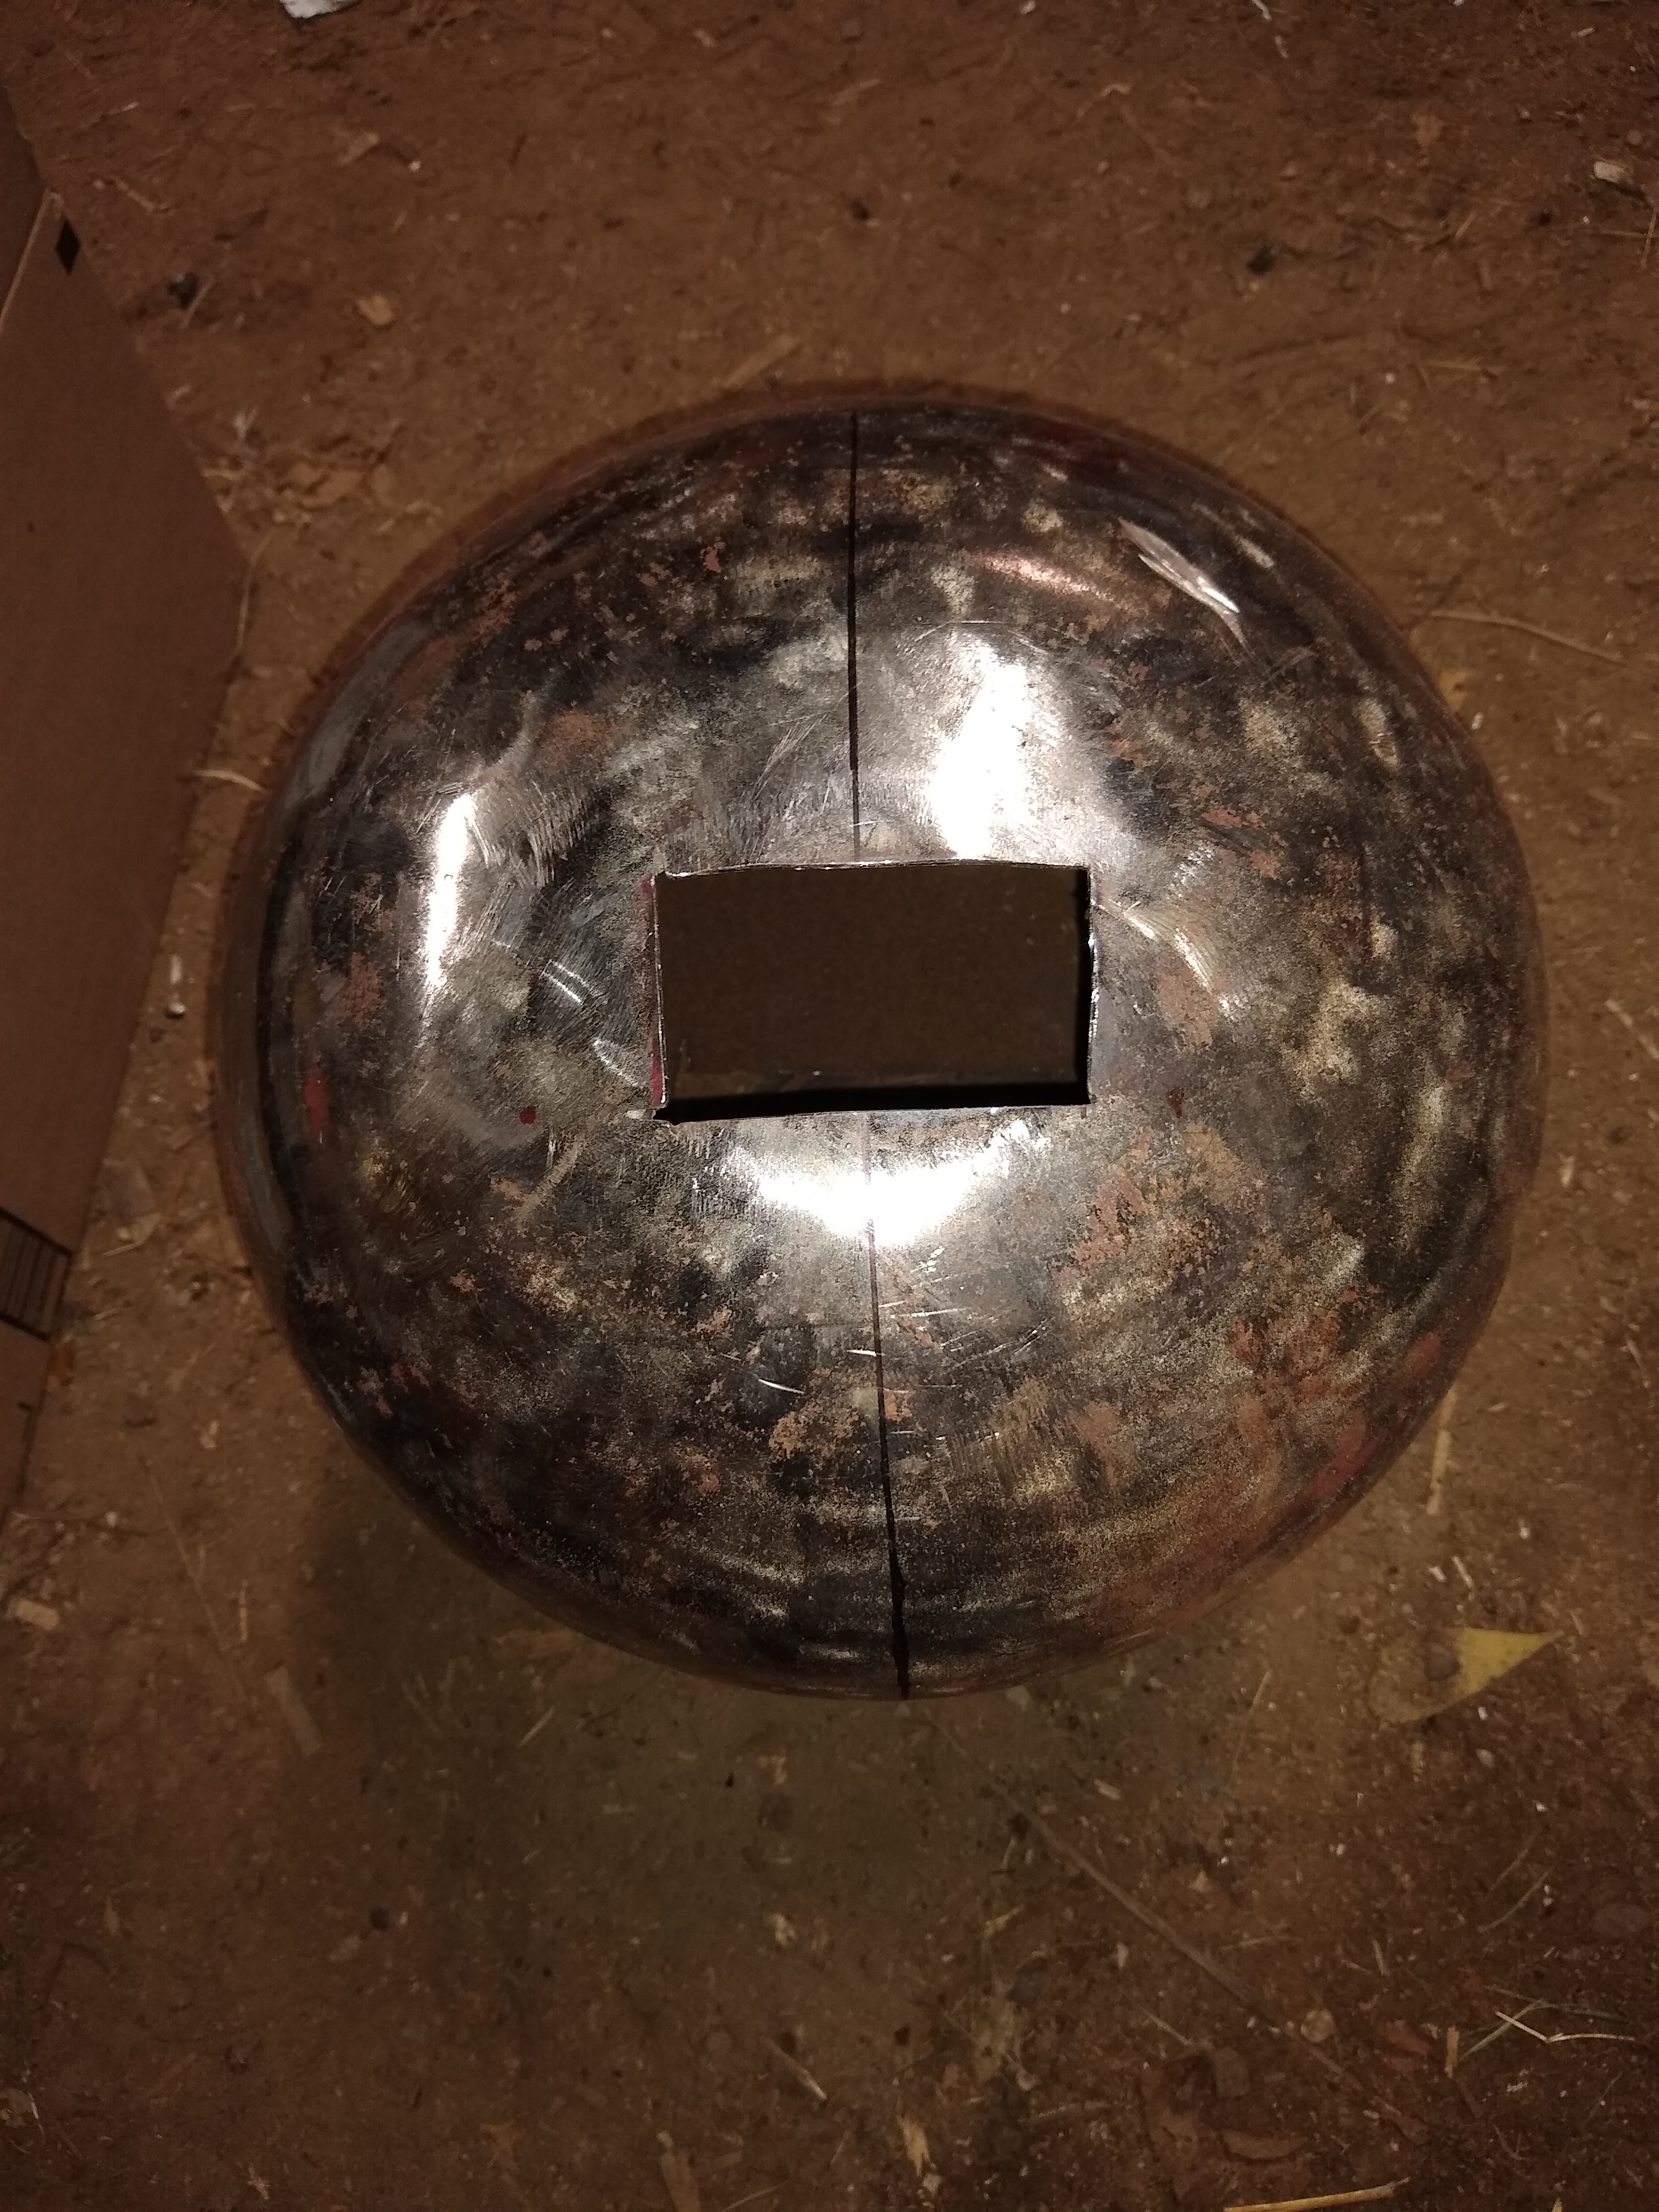
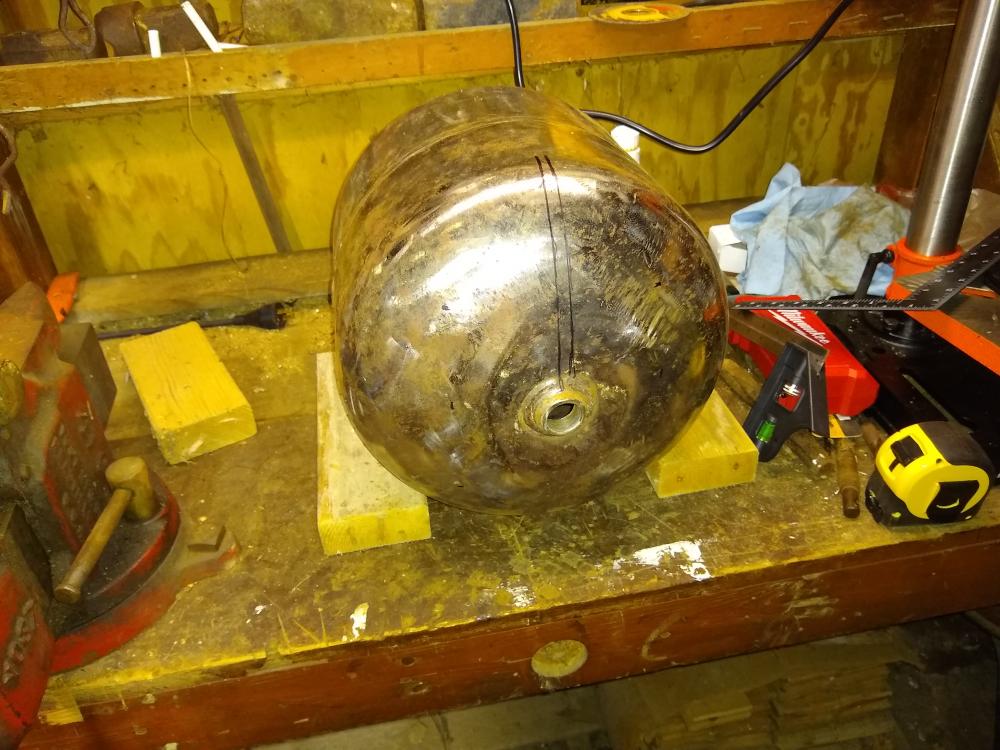
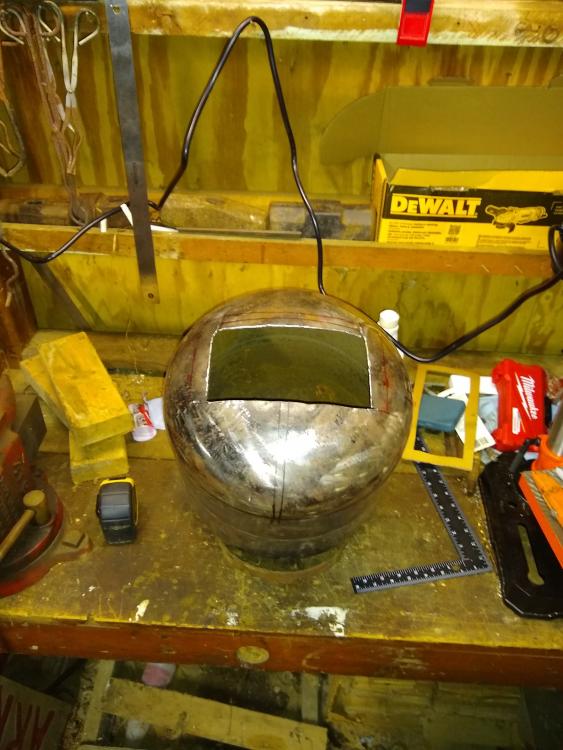
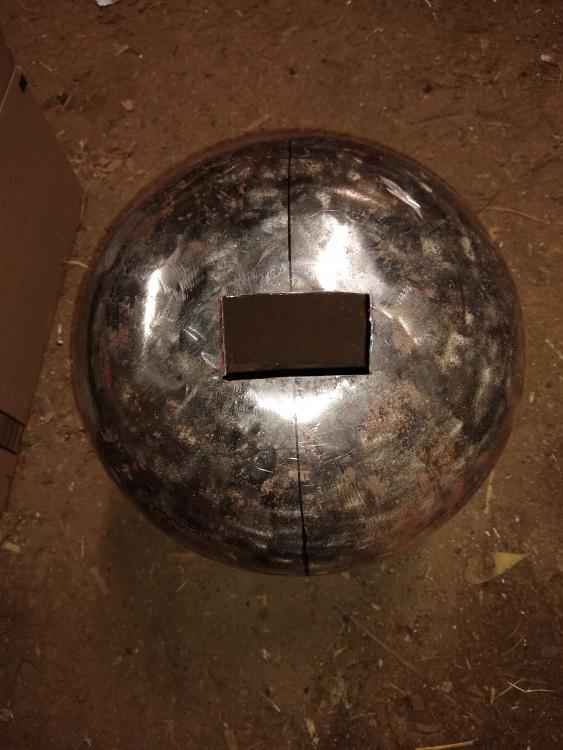
For a number of reasons I have begun putting together a propane bottle forge. Mostly because I found an old propane bottle in the brush on my property and also because this winter I would like to have both coal and propane forges to practice with, because sometimes it is just too cold to putz around trying to light anthracite coal. I have begun by cutting out the front forge portal, cutting the rear through-port for longer stock, and taking the front off to accommodate installing the liners. The front will be welded back on once the insulating blanket is installed, and the rest I plan to apply through the opening. I have been considering whether to open it up with a side hinge like WayneCo suggests in his build, but there is time to decide. The front opening is roughly (really roughly) 4in. x 7in. and the rear one is 1.75in. x 3in. The idea is to use k26 firebrick with protective coating as a door for both sides. I will fabricate an actual door once I get the thing working properly. Reading the forums I have a pretty good idea about the proper method of lining the forge and the right materials that I plan to order from Glenn soon, but the issue I have is the burners. Ihave read up on Frosty's T burners and I am confident I could follow those directions. (As a sidenote, excellent directions and well put together. Thank you.) However, I did some pricing and with the parts I would need for two burners, the correct sized drill bits, and the tapping tools, it would cost me a good amount of money out of the gate. Admittedly I would then be able to make more of them, but the idea for me is to only need the ones I have. The rub is that I can find T burners online for around $50 for two already assembled. Any extra cost would only be for hookups to the fuel source which I would need for DIY ones anyways. Does it seem reasonable to purchase ones online? Or am I just being a bit too frugal? I did the same cost analysis for the forge body itself and because I already have all the tools necessary it was cheaper to make it than buy it. I personally don't trust the burner sellers because the burners are likely made in China, but for the price and fact that I can return them if they don't work, it seems silly to spend more to work harder. Just looking for some wisdom on this front. Anyways, here are some pictures of the hack job. Before anyone points it out, yes I am in fact terrible with an angle grinder.


-
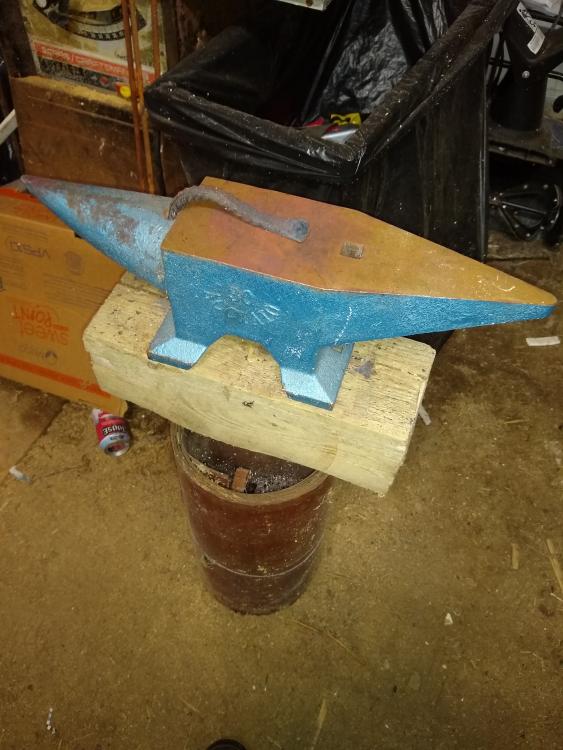
Yeah, that's the thing I was going to be watching when I try it out. I figure as long as I keep it the same distance as I had the hair dryer it should be fine. Plastic is less forgiving than aluminum. And I really have no complaints about the anvil for the price. It's face is hard enough to function for its purpose and soft enough that when someone I let use it (me) hit a little off target (totally missed) because I was distracted (startled out of my skin) by a large and dangerous woodland creature (squirrel) it only left a minor dent and did not chip or crack. I made sure that the 66 pound one I got was steel faced, because the lighter ones are all cast iron. I am passively looking out for bigger and better but this one keeps me swinging hammer, so it works for now!
-
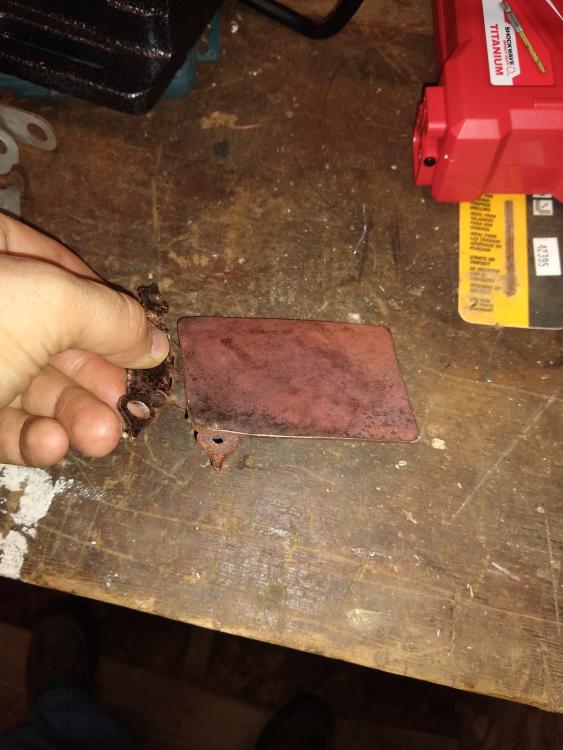
Also, I finished my ash dump contraption. I made a bracket to secure the flap I forged out of the mower blade using old kitchen hardware. Drilled out the holes to put two bolts through a cabinet door hinge on the flap and a drawer handle on the opposite side of the pipe. Then I secured it around the bottom. I can disconnect it and move it once I get a length of pipe for ash collection as mentioned. I welded a bar to the bottom of the flap and welded a railroad spike as a counterweight. Best part is that it seems to actually work! And don't mind my ugly welds, I am just as new to welding as I am smithing!

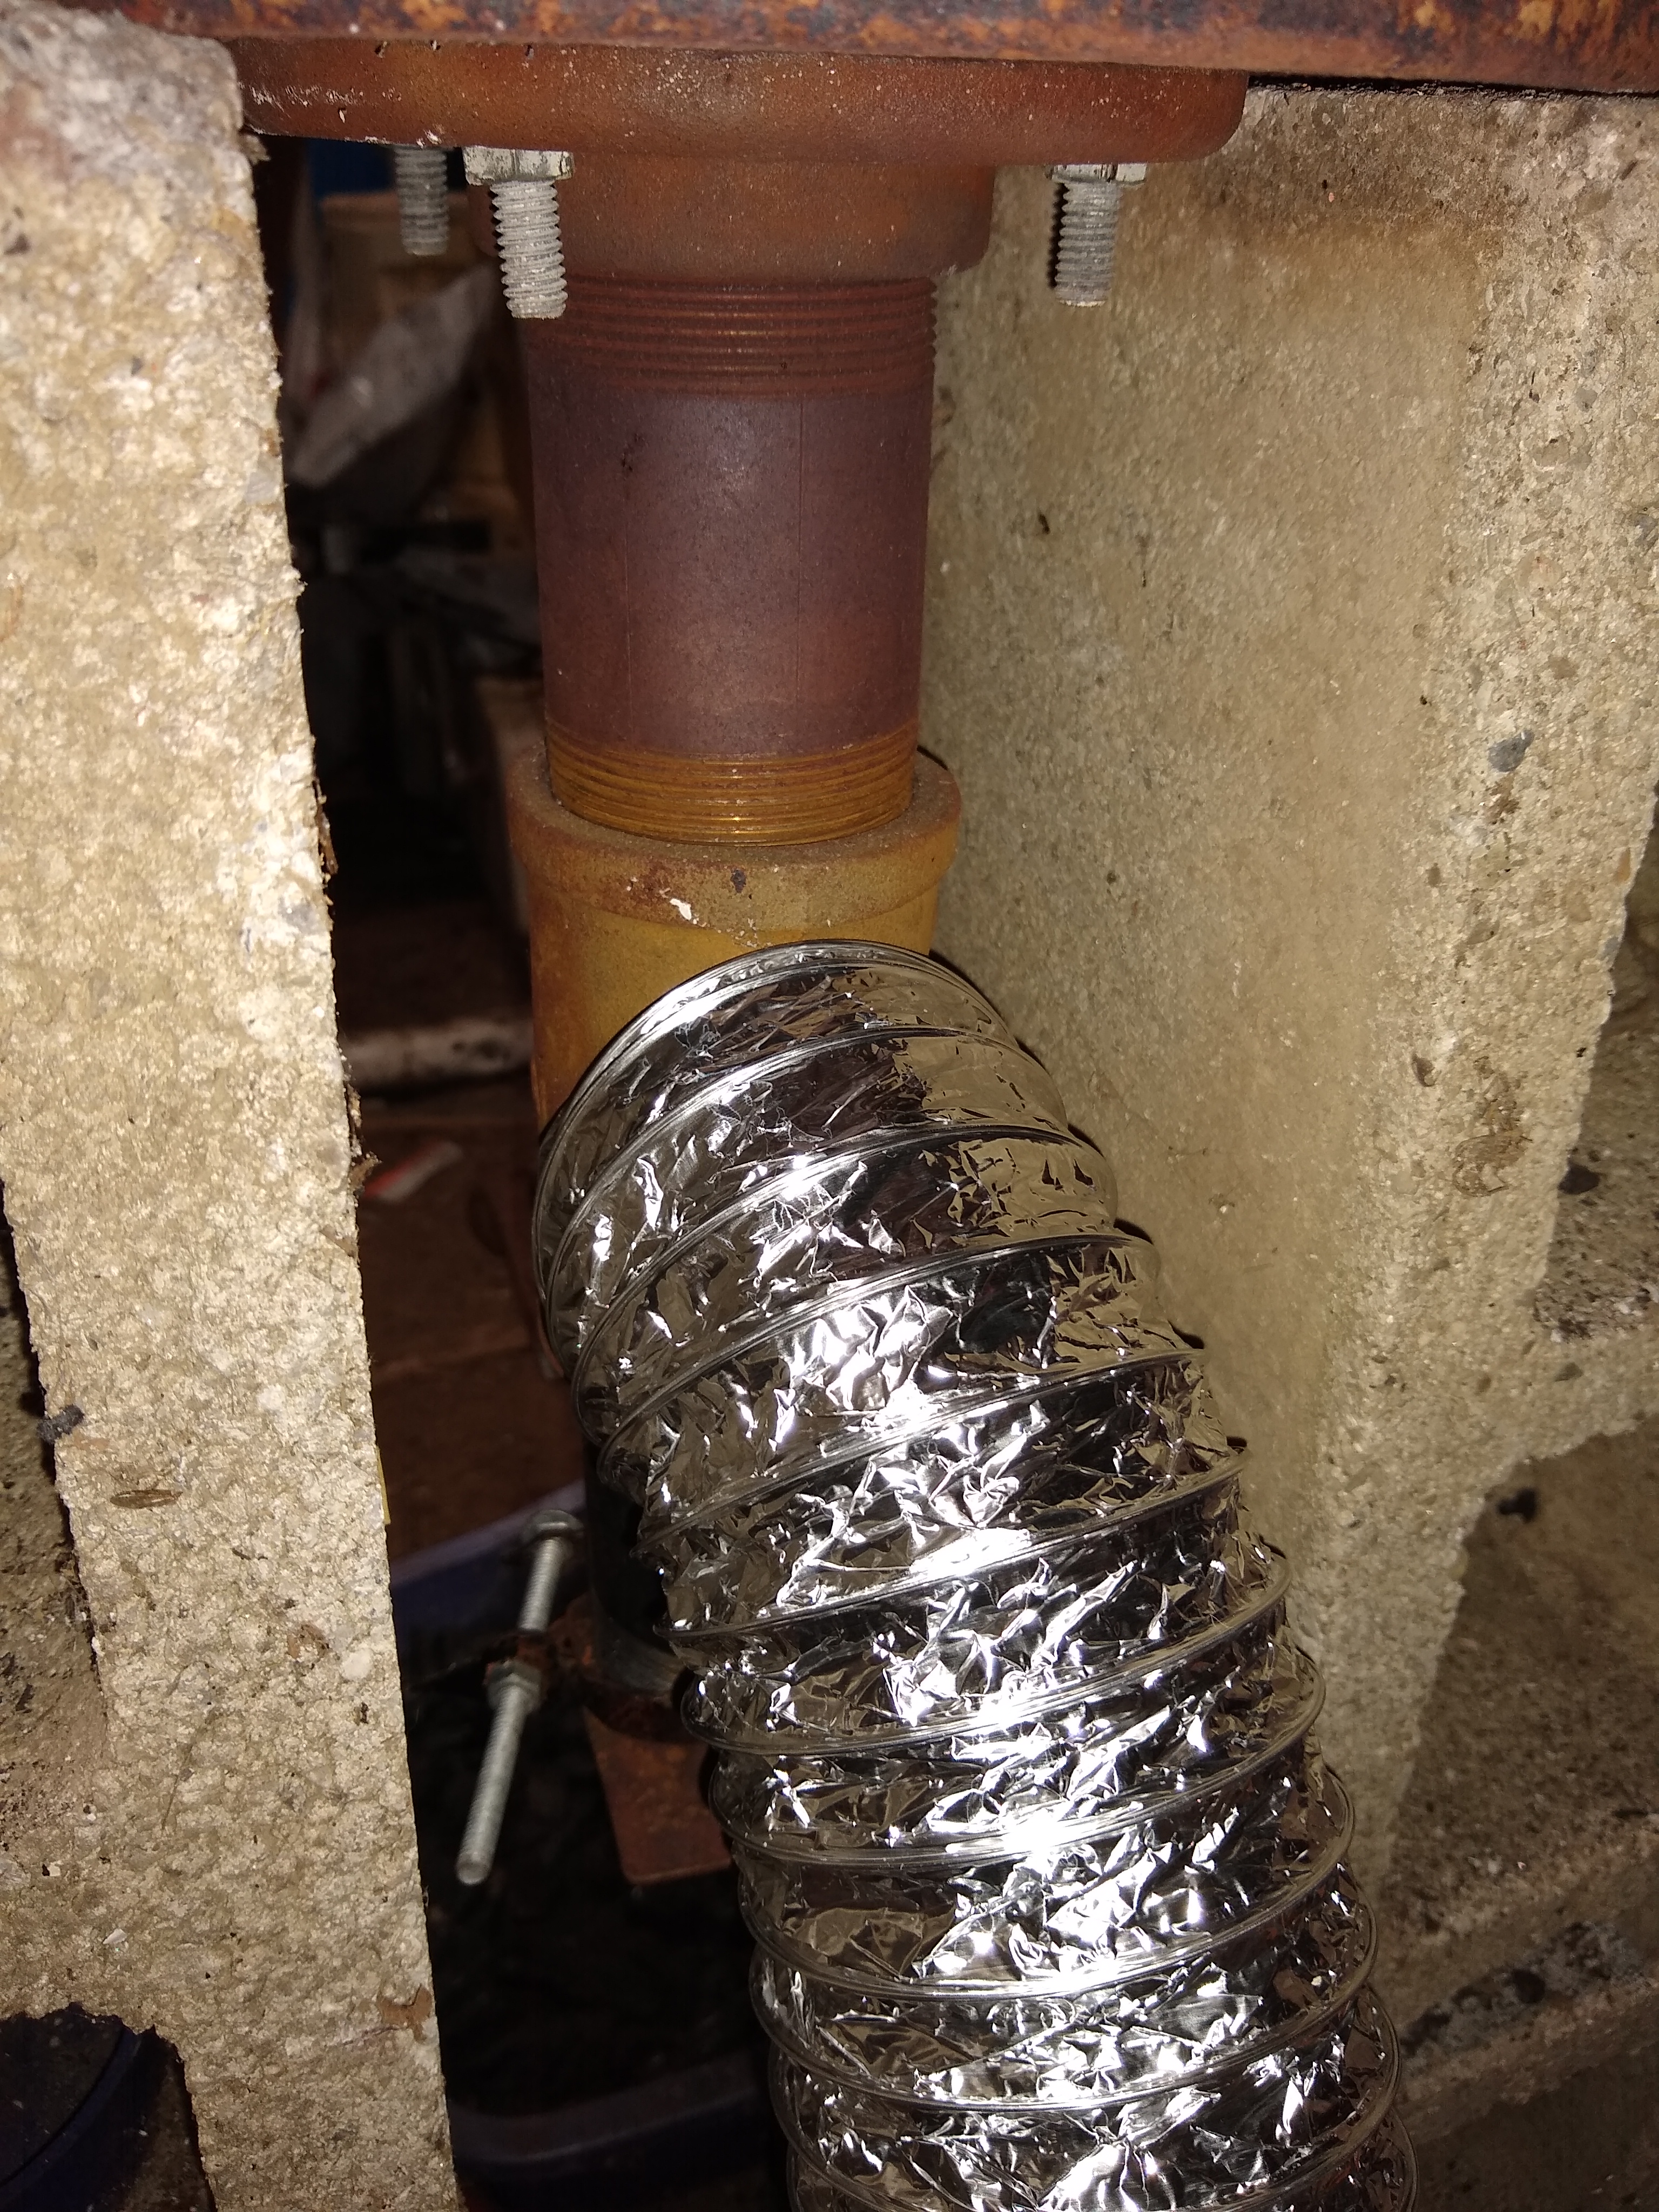
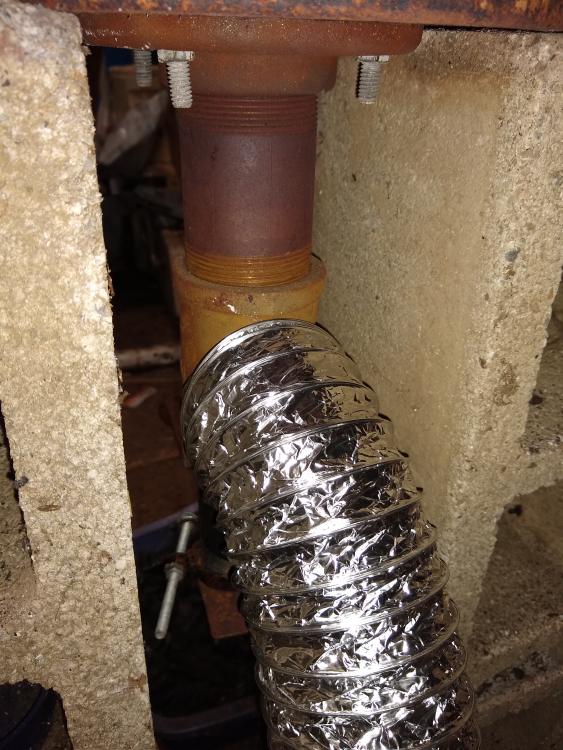
-
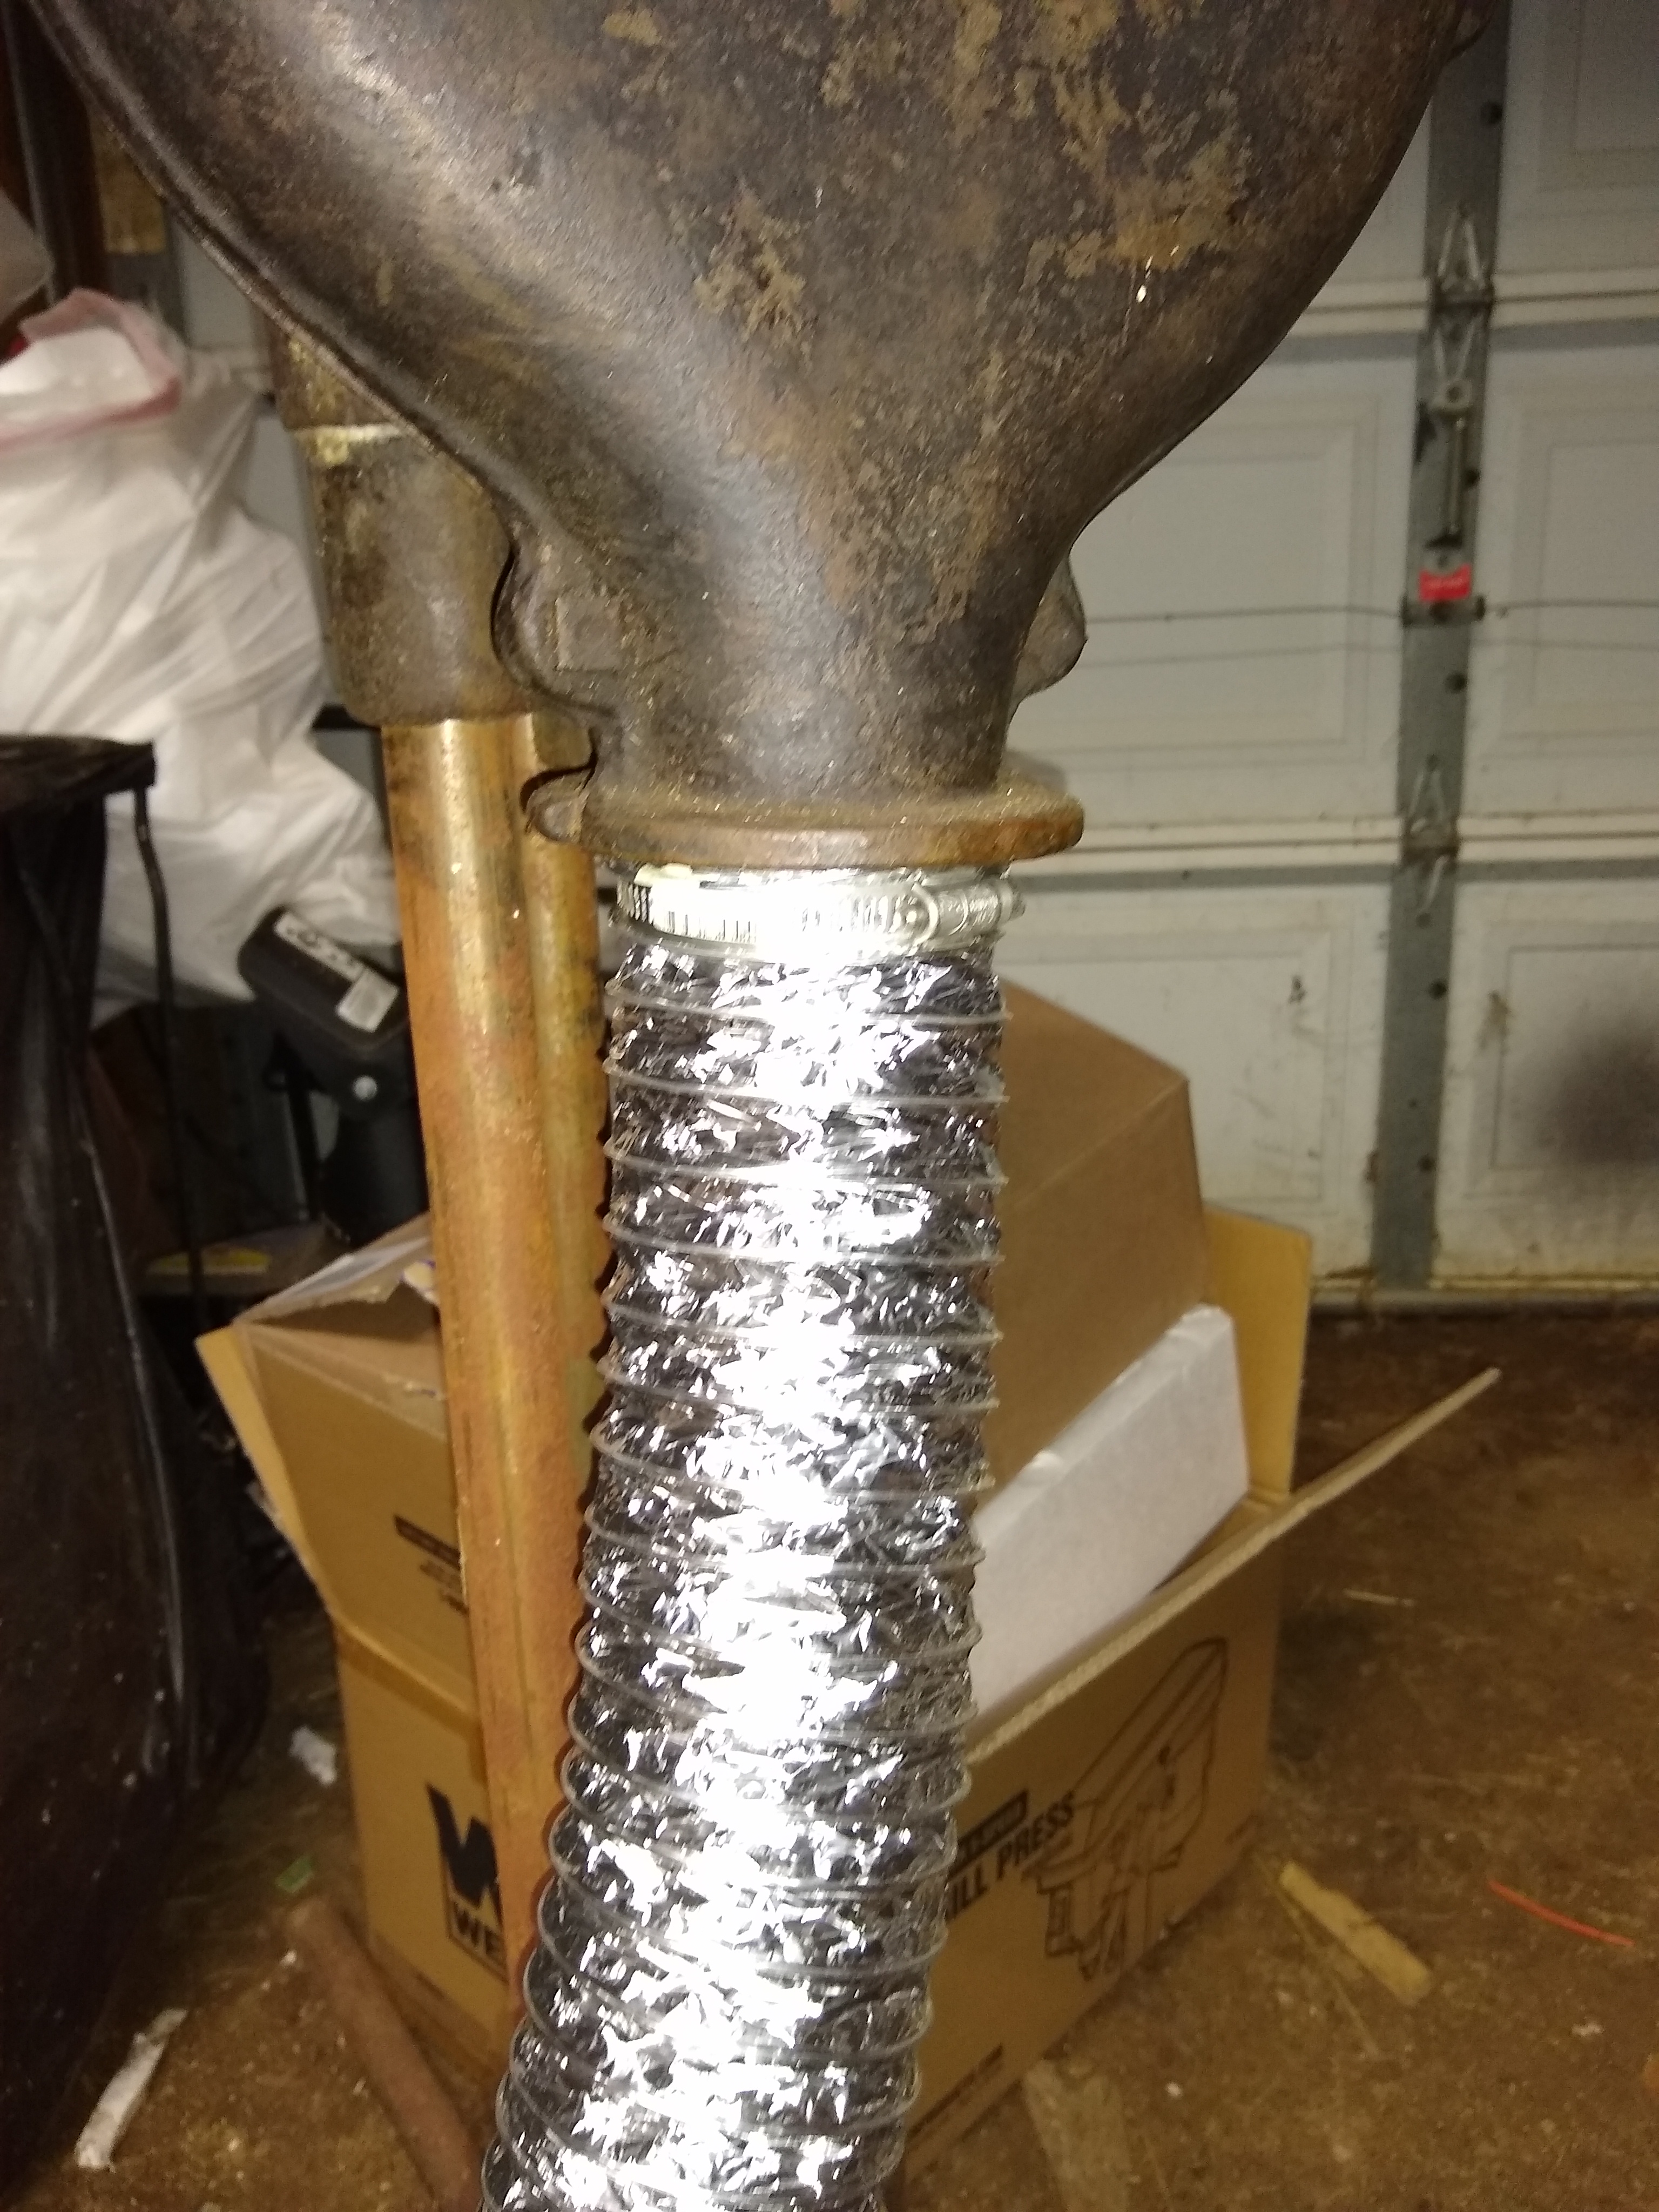
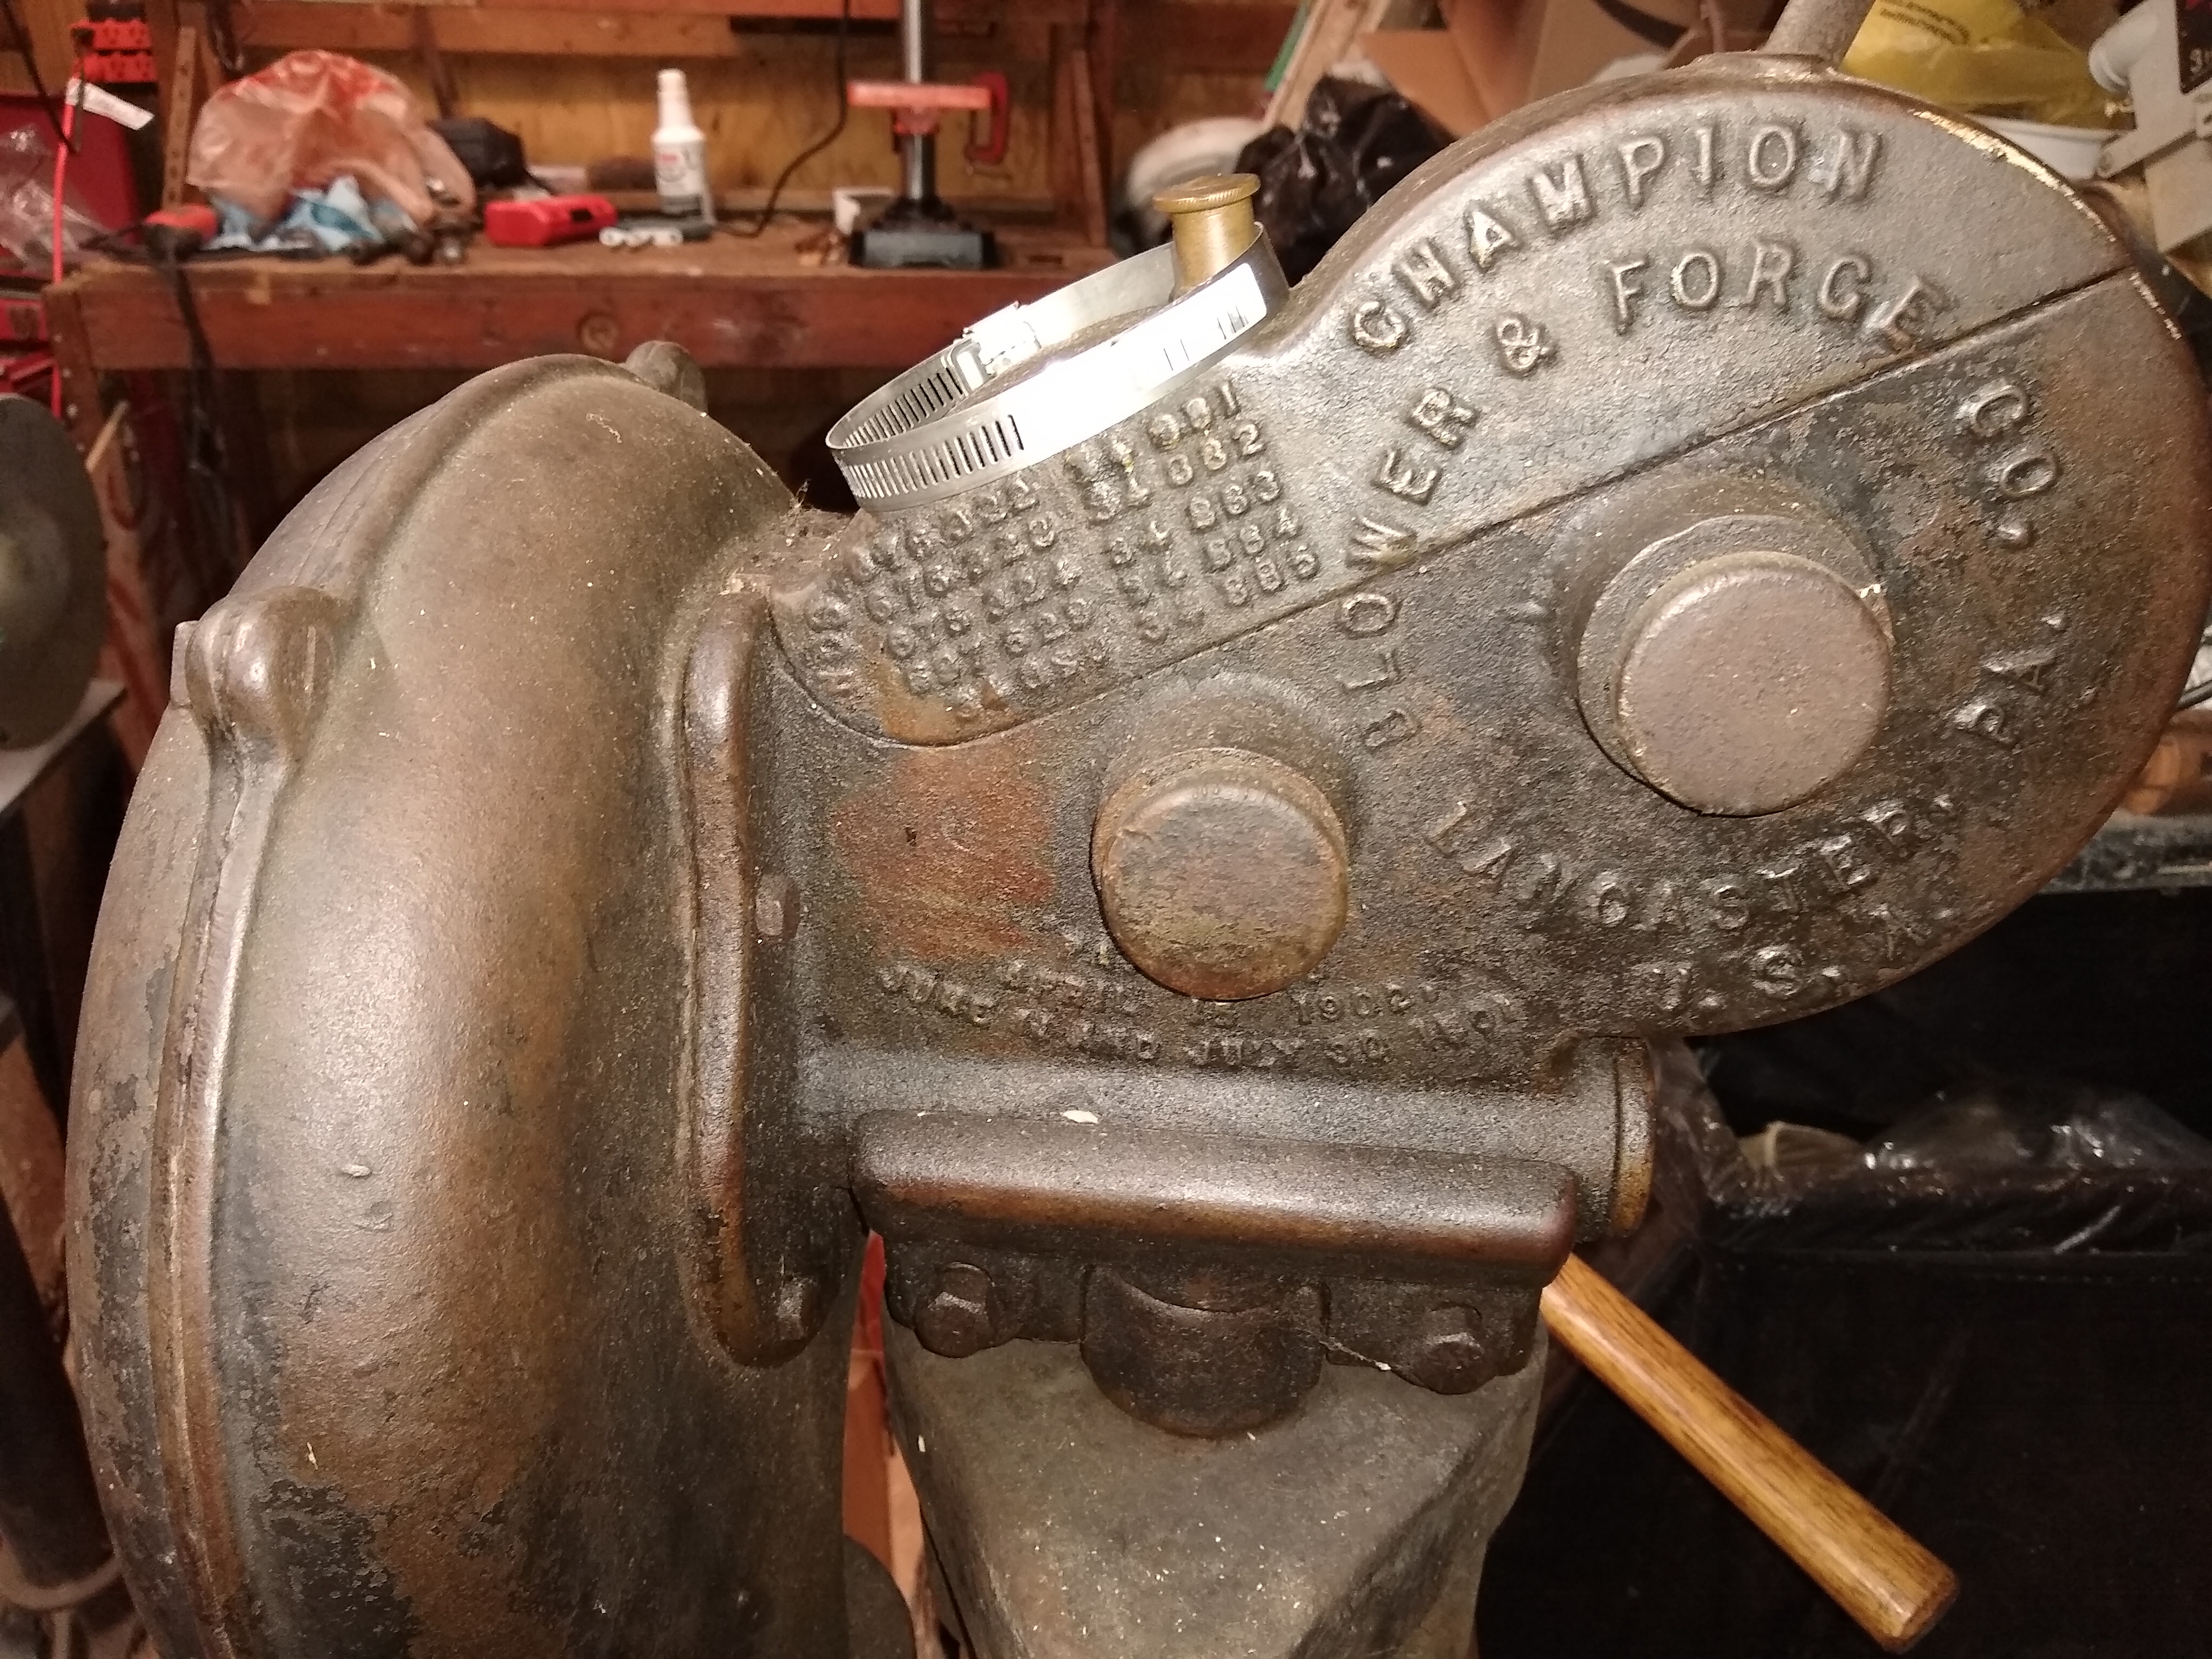
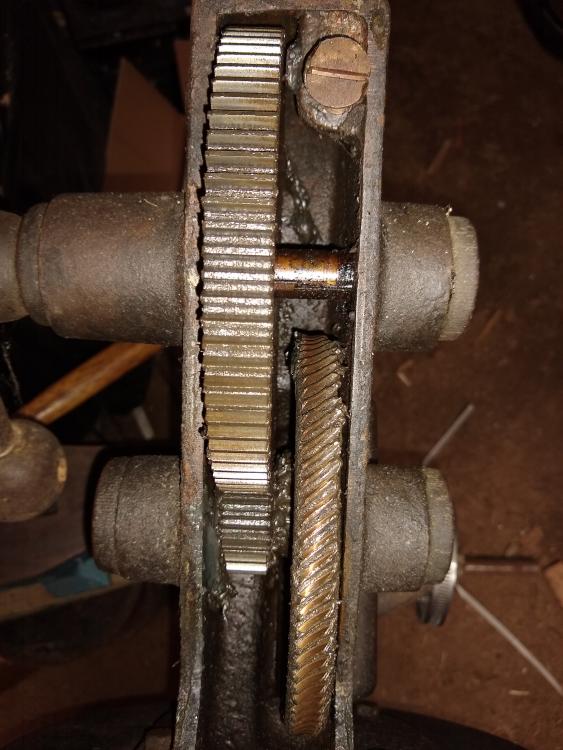
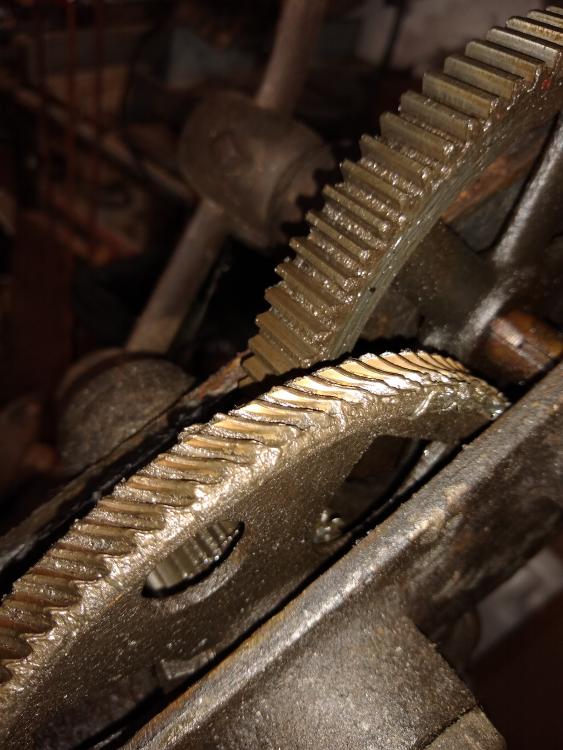
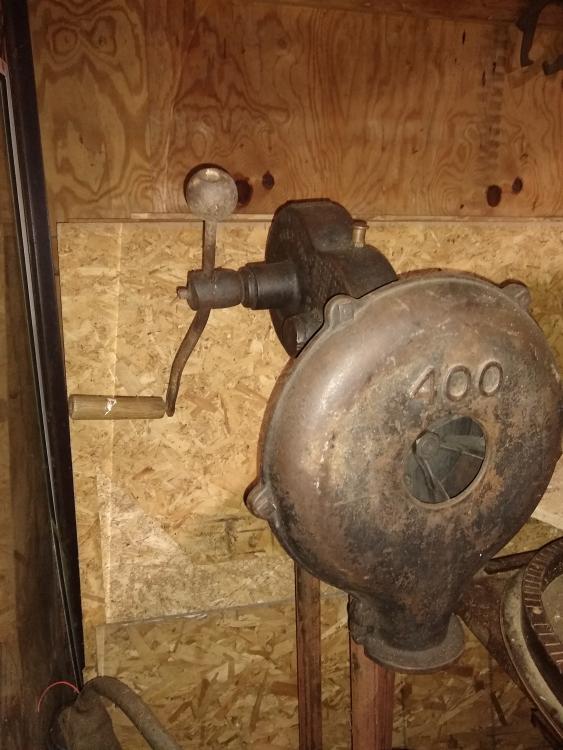
Well, I checked out the interior of the 400 and it was well maintained. The blades are all intact and the interior is free of varmints. The gear box looks like he have used a thicker grease to lubricate but the gears are in excellent condition and it turns smooth. I went to the hardware store and hunted all around for the aluminum dryer vent hoses. I found them and they were all 4 inch diameter. But off to the side there was a that looked like the smaller generic version of all the others. It was 3 inch but labeled specifically NOT for dryer vents. Since I am not using it for a dryer anyways I figured I was in luck! They also had 2-4 inch hose clamps there so I got a couple and now can use my blower once it's cleaned and oiled. Thanks again all.


-
Oh ok, that makes more sense. I suppose I could have figured that out through other posts but my reading comprehension skills are not the greatest. So, I really appreciate the clarity. I will certainly start my search soon with this method and will try my best to be patient. Thankfully I have something to use until then.
-
Alright, so I may just be too literal or too dull, but where does it actually explain how to follow the TPAAAT? The first post seems to be Glenn recounting that he used the process and succeeded but I don't actually see the exact process posted anywhere. Sorry if I am missing something, never claimed to be smart. Lol
-
So, I am new to this forum and have been hunting around. I read a few posts about the TPAAAT but have yet to actually be able to find the details of how it's done. Am I just missing a thread or am I just confused? Or both? Thanks!
-
Thank you Glenn for that, it makes total sense. It saves me time wandering around hardware stores wracking my brain. Goods, I will certainly keep that in mind when I switch over. At the moment I have the opposite problem and tend to burn more fuel than I need to so it will be a new challenge. I may be able to add another T where one direction has a low output electric blower and my hand crank on the other. Frosty, I have already realized that my cap is a pain. Especially when I go to dump it and the cap is still quite warm... With your advice I have begun fabricating an ash dump out of a piece of lawnmower blade I forged flat and welded a little flange to. At the moment I am stalled on that because I work nights and with the virus even wally world is closed overnights so I can't get a couple things I need to finish it. So far picture is below. Irondragon, I originally went to just buy the fire pot but when I explained to him that I was just starting my hobby and had nothing he technically gave me the blower and hammers for free and I paid for the fire pot and wouldn't take any more money from me. I will honestly always bless that man for his generosity because I didn't know at the time what he had actually given me. He did not mention anything about maintenance of any kind but I do realize it will need some. I figured once I started using it I would do research, but if you have any nuggets of wisdom I am always listening. Also, that's a very useful suggestion for stoking the fire back up. Thank you. Thanks everyone!
-
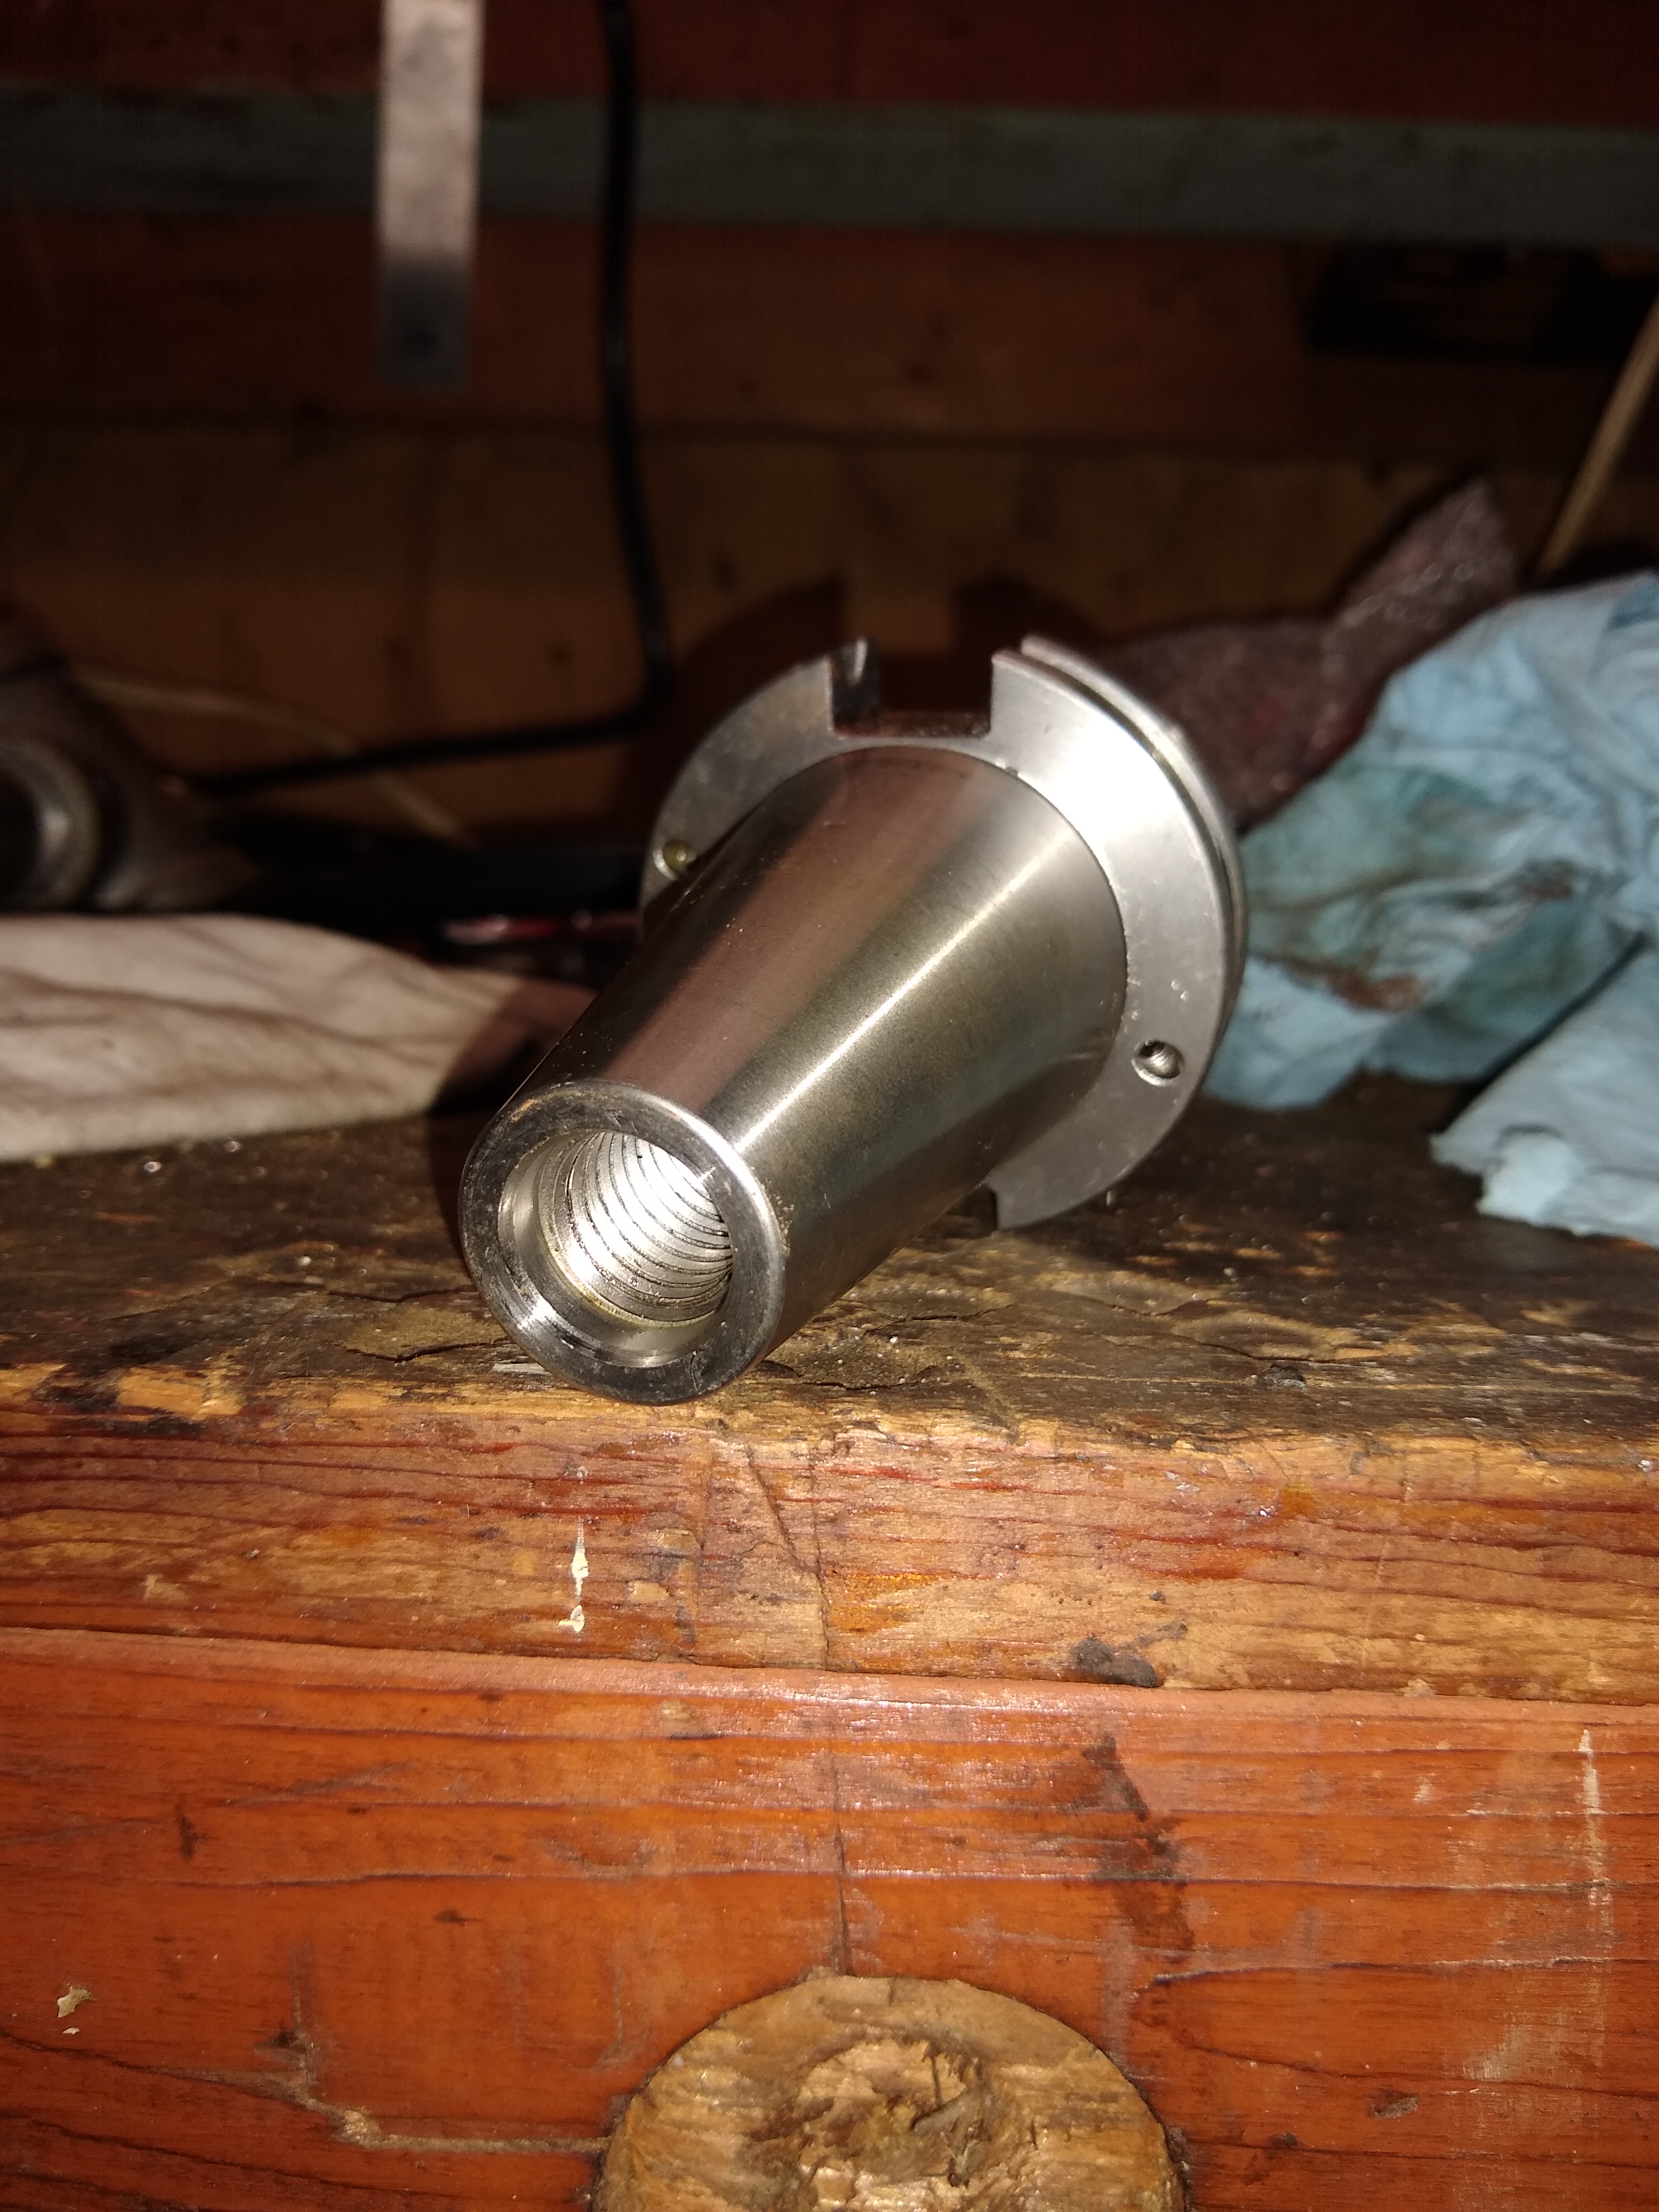
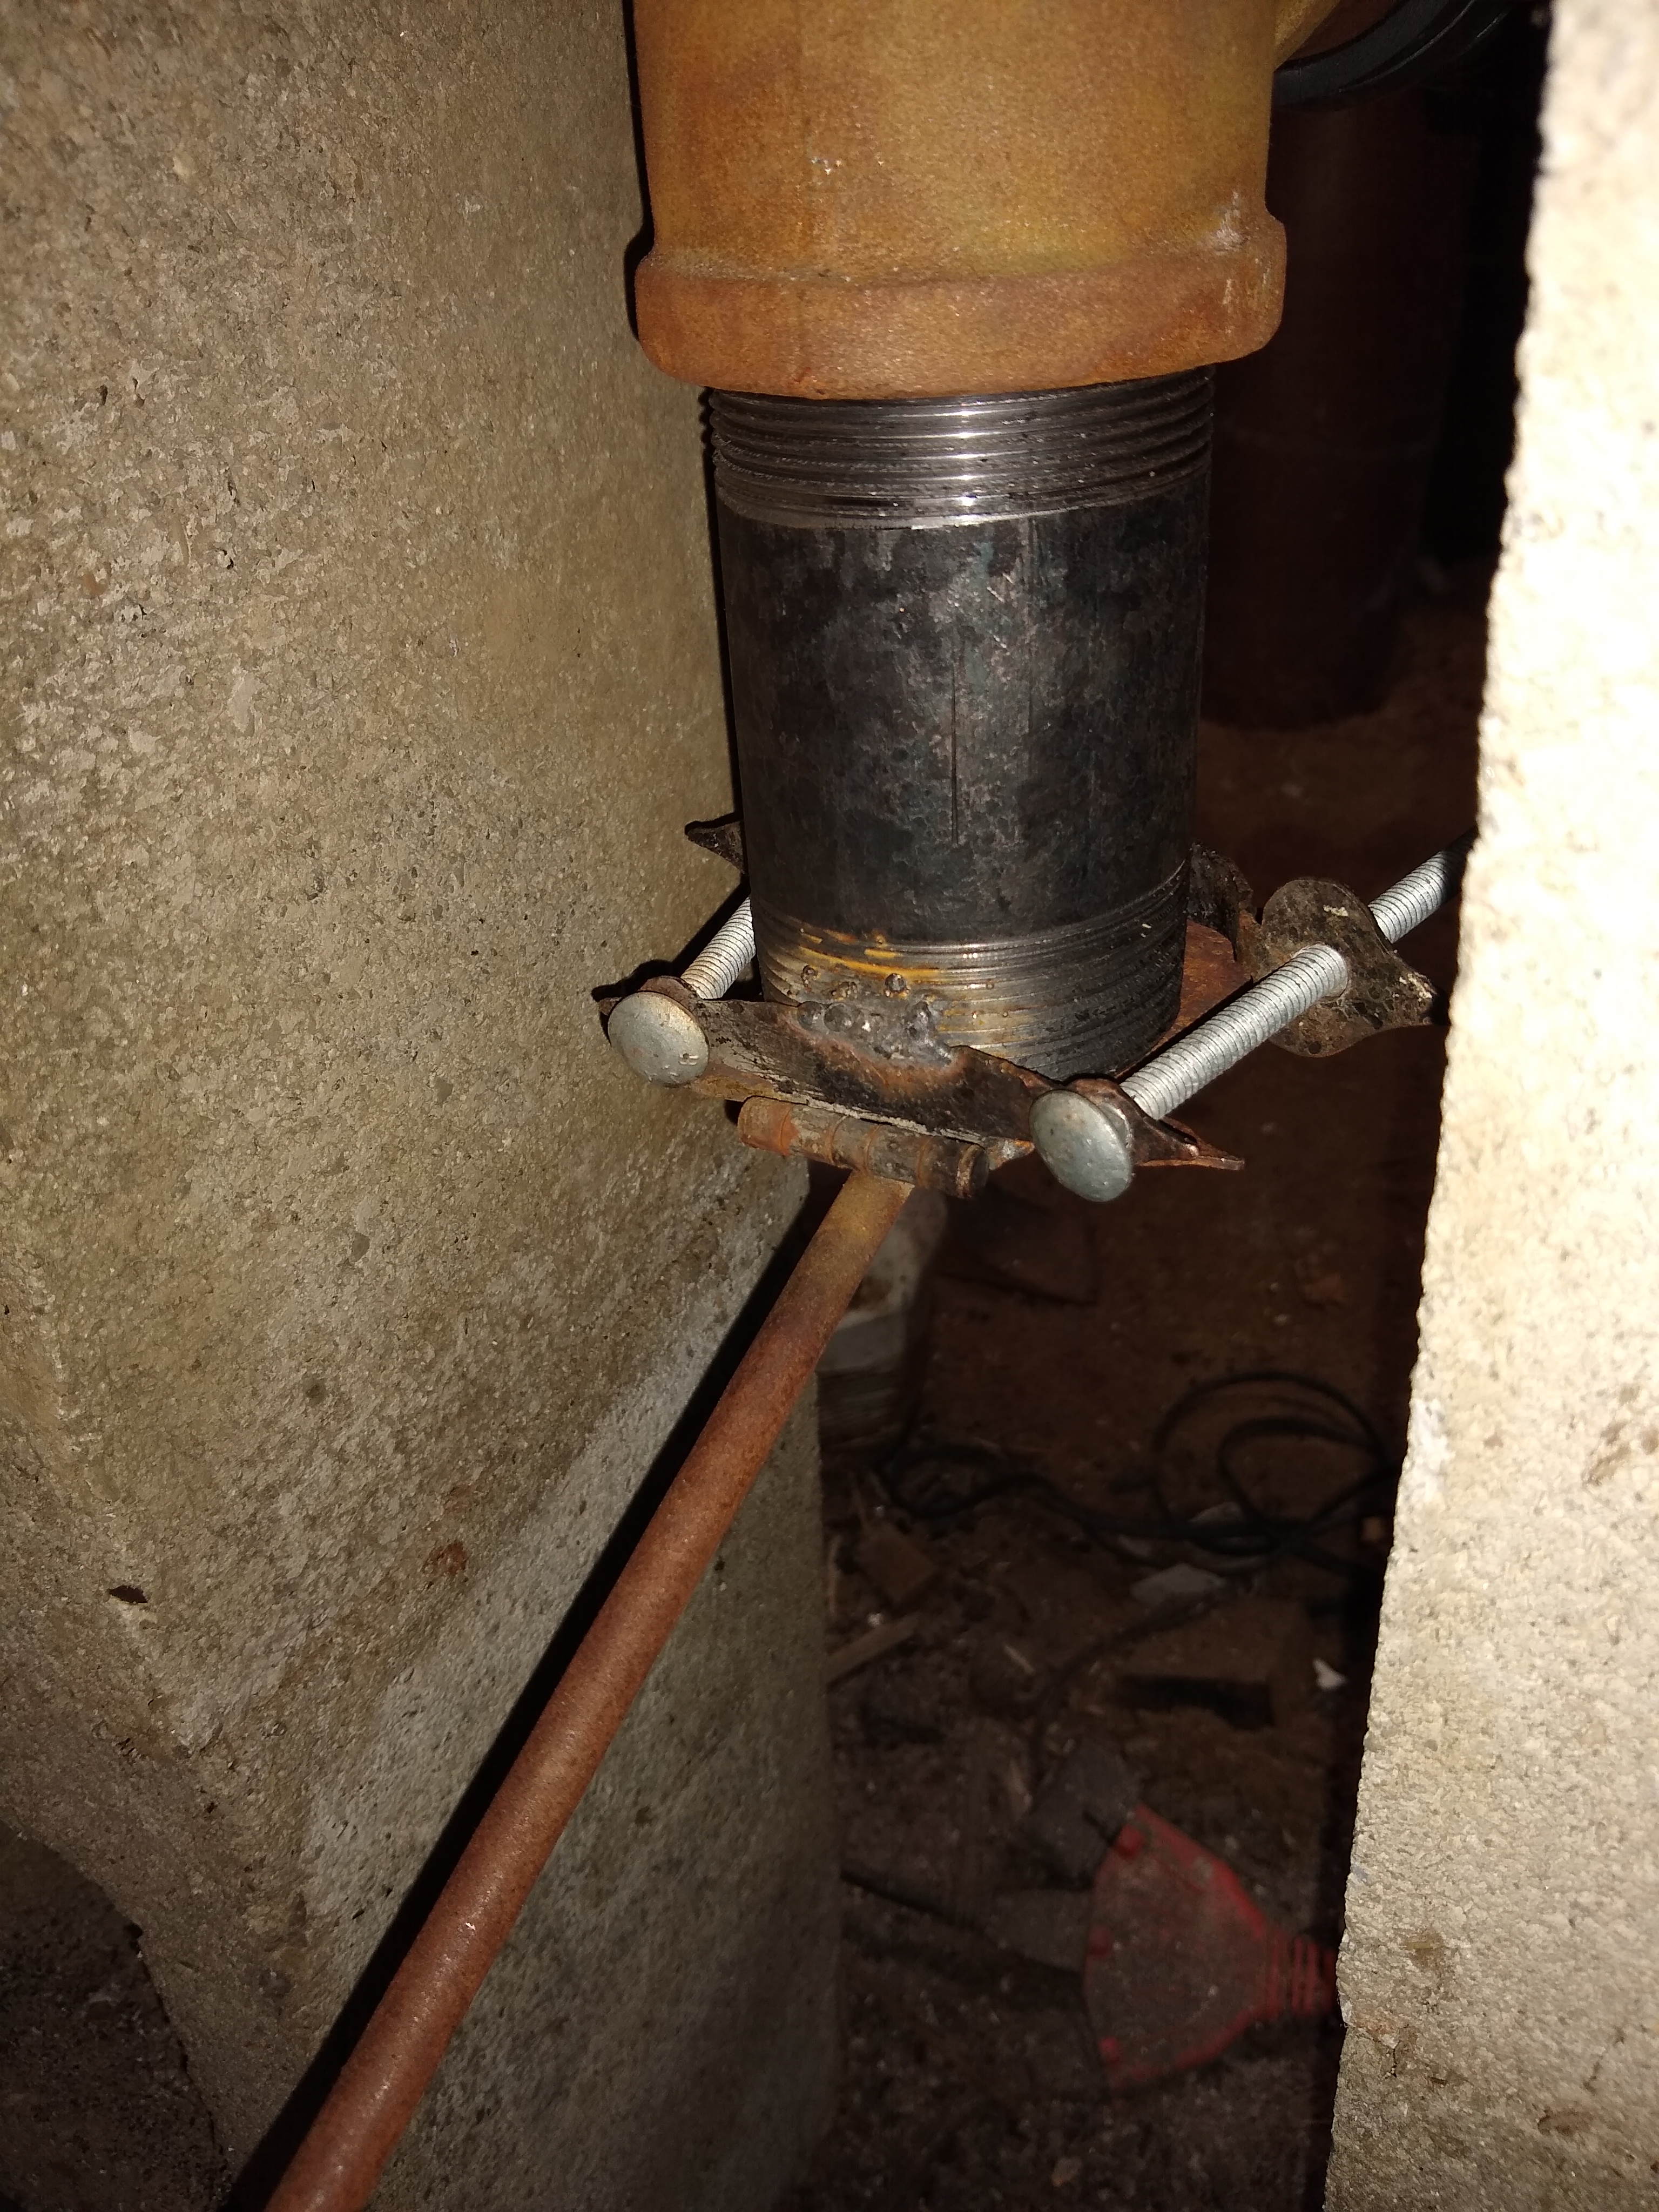
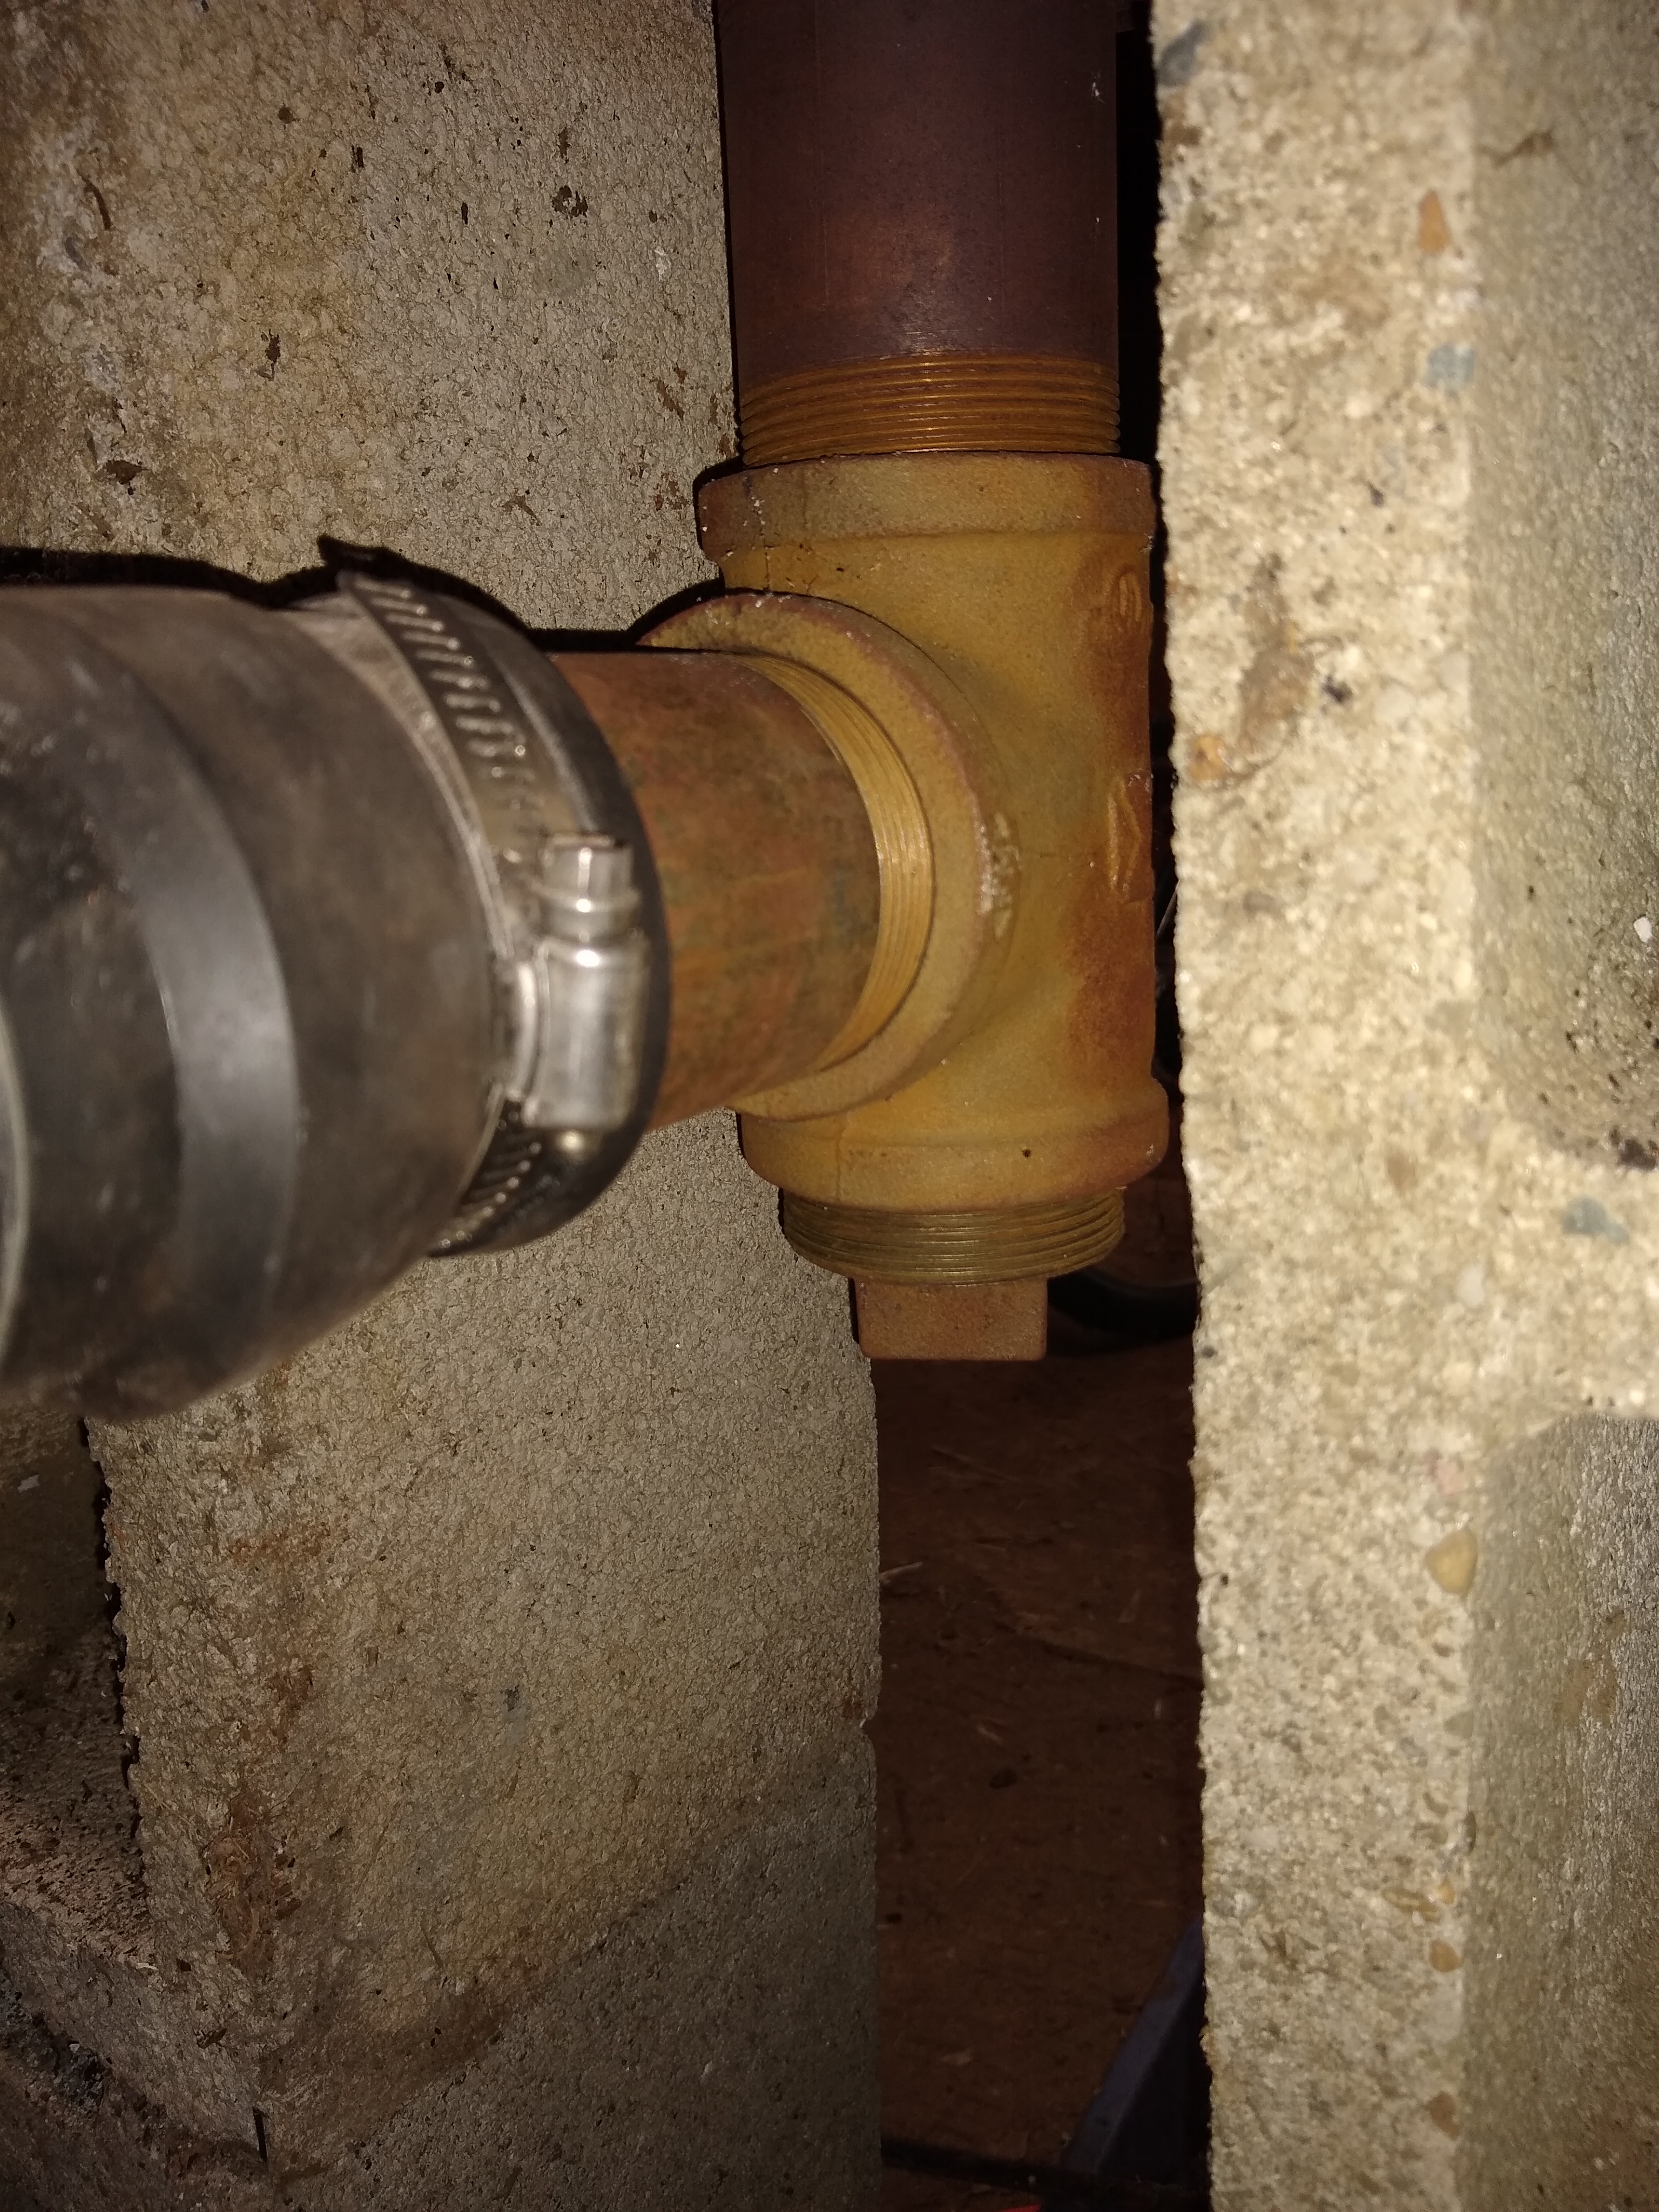
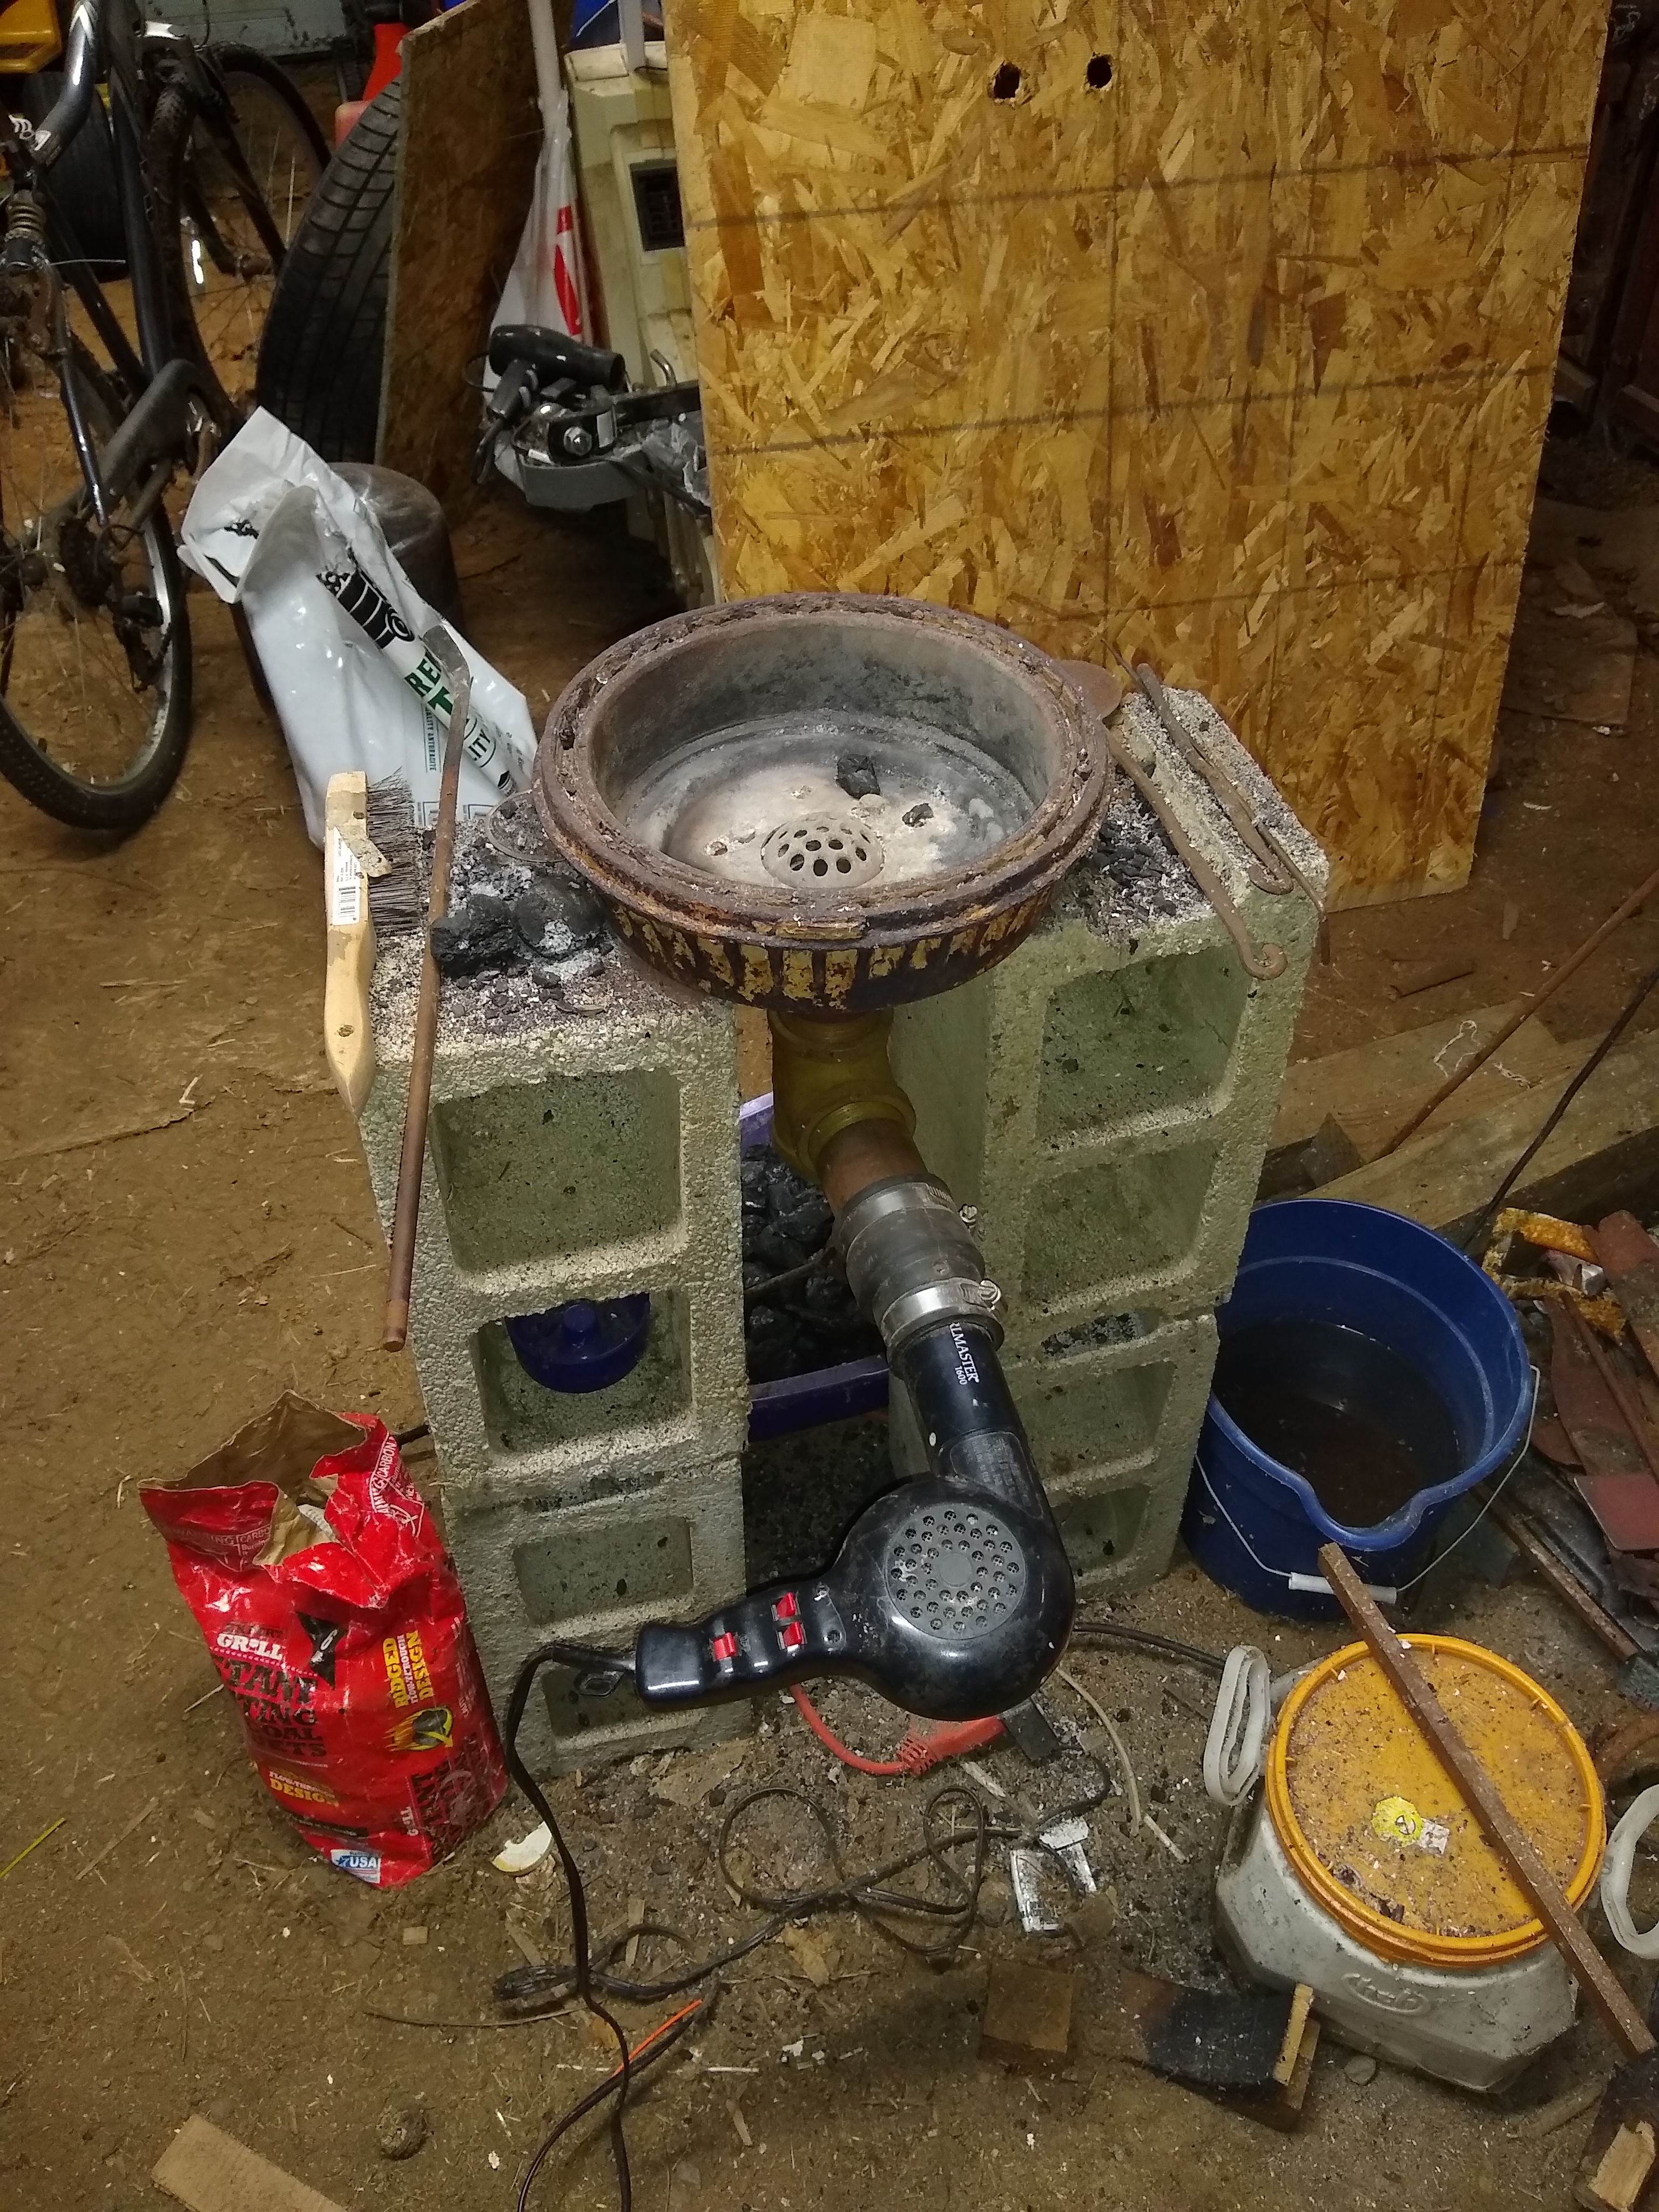
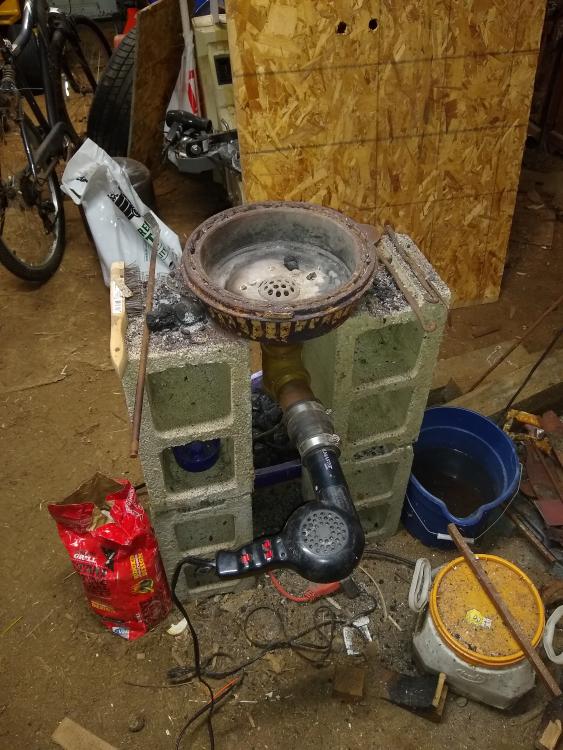
So, I posted some pictures of my forge in the "Show me your forge" thread. I am new to this little obsession and am looking for some tips here and there. In this particular case I have a question about attaching my blower. It's the image below, a Champion 400 that works great. I bought it, a couple cross peen hammers, and the former owner's excessively large fire pot for $100. The fire pot is far too large for me at the moment (it's a hub of some sort off of an old tractor trailer) so I made my own brake drum forge. At the moment I have a hair dryer attached as shown in the other picture below. However, I am trying to figure out how to attach the 400 because I have learned it will work wonderfully. My current tuyere is made from 2inch (internal diameter) formerly galvanized pipe and fittings with the hair dryer attached as shown. The 400 has a roughly 3 inch exit and my piping is slightly larger than 2 inches externally. Anyone have suggestions for the best way to get air from one end to the other? Thanks in advance.

-
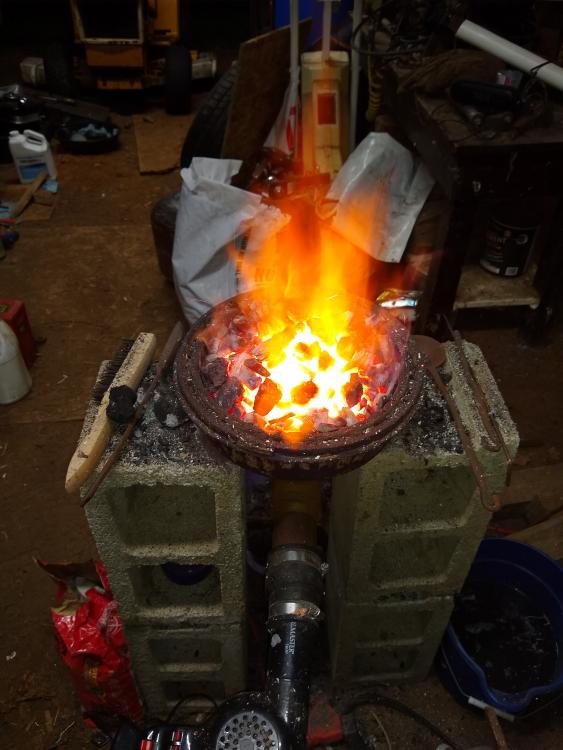
Nothing fancy but it's my first forge. Brake drum design I found on the Tube of You. Plan on buying a steel cart from Harbor Freight to turn into a table around the fire pot. I am very new to smithing but I really enjoy it. I started off with anthracite pea coal, but that burned too quickly and didn't allow good air flow. Switched to anthracite nut coal and it works much better with less clinker. My anvil is from Amazon, it's the 66lb. one from Happy Buy or something. It was discounted at the time and I had a giftcard so I went ahead and took a chance. For me as a beginner it works fine, though I noticed that it has some rough edges both figuratively and literally. Nothing a little elbow grease won't fix. I plan to eventually buy a larger "real" anvil when the price is right and my wallet isn't so thin. I would love to find a used one for a good price but so far in my area they are rare and tend to sell for as much as or more than a new one. If anyone has any suggestions as to what's best I am all ears. I will probably update this post as I upgrade. Thanks for any input!