

Goods
-
Posts
1,160 -
Joined
-
Last visited
Content Type
Profiles
Forums
Articles
Gallery
Downloads
Events
Posts posted by Goods
-
-
What are your main concerns? Efficiency, just time and effort at the anvil, or pattern distortion? Works at the edge of the anvil or an aggressive crosspein, or even a spring swage would move material pretty quickly, but you may have issues distorting the layers. The distortion can be desirable but not always. Drawing on the horn working both sides evenly is probably the best way to avoid distortion, while maintaining some efficiency. You could also make a fairly large radius spring swage. Doing so may be more efficient than working on the horn, but you would still want to work from both sides equally.
Keep it fun,
David
-
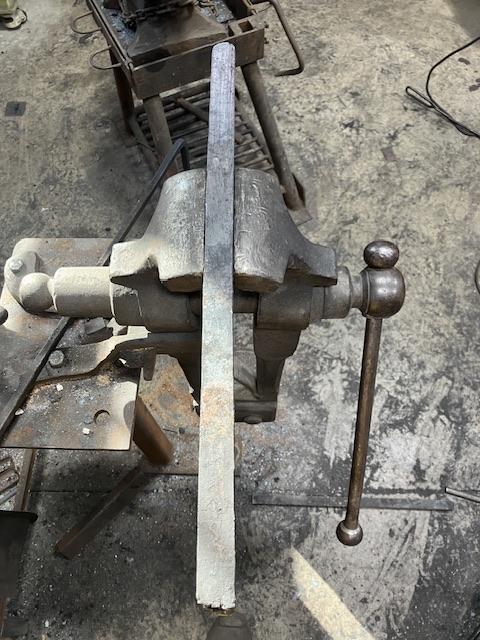
I had good luck in the forge today! I managed to get the 2nd Harley drive chain welded up:
In the above picture it welded but not perfect. Drawn out to 1/2”x1”. Then I cut it into 6 pieces restacked it and went at it again. I drew that out to 3/8”x2”, then moved right to cleaning it up and stack it into a Gomai with the Sanmai I made previously. It welded up great and I should have stopped there, but went on to forging the cleaver. It didn’t come out to bad:
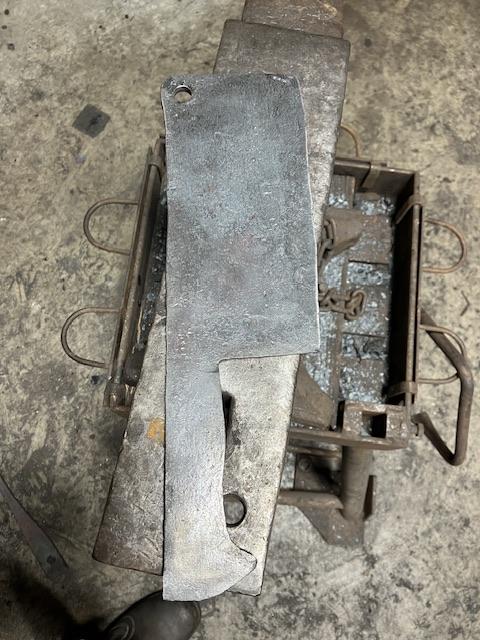
It doesn’t have the shape I got in my test run, but I’ve got enough mass to get there with the grinder. (I’d be much happier if I got to the shape I wanted while forging…) Either way the weld looks really good and I’m pretty sure the 8670 is in the center of the edge. (I really should have stopped earlier though. 7hrs straight with no lunch, I’ll feel that tomorrow!)
Keep it fun,
David
-
I made up a bunch of these scribes as giveaway items over the past couple years:
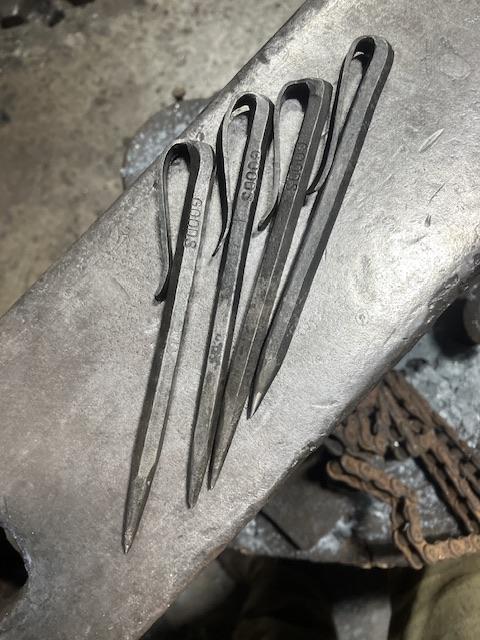
The wire diameter of the spring was maybe 5/16” with the tip water quenched for max hardness. Just a couple coils straightened out went a long way… I’ve also welded bits into the cutting edge of chisels that were made out of larger diameter garage doors springs.
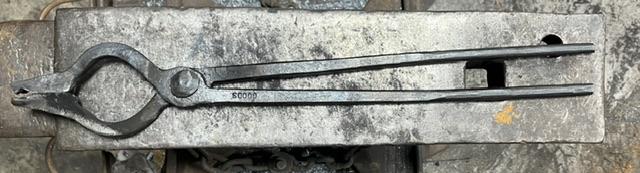
Garage doors springs also make really strong S hooks. Basically, use it in place of mild steel whenever you want more strength, but a delicate look. Just remember to normalize (and not to quench the pig tale scrolls on the ends of a hook before bending like you would with mild steel).
Keep it fun,
David
-
As for me he exposed screw end, I would find that a fun project. I look for a heavy walled tube/pipe that is just large enough to fit over the end of the and forge a cover out of that. I can also see it in my head: neck the pipe down, cut it off, forge weld a collar one that end, forge the collar into a ball finial, then finally cut it off to length and braze it onto the nut. Of course, I tend to over do things… I can even see some details filed in… I’m come on it time at the anvil trying something new and developing more skills, that’s what it all about for most of us* right?
(*Us meaning hobbyists blacksmith, not those of you who are professionals that need to be aware of profit levels. Greatest respect for those that can make a living at the anvil!)
Keep it fun,
David
-
Arthur, I like those broaches. I’m going to have to make some at some point and you’re setting a good bar.
John, you just keep getting better with that repousse. I like seeing your work!
Tonight, I finished up a pair of tongs I started at IBA state hammer-in Saturday. I decided the reigns needed drawn out a bit more, so I ground the rivet off and cleaned them up a little more to my liking:
Sized for 1/4” square. (I didn’t have any small stock tongs for my 12yr old to used while forging in the shop with me. I had to make that a priority!)
Keep it fun,
David
-
Bmoney3, don’t forget to normalize it first. Bring it up to non magnetic and let it air cool two or three times. At forging temperatures you get a lot of grain growth. The idea is to bring it just up to the temperature that new grains start to form and by doing this multiple times you end up with a very strong fine grain structure.
Also even with an oven temper, you should draw the eye back more. Use a torch on the cheeks, or heat your drift in the forge and use the heat transfer from the drift to temper the eye more.Keep it fun,
David
-
I’ve recently seen “white out” pens used for marks that are somewhat visible at forging temperature. I prefer a chisel mark or center punch mark…
Keep it fun,
David
-
Very good for a first hammer, especially with so little experience. The only thing I can see without closer inspection is the fuller marks on the cheeks, not a problem, just doesn’t fit with my personality. Have you heat treated it yet? If so what process did you follow? What’s the weight?
Keep it fun,
David
-
Some of the asking price out there are verging on predatory! At that type of price those anvils will sit for a long time or sell to someone with deep pockets who doesn’t know better. The highest quality new cast tool steel anvils, even with importing costs, are only priced at $14/pound. Less the 100yrs of age is not particularly significant for an anvil as will not justify that price. I personally would have difficulty asking for more that $8/pound for this anvil, but personally I would not sell it. (I would sell one of my others, after all it is top shelf quality)
If only you were in my area, I would be very interested.
Keep it fun,
David
-
Where are you located? General location is just fine. This is a top grade anvil in a good size and visually very good condition. If the ring and rebound it good, $600~800 would be a reasonable price point in my area (south central Indiana).
(Those pictures may have Frosty drooling
 , he loves his Soderfors!)
Keep it fun,
David
-
It looks like that could make a really good British style side blast forge with a little work…
Keep it fun,
David
-
Honestly, the drawing is just as impressive as the fabrication! I’m not much of a fabricator, but I have a lot that I should work on. I would just rather spend my time forging.
Let us know how it runs!
Keep it fun,
David
-
If your ceramic wool is not encased, it will shed more fibers with each heat cycle, if not constantly. It needs to be covered with a good refractory! Safety first!
Keep it fun,
David
-
Arthur, those are fantastic. Good clean work!
I got the cross peen sledge door prize done:
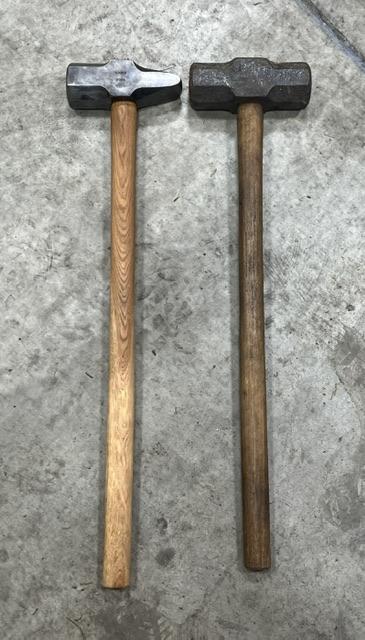
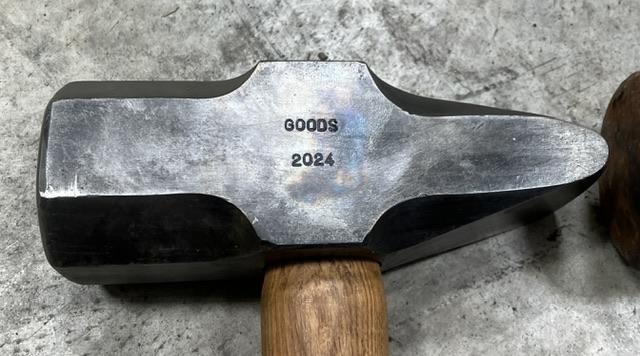
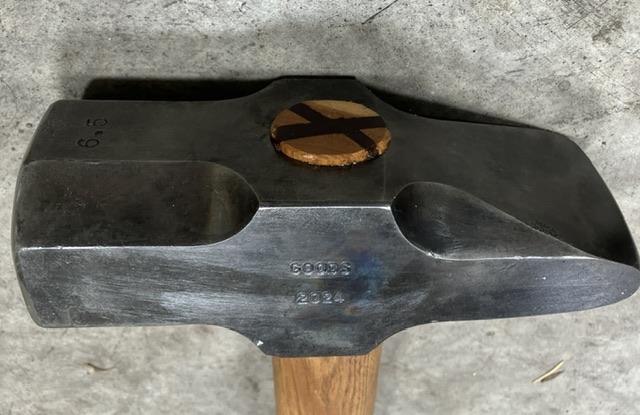
Of course, I mess up the simple stuff:
It will make for good conversation at the hammer-in on Saturday! (Final weight was only 6-1/2lbs.)
Then I started work on the motorcycle chain clever commission:
I’m not sure I can make this first attempt work. I thought it was going good, then the struggle began:
I’m stepping away from it for a while to decide the next step. I may be able to savage it.
I did have luck with the core for the blade. 8670 with 15N20 side Sanmai. (Beside the chain billet in the overall picture.) When I finally get the chain welded up to my liking, the plan is for a gomai final billet. I’m not sure I trust the chain for a good tough edge on a clever. Time will tell…
Keep it fun,
David
-
Fangs on a really big snake sculpture?
-
Frosty, I need to improve my word choice.
")
-
I know they didn’t mention a bloomery in the article, and it’s possible that the wrought iron was imported. I just thought that at such an early time period a large forge like this would also be producing its own wrought iron, especially considering that the northern part Oxfordshire had a principal iron ore deposit. (Of course, if the find was in southern Oxfordshire, it would be easier to transport iron than the quantity of ore needed to produce it.)
I’m obviously not an archaeologist or a historian, nor have I had any other information on this find. It’s just my amateurish thoughts.
Keep it fun,
David
-
I found this interesting today:
I do question there thoughts on the need for a large forge. I personally believe someone in the material chain would need a large forge to work blooms down into wrought iron, and this early in the time line I would think they were doing that at this location.
What are your thoughts?Keep it fun,
David
-
JHCC, I’m not sure I could bring myself to get that organized.
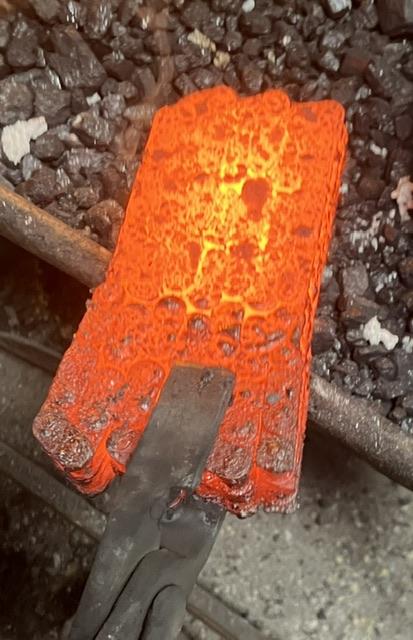
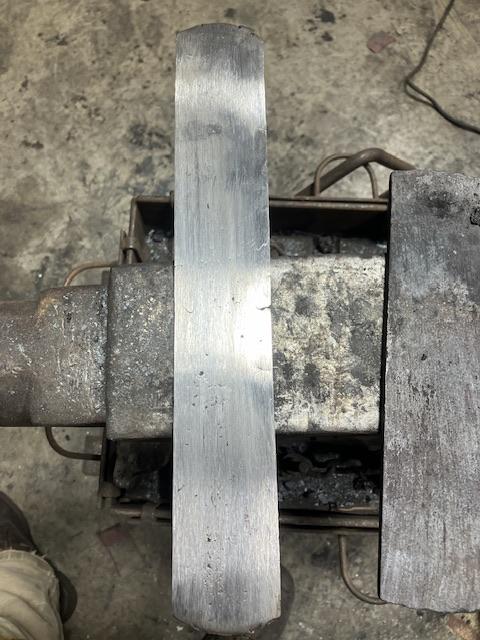
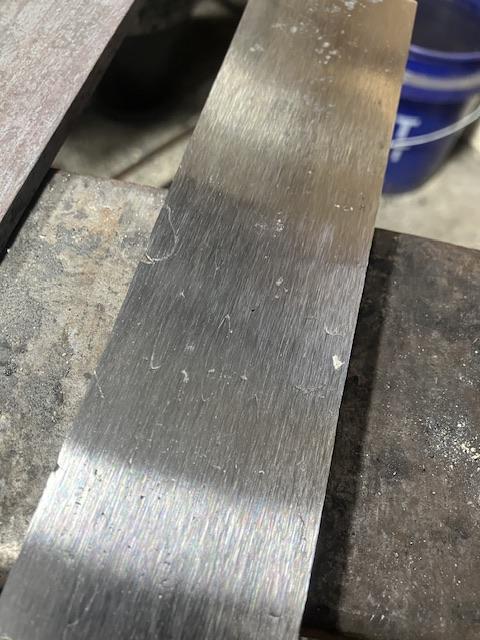
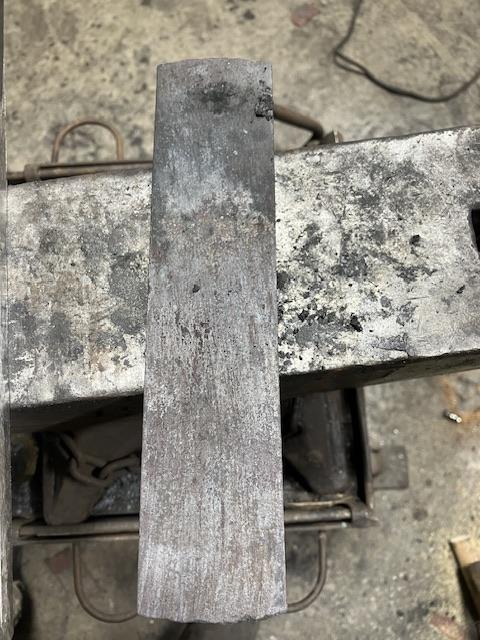
Here’s my work for the day:
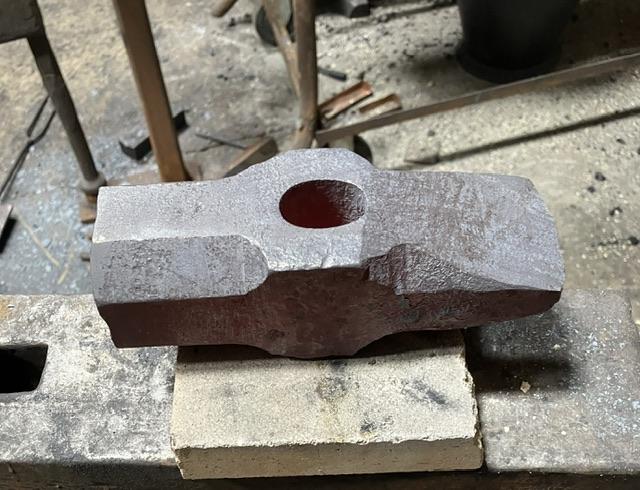
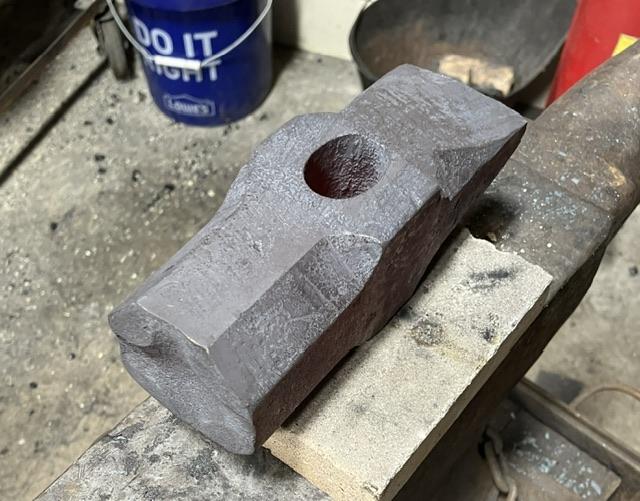
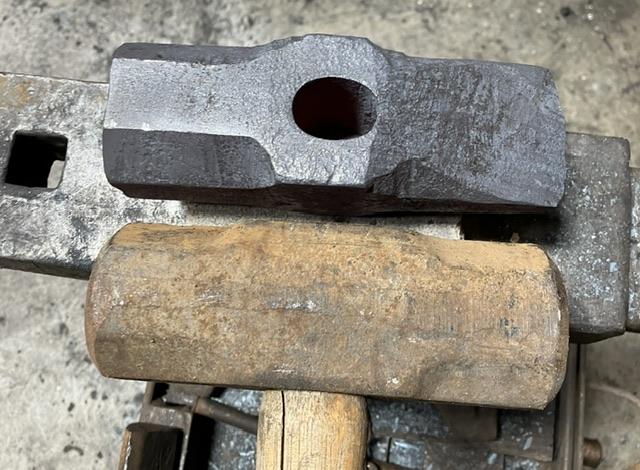
I started with 6.5” of 2.5” diameter 4140. Target was 8lbs, and pictured with an 8lb for scale. Not sure I’ll be at 8lbs when it’s all said and done.I knew this was going to take a lot of work, but even with the power hammer, I’m exhausted. Not looking forward to the final drift, but have to make an appropriate drift first…
Keep it fun,
David
-
Your research looks sound. Just be careful! I’m not an expert on heat treatment, so double check a couple resources.
-
I understand that. I’m frustratingly independent. But this is not something to mess with with out experience and the right tools.
(of course, here I stand forging 8lbs of 4140, with a hammer that just a bit small for the job…)
-
Really should have proof read that. Sorry, in the middle of heavy forging heats…
45~50HRC should be safe. I would send it out to a heat treating shop to get it there. 4340 can be pretty quench crack sensitive. Do you have a heat treat furnace? (I would like one one day…)
Keep it fun,
David
-
Ok, step back and listen to everyone. You don’t want work hammer die at the top range of hardness. You need harder than soft forging temperature steel. Hard that are too hard can kill you. One chip off the die in the wrong place can be lift ending!
Start of normalized, and if you get too much distortion after a year, rework them. Then harden them and draw them back pretty far. One step at a time, and learn as you go.
Keep it safe!
David
-
I see a candle holder without too much work.
Keep it fun,
David
Its official i'm a blacksmith ( just kidding finally got started)
in Blacksmithing, General Discussion
Posted
Those coil spring tools should hold up just fine. I’ve made a couple small fullers just like that and they’ve been used pretty heavily with no issues.
Keep it fun,
David