

Goods
-
Posts
1,160 -
Joined
-
Last visited
Content Type
Profiles
Forums
Articles
Gallery
Downloads
Events
Posts posted by Goods
-
-
Today I bought home a scrap heavy duty conveyor shaft:
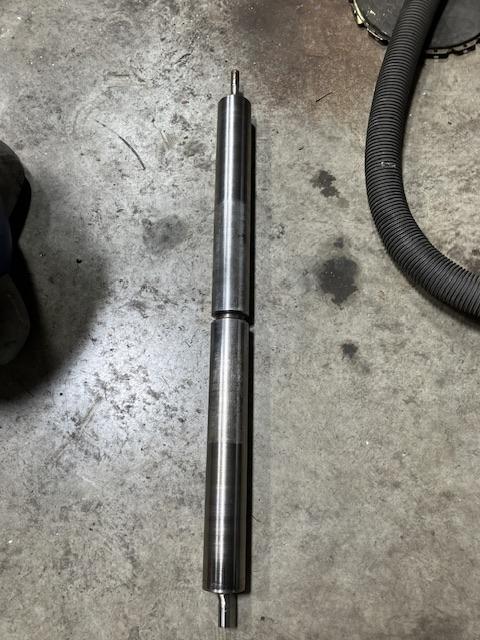
32” of 2-1/2” diameter 4140. Woo hoo! (Already committed a good bit of the material to a project for our hammer-in door prize next month. It will probably take me a while to get this project down…)
Keep it fun,
David
-
Sorry, I’m not familiar with it, but we all love pictures
Keep it fun,
David
-
Irondragon, looking at the straight peen hammer, that is shape fiskars came out with a few years ago. I would have bought one if it wasn’t for the resin handle, just to try out.
I’m not sure that I would call the peen particularly short. It seems to fit the over all shape of the hammer, even if the hammer doesn’t fit traditional blacksmith styles. It look like an over all good hammer, but haven’t had the opportunity to use on yet.
Keep it fun,
David
-
Doesn’t look like they have a very good base built up yet.
I used to go snowboarding pretty often, but the past 5 or so years haven’t be weather friendly to the local ski resorts and the rates reflect it. Not to mention most of my gear is now worn out. At this point, I just put that money into smithing…
Keep it fun,
David
-
There are several good threads here on this forge. I believe JLP has one of the better ones. To get this setup to its fullest potential, you may need an original blow and that may be hard to find. Just to get it functional there are a lot of options. Do you have electricity in your shop? An easy solution is a combustion air blower from a scrapped gas furnace with an inexpensive speed controller and aluminum flex tube for clothes dryer vent.
Keep it fun,
David
-
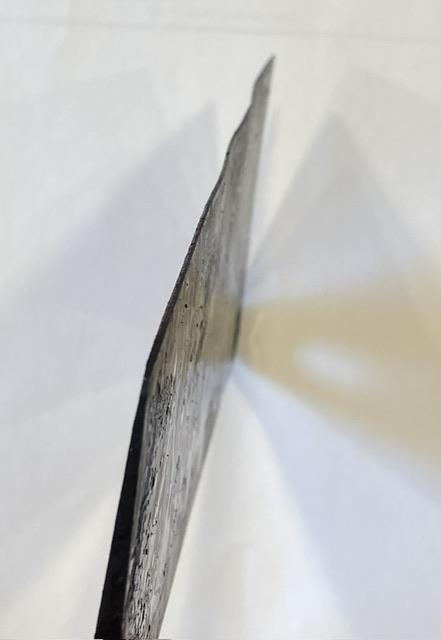
I feel like I had a little be of redemption in the forge today. I came up with a bigger billet size for my cleaver project and tried it out:
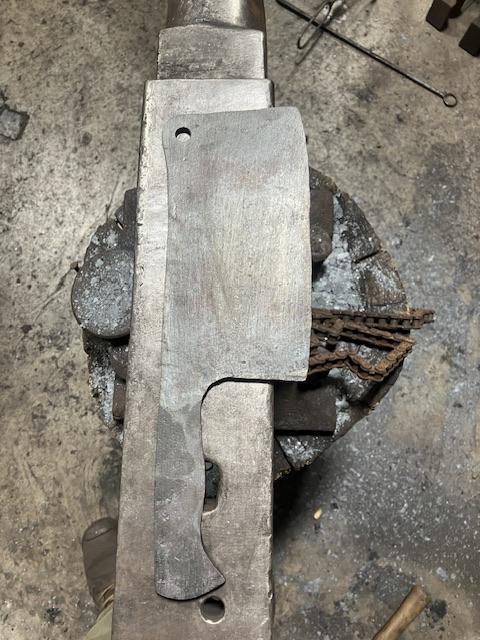
A little bit of rasping and filling, but otherwise forged to shape. I didn’t follow my planned steps exactly, but pretty close and ended up right about where I was aiming. (I anyone is actually interested, i can share my planned steps and the pictures I took of most steps.) It’s still annealing in vermiculite, so grinding will have to wait for another day. Spine is at just over 0.200” and the edge is around 0.100”. More material on the edge so this one should stay straight, right?
Also, after I put it in the vermiculite, I made a couple of my pencil scribes:
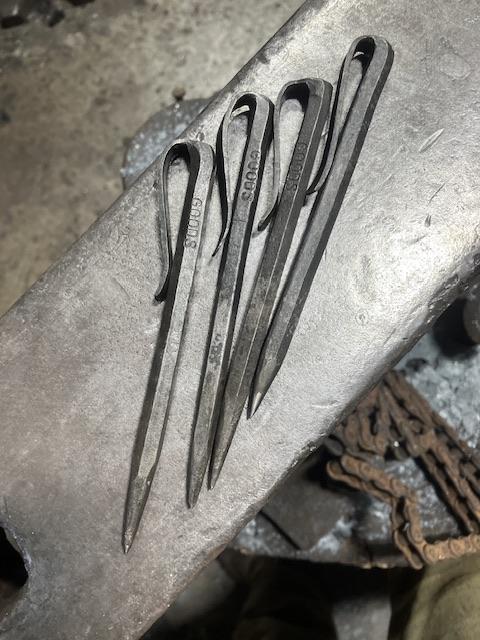
Made from heavy garage door spring and just the point water quenched for max hardness. I haven’t made any for a while (and it shows), but I had some guys requesting them.
Shop started at 52F and was up to 69F by the time I was done, with two windows open and 17F outside.
Keep it fun,
David
-
Frosty, I’m not generally a knife person, but I’m pretty sure this is done as a cleaver. I didn’t warp in the quench, it started warping in the normalization step and I tried straightening it multiple times. Warm, lower orange cold, even tried to do a plate quench with 3” x 3” x 12” blocks. I think it need a lot more experience to make this one work as is. As it, I’m not sure how much carbon is still left in the edge…
aaamax, maybe, we’ll see. I’m probably going to set this aside and try a bigger billet to get where I want to go with this. If I get there, maybe I’ll come back to do something with this. It may hang on the wall for a couple months.
Keep it fun,
David
-
Here is the cleaver from Saturday after tempering:
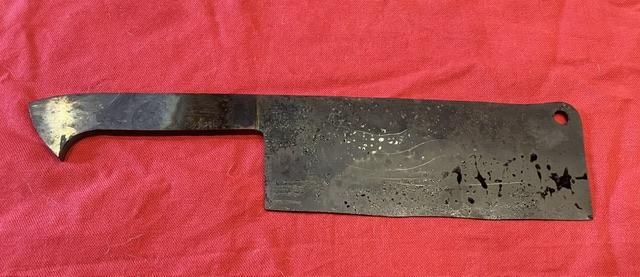
Edge is quite wavy. Believe or not, this is better that the first normalizing round. It was just too thin! Plan at this point is to cut it down to a reasonably sized kitchen knife. (Blade is currently 3-1/4” x 7-1/4”, so there’s a lot of material to work with…)
Keep it fun,
David
-
The hammer-in seemed to go really well:
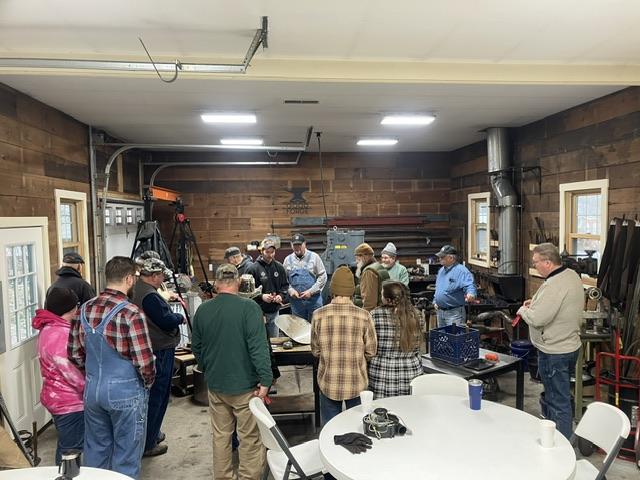
I hammered a test piece out for my cleaver project. I’m going to need a lot more material than I calculated. I tried to make it work, but in the end the edge was just too thin. It warped really bad, even while trying to normalize it. Hardened it anyway and it’s tempering now. I should be able the re-profile it to a small chef’s knife( if I really want to go through all that grinding…)
At least all the heat treatment was after everyone left.
All it all it was a good time!
Keep it fun,
David
-
Gas furnace in there. Not a problem!
-
Shops only 20’x20’ and I try to make the best of it. For these we move the vehicles to the neighbor’s and setup for food and relaxation there.
I guess the picture does give it a stage like feel though
 .
.
Feels pretty spacious right now, but it probably won’t tomorrow…
Keep it fun,
David
-
Shop is a clean as it’s going to get and tables/chair setup:
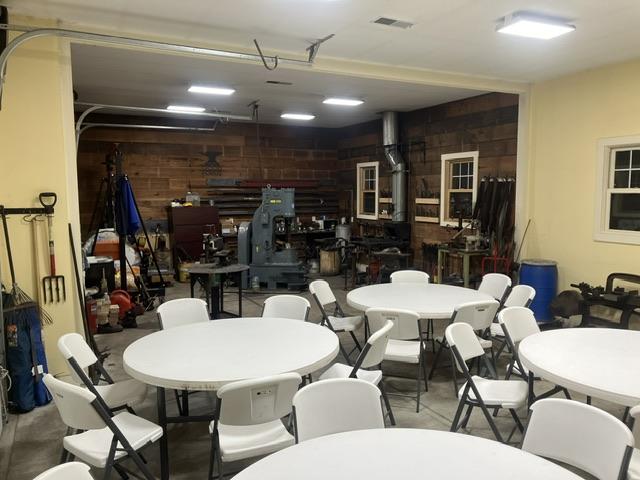
Ready for the hammer-in in the morning!
If any of you are local to south central Indiana, drop on by. Fun starts at 9am.
Keep it fun,
David
-
When I built my shop I put in dimmable high bay LED lights. I like working in a bright shop, but for forging bronze or heat treating I can dim the lights to get a better judgement of heat color. I cost a little more, but the convenience is wonderful!
Keep it fun,
David
-
Beat up Vulcan? When I read the title of the post I was expecting much worse. Most of the Vulcans I’ve seen are in much worse condition. It still has a lot of life left in it. That being said, it is not a top tear anvil. I would probably put it at $500 in current condition. Of course, you never know what you could get on Facebook marketplace place from a newbie that doesn’t know any better, but I couldn’t bring myself to do that.
Keep it fun,
David
-
I would heat it to non magnetic hold it to get the temperature even through out, then slow cool in vermiculite overnight as prep for grinding. (Belt can get costly, but I guess fuel it too.) 4340 can air harden a little, but I’m not sure with a large block. Honestly, I would go with air hardening and leave it at that. Too soft for a hammer die is way safer than too hard!
Just my two cents…
Keep it fun,
David
-
Frosty, I wasn’t planning on using a swage, but I’m not opposed. I’m probably going to figure it as I go.
The 3rd small roller is a visual effect. The chain is folded back on itself and you’re seeing one of the rollers from the bottom layer. It mess with me too, and I had to take a me a close look at the other pictures he sent.
Irondragon, I’m glad you checked them out. Beautiful results with all the details of the steps. I was really surprised/impressed by his hand sanding aid.
Keep it fun,
David
-
northmanlogging, sorry for taking over your post…
George, here’s a pic of the chain that was just sent to me:
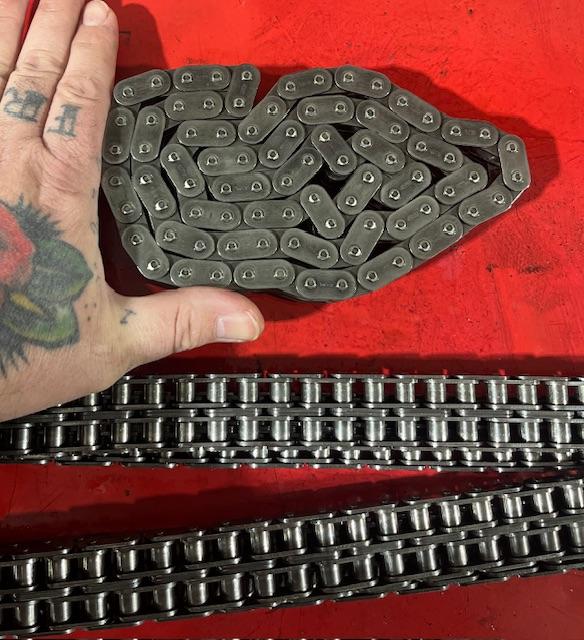
He’s clean up 3 chains to play with, each over 2lbs.
I plan on starting the weld by hand hammering, but will use the power hammer to get good consolidation.
I’m looking to make the final billet up with 1/4” of consolidated chain on each side with 1/4” core of 52100 for a total billet at 3/4”x2”x6”. That should give me plenty of material. (It’s more than I’ve used for my large hatchets!)I’m expecting this to be a fun, challenging project and don’t really expect the first try to be quite right…(I’m generally not that interested in making knives, but this intrigues me.)
Just a note on the YouTube channel for “shurap”. He’s a knife maker from Summy, Ukraine and his videos are well done with interesting forge welding pattern development and shop built equipment, without crazy music or even commentary. I really enjoy his videos and was very concerned after the situation started there and he videos stopped coming. I was very relieved when he started posting videos again last spring! The world can be a very dangerous place… If you have any interest, check his videos out, it may help the circumstances for him, maybe…
Keep it fun,
David
-
I’m not sure exactly what the chain is made from and I don’t have it yet. This is basically a commission project. The person it a big Harley fan and he wants a clever made from it. He’s going to provide plenty of extra chain and I plan on using 52100 that I have as the core of a Sanmai billet to make sure the edge is actually good material. (Lots of challenges on this one!)
If it doesn’t work out he’ll be okay with that, but personally, I won’t give up till I get good results. It’s not a money making venture. It’s a hobby for me and with my personal requirements I don’t think I could ever make it profitable, but it’s nice to get a little coal/propane money.
For reference I benchmarked “sharup” (YouTube) for technique on this one. I will be welding up the links some, but a minimum amount to avoid messing up any pattern.
Keep it fun,
David
-
One thing I’ve always tried to keep in mind when forge welding is that I need to apply force to get a good weld, but need to (at least initially) avoid too much forging that can result in shear across the welding surfaces. The place I see wood under the work as being useful is when you’re forge welding oddly shaped things. I have a project coming up where I plan on welding up roller chain into flat bar. I’m probably going to try the initial welding with a board on the anvil. I’ve not used wood yet, but I’ve never welded up something with so many air gaps and moving parts.
Keep it fun,
David
-
Any thoughts on changing the angle of the splice for the thicker belts? The angle look a little shallow to me, but I’m not at the shop right now to compare.
Keep it fun,
David
-
Thanks, that’s were then connection in my mind came from.
Keep it fun,
David
-
There a power hammer group on facebook that Mark frequently post on…
If you’re on Facebook you might check there.
-
Somehow I connected that story to a blacksmith guild in England. Could be my imagination though…
Keep it fun,
David
-
I’m not sure if we have met or not.
Honestly, I’m not that good a “peopling” and don’t attend too many events outside those of the Vernon Chapter. Those other events that I do attend, I often keep to myself. (However, once I know you, you’re stuck with me
 .)
.)
(I am planning on going to the conference in June and have committed to helping Bill with the kids classes/session. That should help me get to know a few more smiths outside of my normal group.)
Keep it fun,
David
It followed me home
in Blacksmithing, General Discussion
Posted
Absolutely! But, I won the door prize last month, so it’s my duty to provide one for next month. Personally, I like to put forward my best work on these type things. So, I’ll get it done, even if I end up using the whole bar in attempts…
Keep it fun,
David