Donal Harris
-
Posts
970 -
Joined
-
Last visited
Content Type
Profiles
Forums
Articles
Gallery
Downloads
Events
Everything posted by Donal Harris
-
What did you do in the shop today?
Donal Harris replied to Mark Ling's topic in Blacksmithing, General Discussion
If you really want to know if the cross braces are needed, I suppose you could get a “fluffy” guy like me to sit on it. If it holds, you are money. If it falls to the floor, shoulda braced it. At a stand up meeting back in the lab at work one day, I leaned on one of the tables. Next thing I knew, me and everything else on the table was on the floor. At every meeting prior to that, at least one or another of the techs had actually sat on it without issue. But then they were only 130 - 145 lbs at most. 230 lbs and the mounts failed. The worst part about it was the fart that escaped as I picked myself up off the floor. No one heard it, or at least pretended not to hear it, so I just continued speaking where I had left off as if it hadn’t happened. -
I believe I will try to make a steel faced WI hammer
Donal Harris replied to Donal Harris's topic in Hand Hammers
If I had had it to begin with, I probably would have gone with this piece. Some sort of hinge piece. Instead of forge welding several pieces of round stock to make the body, this alone would have been enough.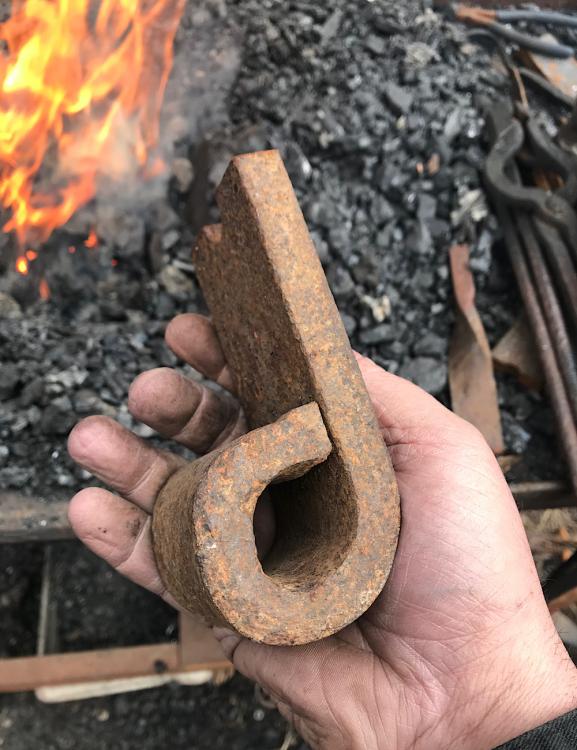
-
I believe I will try to make a steel faced WI hammer
Donal Harris replied to Donal Harris's topic in Hand Hammers
I finally found a video of someone doing a jelly roll which was not a type of pattern welded steel. He makes a WI hammer. -
What did you do in the shop today?
Donal Harris replied to Mark Ling's topic in Blacksmithing, General Discussion
I think perhaps the angle of your B-D cuts may have been too straight. -
Rojo. I haven’t decided yet. I used 8 pieces of the round bar to make the bodies for two hammers. The first I was able to get the faces welded on, but then lost it. I expect it will show up some day in some hole or buried next to a tree. My grandkids will sometimes be attracted to some of my tongs, punches, or random bits of scrap and carry it away to play with. The second I still have. The weld has refused to take three times now. The third time it popped off and landed in the snow. I will have to cut another piece of spring steel for a forth try because it cracked. As for the rest, certainly an axe, hatchet, or hawk at some point, but nothing substantial. Anvil. Thanks. I may end up drifting the holes square. It is easier forging WI square than it is round, especially as thin as I would have to for some of the holes.
-
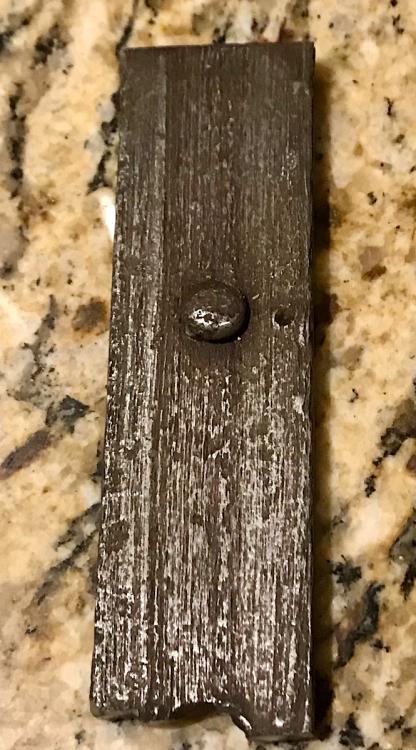
I have about 30 pounds of WI. Most of it 3/4” round bar 8” long. But about 1/4 of it is stuff like that in the pic below. It is the frame the bars were mounted in. The half moon bit where a bar once was isn’t a problem. What I am not sure about is what to do about the small holes. Forge a plug? Split the bar down to the hole and then forge weld the split closed? I think going with a plug is probably best.

-
What did you do in the shop today?
Donal Harris replied to Mark Ling's topic in Blacksmithing, General Discussion
I really need to look into building a shop. All I did was walk out to the forge and scraped some of the snow off and said, “Nope. Think I will to copper work in the garage.”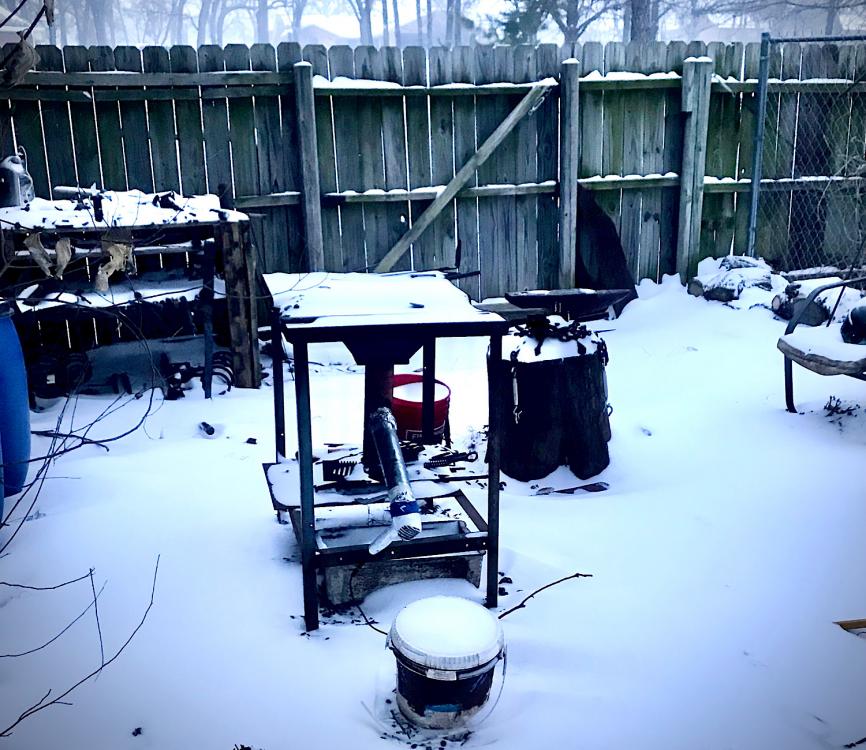
-
What did you do in the shop today?
Donal Harris replied to Mark Ling's topic in Blacksmithing, General Discussion
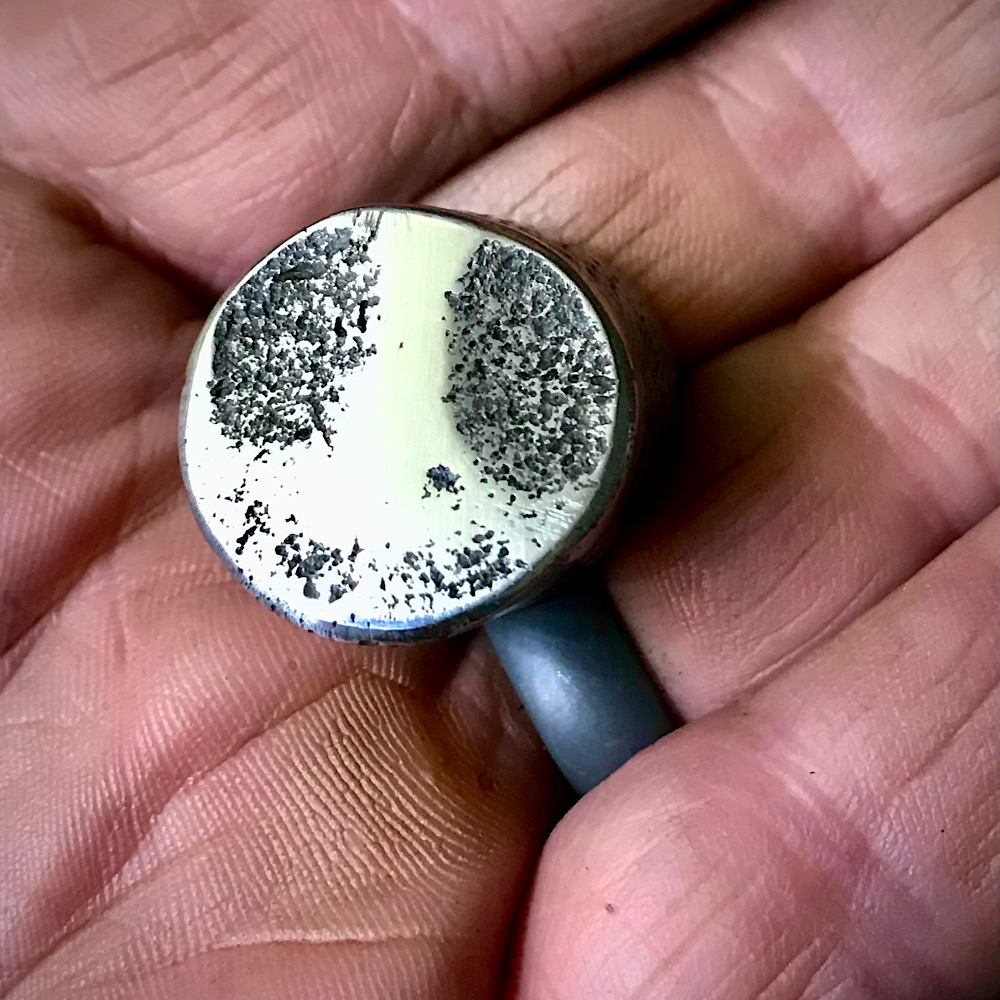
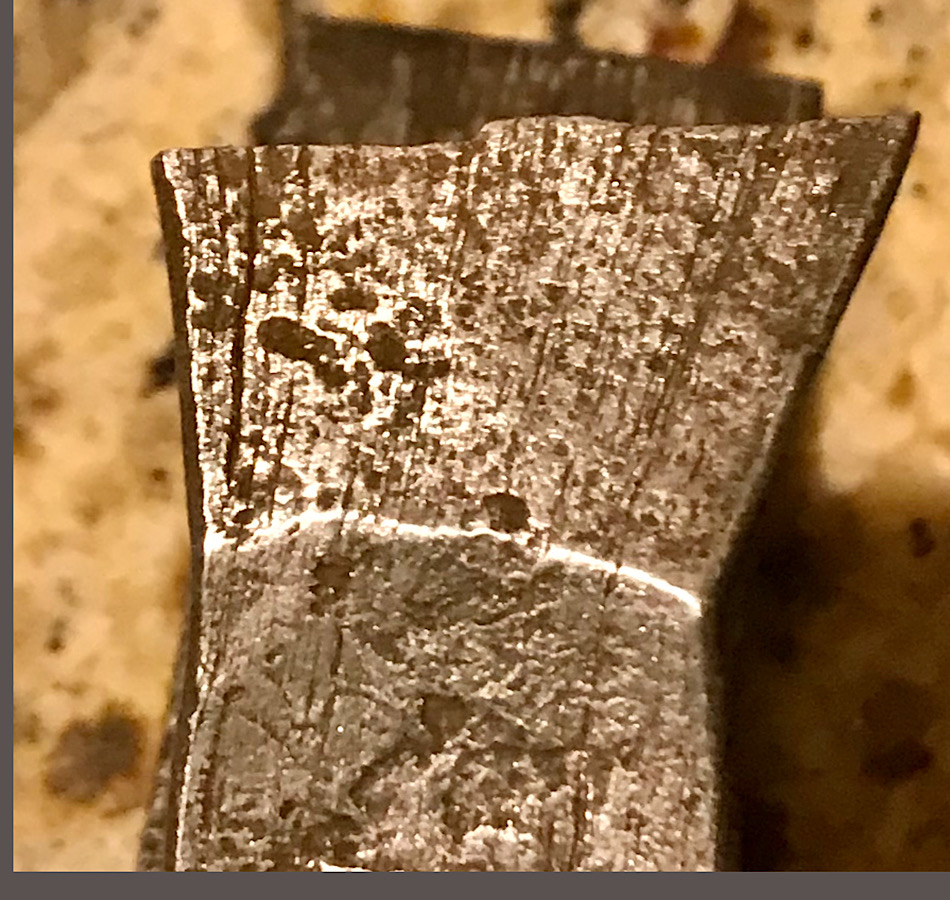
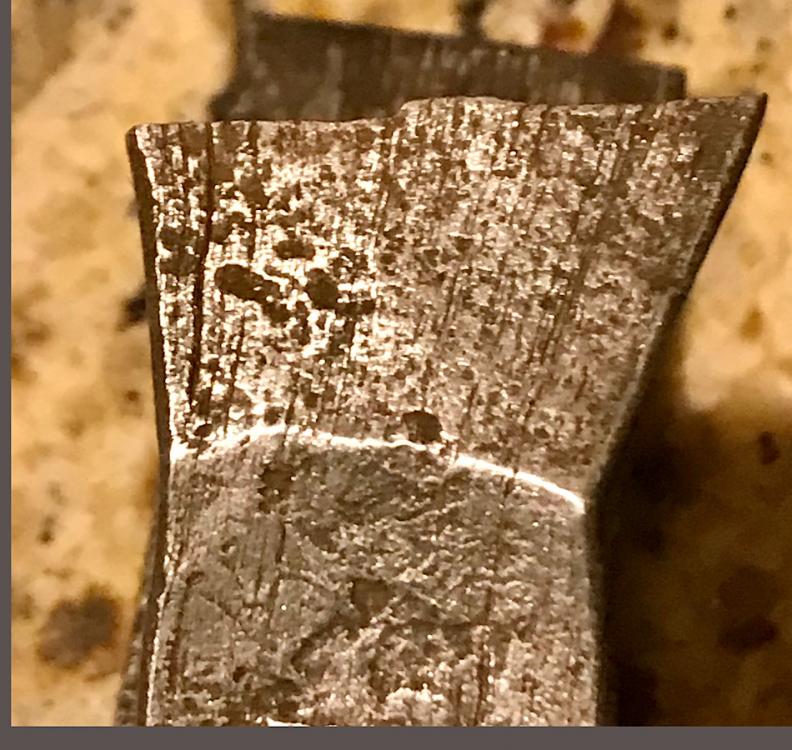
From late Sunday and not today, but interesting how cool randomness can be. Odd bit of WI with decent iron around the outside and slaggy iron in the center, sort of like a “pig in a blanket” or some sort of candy bar. I decided to disrupt it straight down on itself and wound up with that odd- looking, alien smiling face. Any ideas about how that may have happened?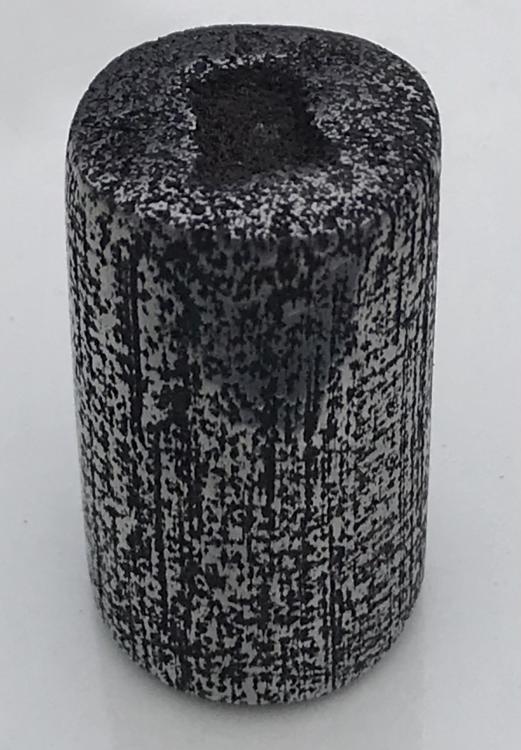

-
What did you do in the shop today?
Donal Harris replied to Mark Ling's topic in Blacksmithing, General Discussion
George, he will be 9 in March of this year. I believe I may have forgotten to post the picture.
-
What did you do in the shop today?
Donal Harris replied to Mark Ling's topic in Blacksmithing, General Discussion
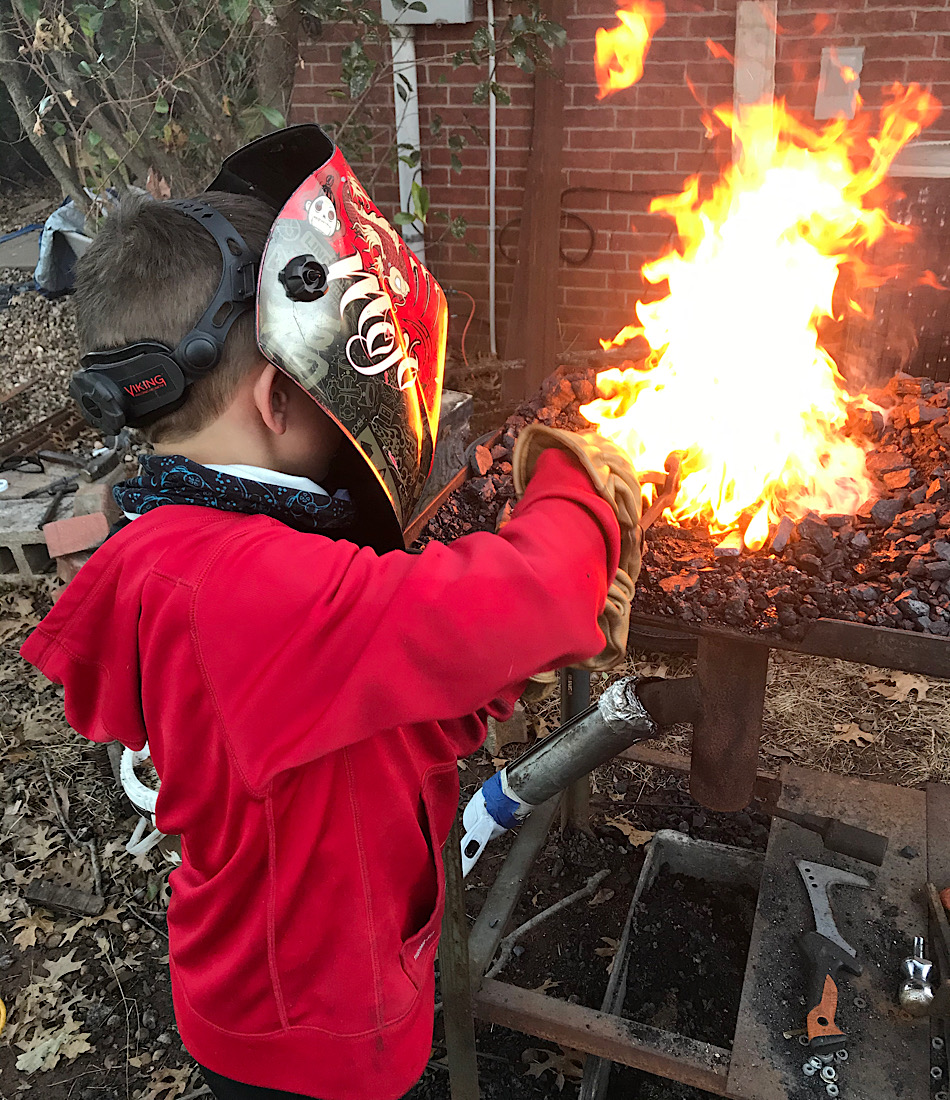
Worked with my grandson. He thought he was making a knife, but he was really learning to turn round bar into flat bar, assuming he didn’t get distracted and forget to keep track of how long his steel had been in the fire. When distracted, which was most of the time, he learned how to burn steel. Gotta admit though, he isn’t a quitter. We were out there from just after breakfast until well past dark. The hood is to keep the flames from kissing his face and burning his hair. It was a windy day and predicting which way the flames would blow was difficult to predict. I need to make him a leather apron and possibly a welder’s jacket. He likes being way too close to the fire for my liking. -
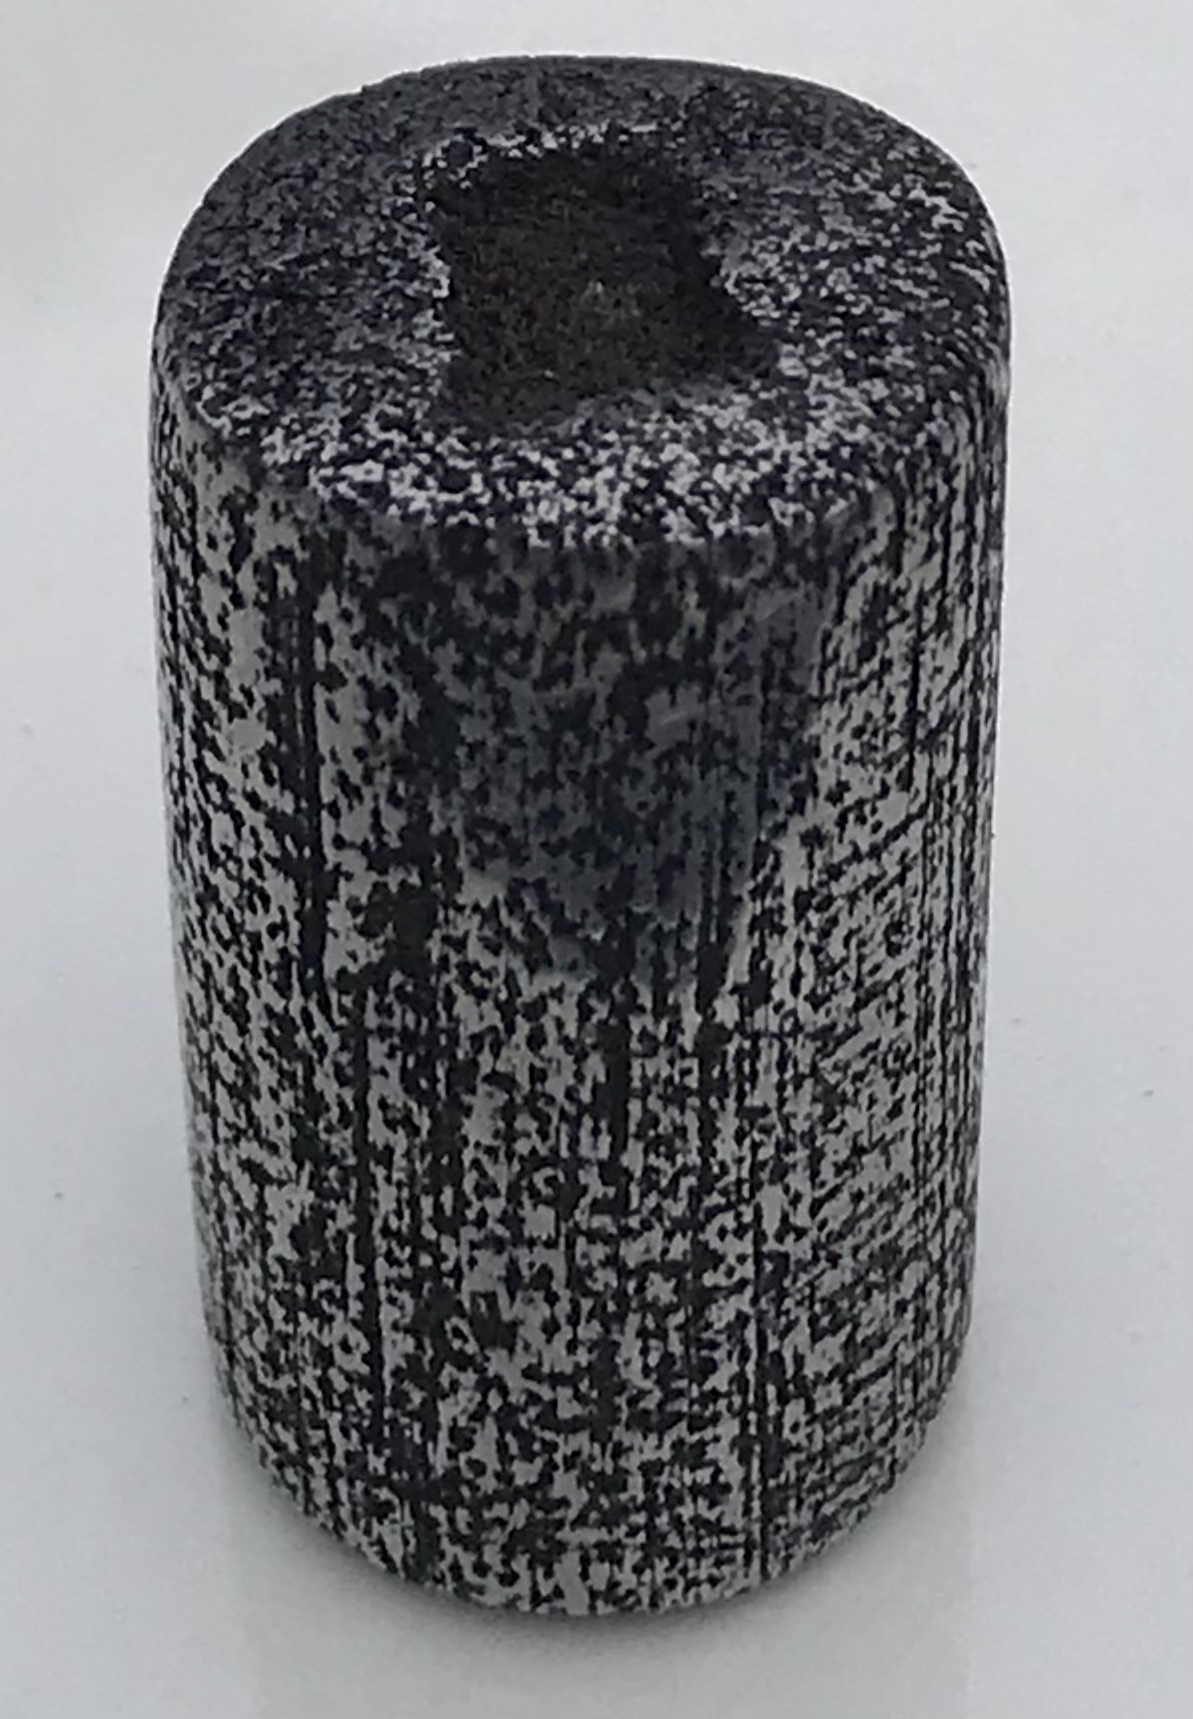
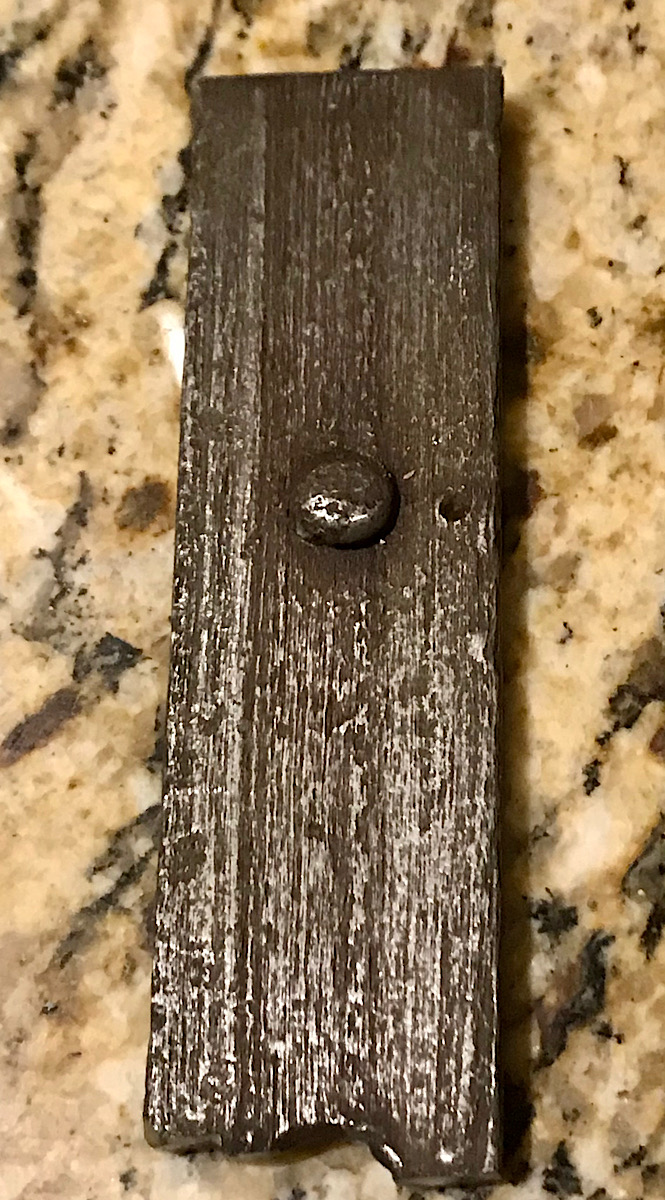
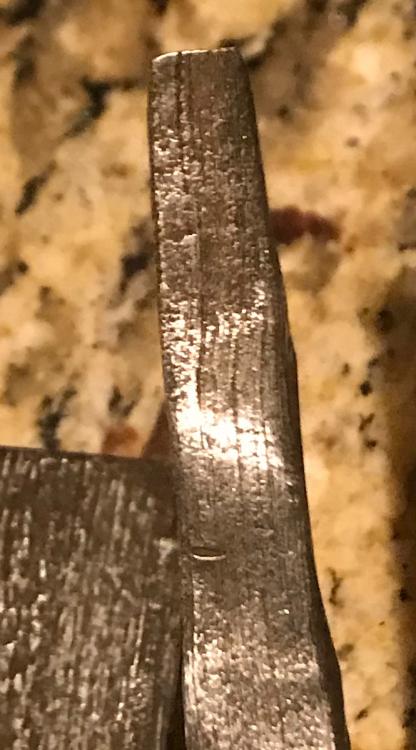
I tried 1 part pool muratic acid in 2 parts 3% H2O2. It works much more aggressively than muratic acid alone. I expected adding the H2O2 as an oxidizing agent would speed up the reaction, but didn’t realize it would be night and day faster. 36 hours in muratic acid alone only etched it enough that I could see the structure as dark and light gray bands, but I couldn’t really feel them. Two hours led the pieces looking like weathered wood. The first piece was just a short piece of rusty WI that hadn’t seen a hammer since 1860 or so. It was the frame around the bars in the window. I really like the texture the etching gave The second piece is a piece of one of the bars from that window. I had flattened it a bit and it was no longer rusty. You can see and feel the grain in the WI, but not nearly as much as in the 1st piece. Perhaps 3 hours or 4 hours would have made the etch deeper. The characteristics of the two are different under the hammer. Both are butter soft, but the 1st piece seems to split easier. I have to pay close attention to the heat. The 2nd, the round bar, is more forgiving. It will split or crack on you, but only when I get really careless and try to work it colder than I should. I have a 3rd piece. It was a crowbar. I bought it at a tractor show in with a bunch of chisels, punches, sucker rod, and other scrap I assumed would be harden-able. When I got home and sparked it, I was surprised a crowbar wouldn’t spark much at all. I suspected it might have been WI and not steel. Breaking it was inconclusive. There was a bit of separation, but not much. I tried soaking it in muratic acid for 24 hours and it was still smooth. At 36 hours I could make out some gray lines that looked like possible evidence, but wasn’t sure. After two hours in the muratic acid/H2O2 it was pretty clear. I wanted to take a picture, but had misplaced it. I am planning to place a piece of mild steel and another small piece of the crowbar in the acid tomorrow. The mild steel will serve as a control.
-
What did you do in the shop today?
Donal Harris replied to Mark Ling's topic in Blacksmithing, General Discussion
Looking forward to seeing the dragon hooks, Thomas. -
What did you do in the shop today?
Donal Harris replied to Mark Ling's topic in Blacksmithing, General Discussion
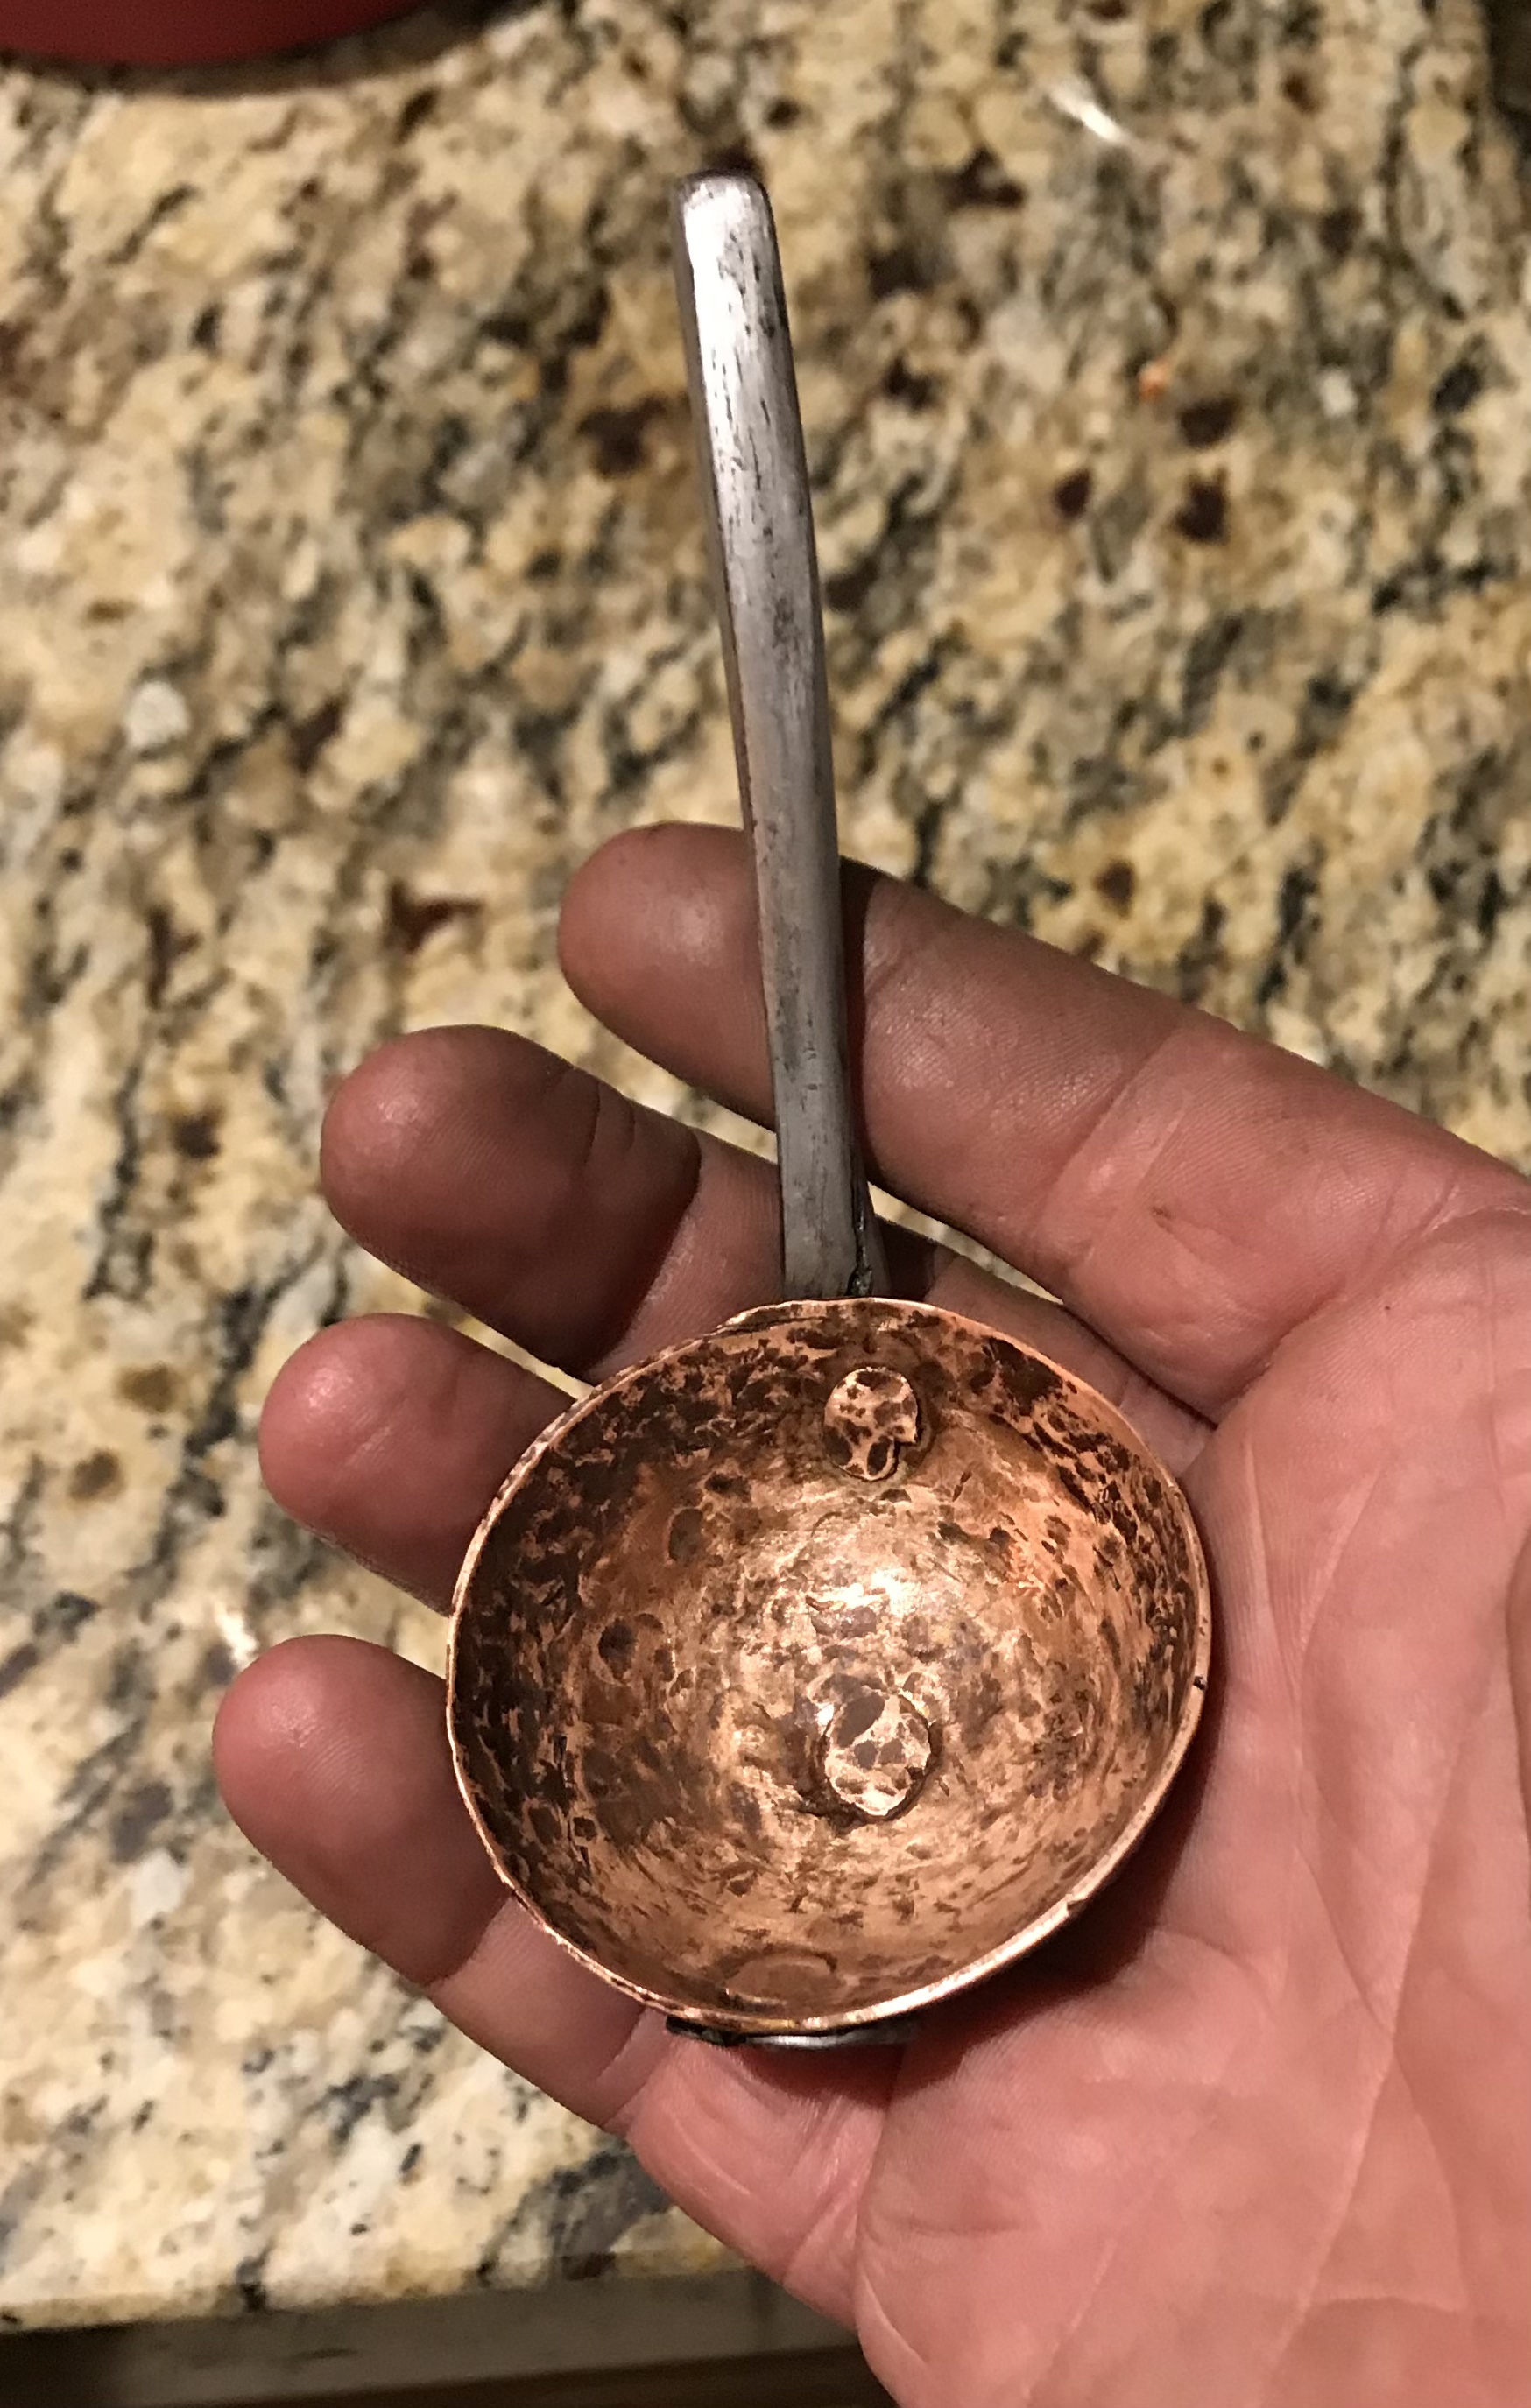
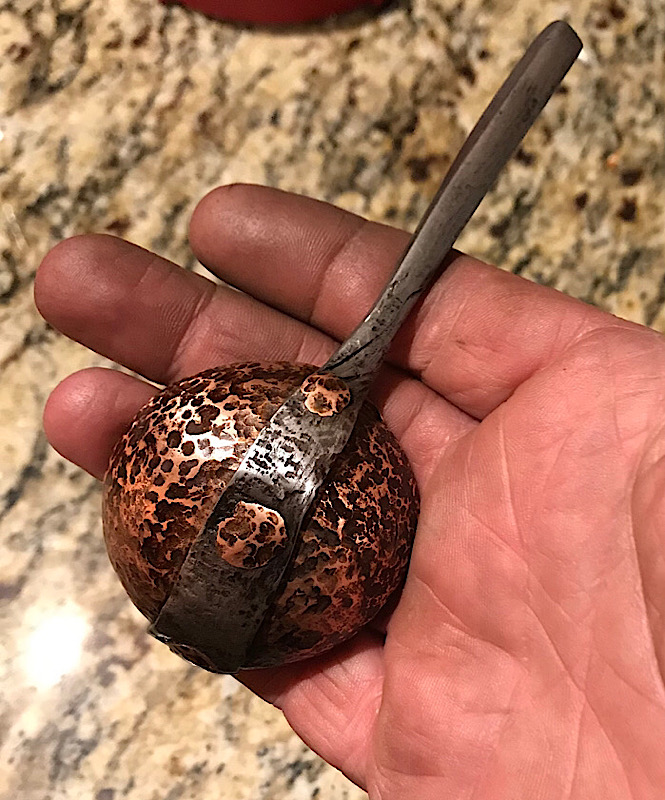
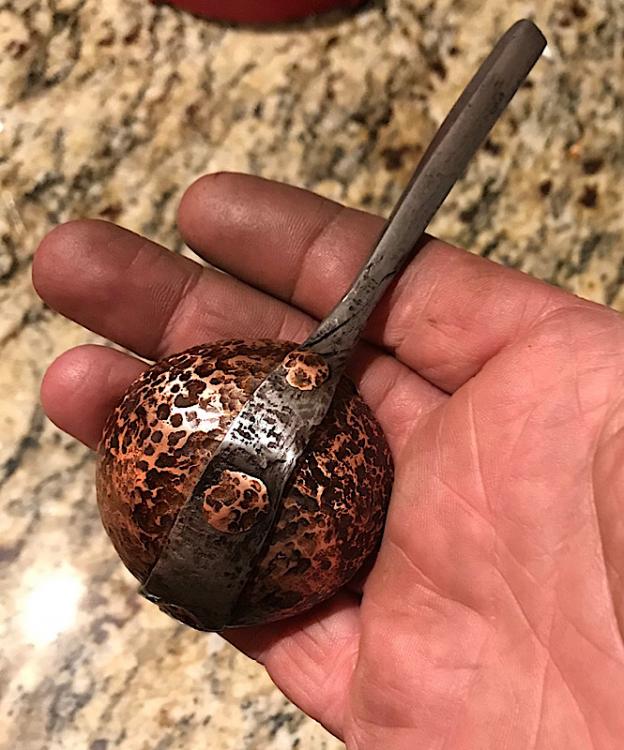
The rivets were net peened to a uniform size. I got them way offline. The handle is slightly twisted, not straight, and a little too thin. I should have let the wrought iron sit in the vinegar/H2O2 solution for at least another 24 hours. The bowl feels like it is just a tad bit too large. But all in all, it turned out to be a serviceable coffee scoop. The wrought iron is from Petersburg, Virginia and was manufactured in Richmond some time in the 1870’s. The copper is just a scrap copper pipe that I split and flattened into a plate. The rivets are just ground wire I drew out until the fit the holes. I finished it with BLO that I applied while the metal was hot enough to burn the BLO. I then hand sanded it with 500 grit to remove the burnt BLO from all but the low areas. After that I rubbed it down with beeswax, heated it with a torch to melt the wax, and buffed it with a T-shirt until it no longer had a waxy feel.
-
I have never had to deal with an HOA. Our last house would have been the first, but we sold it before it started. The development had to reach a certain percentage of completion before it would begin. Our back neighbor would have certainly been at its head. She was a nightmare. My problem with neutralization is mainly container size.
-
How long would it take the gravel to stop smoking? I experimented with four small pieces of WI yesterday. Two hours in muratic acid made it so you could you could see a difference in coloring and direction of the grain, but didn’t make the texture different. Three hours in a mixture of vinegar, H2O2, and NaCl seemed to etch much more aggressively. The grain was apparent to both the eyes and touch. My trial also made another thing horribly apparent. My skills at forging stink. Cracks which were not visible before etching were clearly visible. Spots where I had let the iron twist under the hammer were also obvious. I also learned texturing that may look nice in mild steel are not so nice in etched WI.
-
I believe I will try to make a steel faced WI hammer
Donal Harris replied to Donal Harris's topic in Hand Hammers
Well the one which was a bit heavy is no longer a problem. It has walked away. If I were my dad, I would say one of the grandkids was playing with it and lost it. Not being my dad, I am sure it was just me that lost it. The face would not stick on the smaller one. I will give it another go in a few days. -
I wonder how it went? I have a pool, so muratic acid is something I always have on hand, but am not sure I would want to use it for etching, especially if it was just a one-off thing. It isn’t extremely dangerous, but it can be. Neutralizing it isn’t all that easy and you can’t just dump it in the yard or down the drain. What about vinegar and hydrogen peroxide? Mixing them produces peracetic acid, which isn’t 100% safe. It will burn your eyes and lungs if you breath the vapors, but not nearly as badly or as easily as muratic acid can. You can add NaCl to speed up the reaction. I am not sure what purpose the salt has. I assume as a catalyst. You can also add NaCl to just vinegar alone, but I have never tried it.
-
I believe I will try to make a steel faced WI hammer
Donal Harris replied to Donal Harris's topic in Hand Hammers
No, you were right. A mild steel scribe worked great. It scratched the decarb areas , but wouldn’t after I got down to smooth steel. Maybe a 1/16 of an inch down. Thanks for the tip. -
I believe I will try to make a steel faced WI hammer
Donal Harris replied to Donal Harris's topic in Hand Hammers
That is what I thought. Trial and error. I think I will try Frosty’s suggestion and I pray it works. What I had been planning to try was roughly what Thomas said. I was really not wanting to have to go that route. I am dreading the HT step as it is. Being a noob, I fully expect the faces to crack or pop off in the quench. -
I believe I will try to make a steel faced WI hammer
Donal Harris replied to Donal Harris's topic in Hand Hammers
I finally got around to putting the faces on the first body. I attempted the traditional way, but gave up after a couple of tries and resorted to tacking them on with an arc welder. Question: I lost the hammer in the fire at one point and took a little too long finding it. One of the faces was sparking pretty good by the time I managed to scrape it out. Is there a way to tell how much of the face I will need to remove in order to get down past the burnt steel short of trial and error? The spring steel I used was an inch thick. I wanted to have a large margin for error when grinding, so I can stand to lose quite a bit of it. As it is now it is heavier than I wanted anyway. It is 1.56 kg or 3.44 lb. -
It has been a little over a year since EDL made the above post and EDL hasn’t been back since last December, but it might save time for someone else to know Jeremy said in a video he will not be putting out any plans for modifications to his grinder to take contact wheels larger than 10”. It is fairly early in this video where he explains why.
-
90 Ton Hydraulic Press For Under $500 [Mockup]
Donal Harris replied to apexmateria's topic in Presses
Fly presses were mentioned on the first page. I’ve come to believe I would have an easier time finding and purchasing a unicorn than I would a used fly press here in Oklahoma. -
I believe I will try to make a steel faced WI hammer
Donal Harris replied to Donal Harris's topic in Hand Hammers
I finally got around to cutting the billet in half. It has a rather significant area in the middle which didn’t weld well. (It doesn’t look that dark. I sanded it and left the grit in to make it show up better. The other half of the billet has the same problem. Do you think I could heat it back up and get rid of it? It does not run all the way to the other end. The block is 2 & 14/16th of an inch long and each end is 1 & 9/16th of an inch square. The face is from a Ford truck leaf spring. It is 15/16th of an inch thick. I will slice off the red marked areas. Rather than a cross or diagonal peen, I believe I will just weld on another piece like the one shown and try for a rounding hammer. I don’t have one. The other half I will do a more traditional style. Thoughts?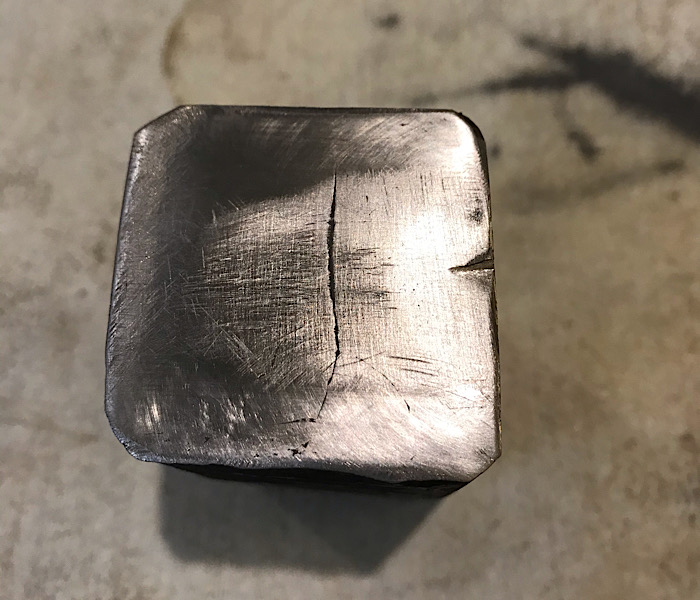

-
Thanks. She helps me sometimes.
-
I was thinking wolf doing the same thing. Others see a hare.