

Peppie
-
Posts
228 -
Joined
-
Last visited
Content Type
Profiles
Forums
Articles
Gallery
Downloads
Events
Posts posted by Peppie
-
-
Not so sure this anvil will be so easy to fashion effective hold downs. It has pig feet. The 4 feet have a shallow, upward curve. I would really like to not cover up the feet. They give a very aesthetic look to this style of anvil.
-
Now that I have gotten the attention of some very experienced smiths.. I have a question.
To mount the 4 footed pig anvil to the base plate. I was thinking of laying the anvil upside down and drilling 2 , 3/8" holes,and taping them. This would allow me to use all thread to cinch it down to the base plate.
Thoughts??
-
Thank You Chris. C, that was what I had planned... "Solid!"
-
Frosty--- knowing you have seen hundreds of stands.... your statement puts a smile on my face, and a fancy feather in my cap. Miss Piggy will feel like she is belly deep in mud!
Captropheus- I have a habit of over killing.
Latticino- yes, I spent today mixing up an oily batch of play sand, and packed the column full.
-
Thanks for the replies guys.
I cant leave well enough alone. Lol
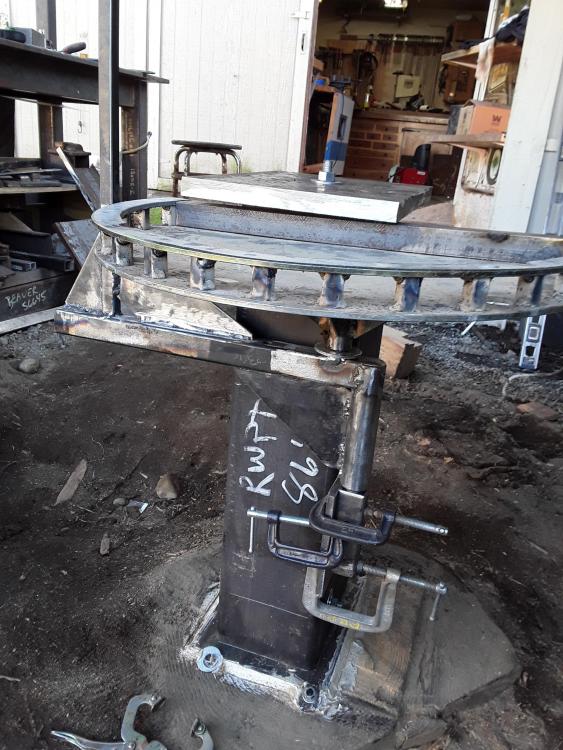
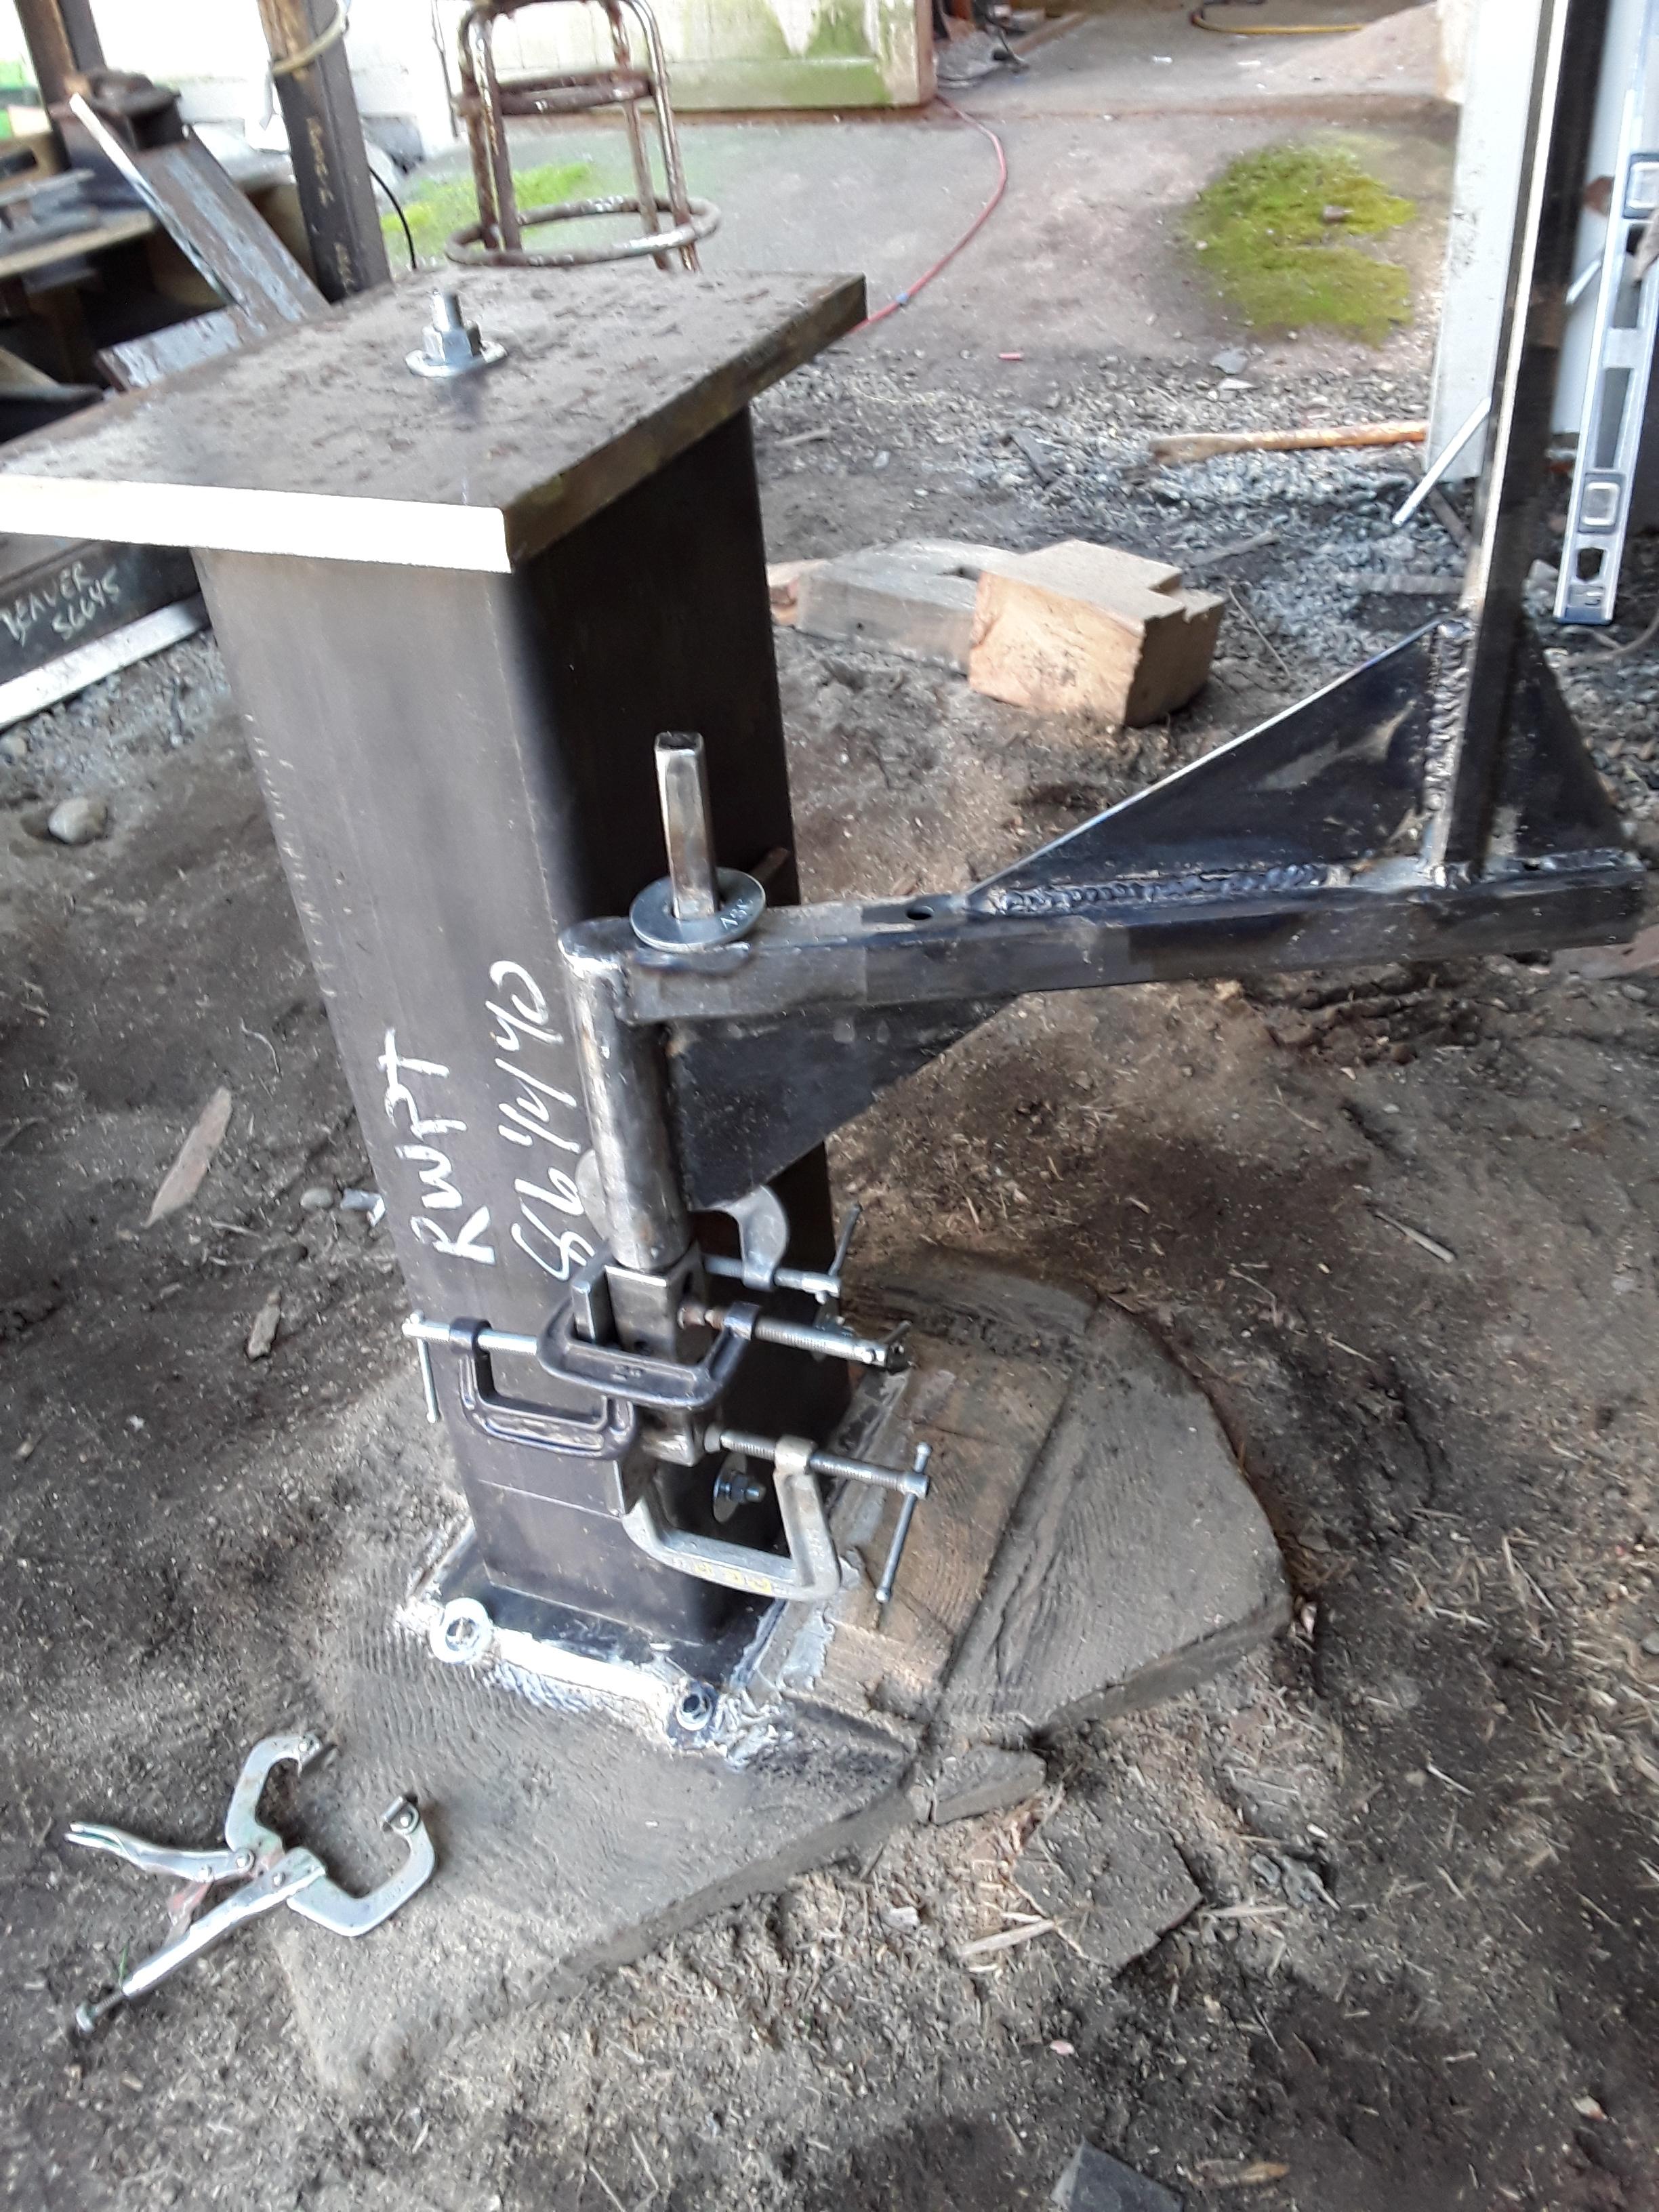
I had seen a post somewhere that a Smith mounted a vise very near to his anvil. That got me thinking.... could be very beneficial to have a third hand.
-
Upper shelf will be for my most used hammers and a butcher's brush. Bottom shelf will be a catch- all.
The wait for my piggy anvil is killing me! Should have it by the end of next week.
I think I am going to install a couple tubes under the anvil base plate to accept a vise mount.
-
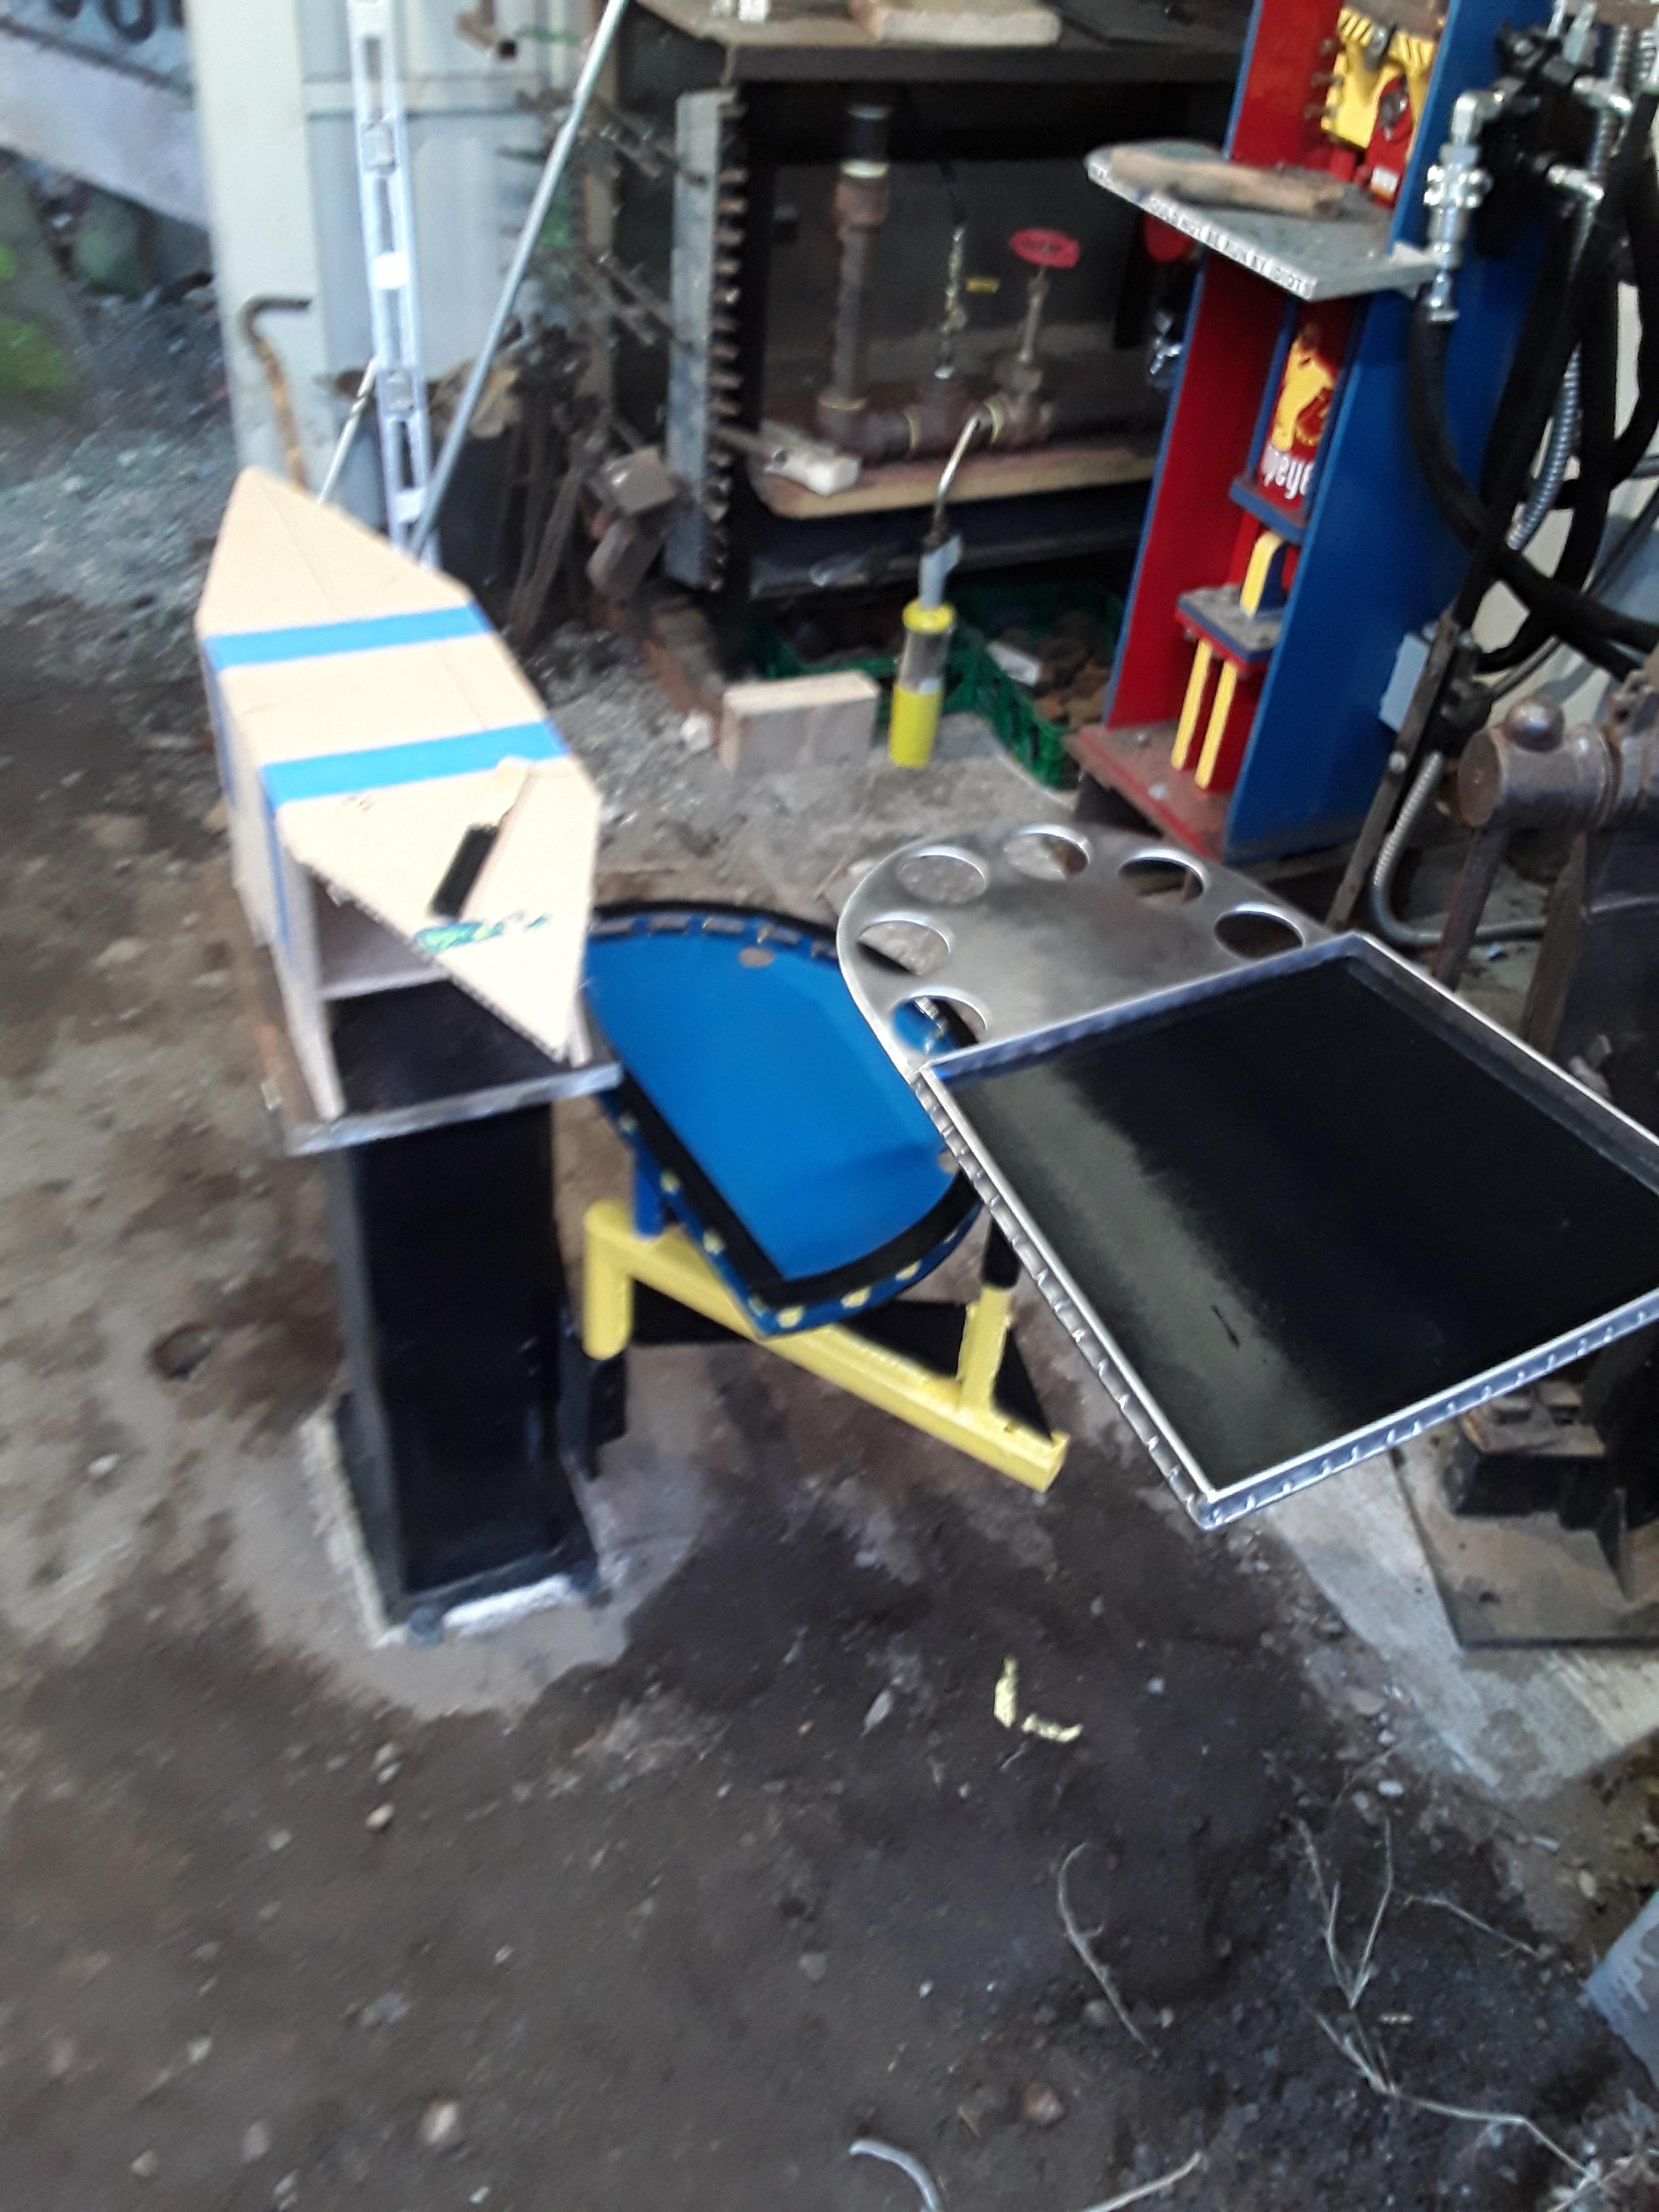
Had time to make them "kinda" rustproof. I kept the color theme to blend in with the press.


-
Been working on mine for a week or so. Just finished protection from rust.
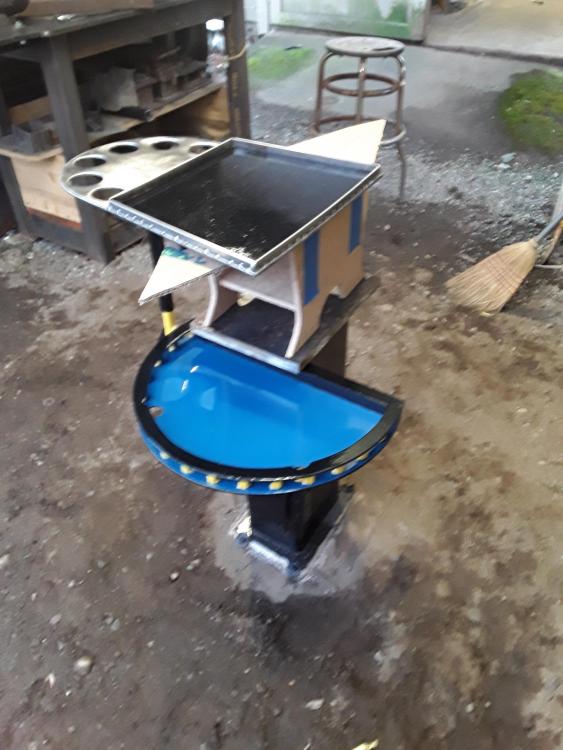
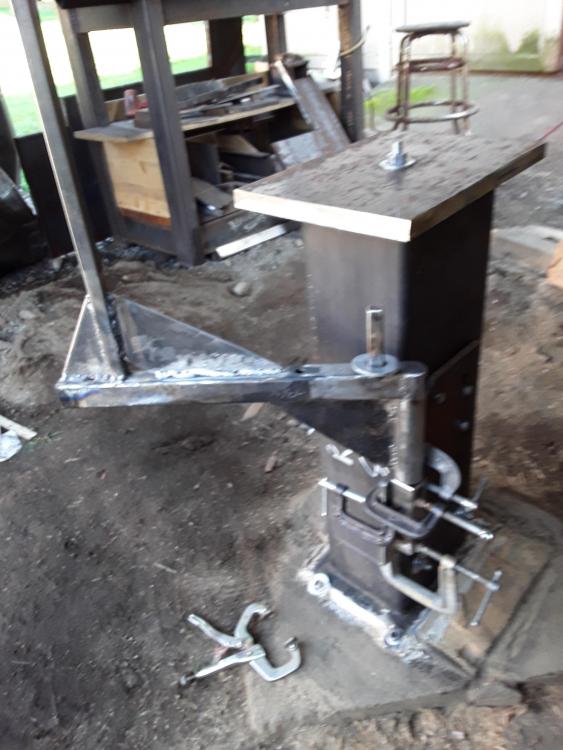
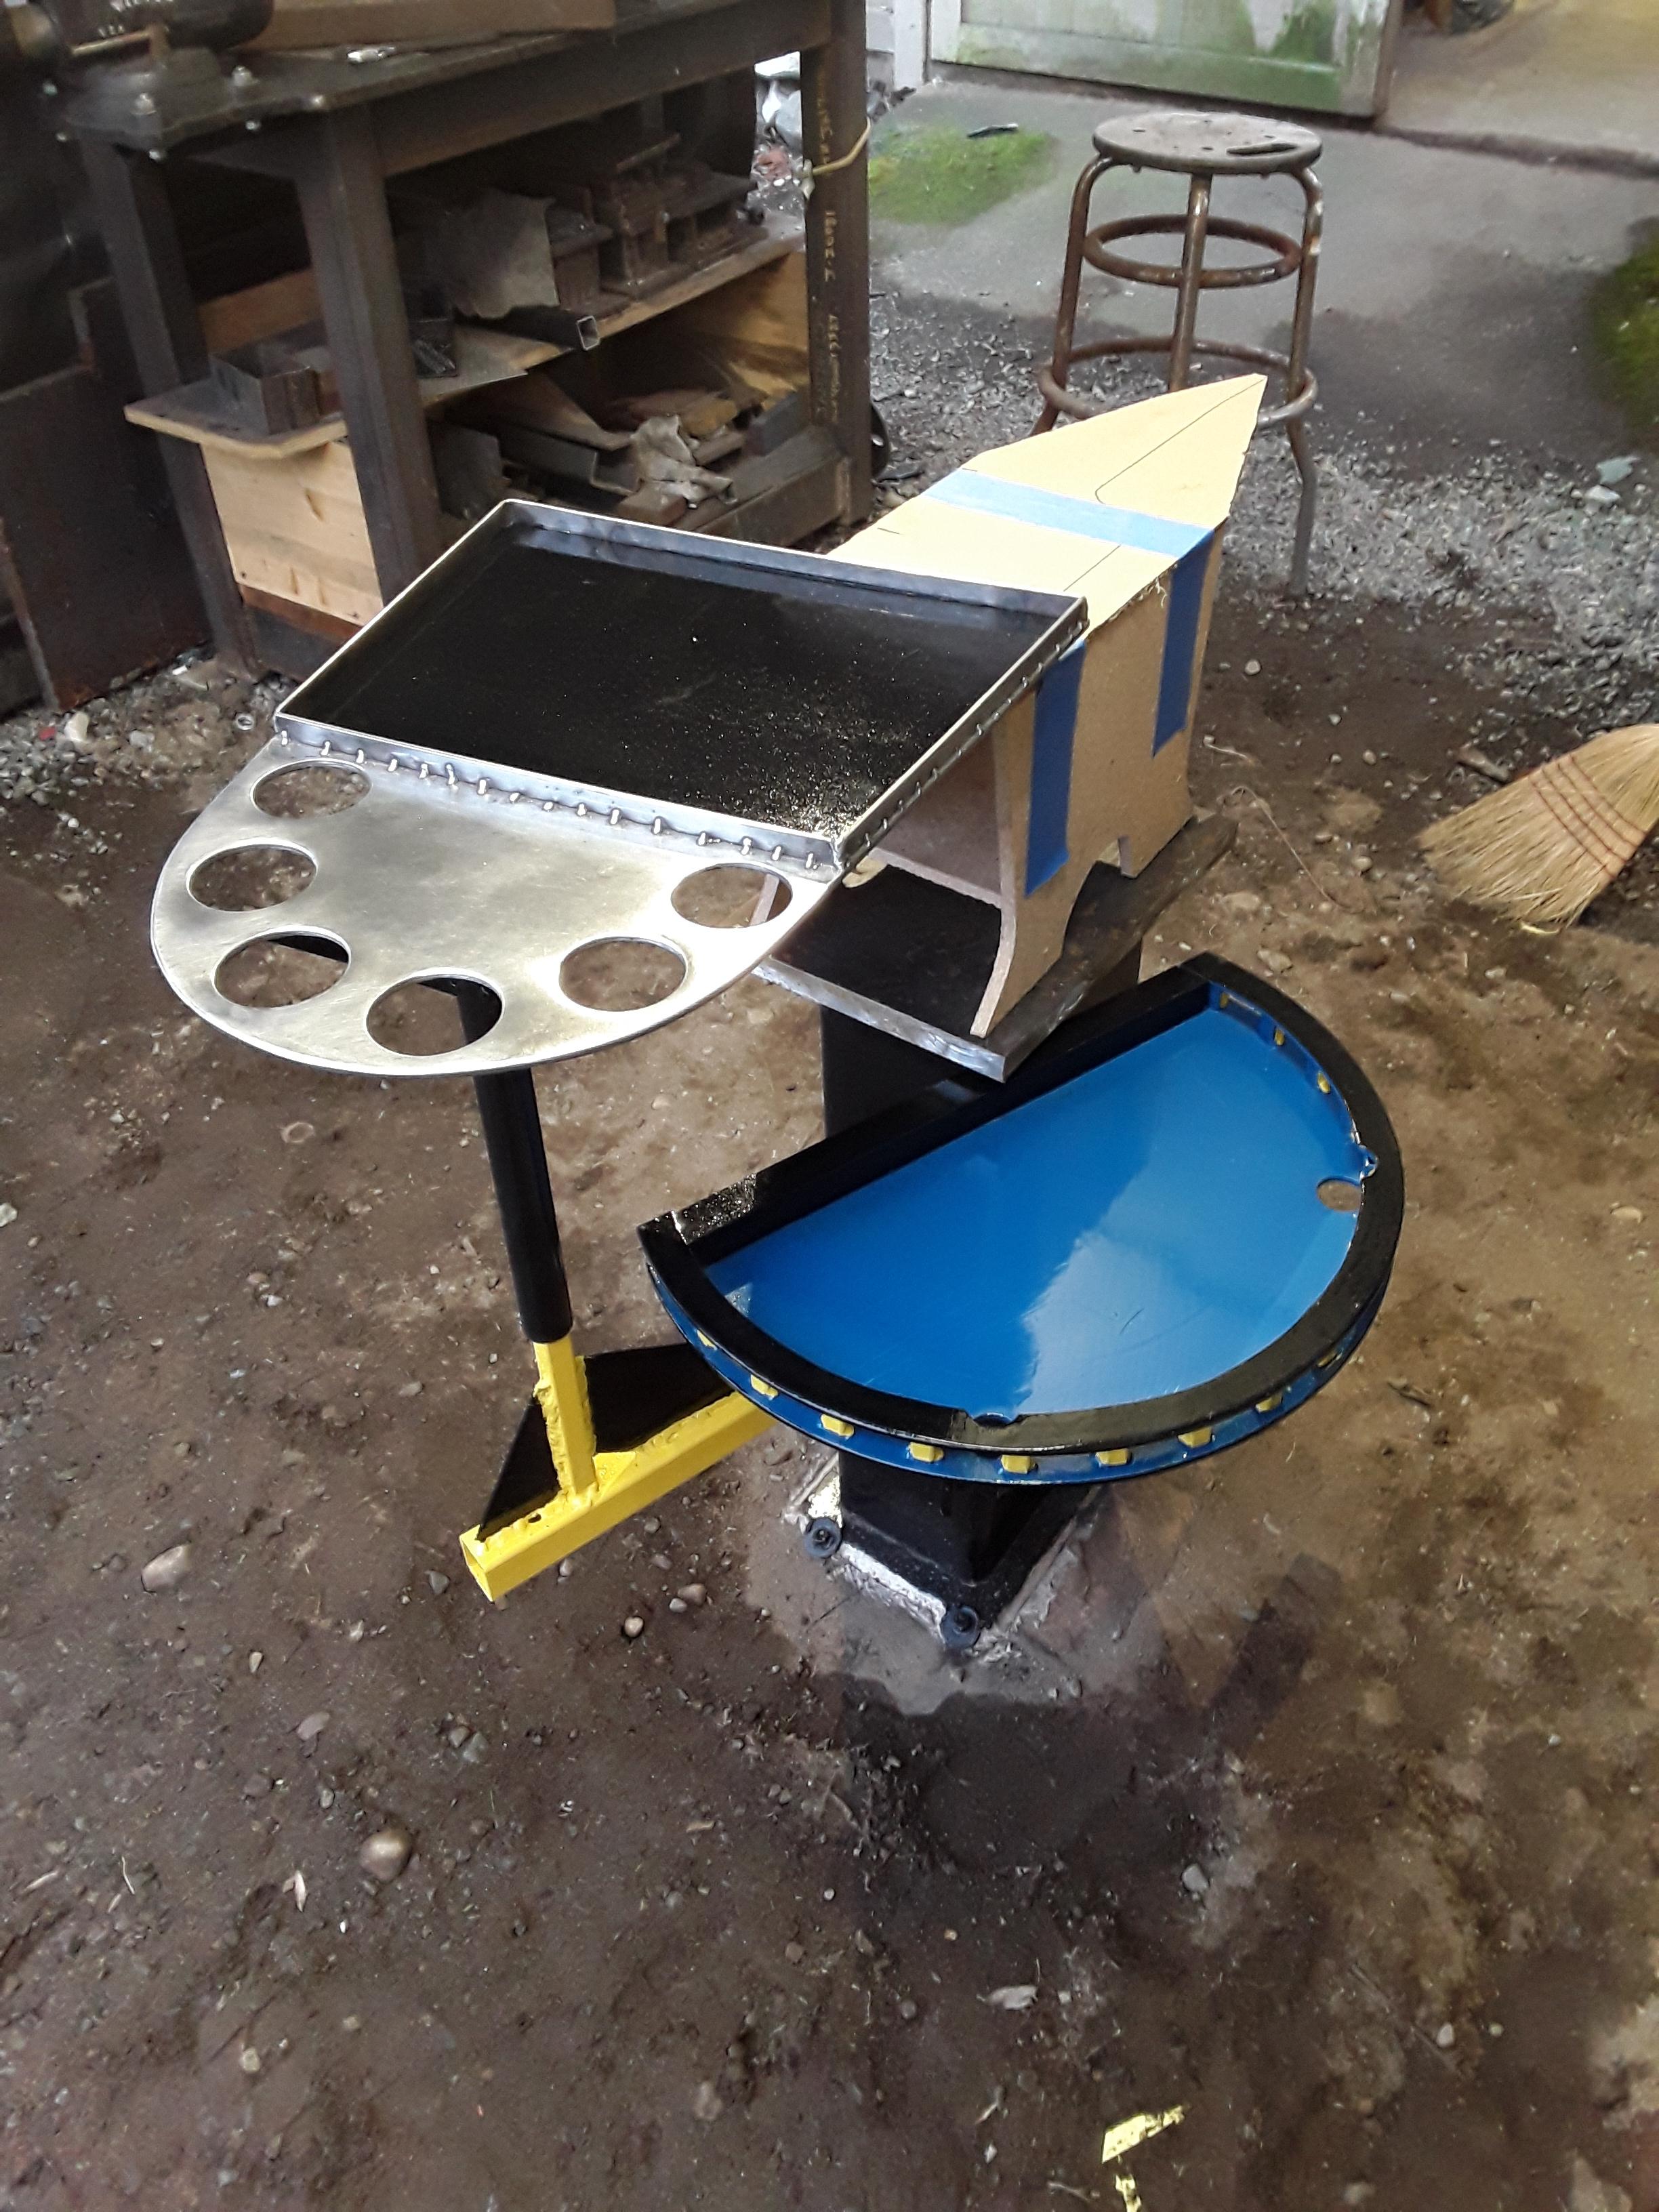
Waiting on my anvil to be delivered. Both top and bottom shelves swivel independently. I can also totally remove them if needed.

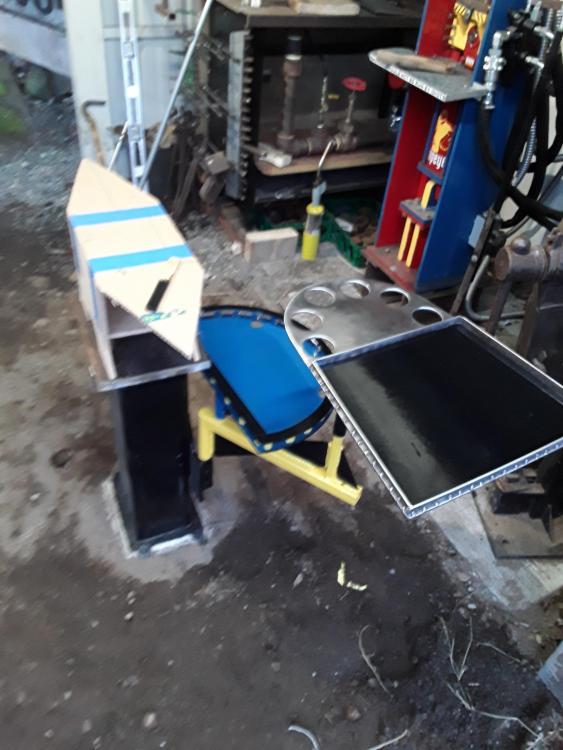
-
Yesterday I fabricated the top shelf. Wanted it to hold a few hammers and a butcher's brush. I like that both the shelves can be turned out of the way, or I just remove 5ge shelves completely.
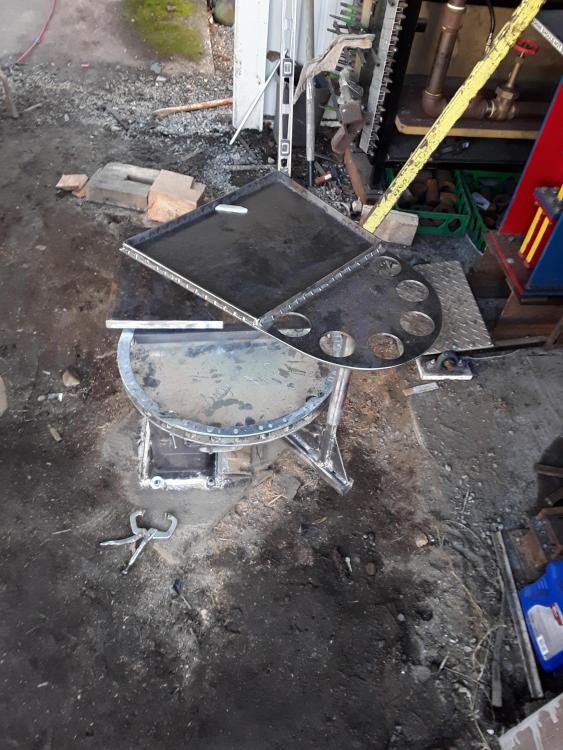


-
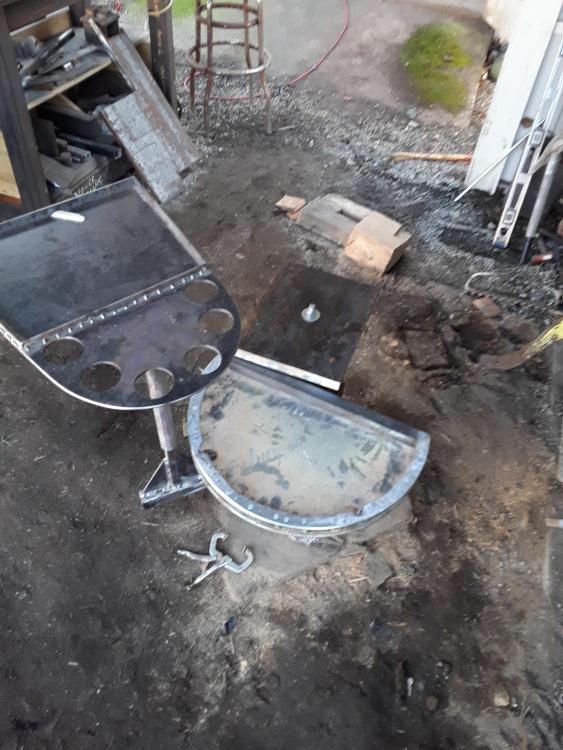
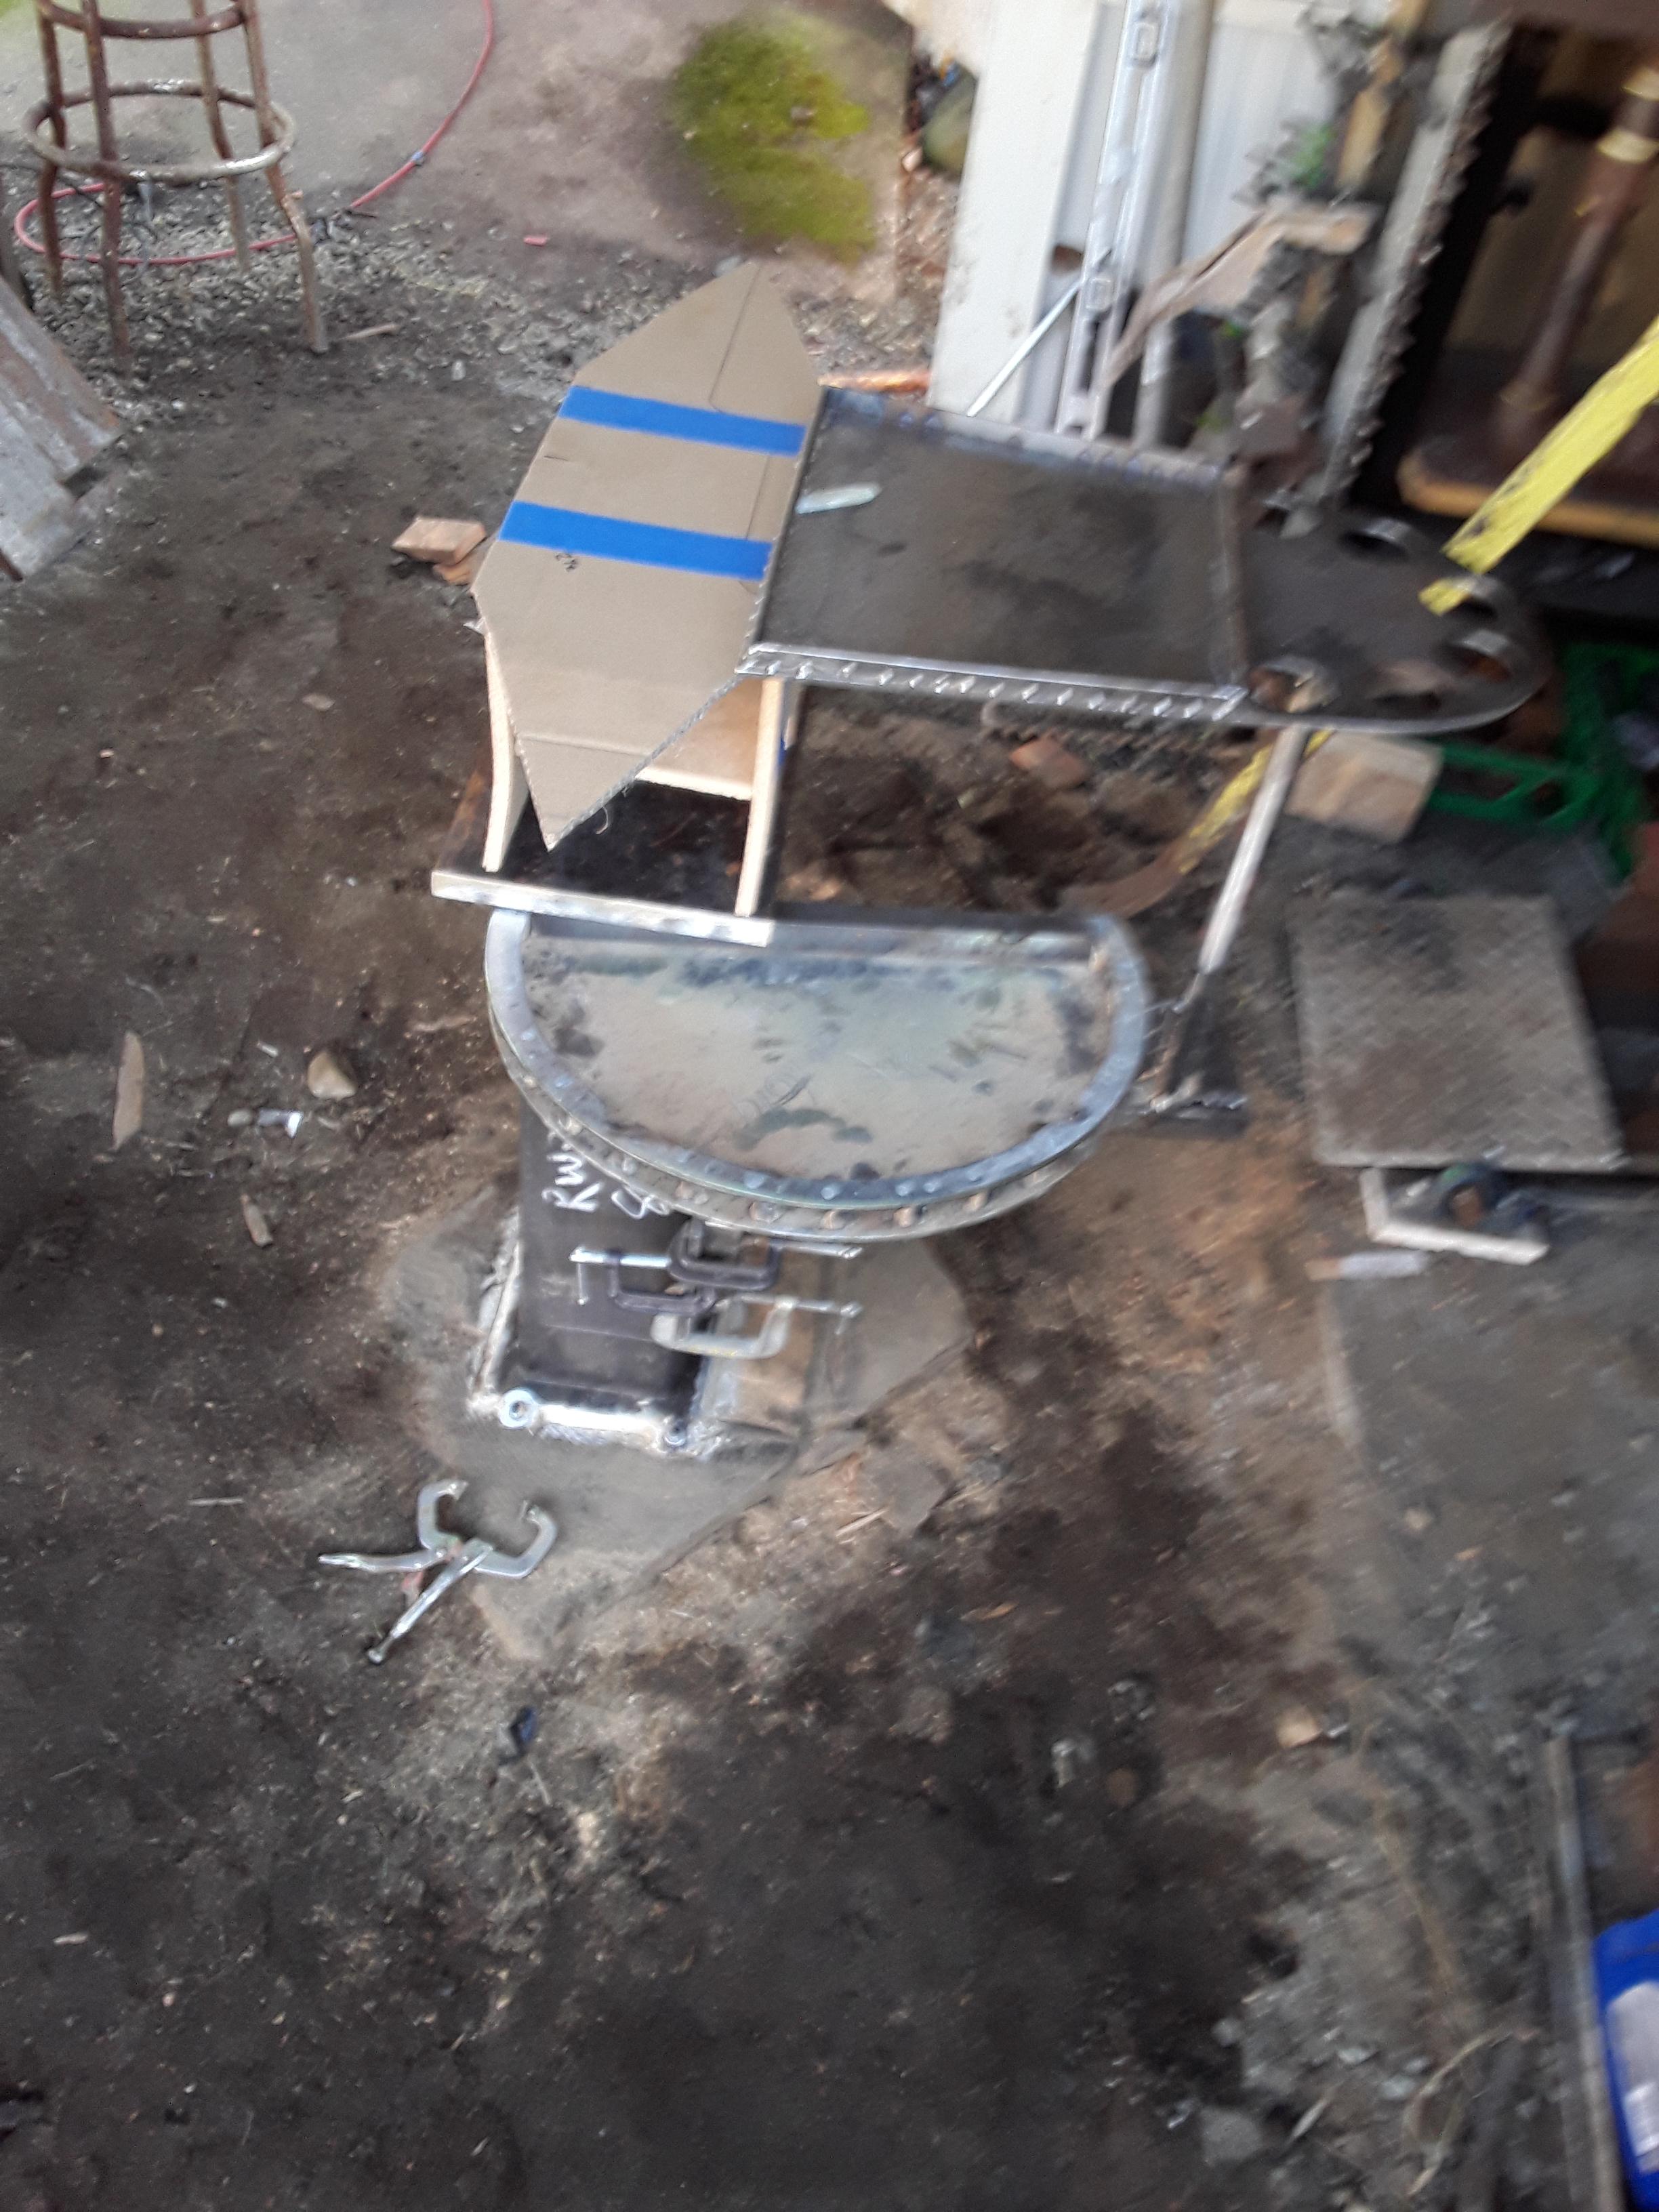
Today I had time to get the bottom shelf fabricated.
-
So today I fabricated a swivel arm to hold 2 shelves. One for below the anvil, and a self for just above the face of the anvil.

-
Yes, Italy.
I wanted to down size from my #300 PW. I fell in love with the Italian design Piggy. Ordered from a reputable web site.
Shipping and customs was a large chunk of $. I made enough from the sale of the PW to pay for the #198 Piggy.
You only live once...who is to say you cant have nice things?
The former PW was mounted in almost the same fashion. It was very very solid. This mount should be the same.
-
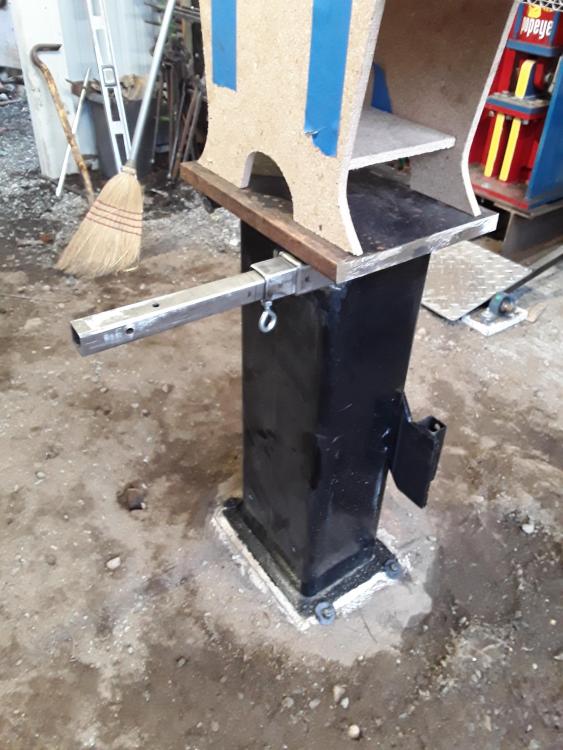
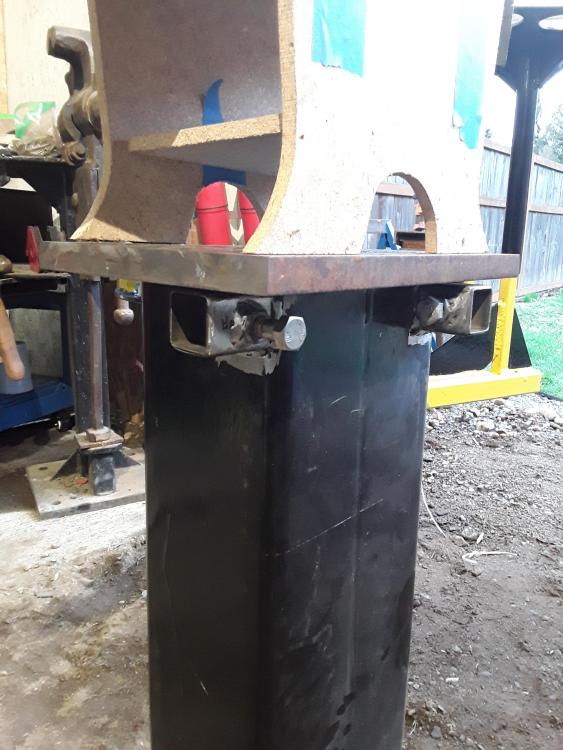
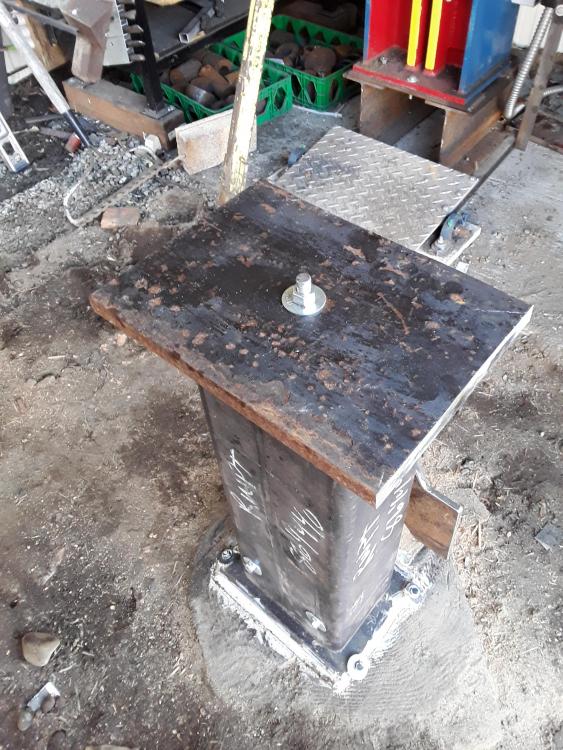
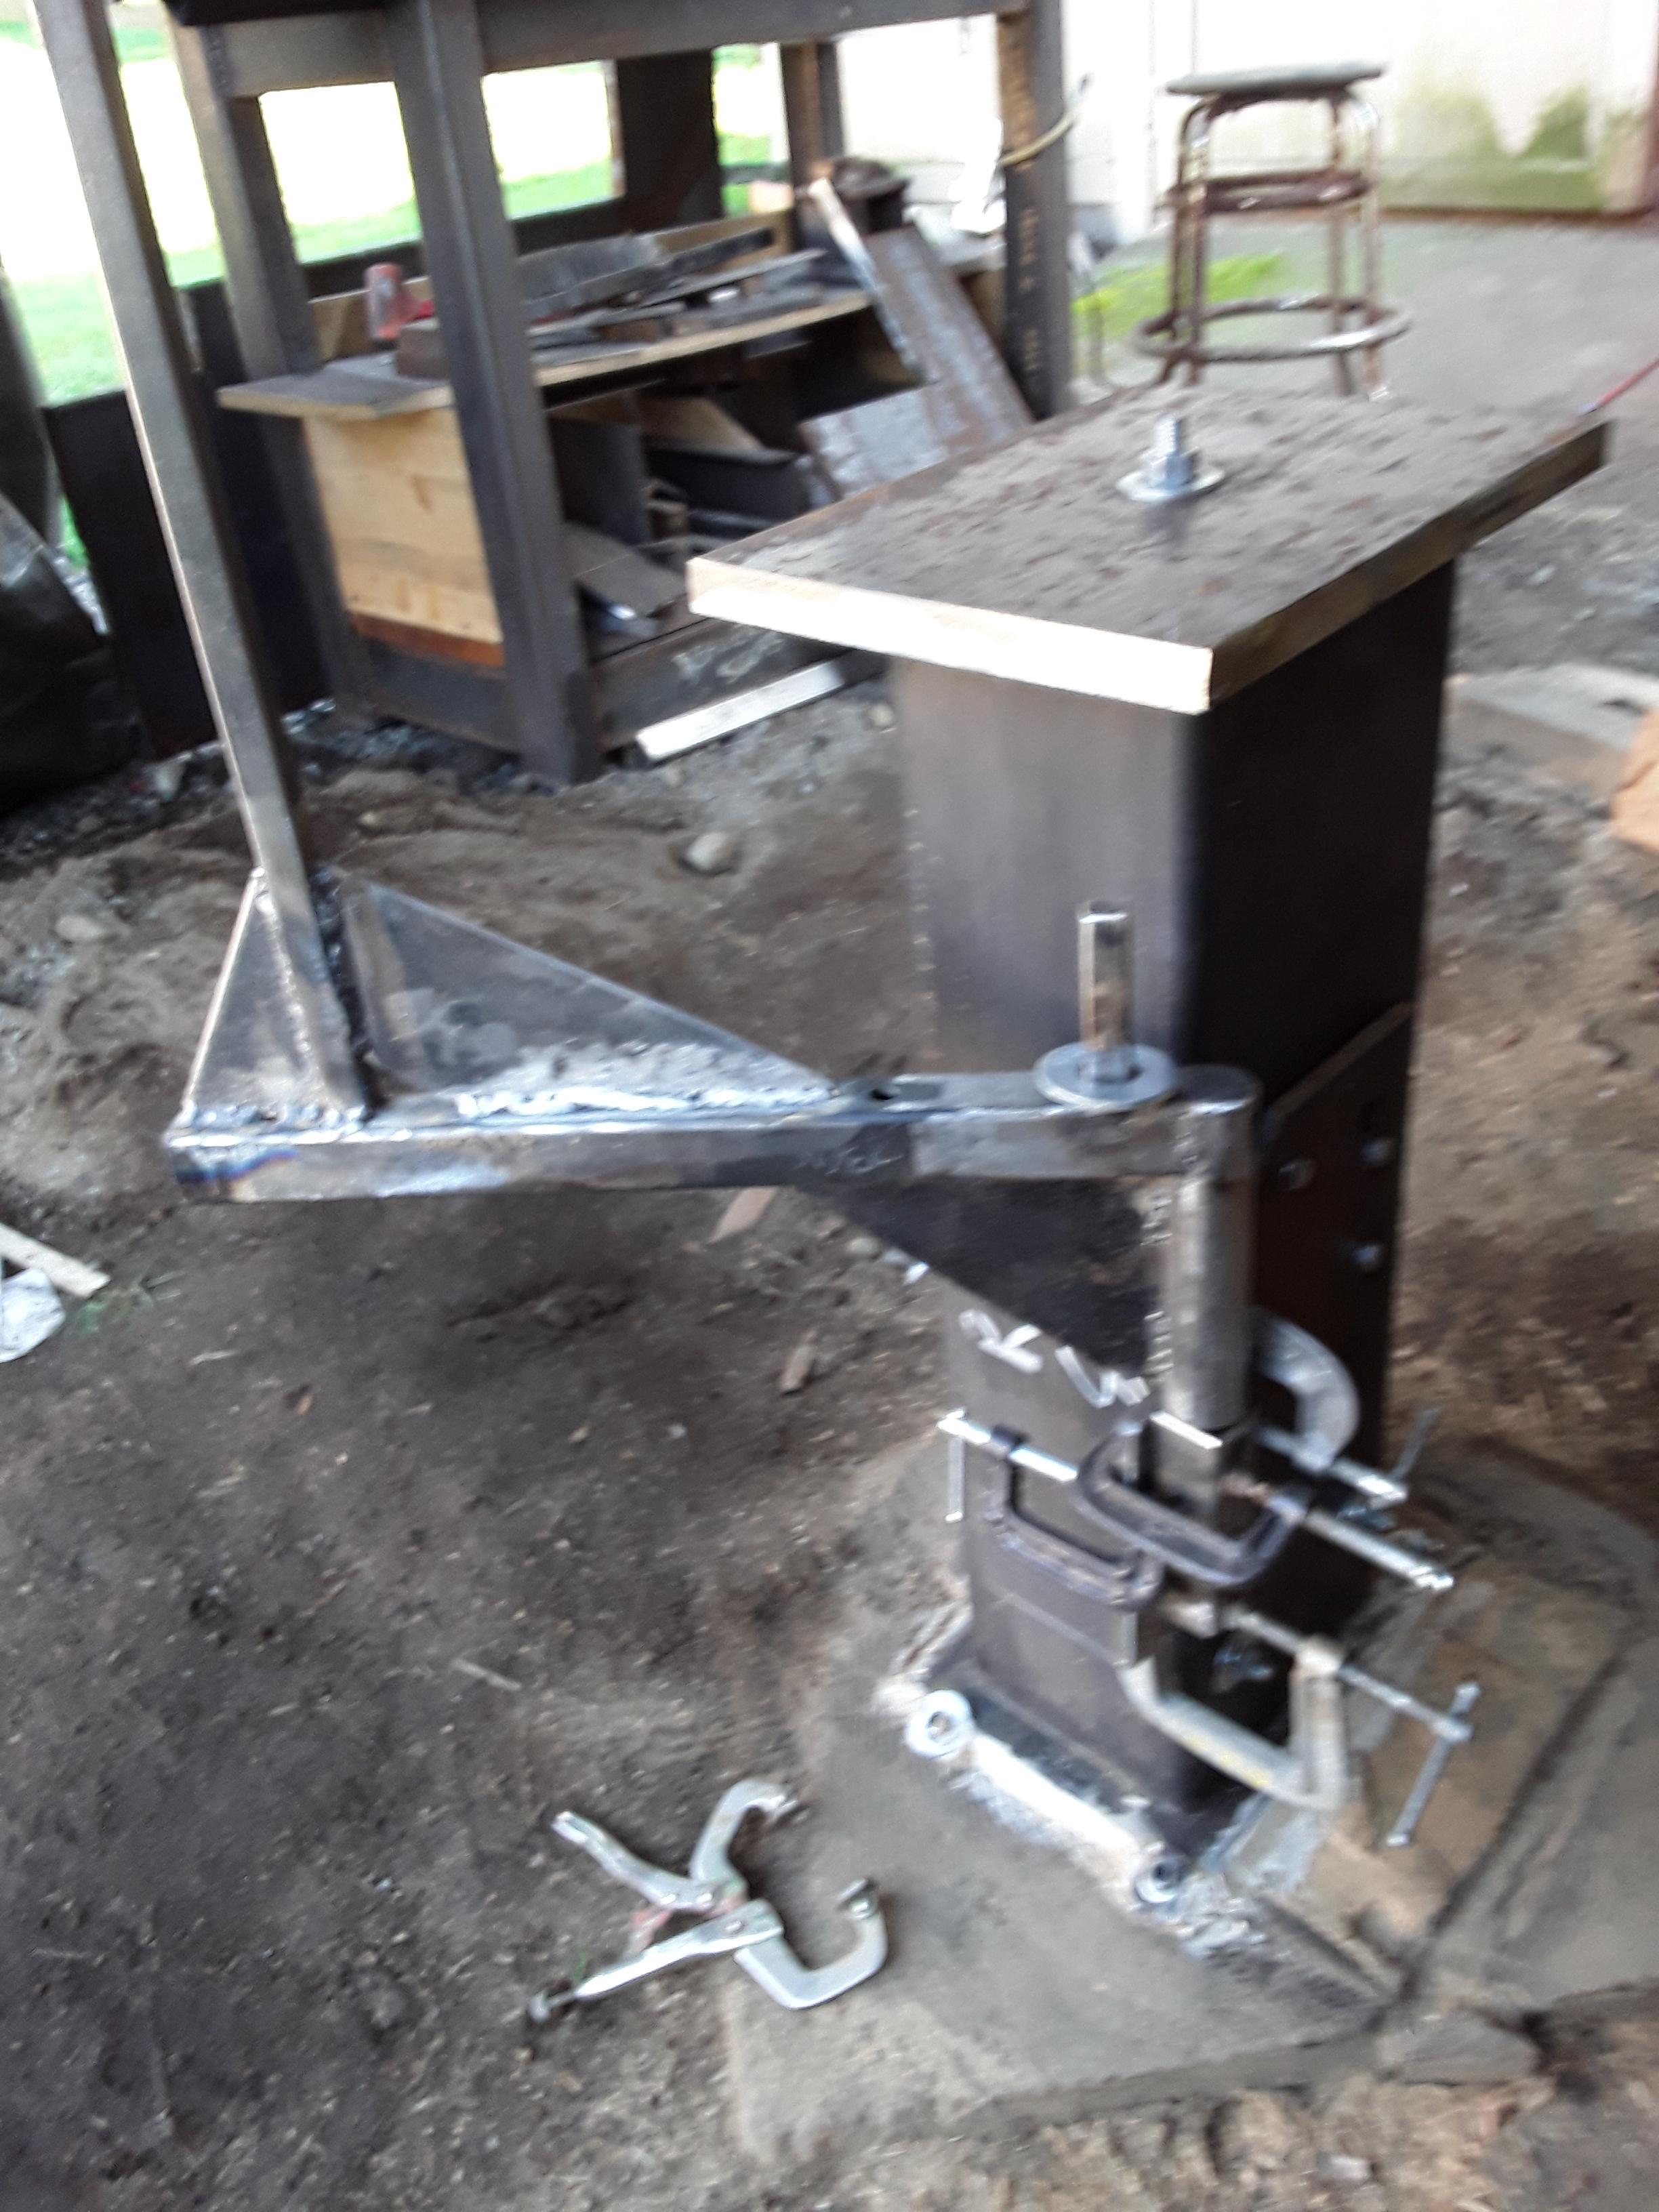
Topped all of that off with a 8 X 12 X 3/4" base plate.
This is solid.
More to come......thinking about a swiveling shelf???
-
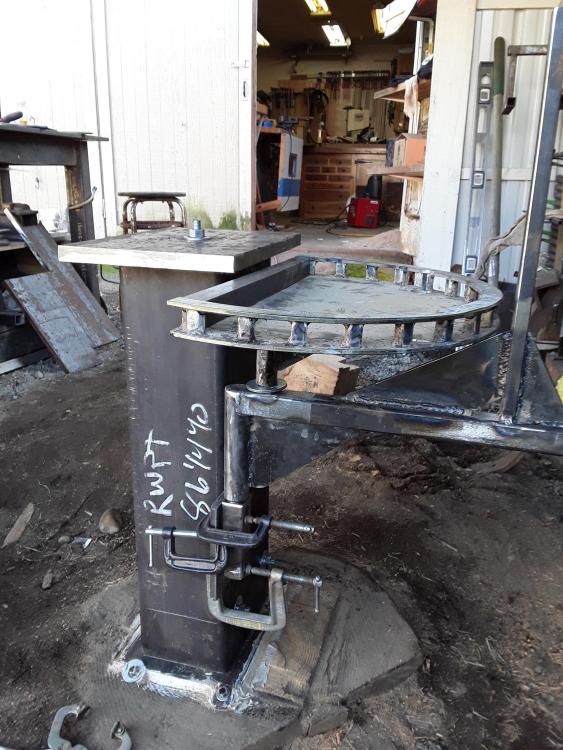
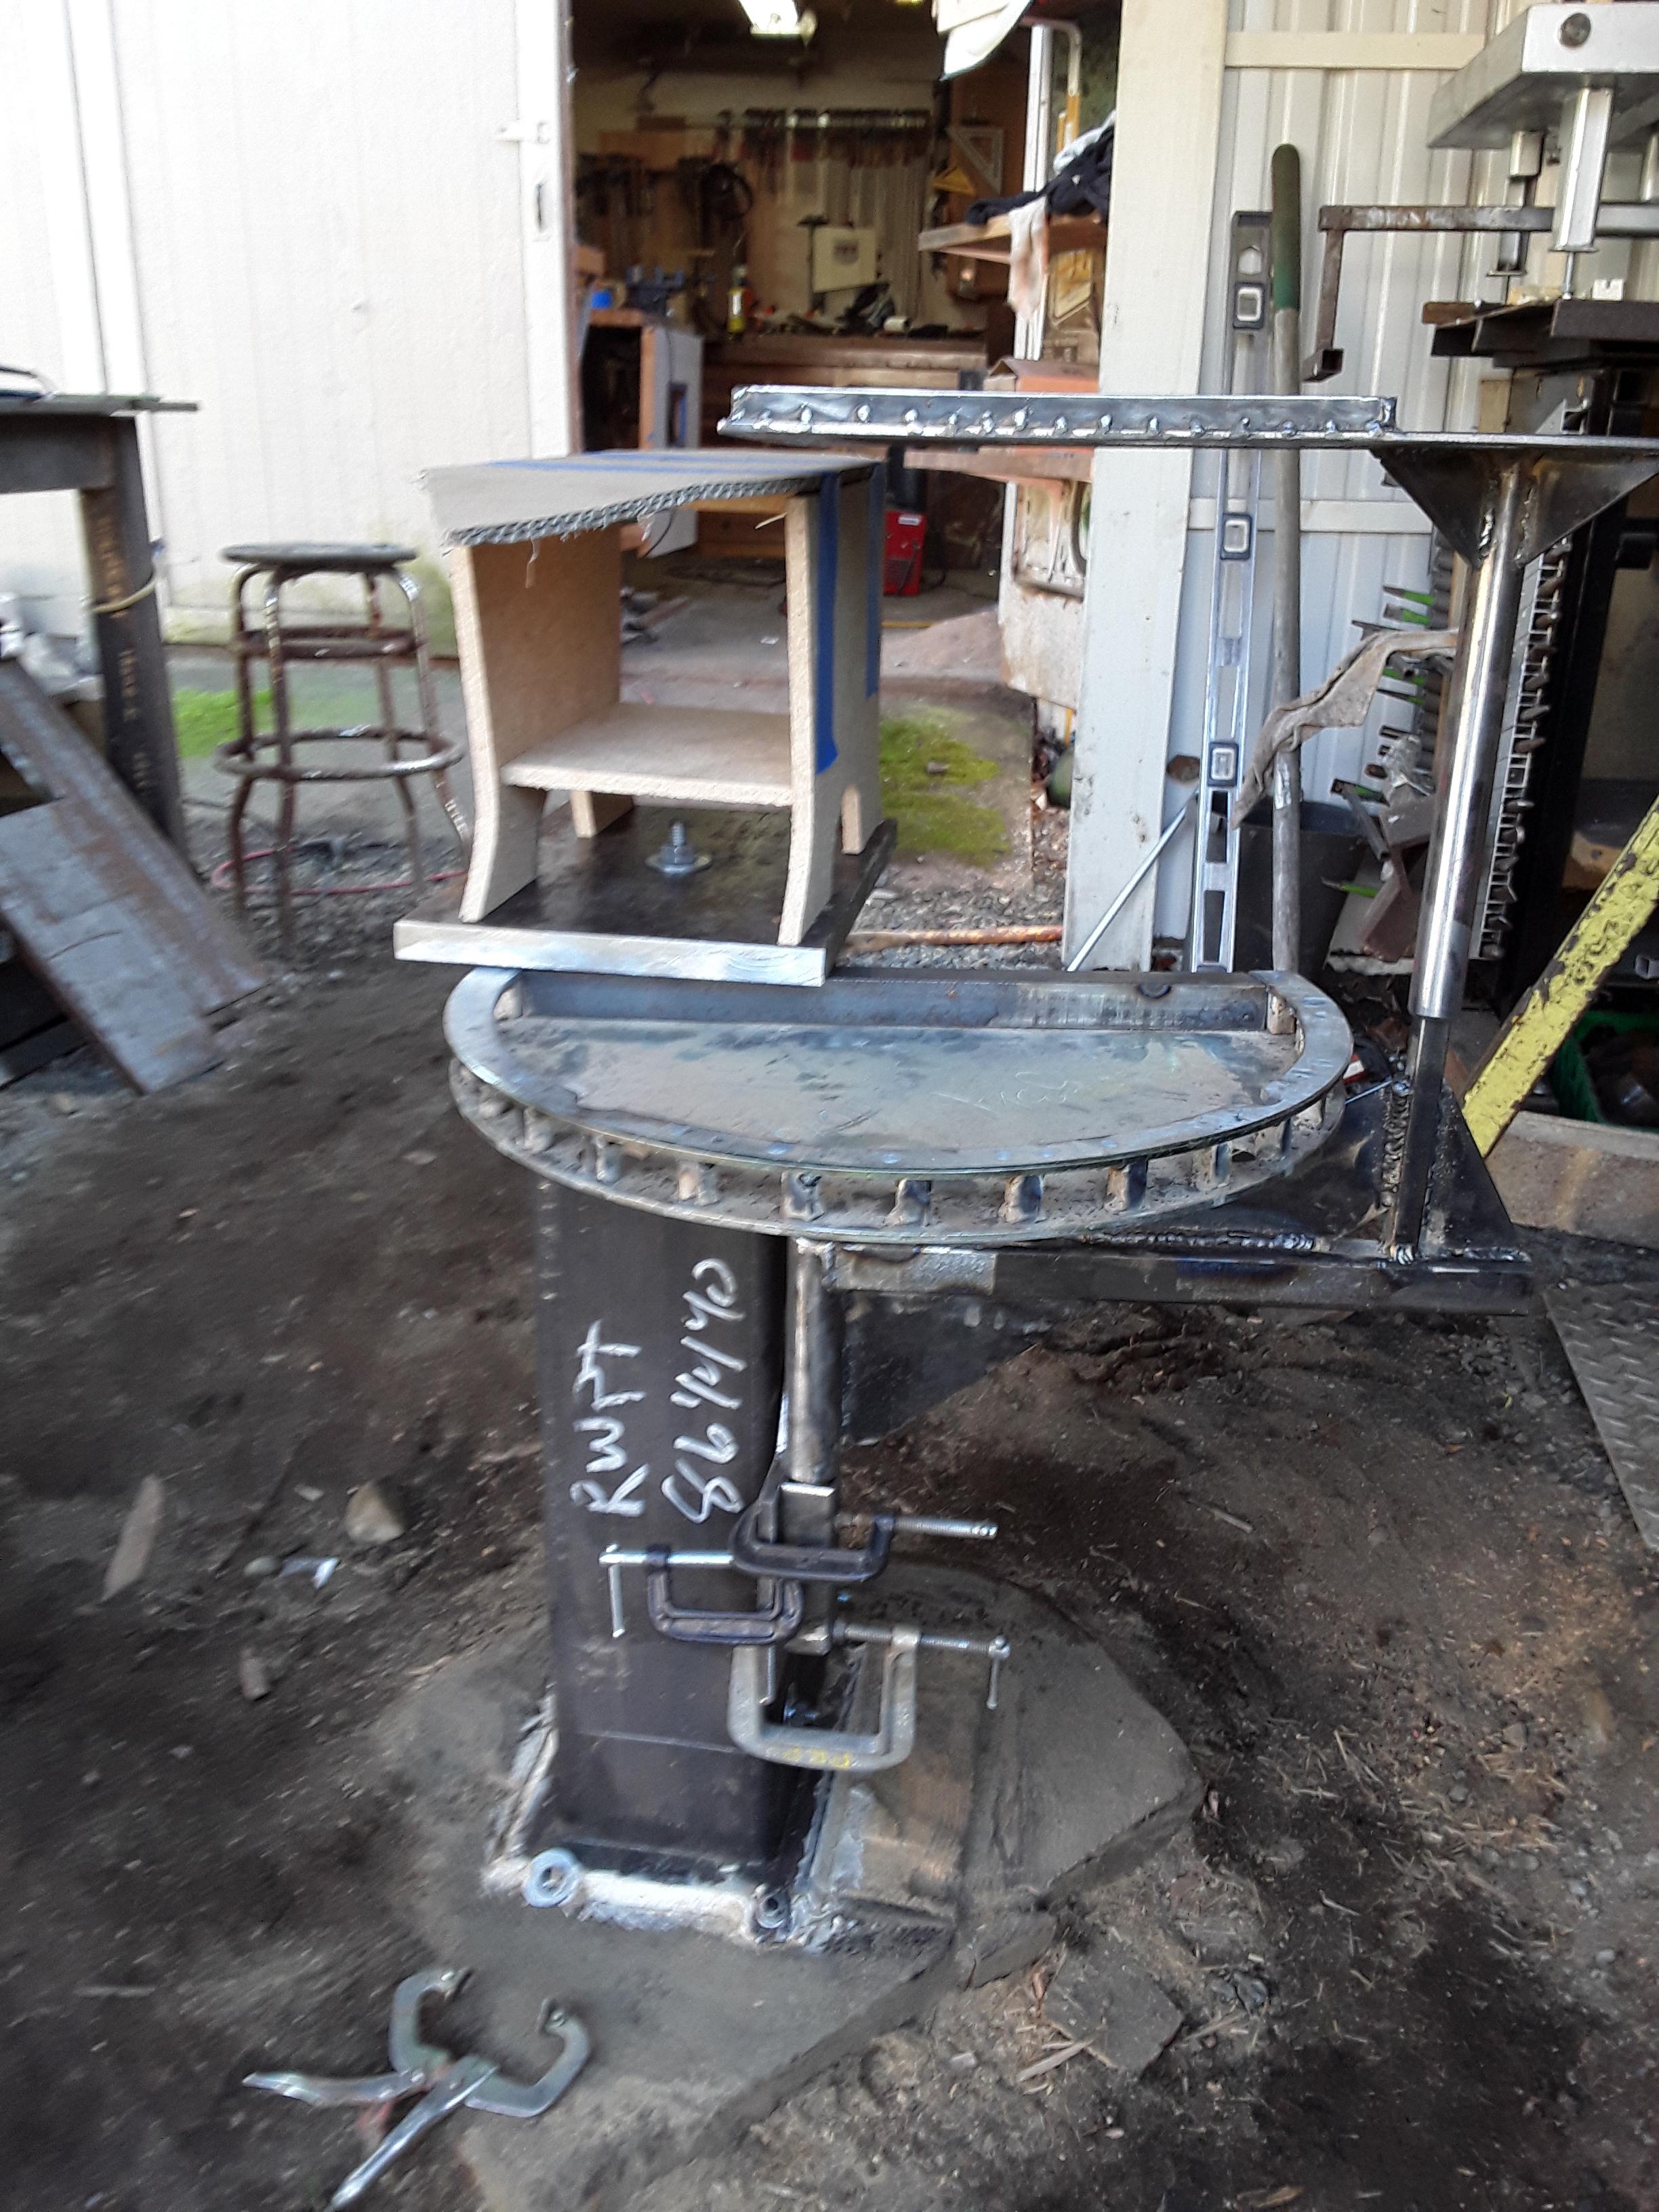
I am a firm believer in mass under your hammer should be as solid as possible.
So this is were I started for the mount of my Italian Piggy. It is in transit from Italy, should be here in about 2 weeks.
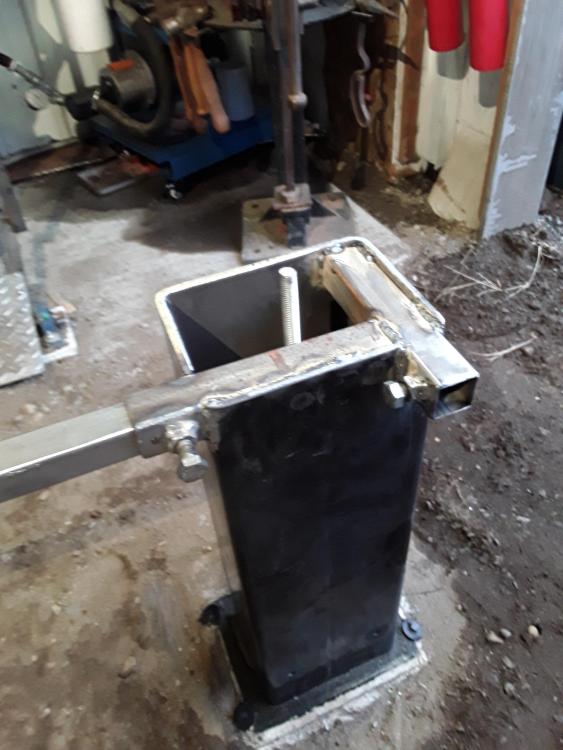
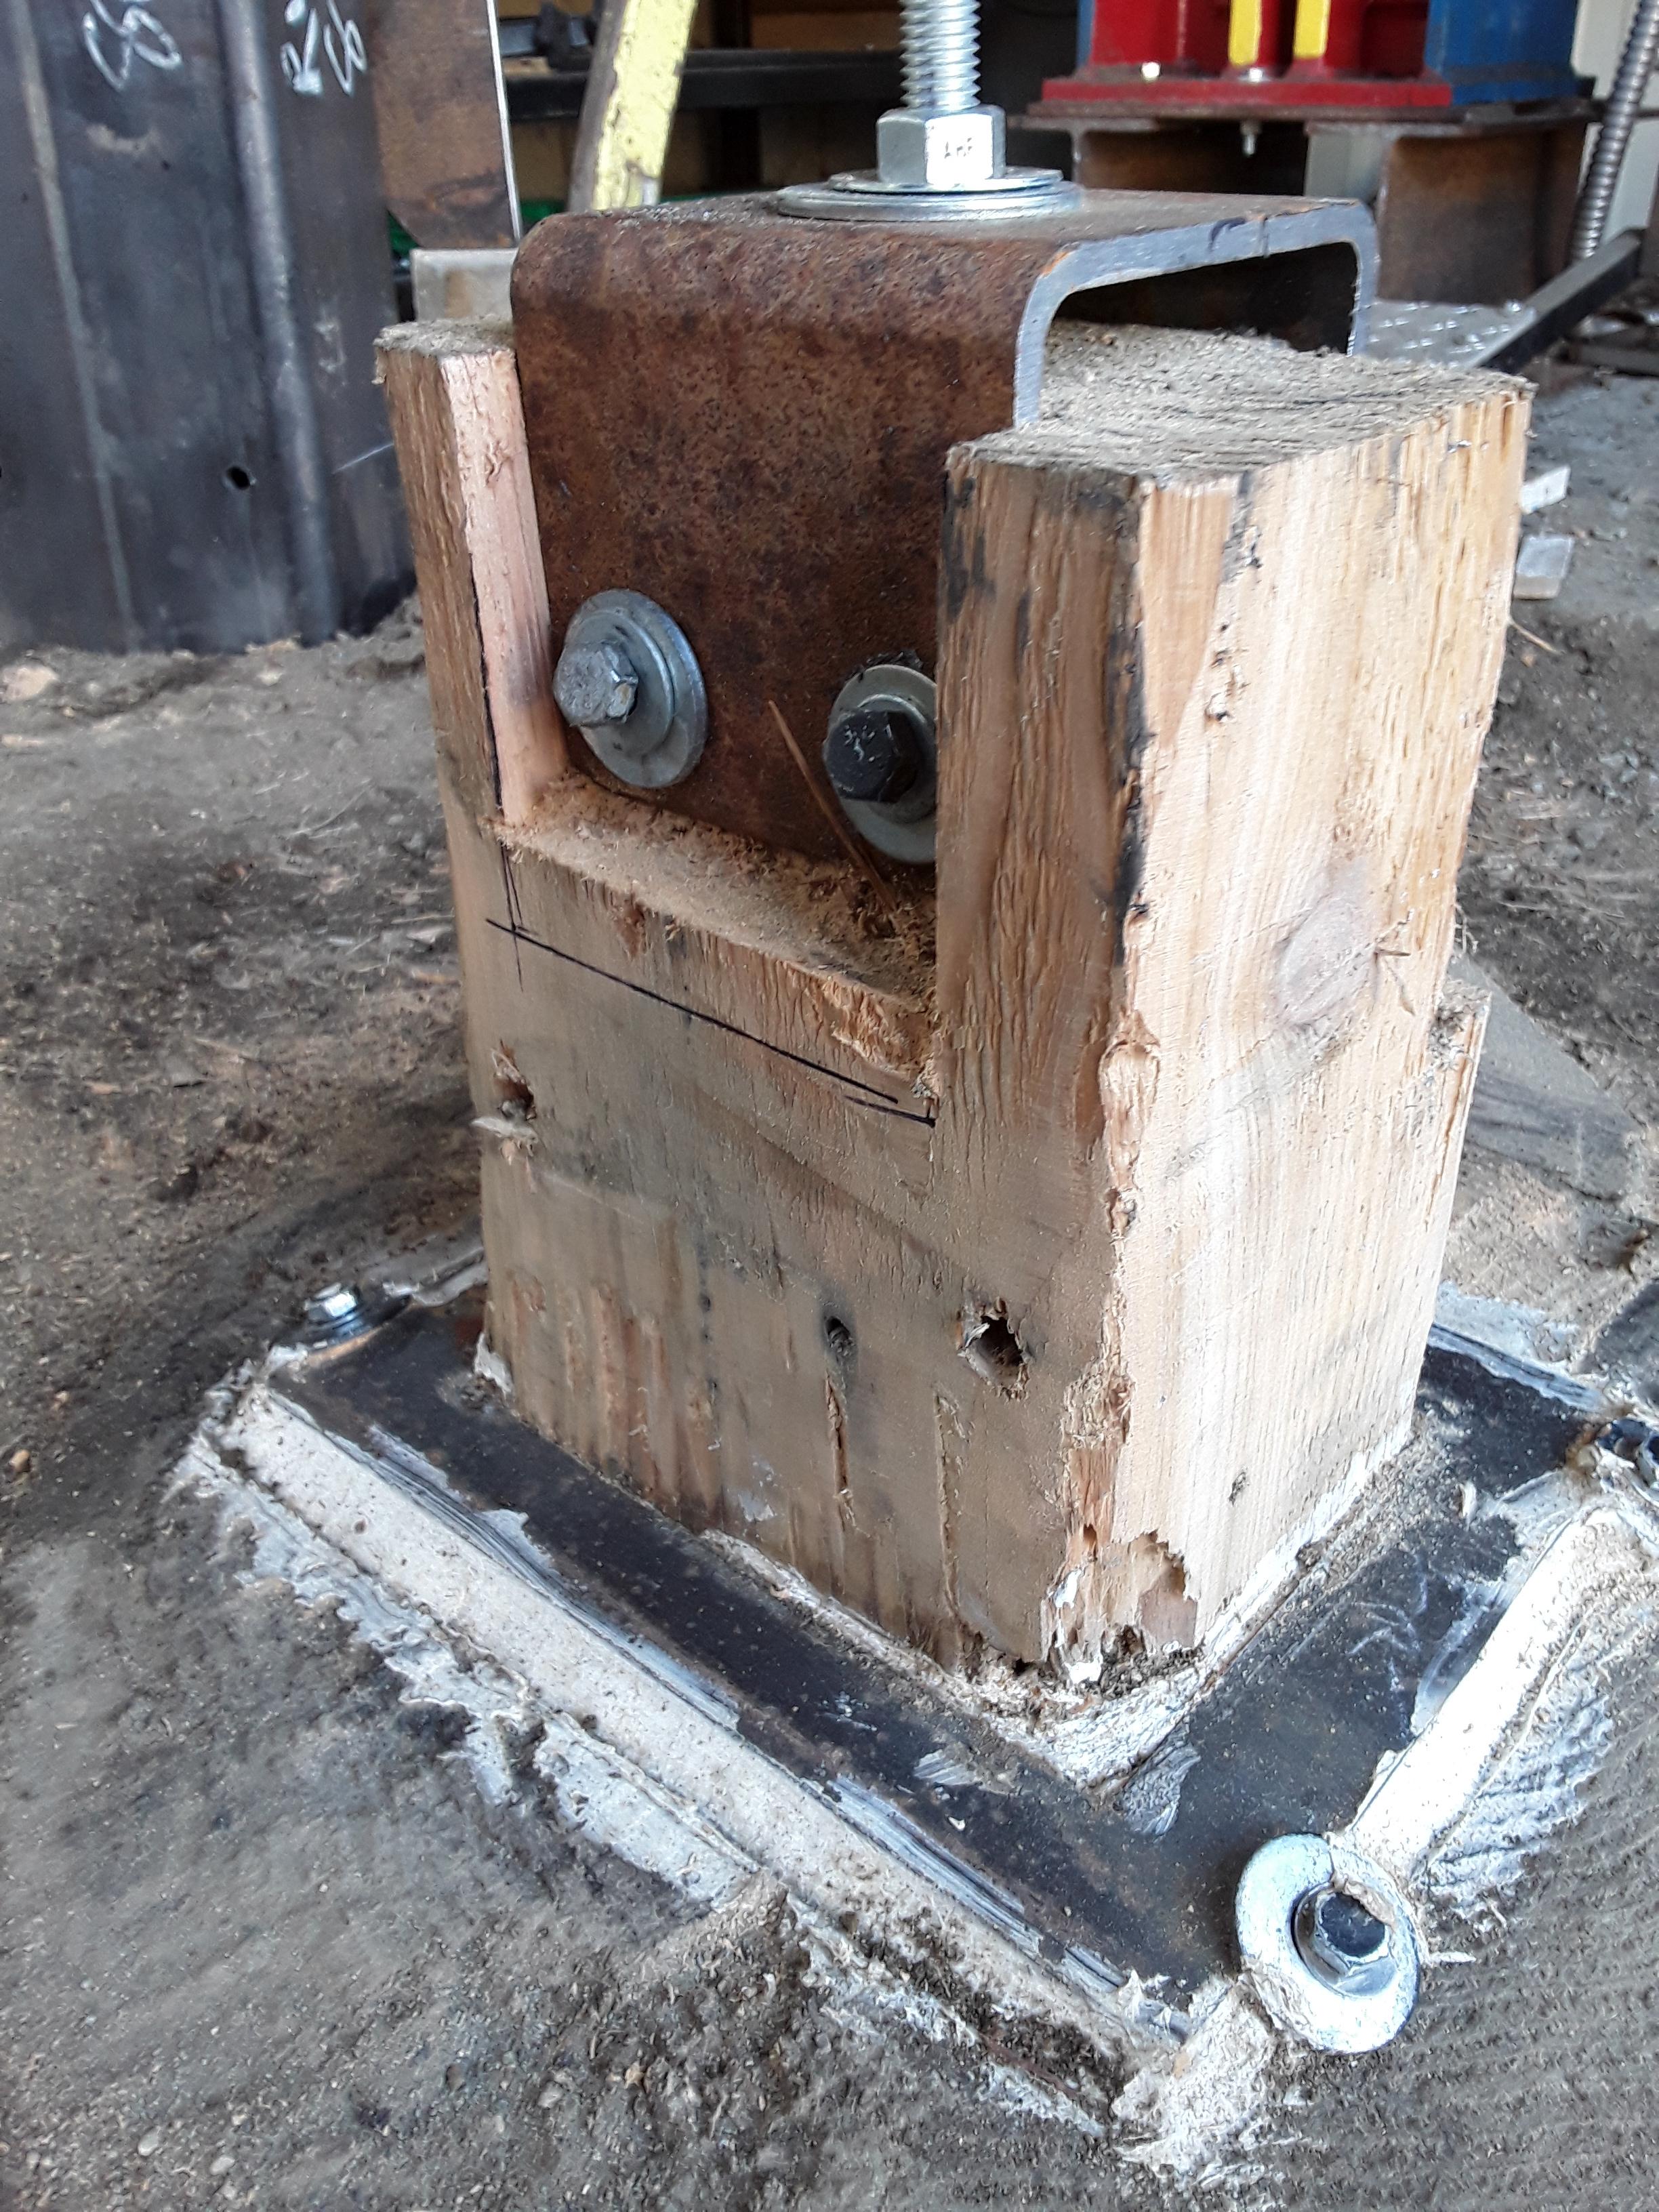
The cedar log is buried 3' in the ground. It has a tendon cut on the top to accept a 6 X 8 X 1/4" rectangle steel tube.
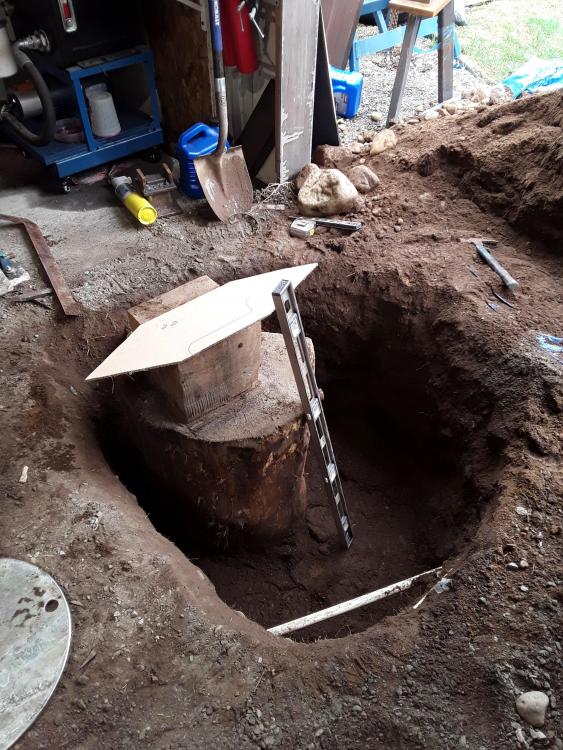
I scratched my head for a few days on how I wanted to keep the stand column in place and firmly attached to the stump tendon.
I first made a square washer out of 1/4" plate to fit around the tendon. This will prevent the 1/4" thick steel column from digging into the top 9f the stump.
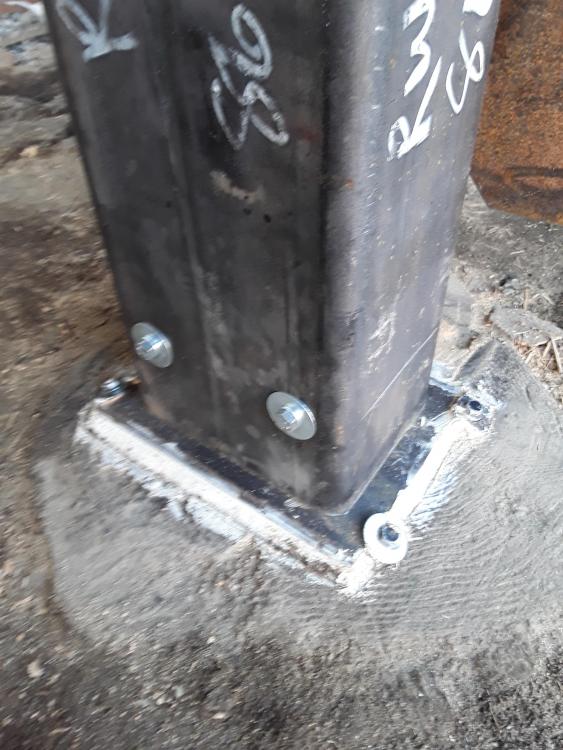
I lag bolted the base of the column to the stump tendon as seen in the previous picture. That will keep the column from tipping from side to side... but I needed to keep the steel column to stay firmly on top of the steel plate washer.
I mounted 3/4 of a square steel tube to the tendon. It is lagged into the tendon from the sides. I then bolted a length of 1/2" all thread to the bracket.


-
Nor have I ....but that is going to change.
Down sizing from a 300#PW, got a power hammer to move into the forge/hut... floor space is at a premium. Cant see that I will need 36" of 300# of PW getting in my way as I am headed to the tire hammer.
-
Thanks Irondragon for k7cking me in the butt. I paged down a bit further and found out they are cast steel. I think I am going to order a 172lb German style from Austria.
-
Thanks Irondragon,
The link you posted was for stainless steel anvils. I am looking for info on anvils manufactured by Sichelschmidt Schlasse. (Aka. S&S).
Abit of confusion on my part.
I have read all the info I found on Google by searching the name. Nothing on how they are constructed, or what materials were used.
-
Looking to purchase an S&S 172 lbs German style anvil. Cant find any info on the construction used in the 1930' era.
Anyone have any insight?
-
Chris, I to have built many pieces of high end furniture. Was leaning toward the Art Deco theme.
ThomasPowers, neat idea.....or make the lifting eye the shape of a bell??
Bubba. TY, I am thinking I need small more compact than my last build.
Been thinking I may need a couple of gussets on the back side. 2 each, one on each side of the opening, running top to bottom. Would help keeping the 1" plate straight over time. Not sure it would be needed at only 16 ton.
-
Had so much fun building my last press, thought I would have another crack at it.
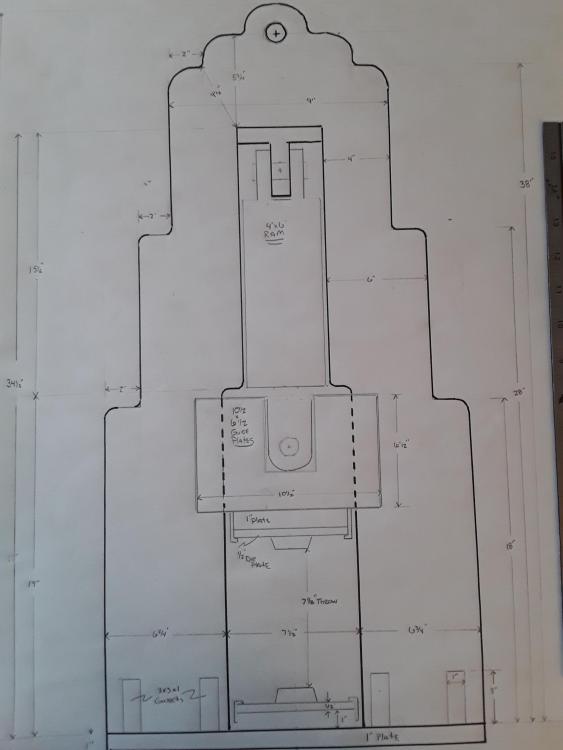
The pic below is a rough draft! All the details can be worked out as long as I have a solid foundation.
The foundation (frame) is a piece of 1" plate cut to the drawings dimensions
Shooting for a 16 ton press. 4" bore with a 6" stroke. 5ph motor to drive a 11gpm two stage pump. That will provide " almost" 1" per second on the second stage of the pump, according to Batson.
The press will sit on top a custom built I-beam to strengthen the bottom. (Not in drawing, ran out of paper space).
I know a few of you press guys out there will be able to say ," yes this is possible ", or " No, you have lost your mind"
All input appreciated
Peppie
-
Update....
I designed the press with an 8" throw, I built the press with 10" between the dies, so as to have room for a punch system in the future.
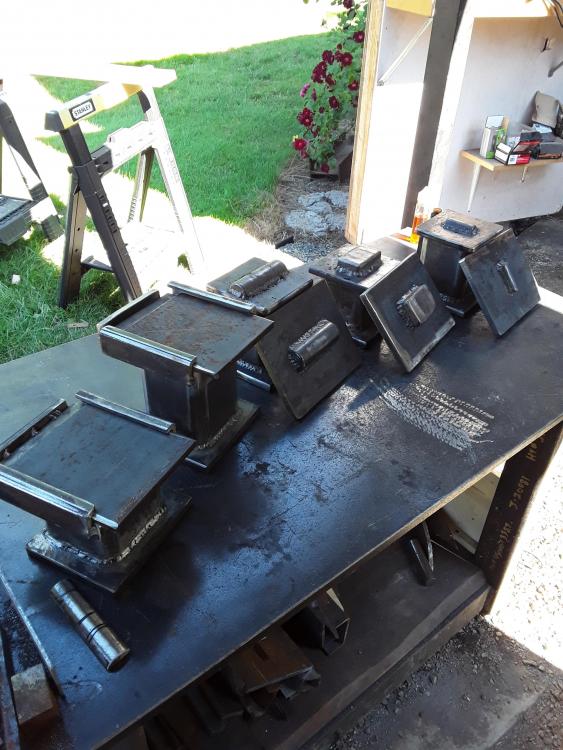
Many press owners have stated the it is better to not extend the shaft to full length. So I started building my dies on a platform to keep approximately 1/2 of the shaft buried in the cylinder. After building 6 different platforms, I realized that I am a true idiot! It's a wonder I designed and built this press.
I have just finished building a couple of platforms to accept, and quick change the dies. This method will save me 28" of welding bead, not to mention the added material and time.
You can research until the cows come home. But NOTHING compares to experience. After using my press for the past six weeks or so, I have realized there are going to be some major changes on the next build!
-
Your on the right track. You need to s rap the frame it is in, less that 1 1/4" plate. I vote for an "H" frame style. Keep it simple. Less moving parts, the better.
Nice score. You couldn't buy the fluid for your future press for the price you payed.
-
I have alot of 4140,4150,52100, all are in the round form. I guess I can press them square, or rectangle, then send them off to my machinist.
-
Sewedfiddle, my creativity is not an issue. The thing on my shoulders, says do your research. For me that means look what others have done! That helps me know what not to do for my ability. It also helps me understand what will work for me , in my shop and my tooling.
My understanding the function of this site is to help other be more informed, to share ideas, techniques,and knowledge to those seeking help.
If you have nothing constructive to offer on the posters question, I suggest you just scroll on by and save the poster, and yourself some time.
TY John , Travis does have a nack for slick engineering, I will have a look.
ThomasPowers, I have thought about that, just seems that it would take up more space than I can afford to give up in my small shop. An attachment to the grinder will suit my needs and space better.
Peppie


Mounting my Pig
in Stands for Anvils, Swage Blocks, etc
Posted
JHCC, that design has also been rolling around in my head. I was concerned that when I were to beat on my work that the anvil would shift. Didnt know if the #200 would stay put.
Anvil should be here in a few days. Dont want to drill the belly....Dont want to cover the feet... 9h what a whirl what a whirl.. lol