Ohio
-
Posts
185 -
Joined
-
Last visited
Content Type
Profiles
Forums
Articles
Gallery
Downloads
Events
Everything posted by Ohio
-

The future and availability of forge fuels
Ohio replied to Glenn's topic in Solid Fuels: Coal, Coke, Charcoal, Wood, etc
That mesquite stuff is a dang fire hazard, more than usual. I bought some to give my crappy blacksmithing projects the lovely flavor of the Southwest and it fireflea-ed all over the place. I made some biochar. I won't tell you how I inoculated it because some things should be Left Unsaid. I used a little electric chipper shredder I had for some other experiment and it worked really well except for the dust. I was trying it to see if I could get the charcoal even smaller for another product idea, which didn't work, but I went ahead and used the stuff I had for the biochar. I ended up adding it to the acreage around the apiary when I was fertilizing with composted manure. What I learned was that it's way easier to chunk up the feedstock before tossing it in the retort. I actually drew up a production line that would screen out the blacksmithing bits from the biochar bits and the really small bits used for other products. It's fun to think about that kind of stuff but oy vey, there's no way around how much work it would be on such a small scale. Irondragon is so right---it's the chainsawing and hauling that is brutal. Loading the retort isn't so bad but emptying is torturous. -
The future and availability of forge fuels
Ohio replied to Glenn's topic in Solid Fuels: Coal, Coke, Charcoal, Wood, etc
Sorry, I missed this earlier. That you are complaining about not being able to get the product you want without doing extra stuff...well, there's profit in pain. That's what I was thinking about: selling locally-sourced sustainable charcoal in the right size for blacksmithing to whoever wants to buy it. I did a bit of research on what it would cost to start up as well as to make a variety of charcoal products other than for cooking or smoking with it. There are several other things I do/can/could manufacture, I'm in a good part of the country to sell specialty products (and already do with our apiary), and I have experience with that kind of stuff. But honestly, I don't think there's enough money to offset the un-funness of making charcoal. Maybe I'll change my mind when I start Burnie the retort back up. I like the pyrolysis part---that's neato---but I don't like the mess enough to do it for money. -
The future and availability of forge fuels
Ohio replied to Glenn's topic in Solid Fuels: Coal, Coke, Charcoal, Wood, etc
Where do I get these minions of which you speak? Out here in the sticks, people who are interested in blacksmithing (they all wants to make knives and swords---which should be pronounced with the "w" just to annoy) all go propane. They try forging something and then quit. It's sad, actually. I try to be supportive by telling them, truthfully, that I am the worst smith in the history of fire. Doesn't seem to help, though. I understand why someone would look for fuel other than charcoal, I really do. And I understand why someone would want to order a truckful of charcoal rather than make it themselves. If I thought there was an actual business opportunity (and not just more backbreaking work) in making and selling charcoal, I'd consider it, but there isn't. -
The future and availability of forge fuels
Ohio replied to Glenn's topic in Solid Fuels: Coal, Coke, Charcoal, Wood, etc
With you there, Irondragon. Last winter we had a windstorm that took out a neighbor's large cherry tree that brought down some alders when it landed. We're slowly beavering away at getting it all bucked up. I have some stored for woodturning, another pile for chipping, some for firewood, some for turning into charcoal for putting in Christmas stockings, etc. Oh, my aching back. I make and use charcoal to forge as part of a woodlands forest management. We have a five-acre parcel and have left two-thirds of it as lowland forest with primarily native species. I have harvested deadfalls and fallen brush for Burnie, my charcoal retort. I also have a neighbor who gave me 200# of black bamboo, most of which is split and chopped for retorting---and he has another 300# for me to turn into charcoal as well. (Yes, it's been split as well as chopped---don't want any unintentional explosions.) The challenge is to find a way to "chunk" the feedstock into the right size for the retort. I keep pondering building a wood chunker so I can chunk the pieces directly into the retort and then fire the retort. Haven't done it, not yet, at least, not only because of time but because it requires an investment in machinery I'm not sure I want to make. Regardless, I have plenty of feedstock stored up for this spring's charcoalification all done with small chainsaws, machetes, and bad language. For me, charcoal is a viable forging fuel because I Iive where there are a lot of trees. There's always a tree that has, is about to, or just did come down. TP makes some excellent points about coppicing, etc., as a means for getting feedstock for charcoaling. The raw material is there, but the amount of labor to go from feedstock to charcoal...see the aforementioned backache. So I get why someone wouldn't want to make the charcoal for their forge: you want to heat steel and smash it with a hammer, not grub around with stupid tree parts. -
JLP Blacksmith Teaching Center.
Ohio replied to jlpservicesinc's topic in Building, Designing a Shop
Excellent. When I had to do the electrical in the Wonder Hut, though comparing the Wonder Hut to your project is like comparing mooning somebody to the moon landing, I found once I got going on it, everything flowed---it was quasi-Biblical in that And Then There Was Light. Regardless, good for you and I salute you. Good thing I'm wearing sweatpants, makes the saluting easier. Look, the moon is out. I accept your challenge. But first I need to buy a million feet of flex duct. And a HF anvil. Srsly, dude, this is helpful stuff, even in a small shop. I was thinking of installing a small fume extraction and/or metal dust control system but I didn't want to half-moon (get it?) my way through it. If nothing else, the 20CFM per person guide is a place to start thinking about what I want to do and how. And I'll bet I'm not the only one thinking about a shop build/re-build while following along here. -
JLP Blacksmith Teaching Center.
Ohio replied to jlpservicesinc's topic in Building, Designing a Shop
This Latticino fellow sounds like a useful guy to know. You can tell because he uses terms like "backpressure" and "duct friction" but not in the form of a question, i.e. "What in all that's sacred is backpressure?" or "Do ducts have more or less friction when they quack?" This has really been an interesting build to follow---thanks, jlp. Are you still on schedule for a grand opening? Should I get a beverage ready for toasting? Truthfully, I'm getting a beverage ready, regardless, but congrats on your continuing progress. -
If you want to roll around in jello or mud, or wear a singlet or whatever, no judgment. While you and Nodebt are doing your thing, I will glide away with that South Bend. It's a win-win for us. Not so much for mountmyfish.
-
For some reason, I am reminded of this:
-
I will fight you for it. And I'm a kicker.
-
mountmyfish, that is a terrible lathe and you will be very sad if you try to use it. Because I am kind and thoughtful, I'll swing by from Monroe and take it off your hands, cheap. That way you won't have to worry about it anymore. Just joshin ya. That's pretty and I want it. If you come home and it's gone, well, I won't say I stole it, but I will say that there's a good chance I would be in the vicinity of the stealing. <---This is also a joke, but only kinda.
-
I have the same saw but in what I think is the original gray-green and with a treadmill motor for variable speed. I wanted to clean it up and adjust for a better quality cut when I found the shaft was a little bent and it turned into a whole thing. I machined a new shaft and bushings, then replaced that nylon gear with a 3d printed one that cost too much but it cuts great now. Yet the downfeed cylinder weeps hydraulic fluid in a mocking manner and I'm taking it personally. A couple hours ago I thought I had it all figured out until I had to bleed it, then I found myself in a handbasket going to a hot place. It may be easier to set up a different system instead of mucking about with this cylinder anymore. Regardless, I have rolled the saw to the side to work on something else. Something else includes pulling out the dozens of spinning tools that came with the Boice-Crane. I don't need all of them, so I'm trying to decide if I want to re-handle them or not before putting them on fleabay along with some molds and crucibles (I bought boxes of ceramic crucibles because I am insane and because the guy who bought them was dying and he needed to clear out his work shop). And now you know why I have to re-organize. Still don't have scissor tools, though. I have to get sorted before trying that. Thomas---thanks for the tip.
-
I said swear words about both of you, Frosty and Thomas. Well, age before beauty, I guess. Heh. When I look up when we can get appointments, the entire Internet laughs at me. So, the saw is swearworded up big time. I fixed the bent shaft and bushings and while not perfect, certainly better than it was. But the hydraulic cylinder that controls the downfeed...I shoulda not touched it. And then when I did touch it, I shoulda not asked my neighbor to take a look. I should just looked at the old seals he busted and just given up right then. But noooooo...I had to think positive and have confidence. I really liked that saw. But it has betrayed me.
-
Dude. How you? So I have the motor and VFD for that spinning lathe just sitting there. I decided to re-organize the Wonder Hut, which turned into a huge project including re-building my little tiny Craftsman horiz bandsaw---a two-dayer turned into a several weeker. Maybe today it will finally be all back together again. I moved the spinning lathe and am again re-thinking where it is in my little shop. I also moved the Beverly but haven't locked it down yet. And I have a metric ton of spinning stuff to weed through.: molds and tools (needing to be re-handled). So, mostly organizing and fixing. And you know, working.
-
For cutting circles: James Riser has a design for a small circle shear that looks nifty: Making the Riser Circle Shear He is also a nice guy. Daniel Remer has a video about building his variation: Homemade Circle Shear - YouTube, which looks a little more versatile. I haven't built either shear---yet. I need to hook up the motor to the little Boice-Crane modified spinning lathe I have, which I can't do until I finish the other projects. If/until I need the little circle shear, my plan is to use my Beverly shear to cut rough shapes and then sandwich the pieces between large molds and trim to final shape. I'll probably do one of those circle shears because they're neato. The spinning I have done is fun, though. Something amazing about seeing the metal flow over the form.
-
That's interesting, Tim. I've tried to use my carpentry experience while forging and I'm still pretty terrible, but less terrible than I was so...progress. But what you describe makes sense to me, so I'll try to remember this once the new forge is set up. I'll try the sitting approach again and not because I'm lazy and would rather sit (though that's true) but more because it looked---mindful? Mindful may be the right word. I don't know if the knee-crouching will happen, but I'll give it a try---you'll all know when I'm doing that because of the crying you'll hear coming from the Pacific Northwest. I have an improvised anvil and was thinking of rotating it to get more mass under the hammer. I'd have a smaller face if I do this, so I'll give it a try as well. I have about 200+ pounds of bamboo pieces to charcoal-ize. A lot of people up here plant bamboo and then forget and a few years later, it's invaded so they cut it all down and give it away. I machete it into pieces about 2-3" long, making sure the ends are open so there are no steam explosions inside Burnie the charcoal retort, then sack them up in burlap and let them sit a couple of years. One of my projects is a rebak chipper for chomping wood into charcoal-sized pieces because that's the part that is by far the most energy intensive---getting the feedstock to the right size. I did run some charcoal through a crappy chipper just to see how messy it would be and whoa, it was messy. And the charcoal was tiny, which is perfect if you want to make activated charcoal. I have a story about this but it's not appropriate for this website and I don't want to hijack Tim's thread anymore than I have.
-
JHCC, you mean like Burnie? It's very fun and not difficult. The rocket stove roars like a xxxxxx jet engine, though. Tim Lively, I saw one of your knifemaking videos on youtube and was really impressed with 1) how you sat when forging, 3) the simplicity of your forge, and 3) the graceful manner with which you swung that hammer. (The knives were neat, too, but I was looking more at how you made them.) You made smithing look so easy. I went a different way with my charcoal forge design but I did try your sitting-down style and failed pretty thoroughly.
-
Good for you, mpc. Welding is fun. And starting a post in the welding sub-forum with "BEHOLD!" is genius. Those little HF welders are not terrible, but the flux wire that comes with it usually is. It's usually pretty dirty. You may have better results with name-brand stuff (I did) and they sell Lincoln MIG flux wire at Lowes. Your local welding store, if open, may have better selection and better pricing, but at minimum, try a roll of the name brand and see if that works better for you. I have a favorite Central Welding store that's full of knowledgeable, helpful people and while I may be the stupidest customer they have, they are always quick with good info. Again, good for you.
-
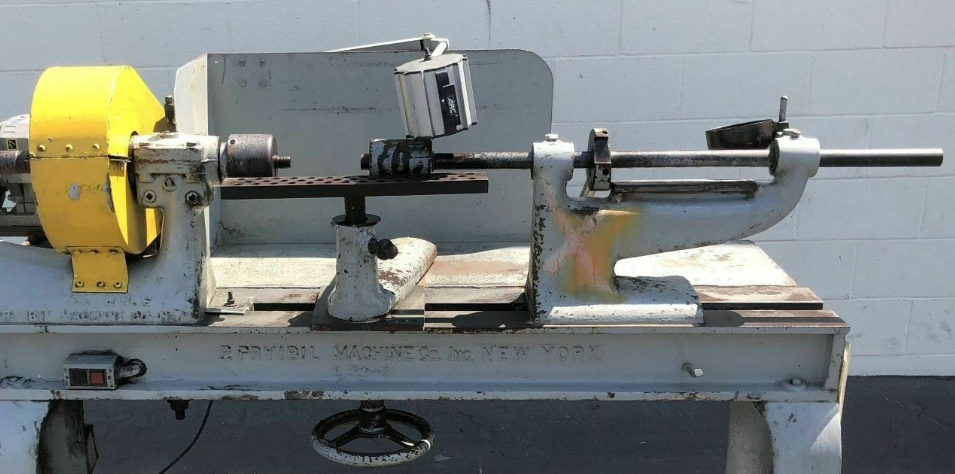
It's no where near as beefy as a Prybil. No where near. But I got me a plan, Frosty, don't you worry. It'll be locked down completely. I fabricated a tool rest for my wood lathe for metal spinning. It's heavier than the one that came with this lathe, so I may see if it'll fit this Boice-Crane. Interesting thing about the bolt way to close the follow block. Really interesting. I'll have to think about that modification. I don't put the blank in while the machine is running, but put it in, lightly close the follow block on it, then turn the lathe wheel by hand to get it lined up using the backstick. I ain't getting paid by the piece and right now, I can't get past the idea of spinning metal not locked in somehow. Ok, I have to finish the Wonder Hut infrastructure---get the shelving in---and then start taking everything apart. I should mention---I think I'm going to use a non-standard paint color. Hahahahaha. Got a long way to go before I get there and I may change my mind, but I may do something a little crazy. Just a little. Not Chevy-transmission-on-a-lathe crazy.
-
Long awaited addition to the shop.
Ohio replied to Irondragon Forge ClayWorks's topic in Building, Designing a Shop
Nice. That extra 168sf will feel luxurious, IF&C. Congrats. -
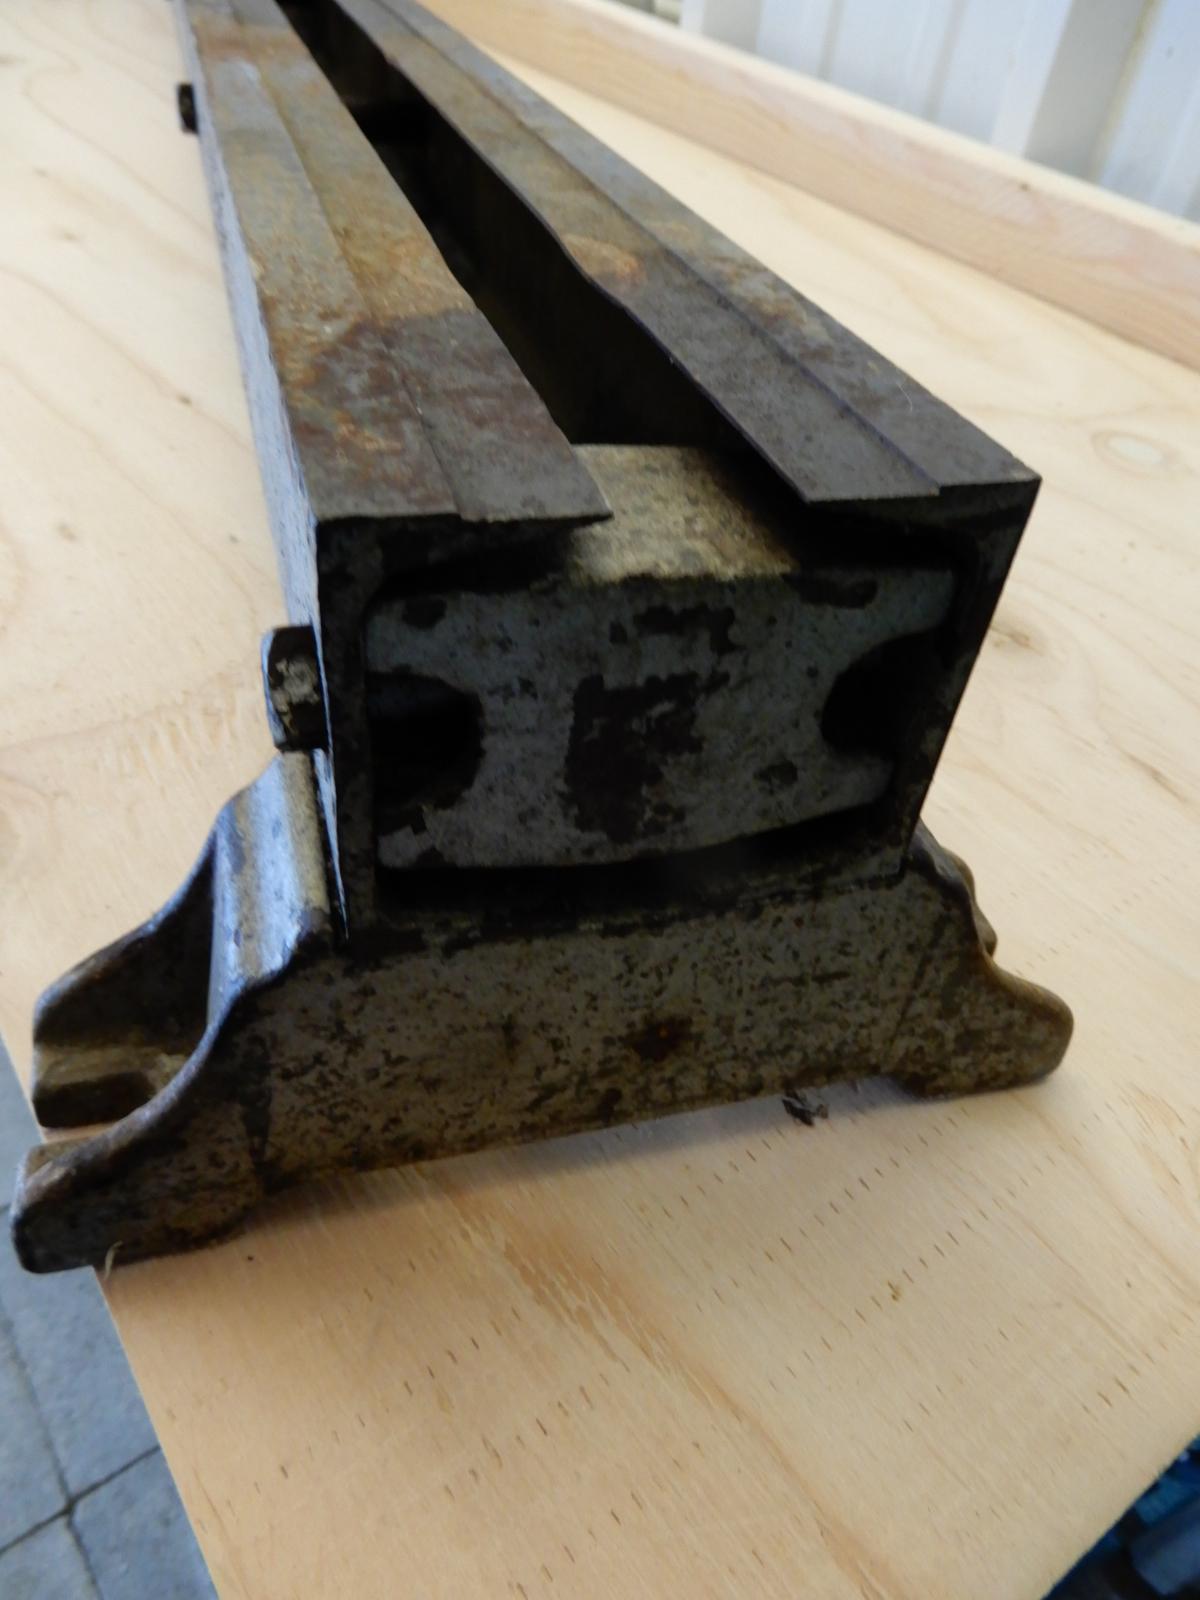
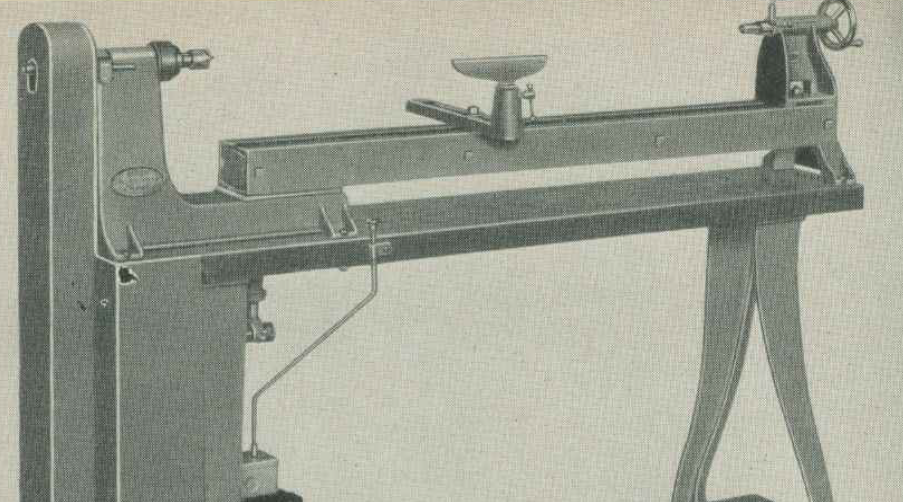
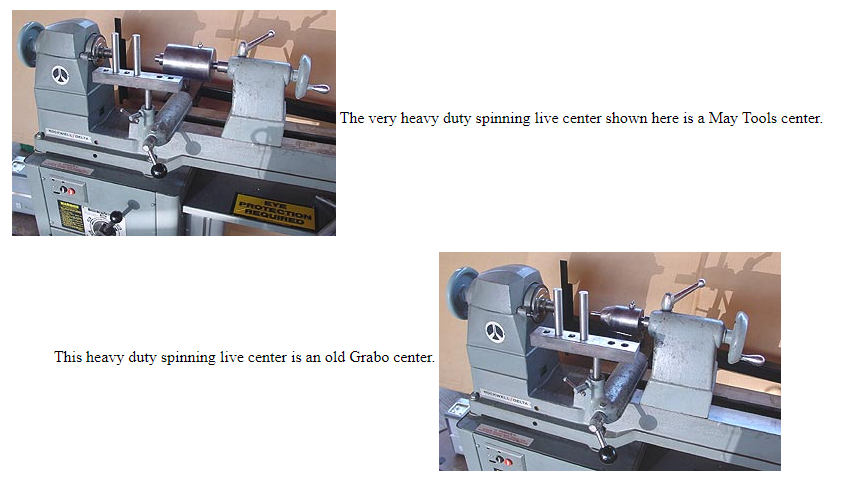
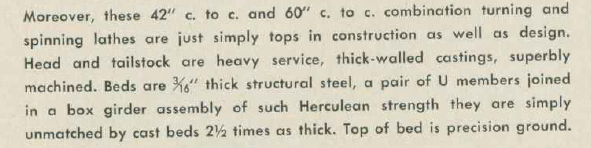
1701 is the same as the 1700 except the ways are 60" instead of 42". In this picture from the catalog showing the 1700... You can see the ways are two pieces of c-channel with four square bolts along the length and a block at the headstock end. Get aloud of the description: Not just strong but Herculean. Use of the word alone has my money leaping from my wallet. The lathe I have has already been modified---the block is at the tailstock end and some of the bolts are missing. Also, the ways around ground on each end so the tailstock center aligns with the headstock center. You know, like they're supposed to. I think the previous owner modified the ways by adding some holes so he could pull the way back to make the gap bigger. He moved the block to the tail end possibly because he was using two bolts at the headstock end and/or he wanted to move the tailstock all the way up to the headstock end for shallow but large bowls, platters, or plates, or for forms that needed more material than what the lathe would otherwise allow. I have some forms that are pretty big but fit the gap, but I wonder if the material would fit. Moving the ways back to a different set of dowel pins and then re-bolting may have been how he accommodated. I'm not sure, though, and won't know until I get it all cleaned up. Here is an image from James Riser's site showing what he calls spinning live centers in the tailstock: (BTW, James is a nice man.) The very end of the tailstock live centers have an insert to fit different follower blocks. Here's one with an automatic oiler or something attached: Dang, dude, if you were standing in the Wonder Hut you'd pick one up and know immediately. I'll try to get more pictures once I finish putting in the Hut shelving. I had to cut stuff up and haul it in there and this girl is tired. P.S. Thanks for the math. P.P.S. A truck transmission? Yet more evidence that your insanity is genetic.
-
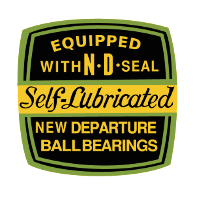
Understood on lubricating the machine. The quills move, so I'm pretty sure they're not dead centers. I'll take one apart and get a pic to show you later, after I get the shelving onto the benches (salvaged some library bookcases that are perfect for the Hut). Yeah, the older wood forms/dies/whasits are some type of ply, grain looks like maple, well made---the threads are still crisp, so maybe rock maple? The newer ones are delaminating (looks like a glue fail) and those are going into a special pile called, "Set on fire." I think this is a Boice Crane 1701, so it is indeed for spindle turning and metal spinning. Explains the bearings. It is missing some bolts, though, from the pictures I've seen, but I can remedy that. The tailstock quills are MT---I'm going to have to take them apart to clean, grease, and make sure nothing is busted inside. They have inserts that fit different follower blocks, but I will need to figure out exactly how they should work. I think I know, but I'm going to have to study up to make sure. I'm going to have to find another step pulley or a matching pair that will work for this application. another website mentioned that there are other lathes with similar step pulleys that will work for this machine, so that's a possibility. I'm taking your advice on the treadmill motor. I found a chart of speeds using the step-pulleys, so I'll do some math to figure out the safe RPMs. 1 1/2HP? Dude, I can't tell if that's genius or crazy. Probably a little from column A and a little from column B. I found the decal that's faded to nothing: And I think I know how I'm going to deal with the C-channel ways/rails. It's quite clever---if it works. But cleaning it all up is the first step. I'm really looking forward to it. And I keep going back and forth on if I want to paint it close to the original color or if I want to go with something else. I'm leaning toward something else, but nothing too crazy as my brush skills are nonexistent. I'm definitely putting that decal back on, though. Thanks again, Frosty. This is really helpful. I'll try to remember to get pics as I go along, especially when I mess stuff up because those pictures are the funniest.
-
Thx, Frosty. I have a wood lathe and keep the woodworking in the woodworking shop and the metal in the metalworking shop, so shortening it makes sense to me. (I started spinning using my wood lathe and realized I would need to replace the bearings on my Rikon if I kept metal spinning with it.) The two lengths of steel that make up the ways/rails are bolted together and there appears to be more room for bolts and feet, like the cast piece at the tailstock end. I'm thinking if I shorten the ways with a plasma cutter and add some steel angle iron as feet and use more bolts thru the ways, I can bolt the feet to the workbench to help stiffen the assembly. The bench is made up of two layers of 1 1/2" exterior OSB sheathing, sitting on a pallet rack shelf that has a horizontal steel member every 16" or so. There are two other shelves below the bench also with pallet rack shelving, but my blacksmith buddy has literally tons of stone he scavenged from stone masons and I just have to go get whatever I want and cut it on his wet saw. Sounds a lot easier than it is because that stuff is heavy. I plan on adding some of that material to at least one if not both of the lower two shelves for additional mass. Each pallet rack is strapped to the frame of the steel building as well because earthquakes, with blocking to keep the uprights of the pallet rack a specific distance from the wall and the surface-mount electrical. After I installed the strapping and blocks, I swung on the uprights to see if anything would move---nothing did. Good point on the tailstock. It may be easier to make. There are two metal spinning quill things---not live centers, but like them in that they spin freely but I can't remember what they're called. They're better when working with follower blocks, but I've done the follower blocks with these neat little live centers I got from Nova. These tools, though, move freely but they need to be taken apart and cleaned and re-lubed thoroughly, but should work better. Yes on shining up those forms/molds/chucks/dies. I"m actually looking forward to that. I just spent some time cleaning up some of the wood ones (kinda gross) and oof, some of those really need to be smoothed. The forms I made had a layer of Bondo I polished to a shine so there was no grain to telegraph through the spun material. Regardless, it'll be a good day when I'm polishing those steel and aluminum dies up. I'll re-hab the spinning tools that came with this lathe then, as well. I'm getting kind of excited about this. Is that wrong? Nah. Got any opinions on motors? My Rikon has either 1/2 or 3/4HP 110v motor that I don't think I've ever stalled, but I'm a freak when it comes to using sharp tools when woodturning. I mean, really, why work up a sweat trying to shove a dull tool through the material when you can sharpen it up and finesse it? Oh, also, how about lubricants? The two tailstock tools have zerks, plus I'm going to have the hjole thing open so I might as well put the right lubricants to work.
-
Wish I had time to work on my fiction and non-fiction projects. The fiction is a series of concurrent novels with all the characters ending up in the same place at the same time. The non-fiction is an annotated review of an historical book. The projects are related and will easily take ten years to complete. Bit the sun is starting to come out and there's work outside to do. By the time I come inside I'm pretty tired. Sometimes I get some research done but usually I'm working on non-thinking stuff, like a scanning project or something like that. So it may have to wait until autumn again. At least maybe the Wonder Hut will be operational.
-
Thanks, IF&C. It is coming along. I have shelves to put in and then I can haul in tools and start getting them bolted into place. I also have to build the forge area, but I'm re-thinking my design. I think I know what I'm going to do with the lathe. Fell on me like the house on the Wicked Witch of the East in The Wizard of Oz. Still looking for any suggestions/opinions, though.
-
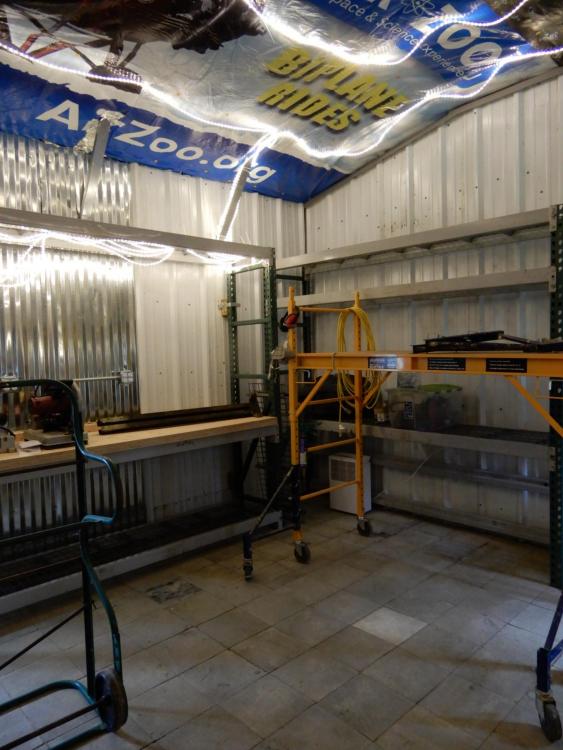
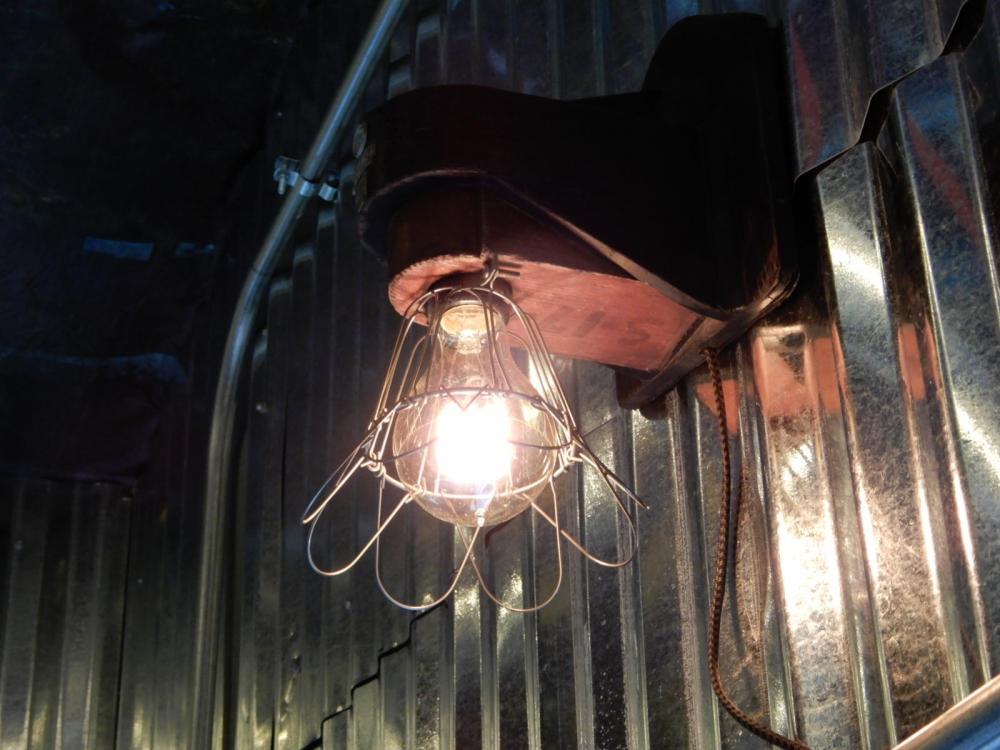
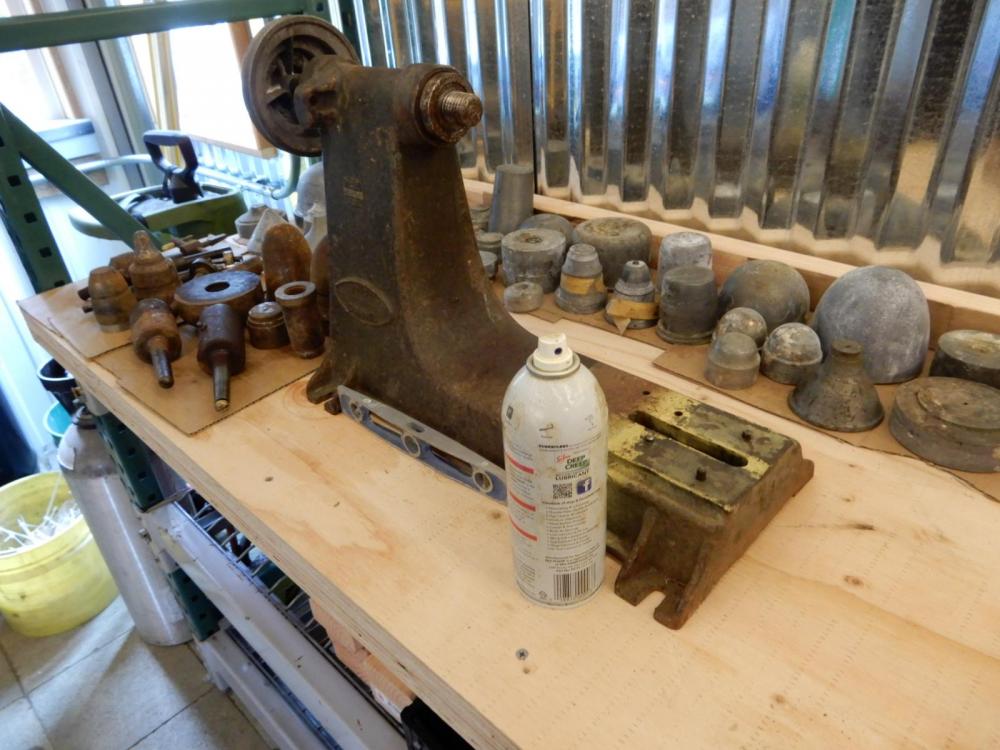
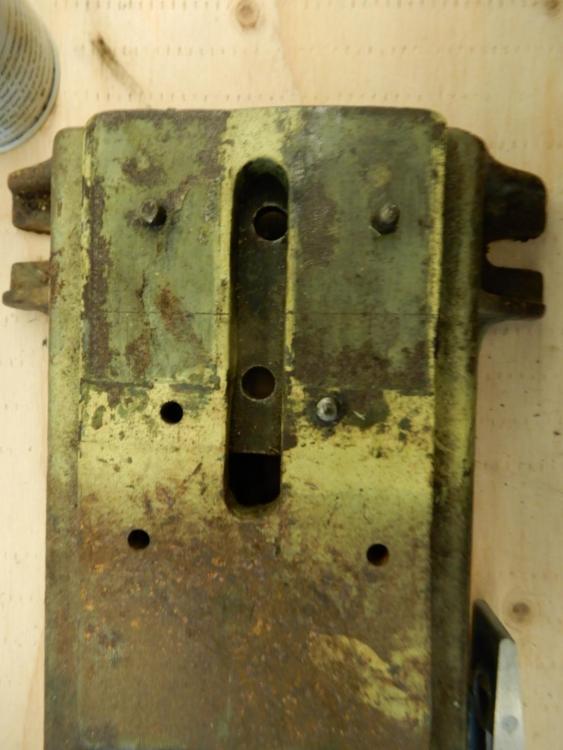
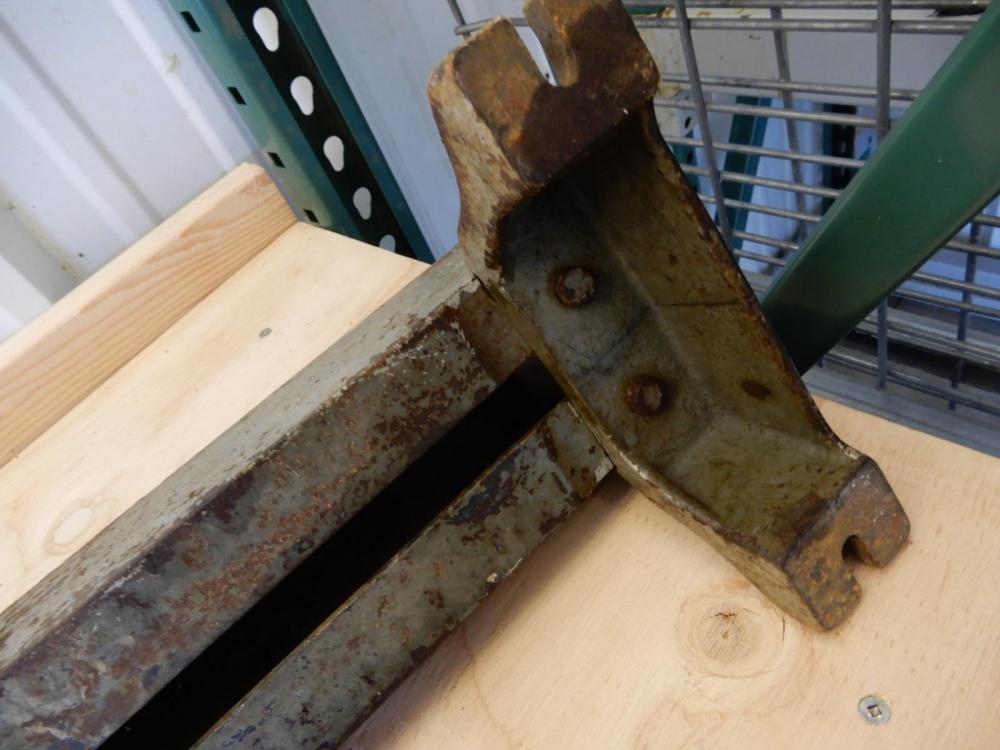
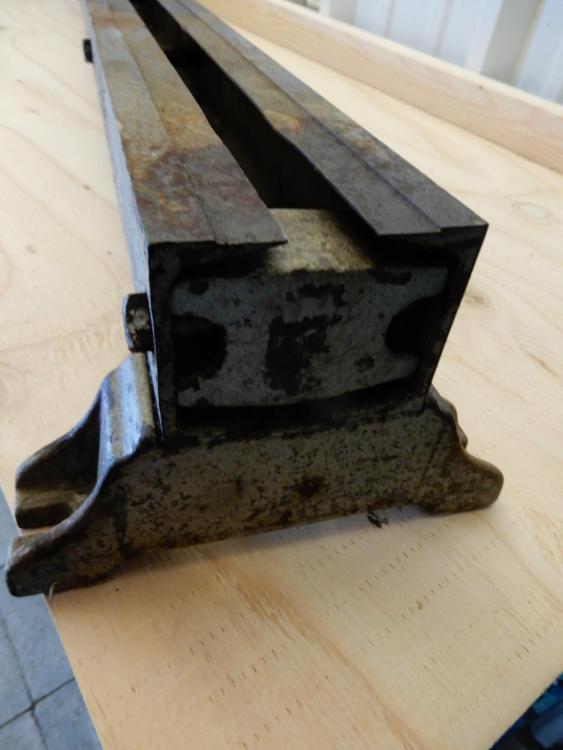
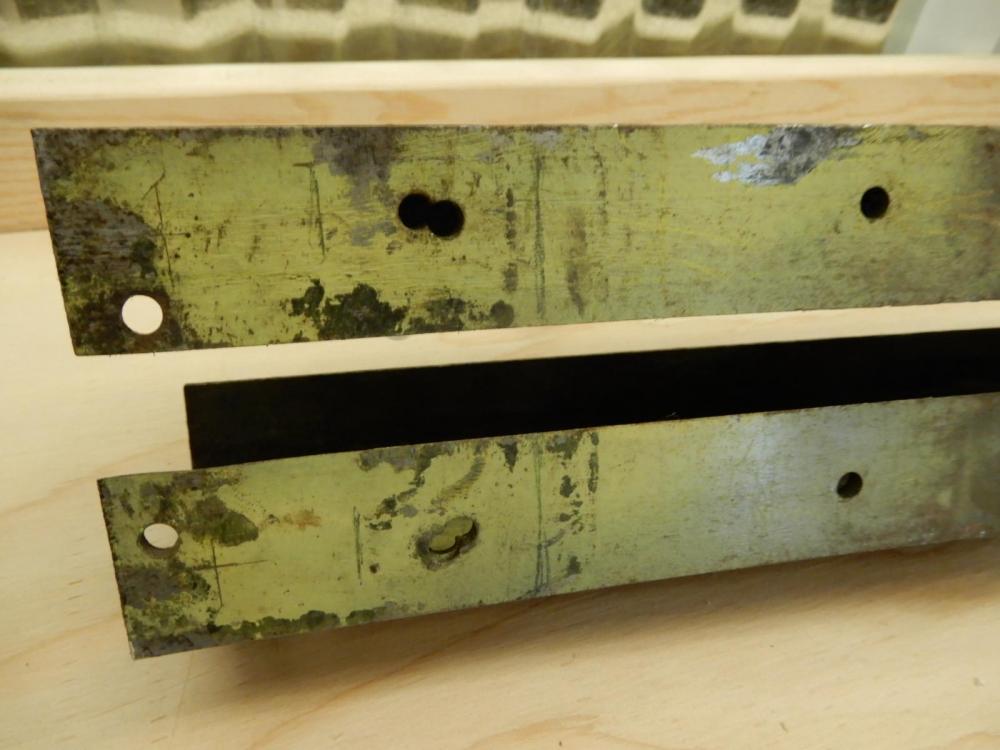
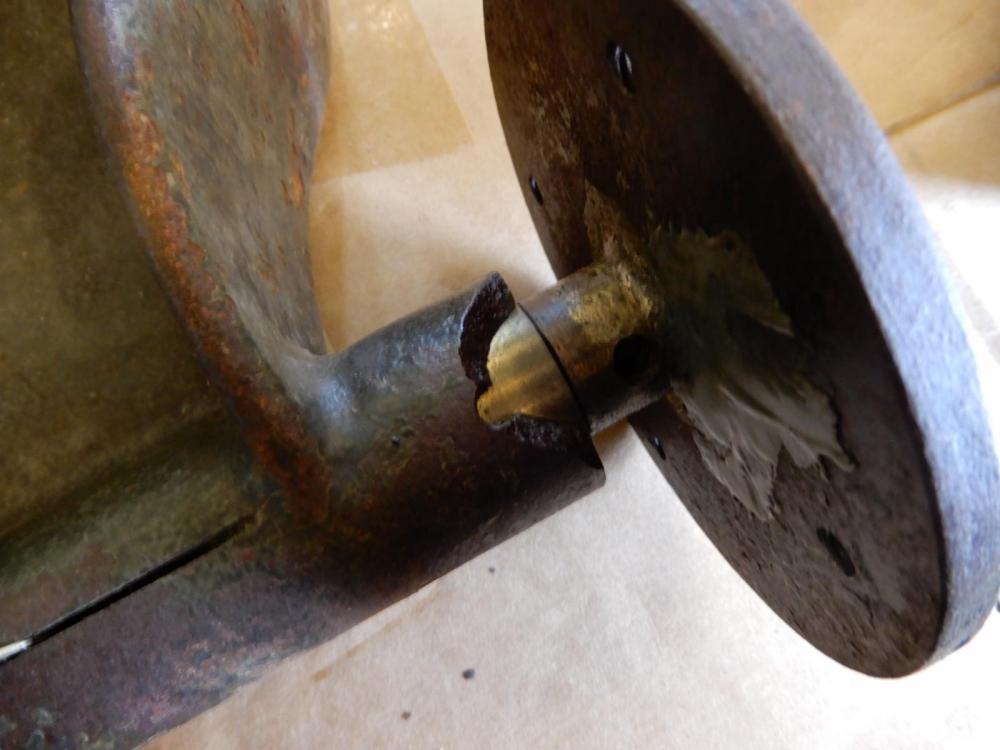
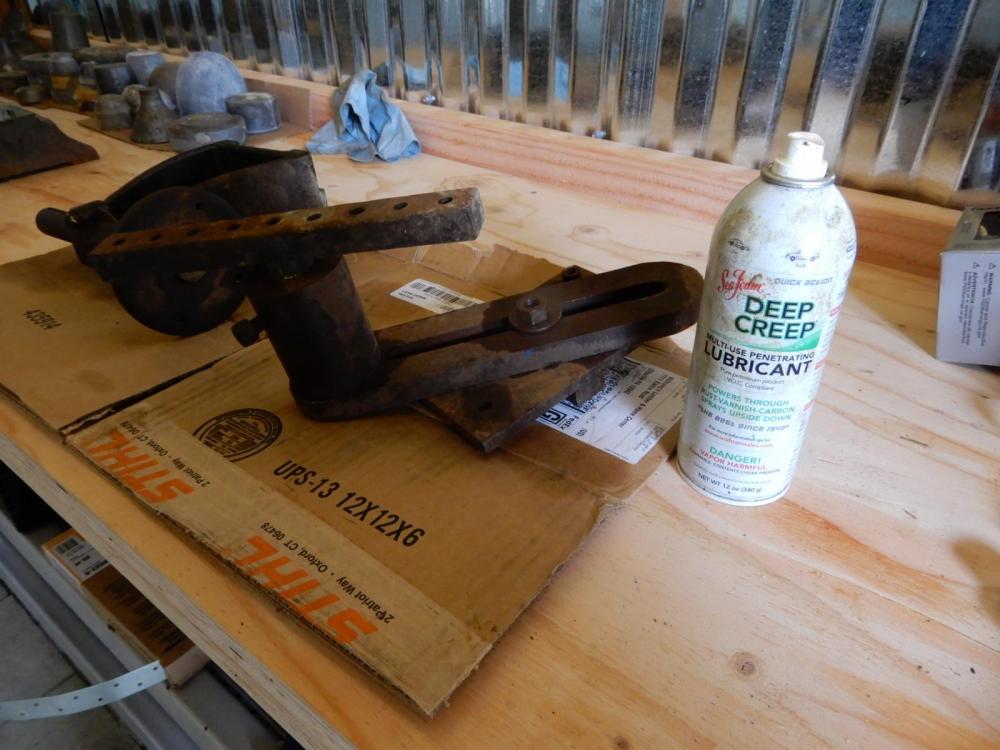
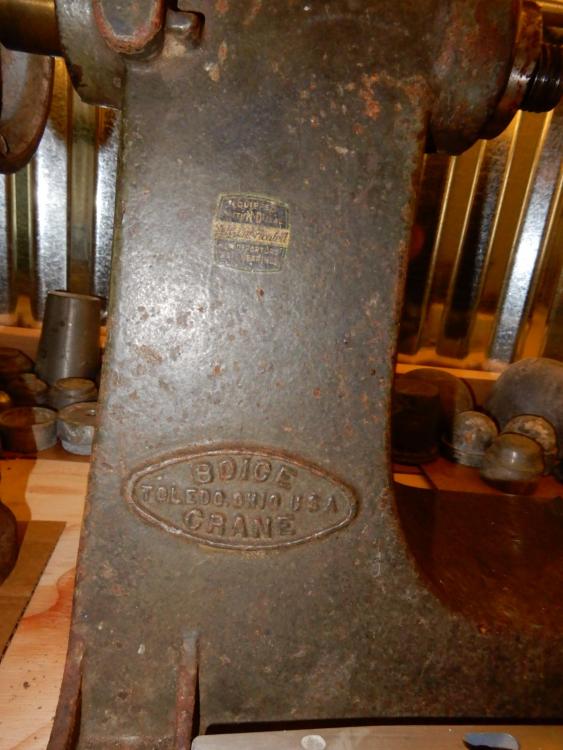
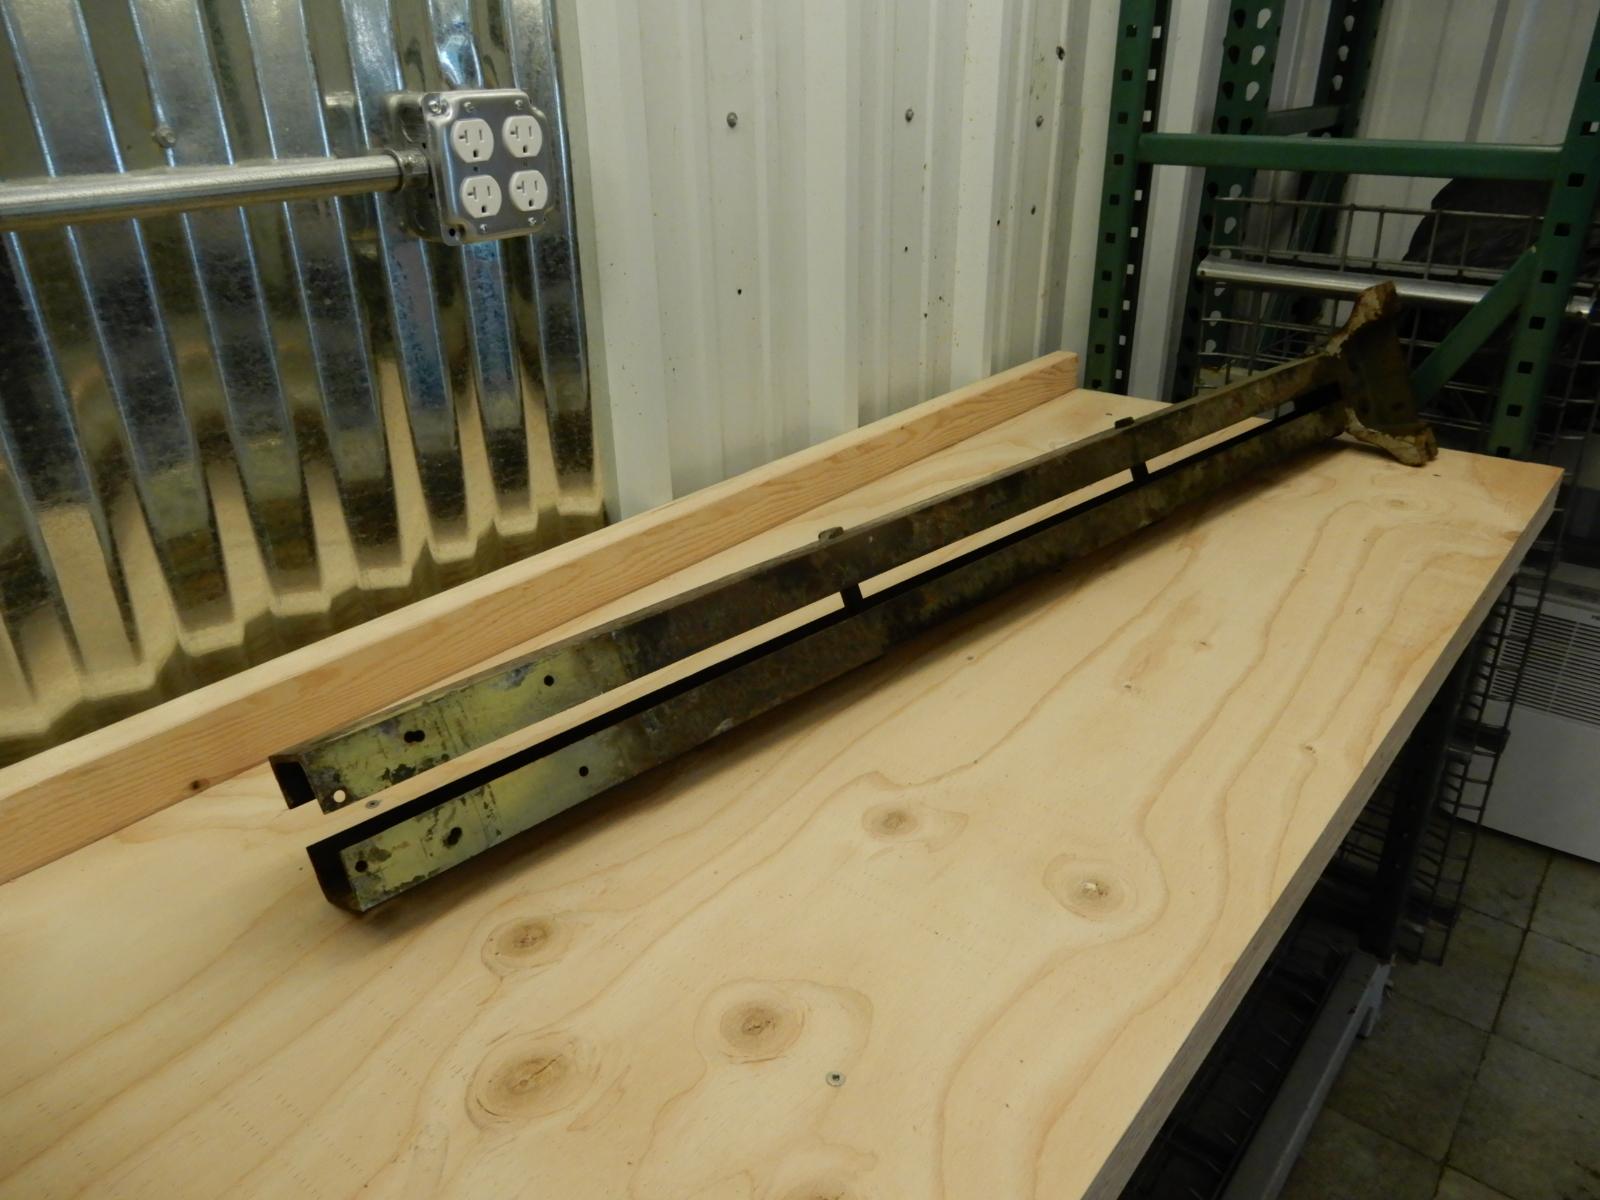
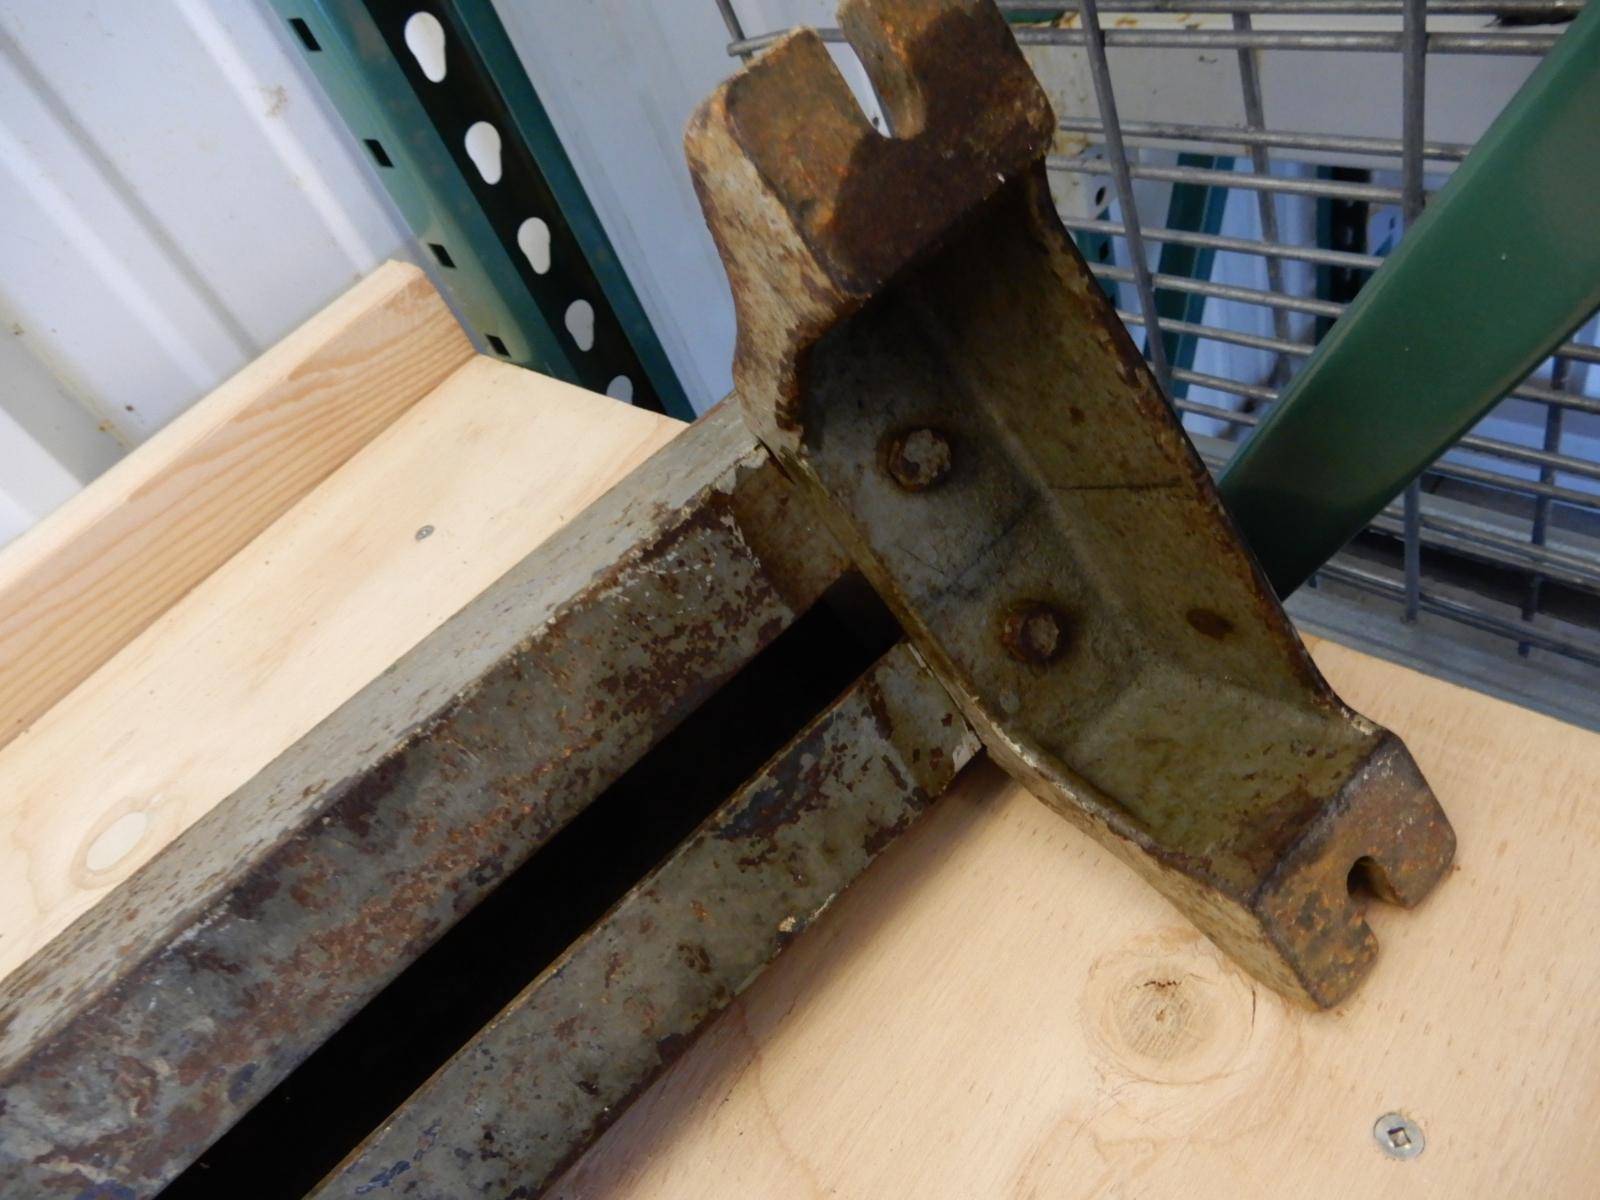
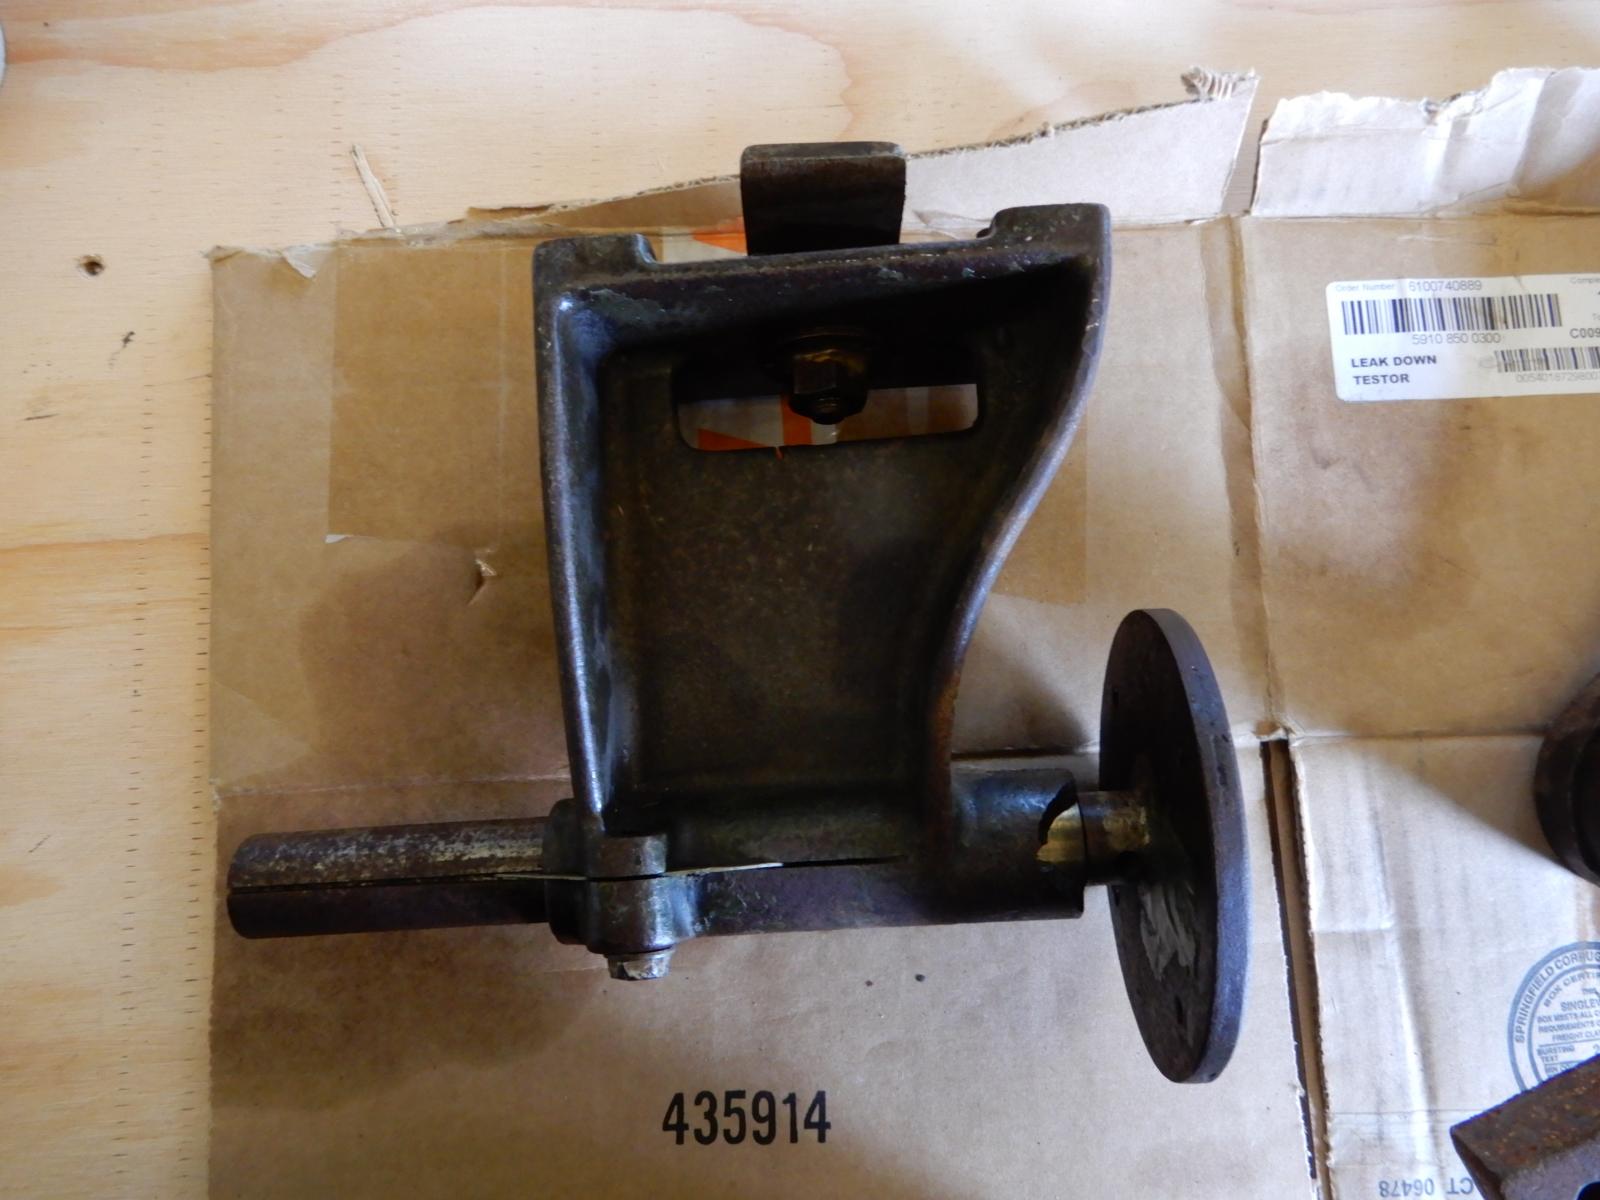
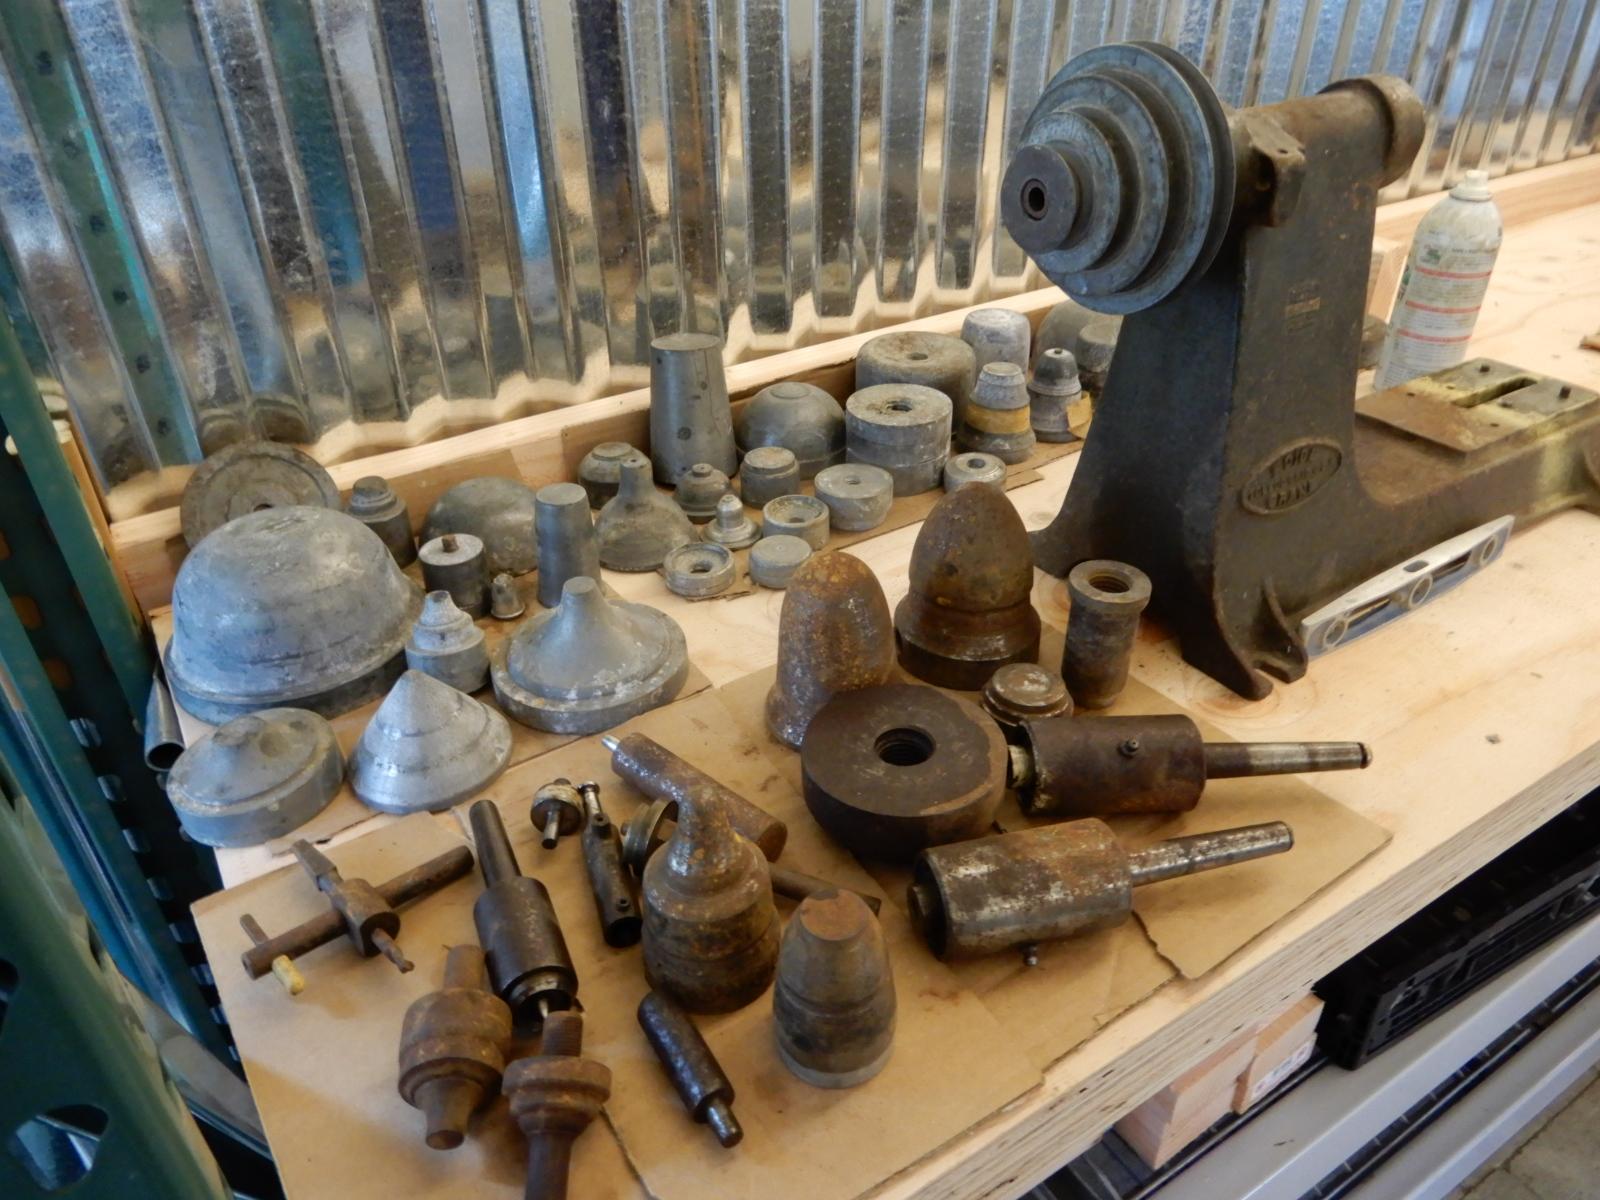
No pictures was strategic: your rage means you don't need to buy TP. I was thinking of your welfare, Frost. So here we go... First, Wonder Hut interior southeast corner. The scaffolding is destined to be chopped up into a worktable, the Greenlee wireholder thing will be turned into a beehive stand because I don't need a wire reel holder like this. Ways are on the bench on their side. This is the light made from a foundry mold I hung over the door. It's neato. Headstock with tooling and some of the molds in background, Deep Creep can for scale. This is a single cast piece. At the foot, near where the can is, there is a section painted yellow. That's where the ways attach. I think the previous owner changed the configuration to get more of the ways on the headstock cast. I think he also added the piece below with the two holes so he could bolt either the ways or the toolslide to the headstock. Bottom of the ways where it attaches to the headstock The ways, turned to show the bottom. It's about 4' long---way too long for my use. Cast foot on the tailstock end of the ways. There's a block of cast iron that is bolted to the feet inside the ways. Also, you can see where the end of the ways were ground down to about half the width of the original material. This is also on the headstock side. I think this is part of the original design. I think this block is supposed to be on the headstock end. You can also see where the ways are dented on the top. Tailstock showing the crack on the backside near the wheel. Closer on the crack and what looks like a repair to the wheel and spindle. This may be a heavier wheel attached as a repair or replacement because I think the originals may not have been solid metal but had spokes like a wheel. Toolslside and t-rest. Definitely not original. Heavier than the tailstock. Boice and Crane mark and a really neato decal that reads something about a new ballbearing design in the headstock. I'd love to find the design of the decal because after I clean this up and re-paint, I'd put it back on there. Another view of the headstock. The headstock spindle moves freely and smoothly. Some of the molds and tooling---when I say some molds, I mean some. There are three, maybe four, more large boxes in my other shop that I have to bring out. There are also some of the stick tools that I'll clean and re-handle, though I have sets of stick tools. Everything needs a good, thorough cleaning, and those bits that need it need lubrication. Some of the molds seem too big for such a small lathe, so they may get sold, but I have to figure out what everything is and how it fits together first.