
Arthur210
-
Posts
238 -
Joined
-
Last visited
Content Type
Profiles
Forums
Articles
Gallery
Downloads
Events
Posts posted by Arthur210
-
-
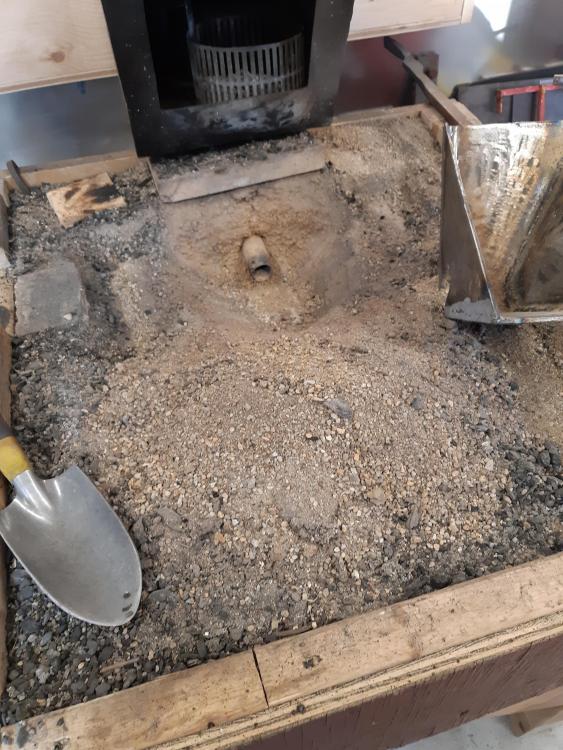
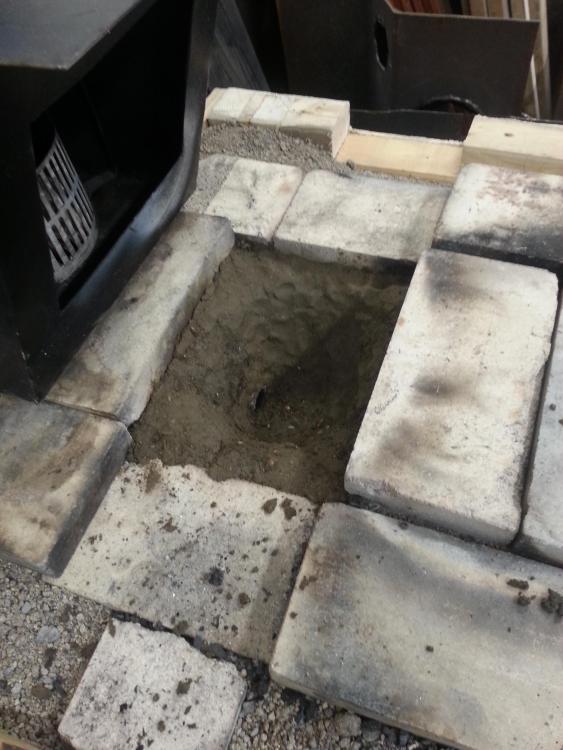
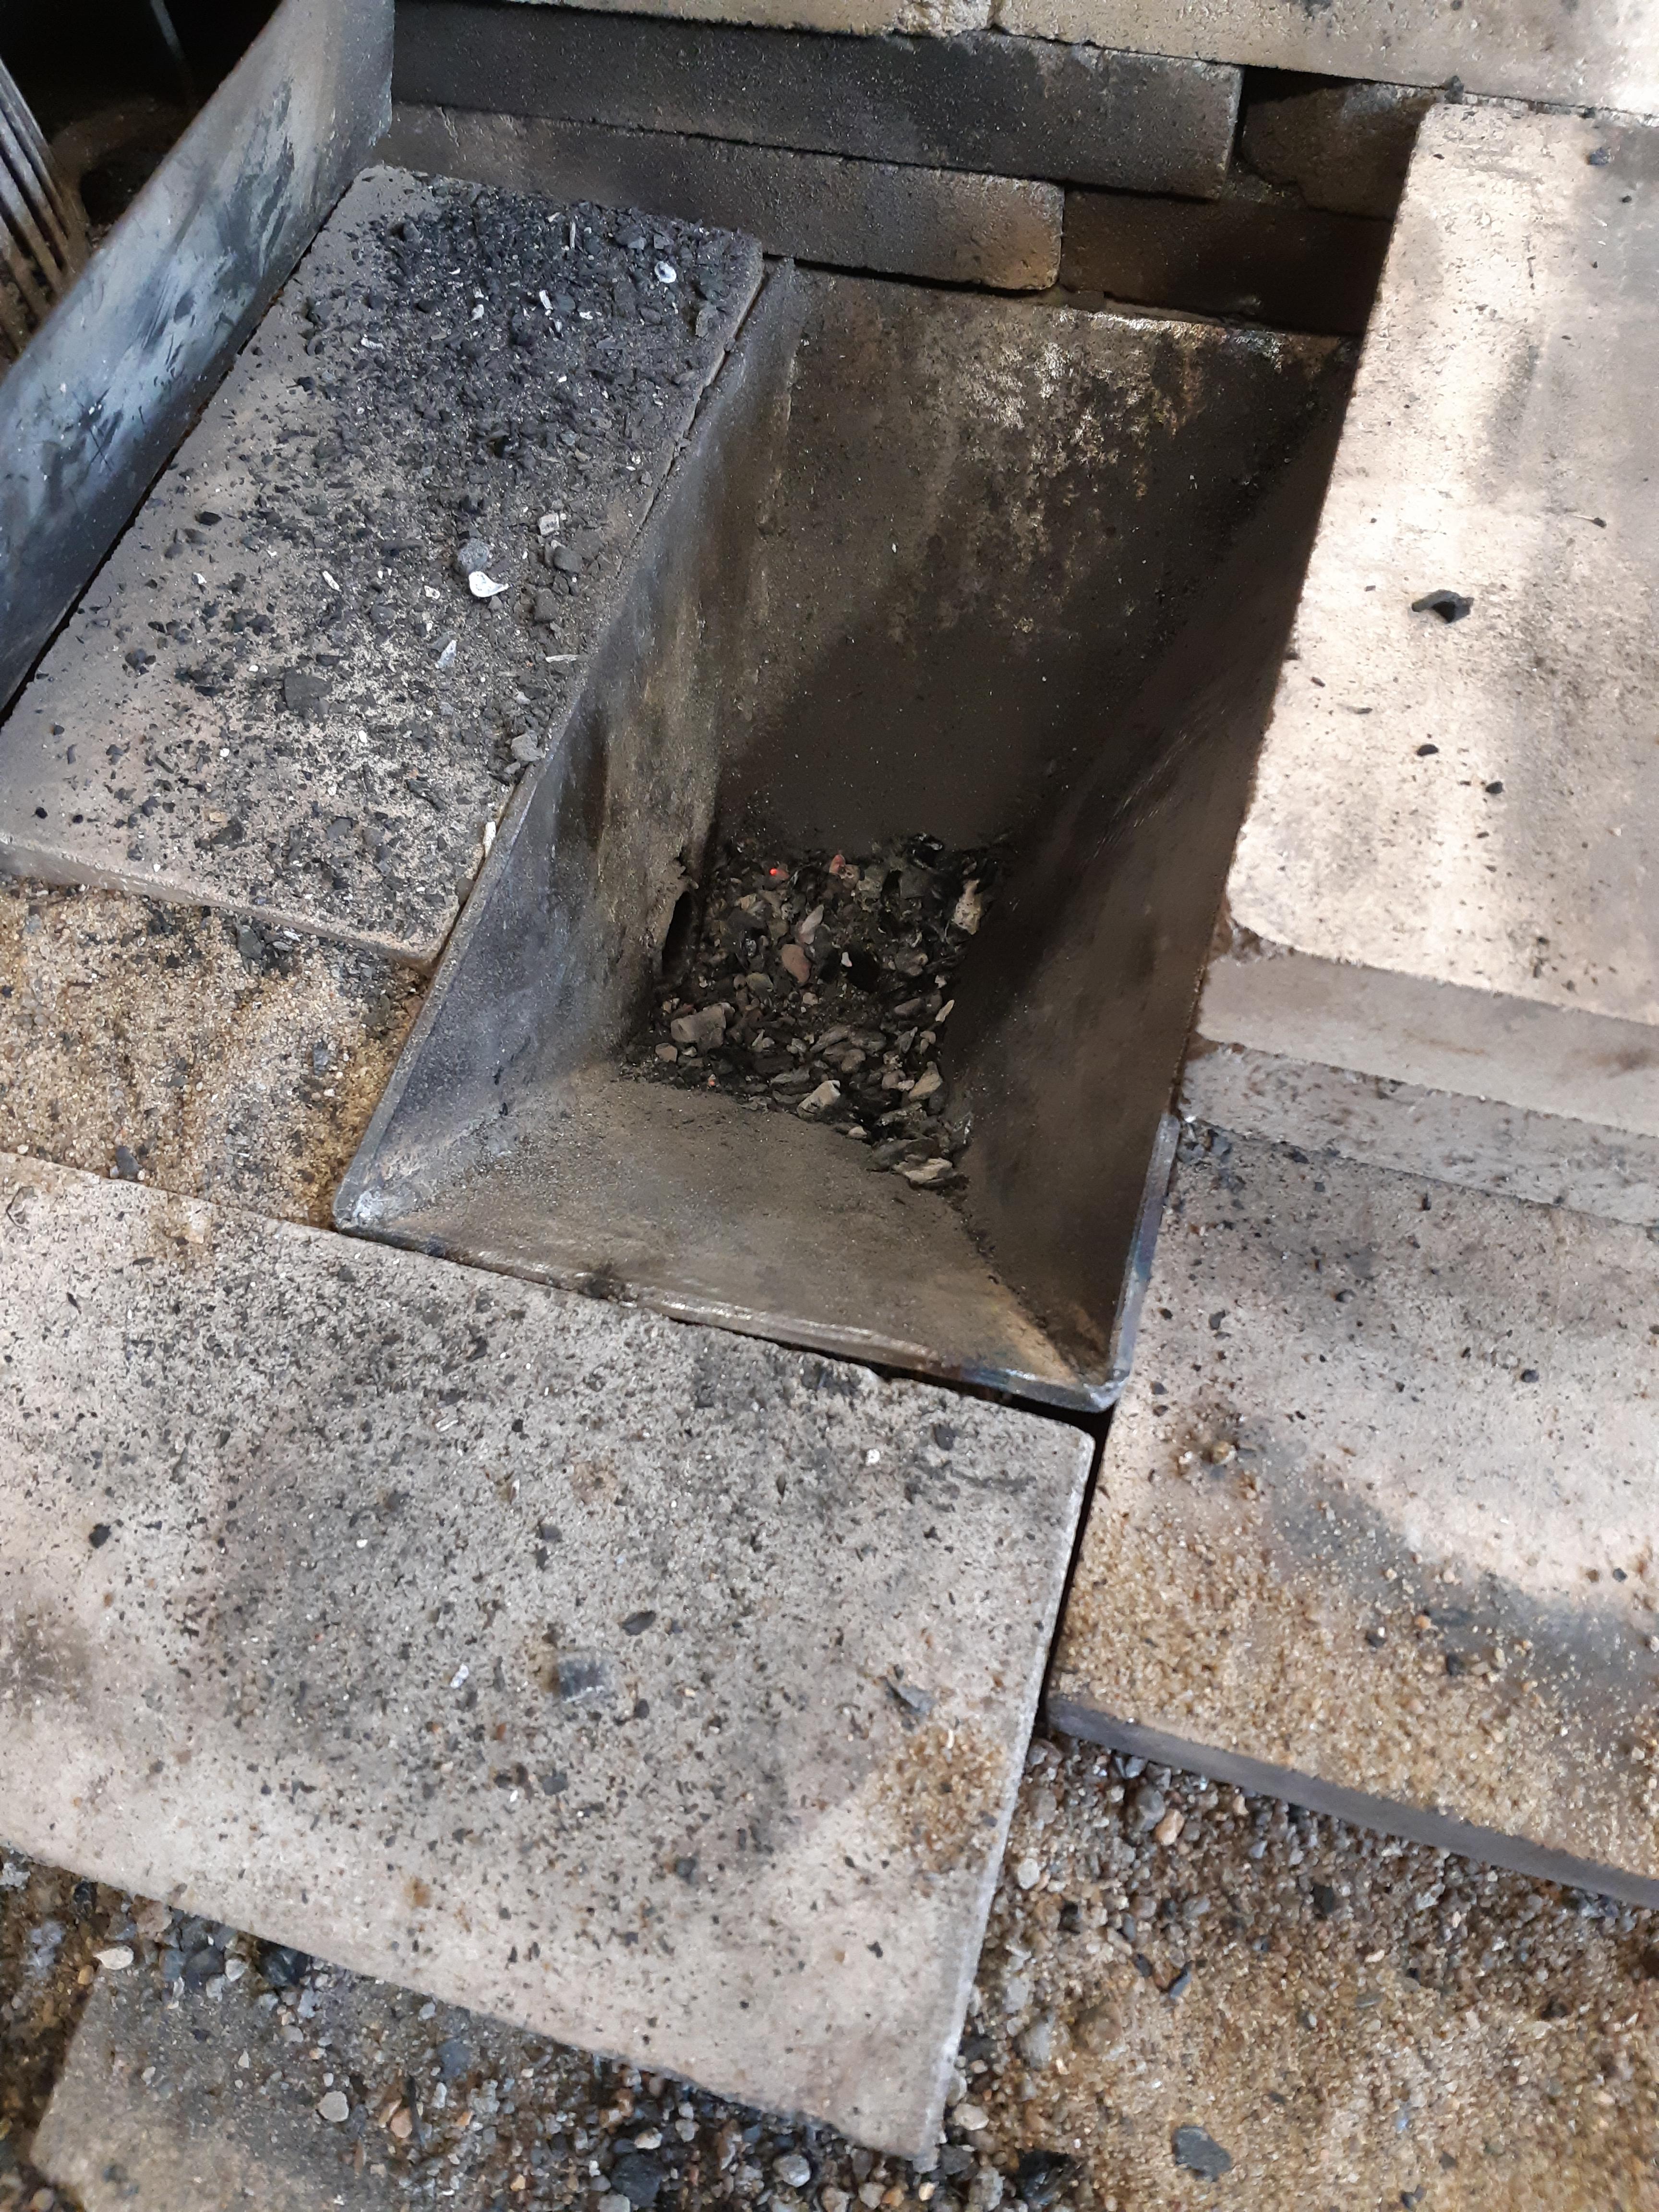
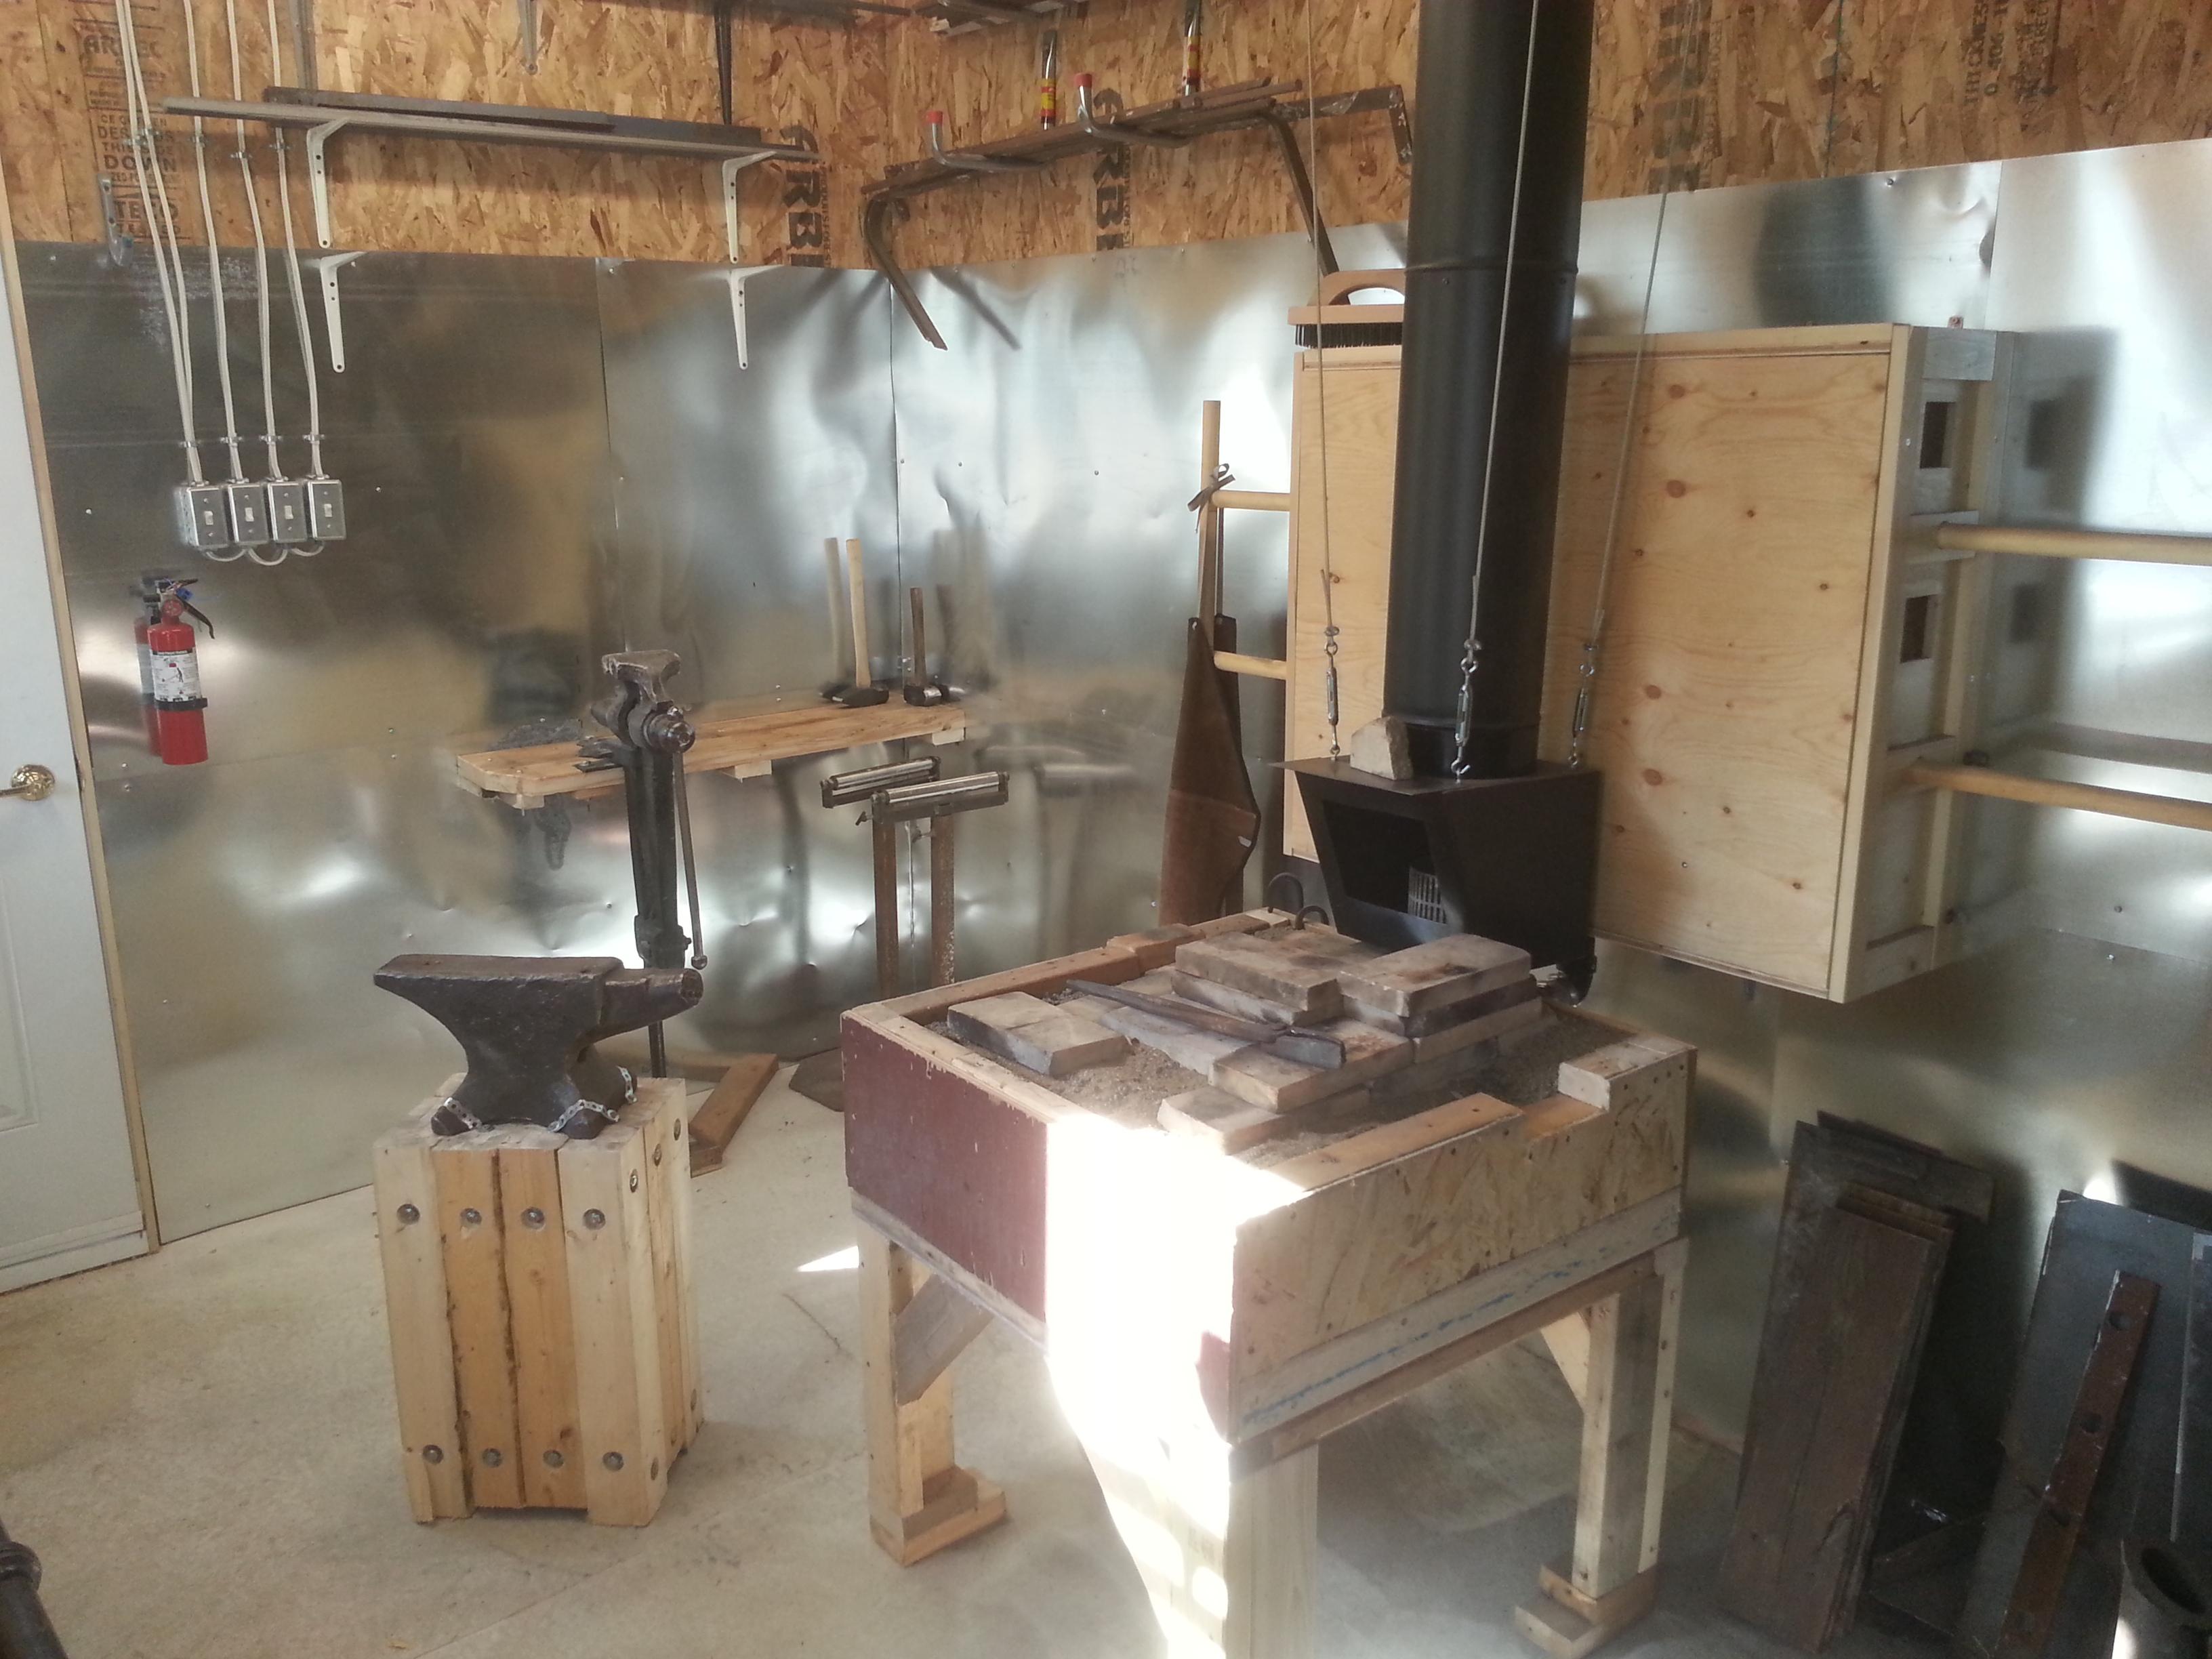
After a year using a JABOD forge (using charcoal), I decided to solidify make a steel fire pot. I was tired of having to reform the sides because they'd crumble.
So, inspired by the fire pot that Charles R. Stevens showed us in a different topic, I made my own.
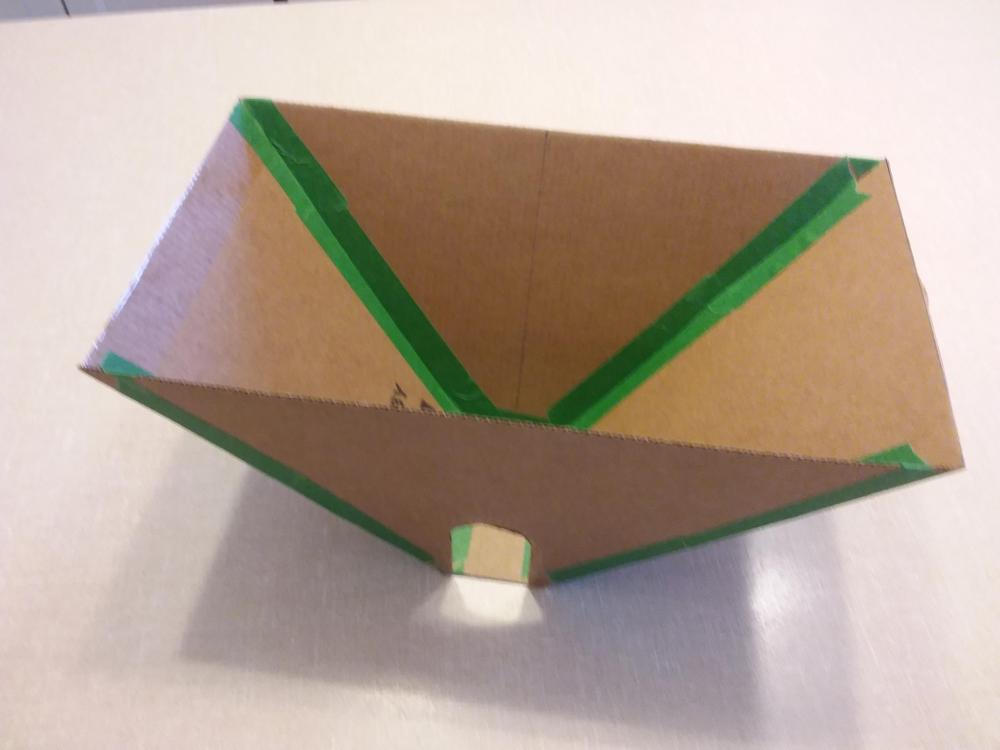
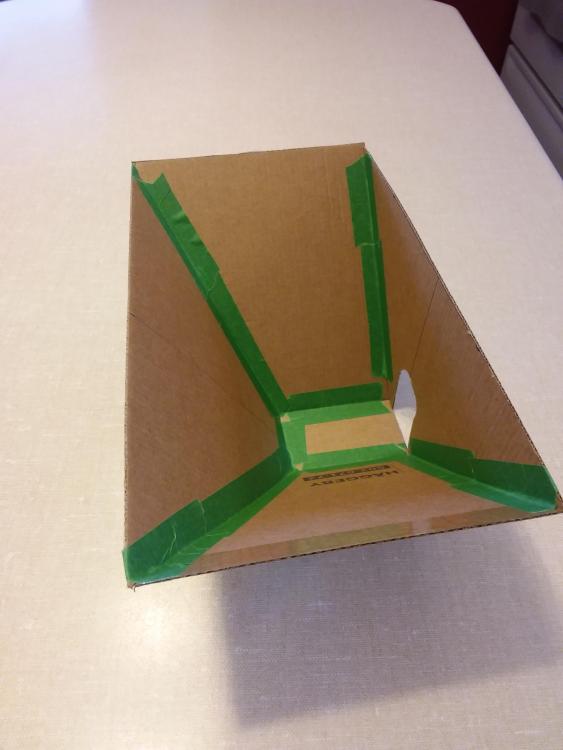
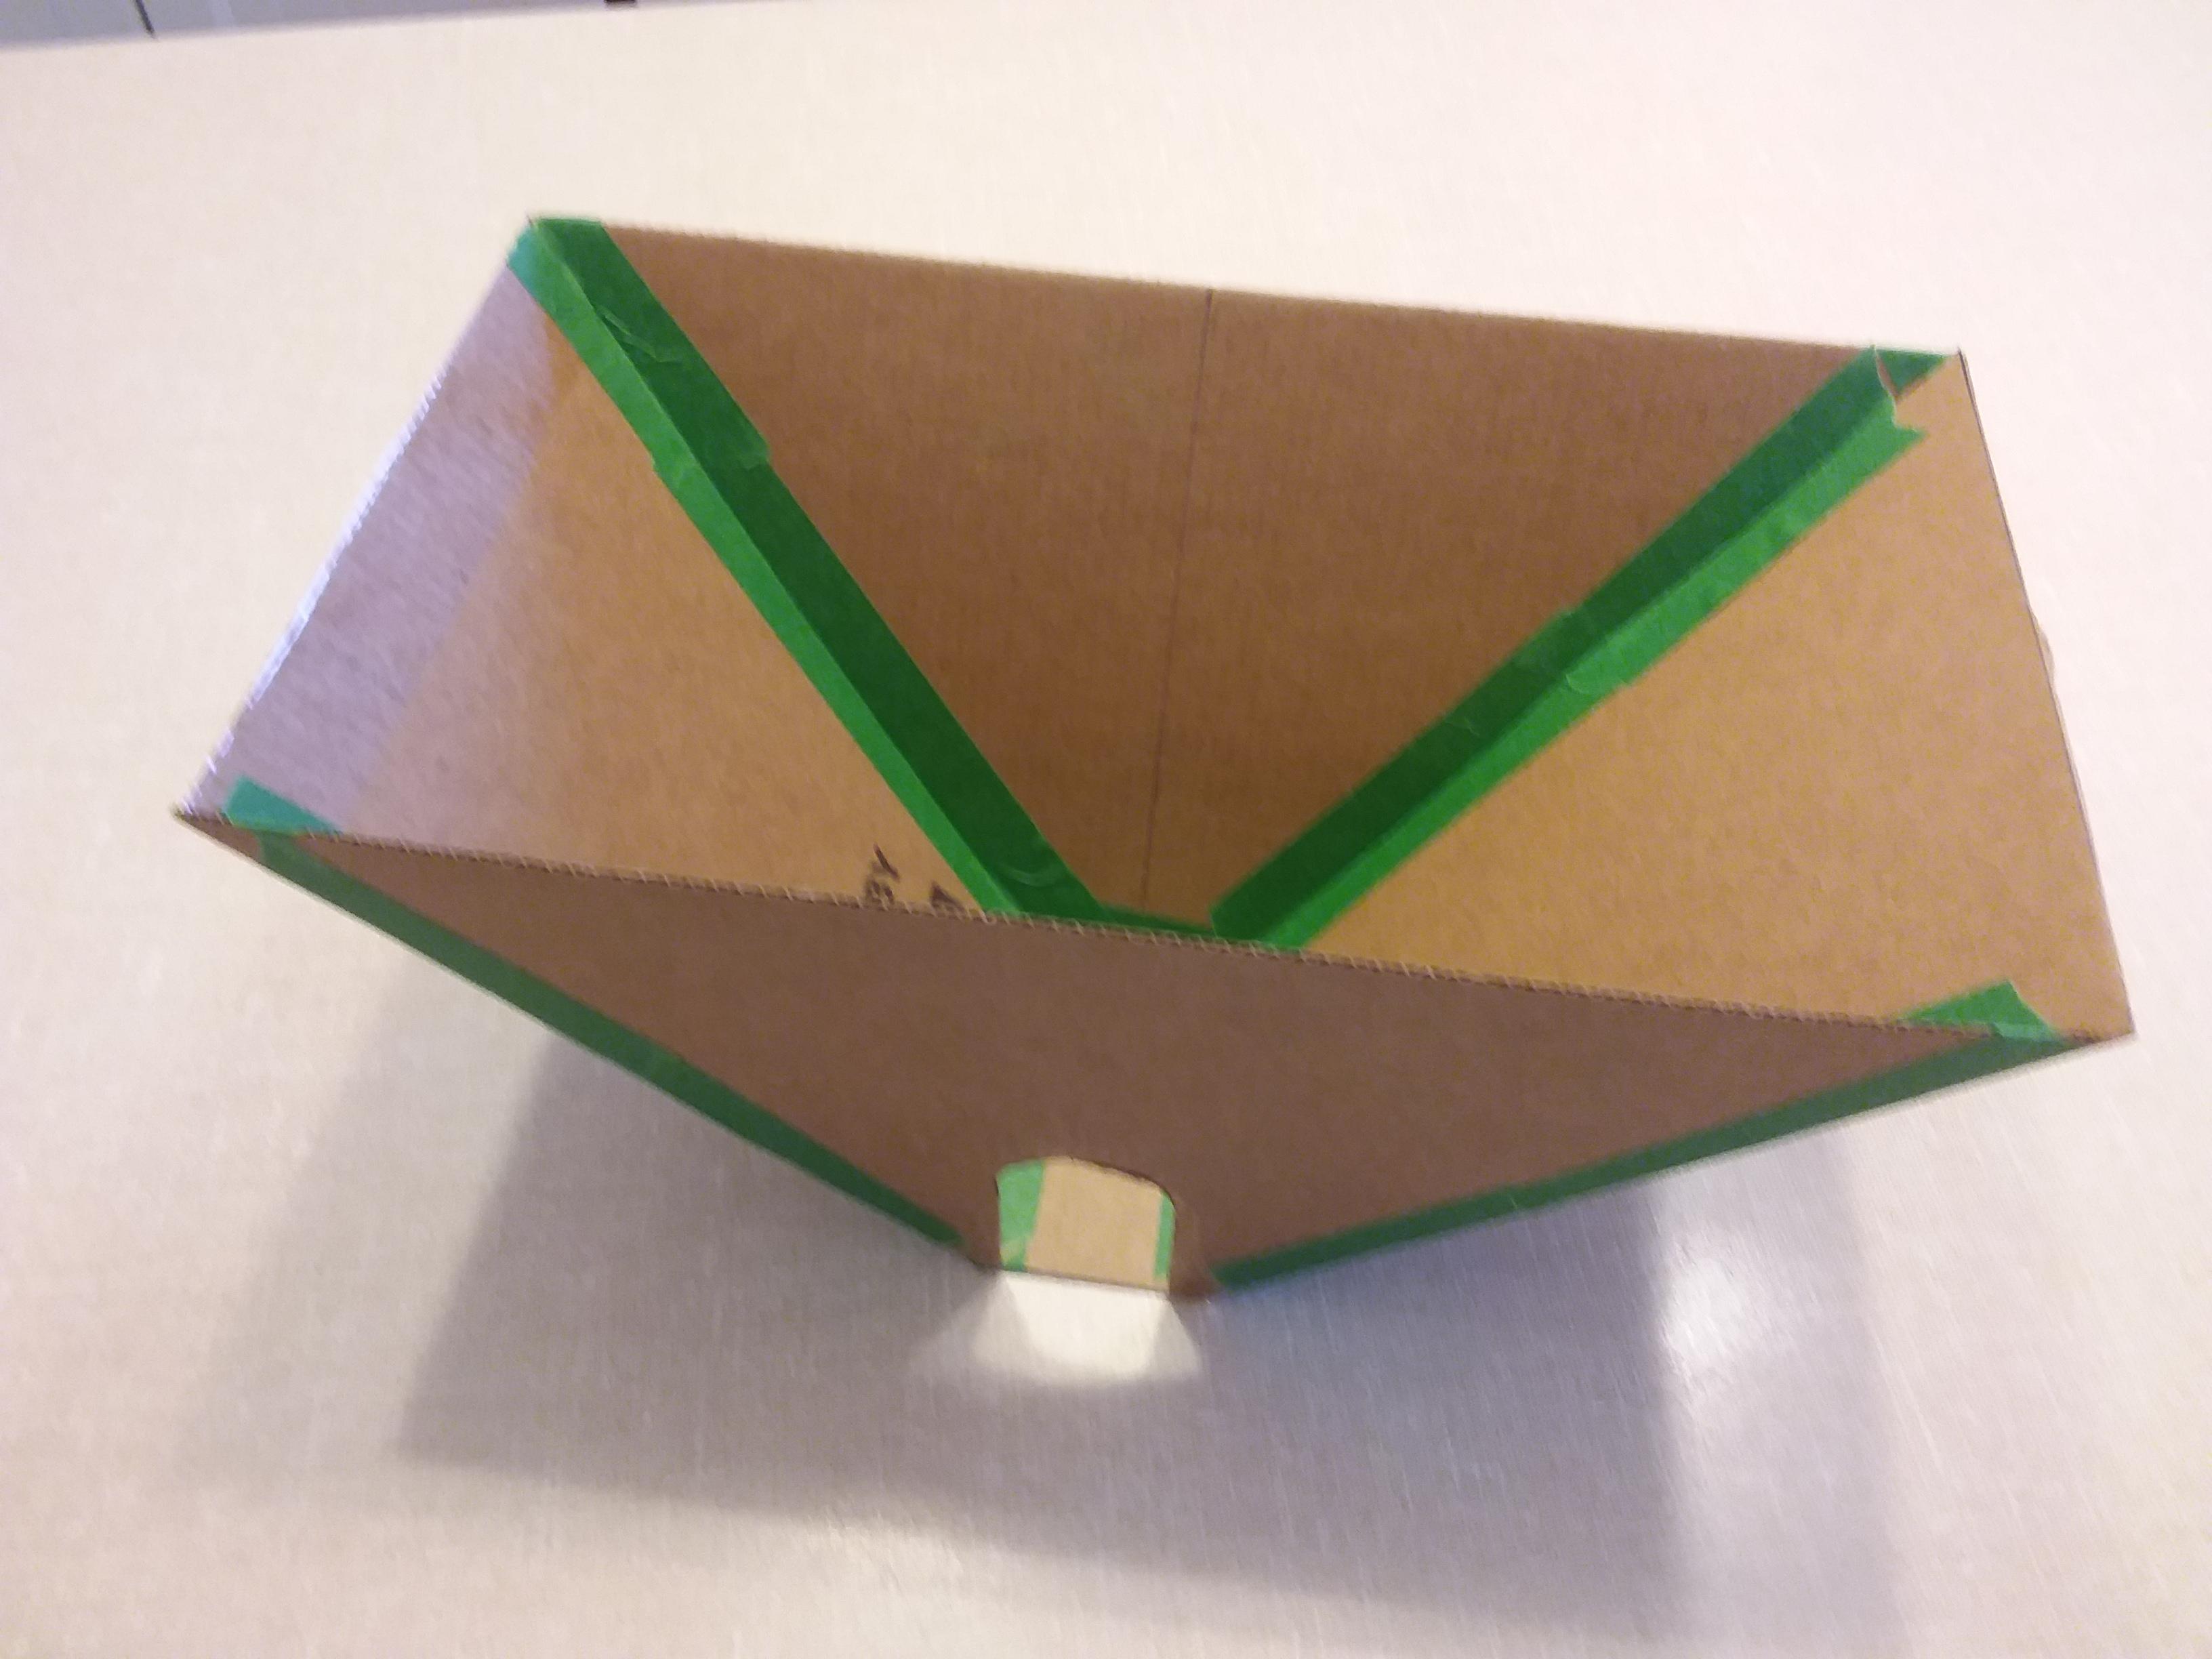
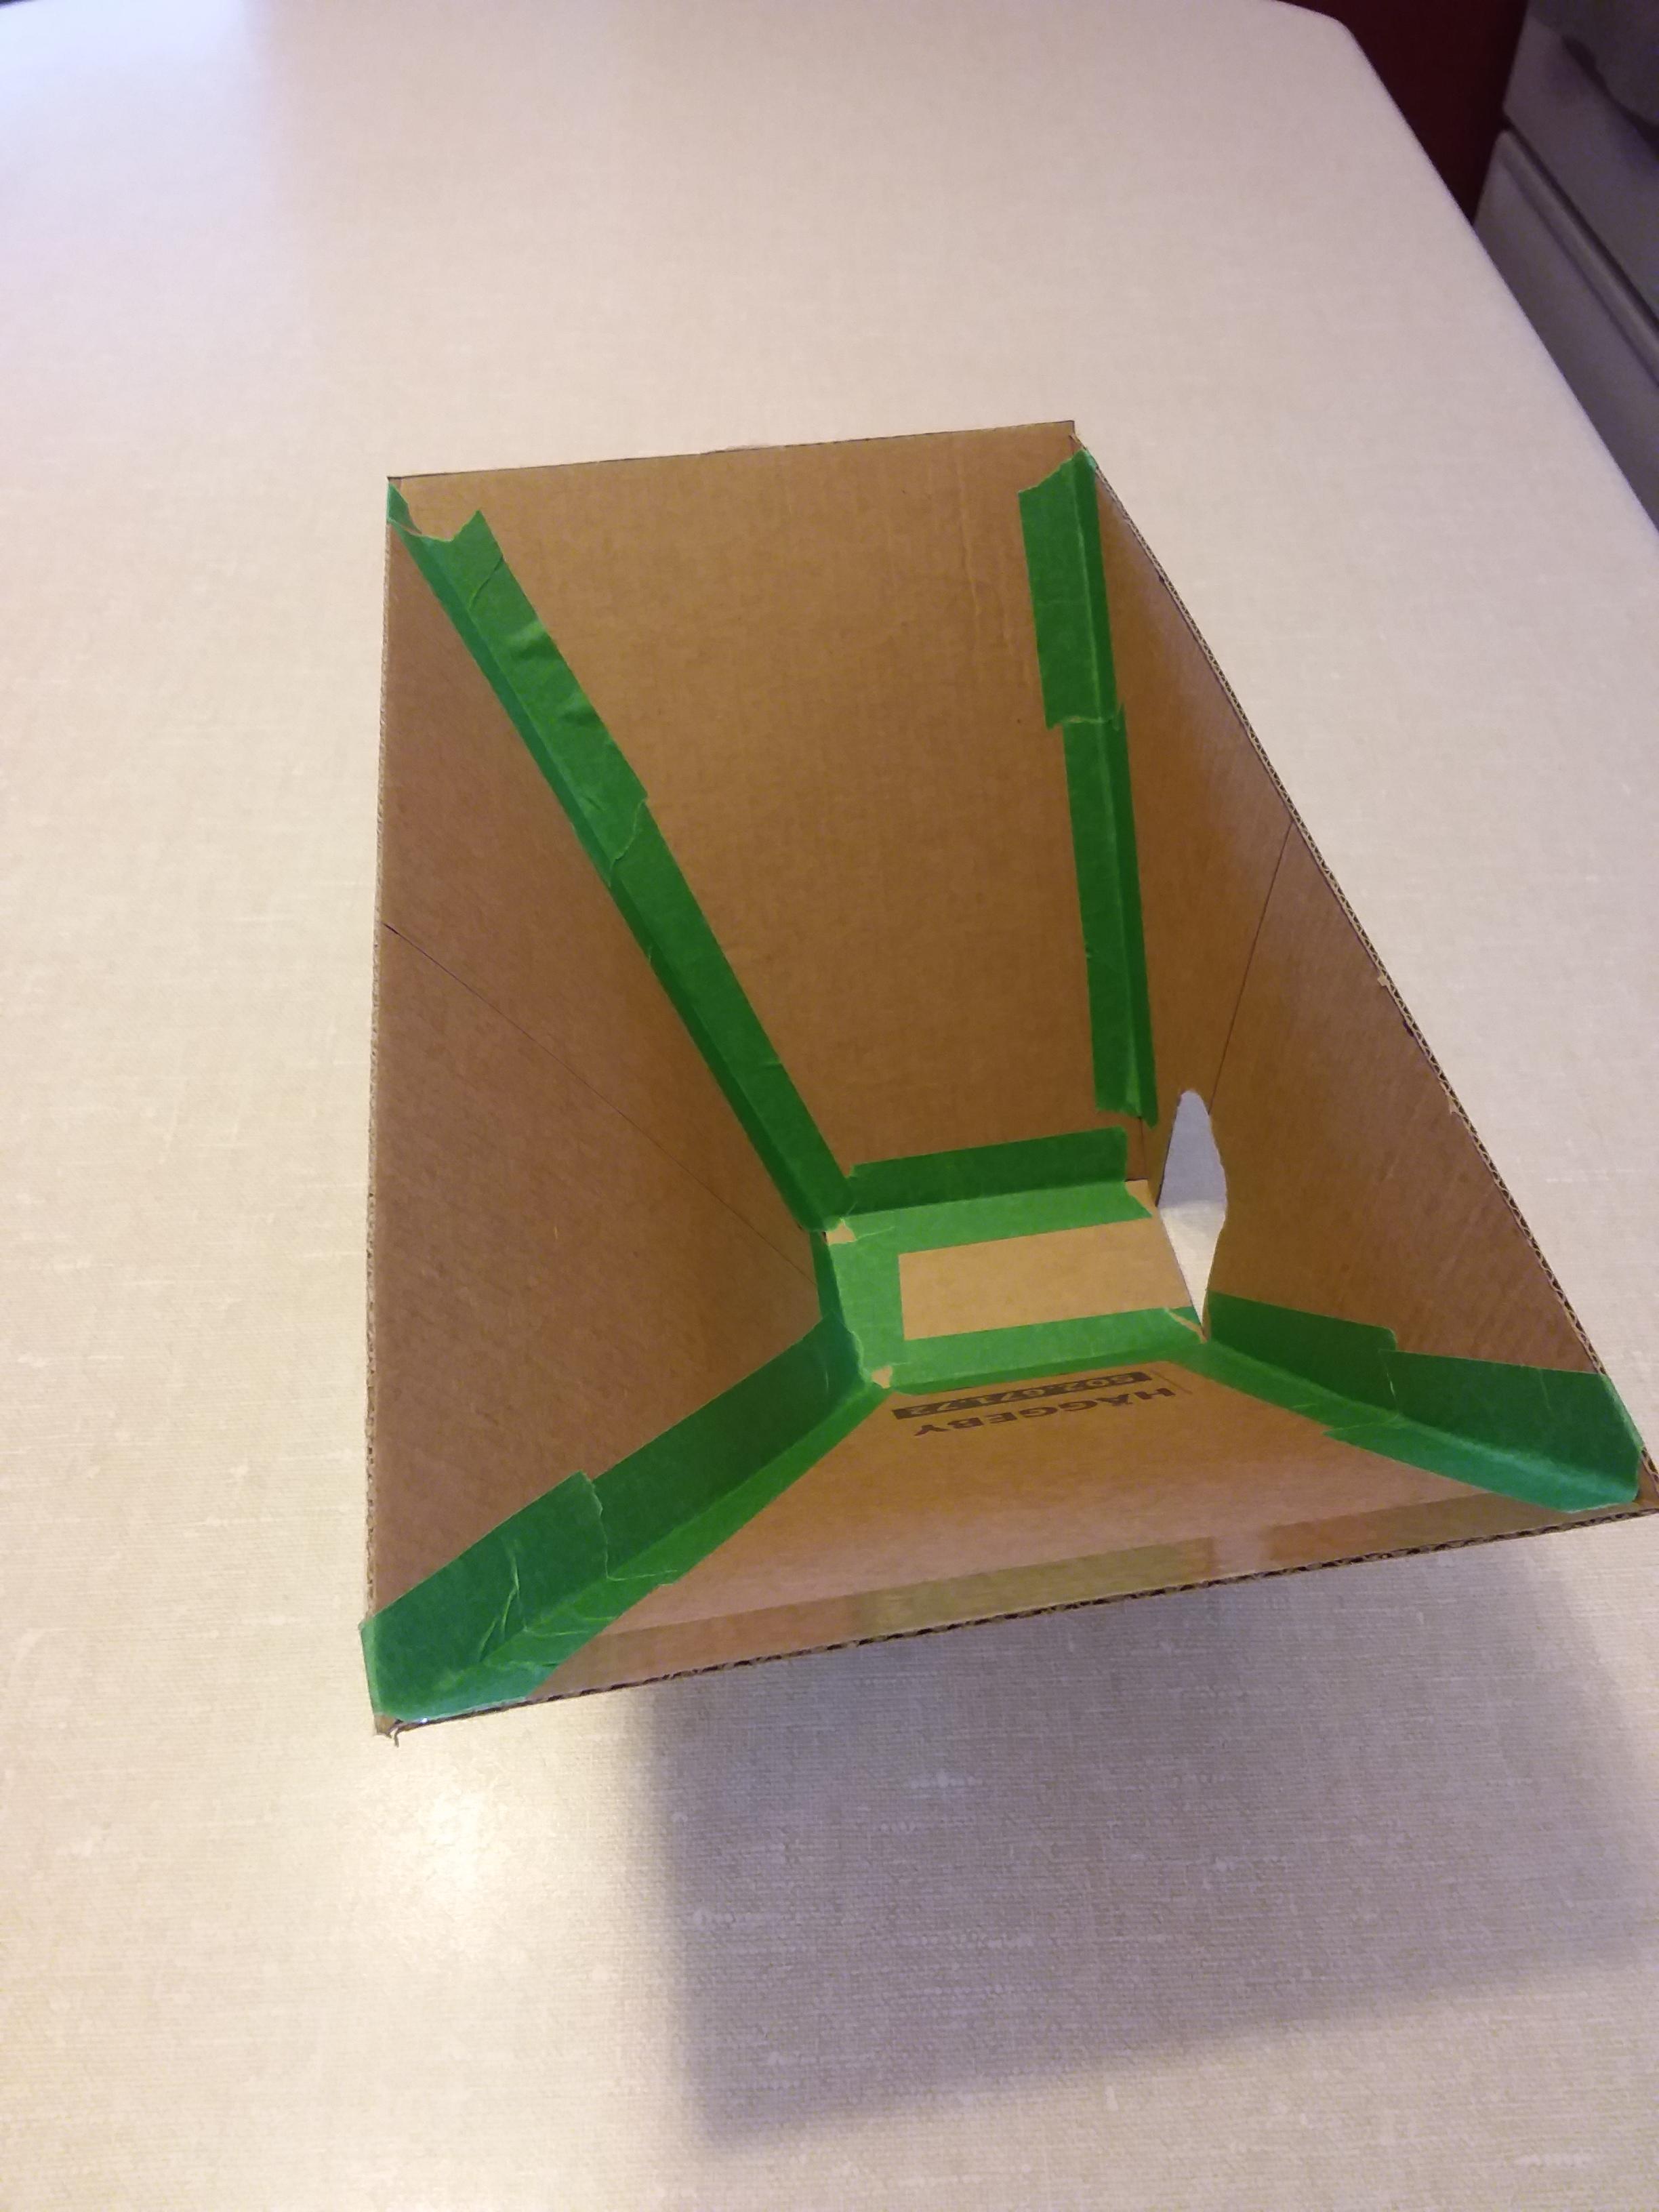
I work mostly on small items (hooks, leaves, etc.), so I wanted a shape that would conserve fuel as much as possible. This is why I added a slope on the wall opposite the tuyere. A slightly more complex shape but the bottom is only 2" by 3", while the top is 5" by 10". Total height is 6".
First I made a cardboard mockup to be sure my plan worked:
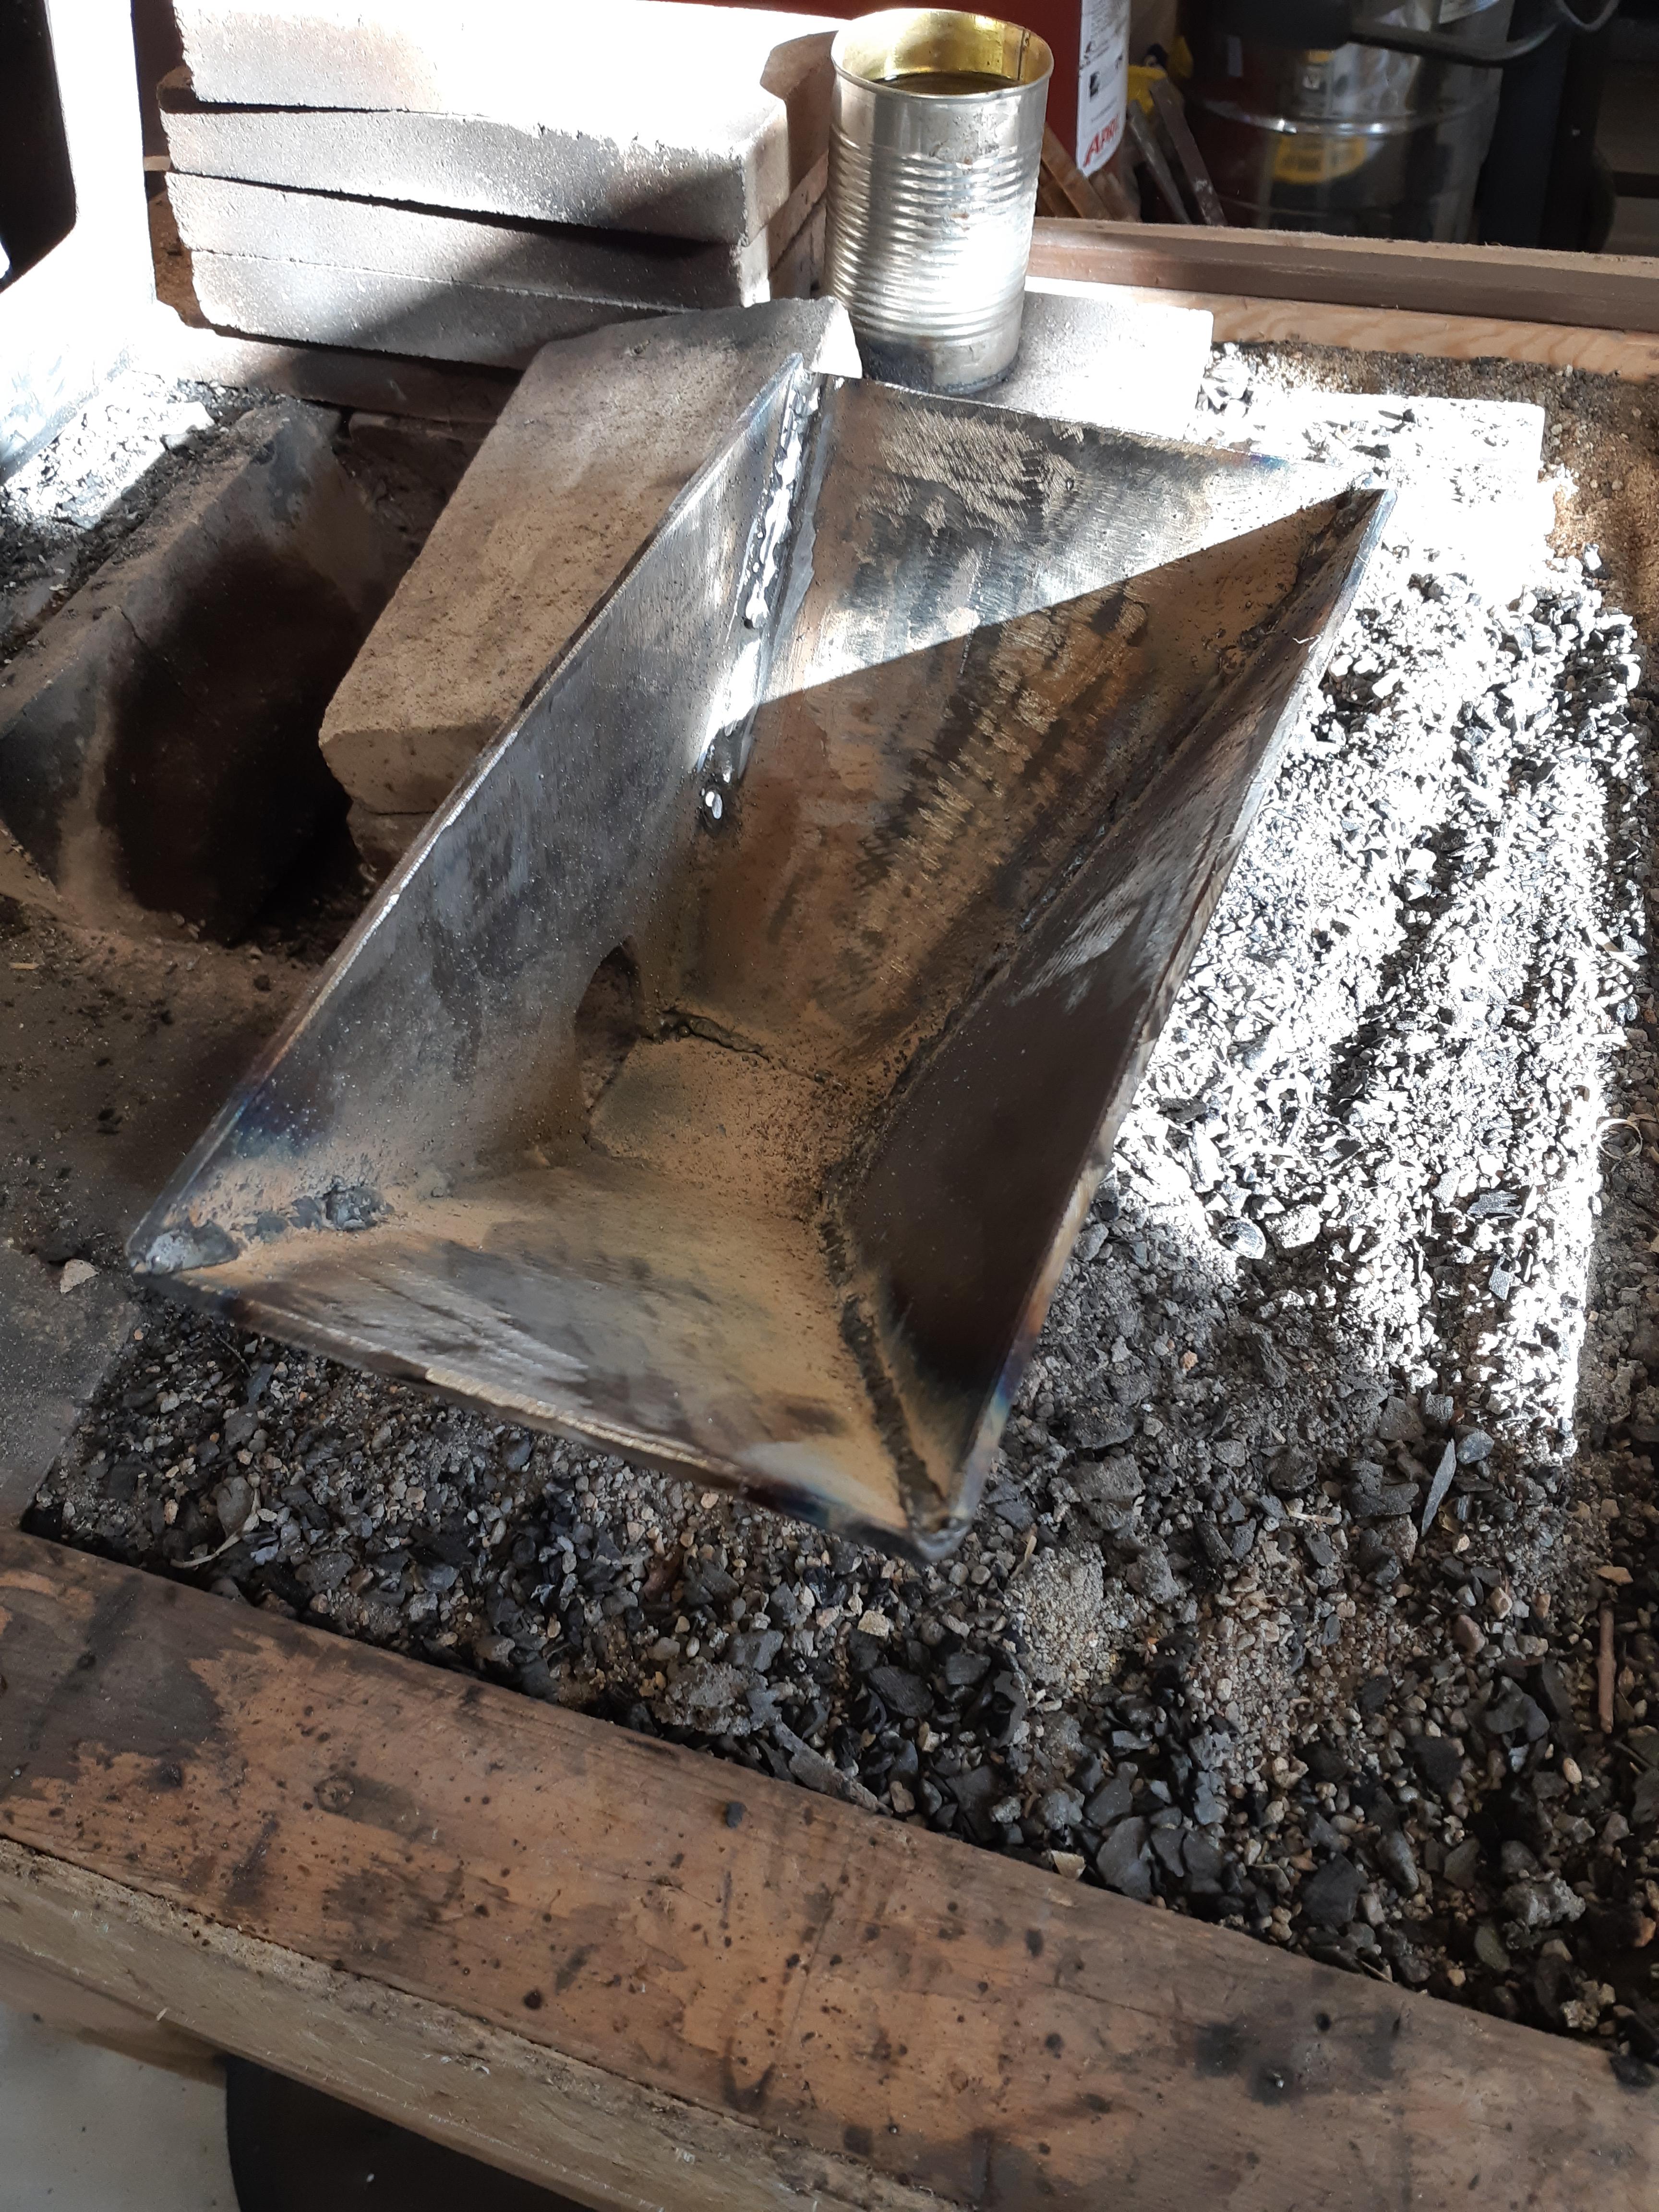
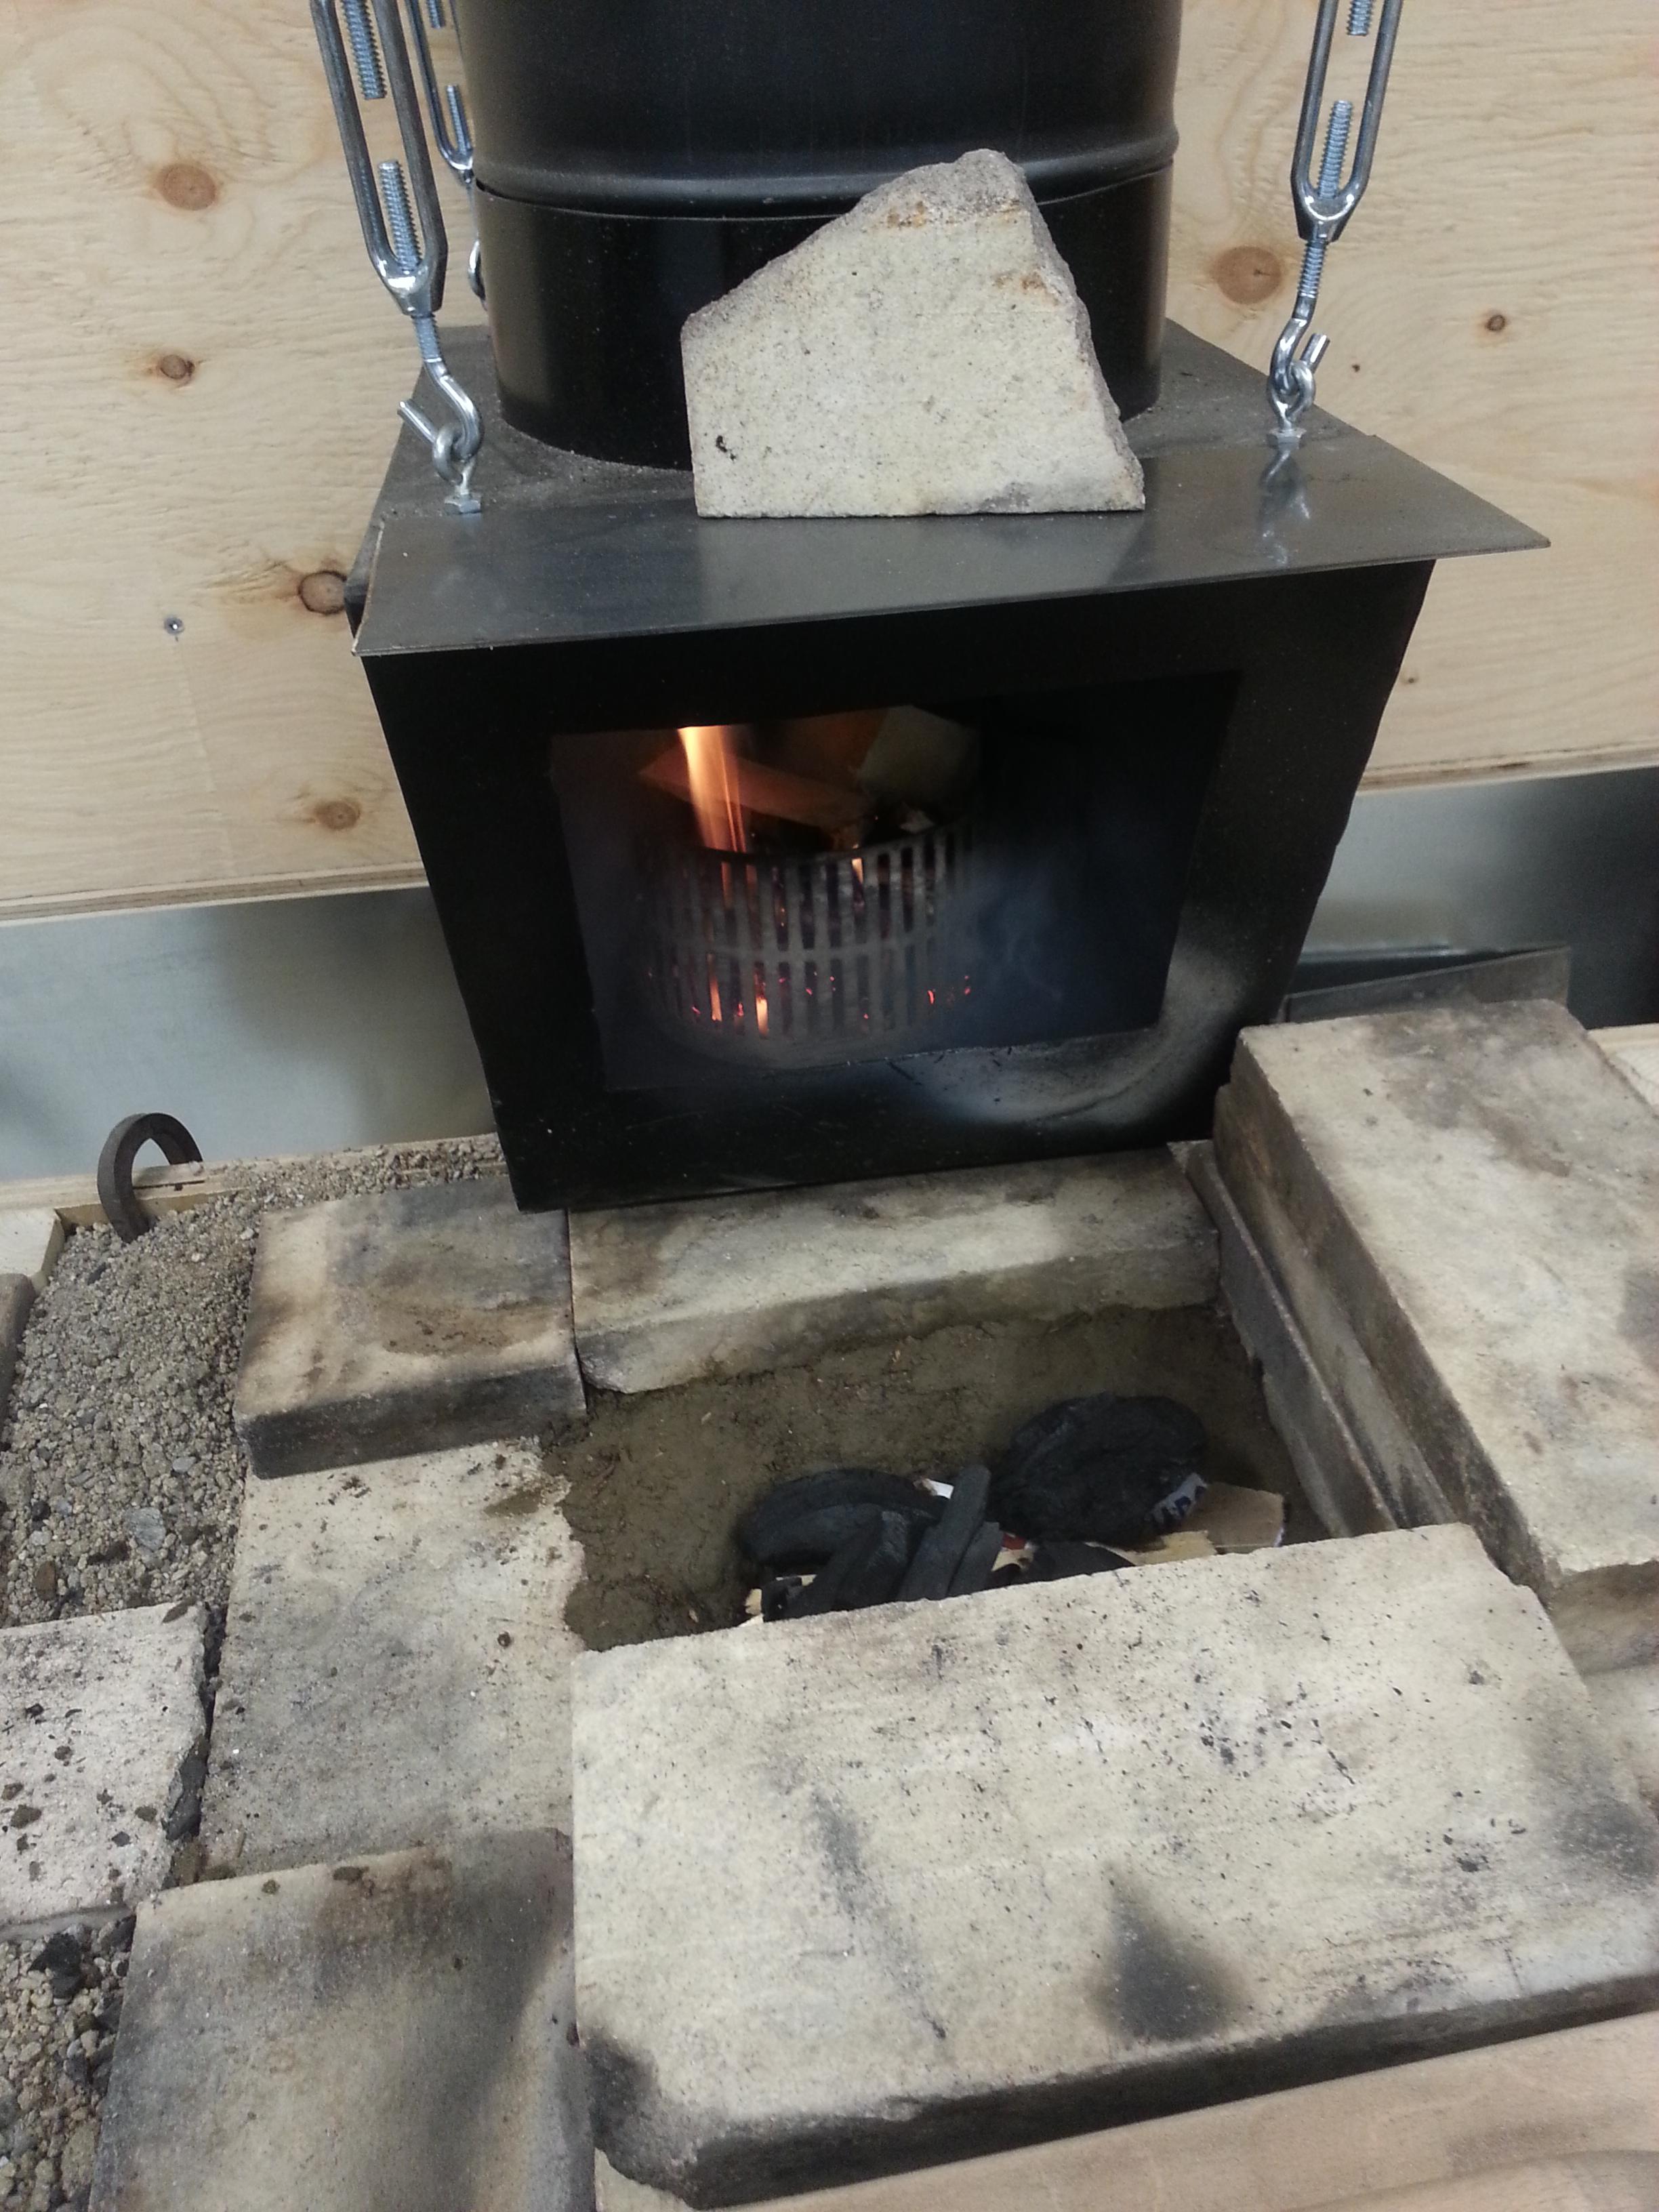
Everything looked good, so I proceeded with steel. I used pieces from a wood stove I took apart last year. The plates are 3/16" thick. Should be thick enough to last me a good while, considering that I spend less than 10 hours a week.

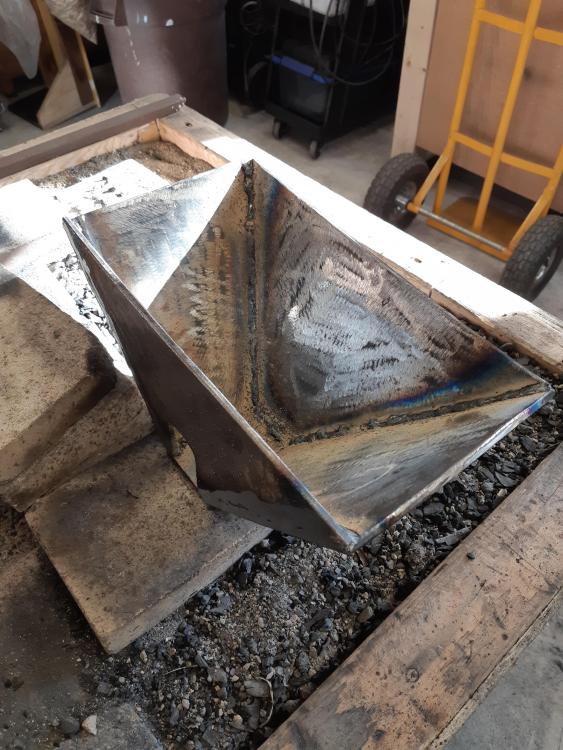
Overall, it took me about 3 hours to cut the pieces, fit and weld them together. I immediately moved it into place in my existing forge.
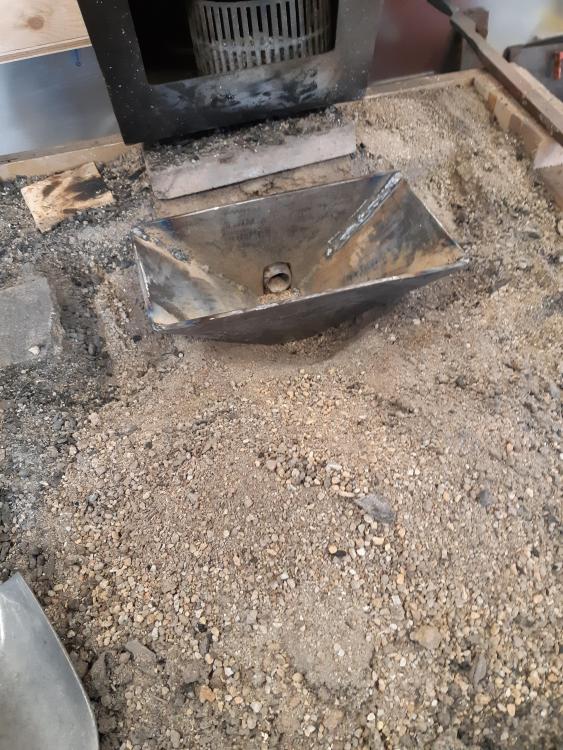
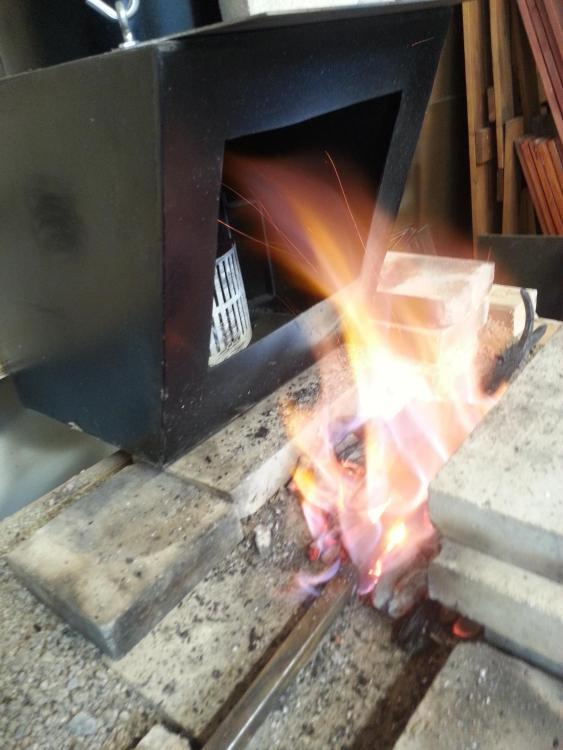
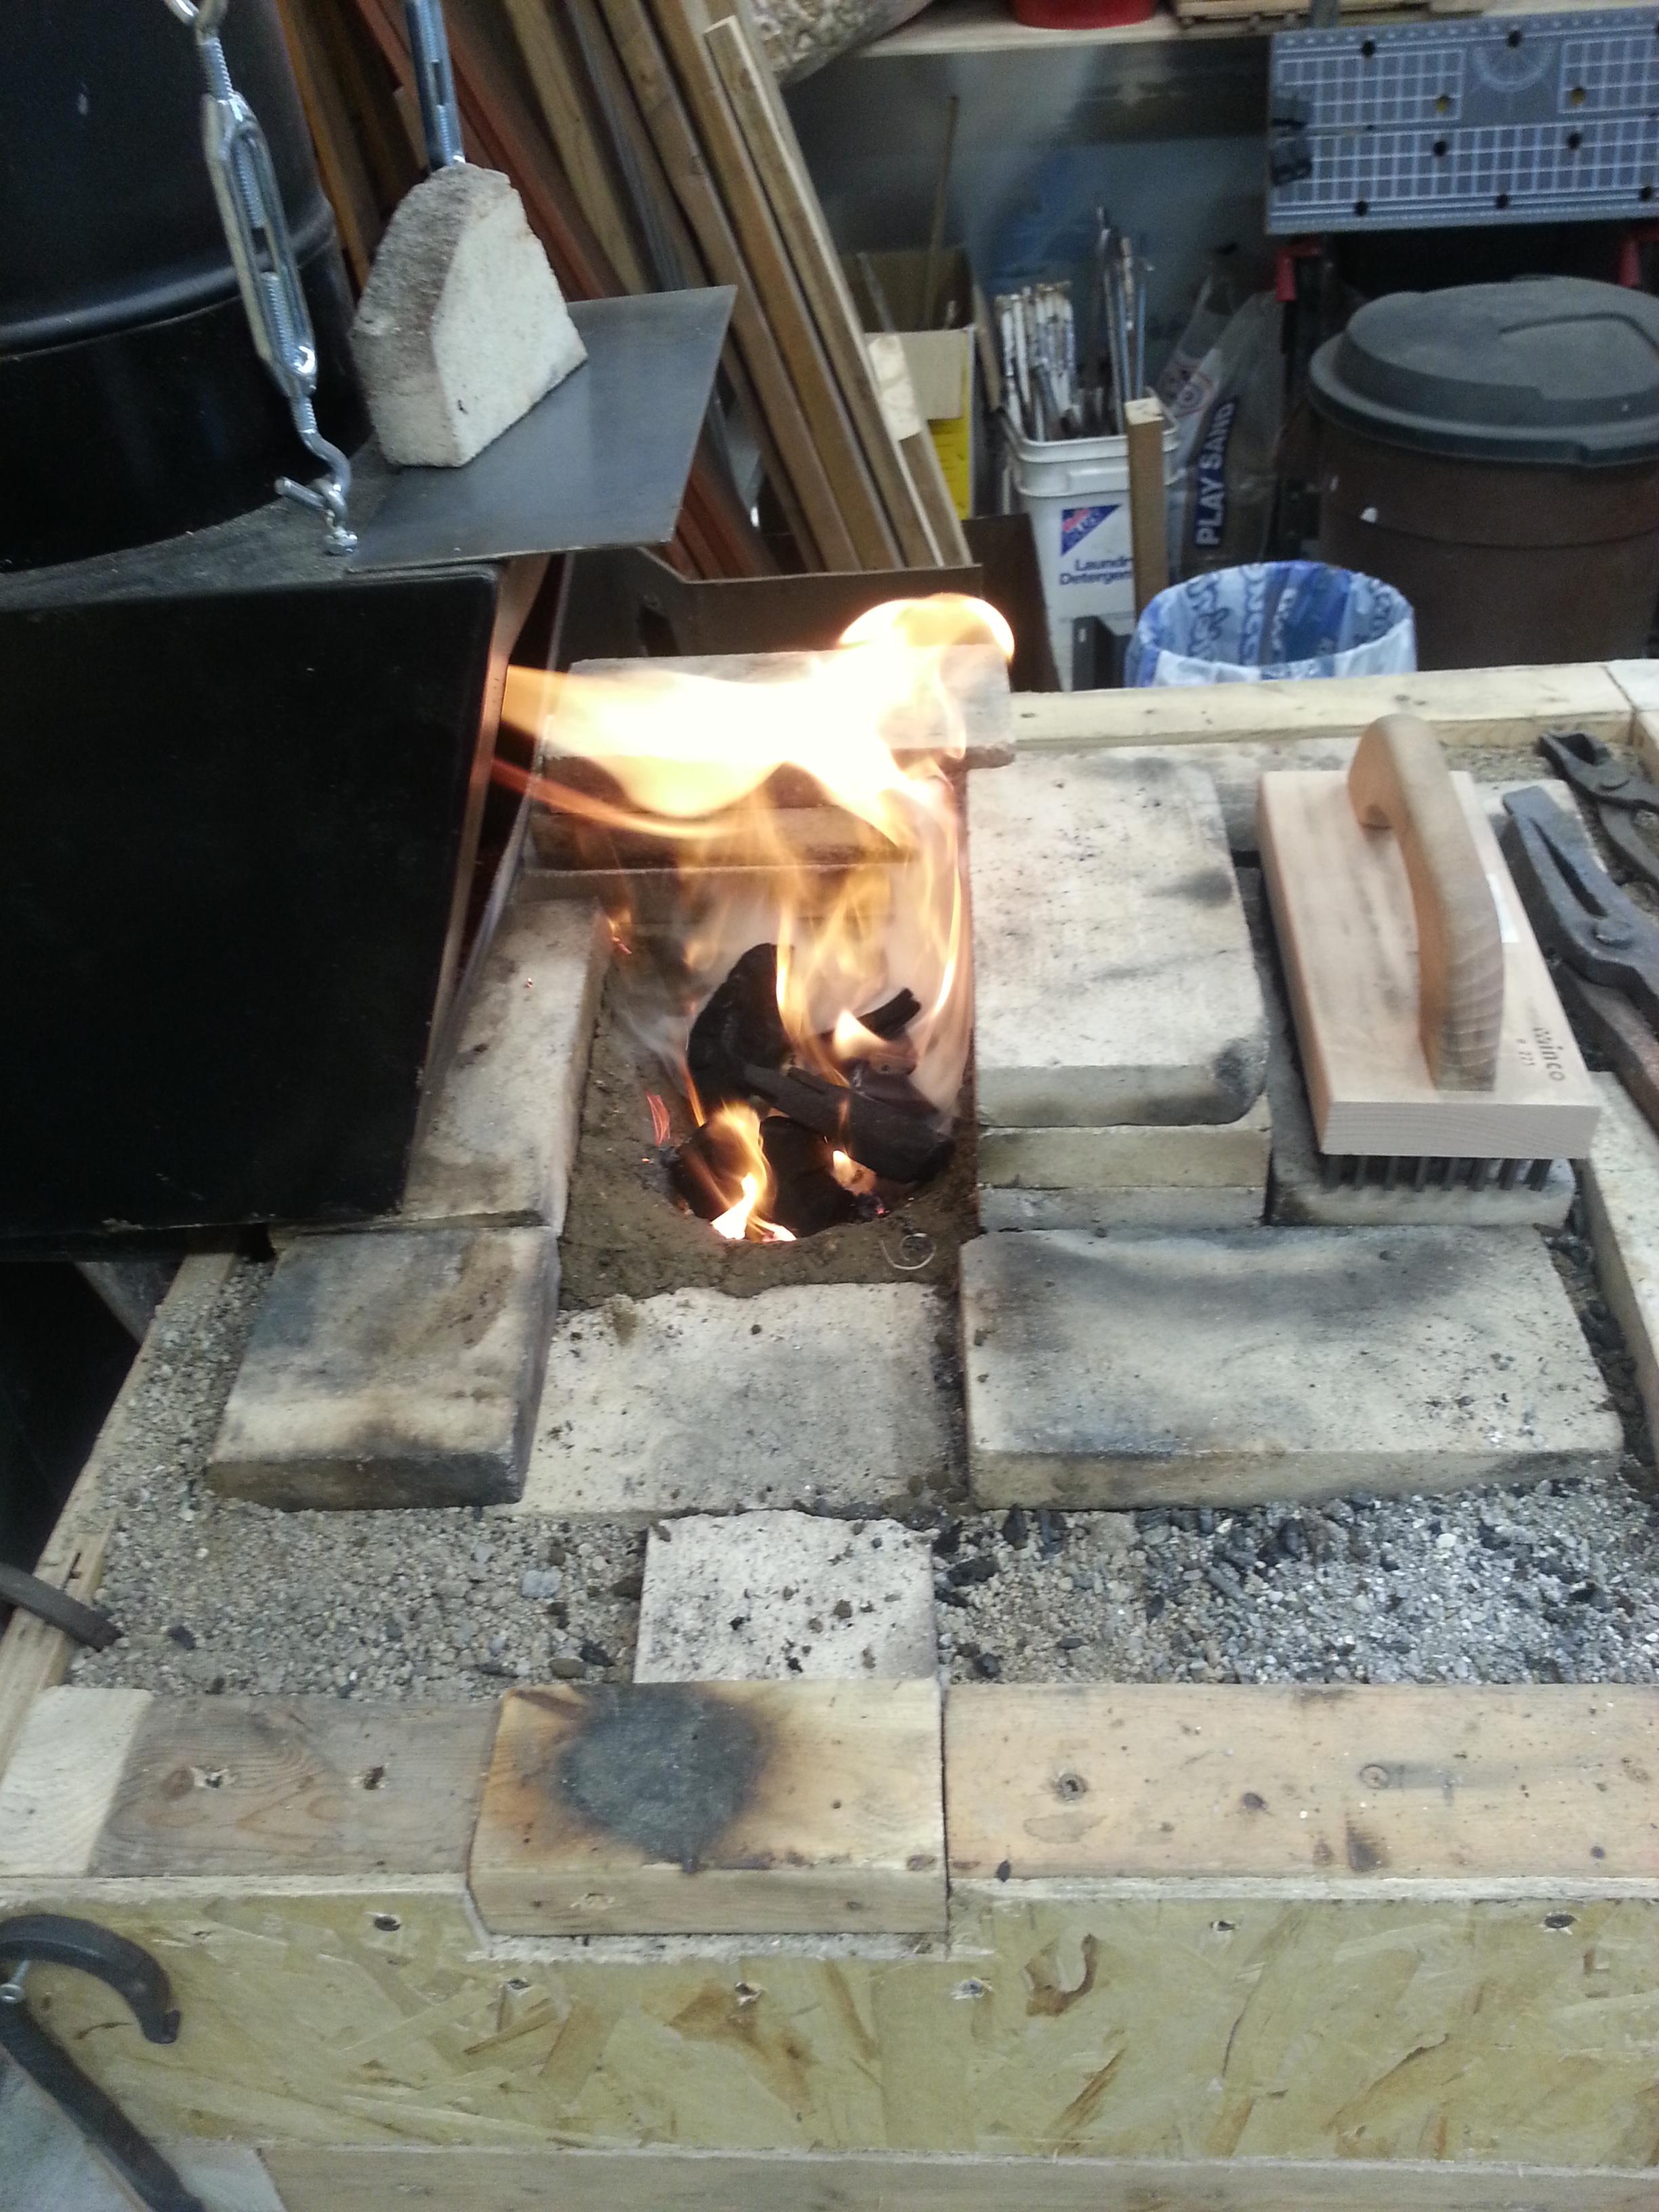
I only had time for a quick test burn.
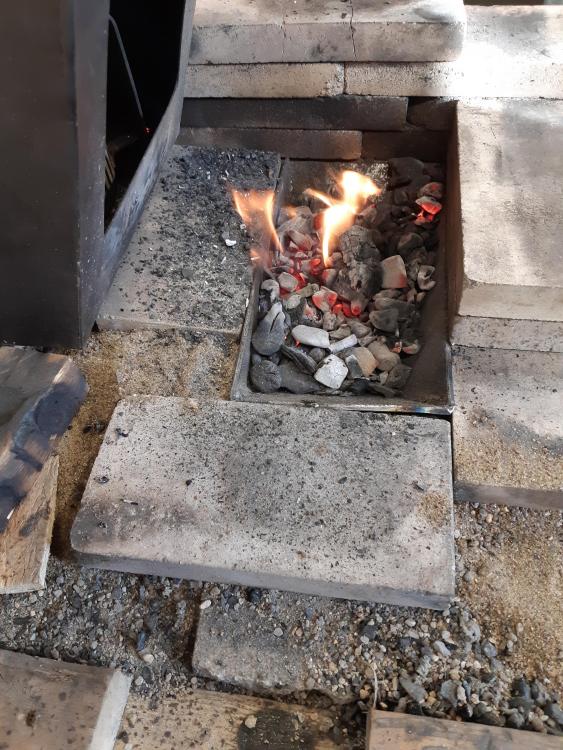
Worked well, although the sides are higher than what I was using by about an inch. It still took less charcoal to fill than the JABOD. Even better, it was much faster and easier to clean up.

I should be able to do more complete testing tomorrow and deteemine whether I need to shorten it a bit. Once that is determined, I may add a rim to finish it.
Cheers! Arthur
-
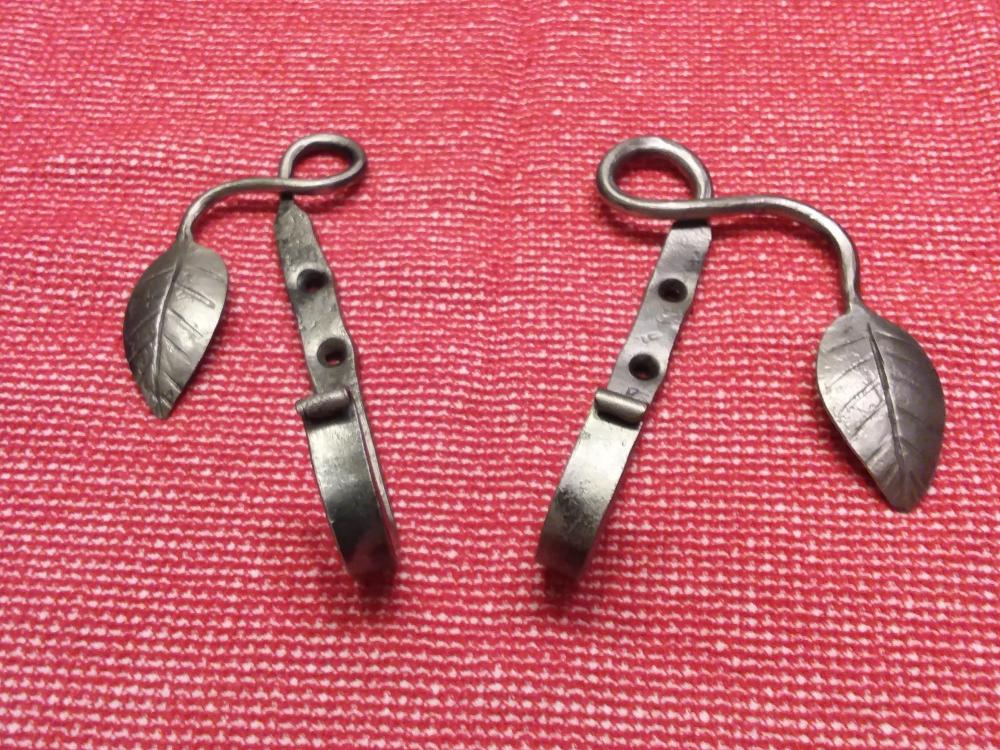
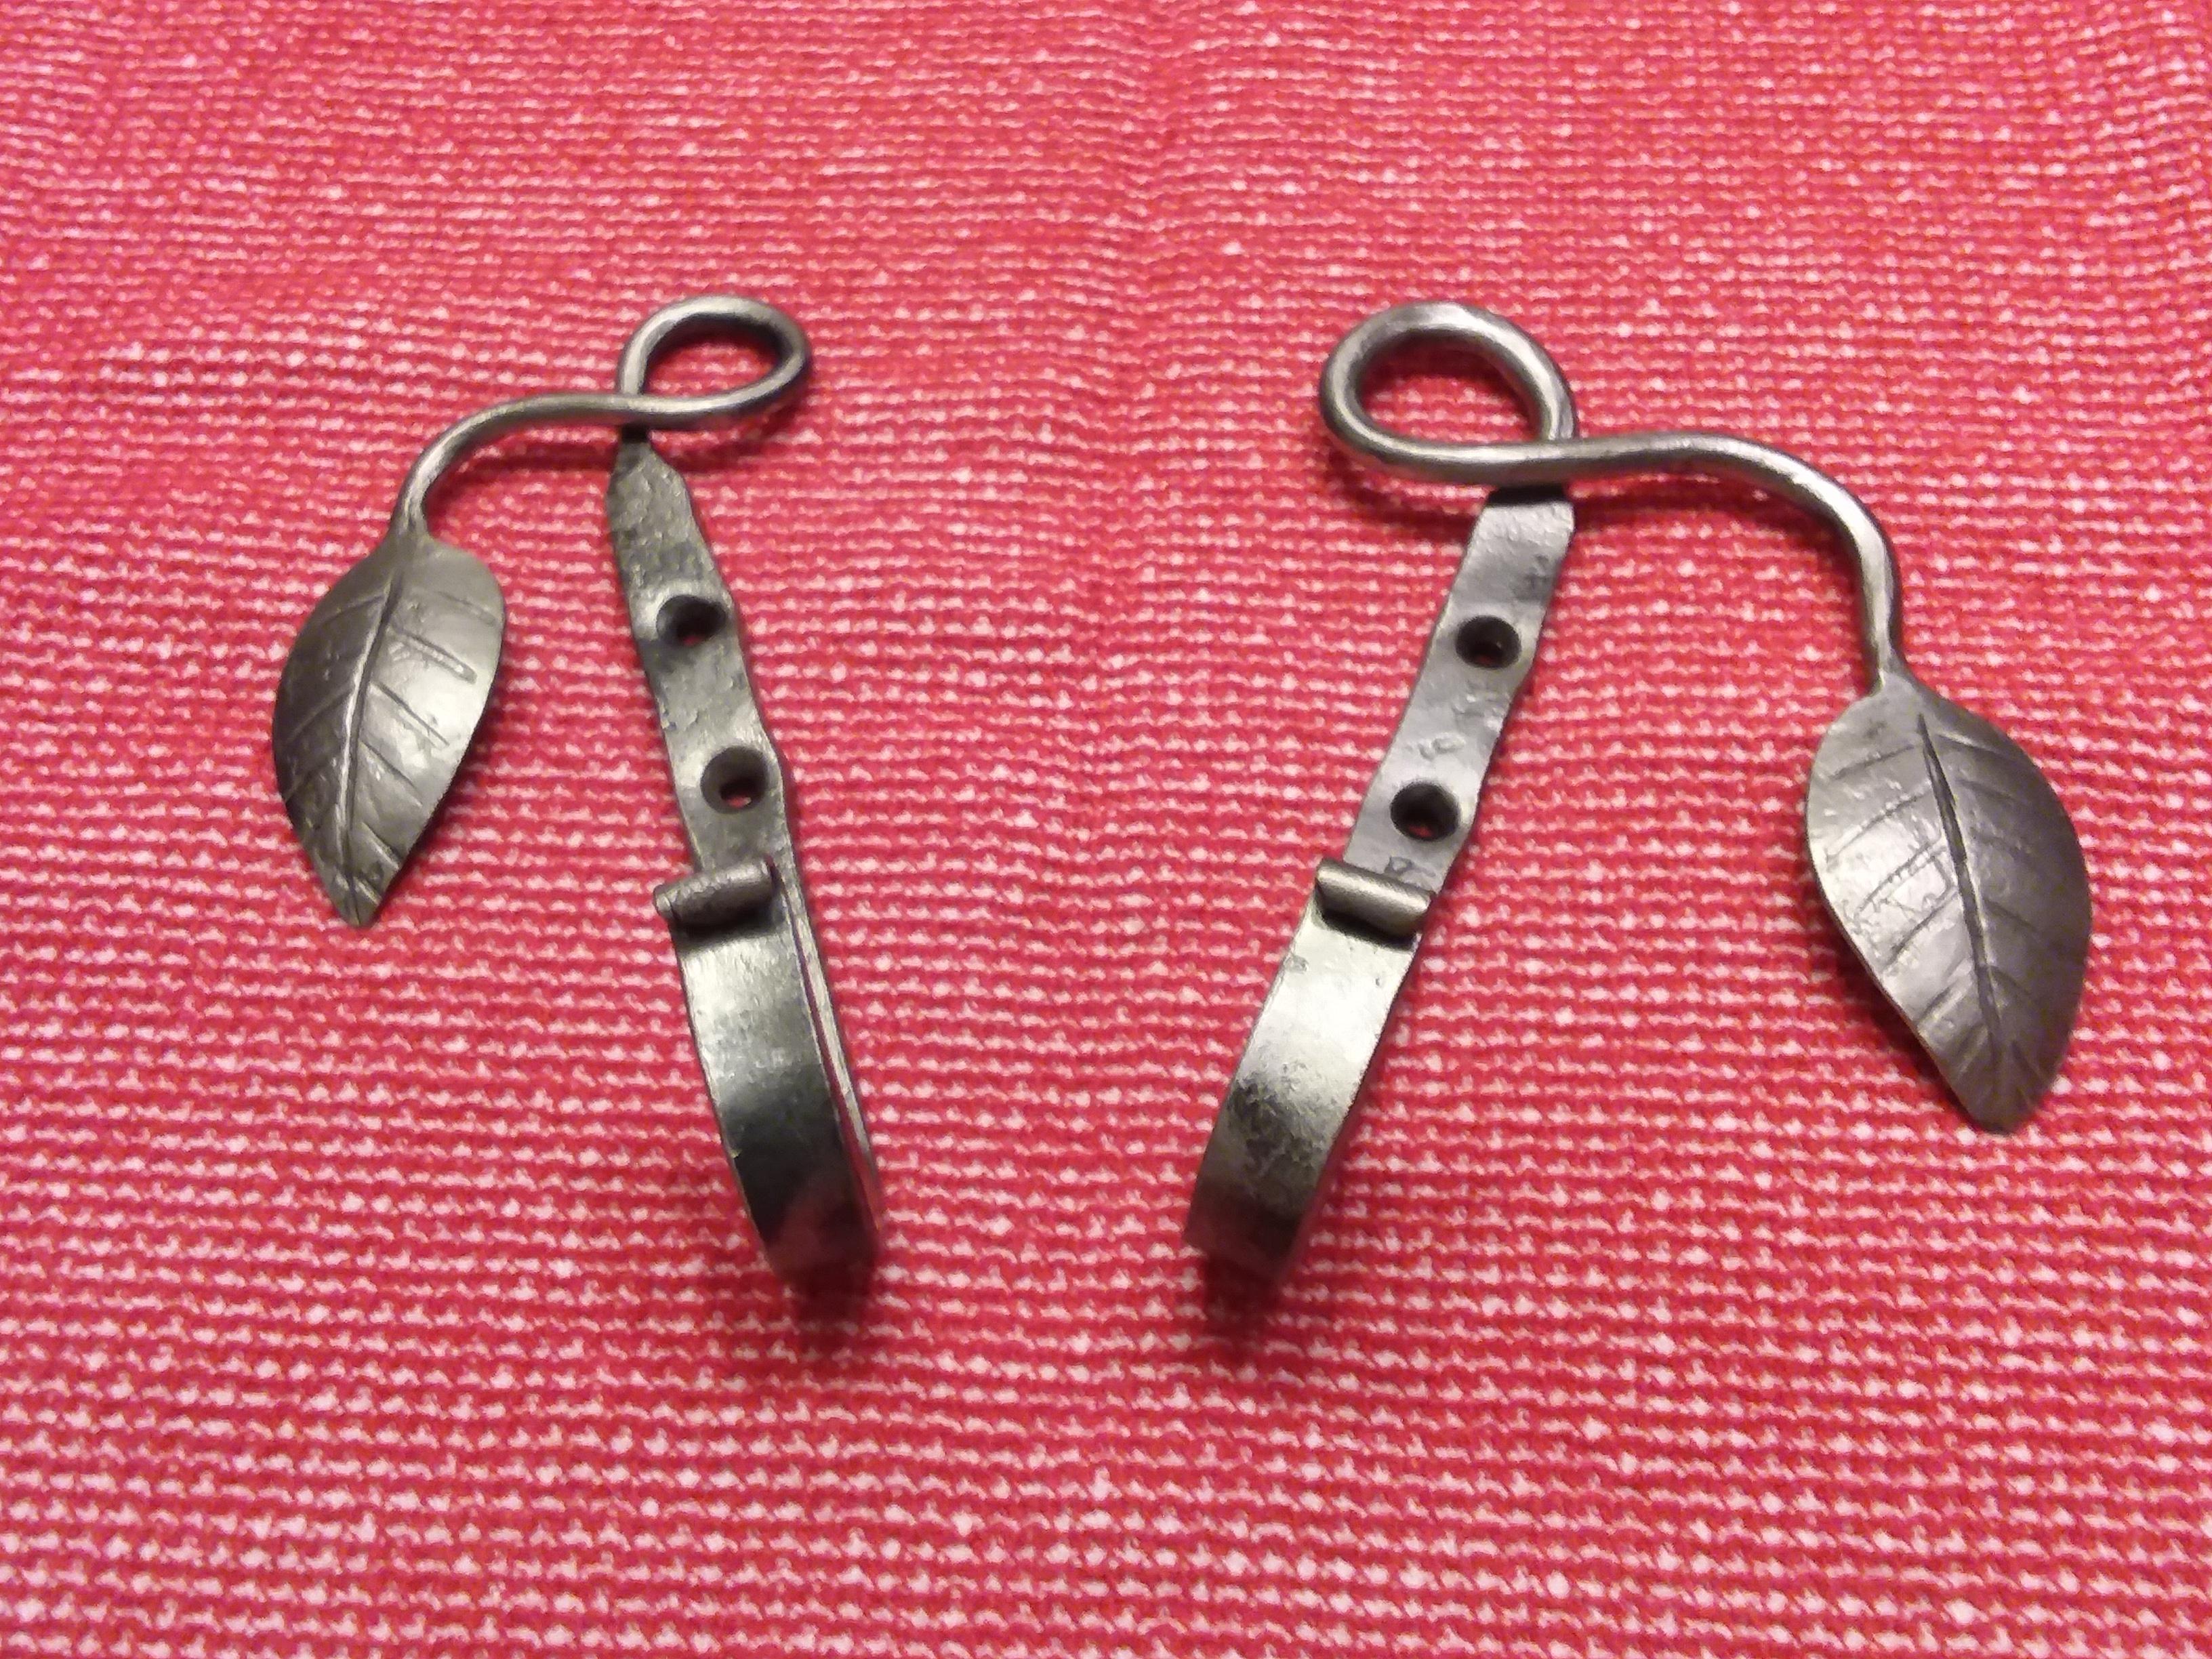
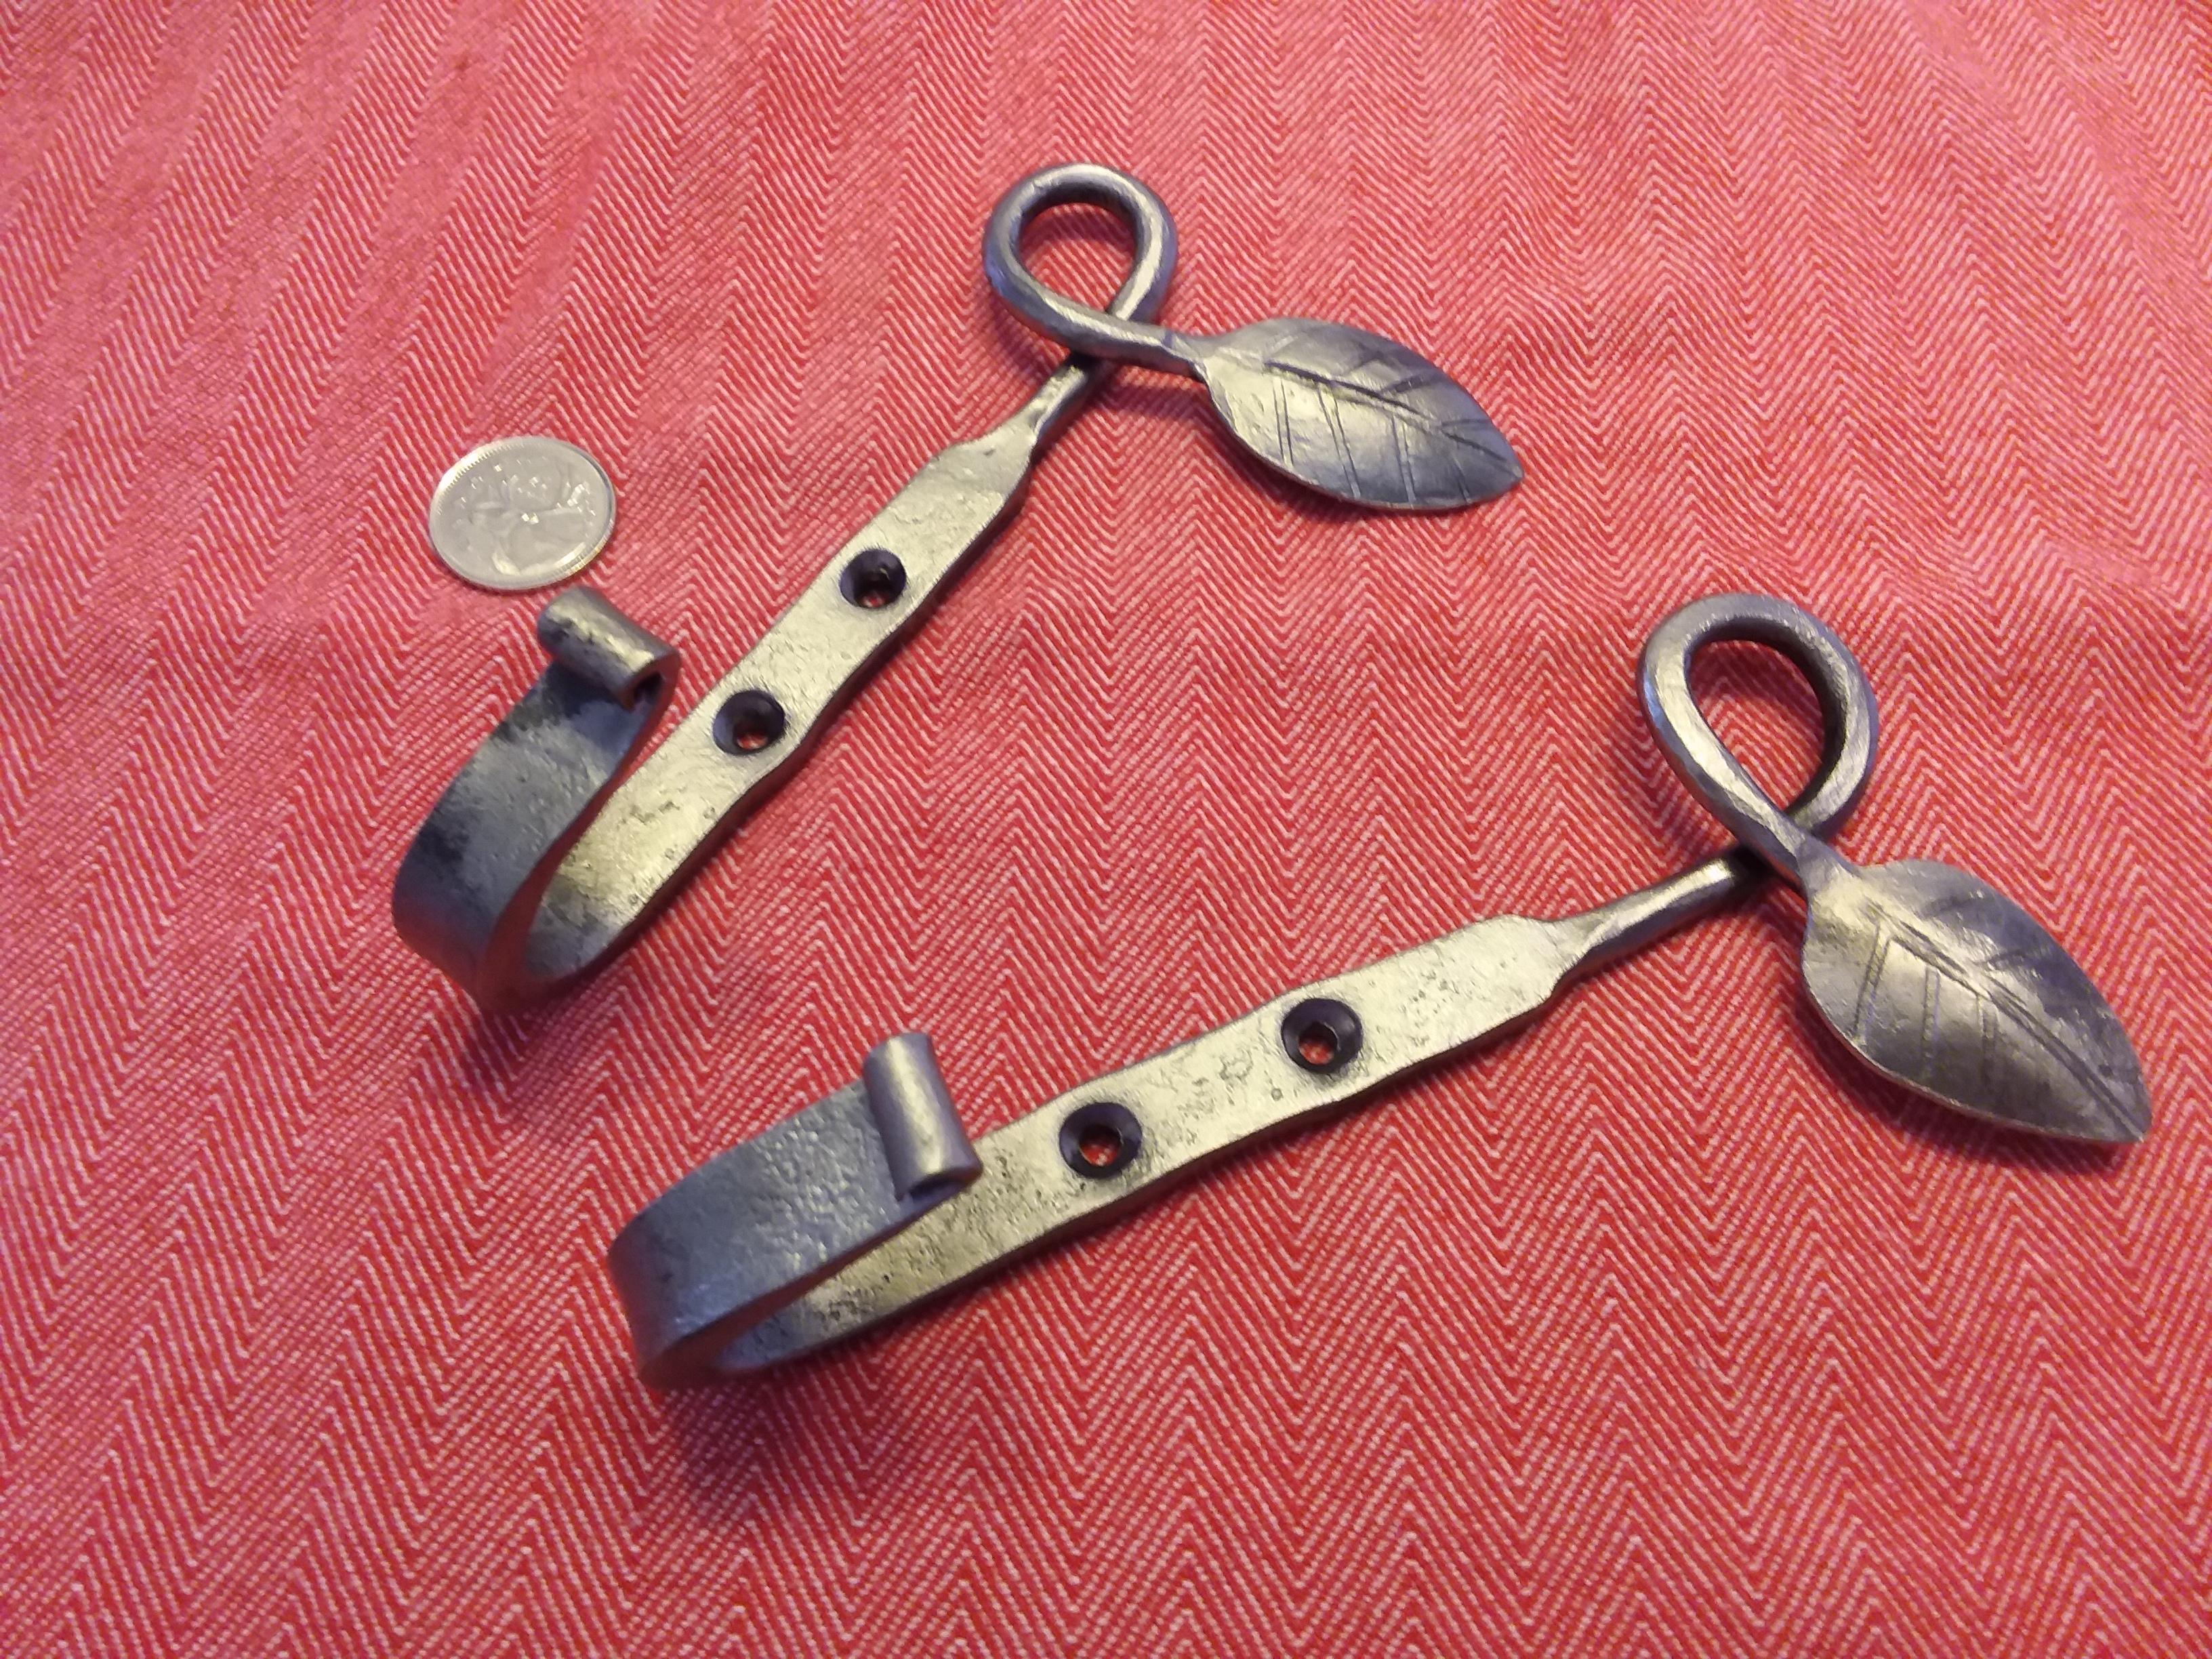
Finished the two leaves I made on Monday, adding the hook end. With the longer stems I was able to add more curves.
-
9 hours ago, Frosty said:
They look really nice Arthur. Like your spring fuller do you?
")
Indeed I do. No need for me to grow a third hand now.
") 9 hours ago, Daswulf said:
9 hours ago, Daswulf said:Arthur, you could make spoons very similar. Nice work. Hmm... leaf spoons...
I could do that. Would be fun. But I wonder what kind of treatment should I put on my steel, or what kind of steel should I use, so that they would be food safe and not rust? Beeswax? Stainless steel?
-
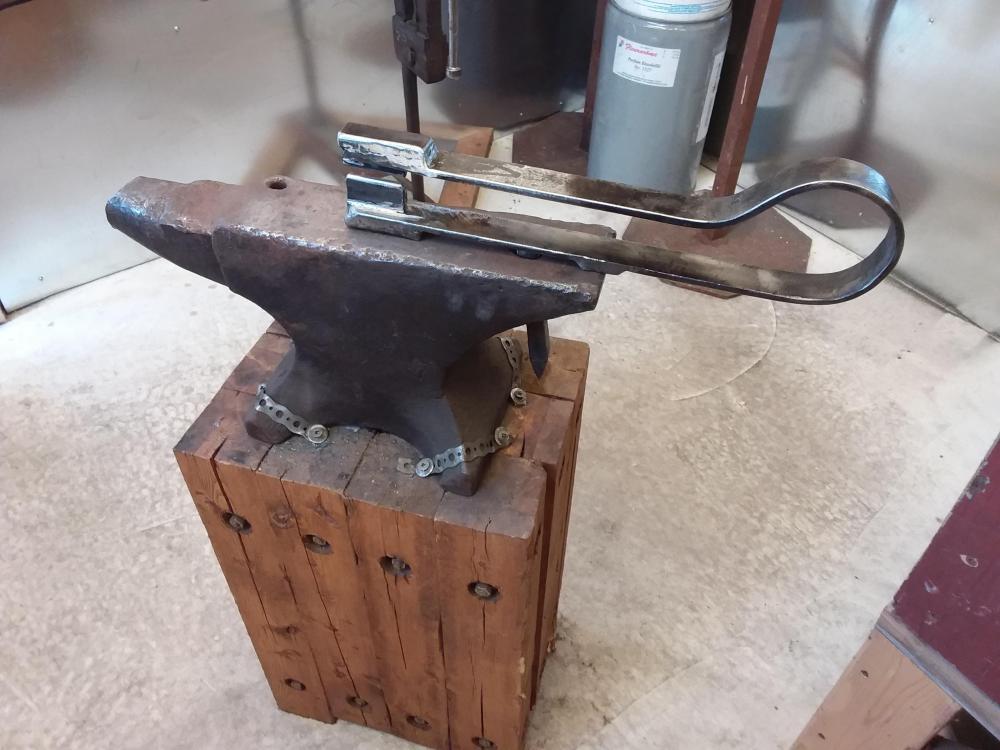
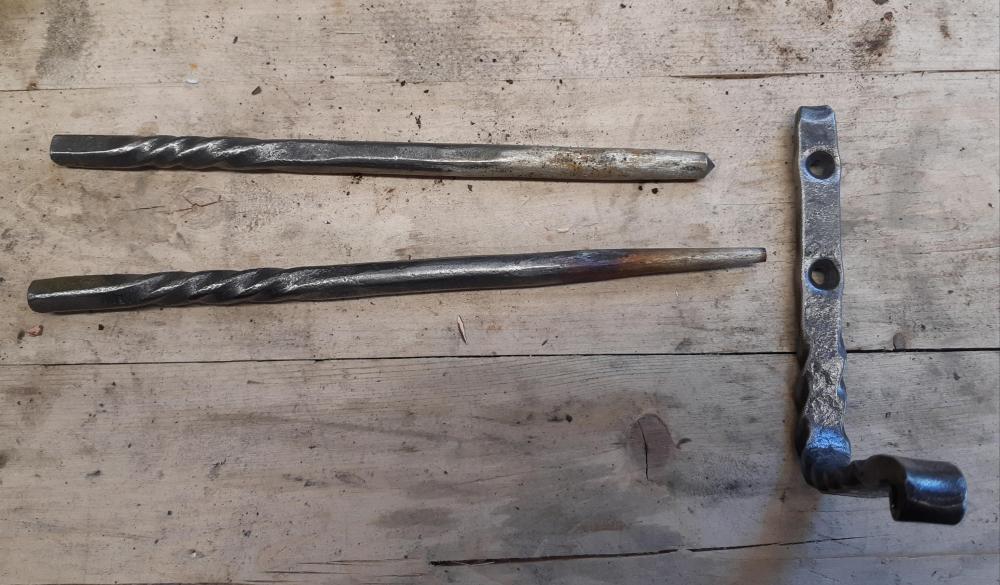
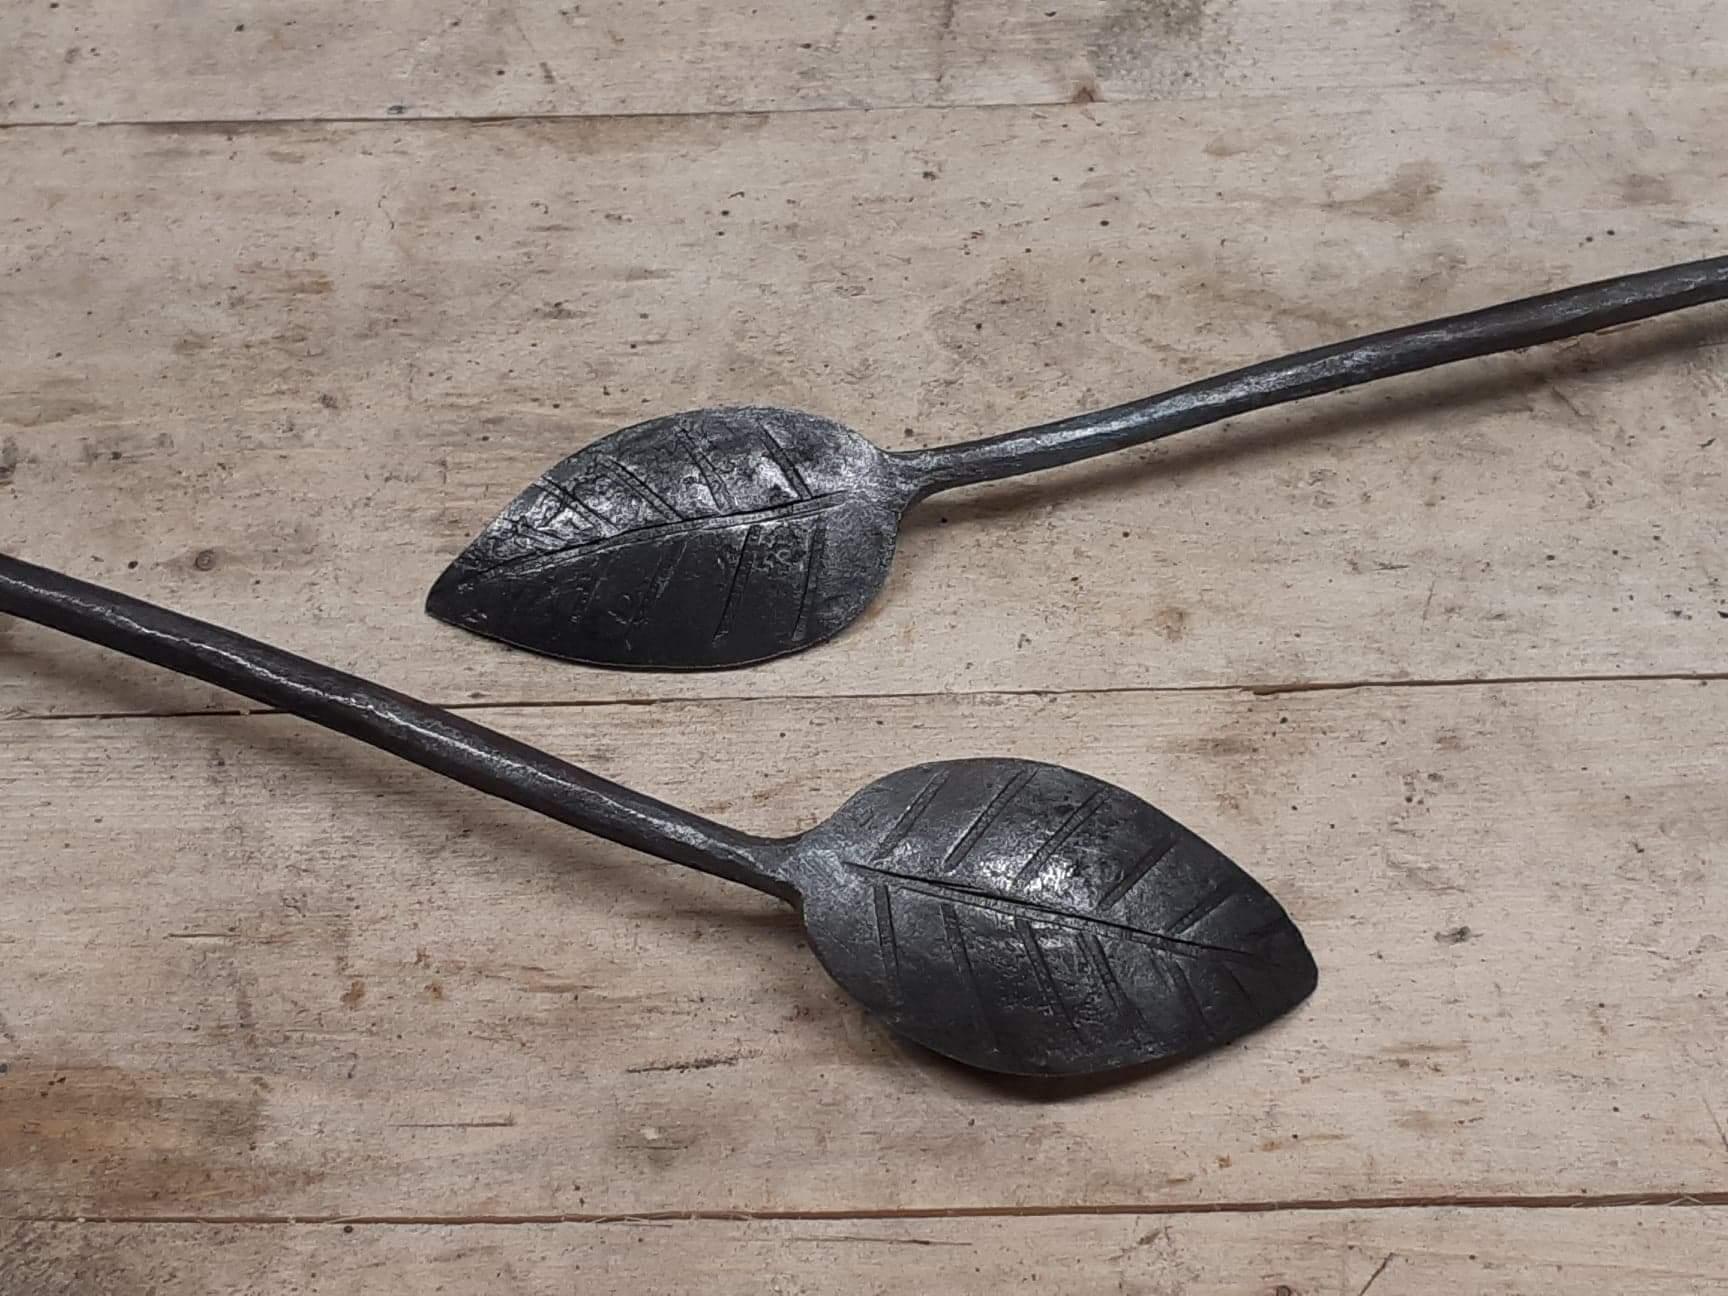
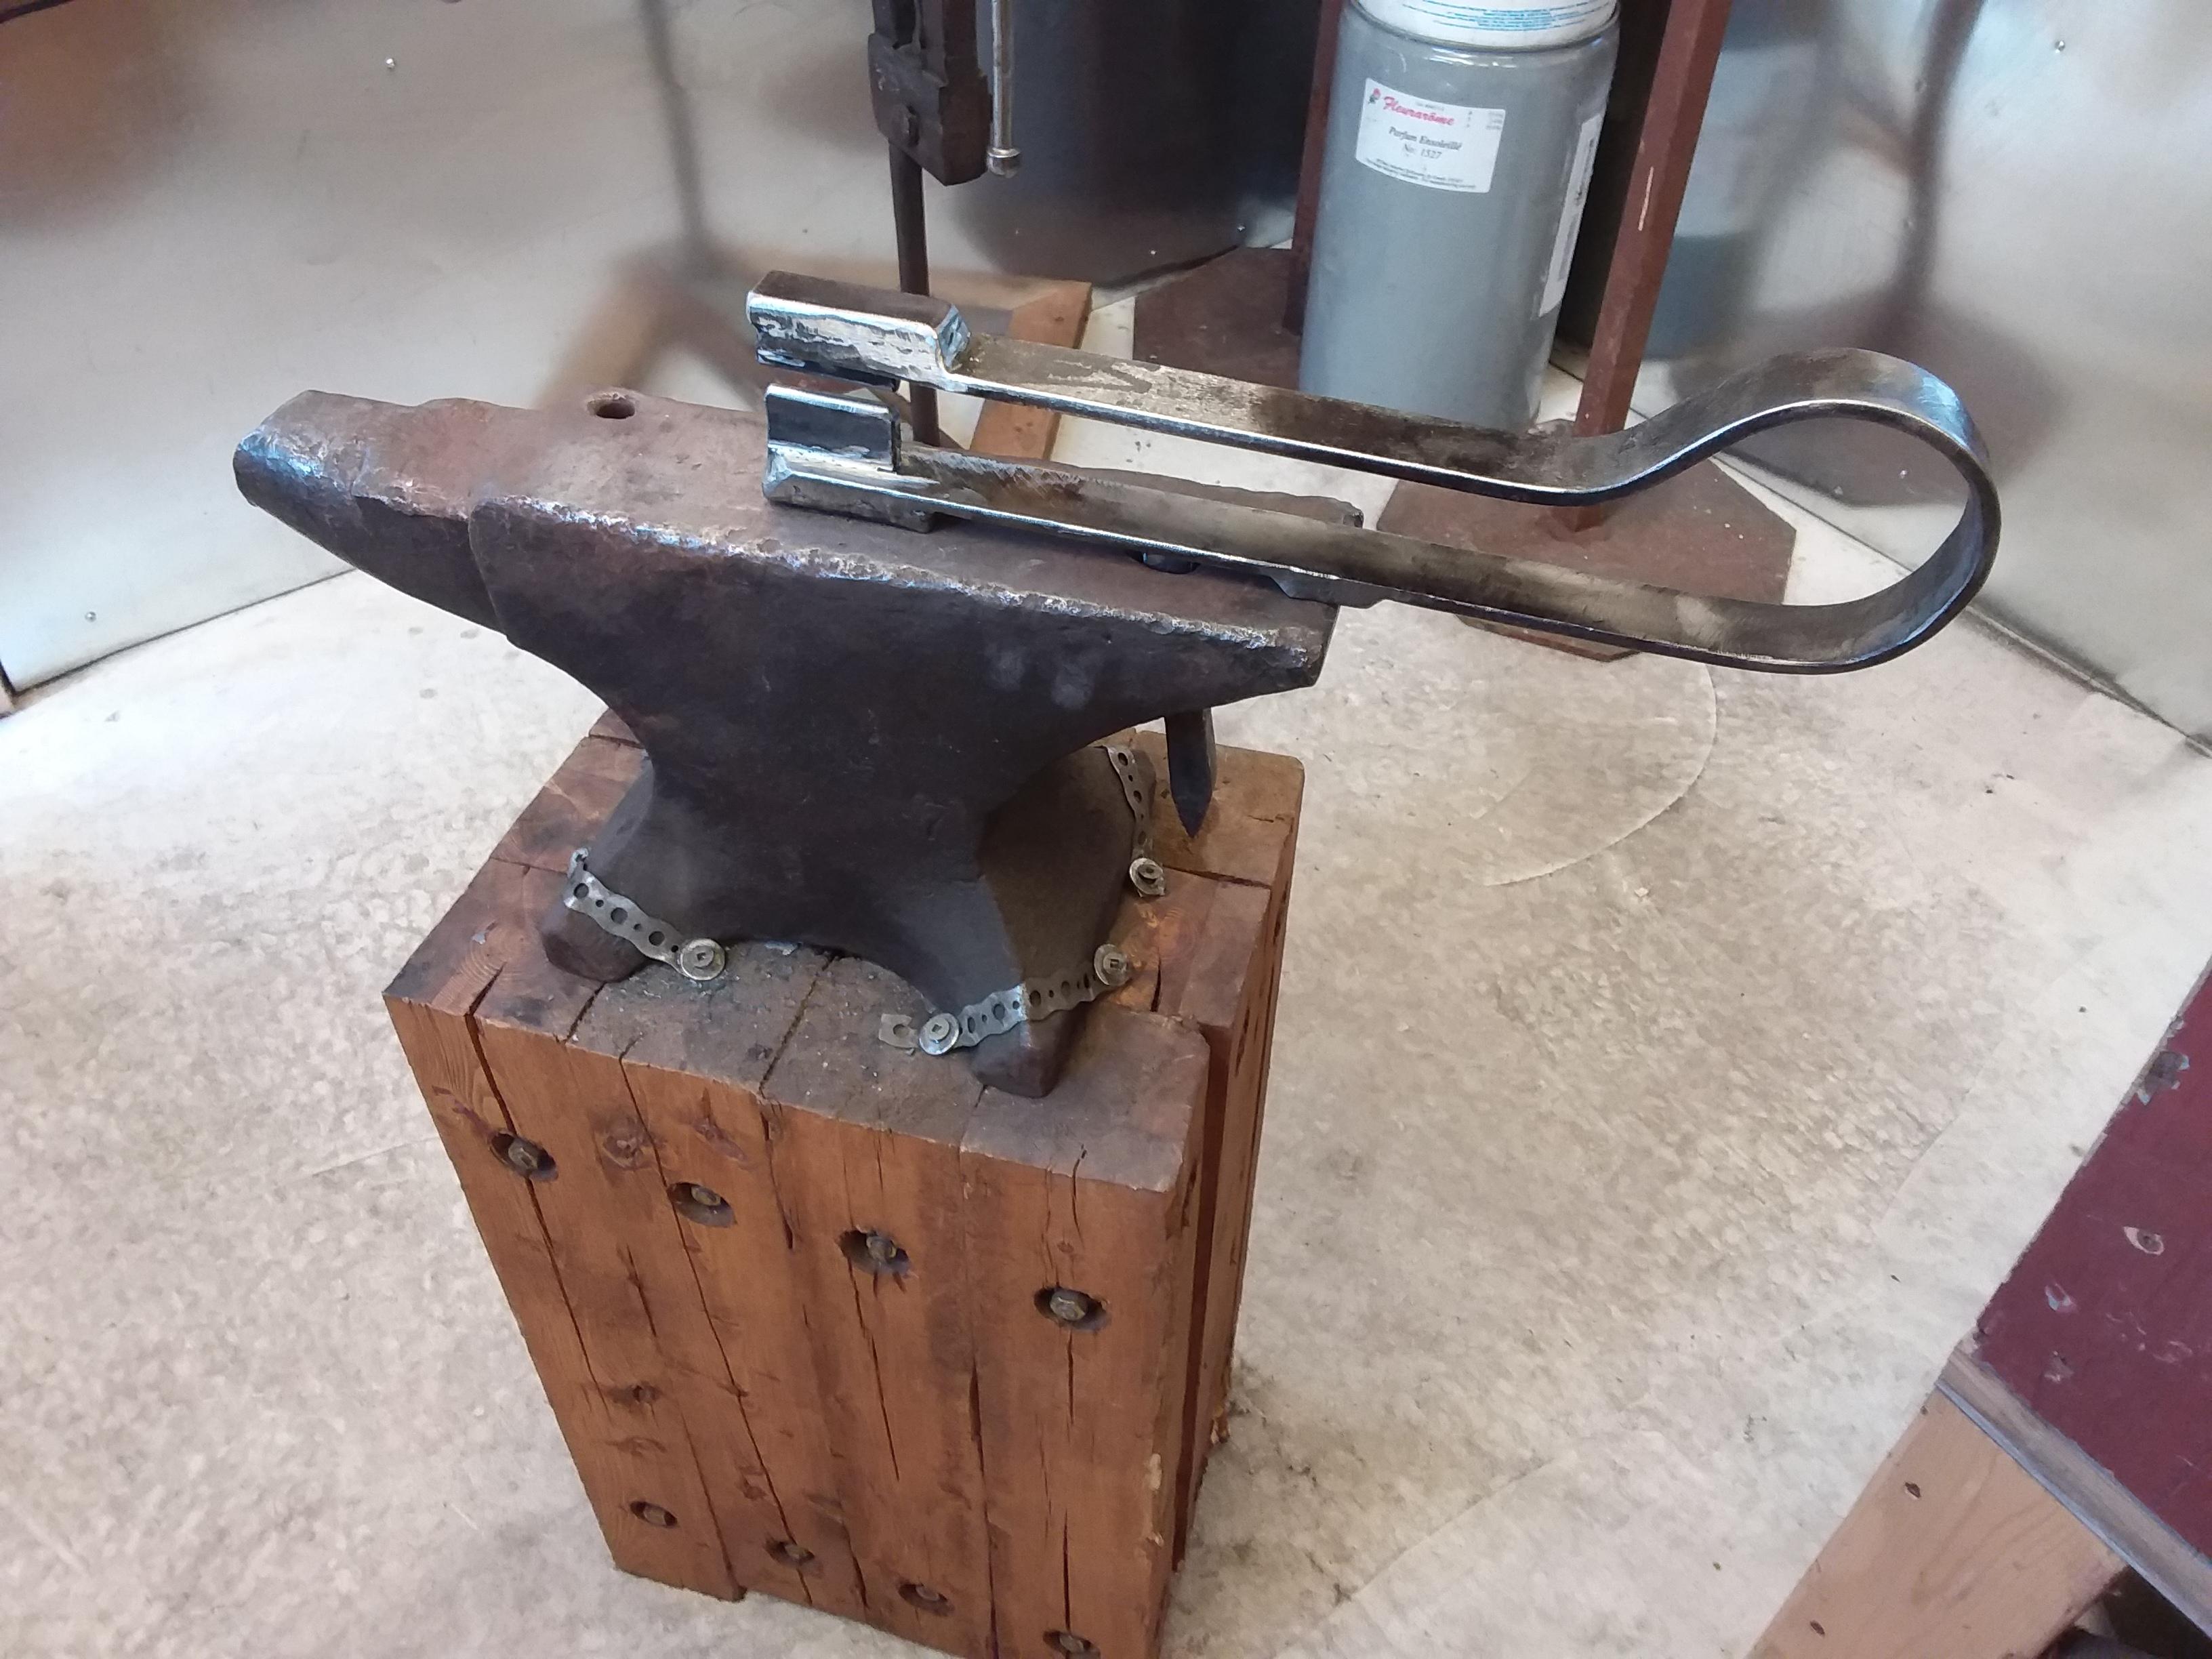
Lit up the forge for a little 2 hours tonight and practiced making leaves. Got to use my new spring fuller (about 4 messages back) and it works well.

They are not fully finished, as the other end will be a hook. I just did a bit of filing to even out the shape and a light wire brushing by hand.
-
15 hours ago, Rojo Pedro said:
Made my first horse head. Its a little long in the face
Very nice Rojo Pedro! That horse looks happy.
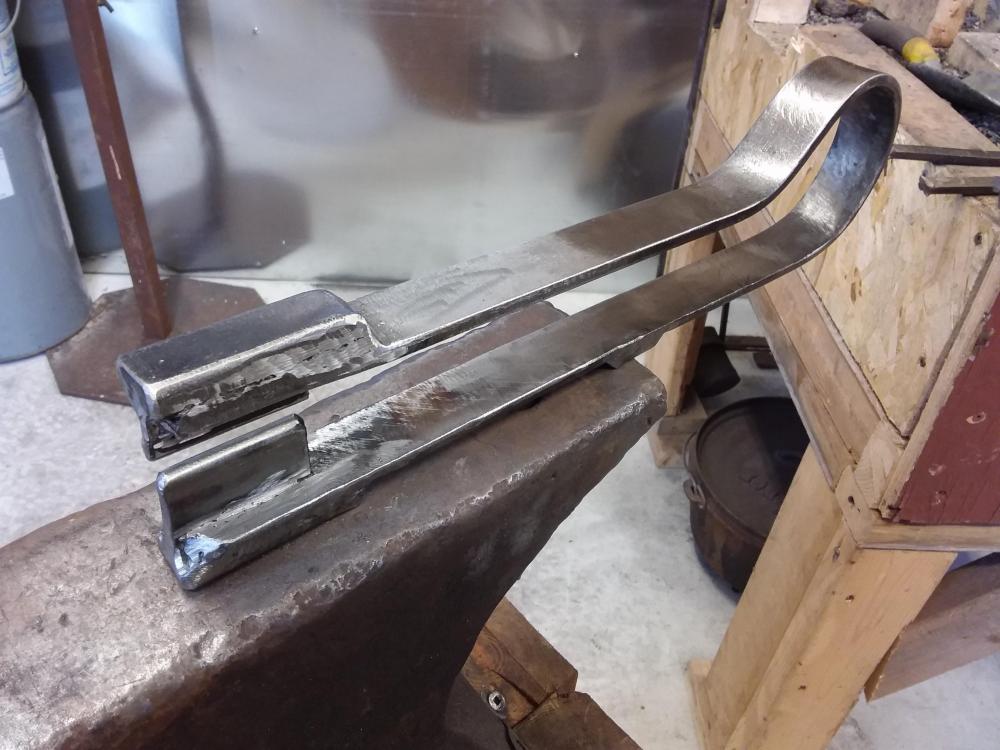
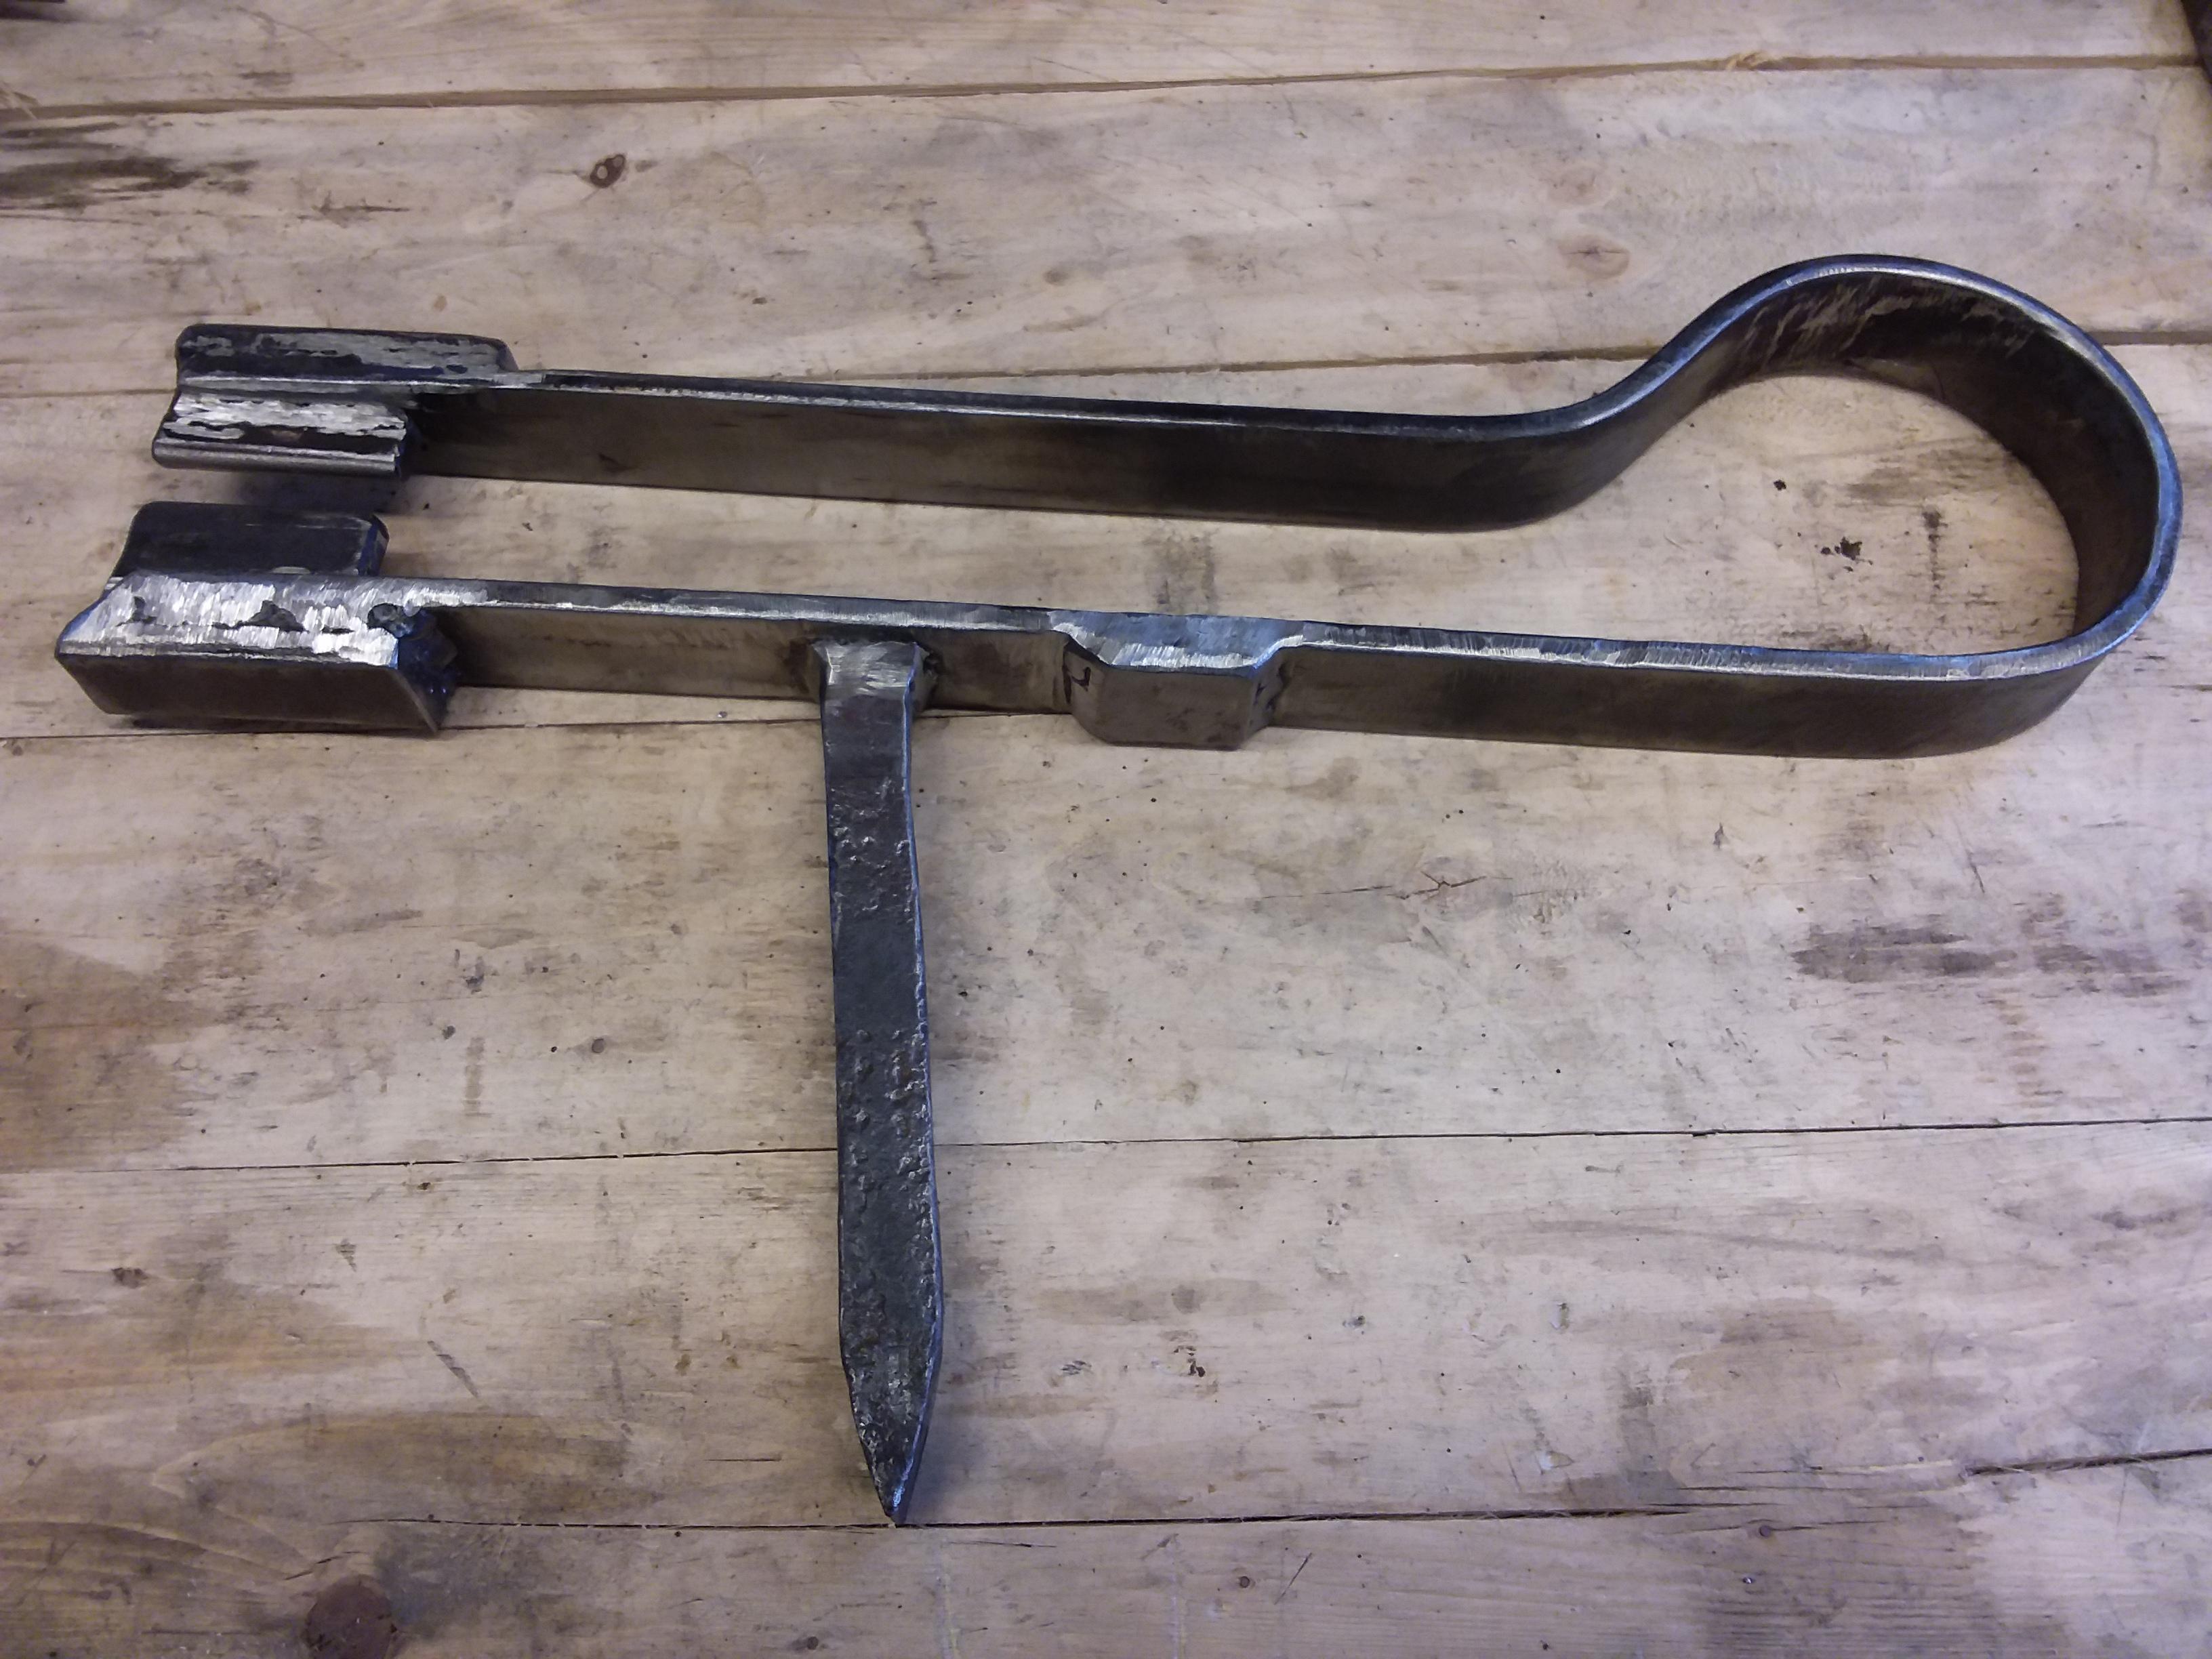
Me, I made a spring fuller this morning. The body is 1.5" by 3/16" mild steel and the jaws are pieces of a J-shaped rail anchor. I cut a slot in the mild to insert the jaws then mig-welded them in place. I don't see it coming apart any time soon.

-
On 4/6/2019 at 9:53 PM, SLAG said:
Nice design and good job. Practical tool for sure.
Thanks SLAG!
Au plaisir, Arthur
-
No smithing but still related, I did some cleaning in the shop and made a holder for my punches and chisels. I don't have that many yet, but I was a bit tired of them lying around on the table mixed with other tools and pieces. I just used some wood scraps.

-
On 3/30/2019 at 6:02 PM, Arthur210 said:
The chisel was made from what looked like a damaged chisel, but it may have been a small spike. Though it had seemed to harden on quench and showed colours when I tempered it. Perhaps I softened it too much.
So I reheated and water quenched the chisel again, with no tempering at all. Same thing happened again, so the mystery steel was just too soft for a chisel. So I made another one from a large Allen key and this one worked well.
Here is the result. Much better definition on the veins.

-
On 3/25/2019 at 7:44 PM, Daswulf said:
The hooks nice Arthur. What kind of chisel are you trying to use in the leaf veining? A slightly curved dull chisel works well for me.
Thanks Daswulf.
I had just made a rounded chisel for that purpose, but instead of marking the leaf the chisel blade deformed and rolled on itself. It was strange and I was tired by that point, so I stopped there. I will try again next time.
The chisel was made from what looked like a damaged chisel, but it may have been a small spike. Though it had seemed to harden on quench and showed colours when I tempered it. Perhaps I softened it too much.
-
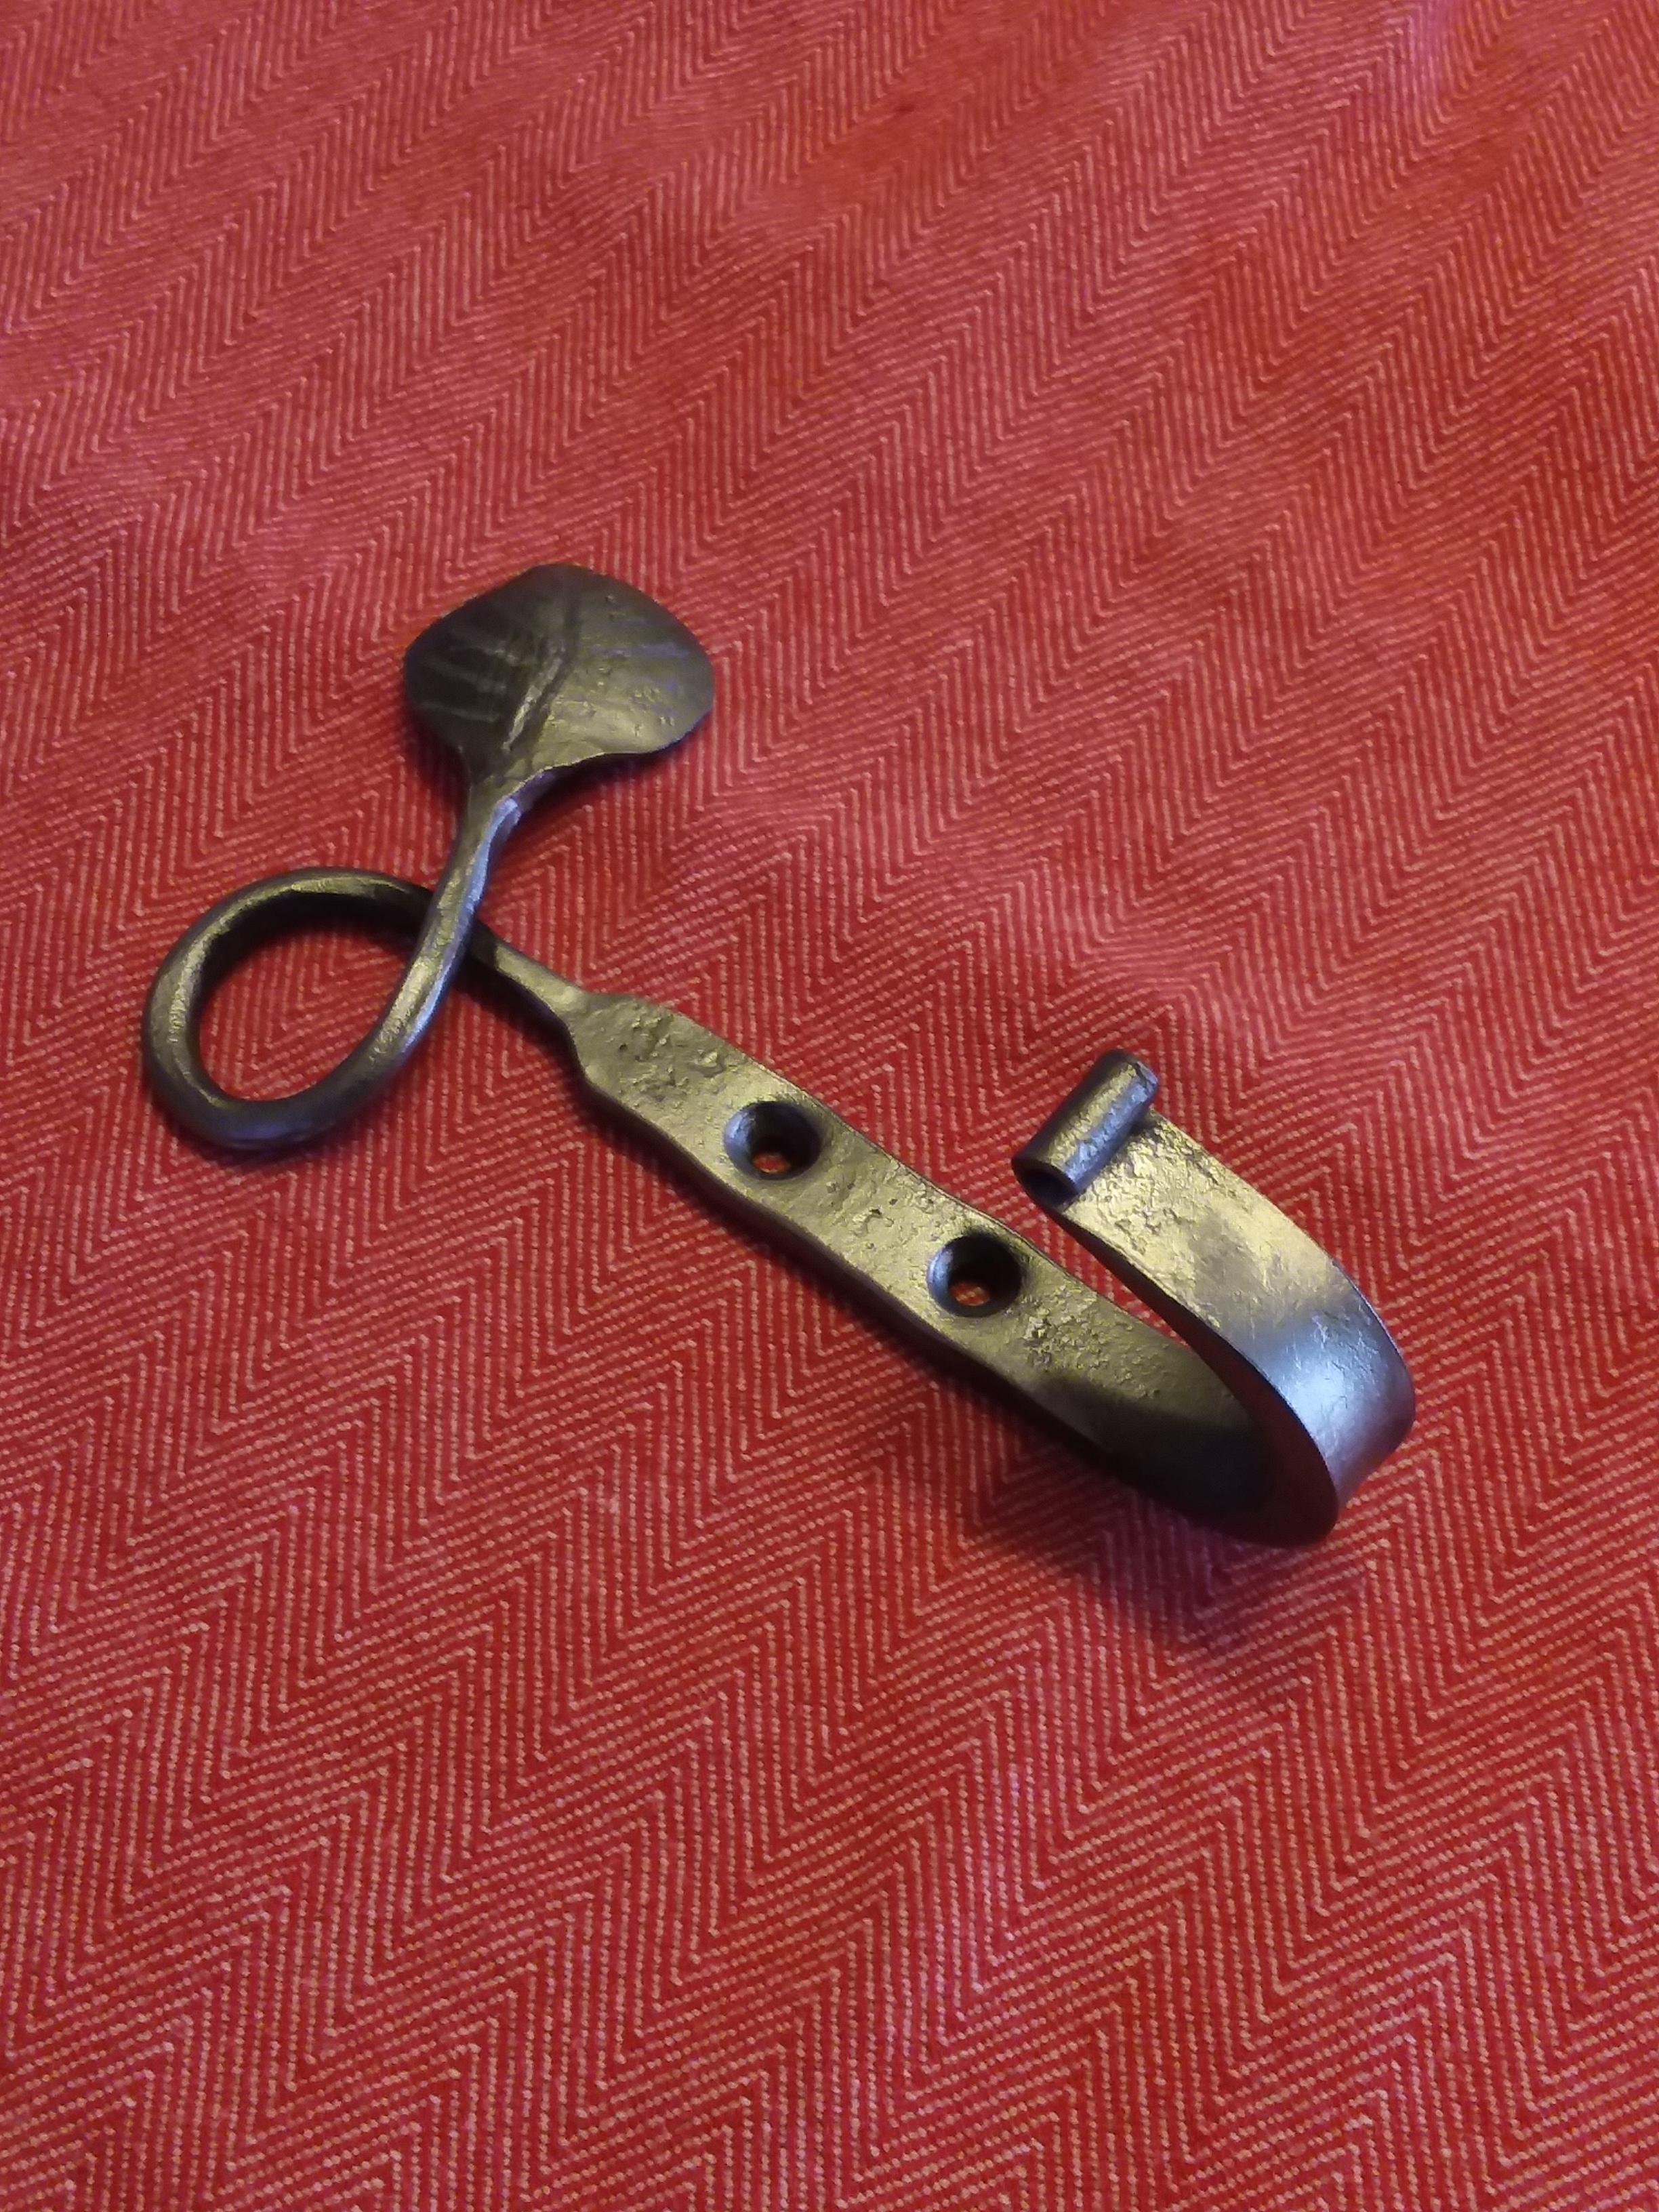
It had been too long since I lit up the forge. Just another coat hook, this time with a leaf (third one ever). Had trouble with the veining, so I ended using a dremmel tool. Far from perfect, but part of the learning curve.

-
8upSmith, charcoal is good. I like charcoal.
How long does your chimney go up once it's outside? You need a good long column of hot gas going up to provide good suction.
Also note that a pair of 45-degree elbows, with a few feet of pipe between them, combined with as short a length of horizontal pipe as possible. Any section of horizontal pipe gives you a volume of air that isn't moving up, increasing drag.
When you go take measurements of your pipe size, take more pictures of your chimney -- all of it, from start to end (outside). That will help us understand why it isn't pulling smoke as much as it could.
Cheers!
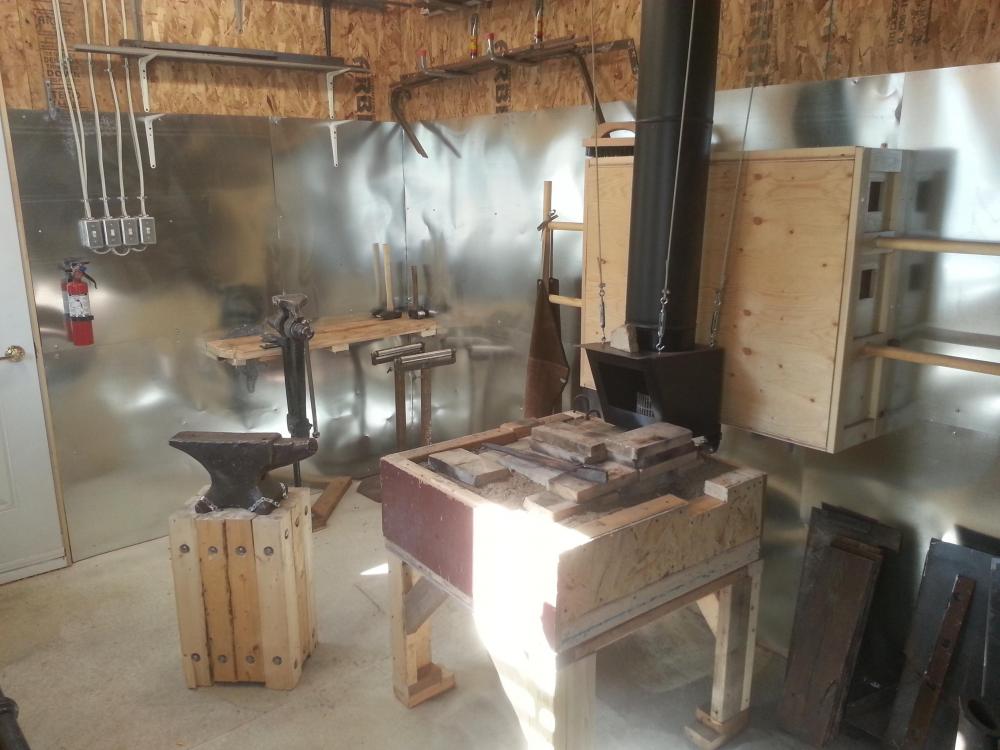
Arthur2 hours ago, Charles R. Stevens said:As long as it works, brother I’m happy.
Arthur’s, I like your set up
Thanks Charles! Your various posts on the JABOD forge were a great inspiration.
-
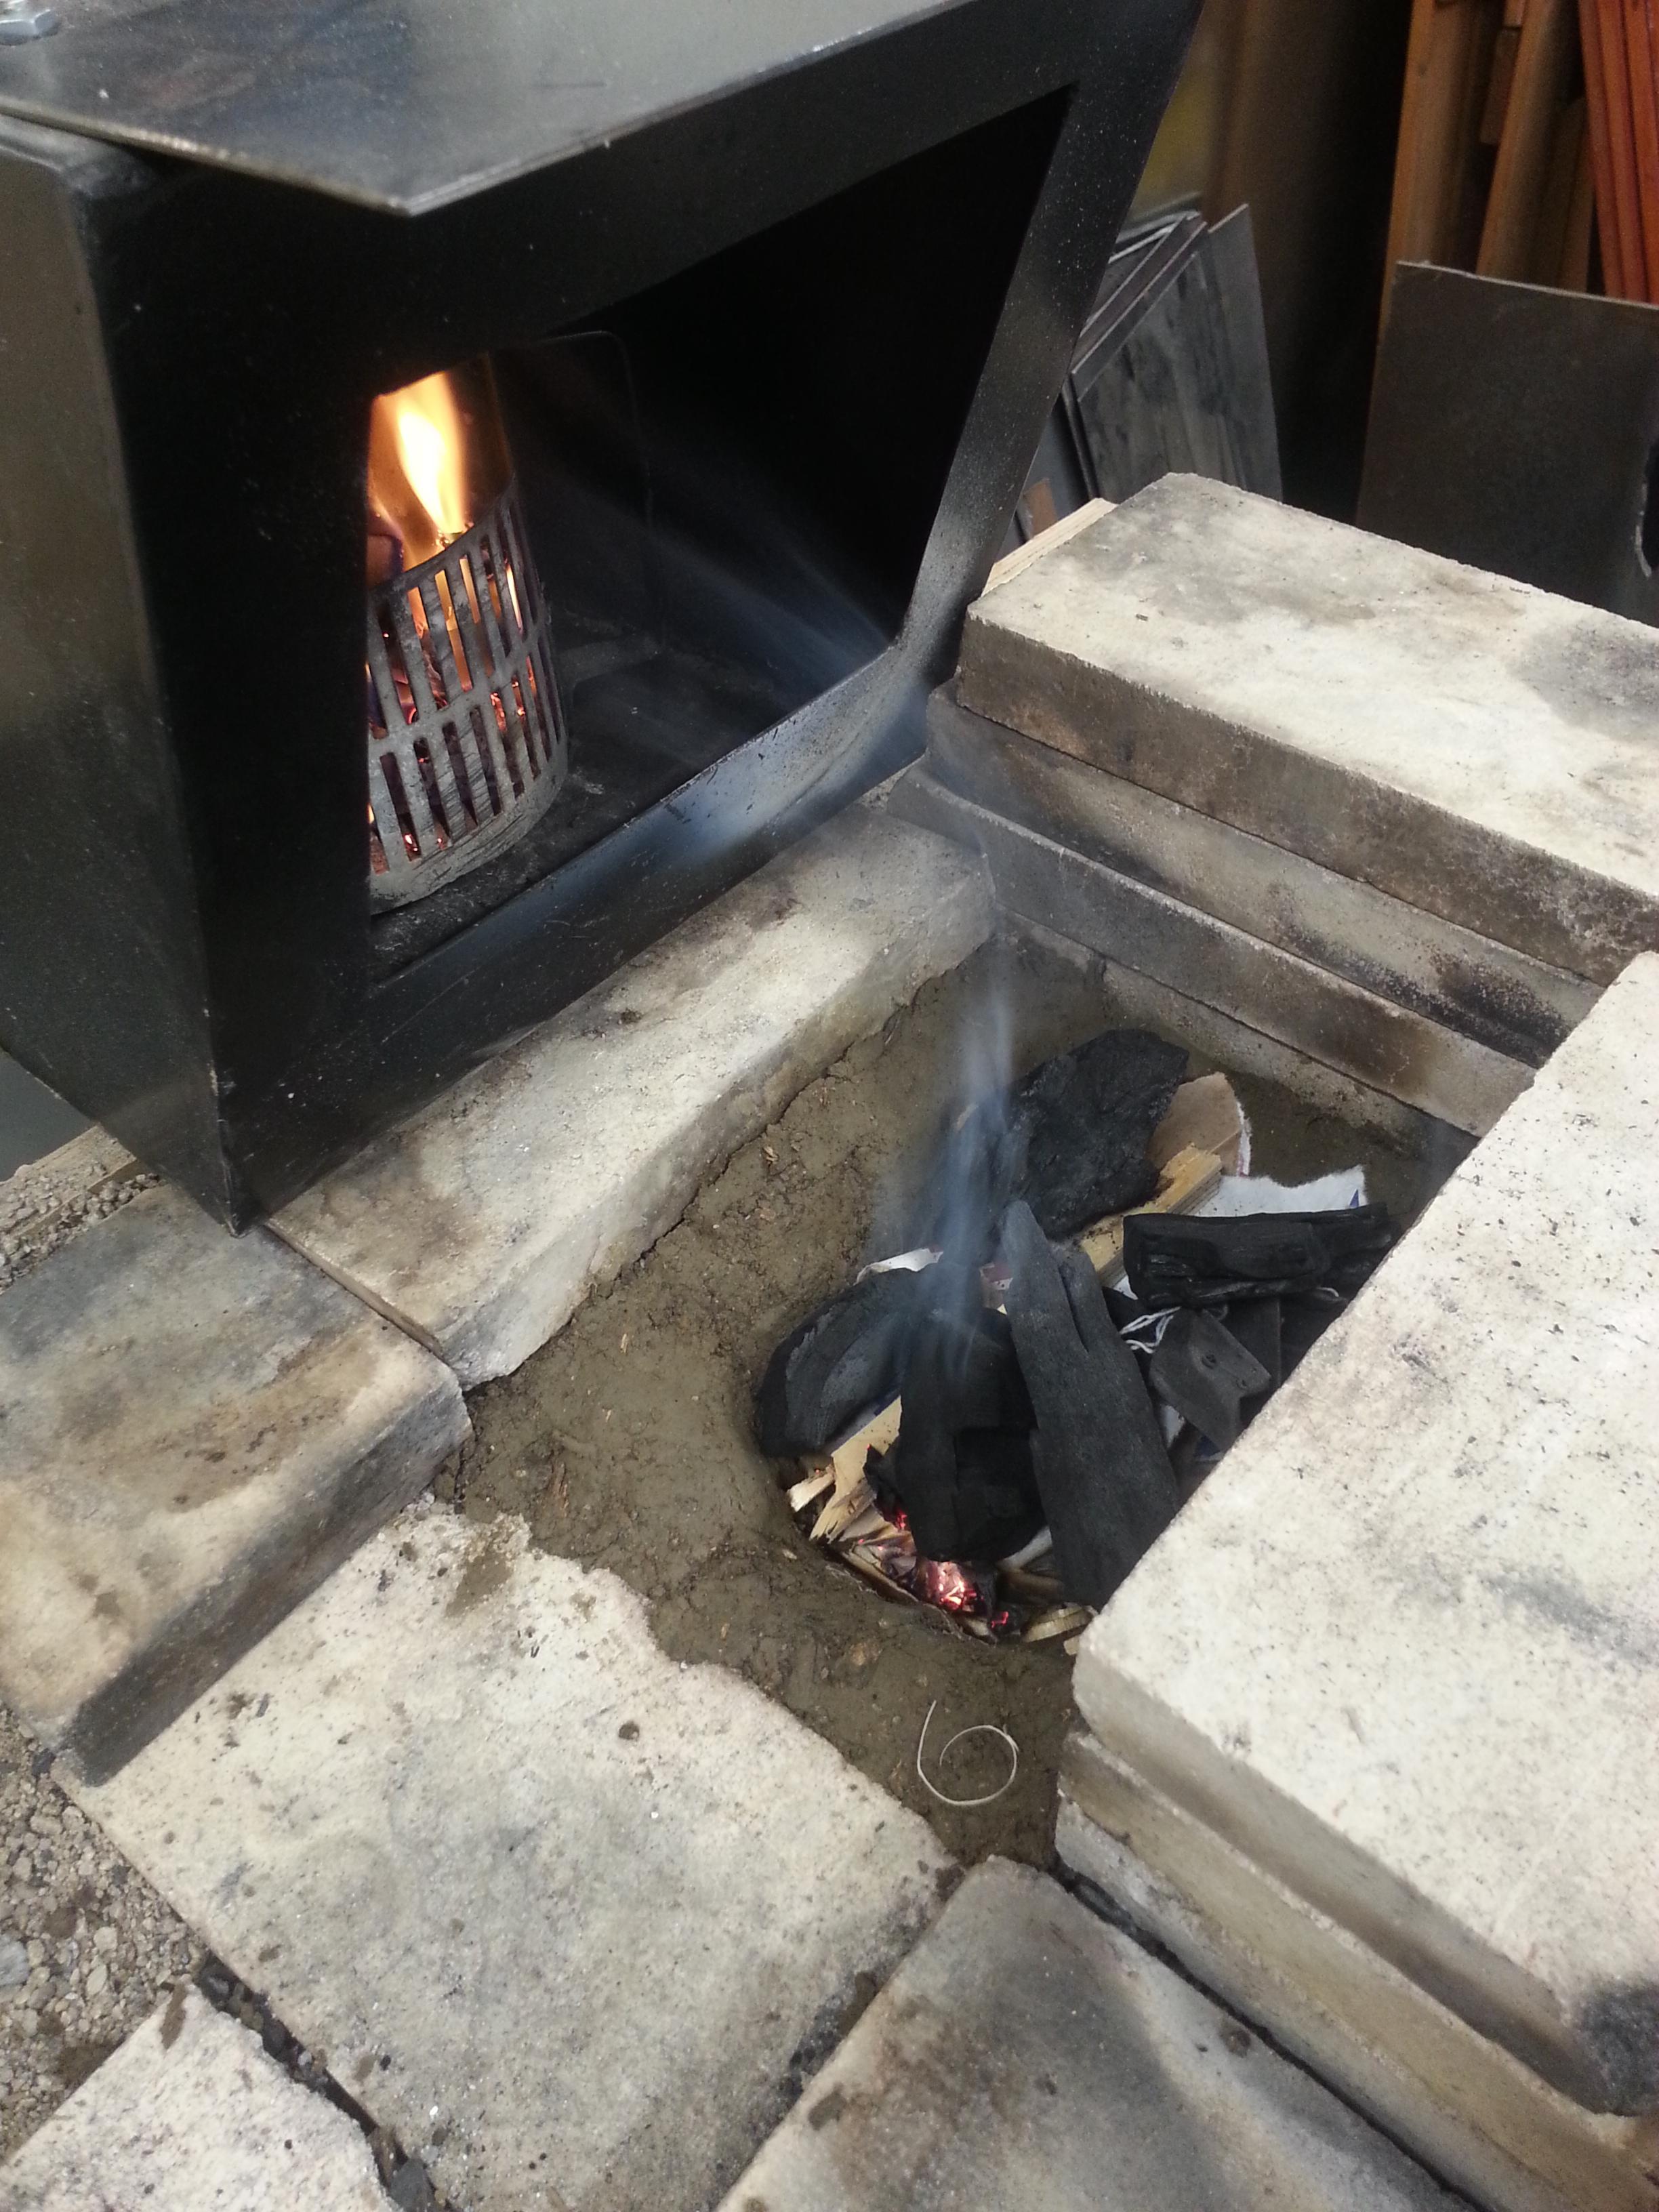
Try starting a very small fire with a bit of paper and kindling, *without* starting your blower. This will allow a little bit of hot air to start moving up into your chimney. As the hot air moves up, it will pull more air into the chimney and you can add more fuel.
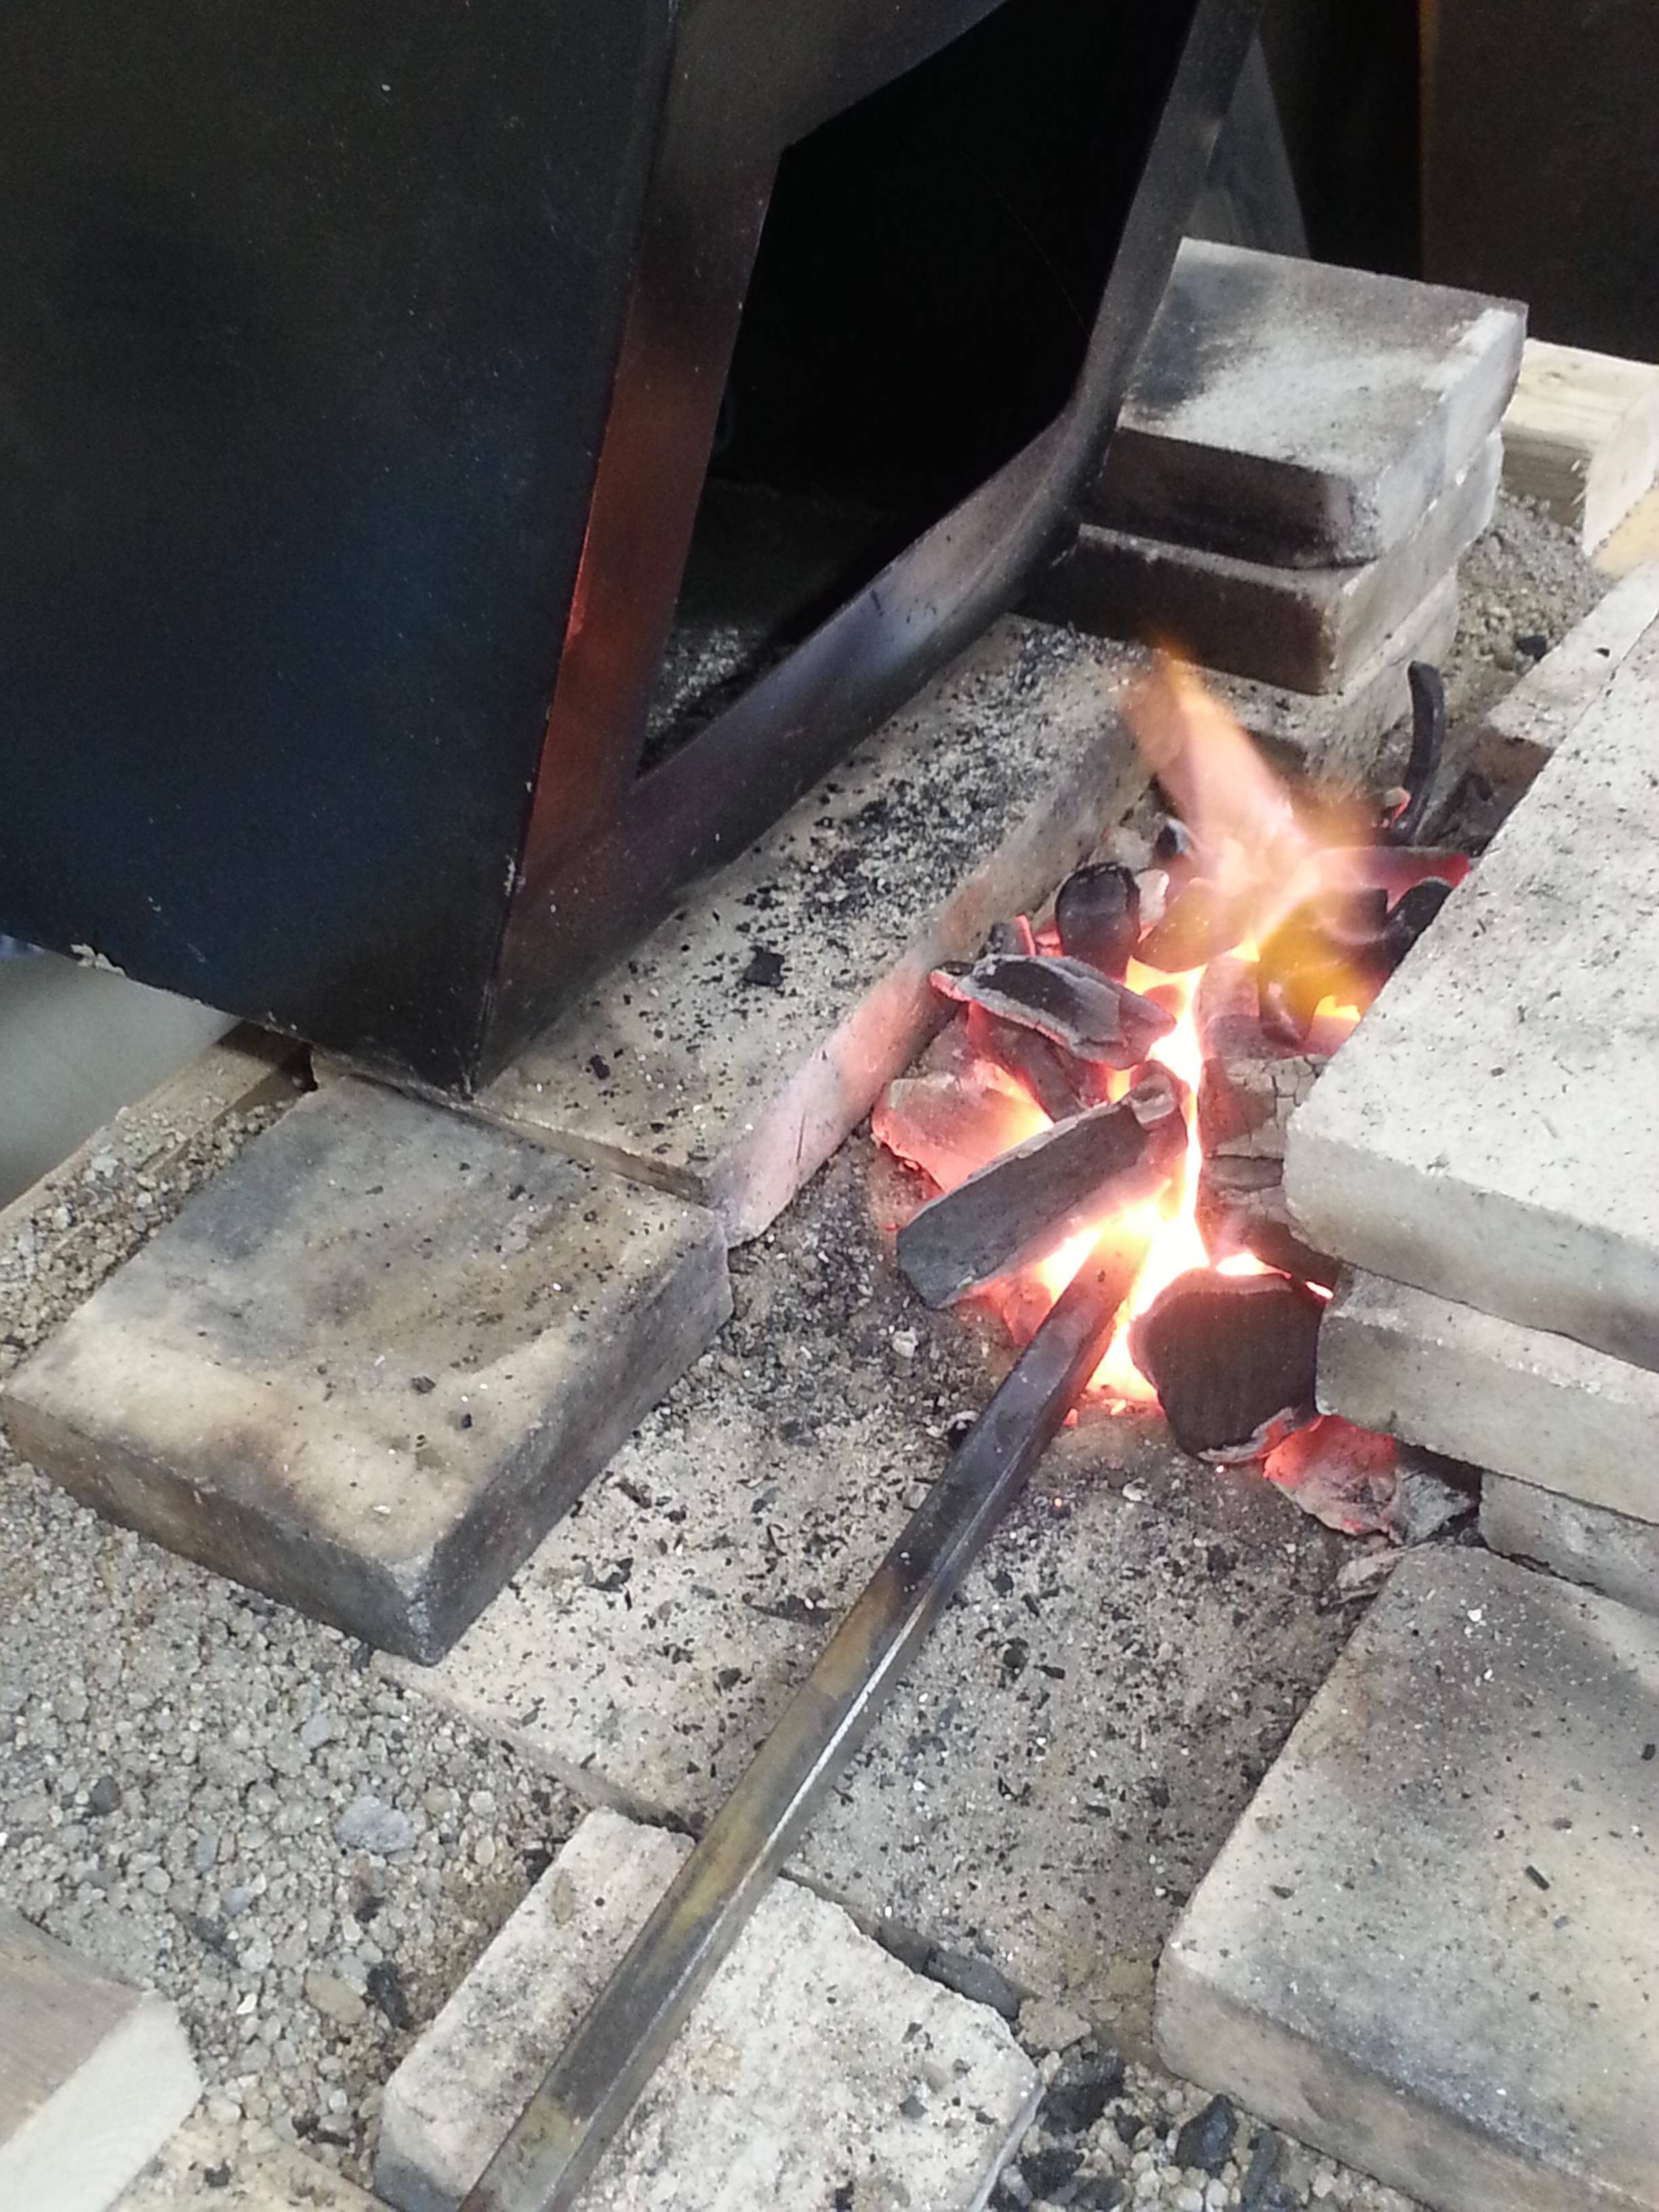
It is only when that is going well that you will start *gradually* adding more air to the fire with your blower. Then you can start adding coal into the mix.
I may have missed it, but you haven't told us the diameter of your chimney. As others have said, 10-12" is best, though 8" can work for some setups.
I only have an 8" chimney but I use a side sucker. I prime my chimney first. And my forge uses charcoal, which is relatively smokeless.


-
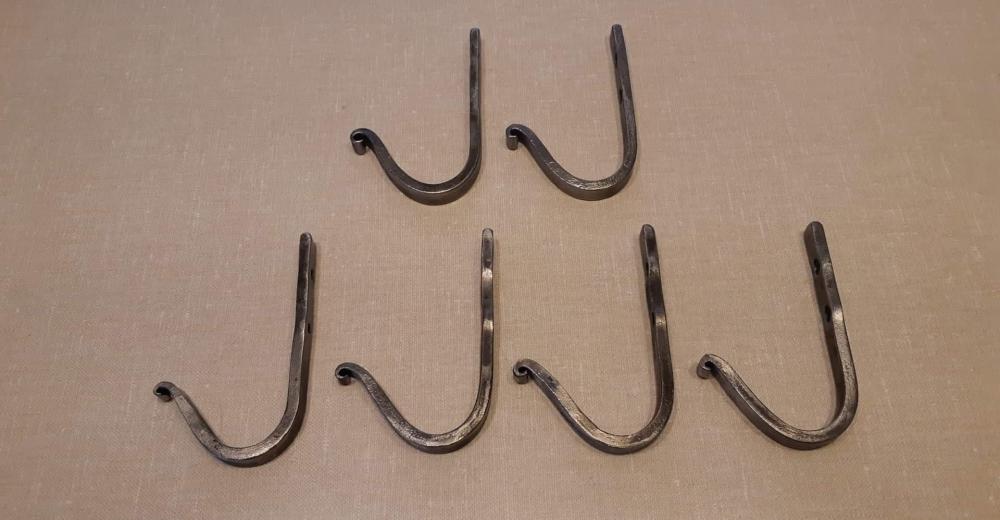
Some simple wall hooks. I will be doing many more of those in the coming weeks. They're good pratice.

And a different set I made yesterday, slightly larger. Both sets are made from 1/2" by 3/16" stock. Wire brushed and clear coated.
-
Bonne chance Mel. Juste pour ton information, il y a plusieurs forgerons qui peuvent échanger en français sur ce forum. Par courtoisie pour ceux qui ne maîtrisent pas la langue de Molière, la plupart des discussions se déroulent en anglais. Mais si tu as besoin d'aide spécifique et que tu ne sais pas comment l'exprimer en anglais, n'hésite pas à le demander en français!
Au plaisir,
Arthur(Just letting Mel know that there are a number of French-speaking smith on the forum.)
Good luck Mel. Just for your information, there are several blacksmiths who can exchange in French on this forum. As a courtesy for those who do not speak the language of Molière, most of the discussions are conducted in English. But if you need specific help and you do not know how to express it in English, do not hesitate to ask in French!
Looking forward,
-
47 minutes ago, King Arthur of Camelot said:
I knew the maille would be the easiest part of all of this, but certainly the most time consuming, due to my childhood interest in shark shows. Maille is often used during observation dives because the sharks teeth couldn't penetrate the maille as easily as something like kevlar. Smelting my own steel is preferable, but not necessary, as I can always just melt down some stock or scrap and add carbon if needed.
Correct me if I'm wrong, but the maille that arthur is wearing in the photos is made of wire rings, right? Should I make my own wire, or just buy some?
Actually, the mail the actor is wearing in that picture could be made of plastic.
If you want to make a coat of mail, I would advise you to buy the wire instead of making it. In fact, you can probably buy pre-made mail rings and then knit you own mail.
If you think making the mail is the most time consuming, you're in for a shock. The time you'll need to spend to make a functionnal sword (as opposed to a prop) is probably in the order of 10x as much as the time needed to make the coat of mail.
Your comment about melting down "some stock or scrap and add carbon" is a good example of how much you'll need to learn. Making steel from iron is much more complicated than that. Modern methods made it cost-effective to a level undreamt of in the past, but impractical for an individual withouth industrial equipment. Historical ways were time- and ressources-consuming, and did not always produce reliable results.
Before tackling your project, I would advise you to do two things.
First is to find someone in your area that can give you a basic blacksmithing class. This will help you understand how much knowledge and work is involved in attaining your goal. You may have to pay for that initial class -- finding a job like mowing lawns or clearing snow from neighbours' porches to pay for it is a better avenue than offering your time to the smith.
Second is to read a lot. This site contains a wealth of knowledge. A few hundreds of hours of reading is probably a realistic estimate of how much knowledge you can gain here. And making a good functional sword will probably require as many hours of physical work at the forge.
Cheers!
ArthurP.S. I discovered this site a bit more than a year-and-a-half ago and spent about 5 hours a week reading from it ever since. I was only able to spend about 60 hours at the forge so far. And I would dream of trying to make a sword yet. This is a long-time endeavour you are contemplating, my friend! Be ready for your project to mutate over time as you learn more.
P.P.S. Or be ready to settle for props instead of functional (let alone historically accurate) armour and sword.
-
The pictures of the inside help a lot. Your coal bed area is on the large side for what you seem to be doing. It is also oriented at a 90 degrees angle of what you need it to be, IMHO.
You want your stock the be laid lengthwise on your coal bed. That way, your stock is getting more of the heat from the fire. All of the fire that is more than 2" to the left or to the right of your stock is just wasted fuel.
So I would advise reconfiguring the inside of your forge to rotate the coal bed area 90 degrees and making it smaller (about 4" wide by 8" long). Try to position the air entry hole in the center of the 8". Eventually, you may also consider leaving a second hole in your wall so that you can pass through longer stock.
And definitively less air. As a side benefit, you will get smaller flames and can lower (or outright remove) the wall around your forge.
Have fun!
Arthur
-
-
Welcome aboard brickforgebeginner!
My side-blast JABOD uses about 1 kg (2.2 pounds) of maple lump charcoal every hour. My burn area is about 5" wide by 9" long by 4" deep. So roughly half as much as you use.
I would say that the two main things that makes a difference is the size burn area and the amount of air.
First, you can get a much more efficient fire with charcoal by containing it to as small a volume as possible. Any charcoal that is in contact with your fire will burn, whether it contributes to heating up your steel or not. So adjust your brick so that you only have as small a fire as you need for what you are working on. If you could show us a picture of the inside of your forge, that would help. (For scale, the bricks in the following pictures are 4" by 9")


Second, charcoal doesn't need much air. I use japanese-style box bellows (hand pumped). So I can adjust how much air I pump in, depending on how hot I want my fire to be. And even more important, whenever I am working at the anvil on my hot steel, there is *no* air being pumped into the fire. So make sure you turn your blower off whenever you take your steel out of the fire.
Your blower is probably way too much air for your forge. By my calculations, my box bellows pump about 60 cubic feet of air per minute (cfm) when I am pumping it hard enough to get welding heat. When I just want my steel bright red to yellow, I am probably pumping at about 40 cfm. That gets an half-inch square bar from dead cold to bright red in about 3 minutes.
From what I know of leaf blowers (I recently purchased one), they blow about 400 cfm...
-
Round punch and countersink punch for #8 screws from sections of a small coil spring. First tested on a wall hook for the shop.
-
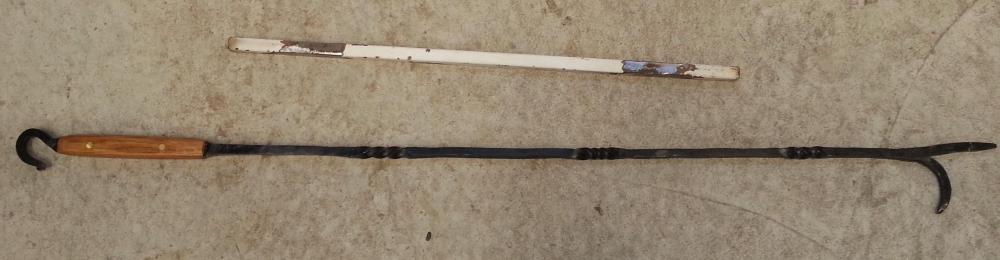
One of my first projects once my forge was ready. My mother wanted a longer-than-usual firepoker for my parents' outside firepit.
I made it from a 1/2" bar from a window grate from their previous house. The handle is from a piece of broken axe handle with brass pins.
-
Jim, that's an nifty idea. A small oven for the forge!
")
Frosty, most people will give their old stove away if you get it out of their house. But they are massive and a pain to bring up from the basement. My brother's weighted over 300 pounds, even after taking out the fire bricks and removing the door.
-
Like Realtree wrote, older wood stove sometimes had those thick pipes. They pass through the hottest zone with the holes on the front and back of the stove. A blower in the back pushes air through the pipes, which gets warmed.
-
Thanks for identifying it IronWolf. From what I saw of Shelby tubing, that would be 1016-1020 steel.
I wasn't even considering using it for smithing. It would take forever to heat it up to red in my small charcoal forge!
What I was considering was using it as a tool to shape metal over it or to bend around it.
-
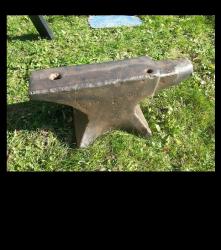
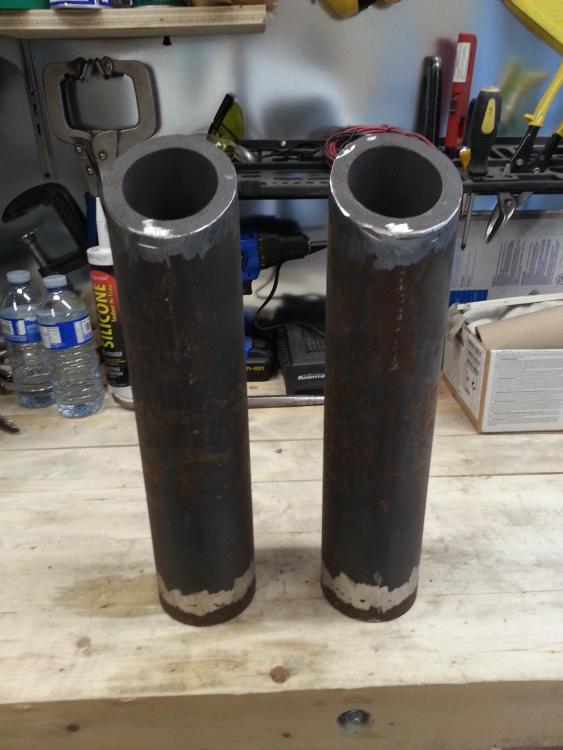
What would you do with these?
They are from a wood stove and are about 16" long, 3.5" external diameter with 0.5" wall thickness.
Curious to see what use you would put them to.


What did you do in the shop today?
in Blacksmithing, General Discussion
Posted
Made a steel fire pot for my side blast charcoal forge.
More detail in a seperate topic.