
Arthur210
-
Posts
238 -
Joined
-
Last visited
Content Type
Profiles
Forums
Articles
Gallery
Downloads
Events
Posts posted by Arthur210
-
-
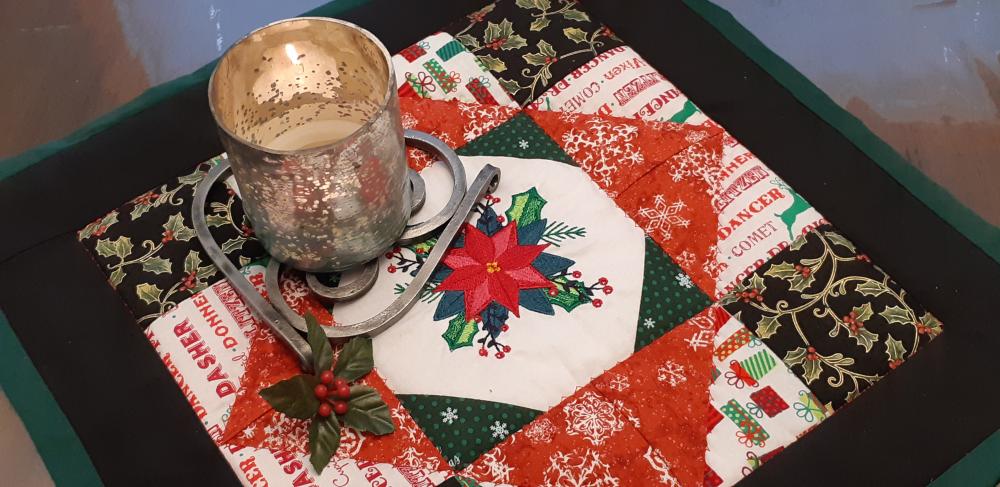
My wife wanted something to put between her Christmas cnadle and tablemat, so I offered to make her a small trivet (6" wide).
She likes it!
")

-
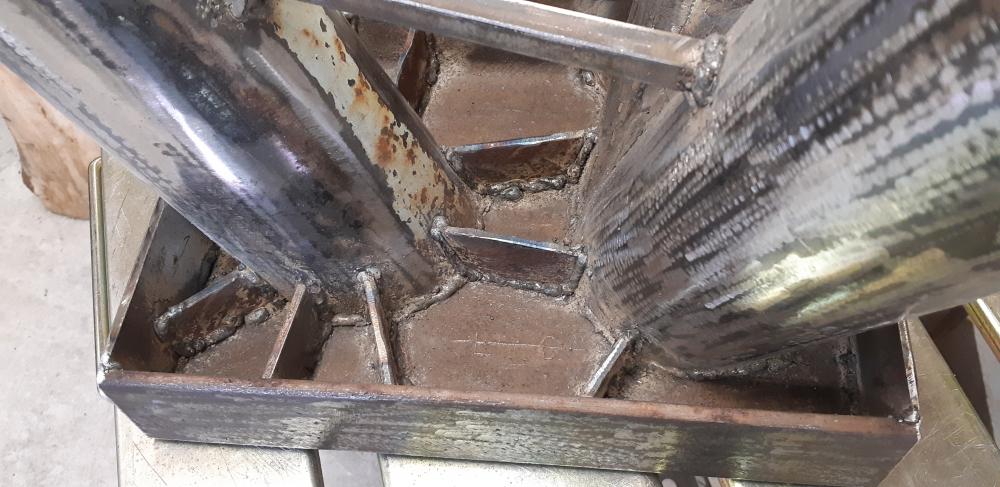
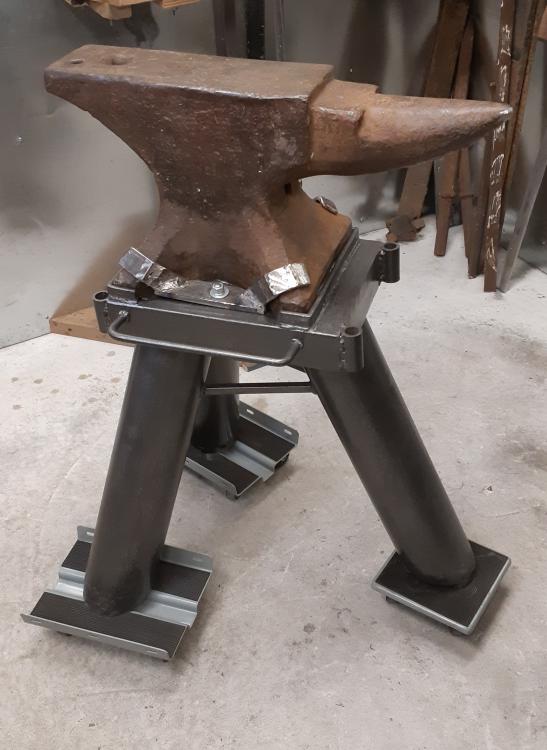
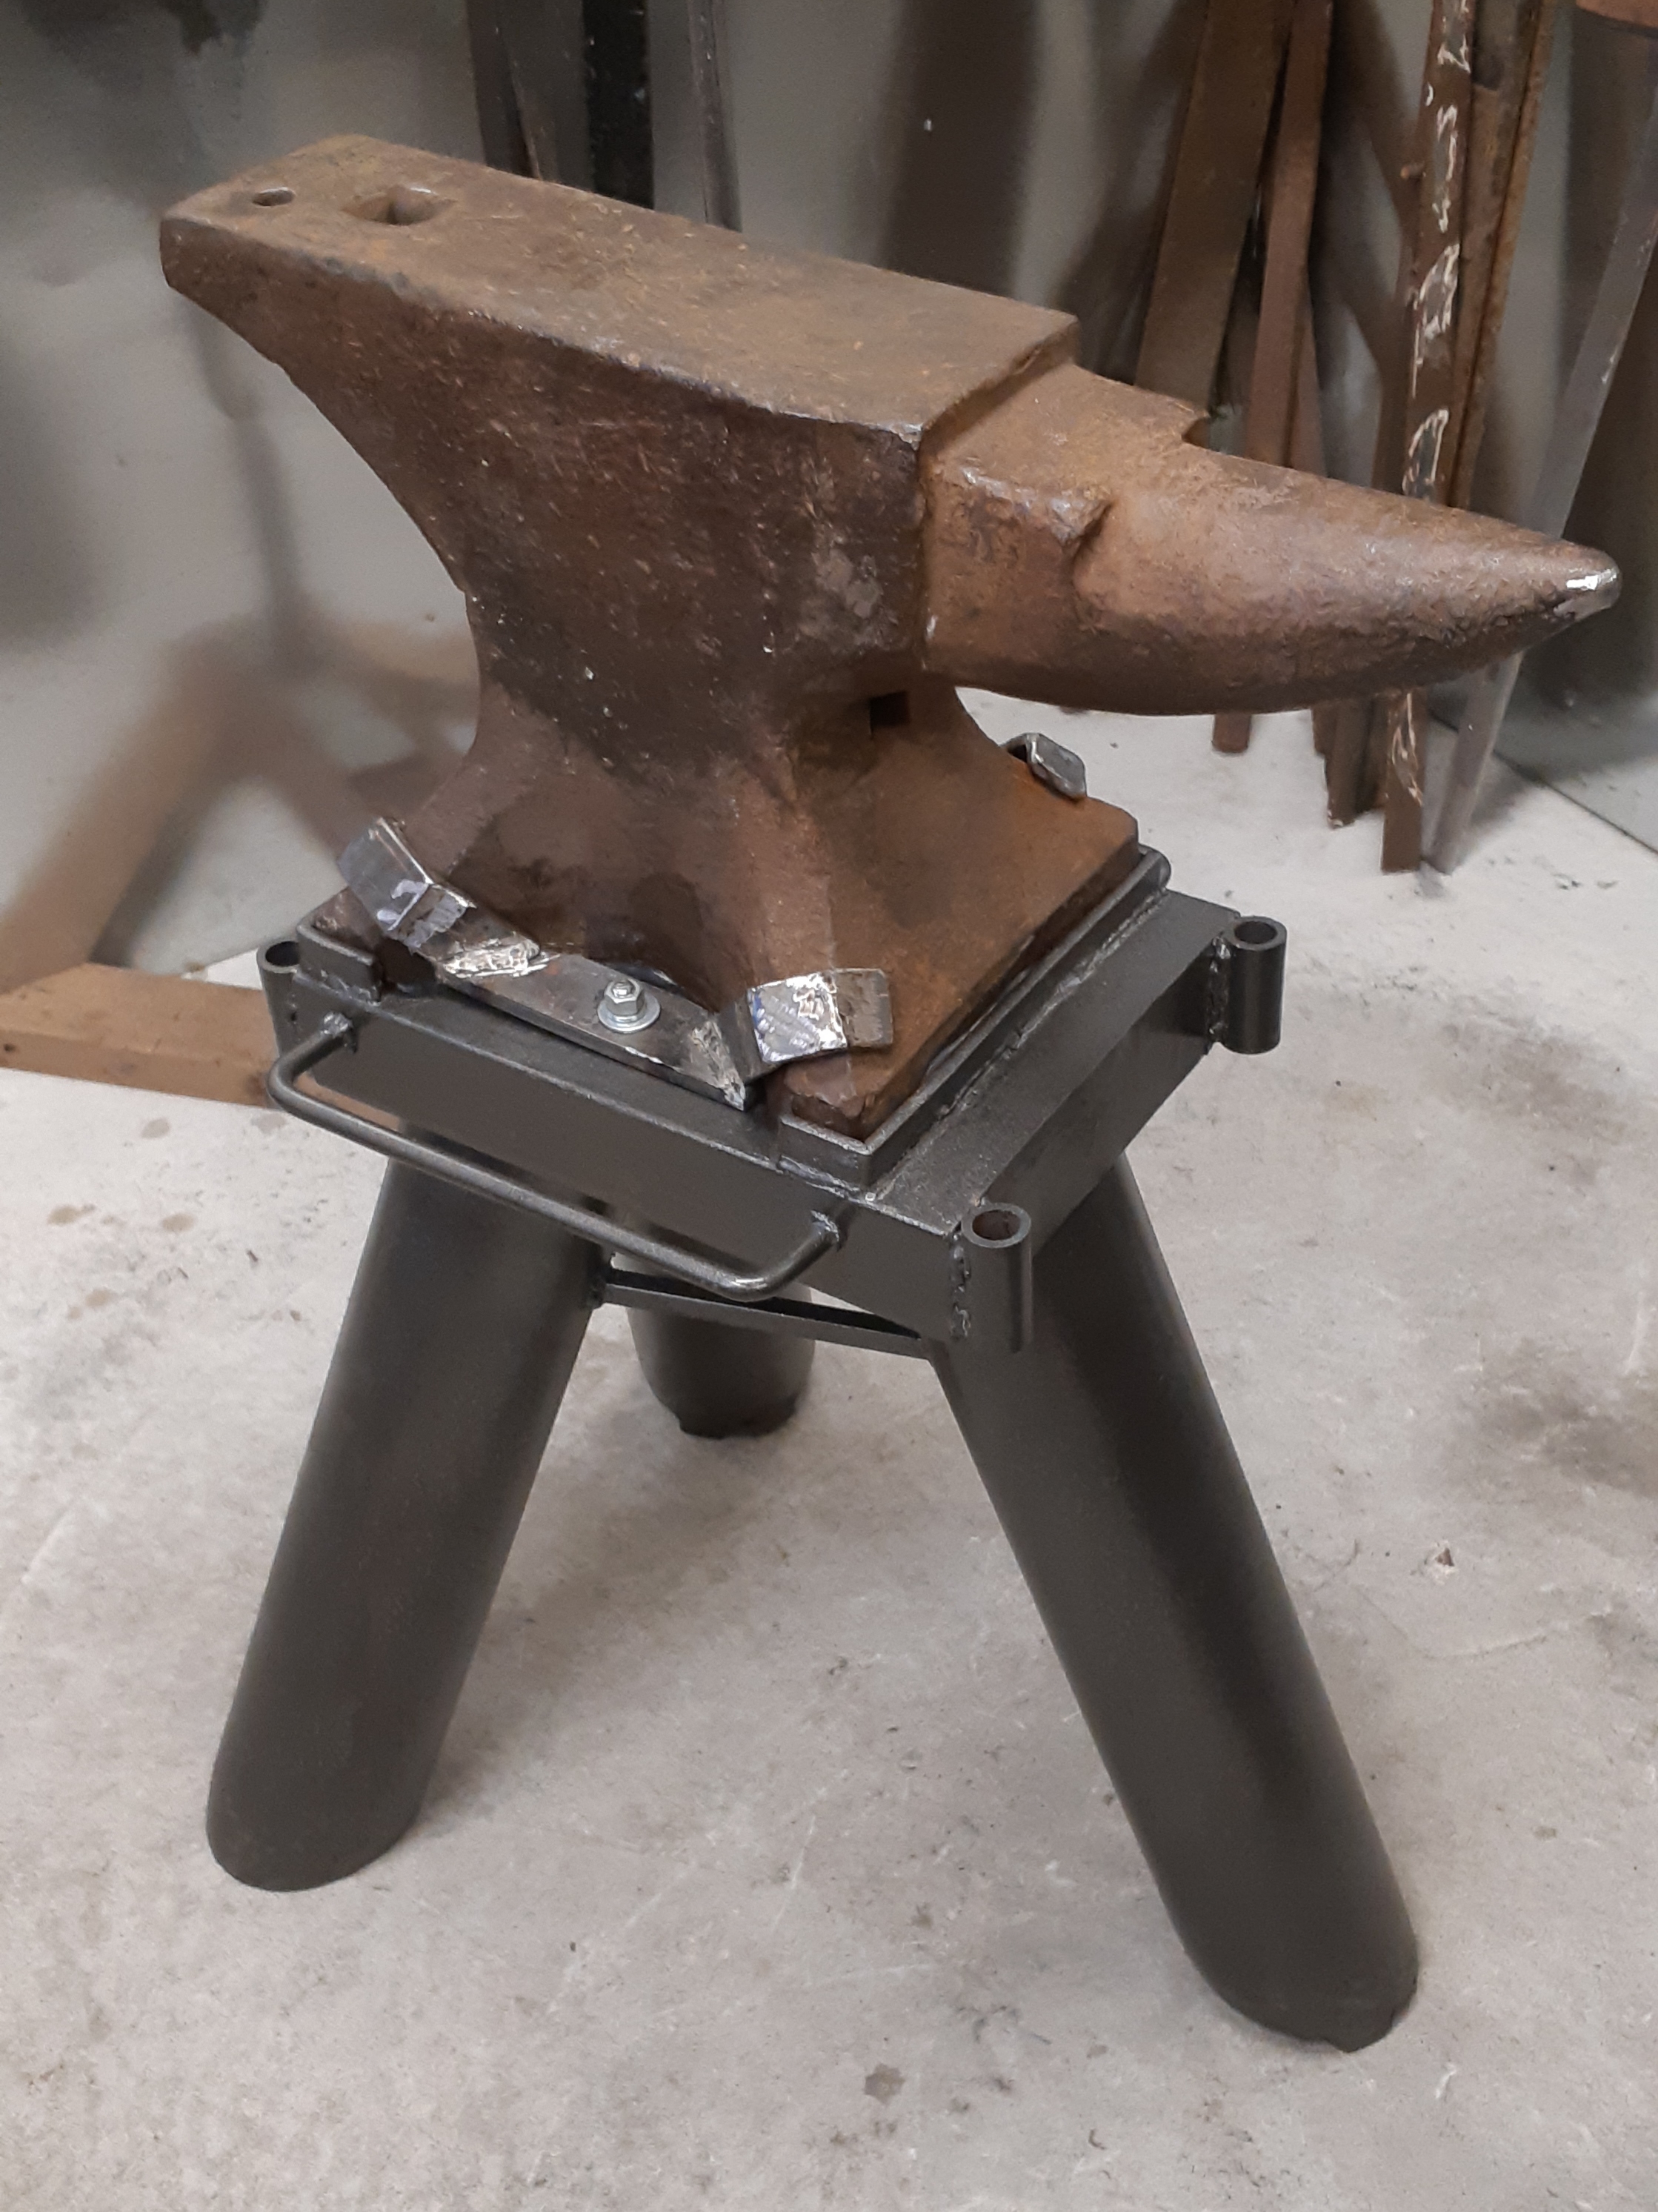
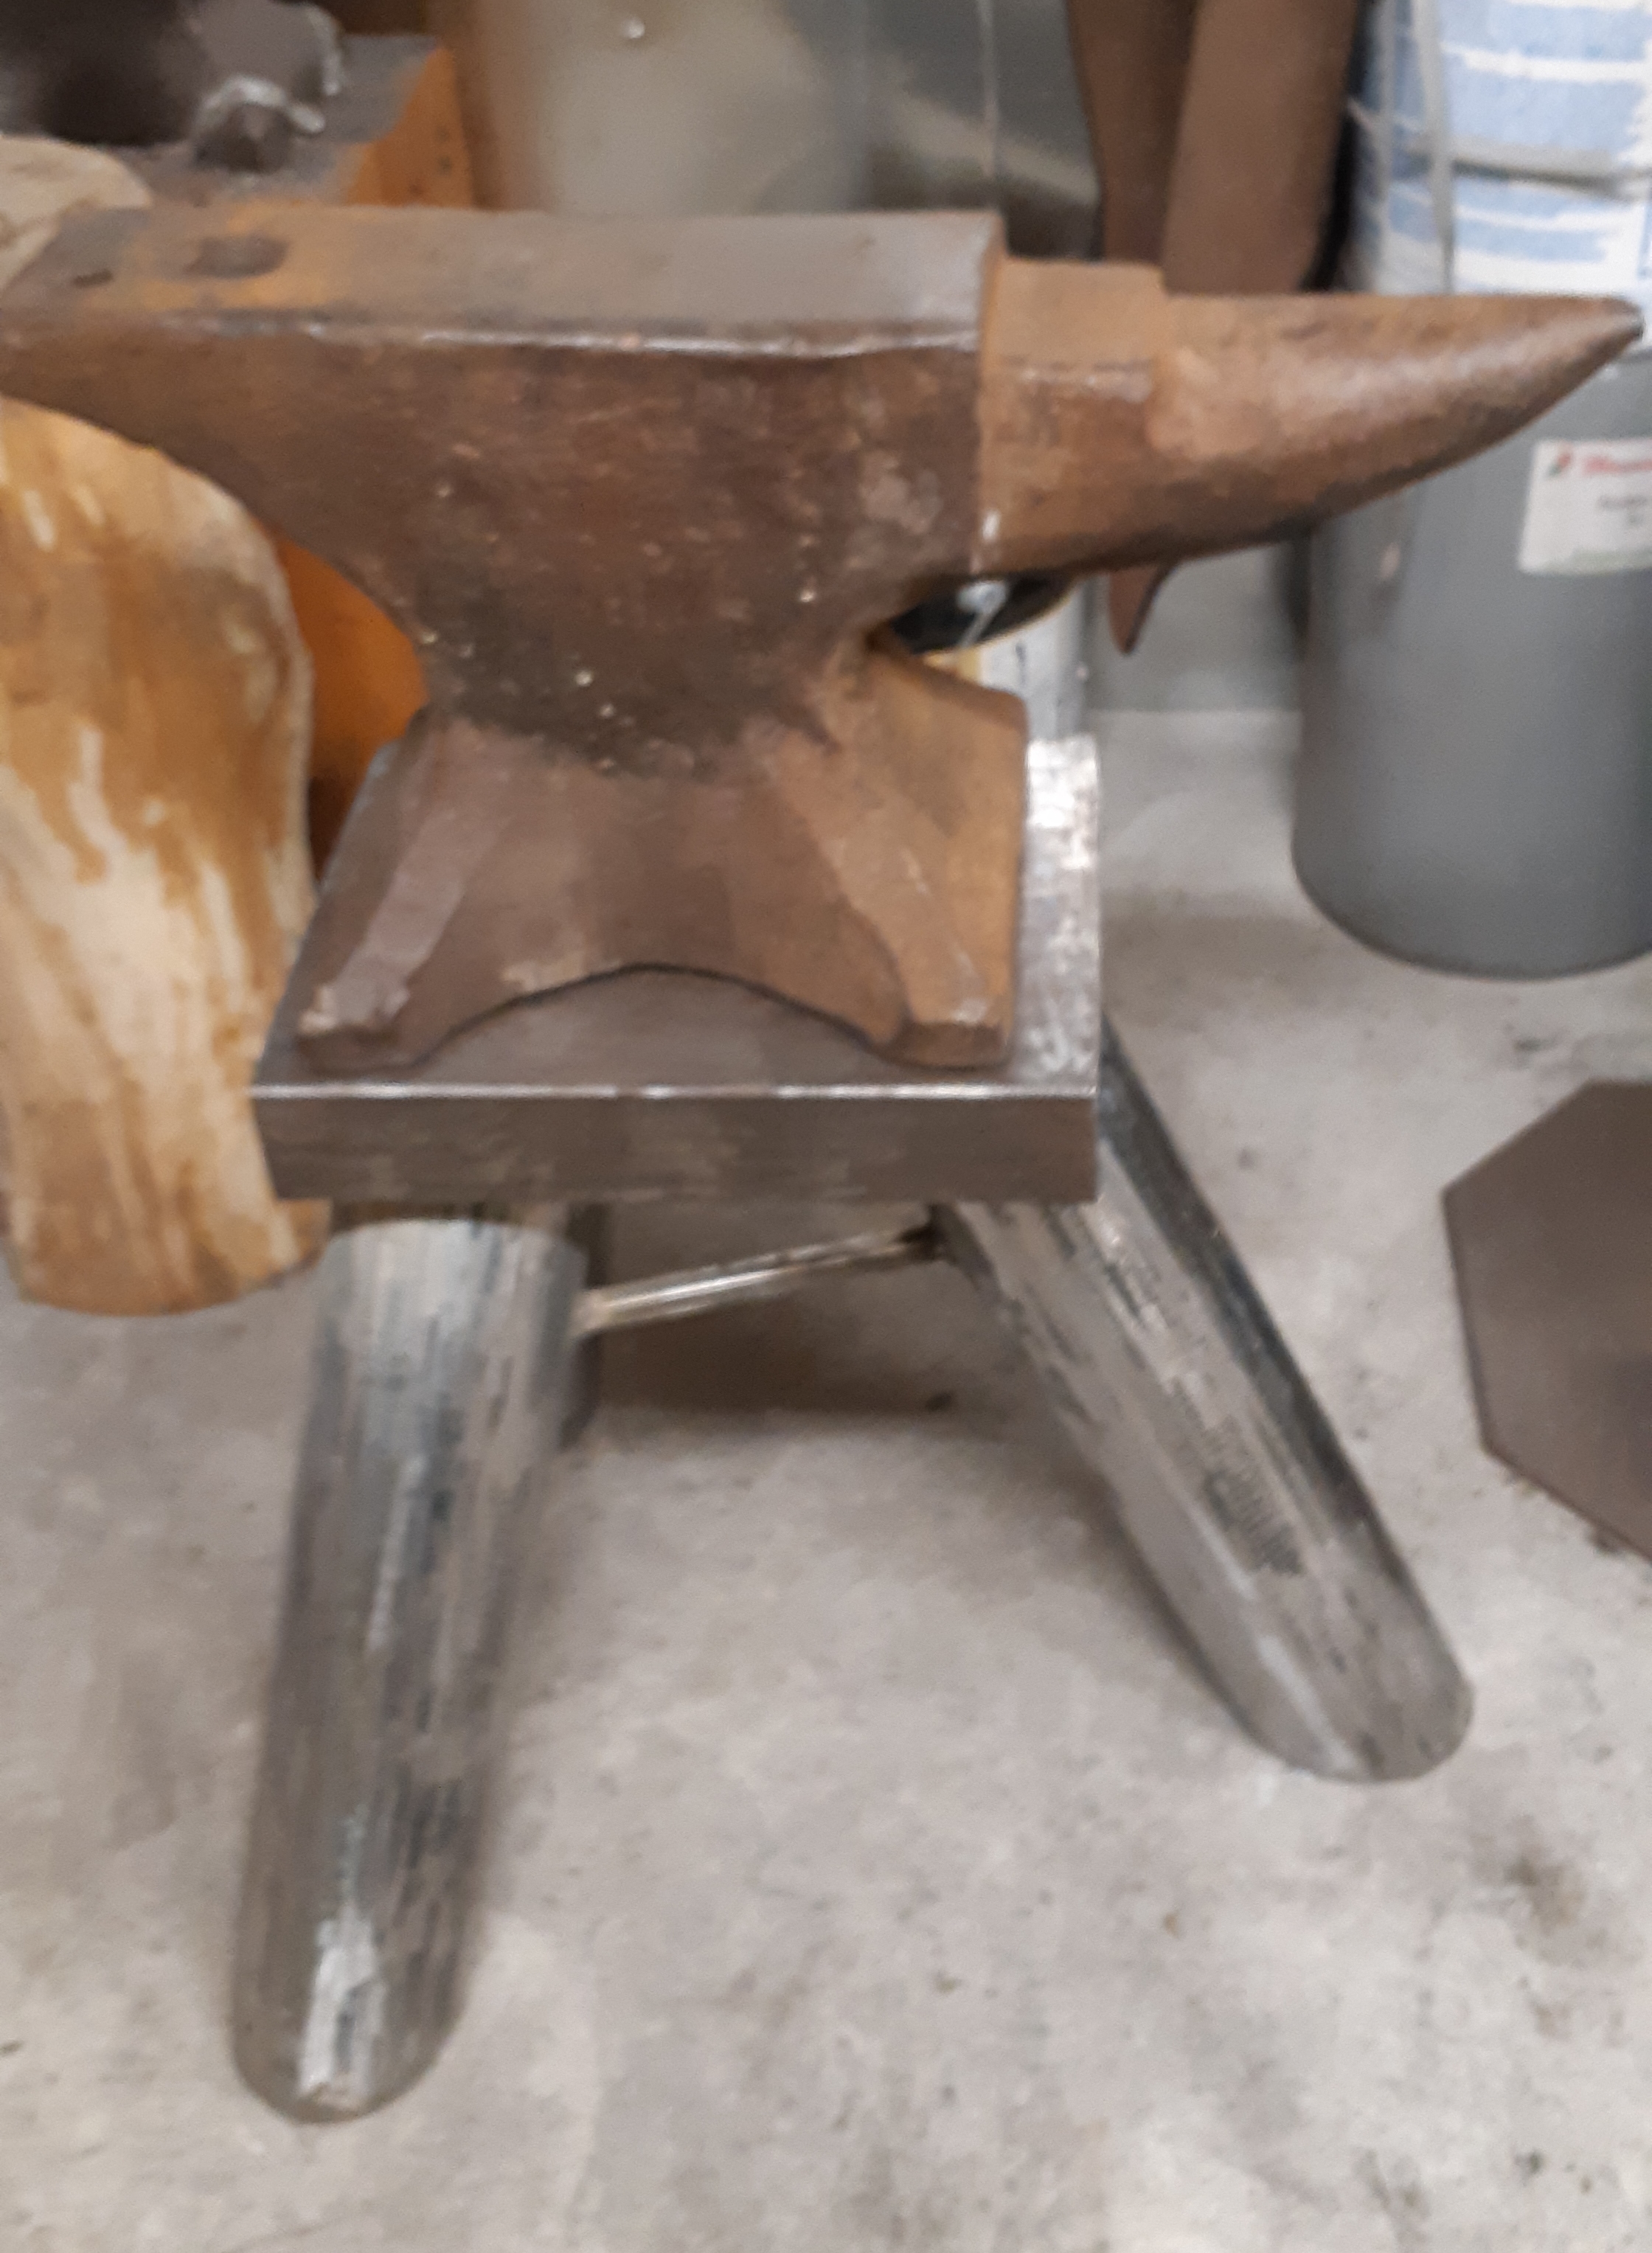
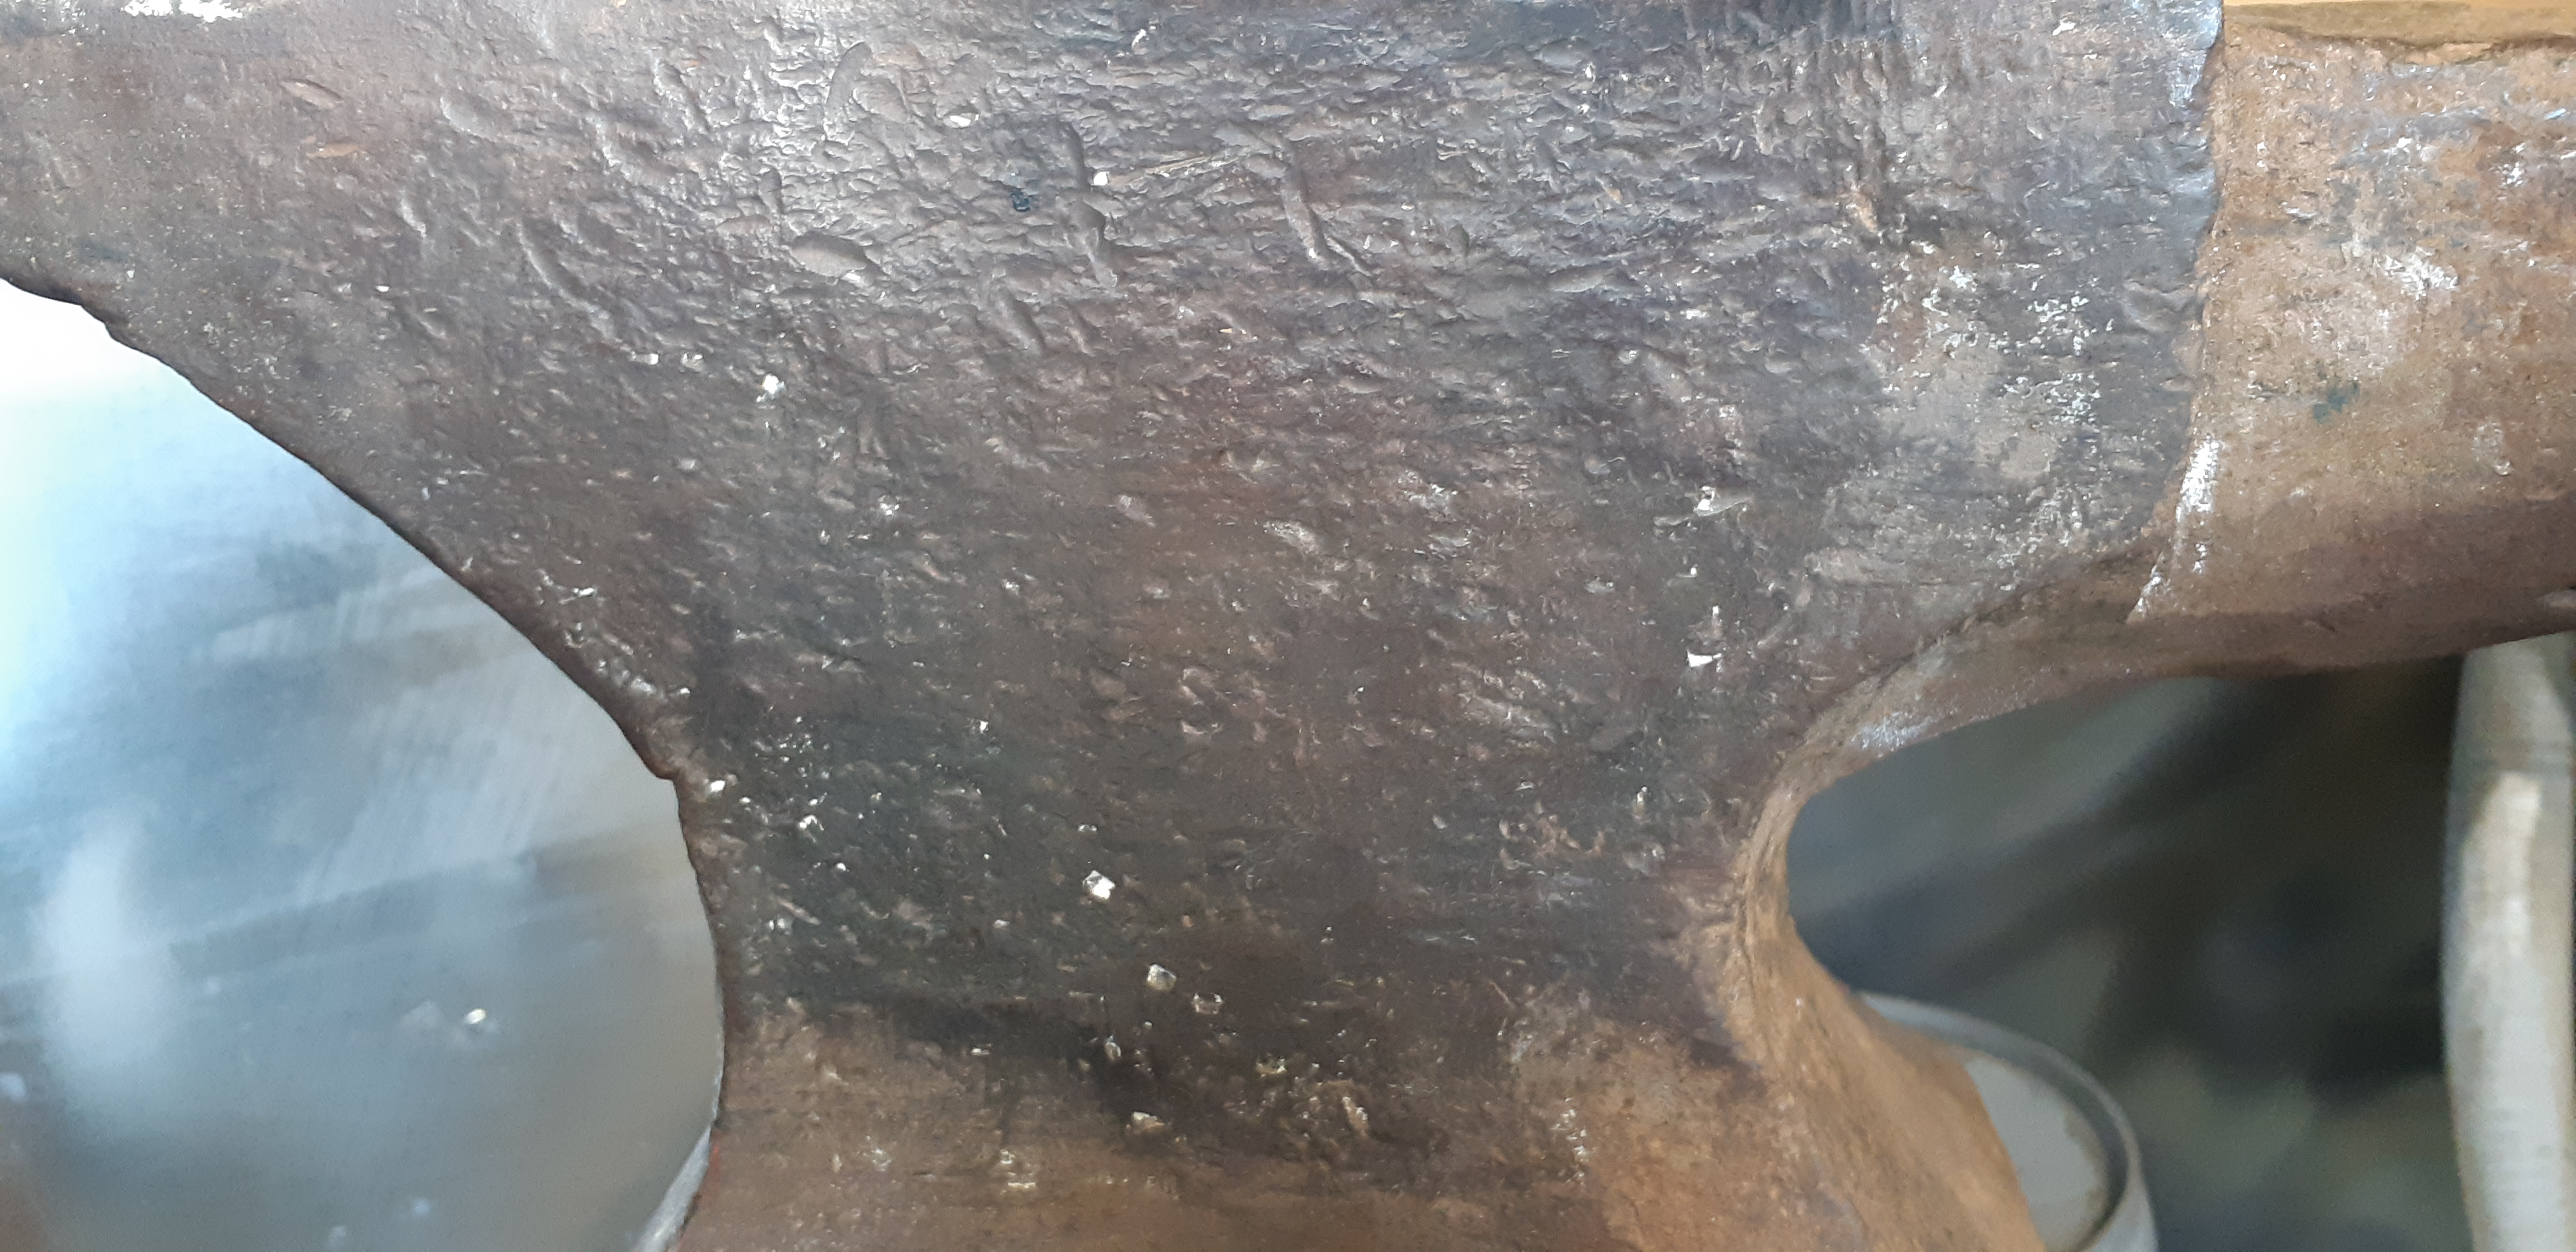
Stand for my 157# Wilkinson Dudley anvil. Legs are 4.5" diameter tubes filled with sand. I will use the handles on each side as hammers and tongs rack, as will as attachement points for bike chain hold down. The short lengths of tubes at the corners will eventually host small remkveable shelves to lay down tools.

The underside of the stand is reinforced with welded webbings.
The stand weighs a bit over 100# and is rock solid. I laid transparent silicone caulking between the anvil and stand, so no ringing at all.
When I need to move it around the shop, I will use a set of snowmobile rollers. Much easier than dragging it around!

-
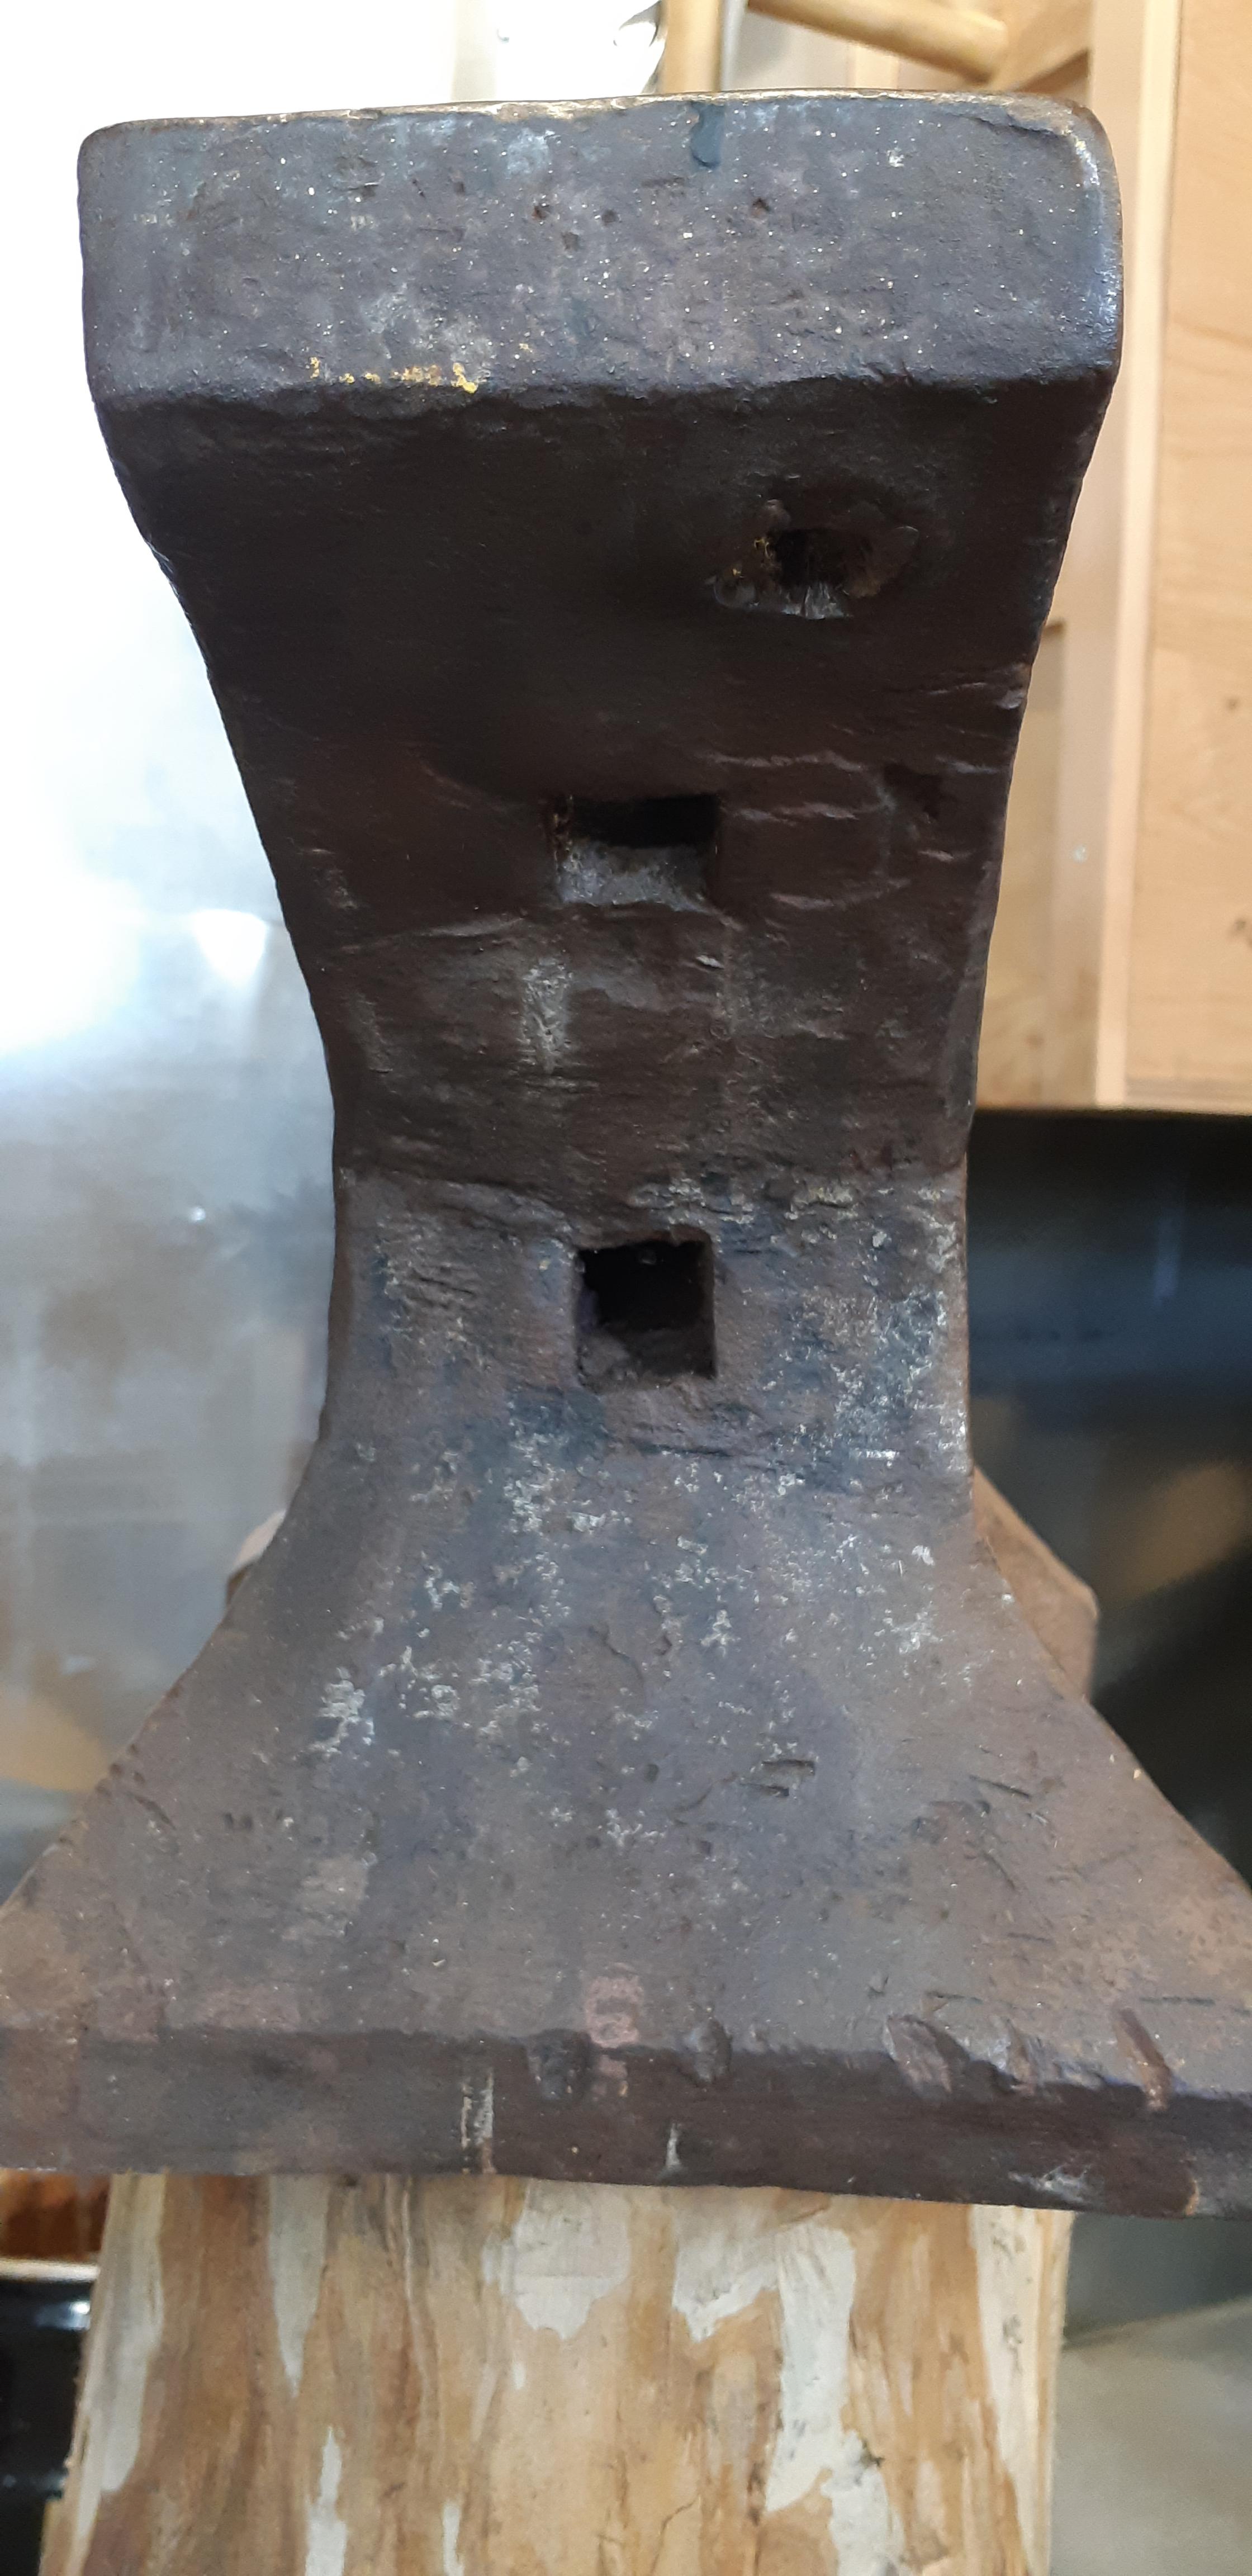
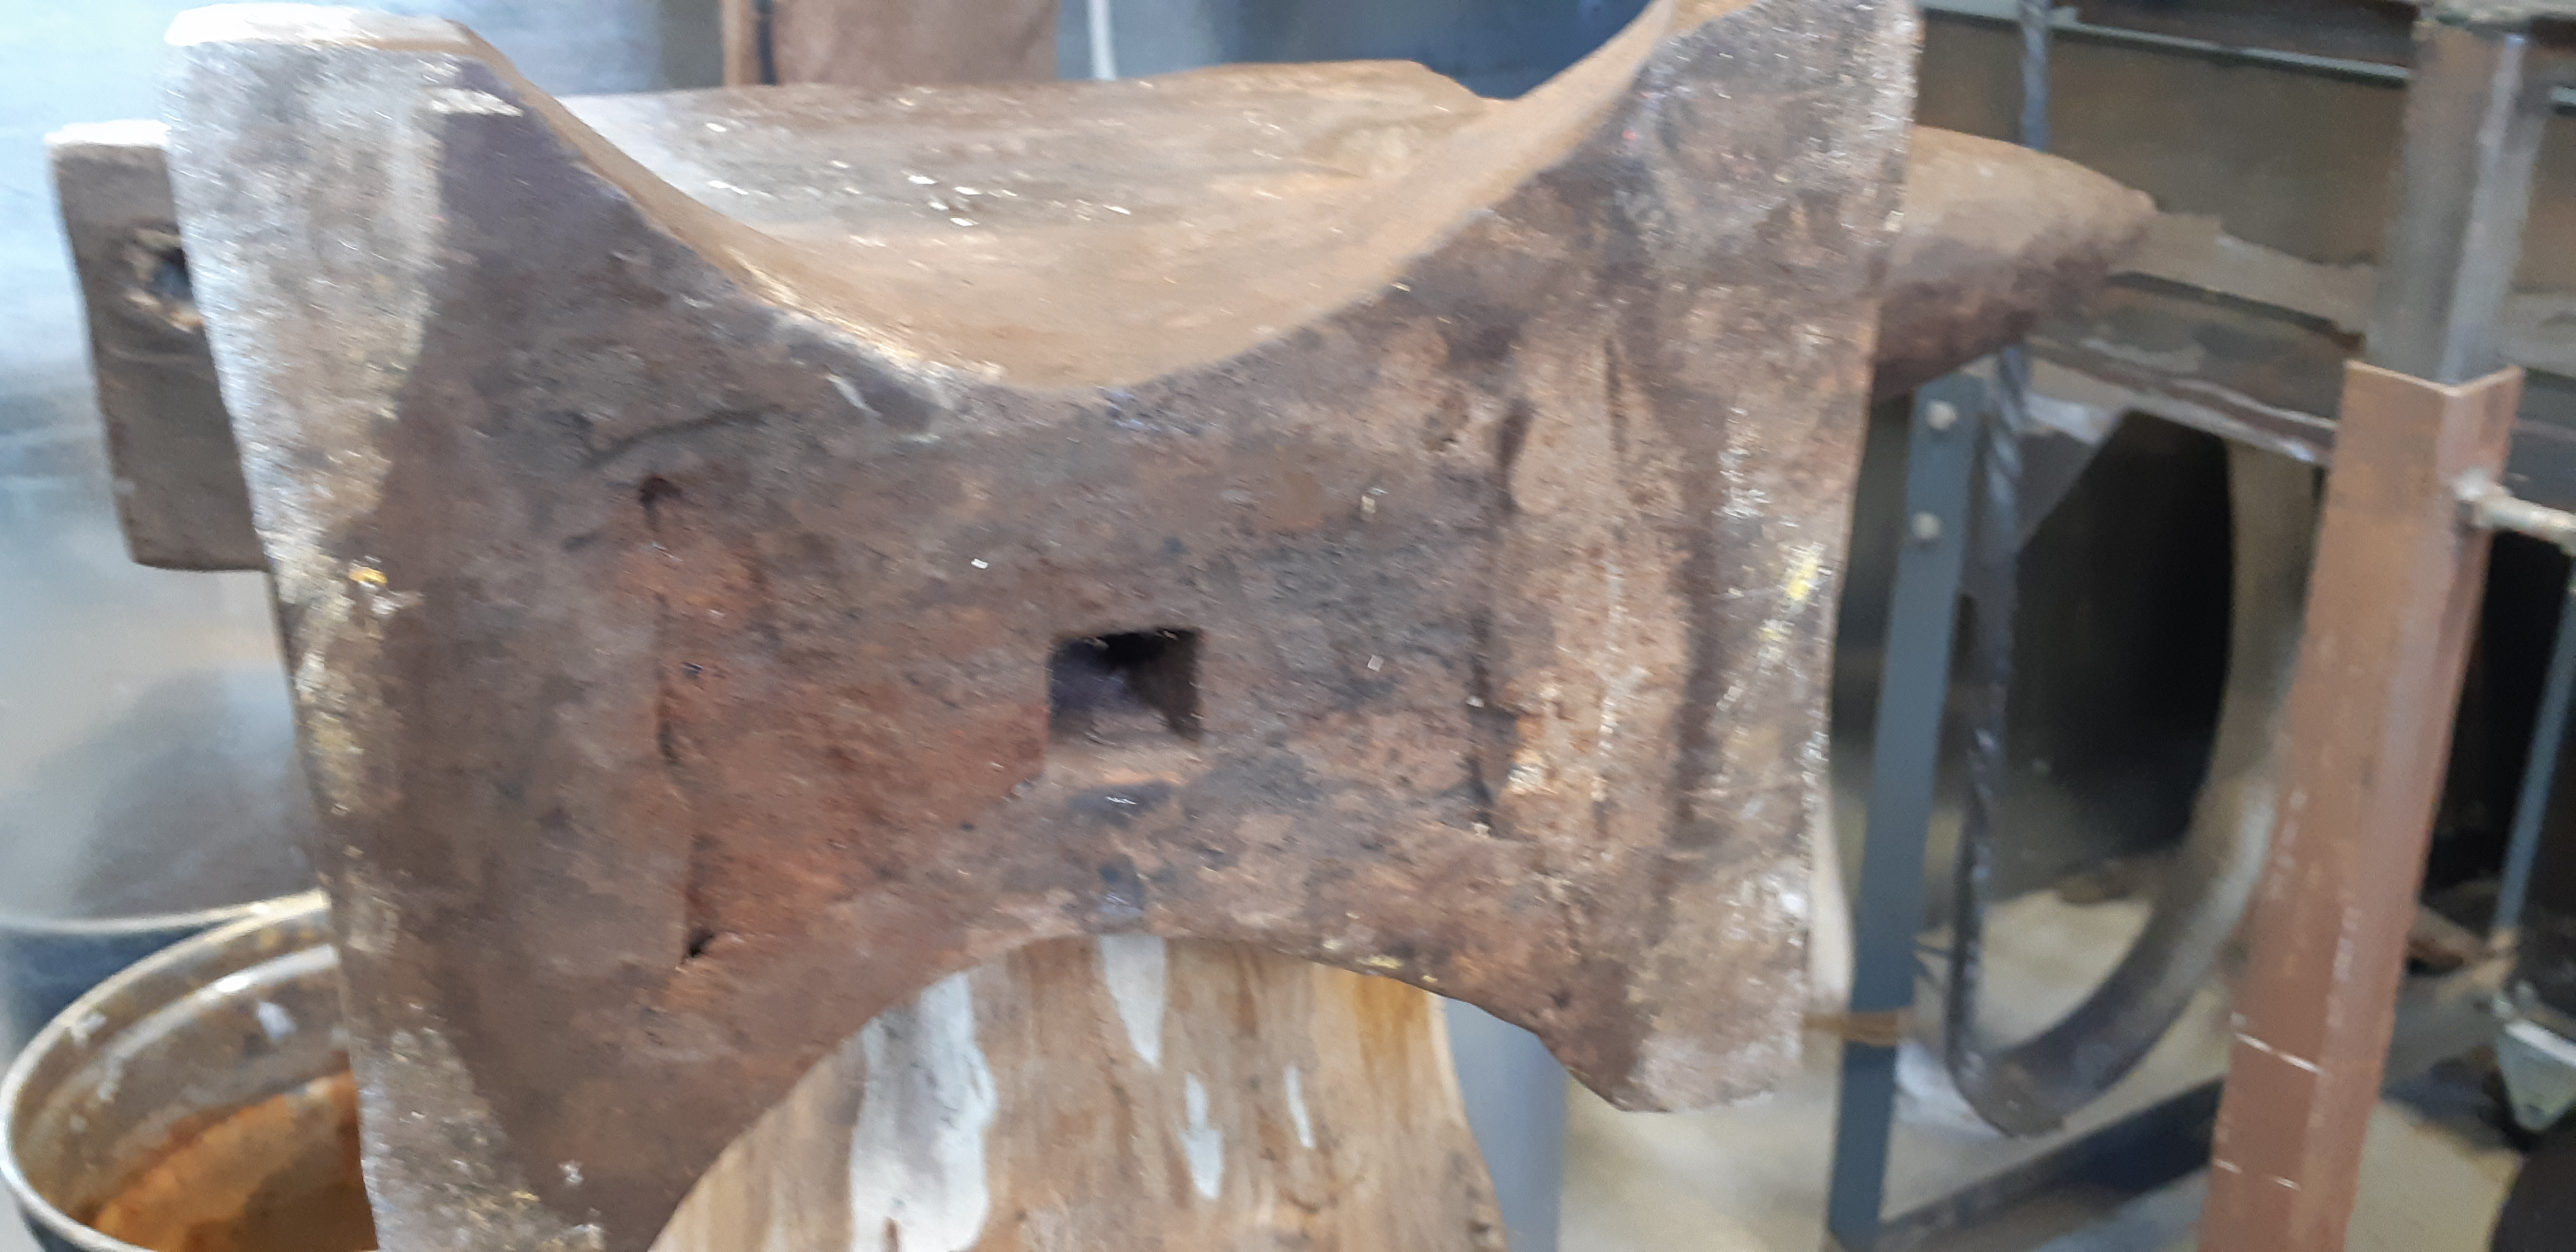
Finished the mounting my new anvil to its custom-made stand.
The anvil is a 157# Wilkinson and the stand weights a bit over 100#. The legs are 4.5" diameter tubes filled with sand. There's silicone caulking between anvil and stand.
Rock solid, no ringing. Now I can put the new anvil to work!
-
Welded the support webbing under the plate of my new anvil stand, as well as the front and back plates.
The welds may not be the cleanest (I am not an experienced welder and I use flux core), but they will hold.
-
Made progress on my new anvil stand. Legs and welded to the plate, though I want to add some support webbing between the legs and the sides of the plate. Still quite a bit of work yet before it is finished, but it was too tempting to put the anvil on it.

-
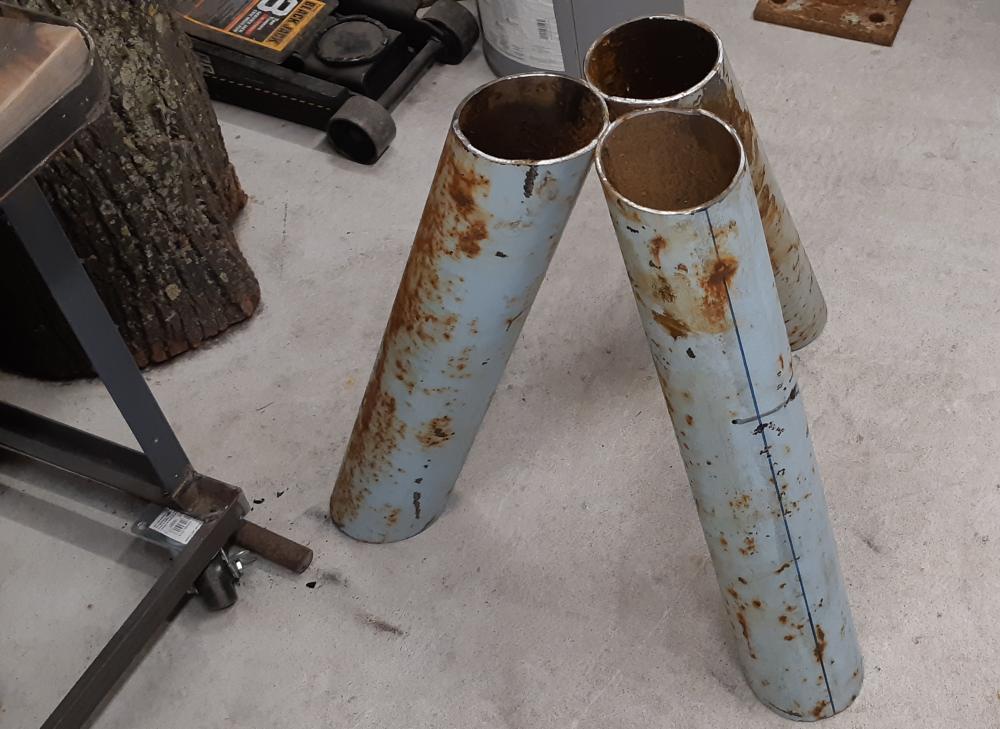
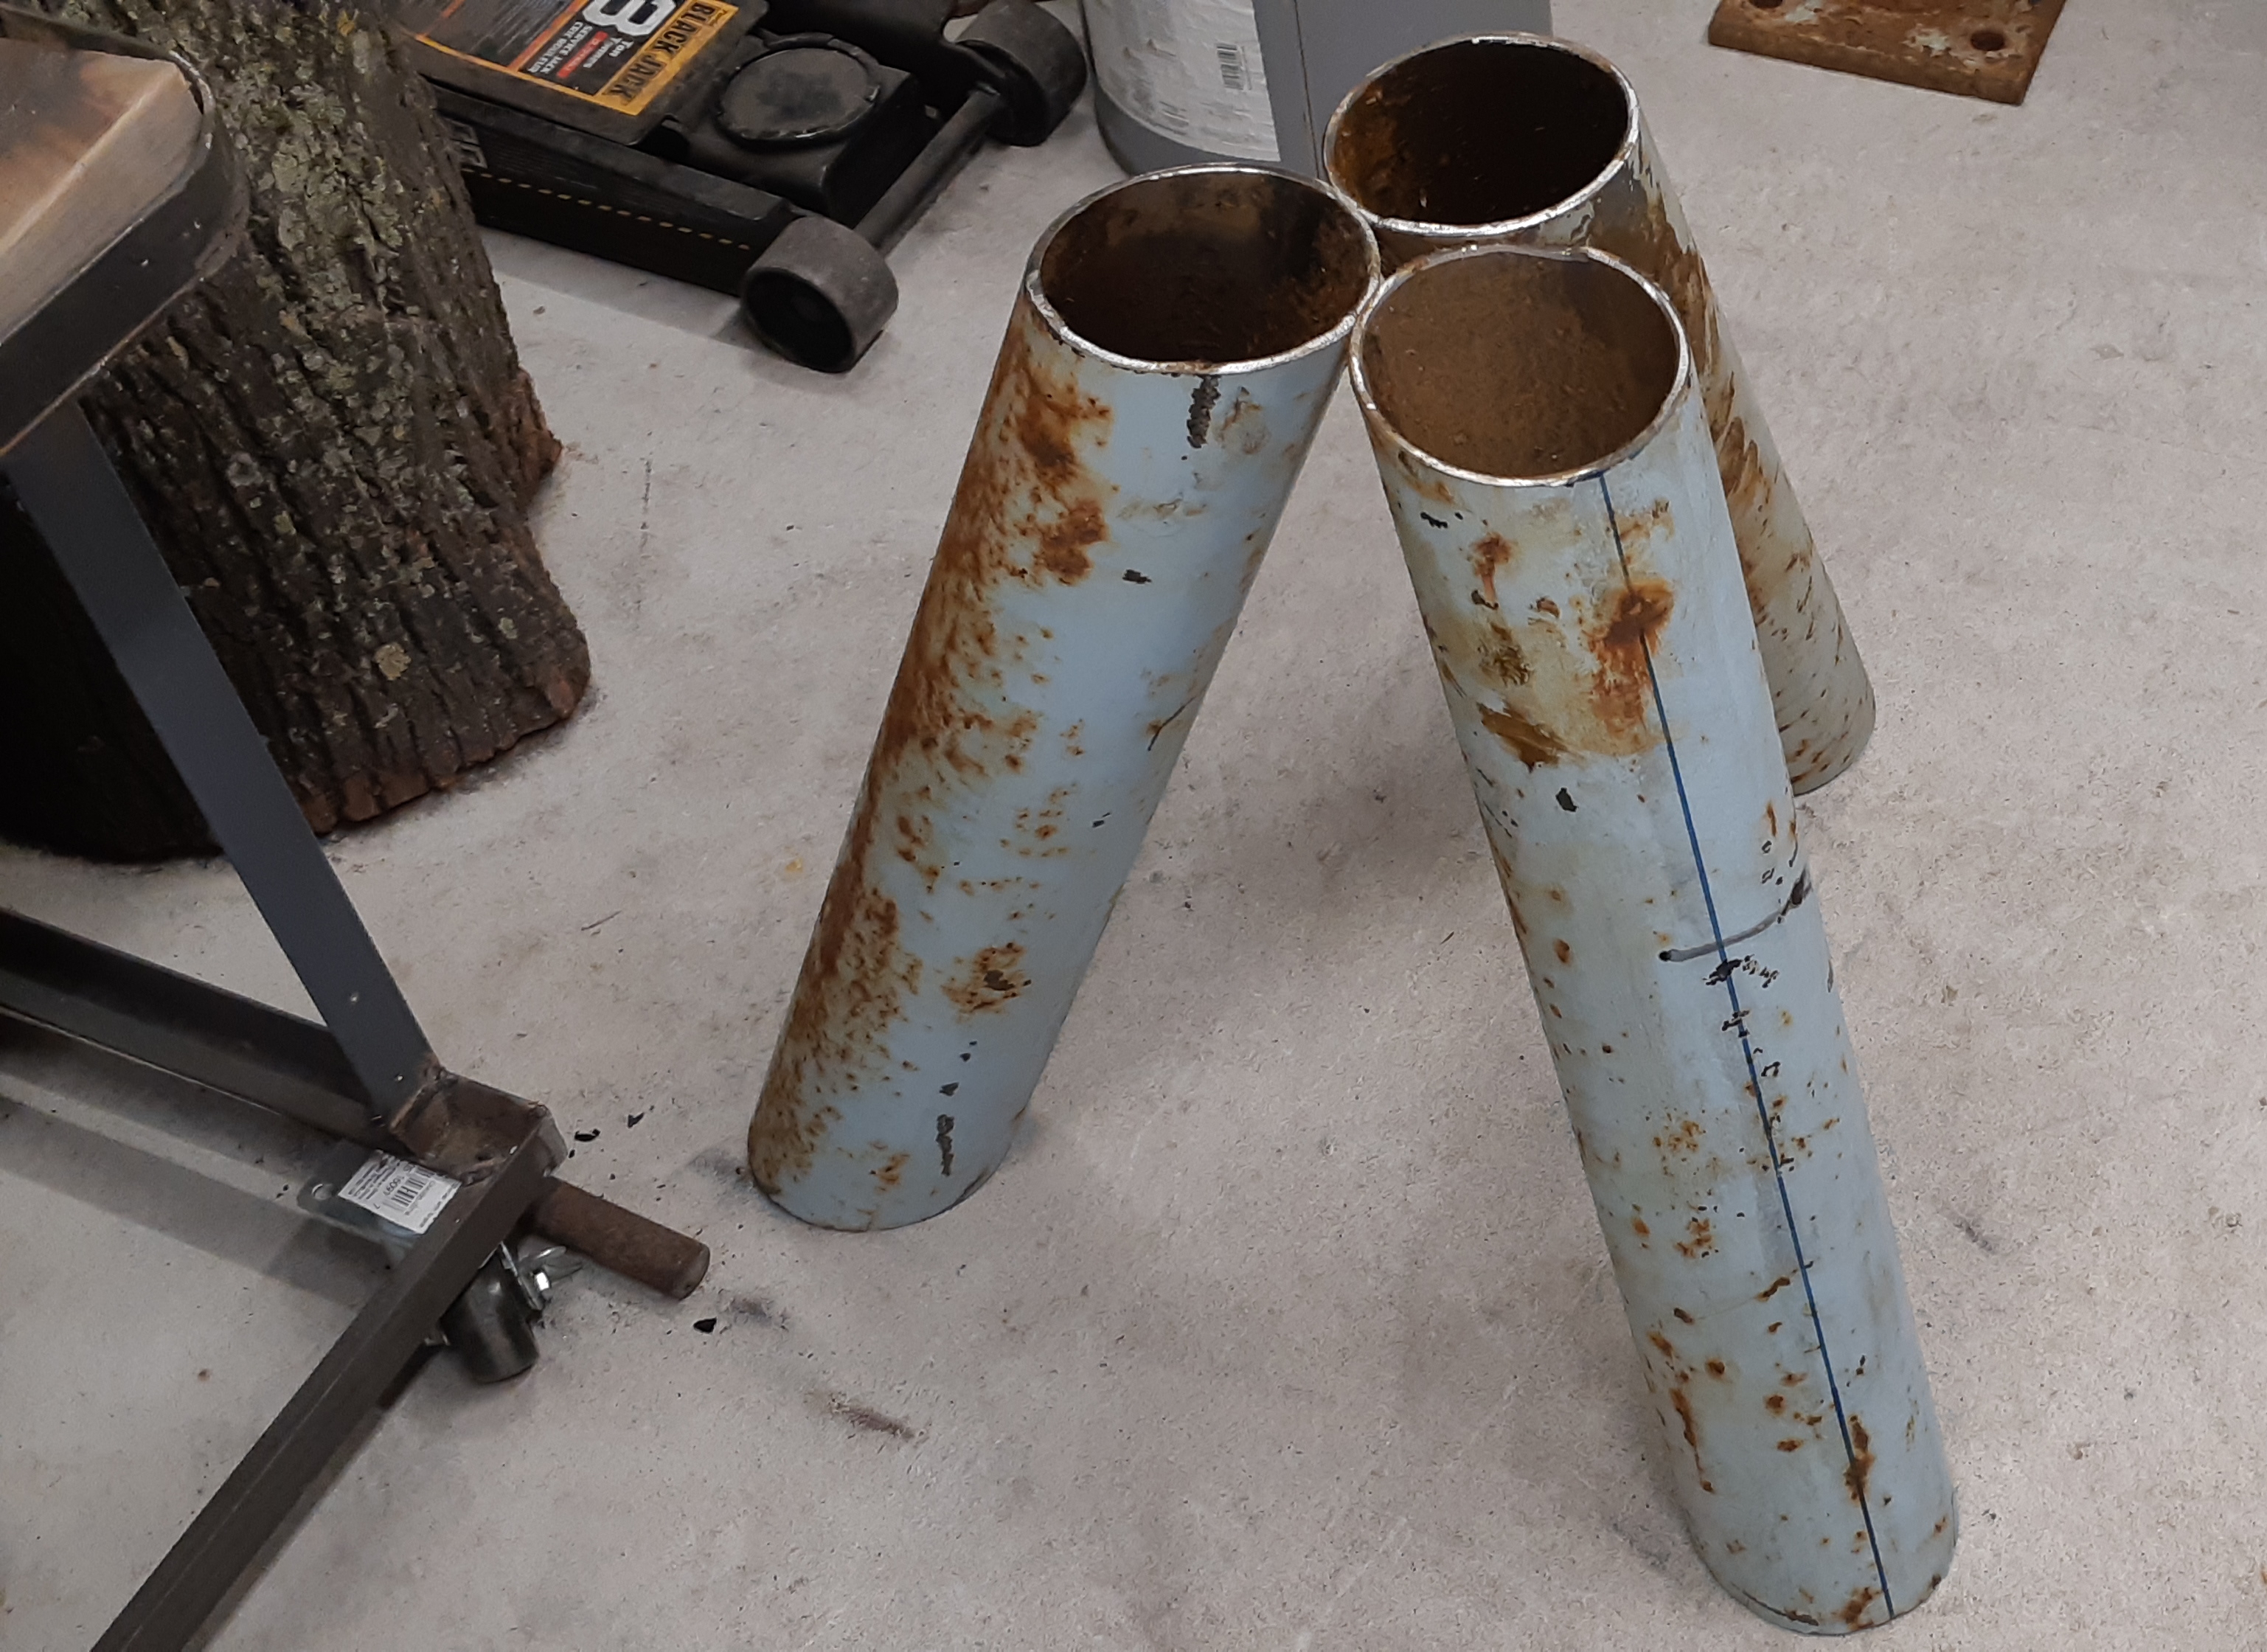
Only a little time in the shop, but I was able to cut the legs for my new anvil stand.
-
Yep, I plan on filling the legs with sand.
-
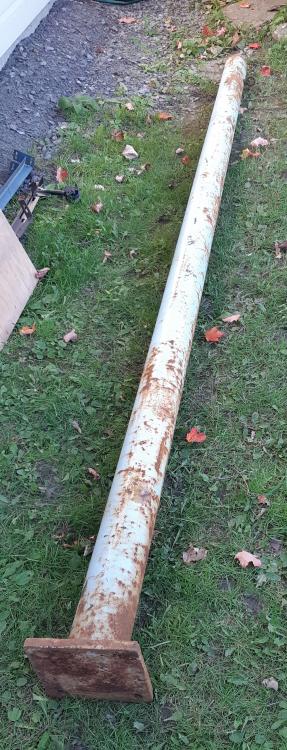
A former clothesline pole, 11' long and 4.5" in diameter. I see the legs for the stand of my new anvil.
What is left after that can be used for a stand for a grinder or a vise.
-
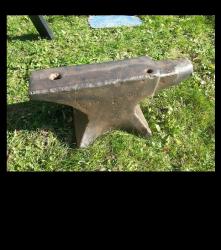
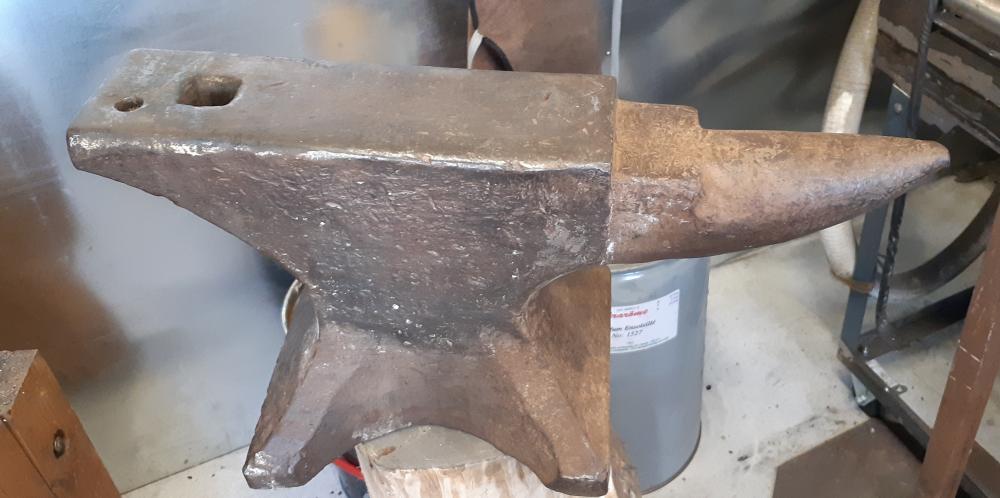
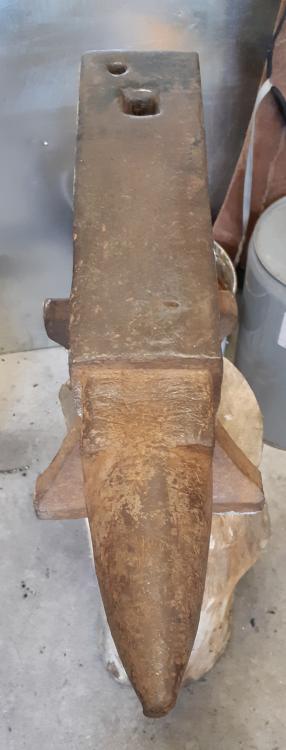
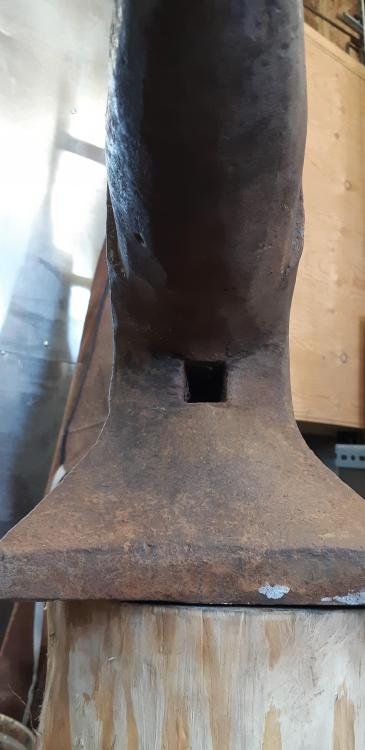
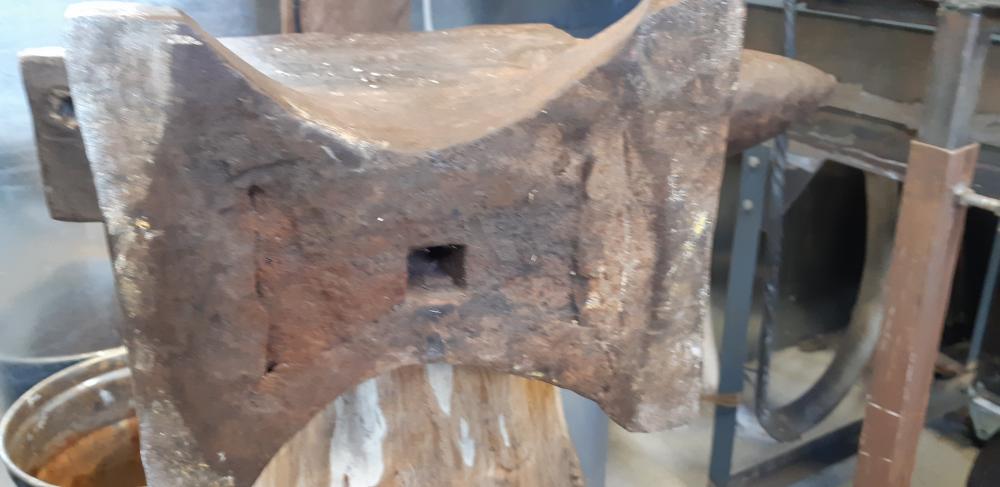
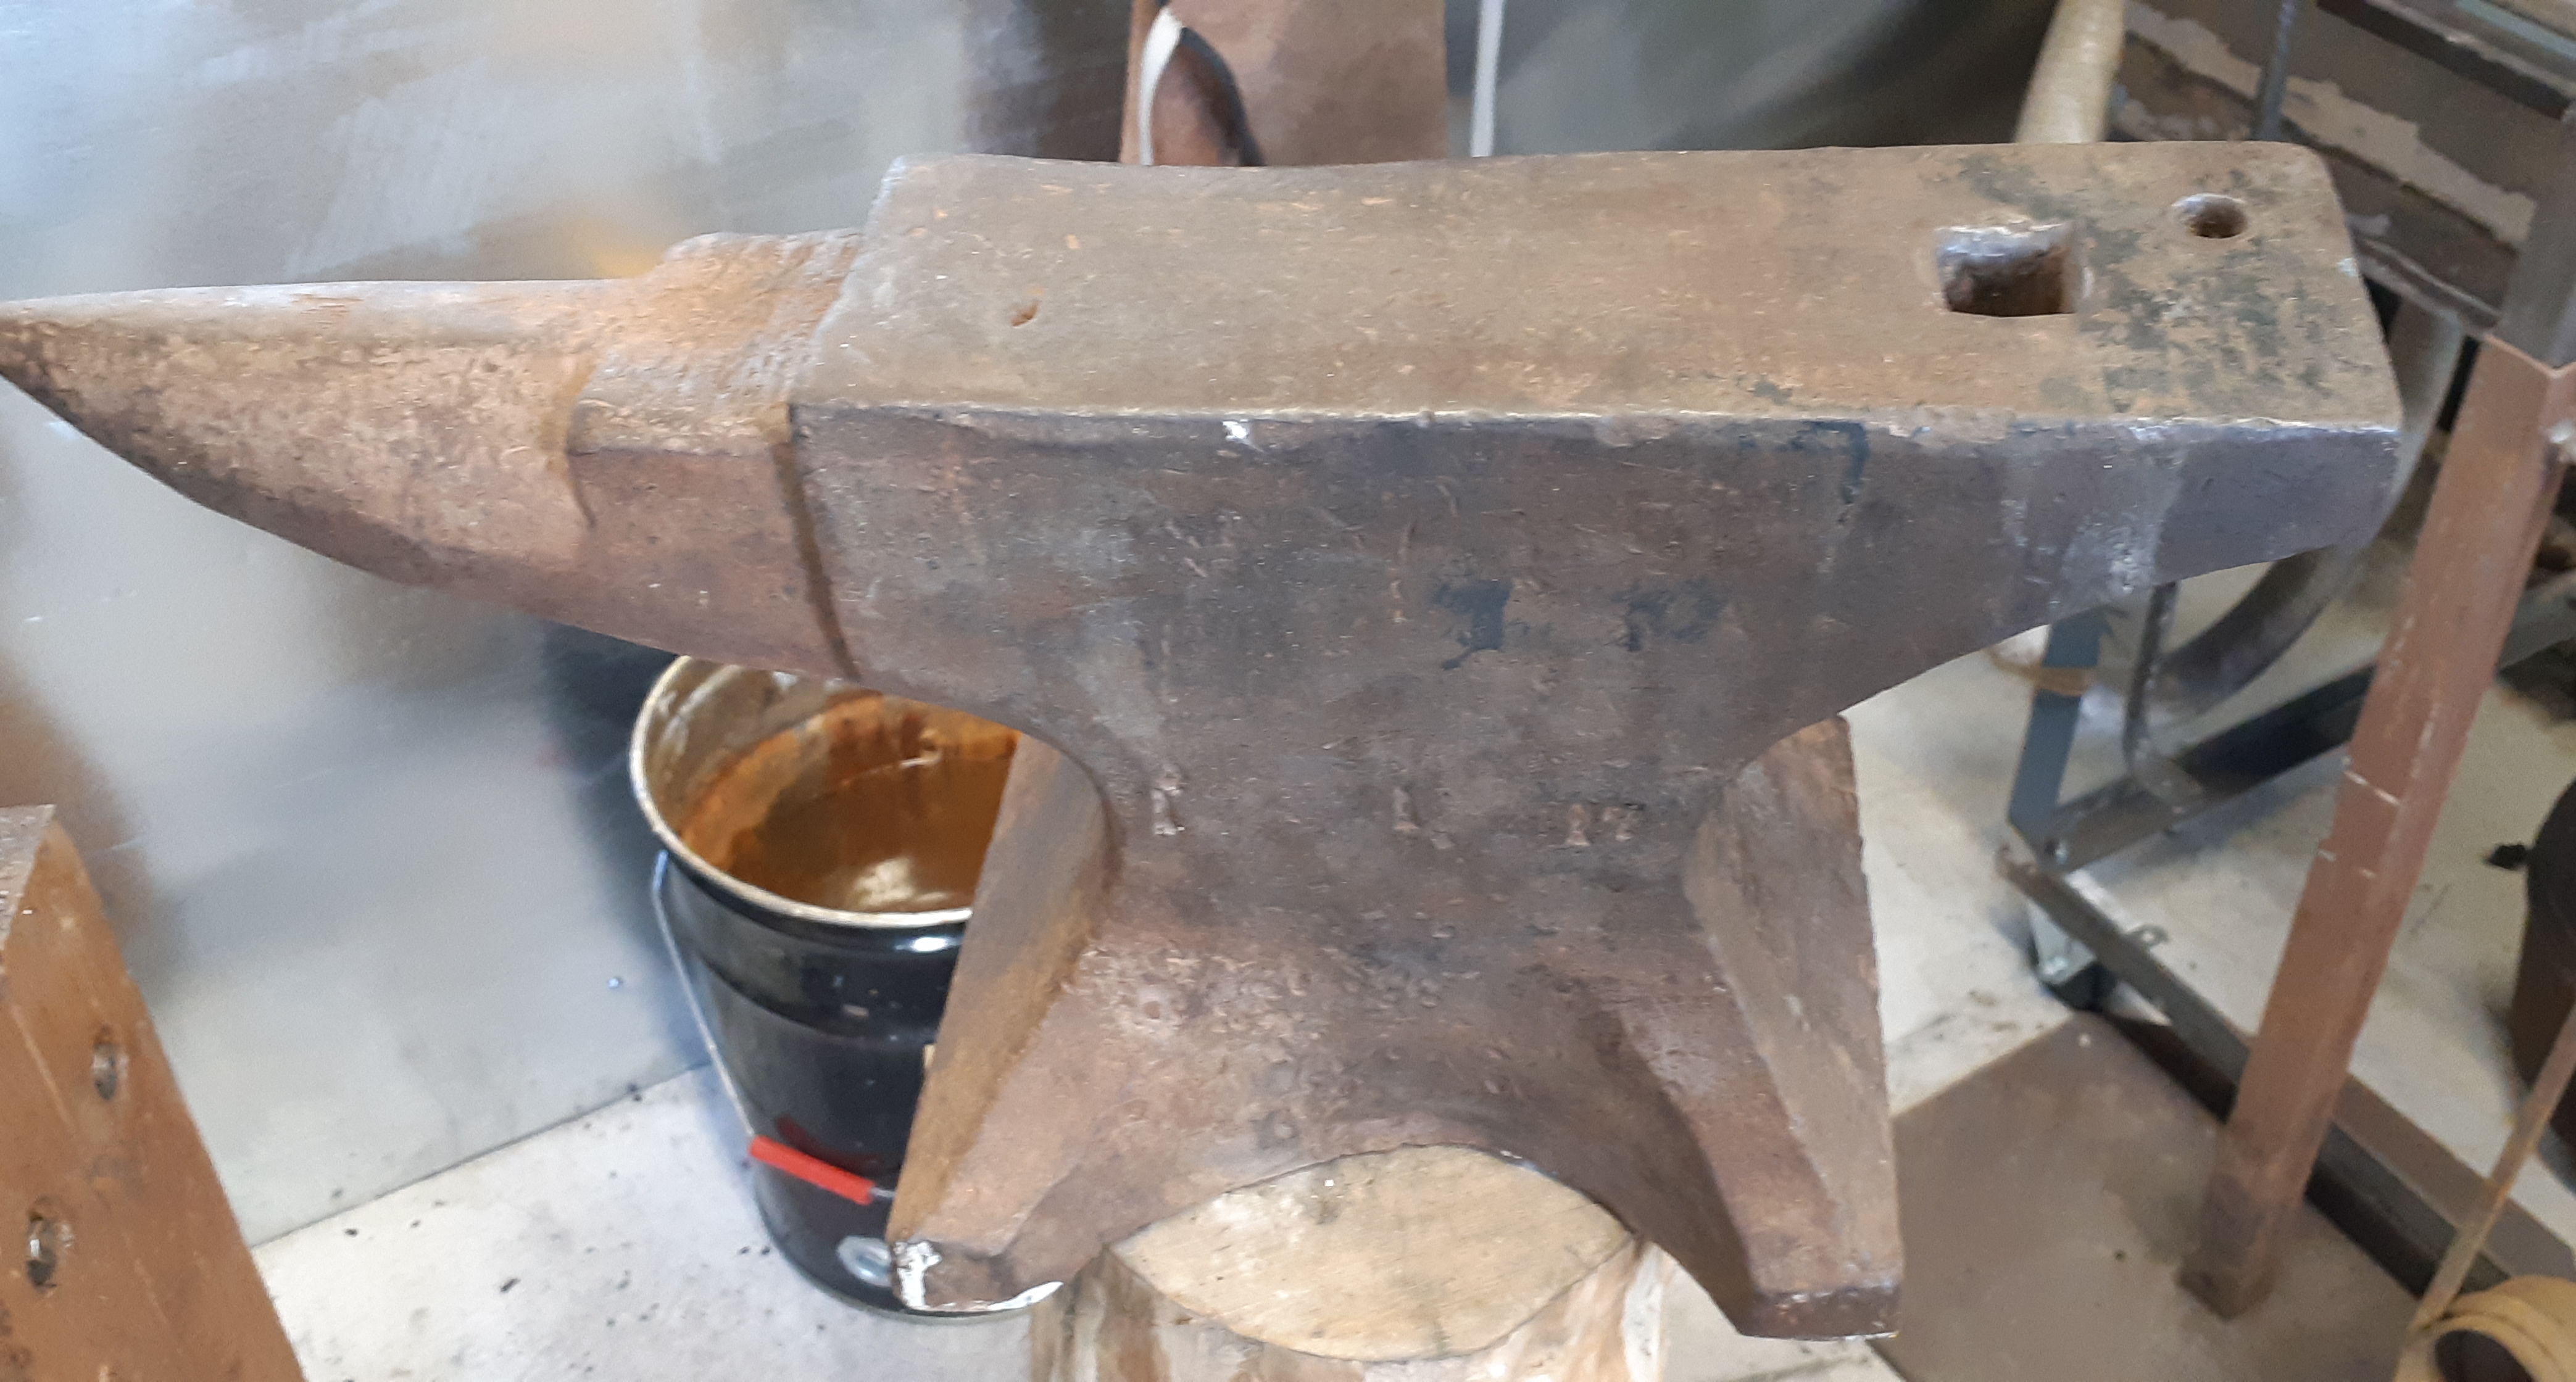
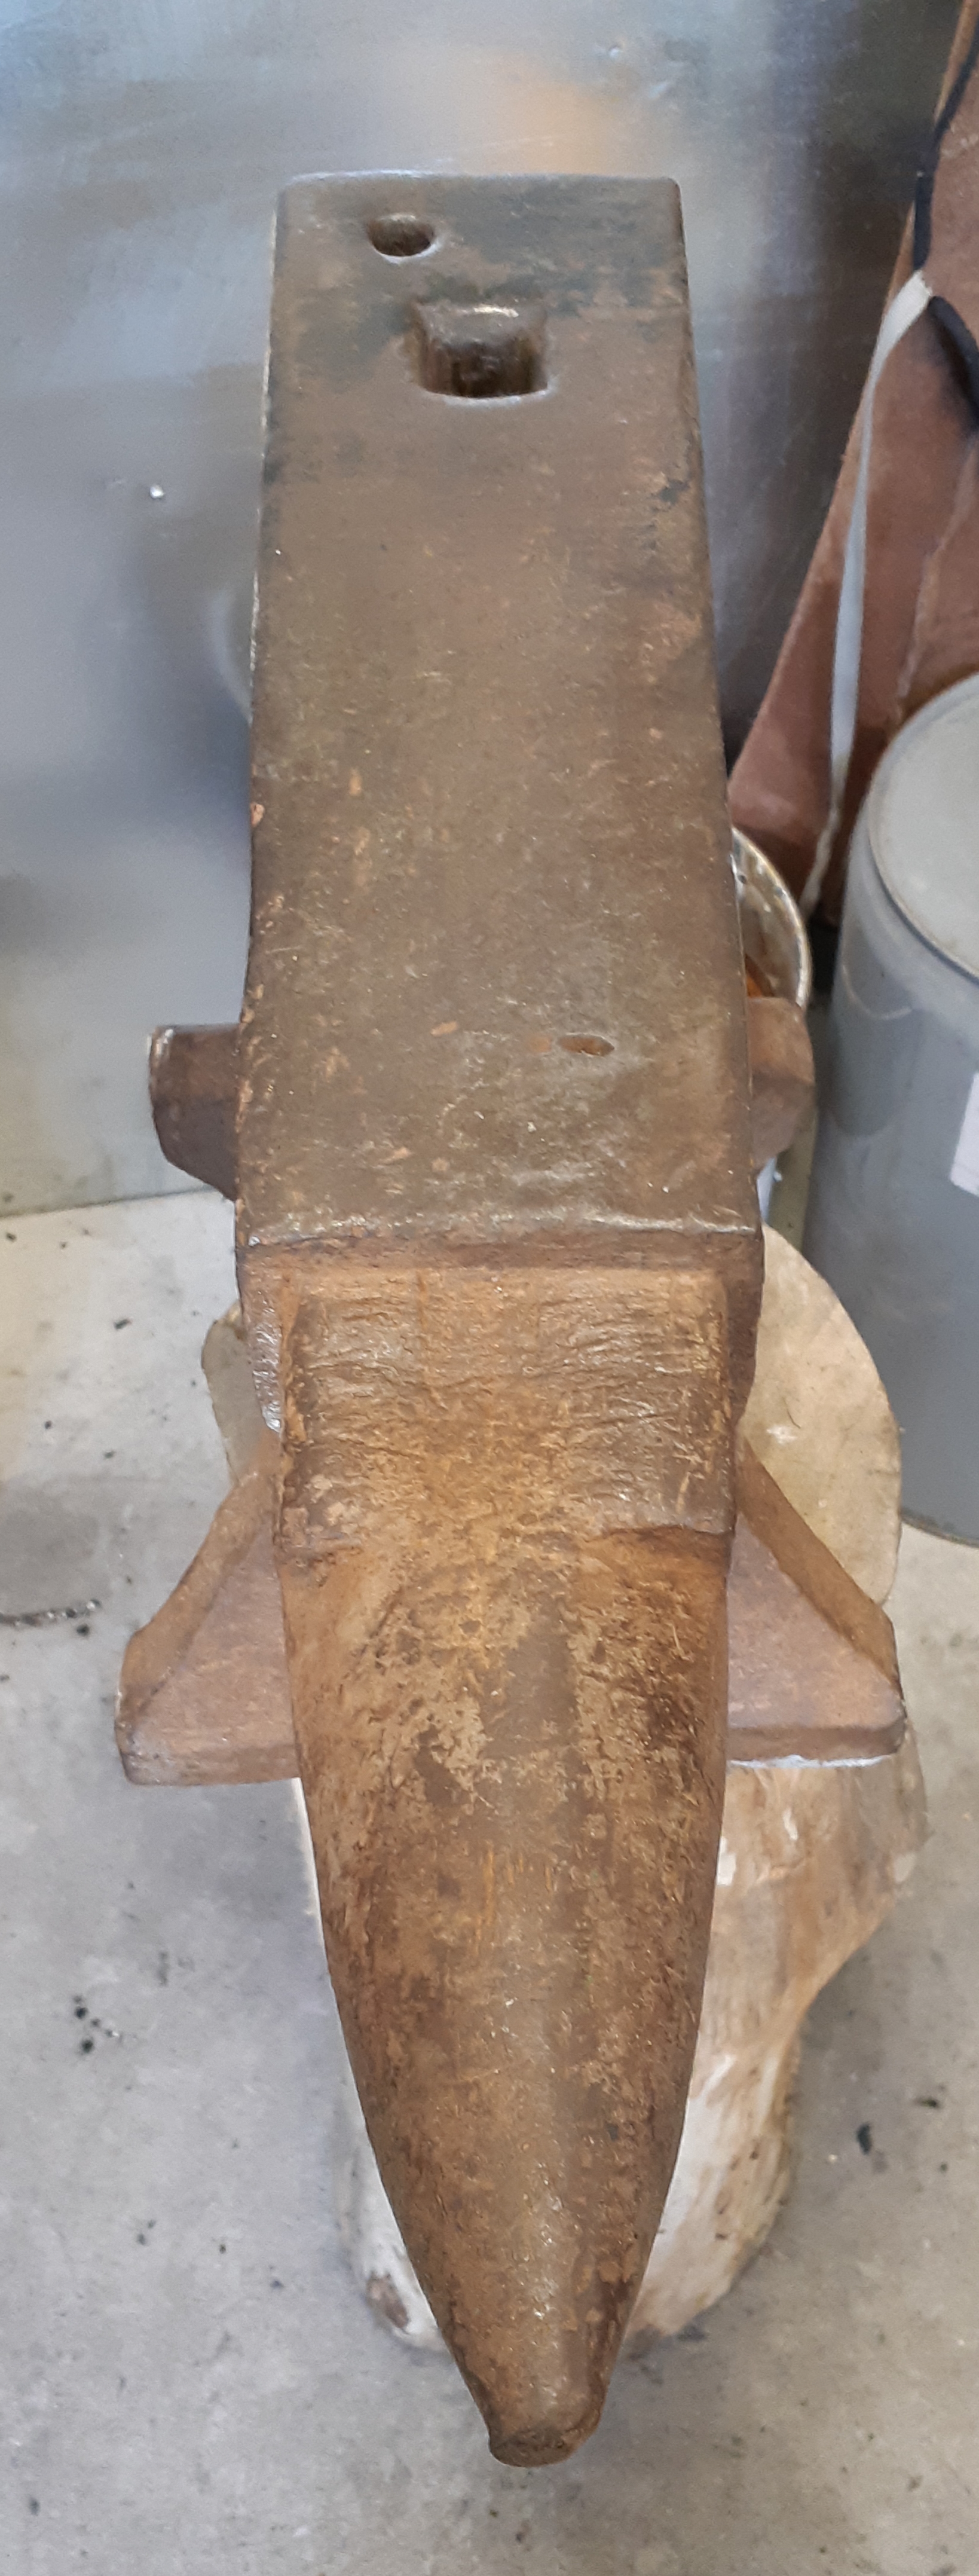
A new to me anvil, possibly a Wilkinson Dudley (though the markings are pretty much impossible to make out).
Good face with only a few dings and a little sway, 80%+ rebound, 157# (1-1-17 clearly marked).


-
A new to me anvil, purchased from a fellow local smith who had one too many. The markings are very faint, but he's had it identified as a Wilkinson Dudley.
Only has a few dings on the face and a bit of sway. Marked at 157#, which is almost double what my current anvil is. Plus it has a horn, which my current anvil is short on.

I see a nice stand for it in a close future. Just put it on that small stump to take pictures.
-
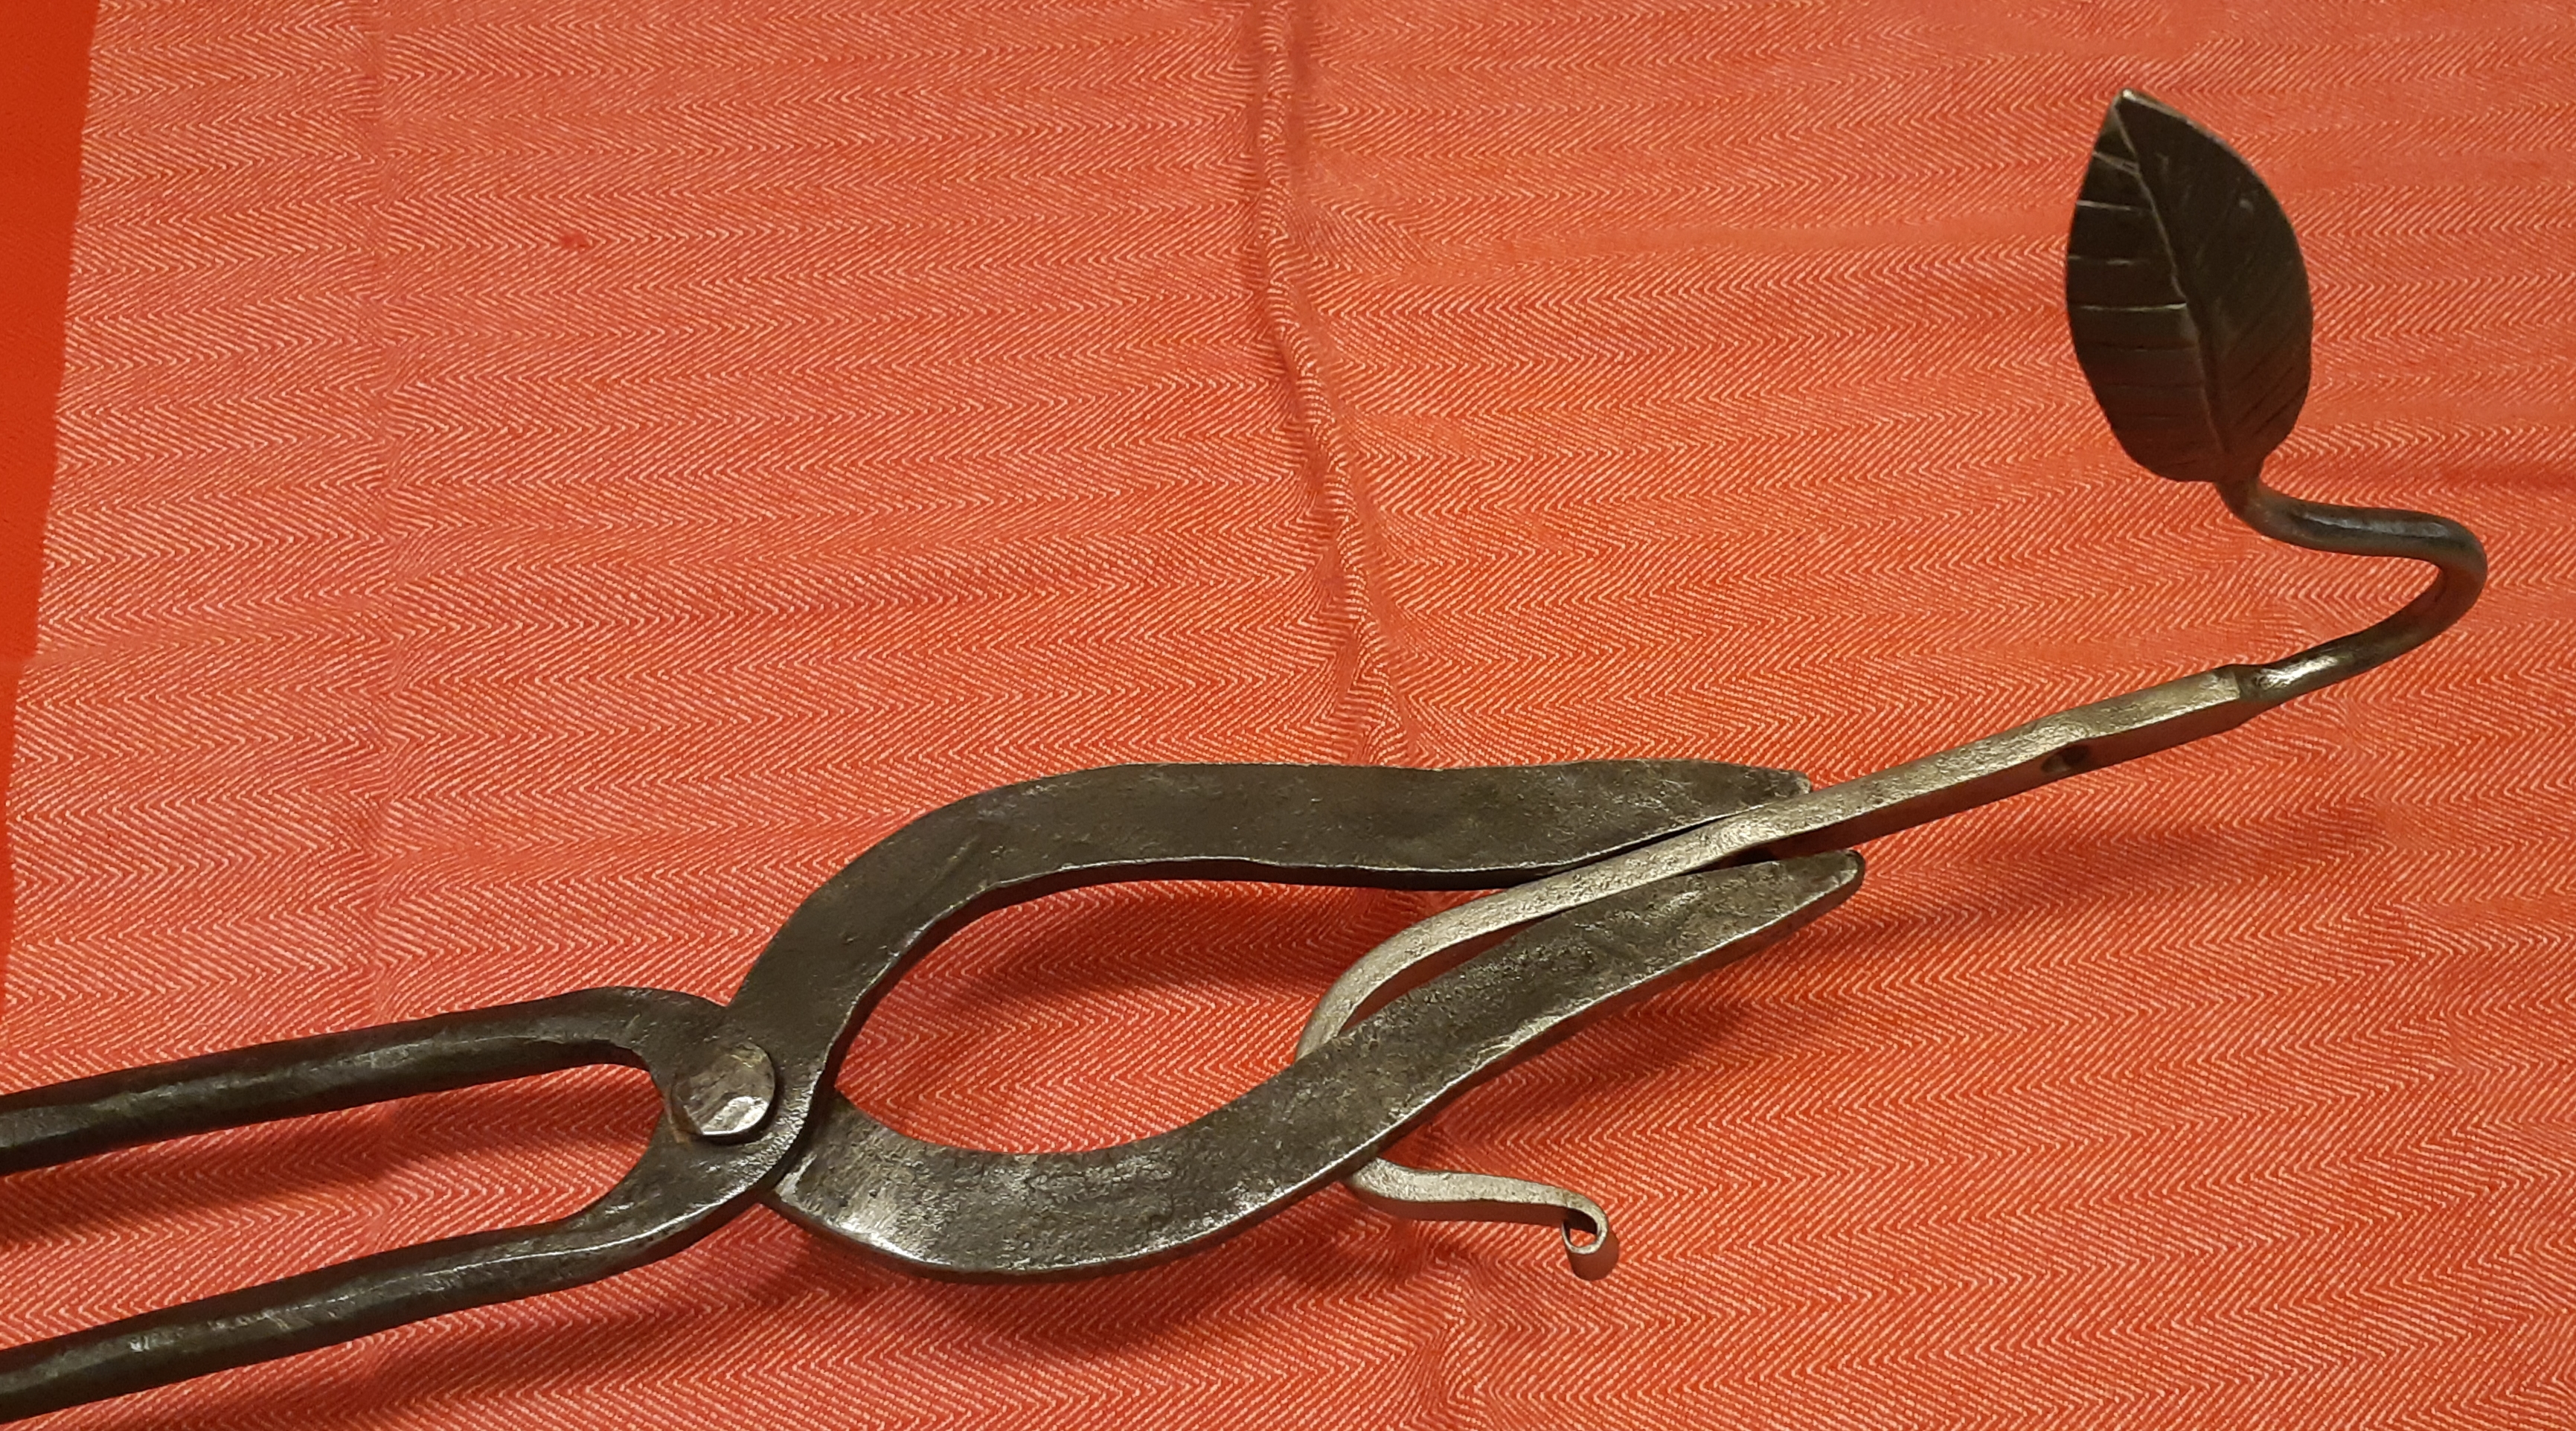
C'est pour un contexte d'activité médiévales, alors le but était d'être le plus fidèle possible aux pinces Mastermyr, dont les poignées sont rondes. Je trouve aussi ça plus confortable.
The tongs were made for a medieval recreation context and the objective was to have them as close as possible to the Mastermyr ones, that have round reins. I also find them more comfortable.
-
Thanks SLAG.
blacksmith-450, yes it took a few hours to draw out those reins. I learned that I need to heat the steel to bright yellow to have it move faster.
Overall the tongs too me about 10 hours to make. Next one should be faster, as I now have a better sense of how curved the jaws need to be.
Nice bottle opener, btw. Very clean lines.
-
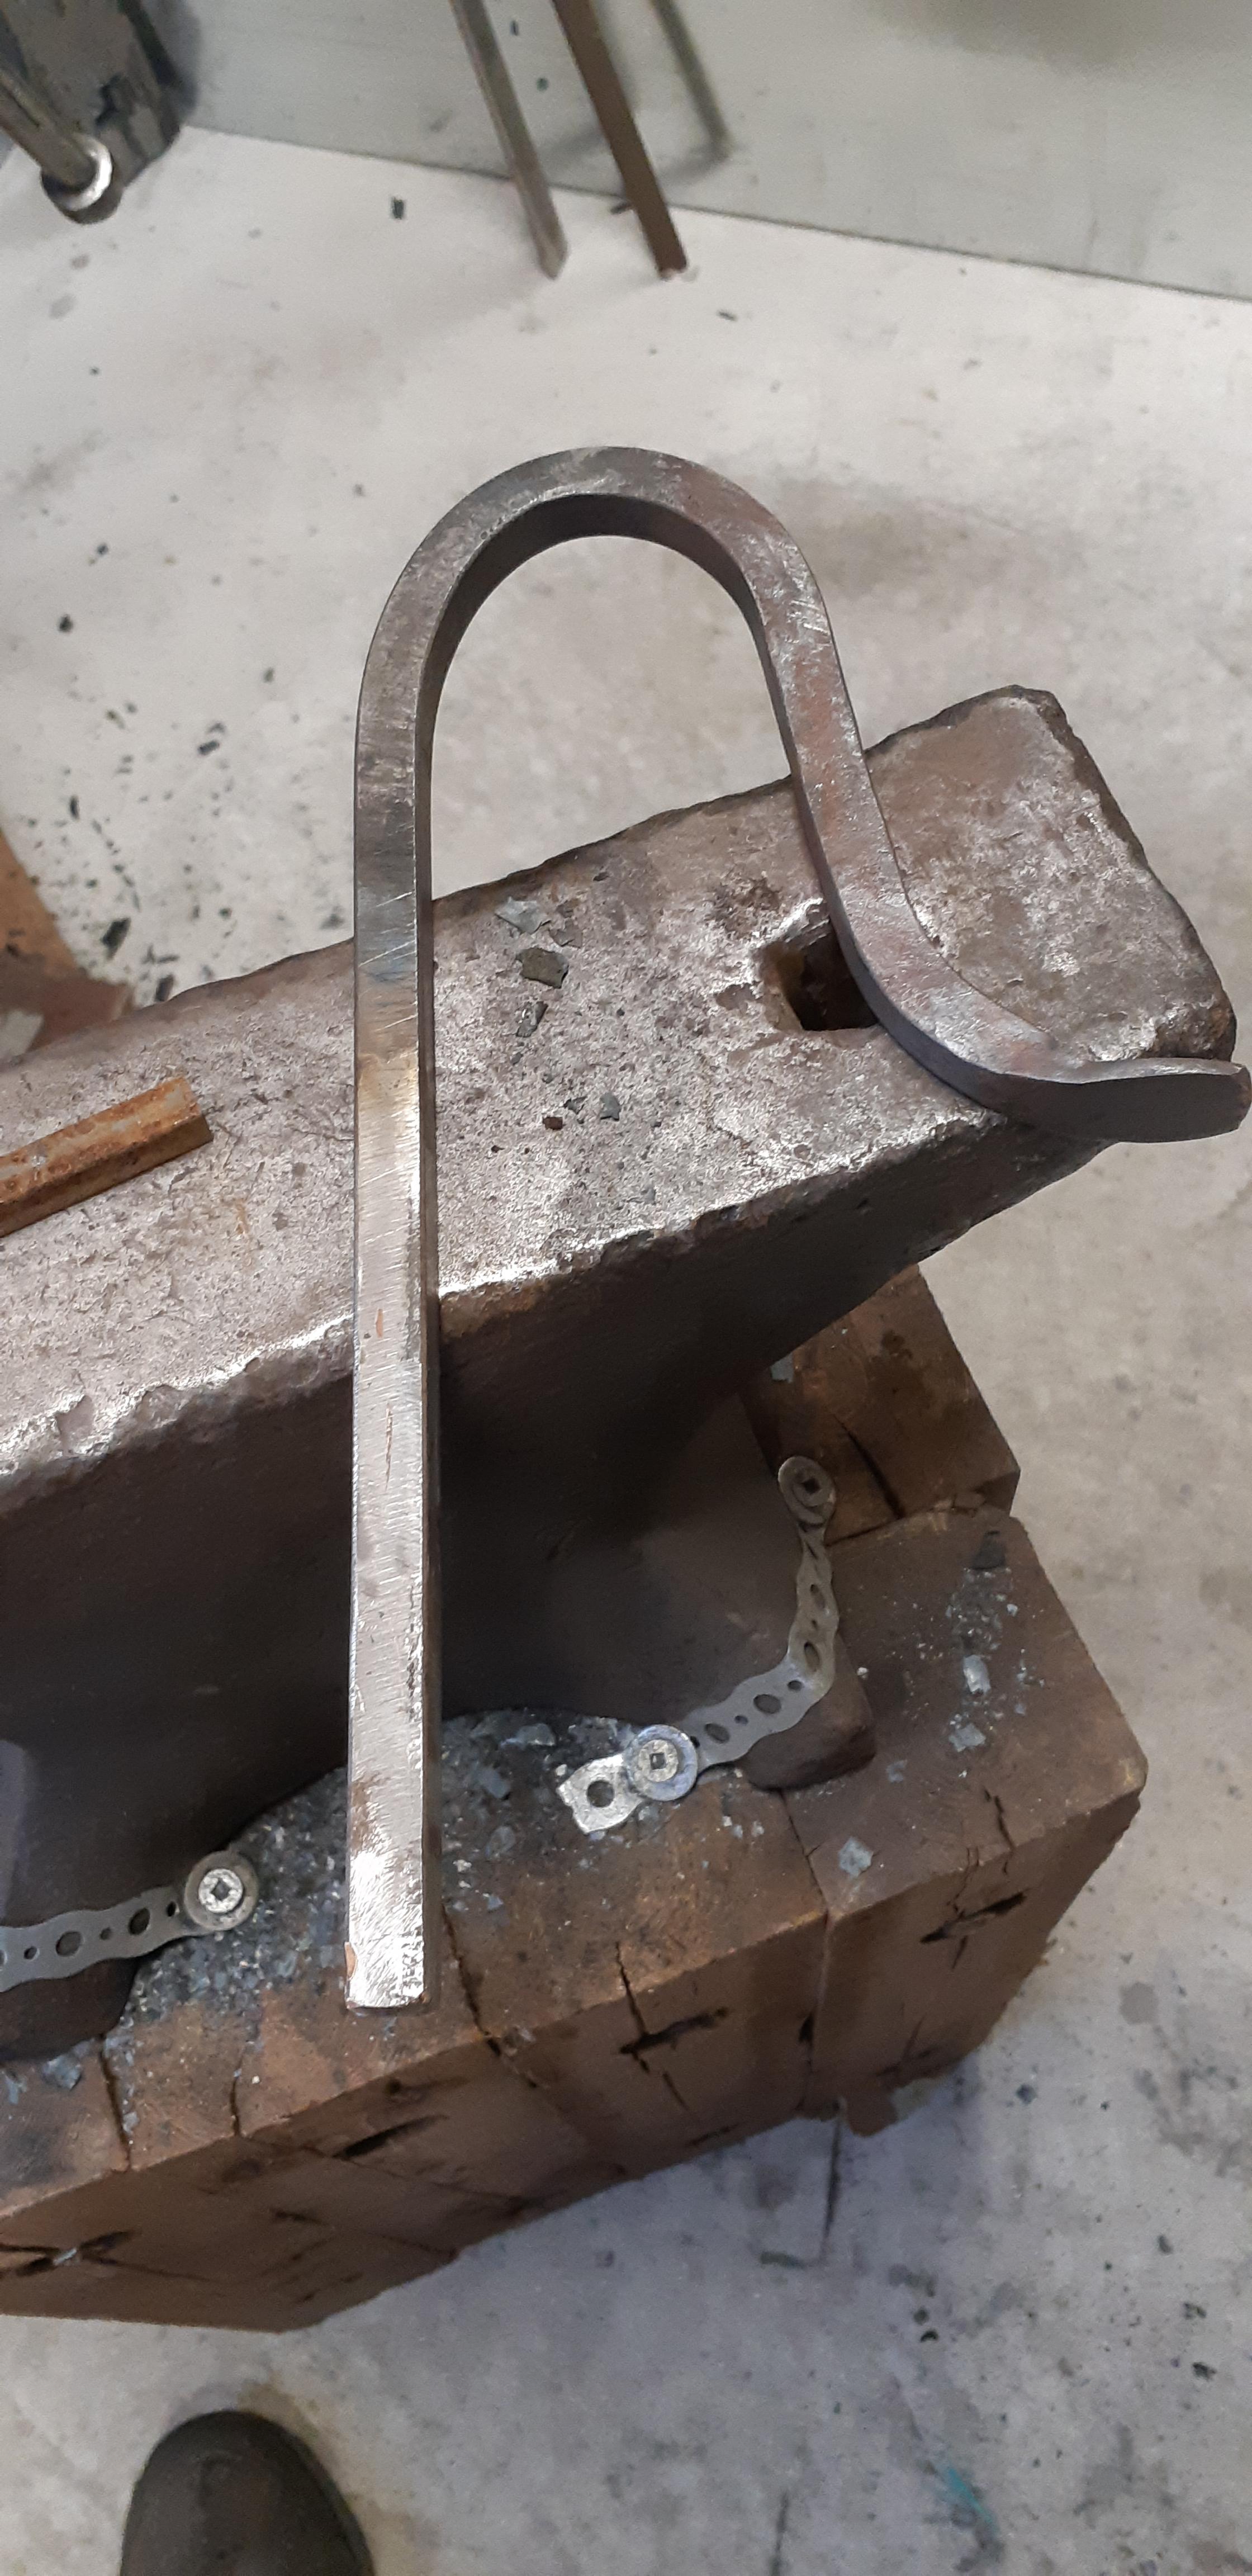
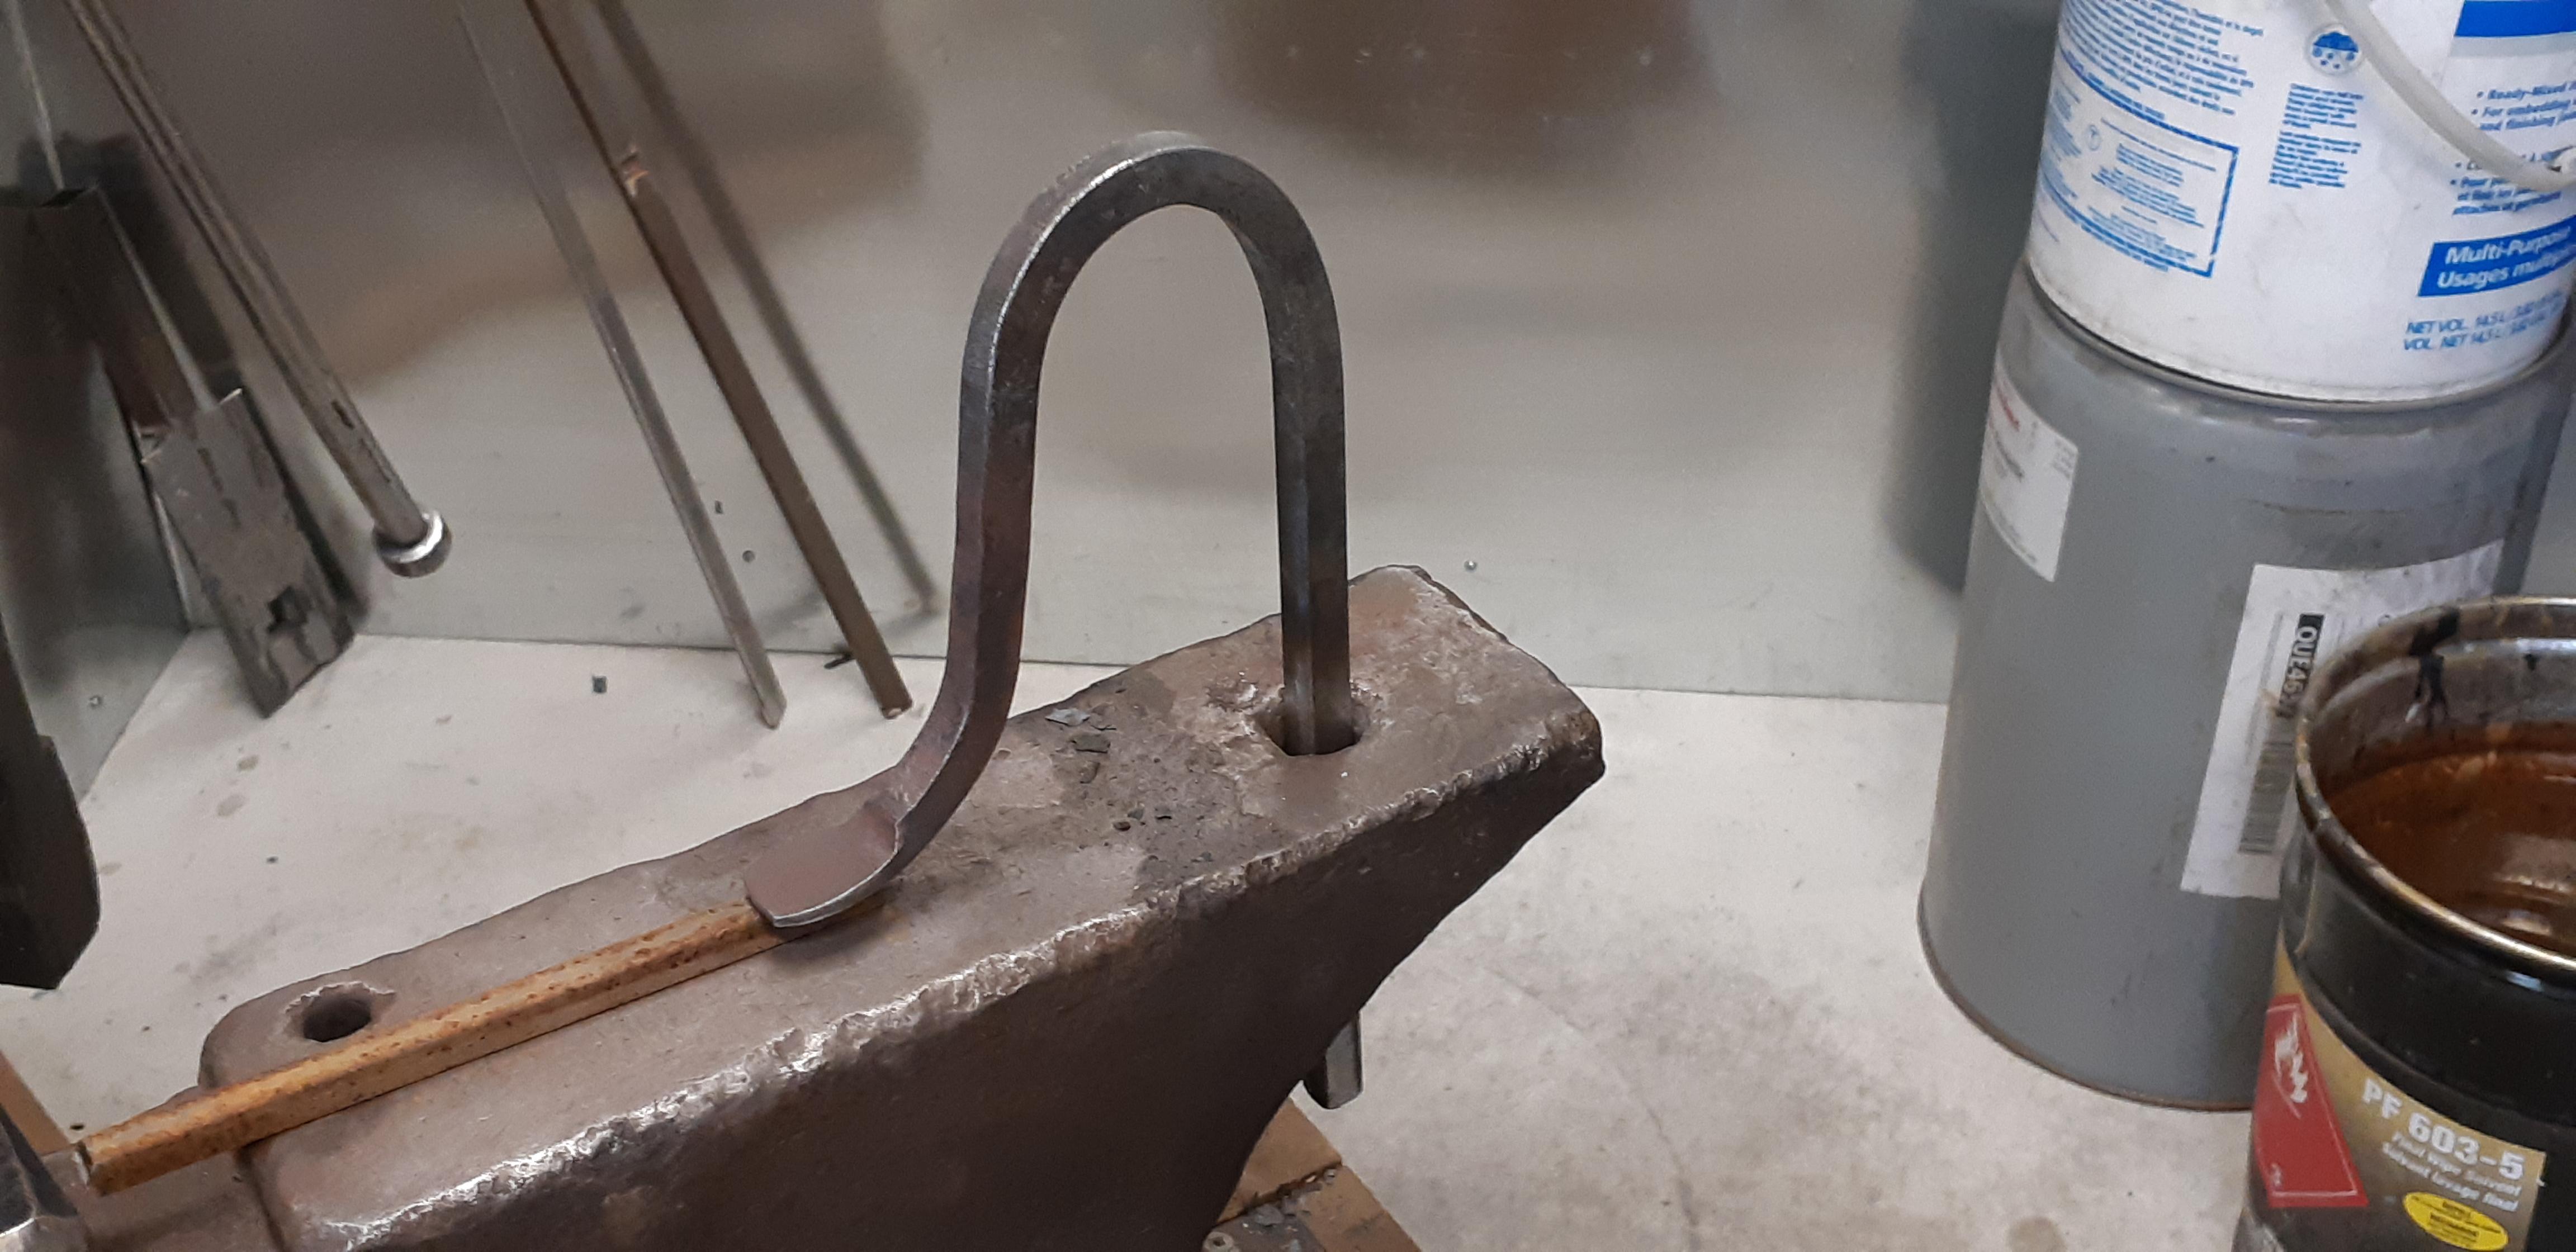
Finished a pair of Viking-style tongs, based on those in the Mastermyr chest.
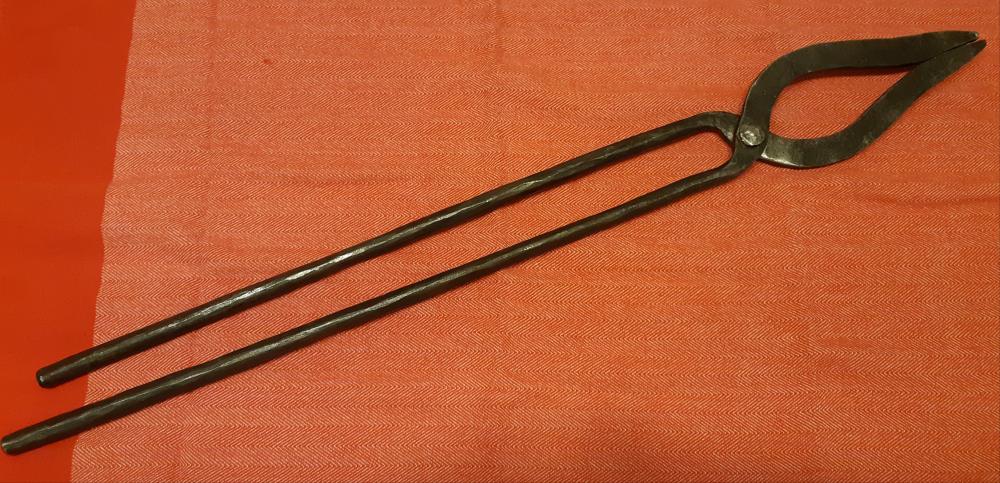
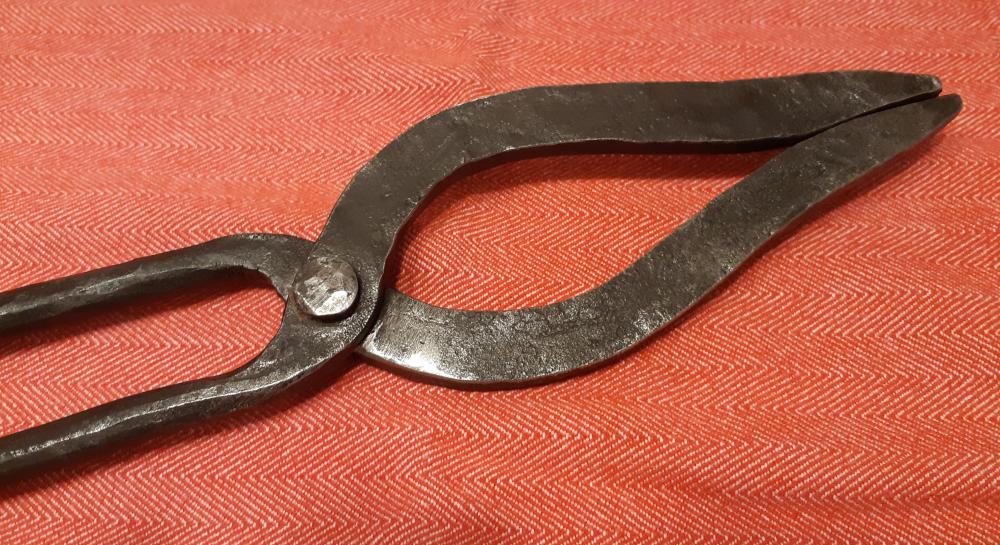

Made from 2 17" pieces of 1/2" square. Final length 25", weight 2.25 pounds.
-
Sending positive energy his way.
Arthur
-
Started working on viking-style tongs., similar to those from the Mastermyr chest, from 1/2" square stock.

-
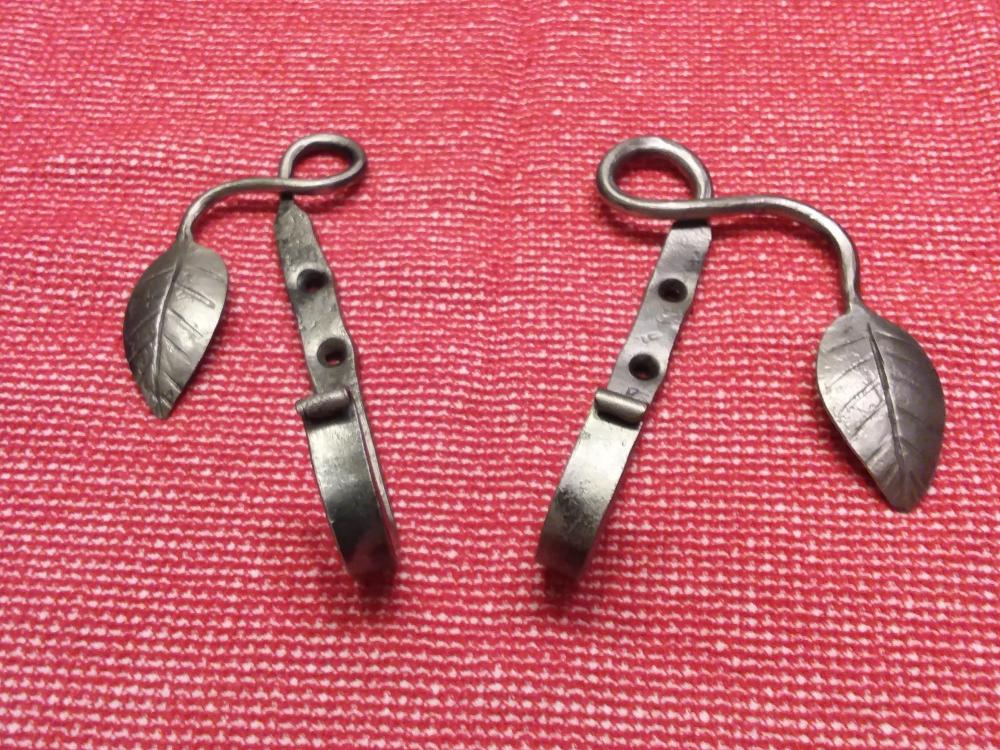
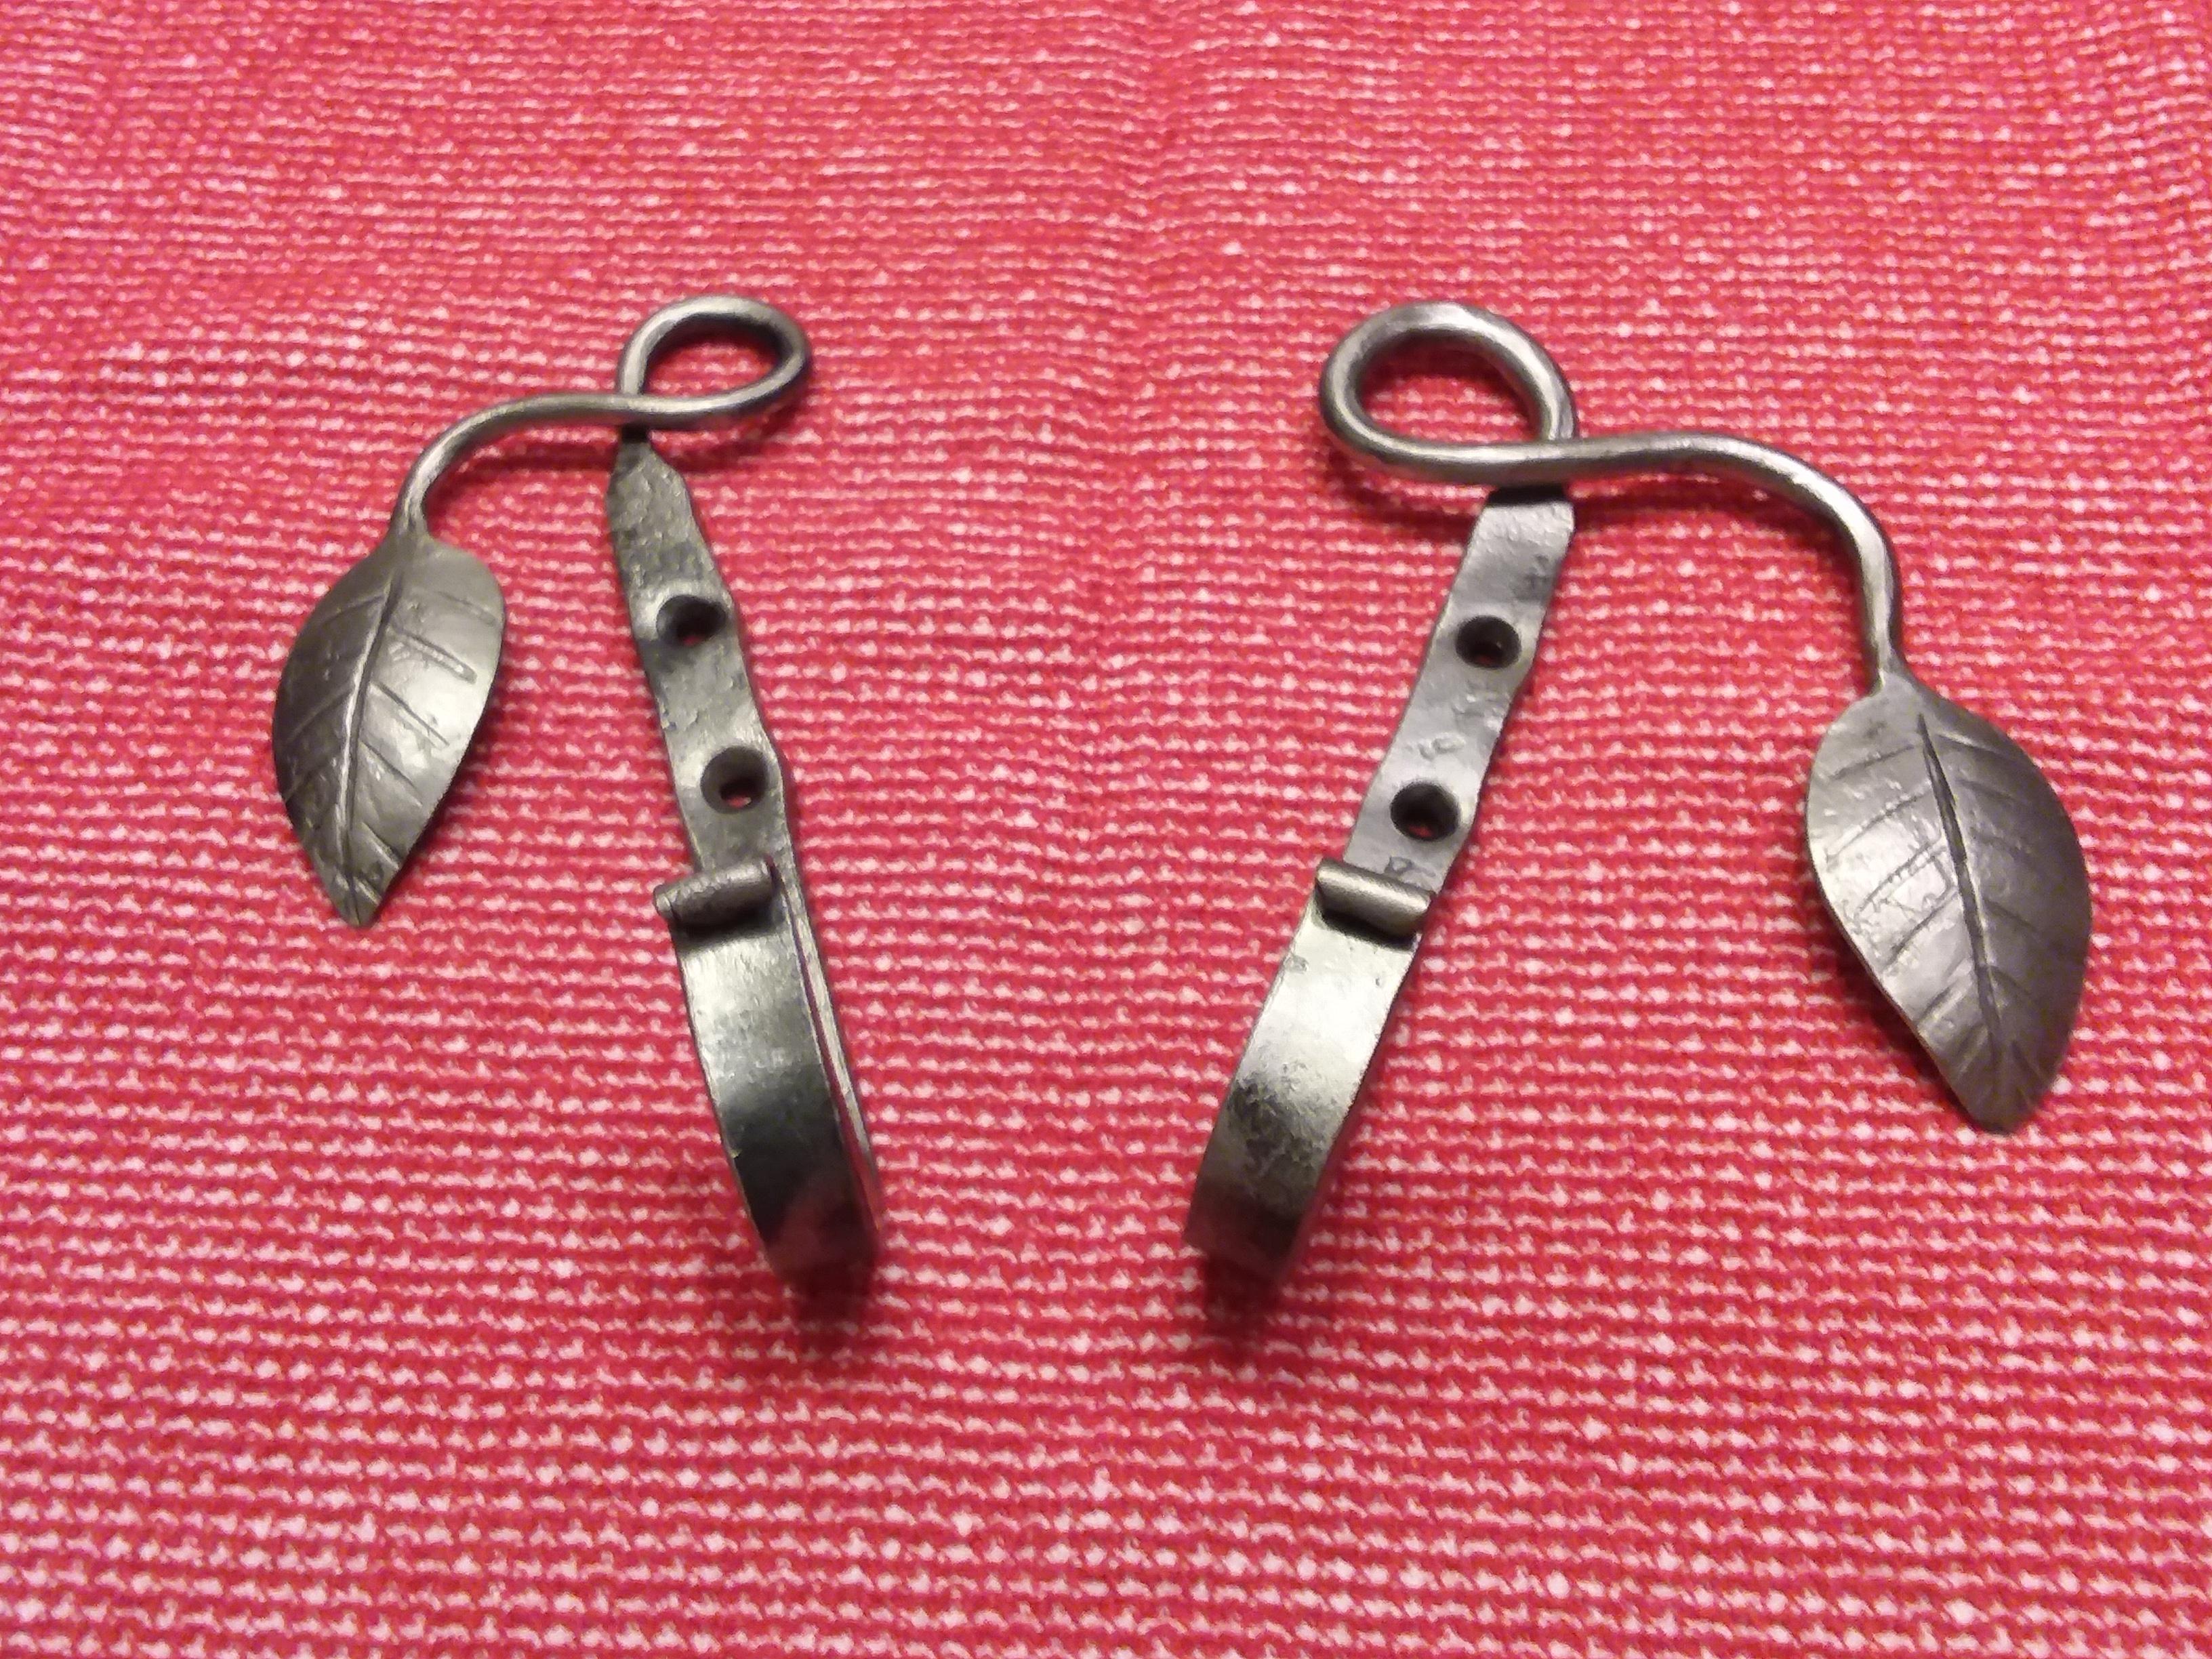
I tend to think of mine as laurel leaves.
-
Helena, it makes it easier for you to locate the one you need for a specific use. Otherwise you need to lift each one until you find the right one.
Thomas, I did mark the ends of the inscribed lines with a center punch before chiseling.
-
That is why this morning, before making another one, I made a simple hold down from a piece of 1/2" square and a sharper chisel. Took me half as long as the first one.

-
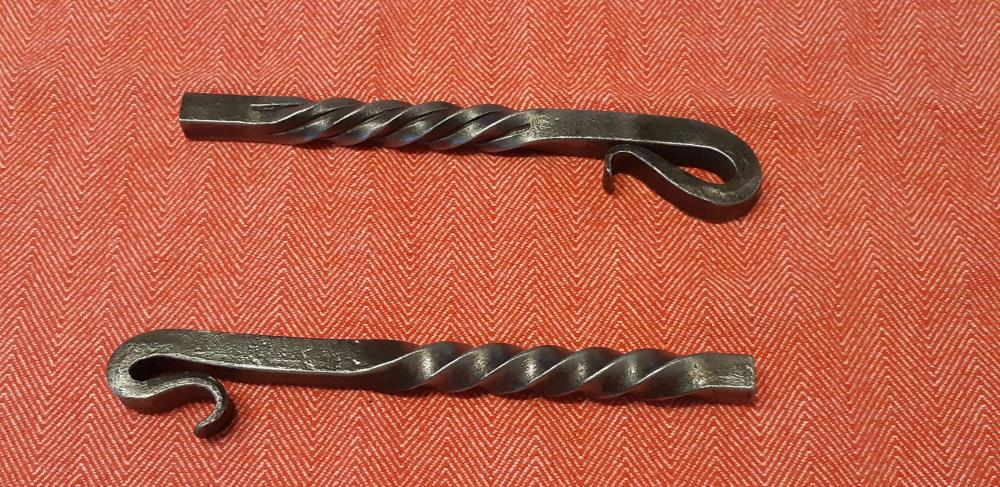
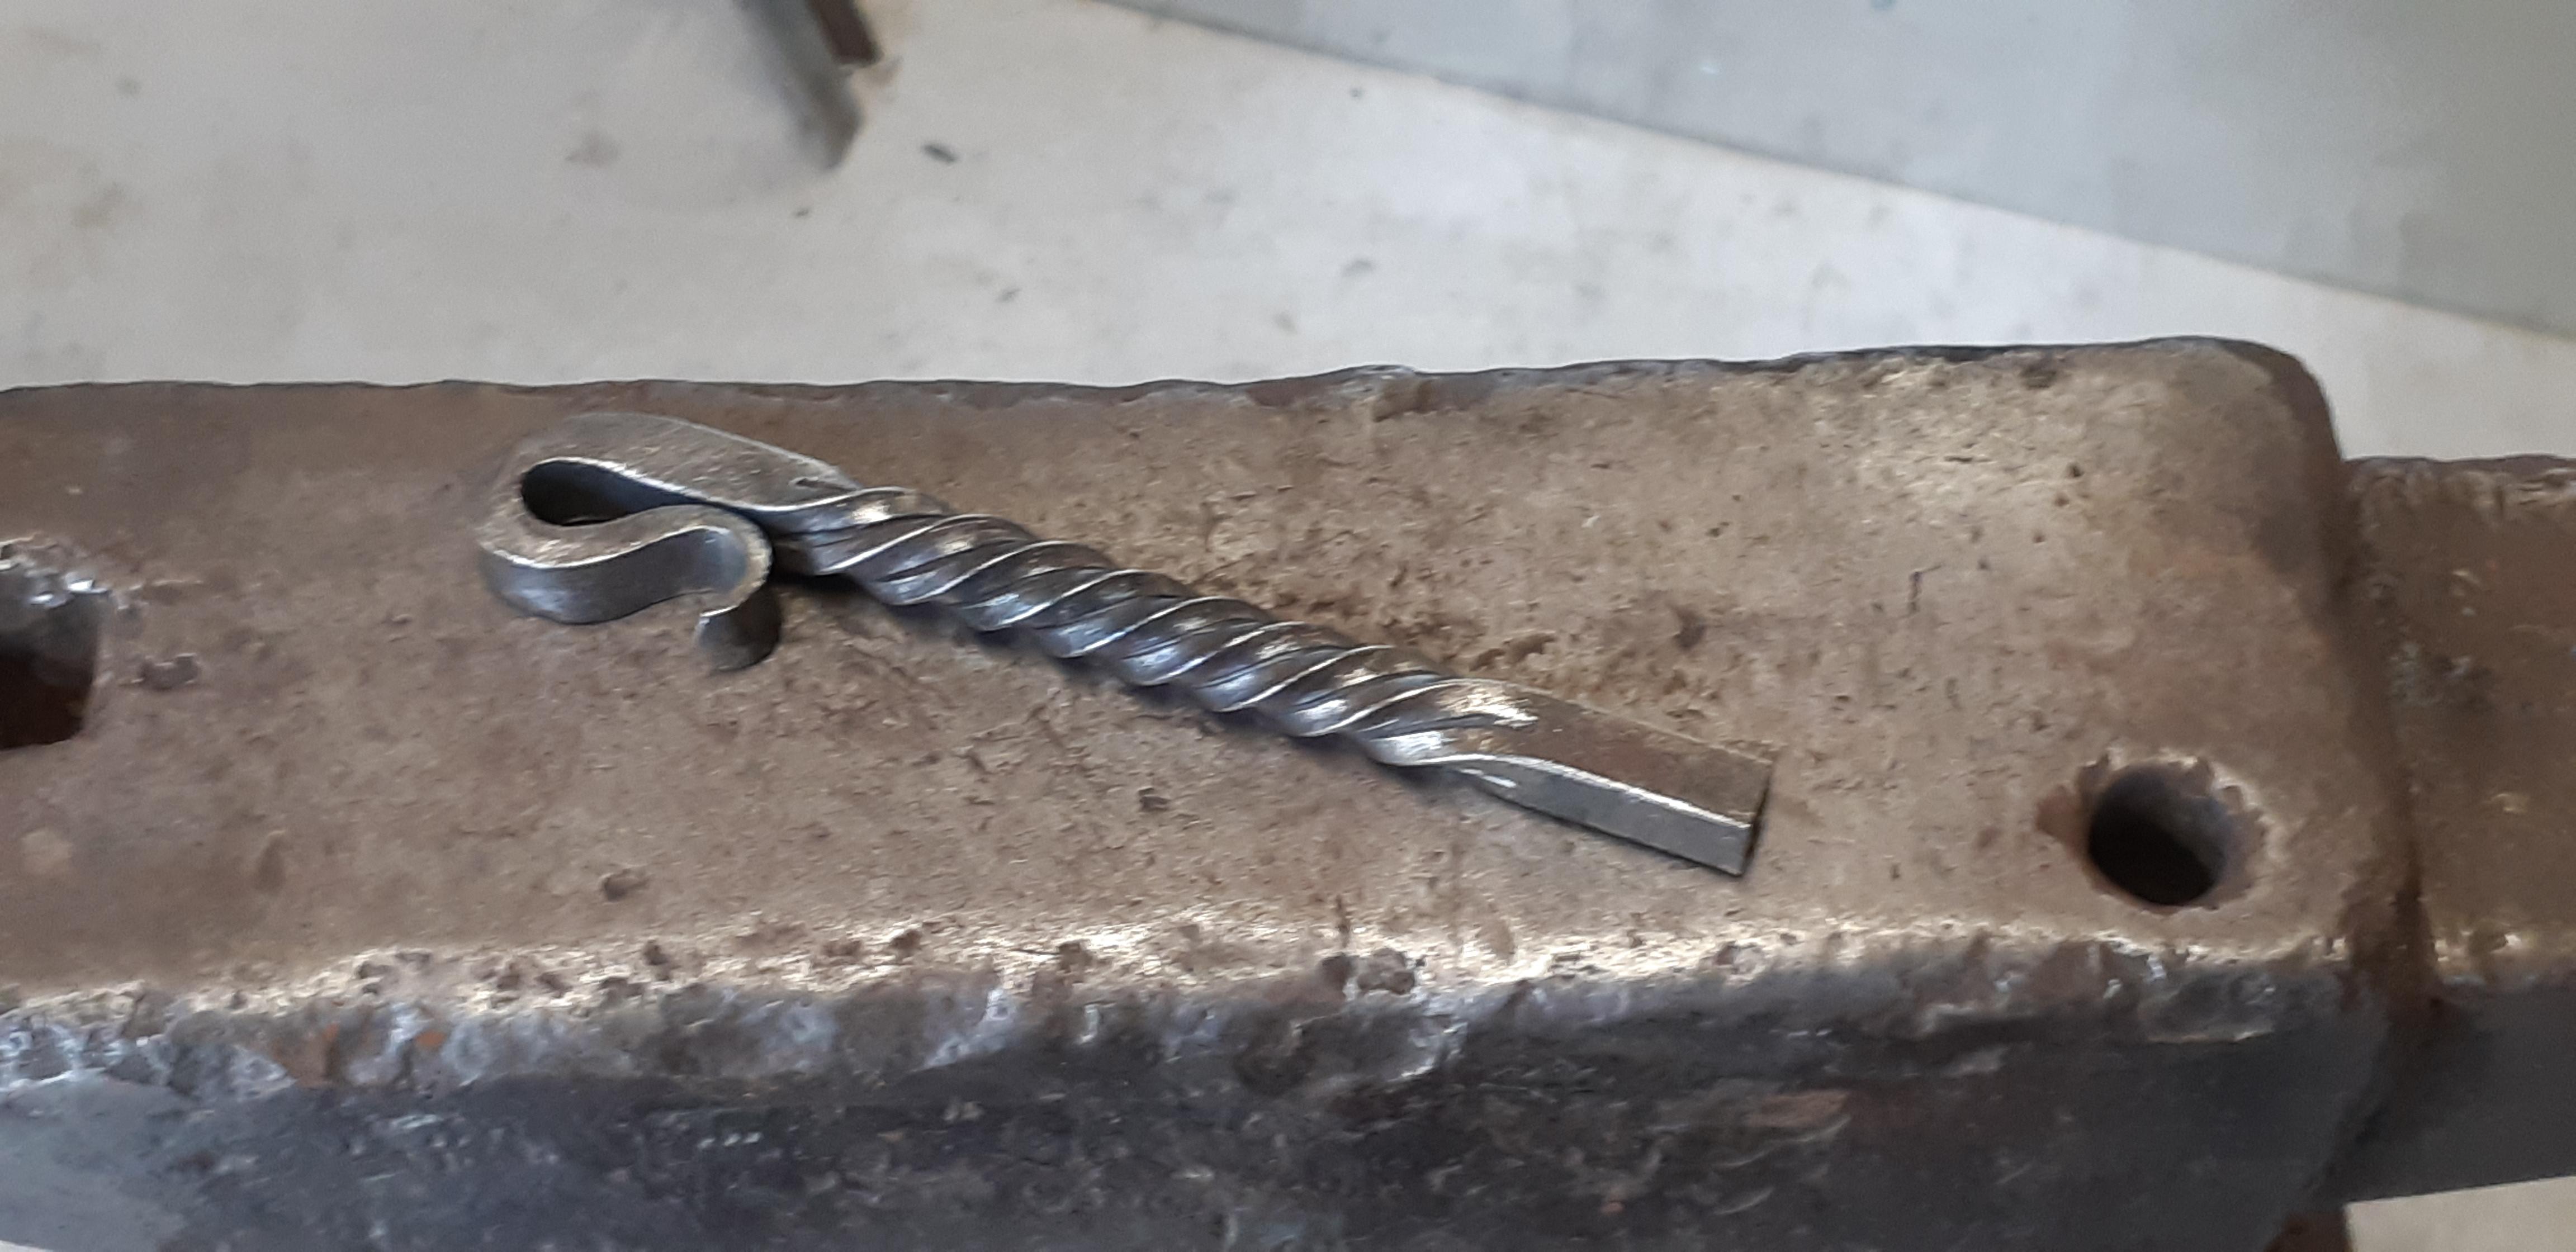
Five months since the last time I lit up the forge, so I took it easy and made some simple things. A dozen tent stakes and a pair of bottle openers from small cuts of 3/8" square.
The top one took a lot longer to make. Chiseling those lines before the twist was time-consuming, but it was good practice.
-
Simple ones made from 3/8" square.
-
Indeed, I will be careful with that. Doesn't look like it, as there are some areas where rust is starting to come through the paint, but I will double check.
-
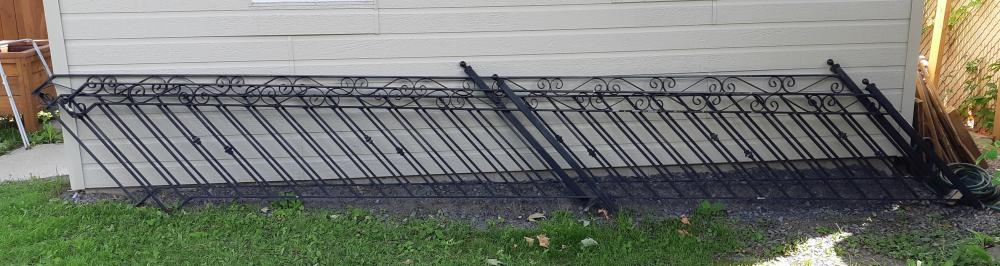
Stair railing for free. Made from 1/2" bars, 1.25" by 1/4" flat and 1.5" square tube.
-
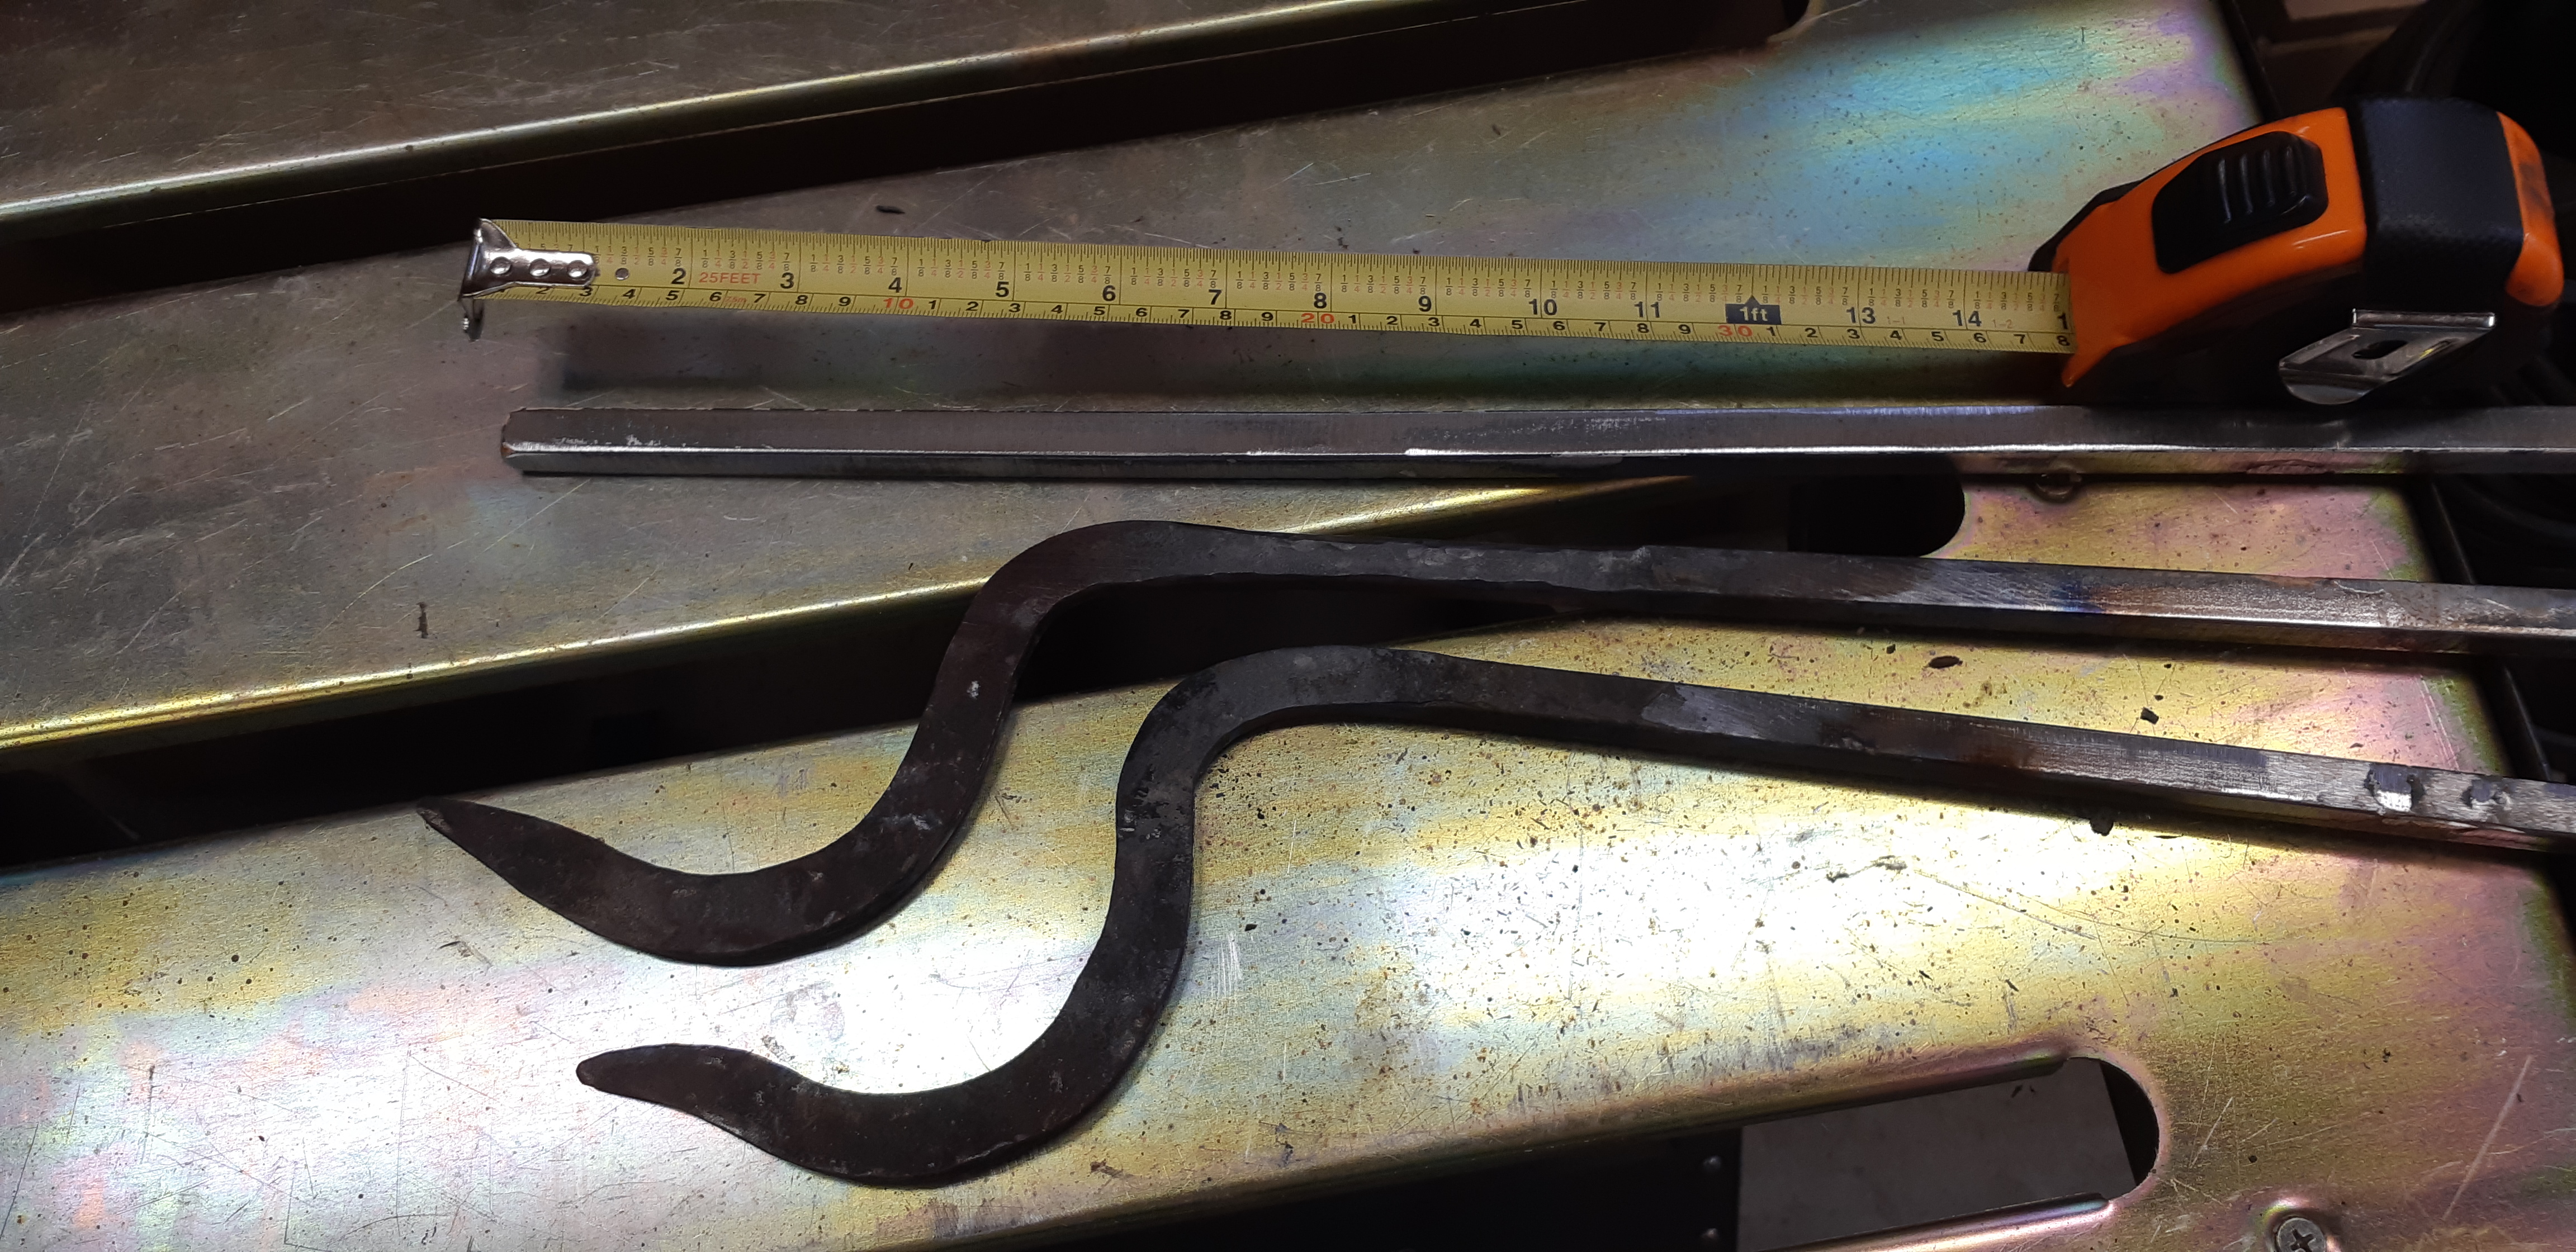
The hole runs the whole length. I have two shorter pieces which were broken and the hole is there.
I don't know how easy they would be to forge weld. From what I could find out they're (probably) made of 95CrMo.
-
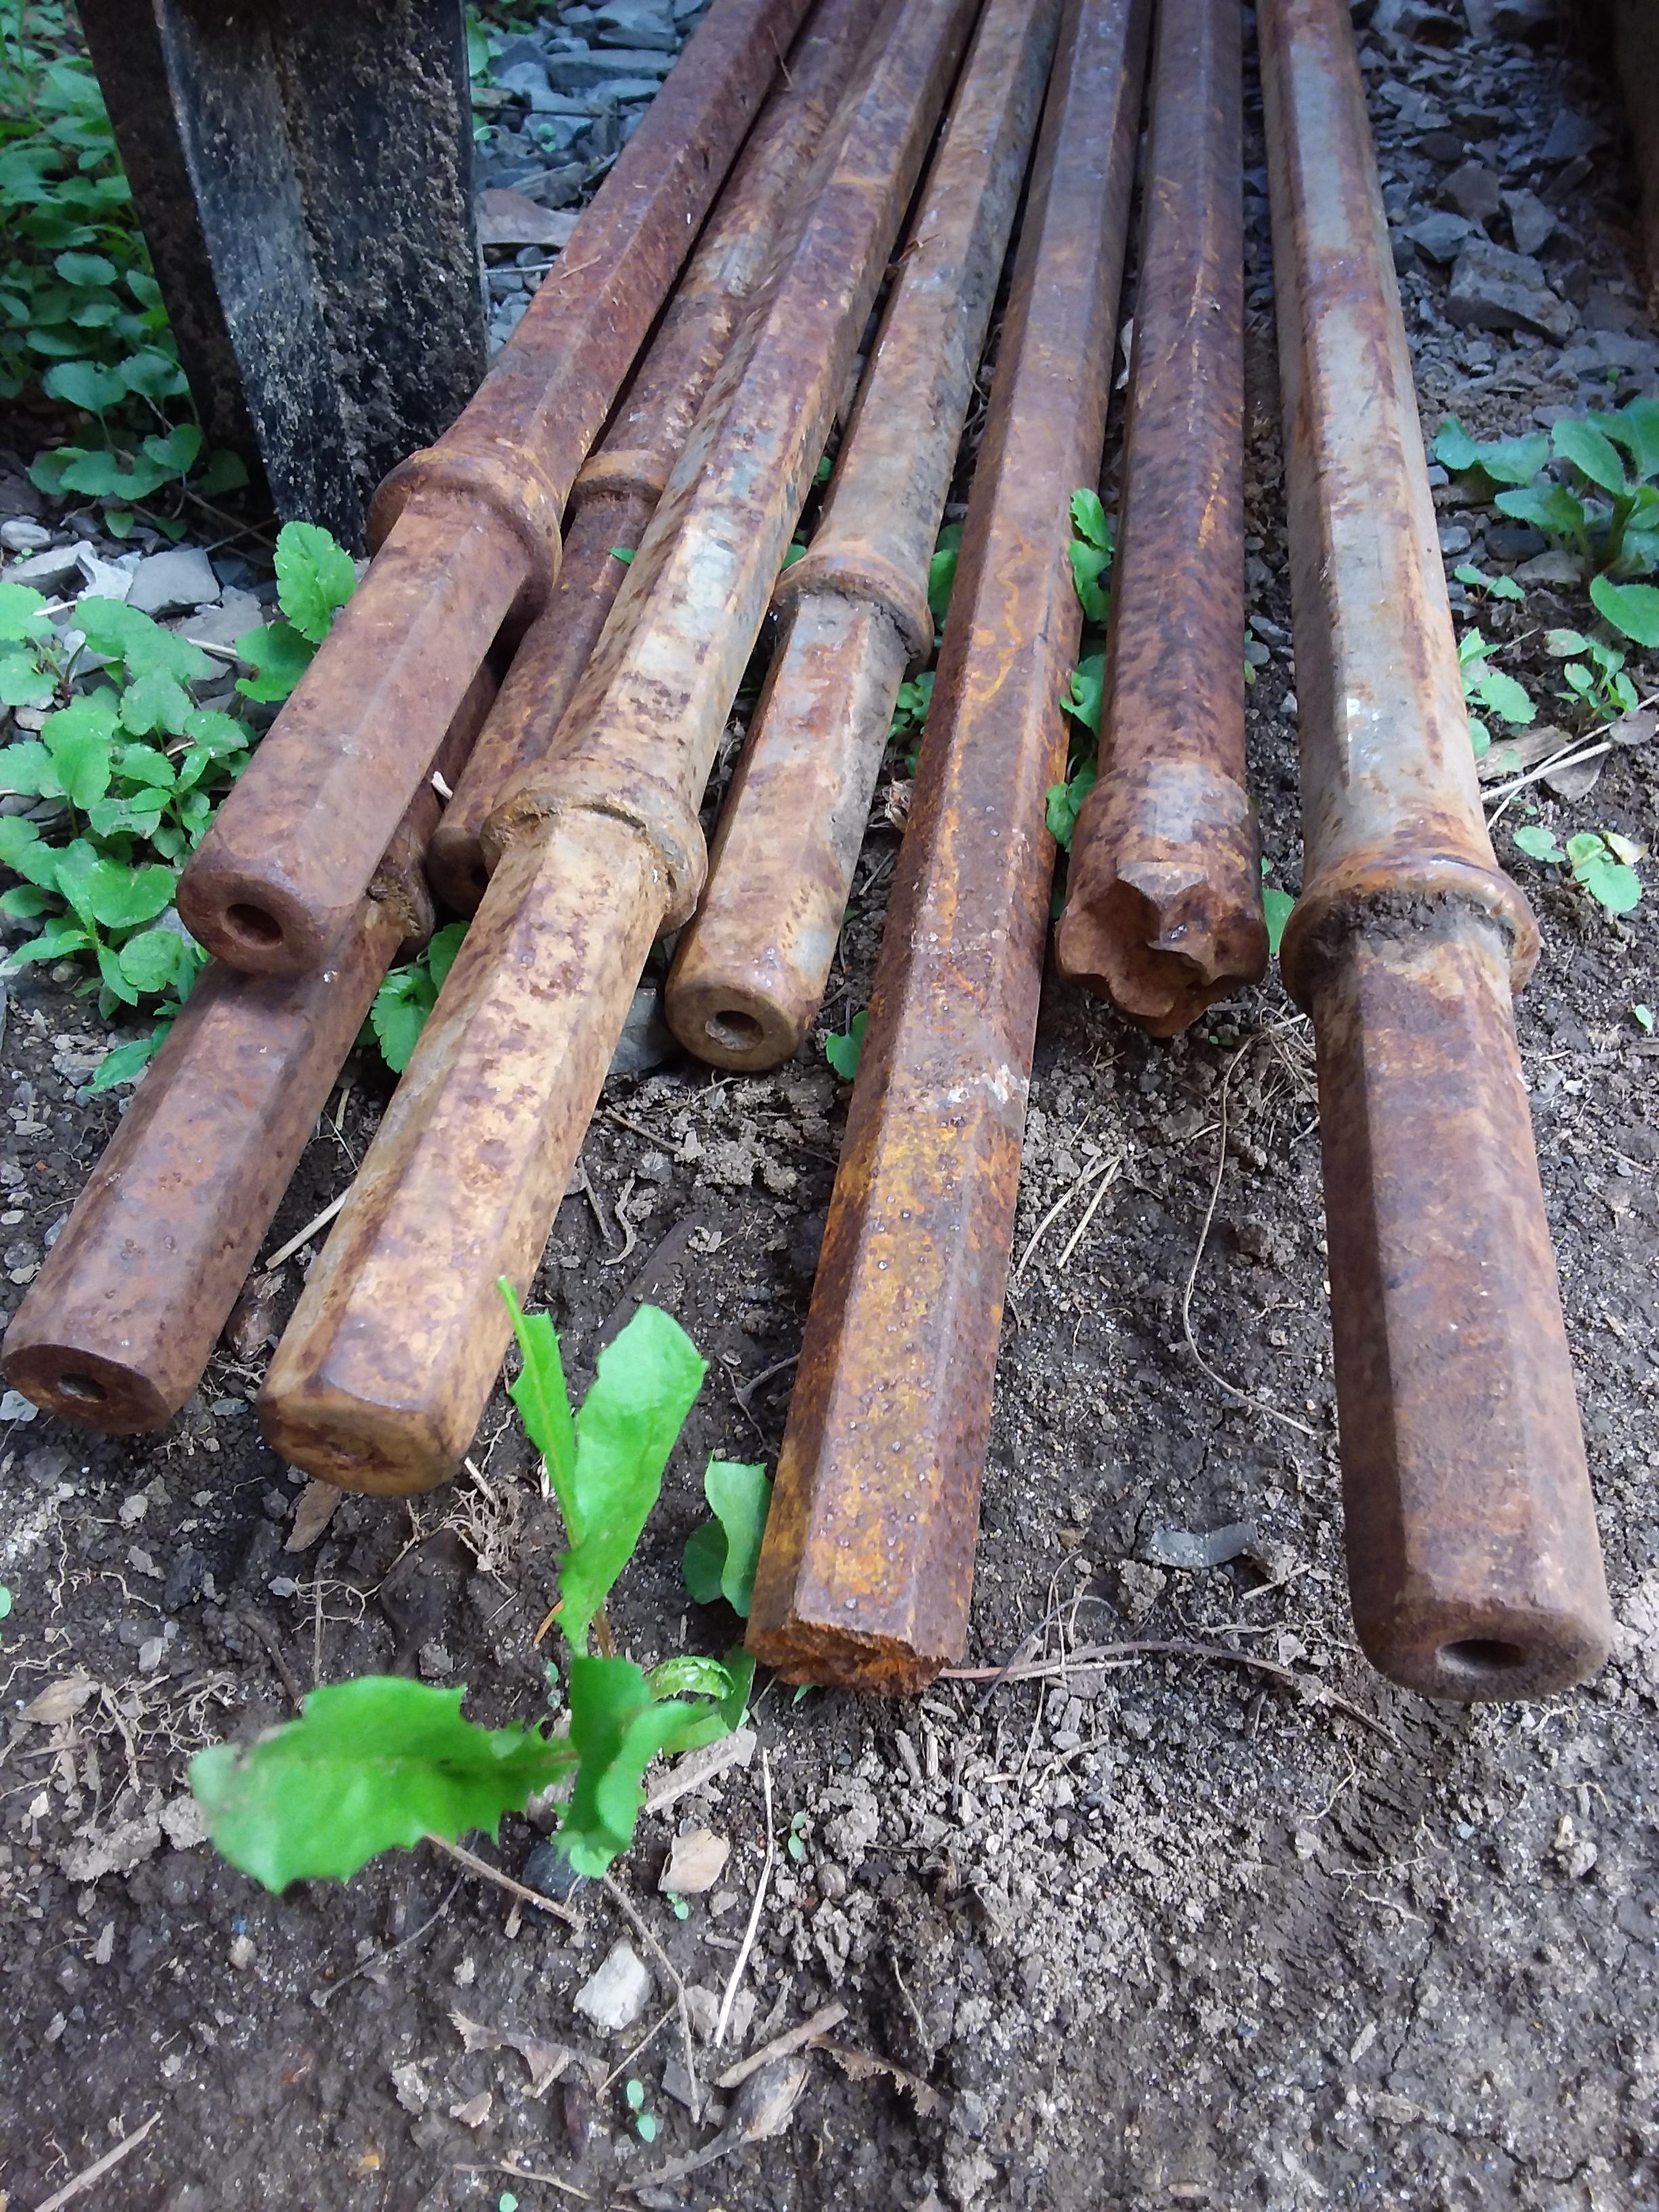
Got my hands on some hexagonal drill rod (1" diameter), but they have a small hole in the middle. Are they still useful for forging? What would you make with them?


What did you do in the shop today?
in Blacksmithing, General Discussion
Posted
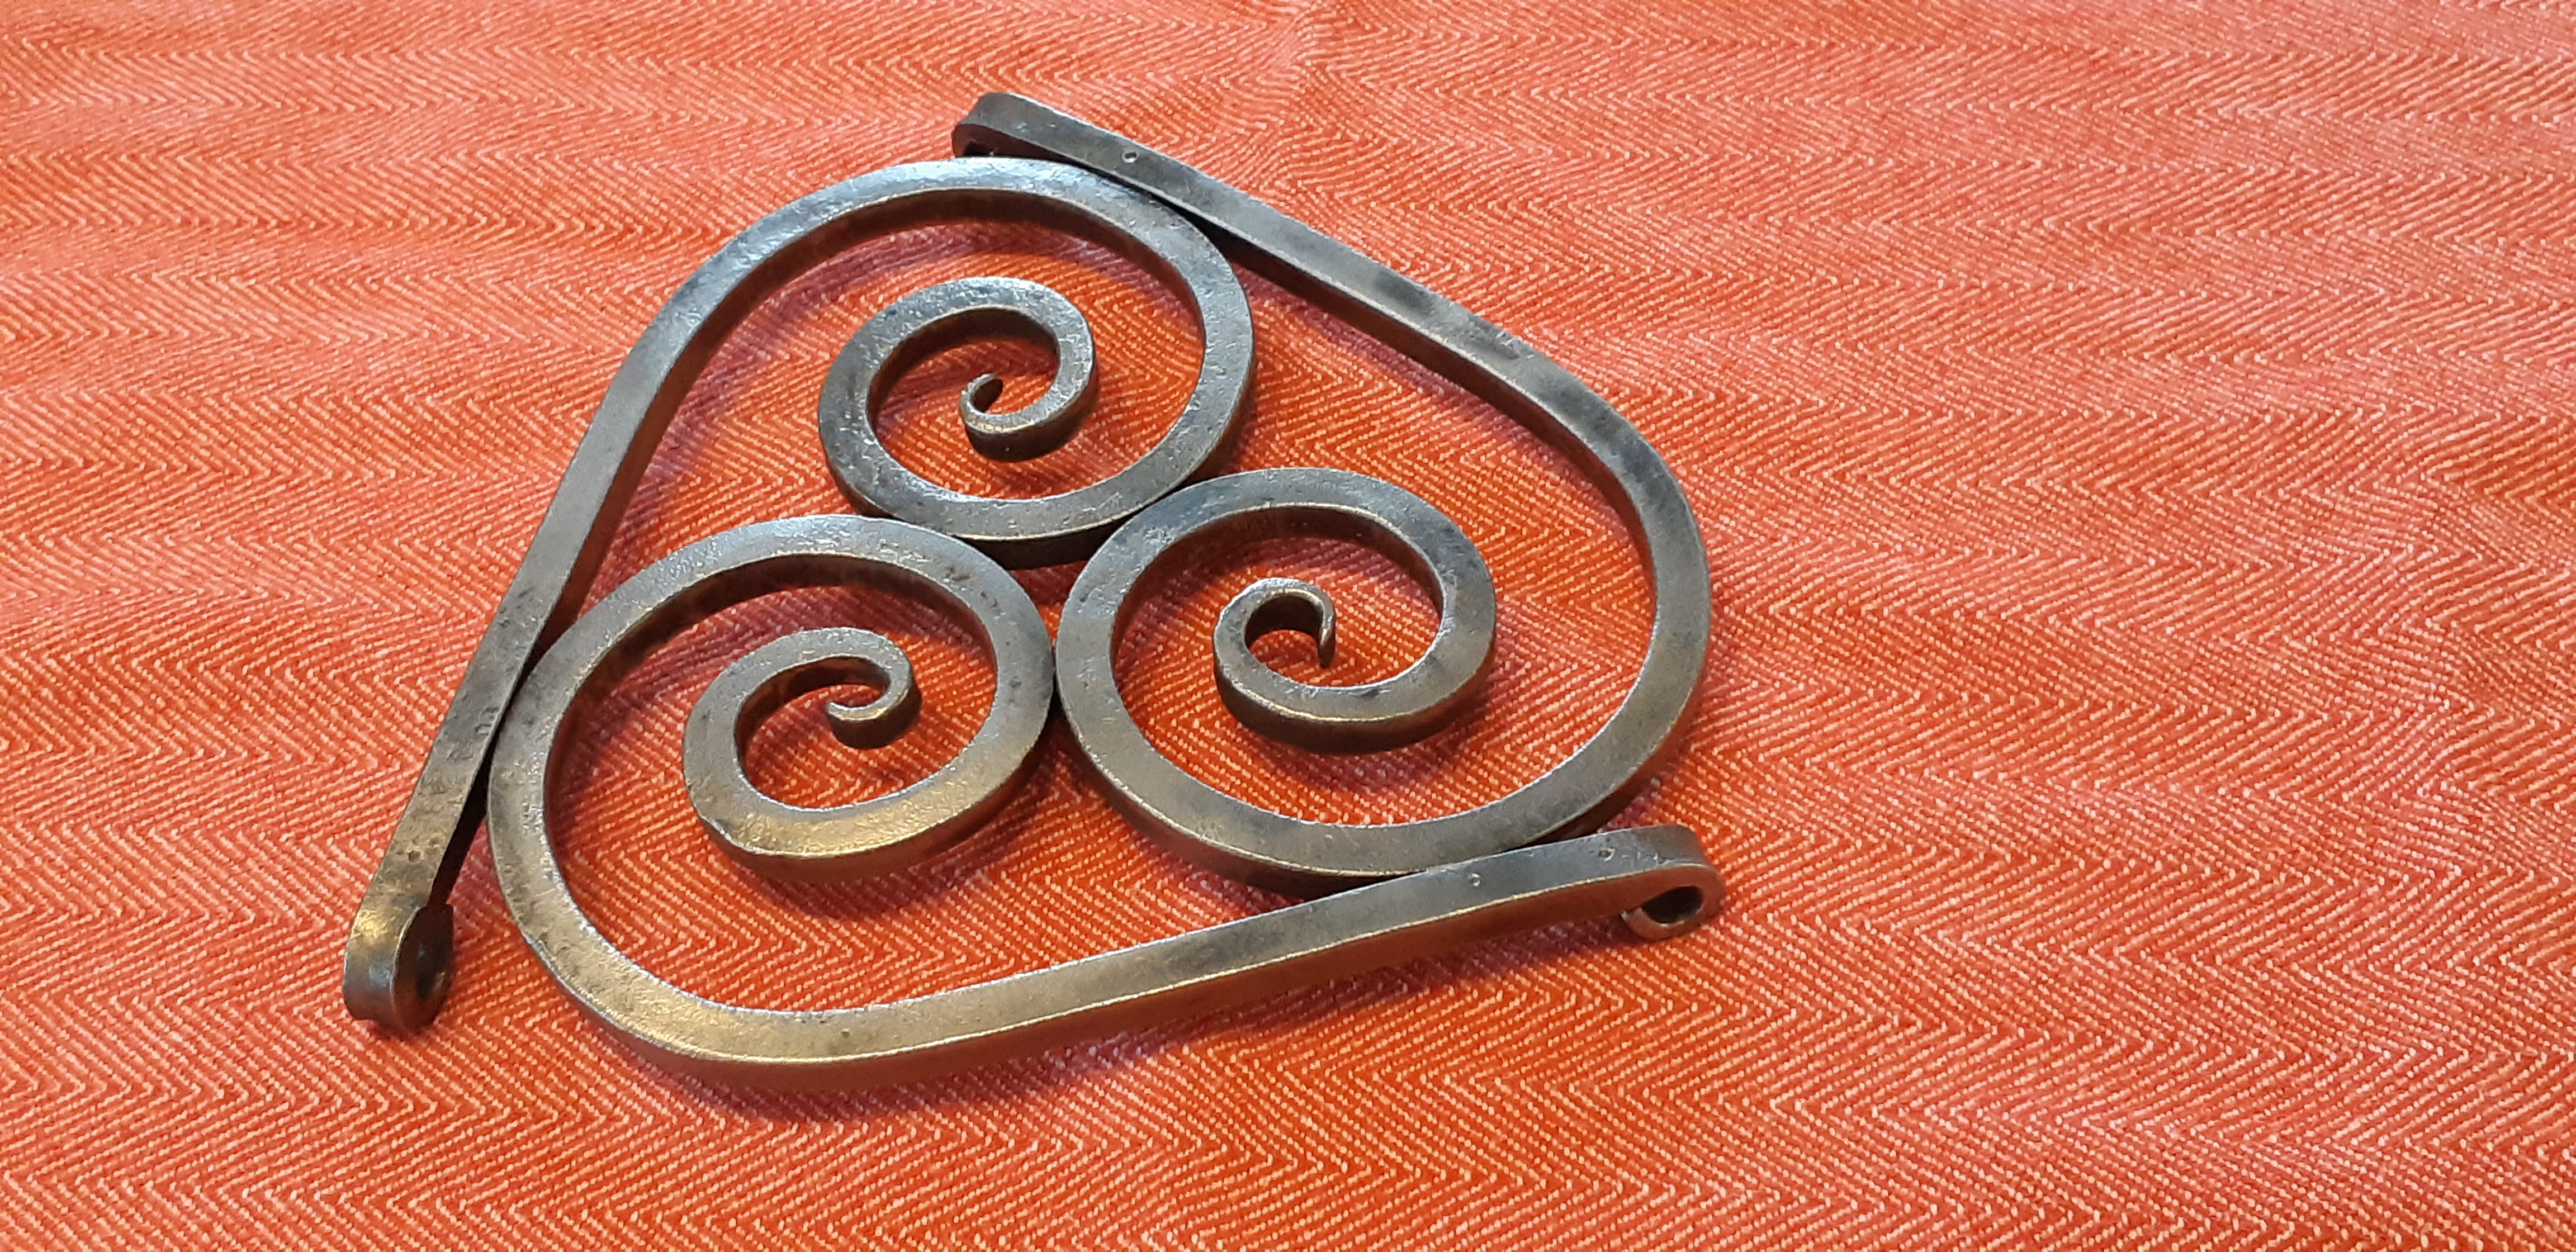
I got lazy and used my electric welder.
Never done any forge welding, so I didn't feel that attempting it on a fairly delicate piece like this (it is made from 1/4" square stock) was a good way to start.
Riveting didn't seem practical either (not a lot of space between the turns). I could have tried using collars (or wire), but was worried the pieces would not be secure enough and would twist. Plus the surface wouldn't be flat.
I am happy with the result, but I feel like it took a long time to get reasonably even spirals. I used only a small hammer and scrolling tongs. I should make a spiral template before I make more like this.
Overall, a pleasant and relaxing morning.