
Arthur210
-
Posts
238 -
Joined
-
Last visited
Content Type
Profiles
Forums
Articles
Gallery
Downloads
Events
Posts posted by Arthur210
-
-
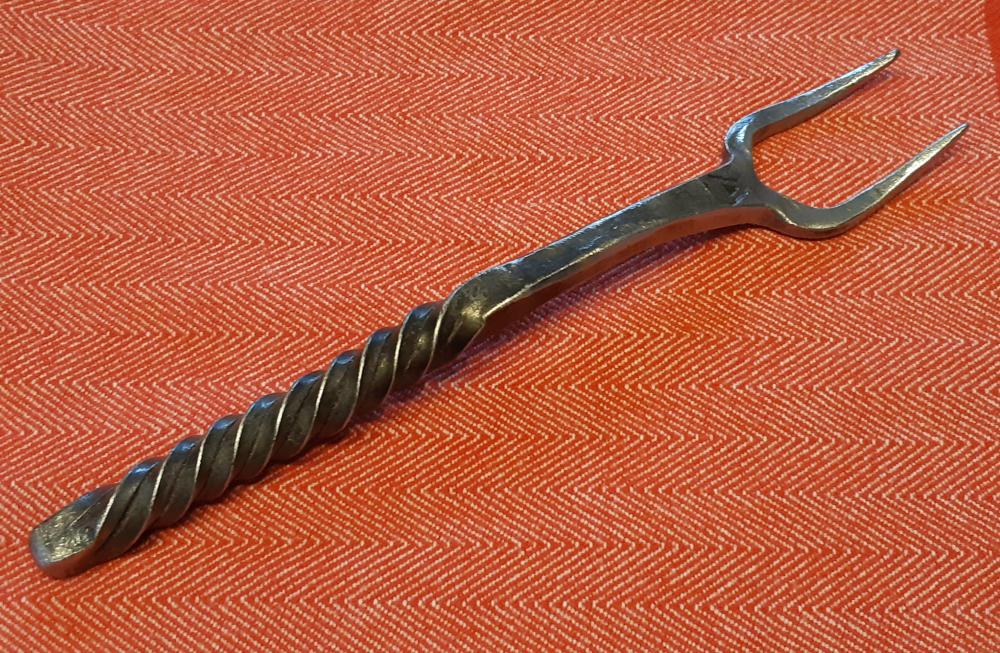
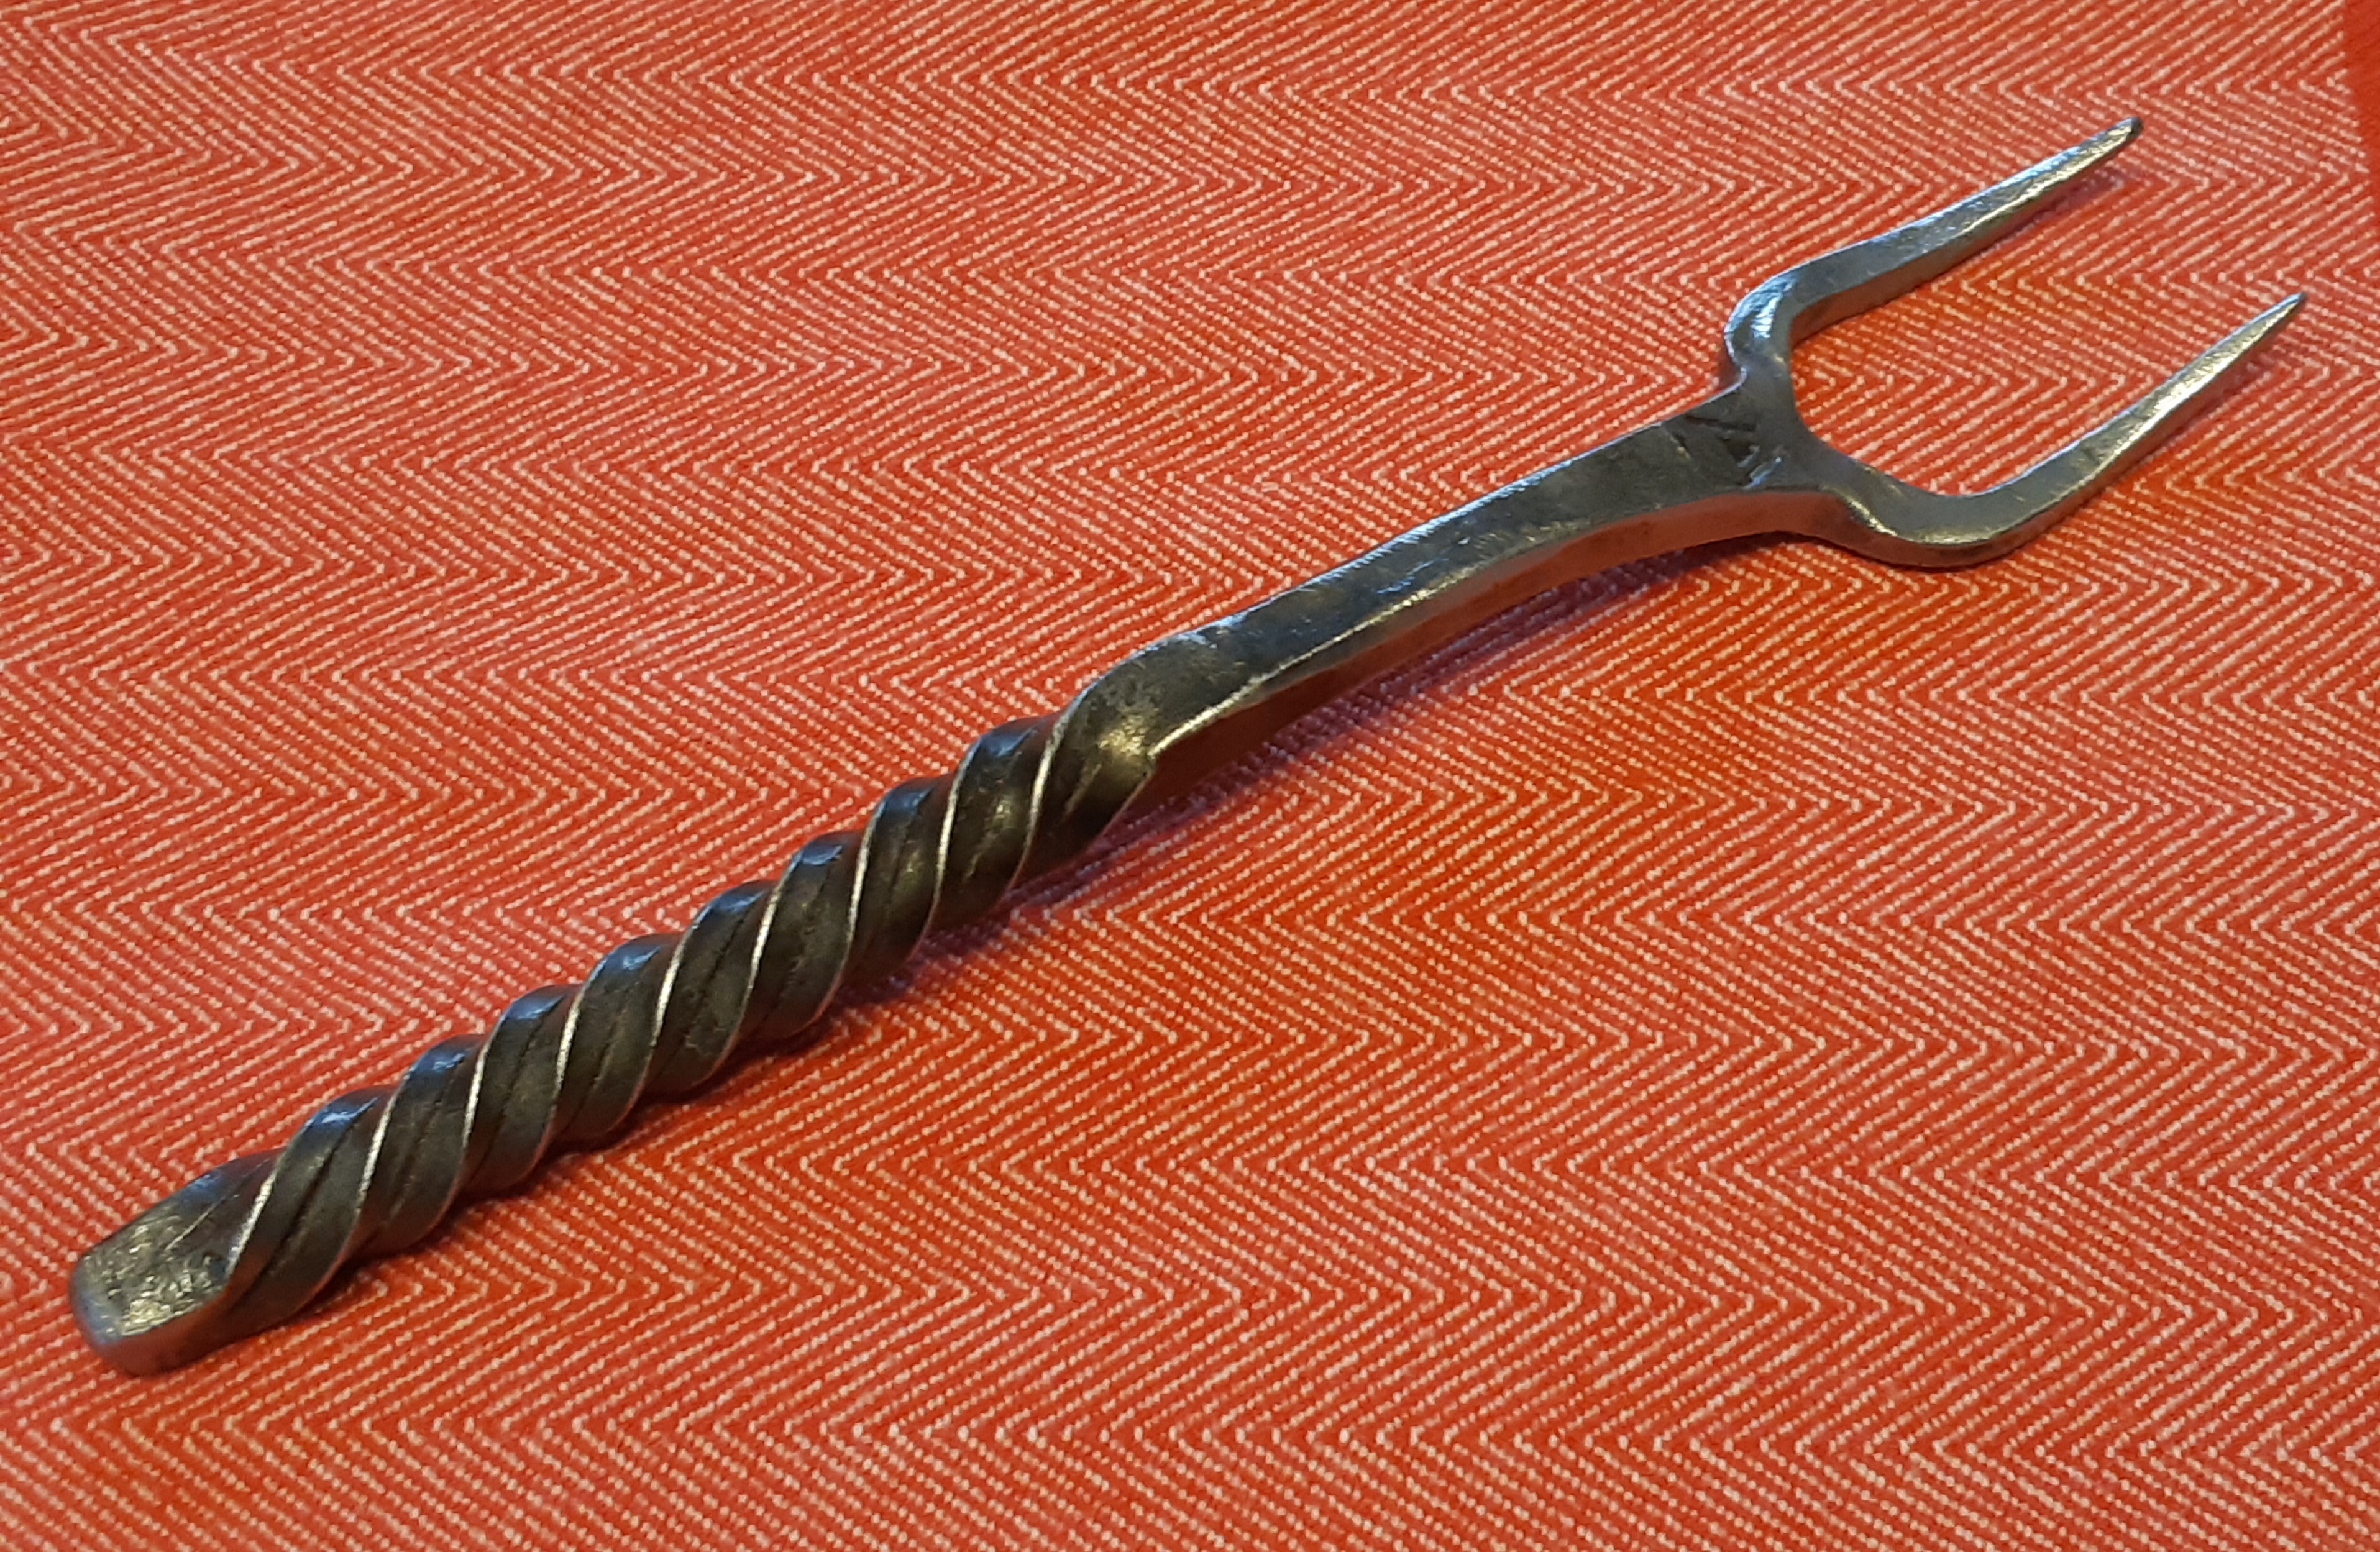
Another day, another fork. Quite happy in how my incised twist turned out, considering I had to adjust it in a second heat.
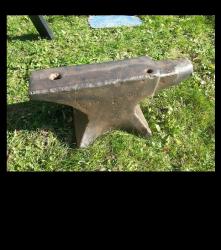
I also started another attempt for the nail header, using a thick rail anchor this time. Just flattened it for now -- I can only do a little work with the 6-pounder before my arm wears out.
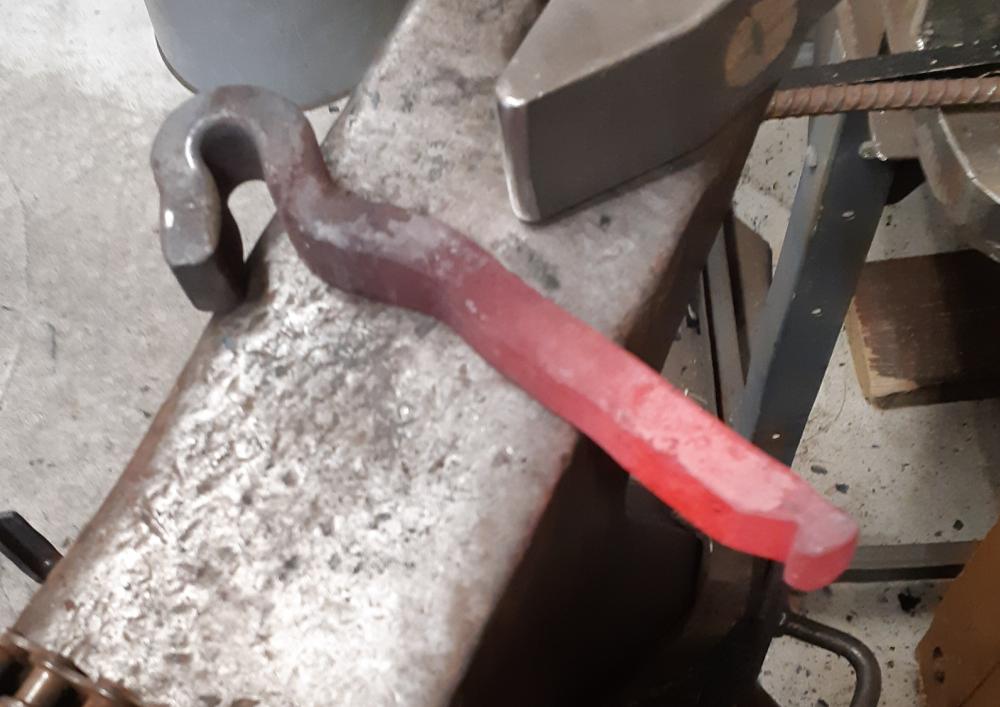
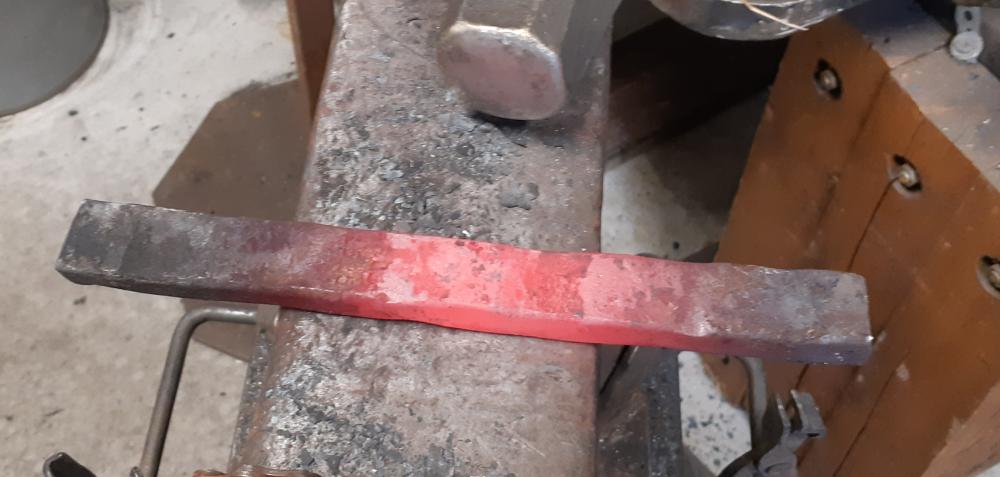
This starting stock is quite close to the shape of the nail-making iron from the Mastermyr chest, so I think I will try to make that. The original is 9" long by 1.5" wide by 1" thick. I may end up with one just a bit smaller.
-
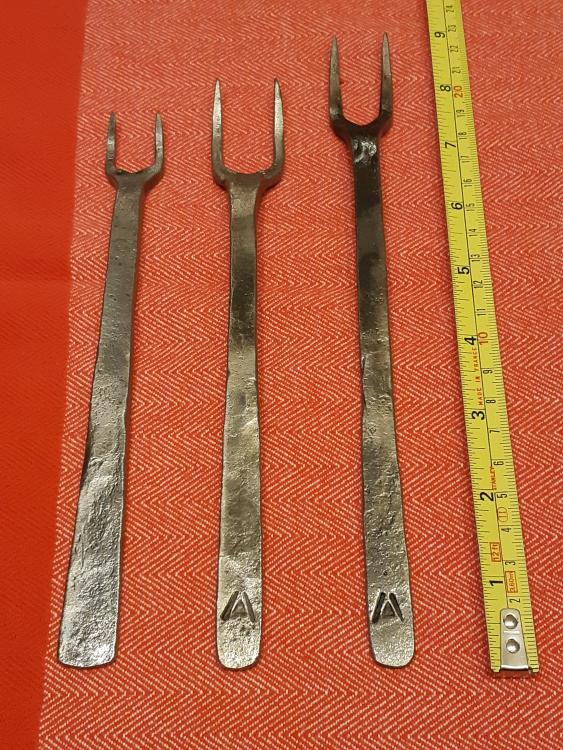
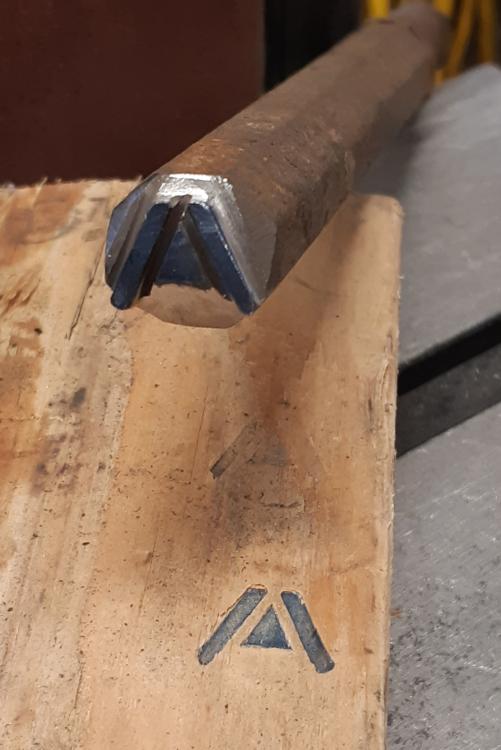
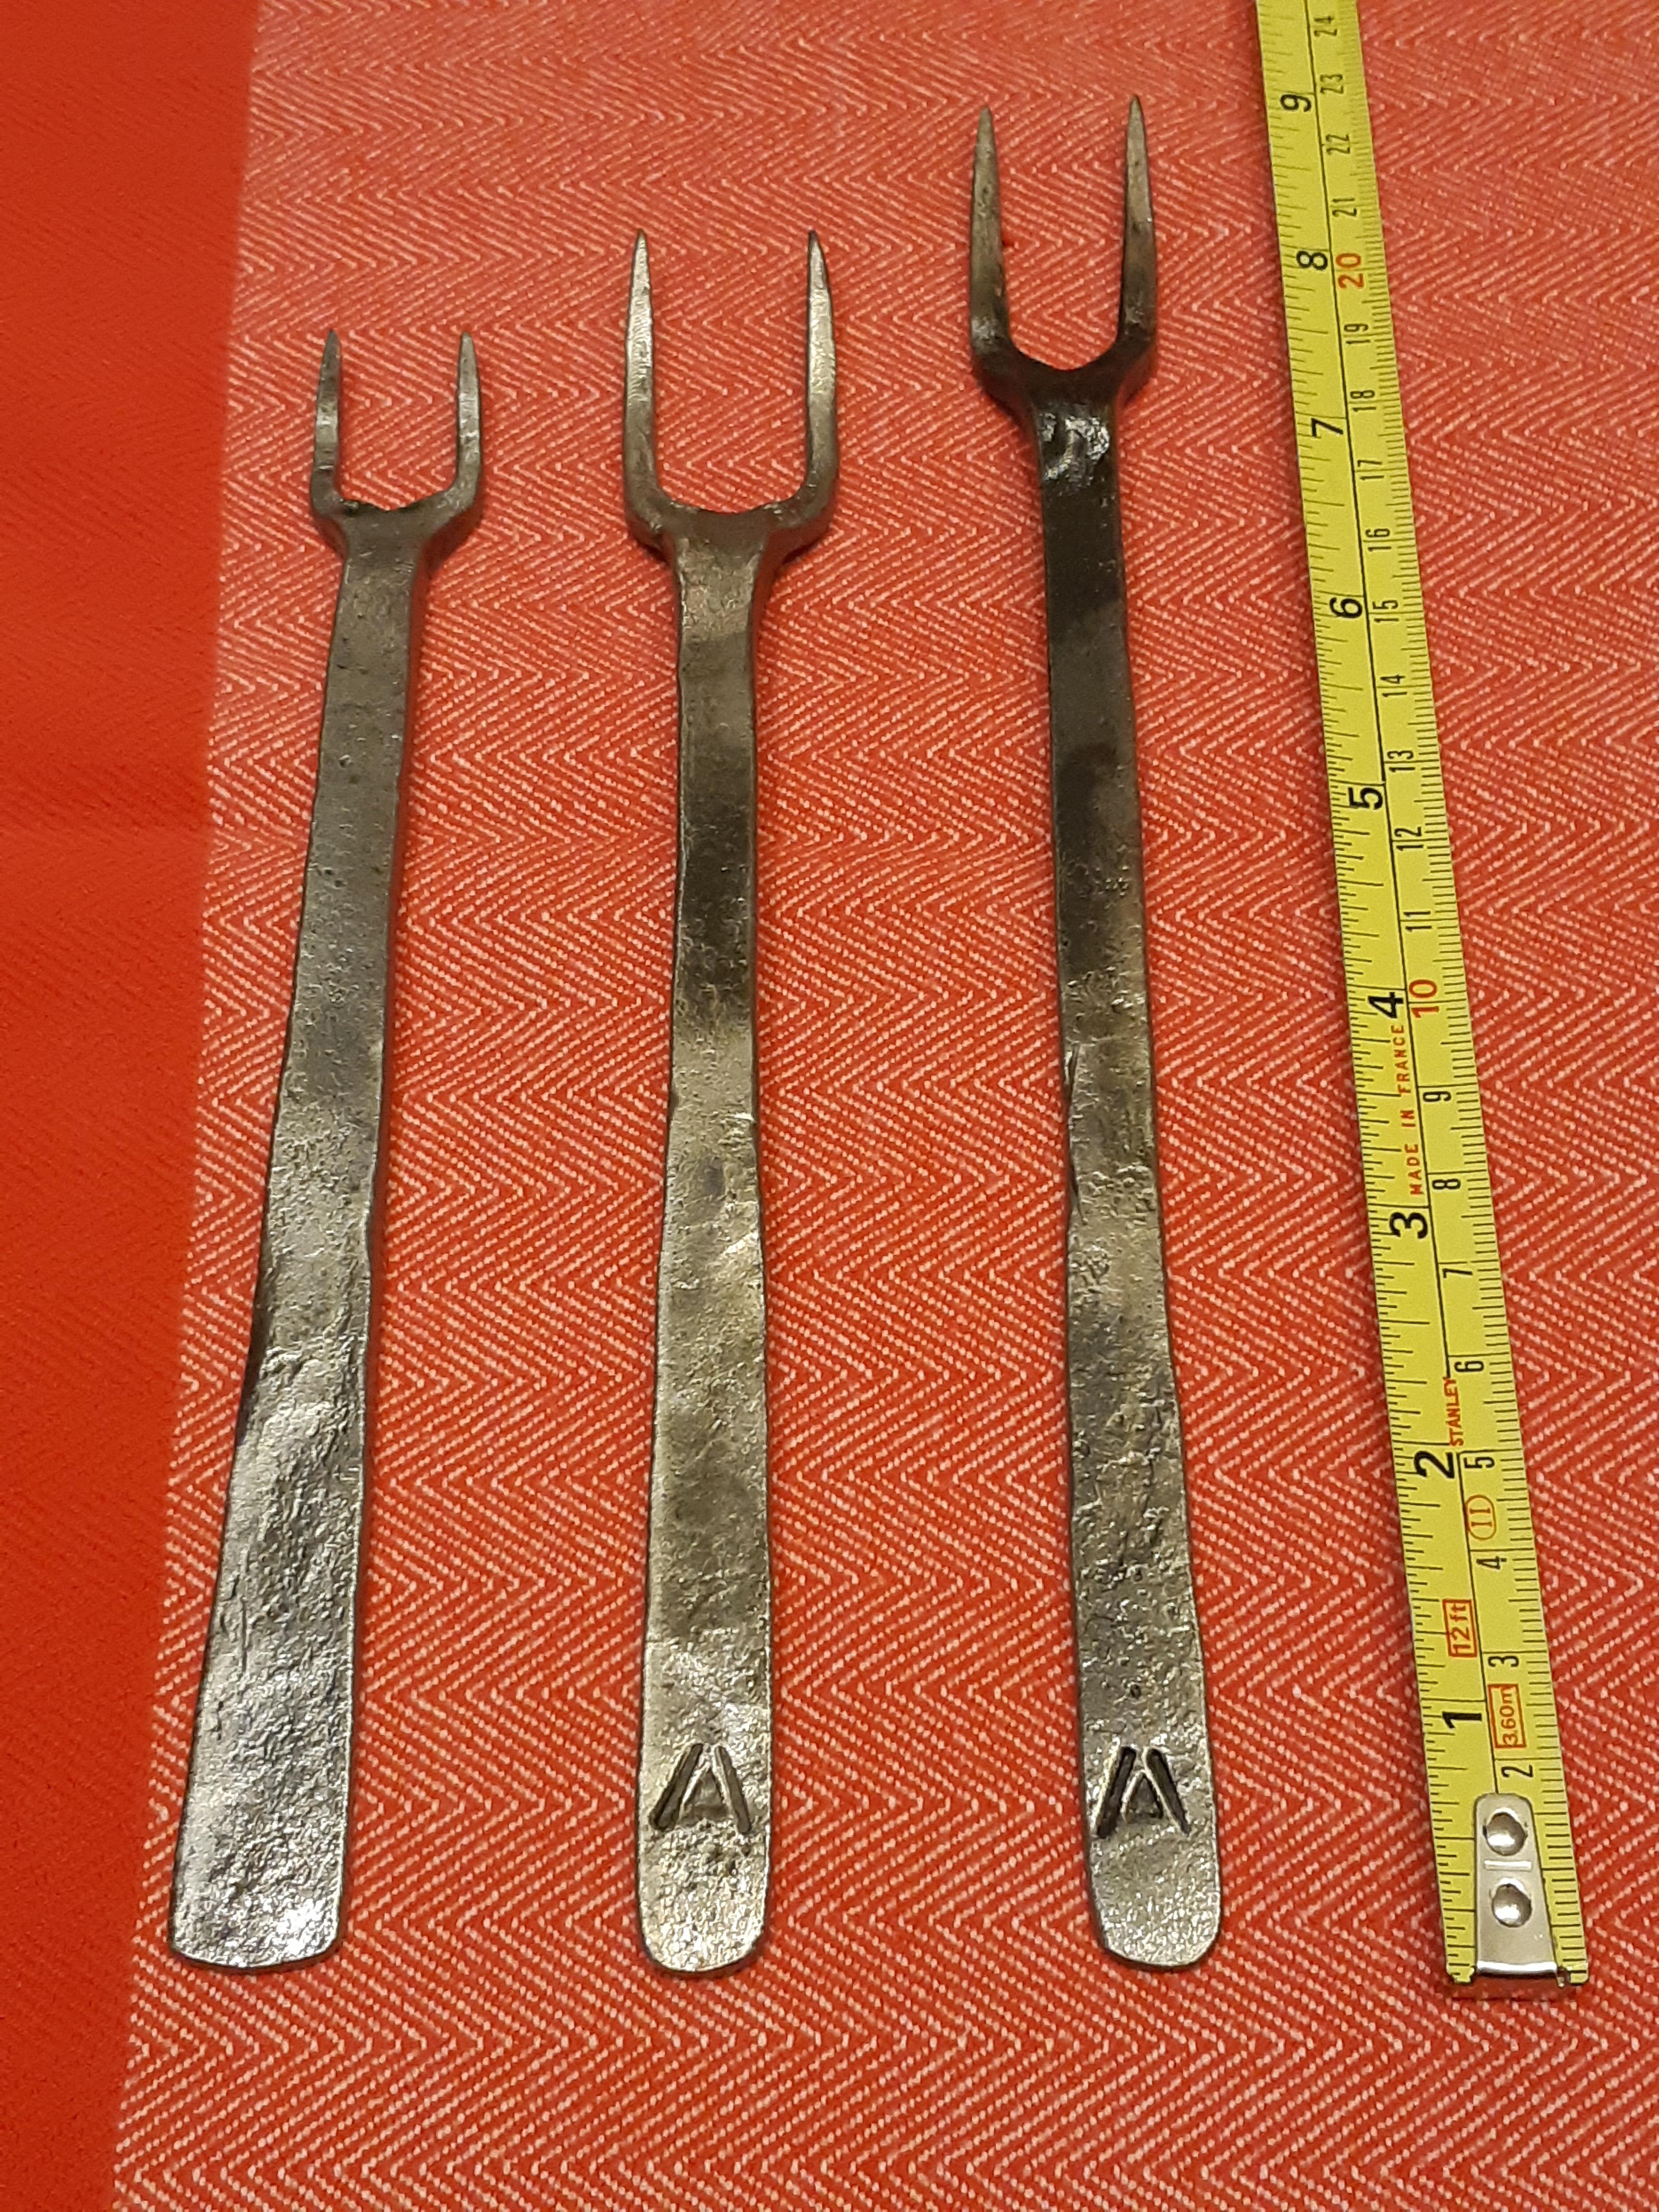
Yesterday, made a fork and tried the new touchmark and found out that it wasn't working so well. With the lines and the triangle as thick as they were, it was almost impossible to stamp it with a single hammer blow (that was on red hot steel).
Tried to adjust it by some filing, but the end result was unsatisfactory. So I made a new one, smaller and with sharper lines, from 1/2" coil spring.
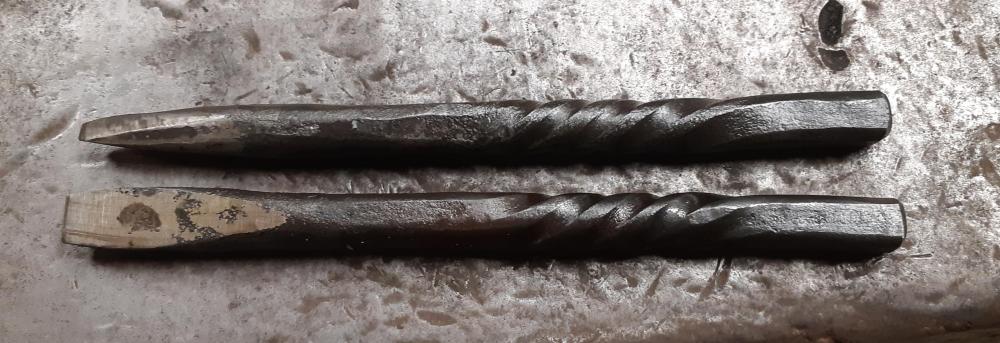
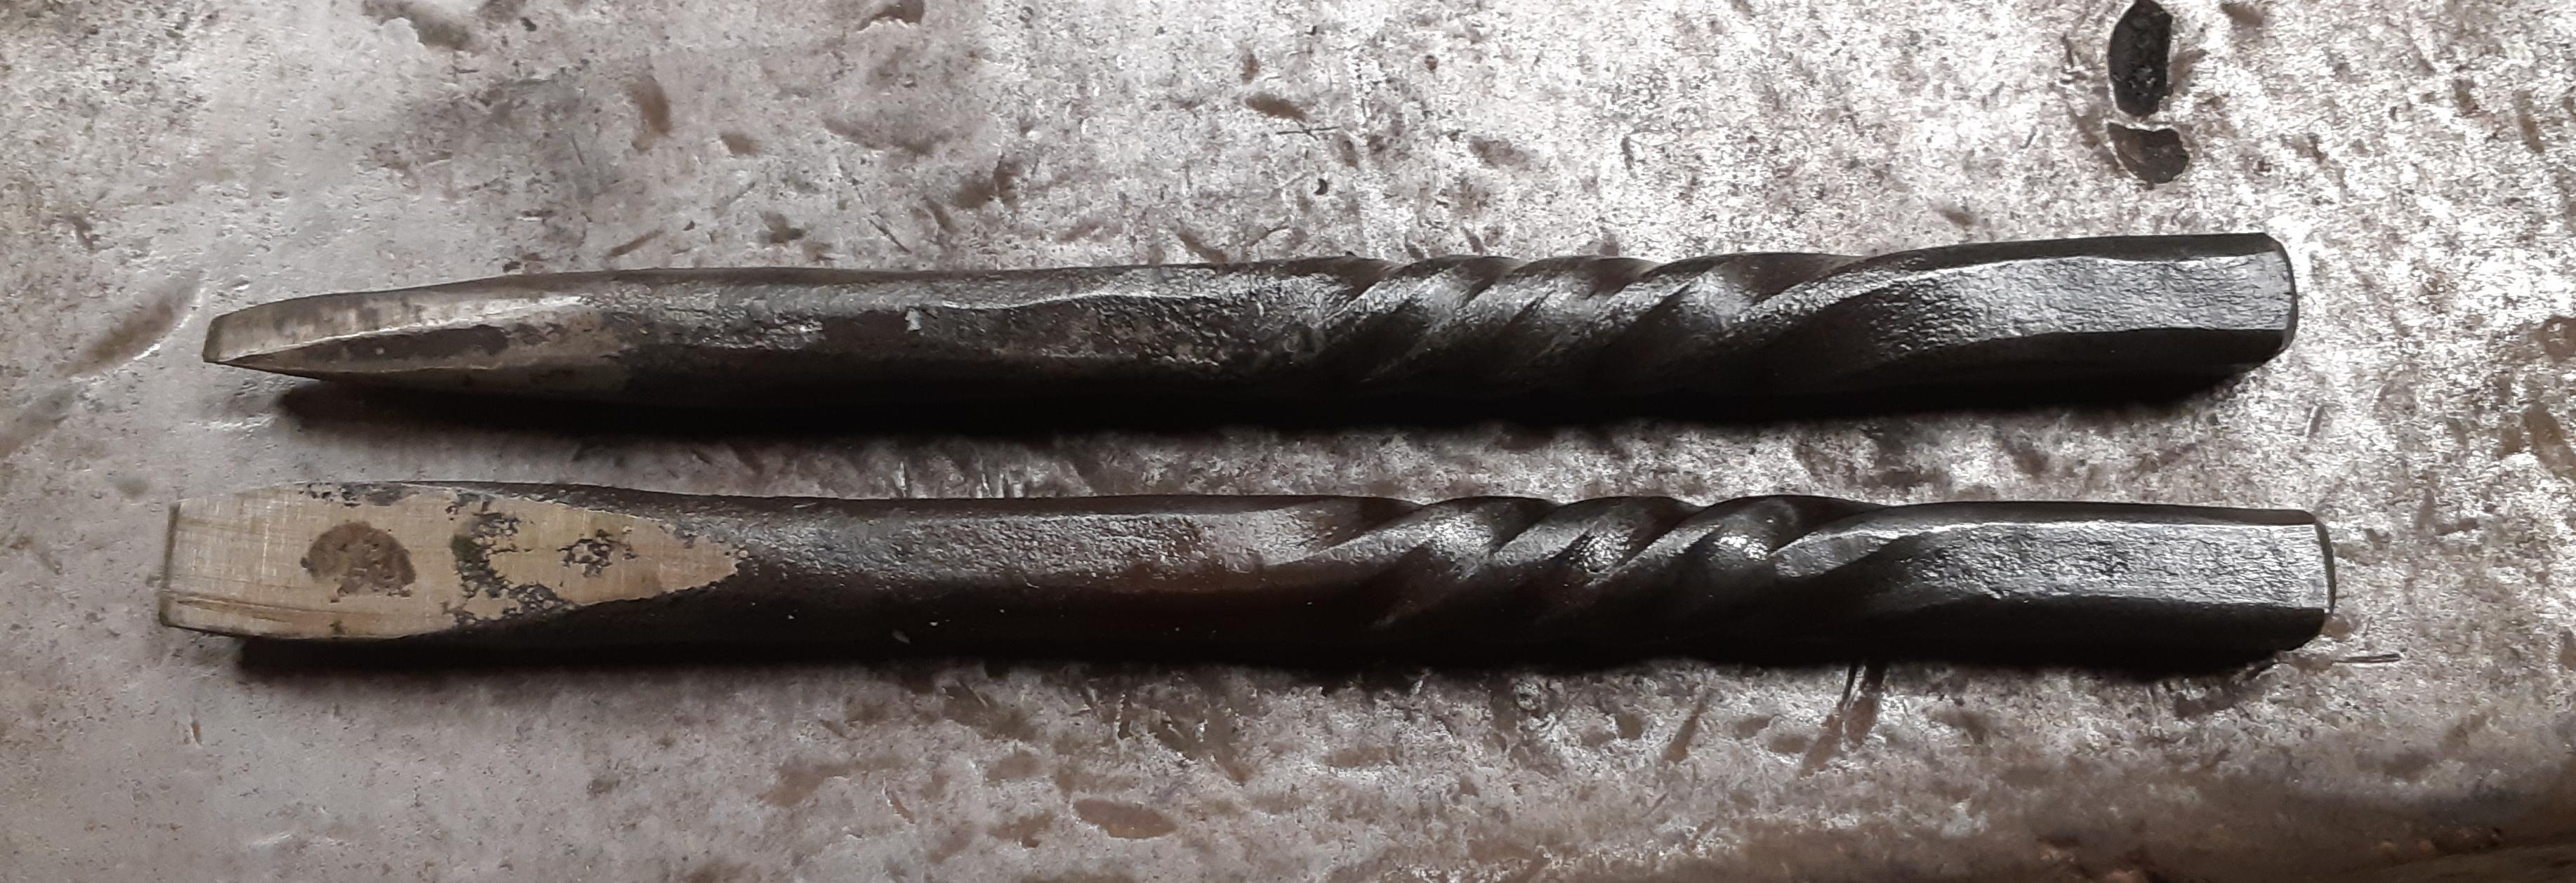
Today, made two more forks and used the new touchmark. Works great now. And the forks are getting better. The one on the left is from yersterday.
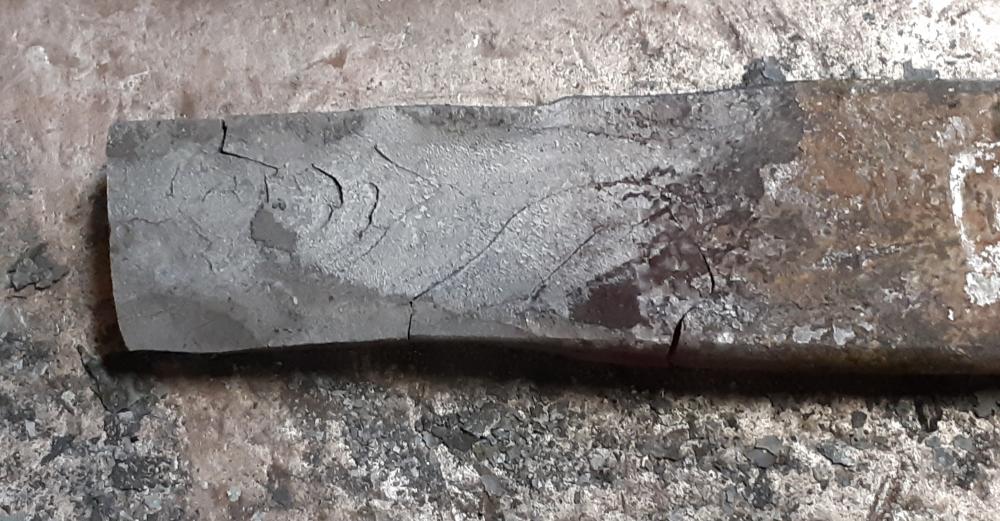
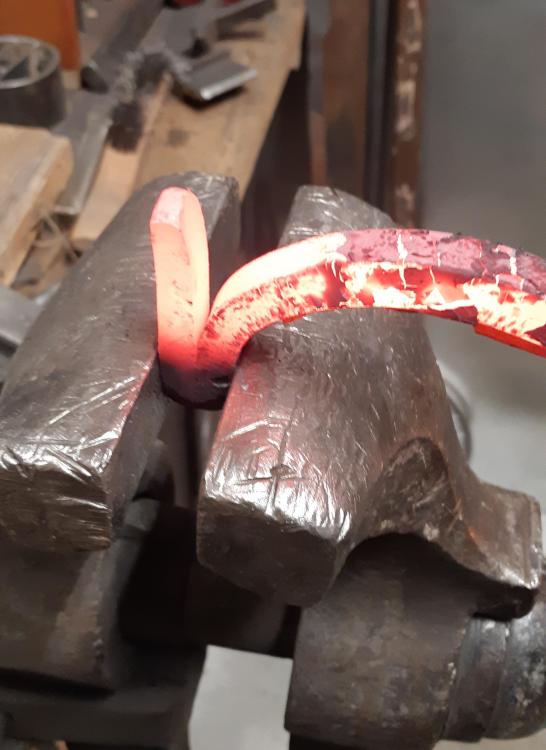
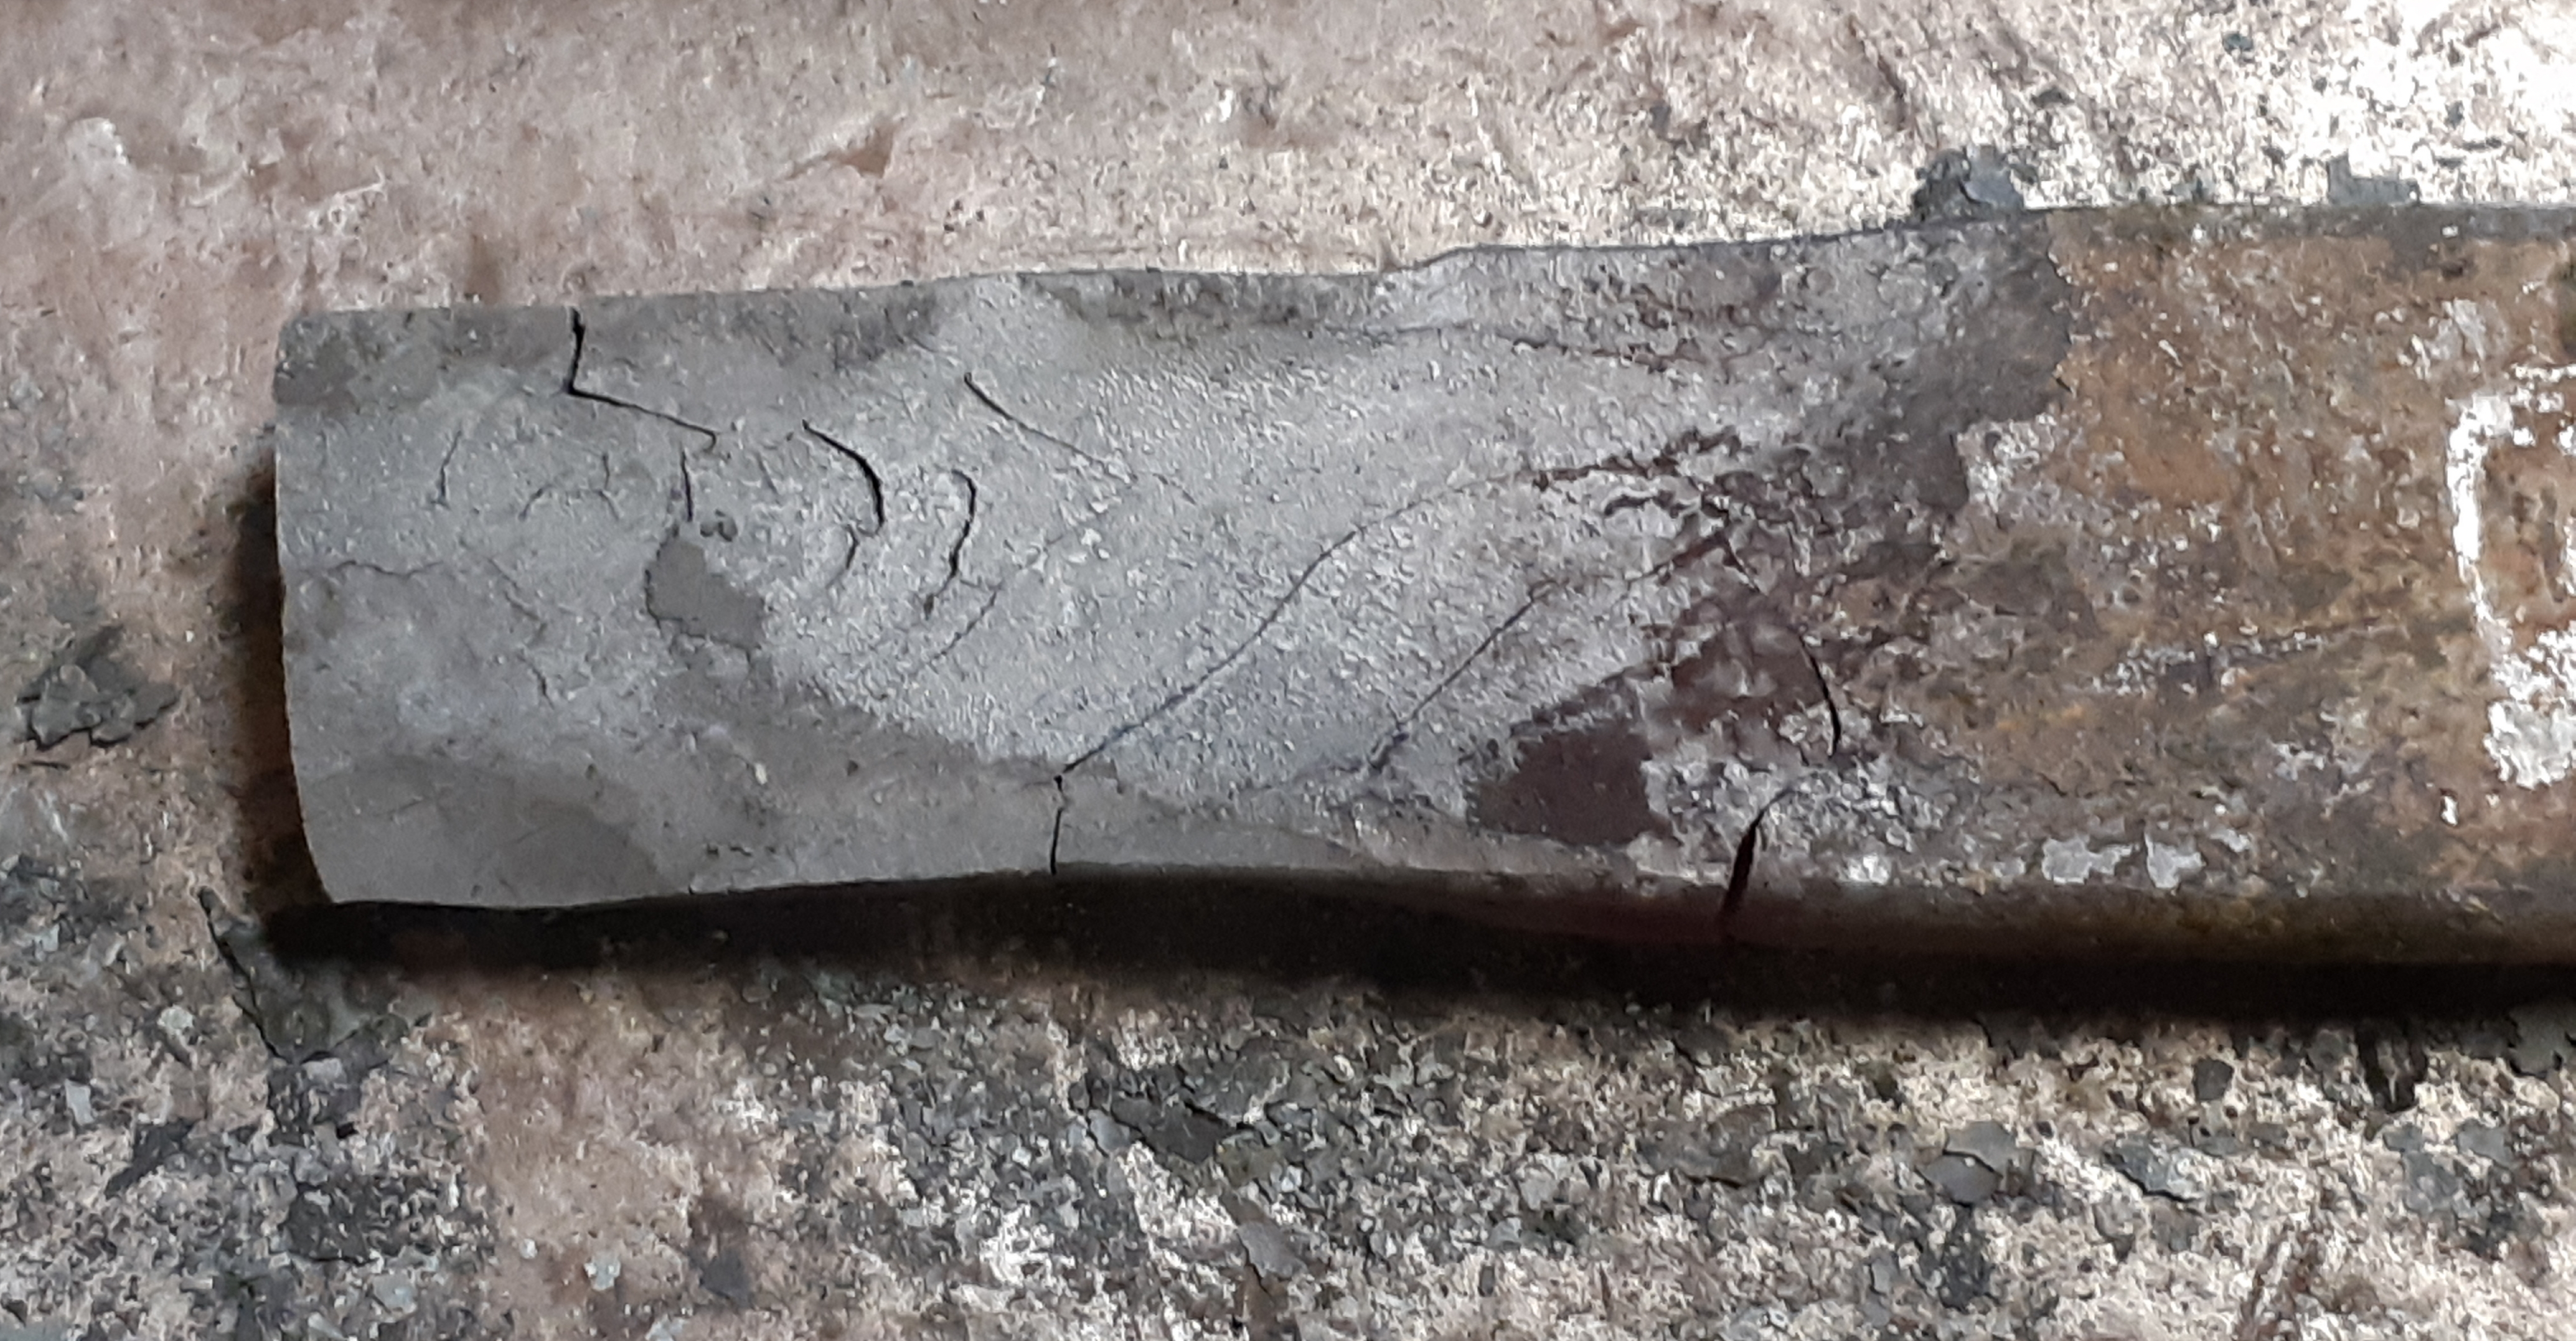
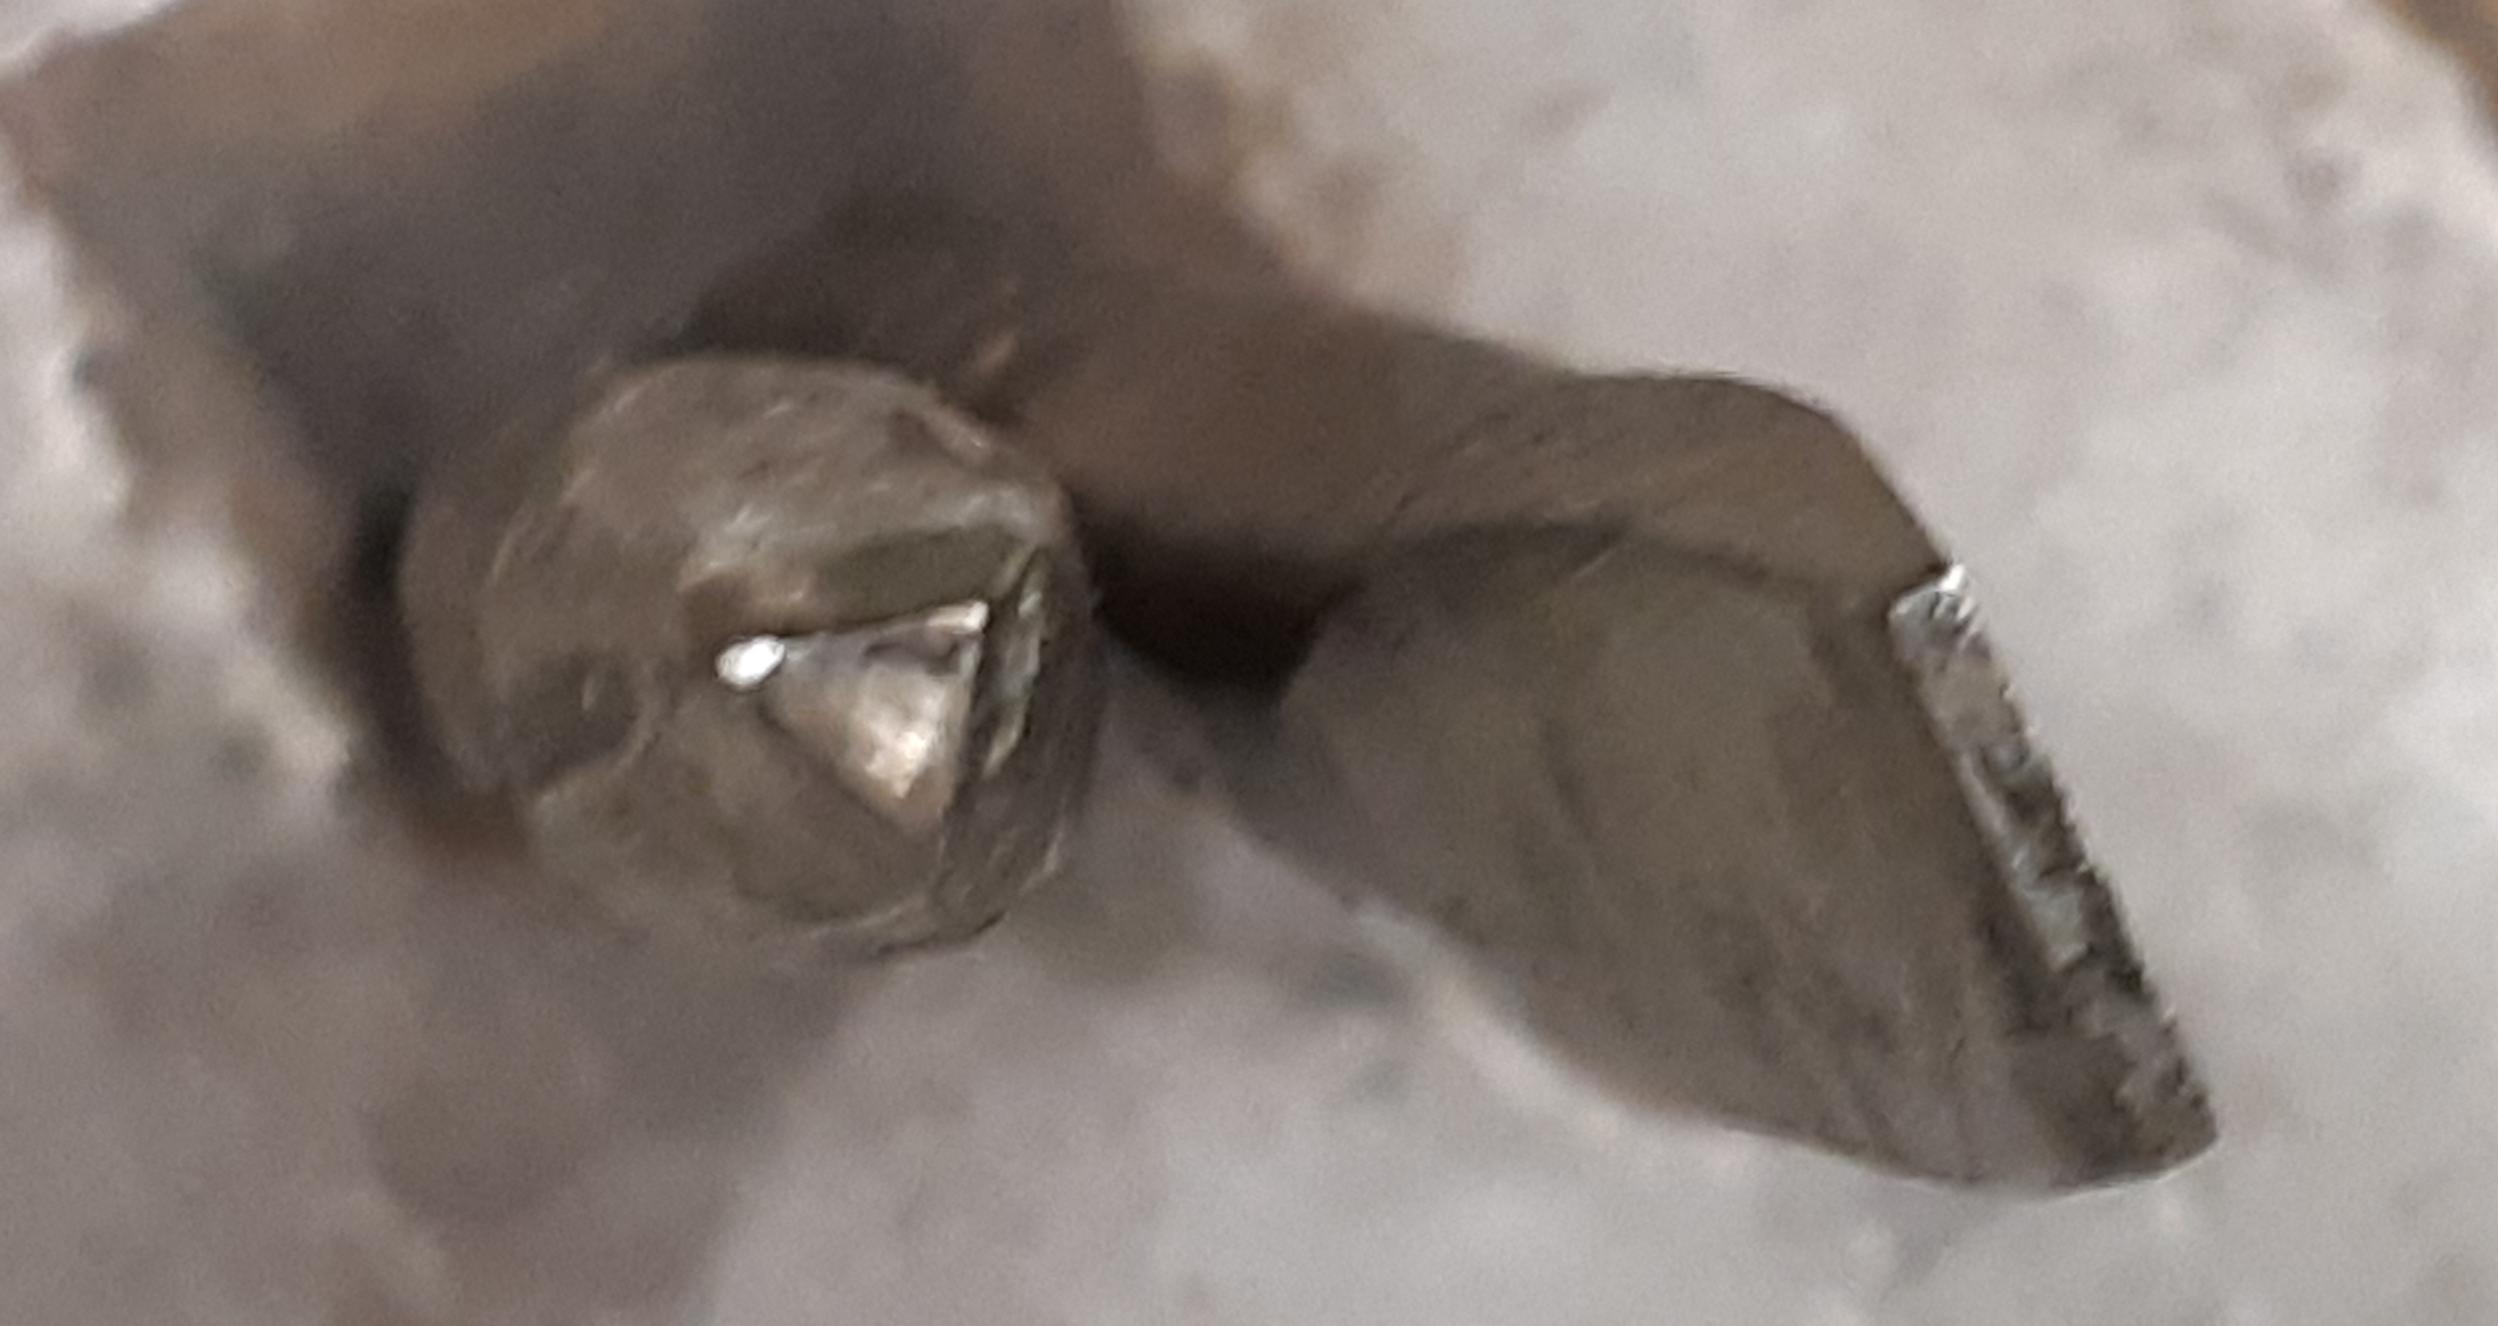
I was also hoping to make a nail header. Used a piece of high carbon steel, probably from a leaf spring. I must have worked it too cold, for it developped a spectacular set of cracks! More heat next time.
")
-
-
Do you have a picture of your mark, Jim? I don't want to infringe if they are too close to differentiate. (But it sounds lile they are different enough not to.)
-
Indeed George, I'll see how well it works on steel and adjust it if necessary.
Thanks all!
-
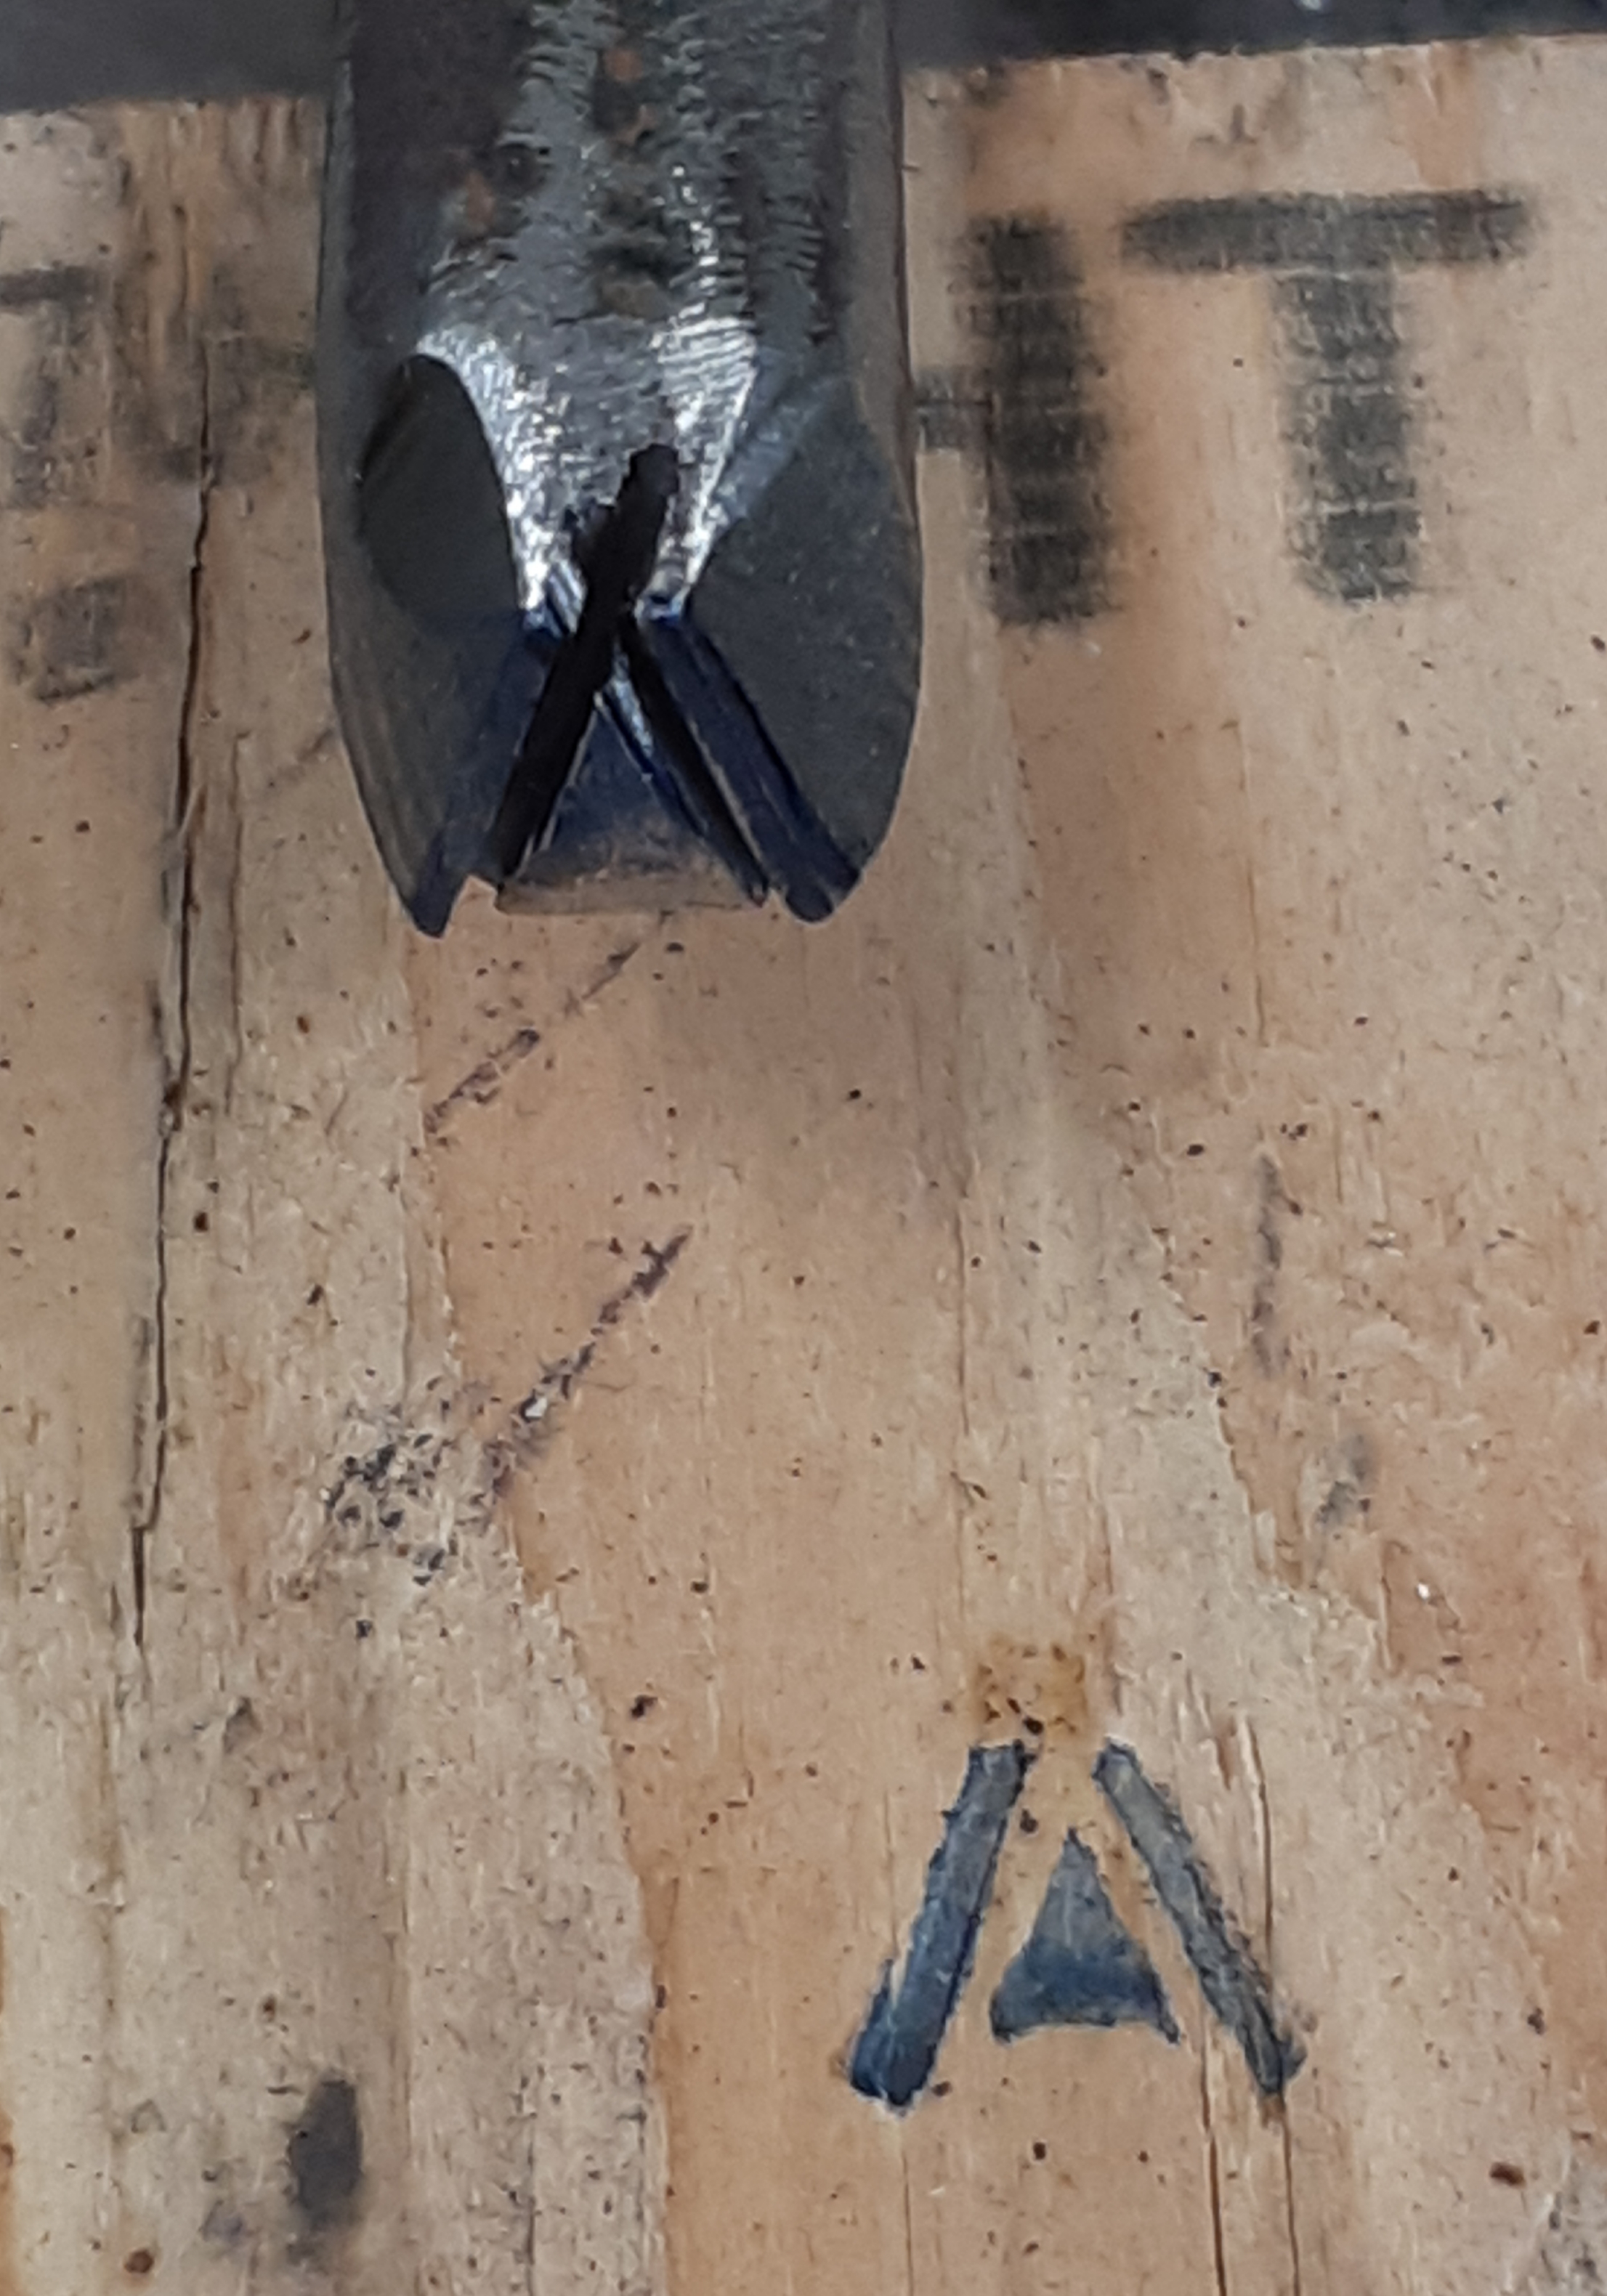
Hadn't had the chance to spend time in the shop since September. No forging today, but I was able to make my touchmark. Mostly used an angle grinder with a thin cutting disc, with a little filing work to finish it up. Took me much less time than I expected!
Couldn't try it on hot dteel yet, so I just used a felt marker and tapped it on a piece of wood. Much more even than when I used individual punches to make the mark.
")
Can't wait to see how it comes out on steel.
-
Yep, the ball peen head is sized right for two pounds, so that was my guess as well.
I was thinking about modifying the fencing pliers by rounding them slightly for use as scrolling pliers. At $2 they were a no brainer purchase. The other pliers were $1 each.
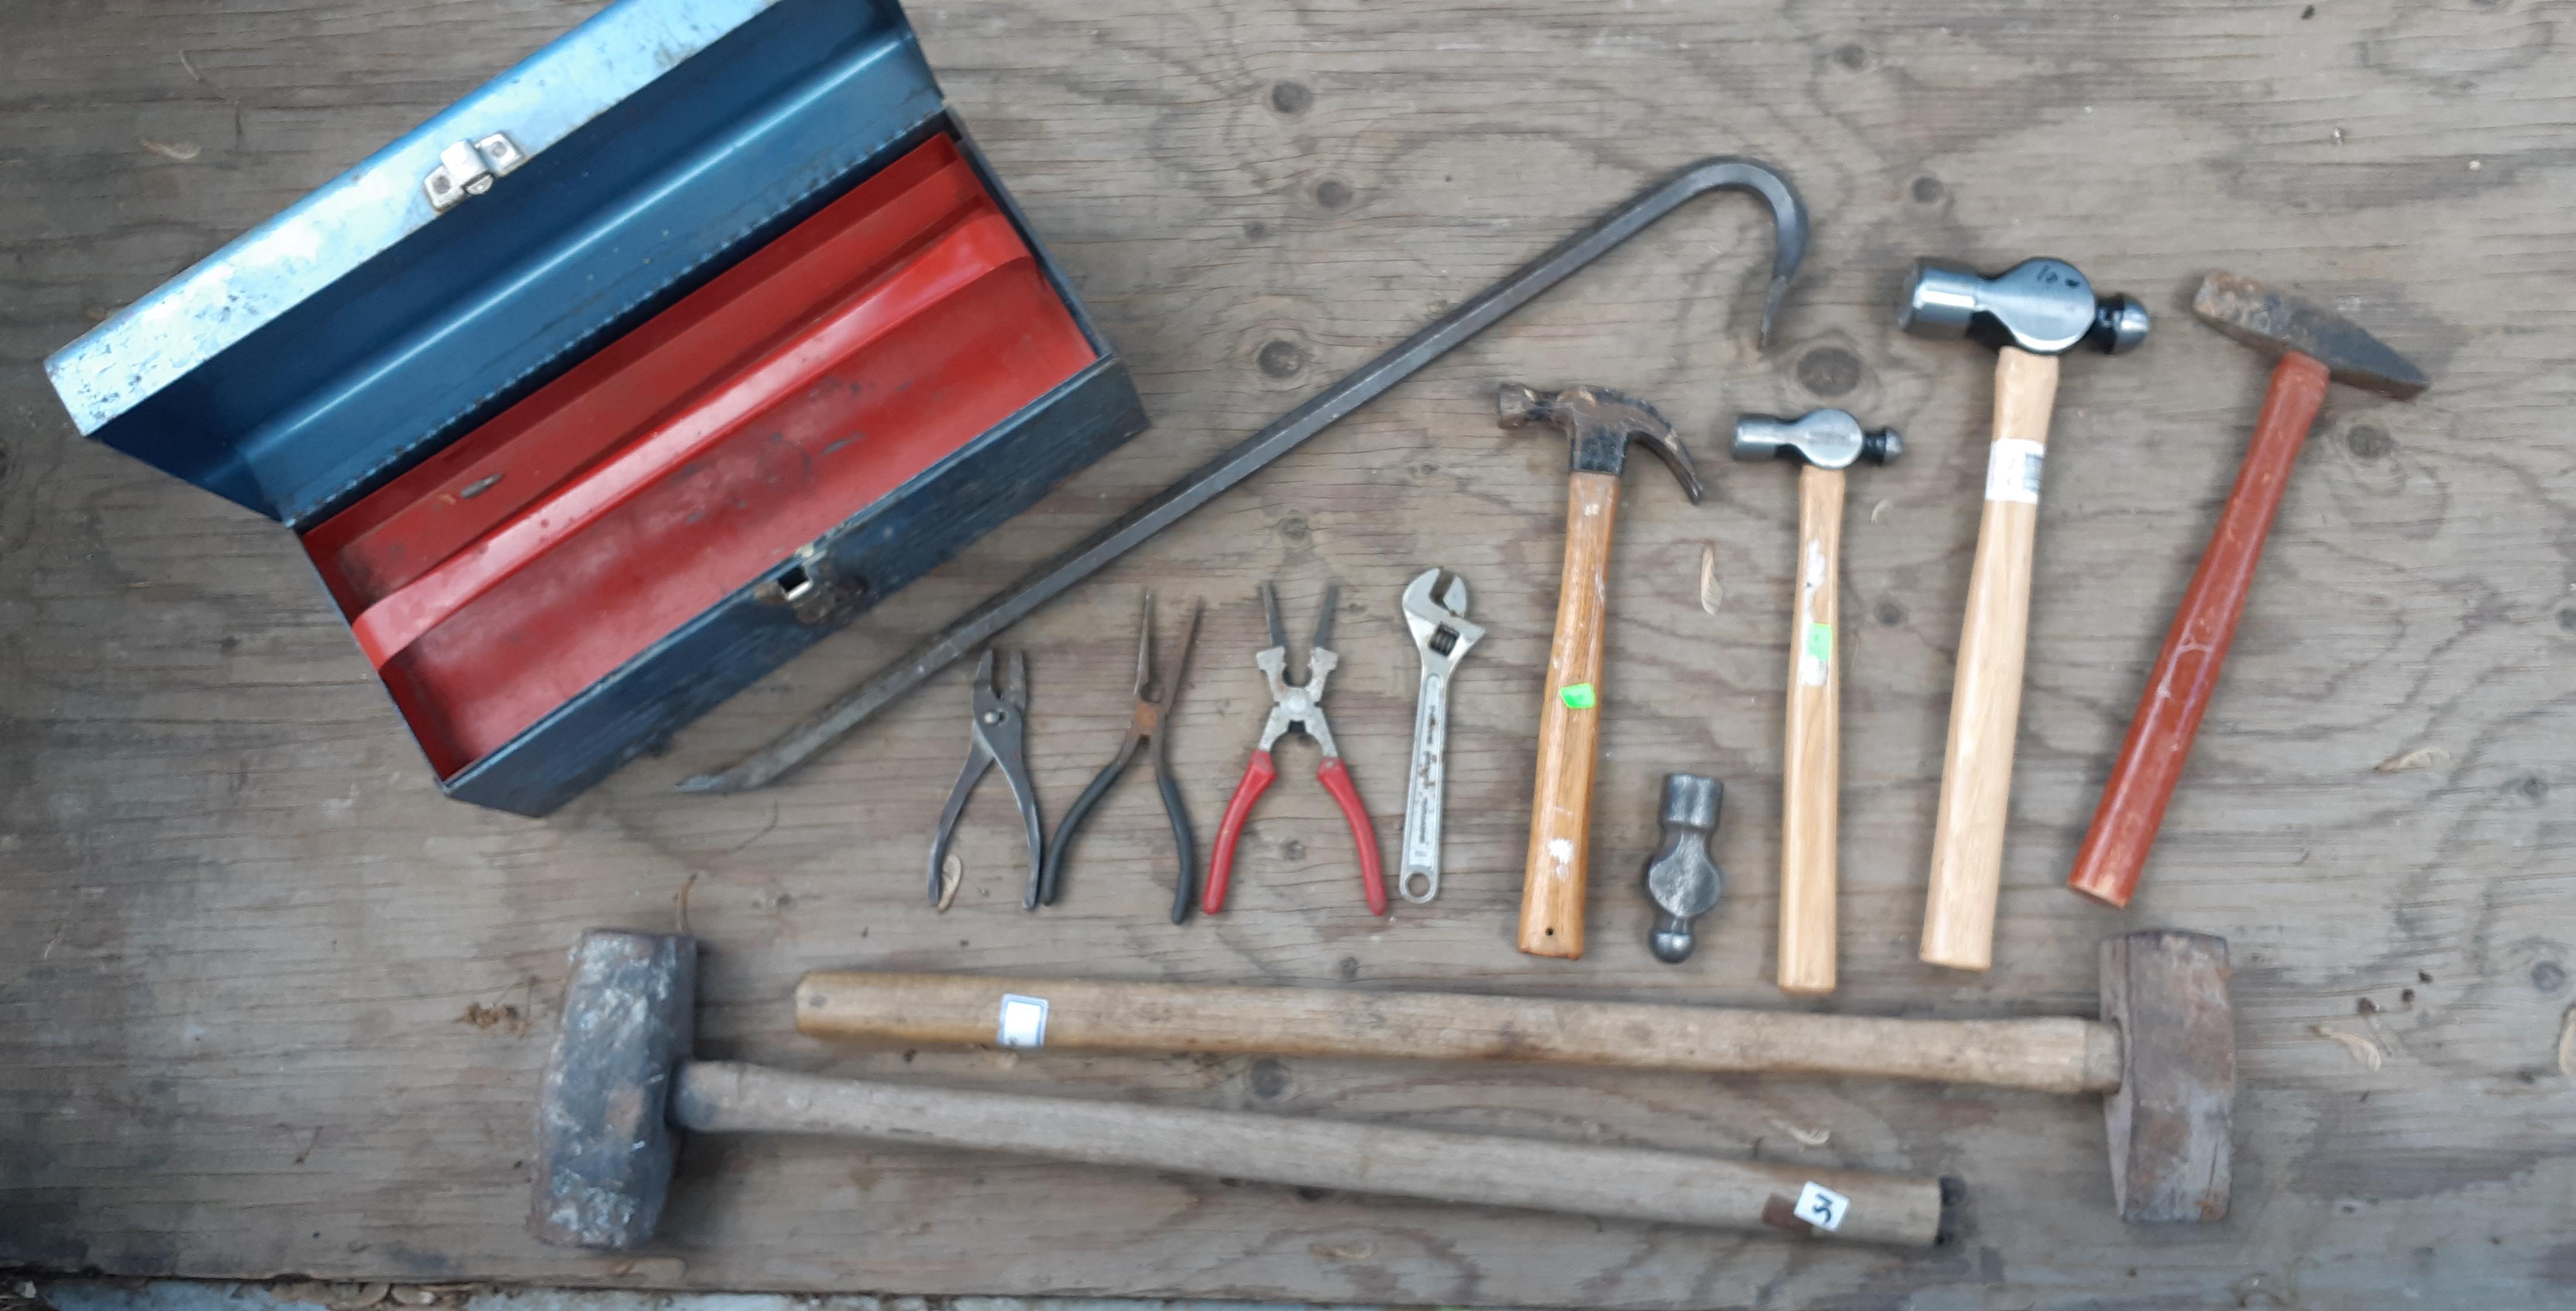
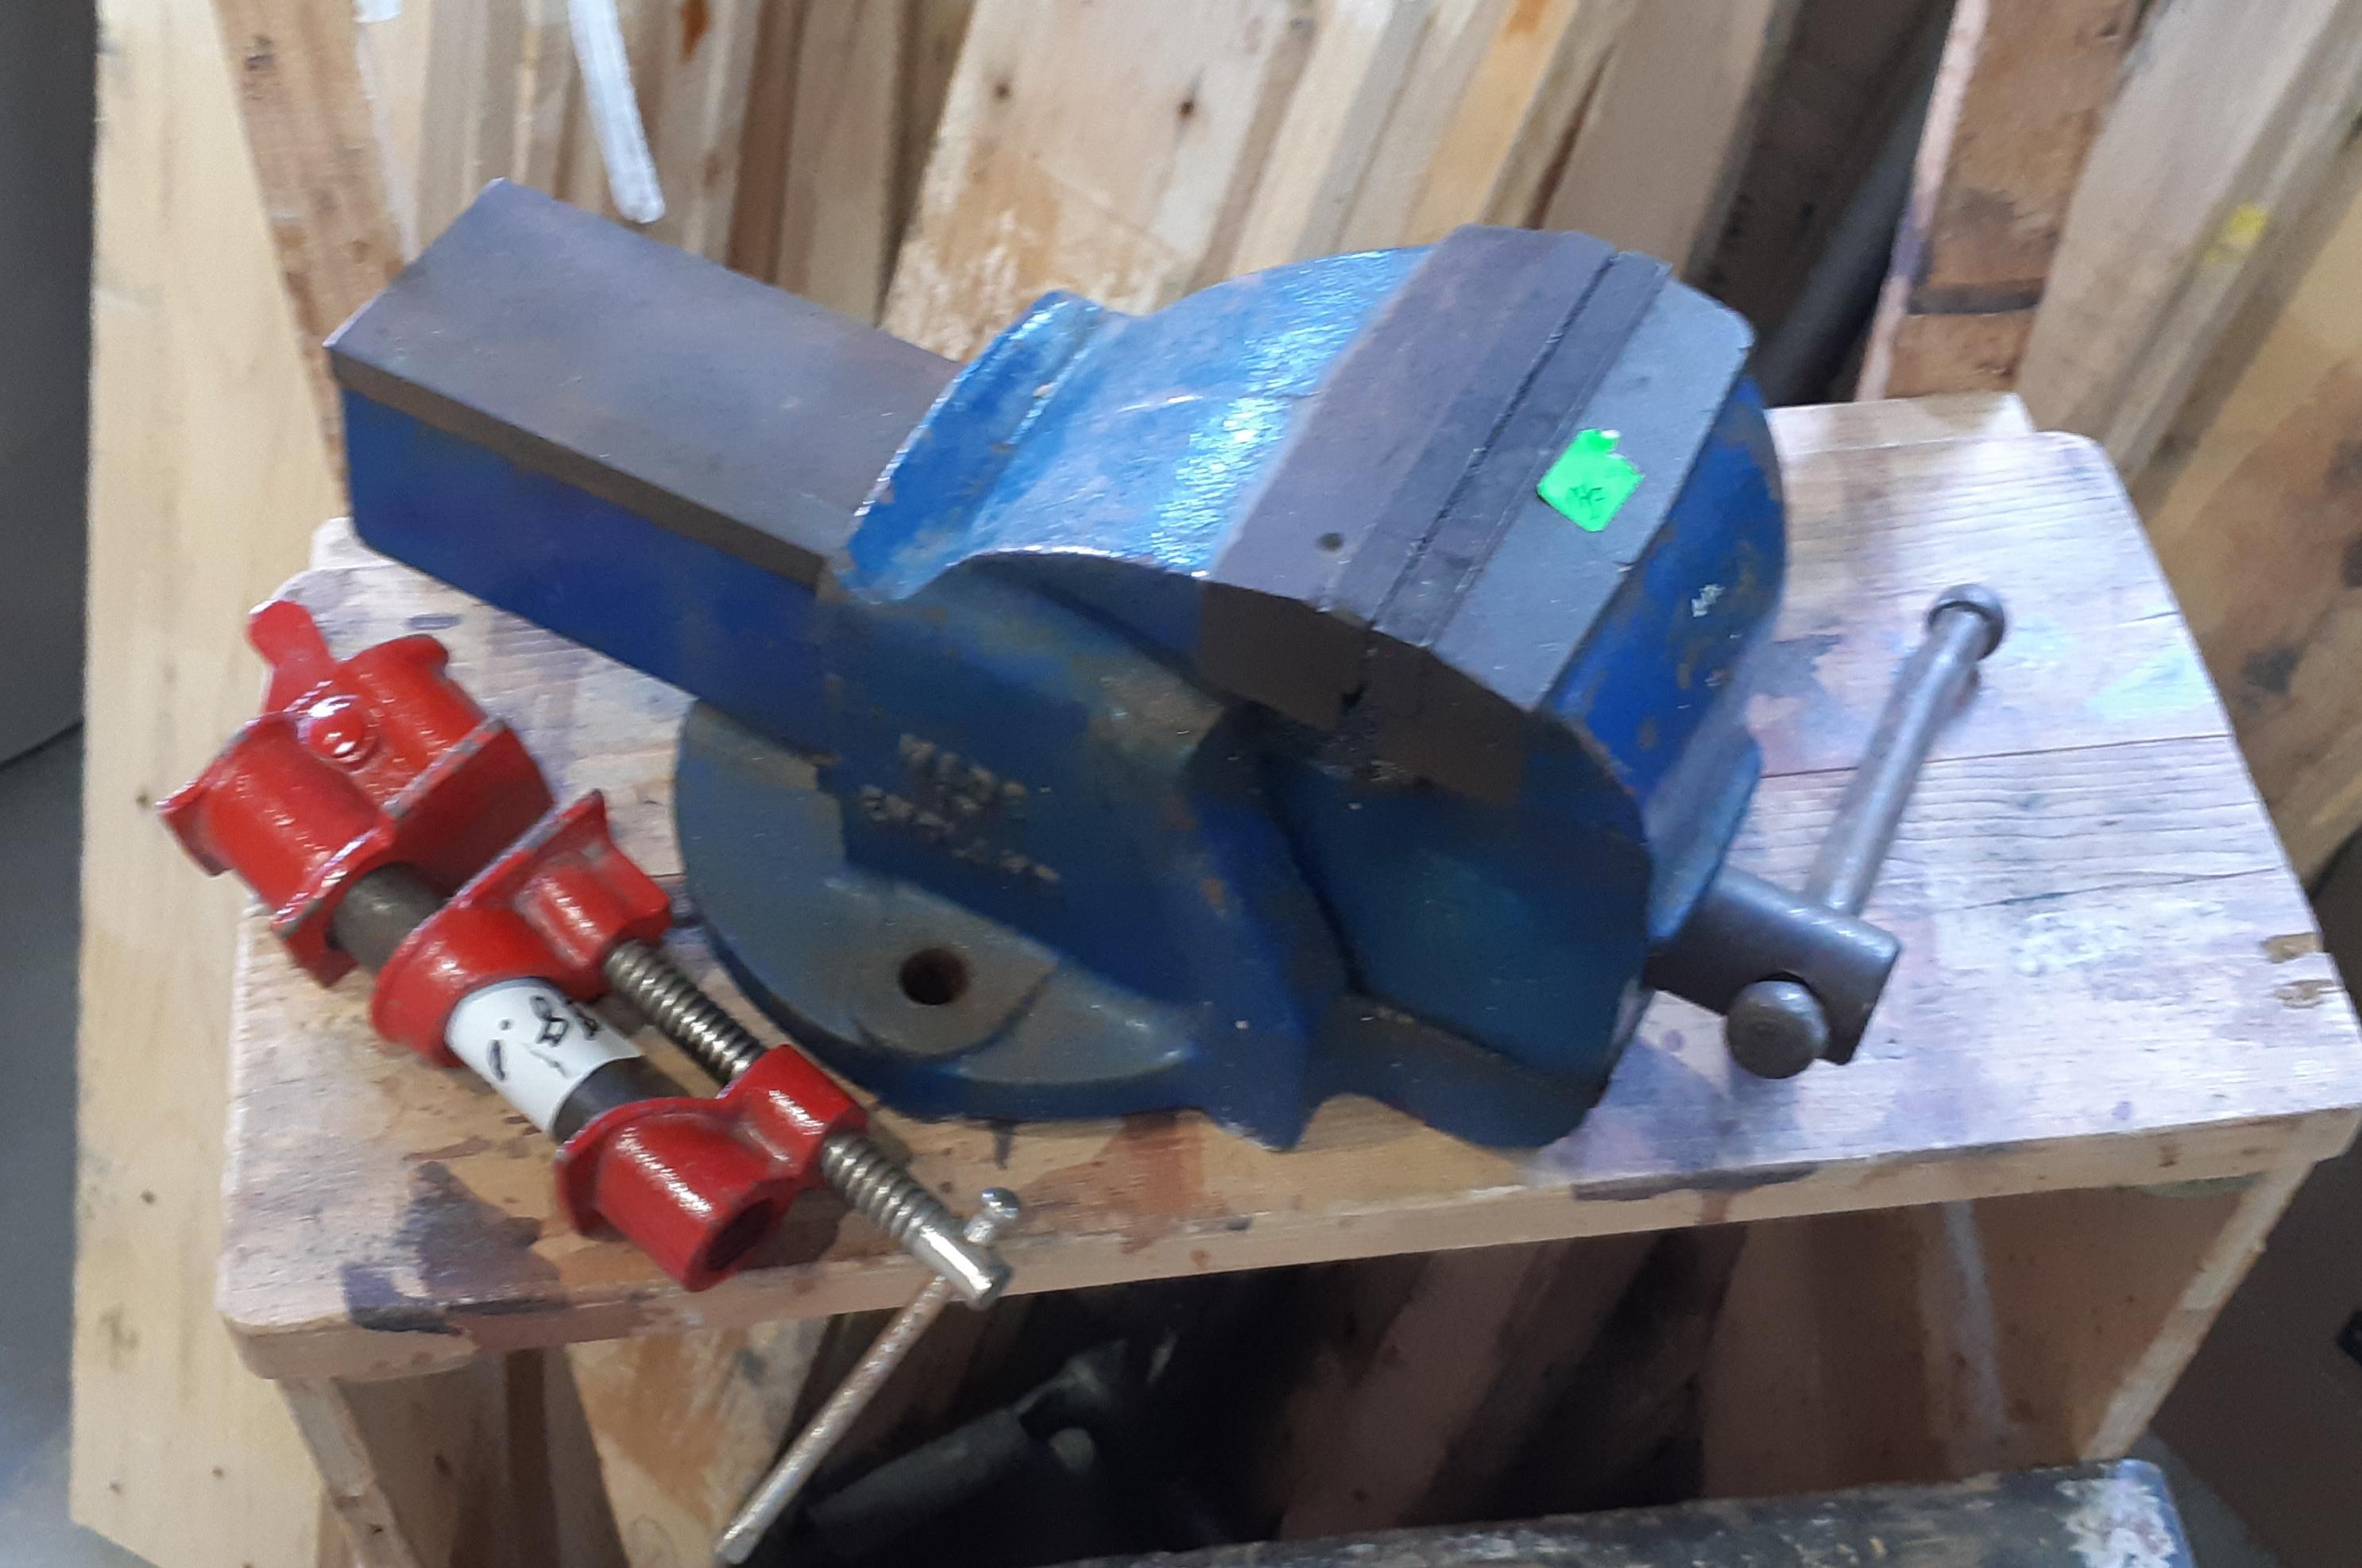
And indeed the vise is the best deal of all. My guess at the time was that it was worth in the $100-150 range. It was labelled at 35, but I applied some of the advice I read on these boards and combined it with a few other items (the small ball peen at 5, the carpenter's hammer at 3 and the crowbar at 5) making an offer at 40 for the lot.
The time with my dad was the best part of it. I am lucky I still have him and my mom both.
-
During a visit to my parents yesterday, I went to the flea market with my dad.
Got a bunch of hammers, some pliers, two sledges, a small adjustable wrench, a crowbar and a metal toolbox. Cost me about 55 CAD total.

The two ball peens with handles are 16 and 48 ounces, while the head looks to be 32 ounces (it is just stamped with a "2"). The big sledge is 12# while the smaller straight peen sledge looks to be 6#.
Meanwhile, my dad got a 4" Record bench wise for 27 CAD and a 1/2" pipe clamp for 8 dollars. Both pretty much new.
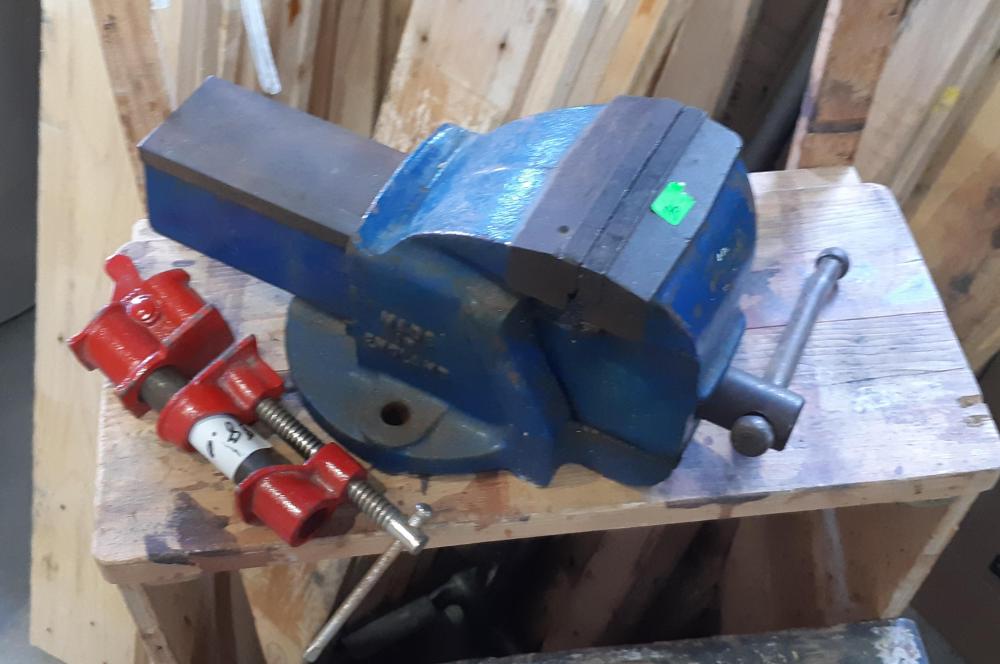
Since my dad is 79, I was the one who carried the vise back to the car. Good thing we had a backpack!
We also had a good time, which is priceless.
-
Oh yes. A great book full of interesting details. I haven't gone through it from cover to cover yet.
-
Indeed, I bought CF&W based on your posts some time ago.
-
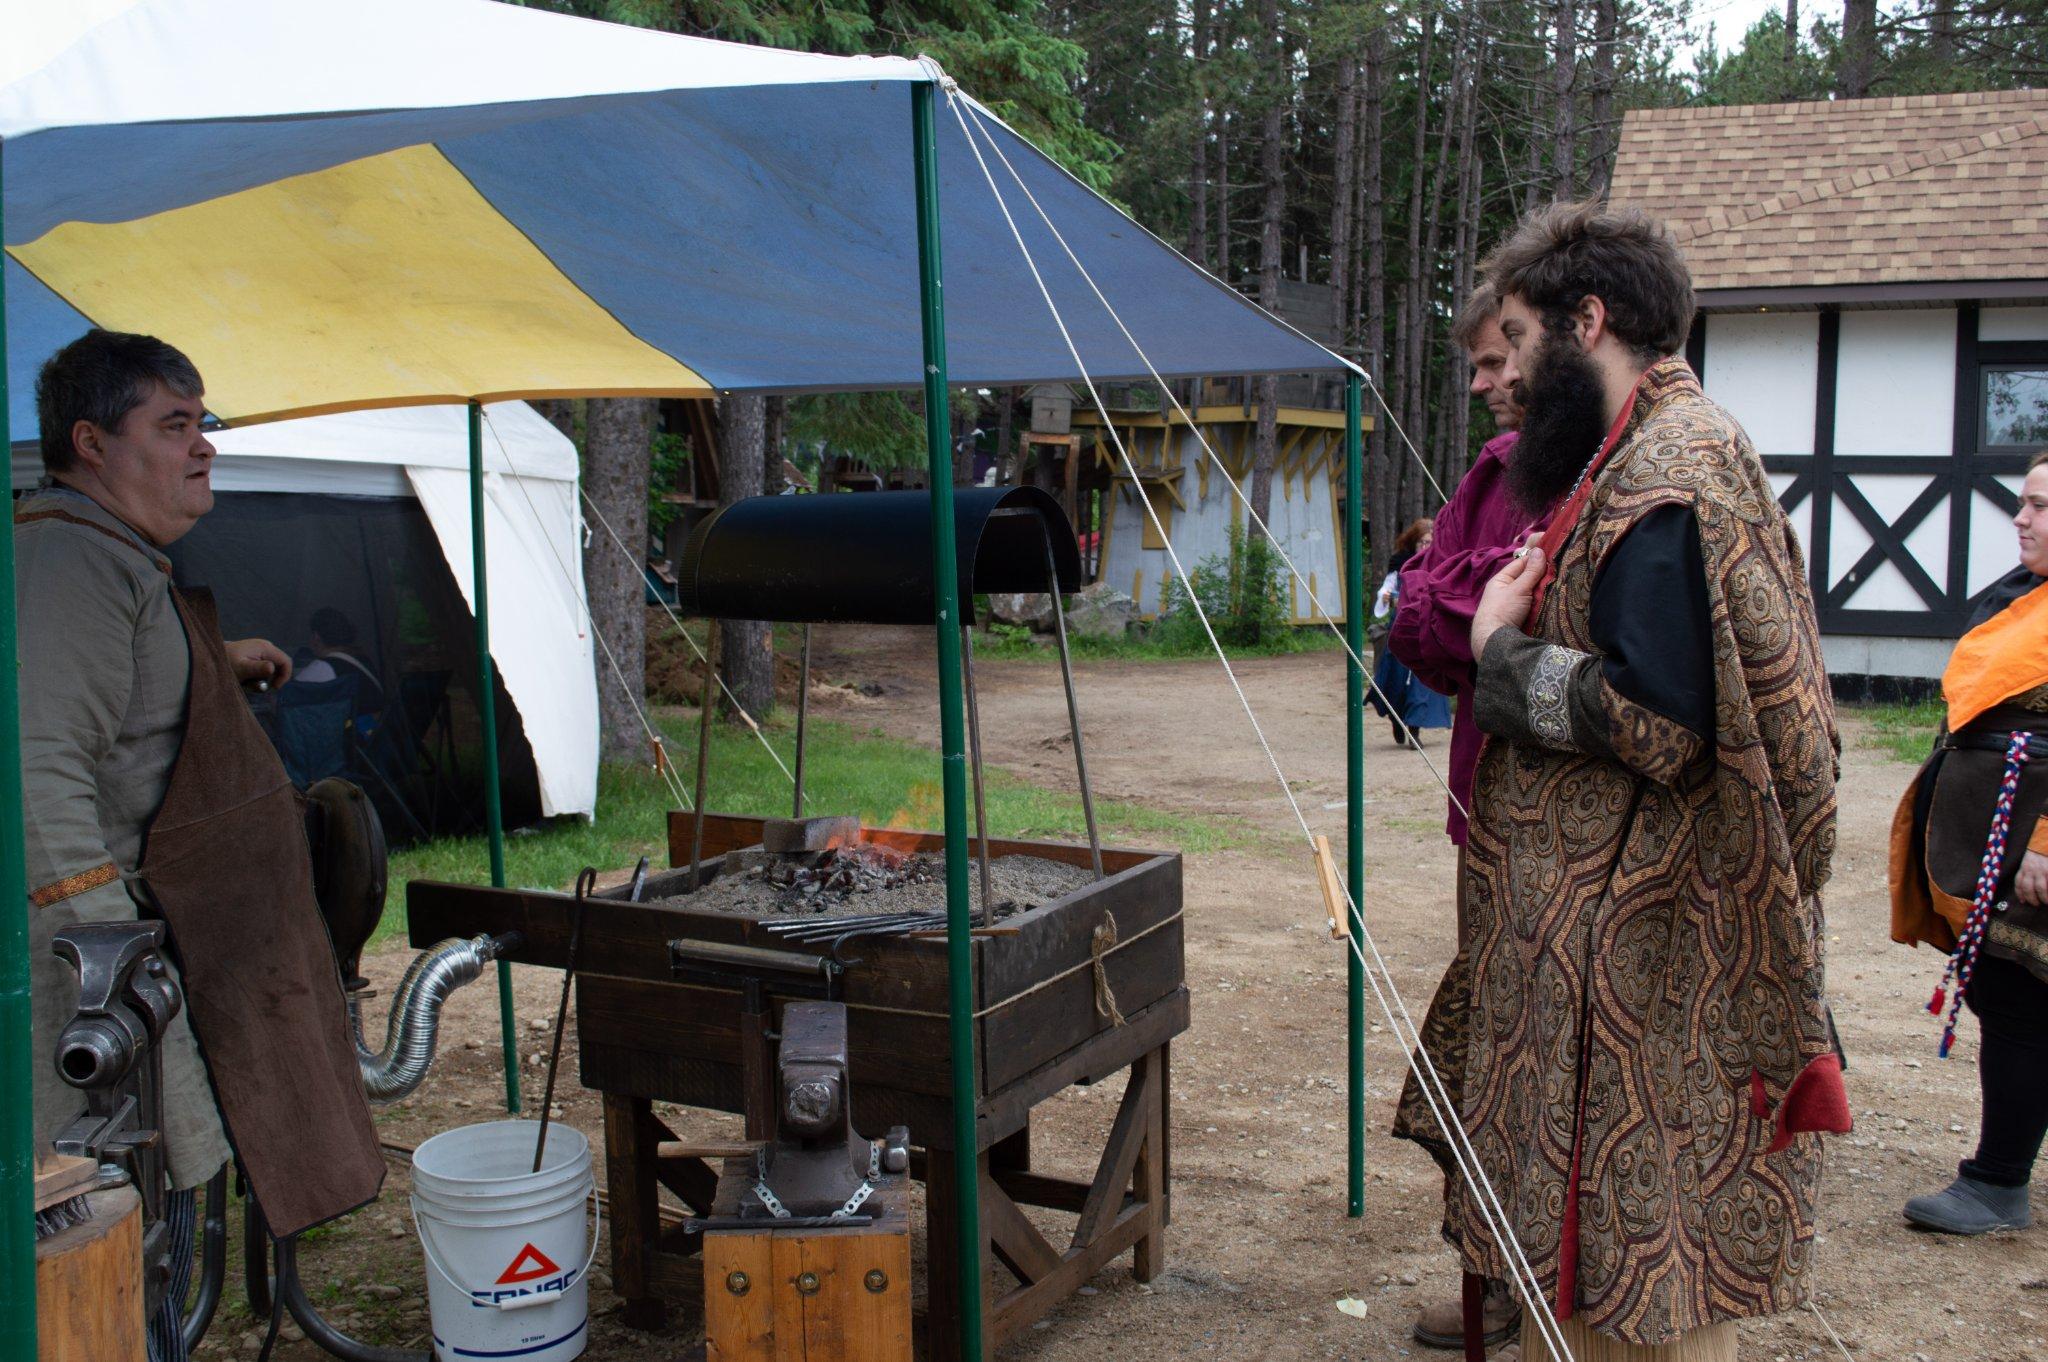
As Thomas indicated, the blower is an anacrhonism (by several centuries) for my mid-14th century persona. Such devices were invented in the early industrial period, I think. But I just don't have the space to store a pair of single-lunged bellows at home, which *would* have been the height of technology for a small-shop smith.
BTW, Thomas, a smith I've worked with (Danr Kretchmar from Irontree Works) uses alternating bellows that can be operated by the smith himself, using an X-shaped handles over the bellows. So a thrall would not be absolutely necessary.
The leg vise is another anacrhonism, and so is a London-pattern anvil for that matter. But I take the time to explain those to anyone who is interested, and why I am making such compromises.
Sometimes convenience wins over accuracy. But I do plan on improving my setup over the coming years.

-
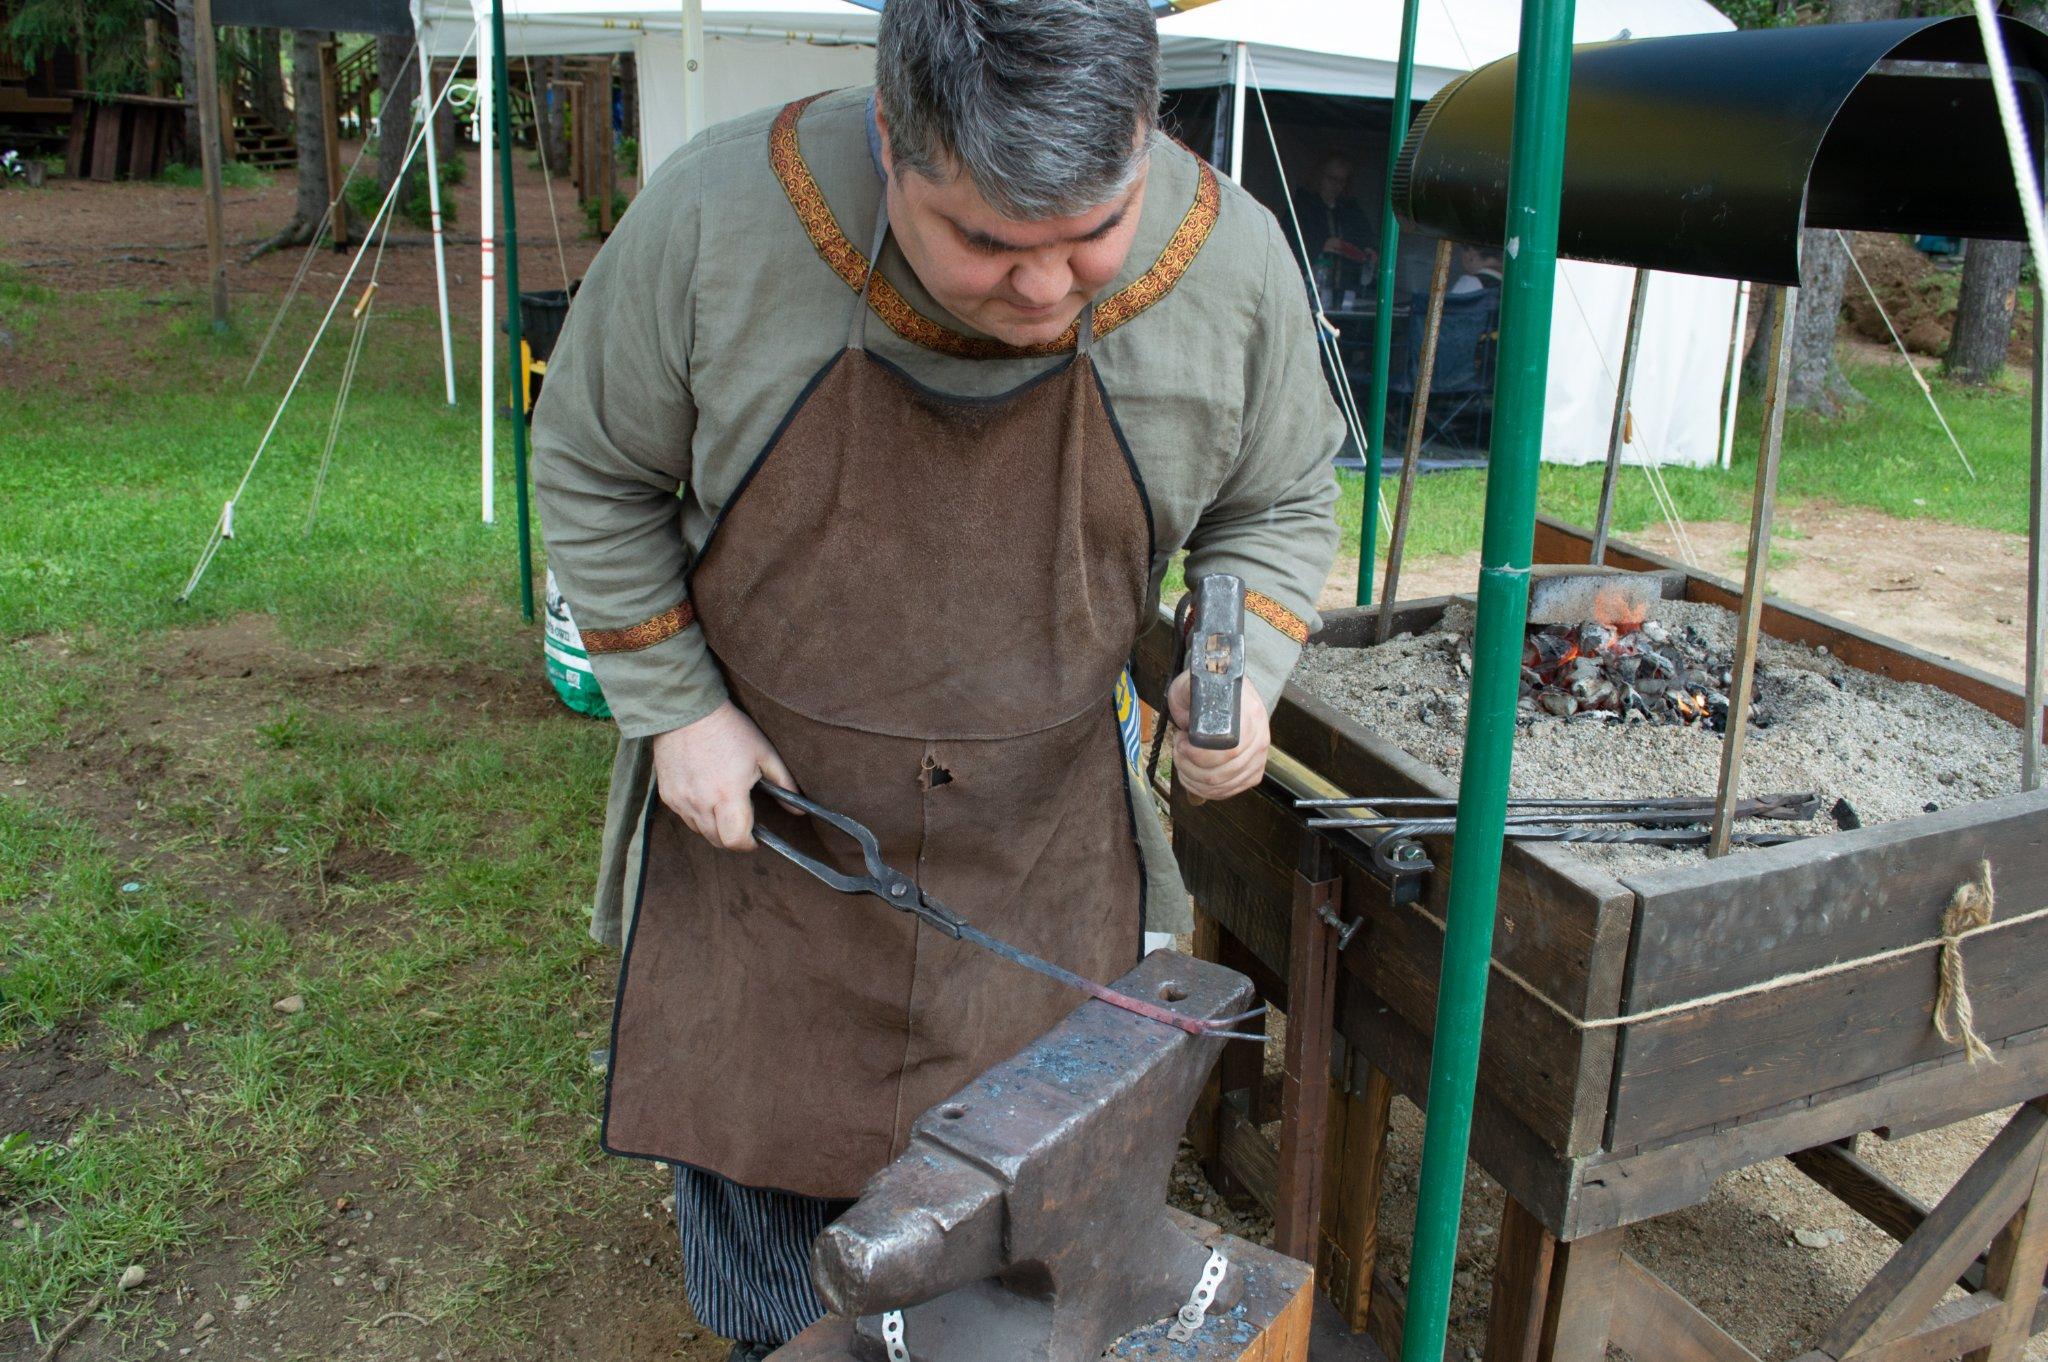
Not so much what I did in the shop, but rather the fact that I took the shop outside and away from home.
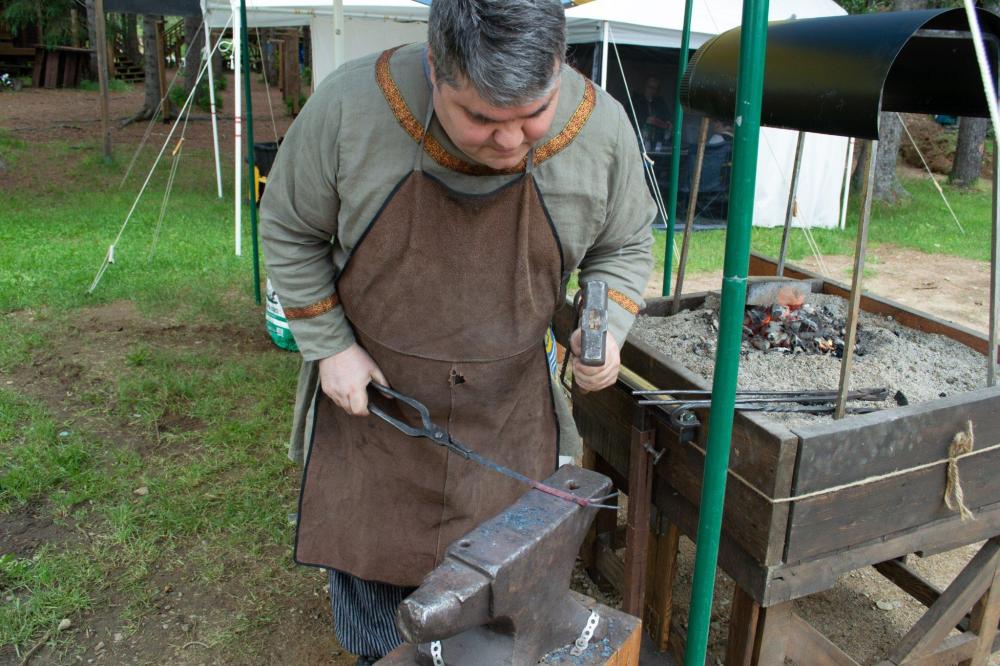
I held my first blacksmithing demo last weekend during one of our local medieval event. Only did a little bit of actual smithing, but talked quite a bit about it. Also coached a young lady through the forging of a S hook.

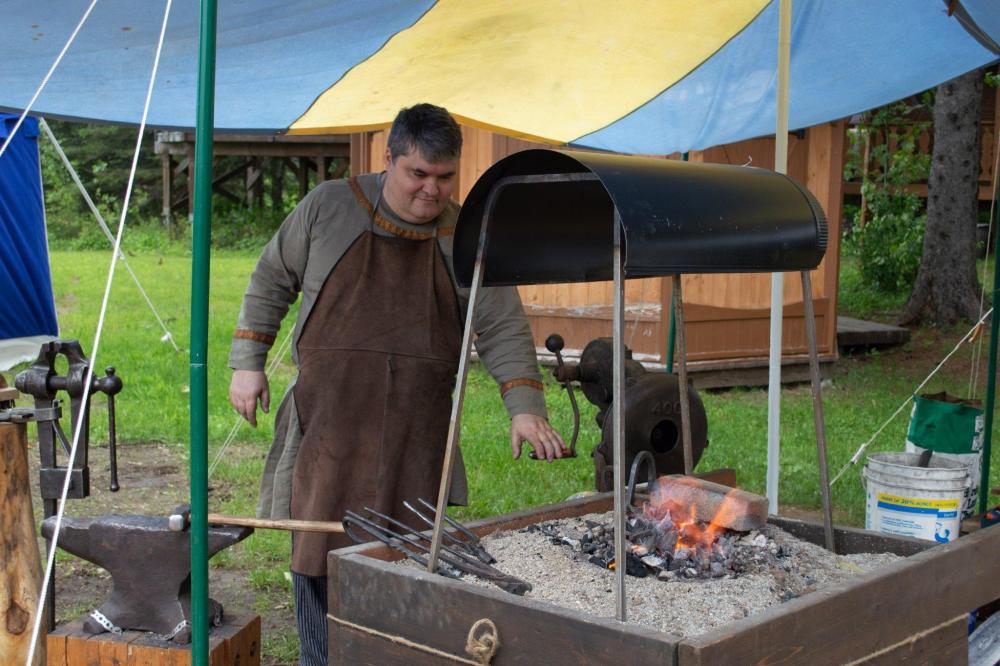
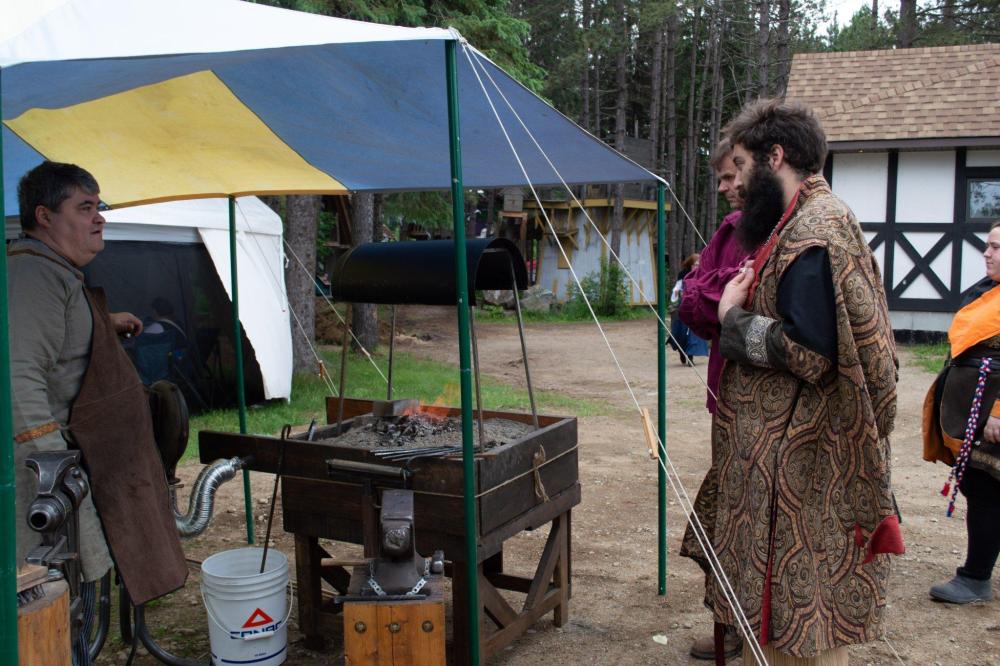
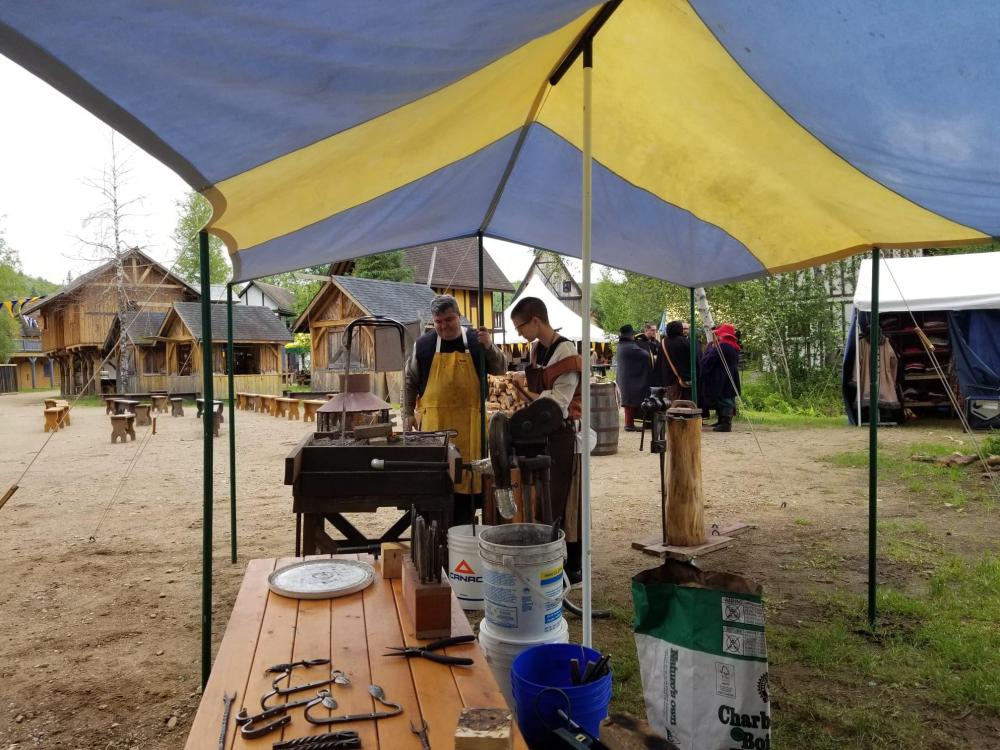
A fairly simple setup, with a JABOD, Champion 400 blower, 86# anvil and small 40# leg vise. I put a heat deflector/dissipator above the JABOD so that I could forge under the tarp without burning it, as we were expecting some rain over the weekend.
It was a lot of fun and I will do it again next year.
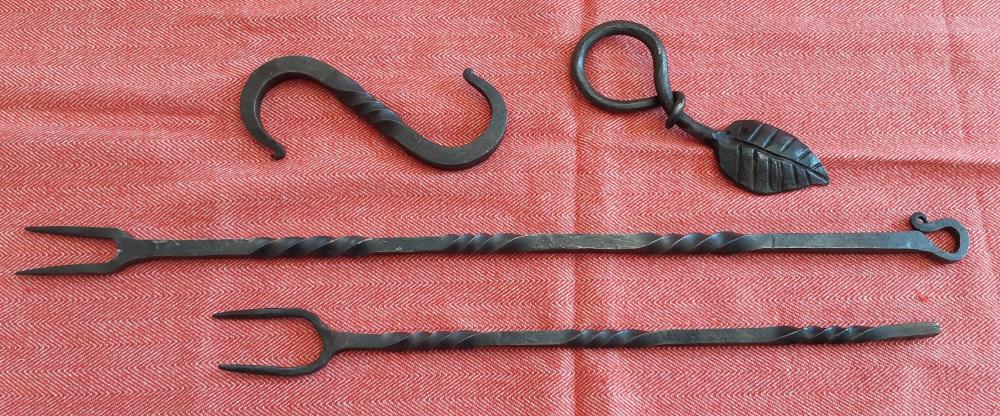
Only made a few items: my first BBQ forks (to heat up some sausages over the forge for lunch), a leaf and a duplicate of the S hook the young lady made.
-
-
12 hours ago, Frosty said:
Nice flux spoon Arthur, I'd say more but your timing stinks.
Thank Frosty!
I could say that my timing is digital, but I'm not sure how many will get the reference.
")
-
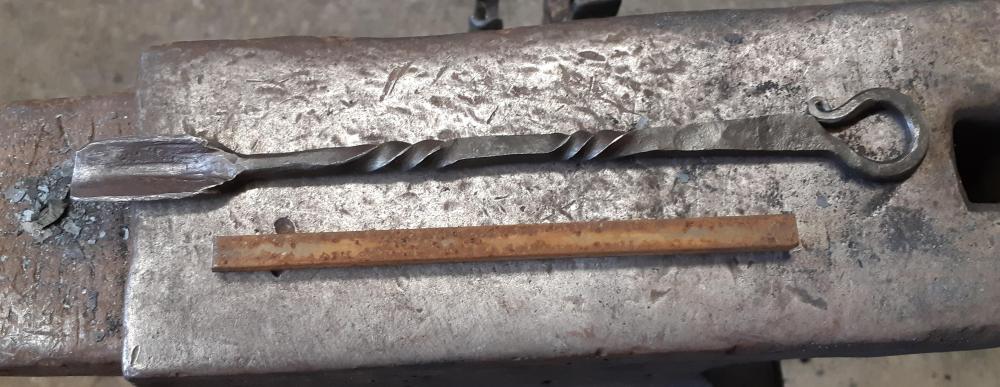
Chopped up some charcoal into smaller pieces for my next attempt at forge welding and made a small flux spoon from an 7" piece of 3/8" square.
-
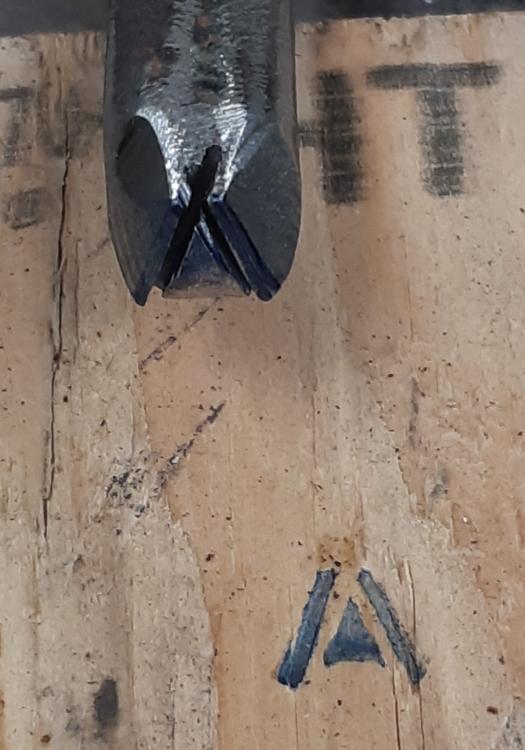
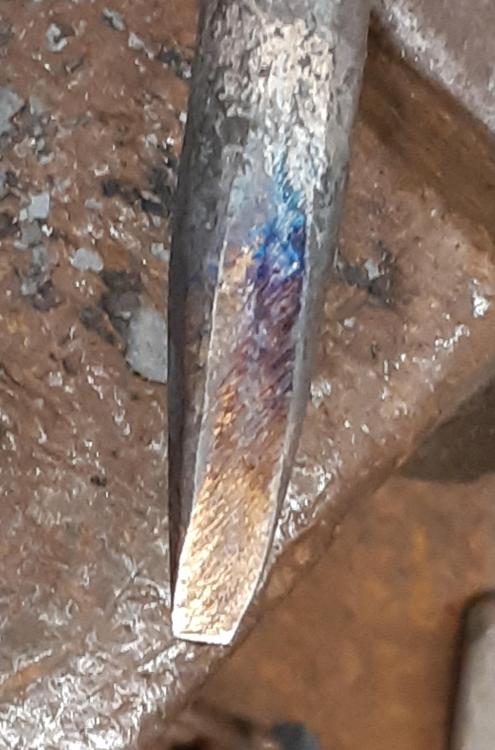
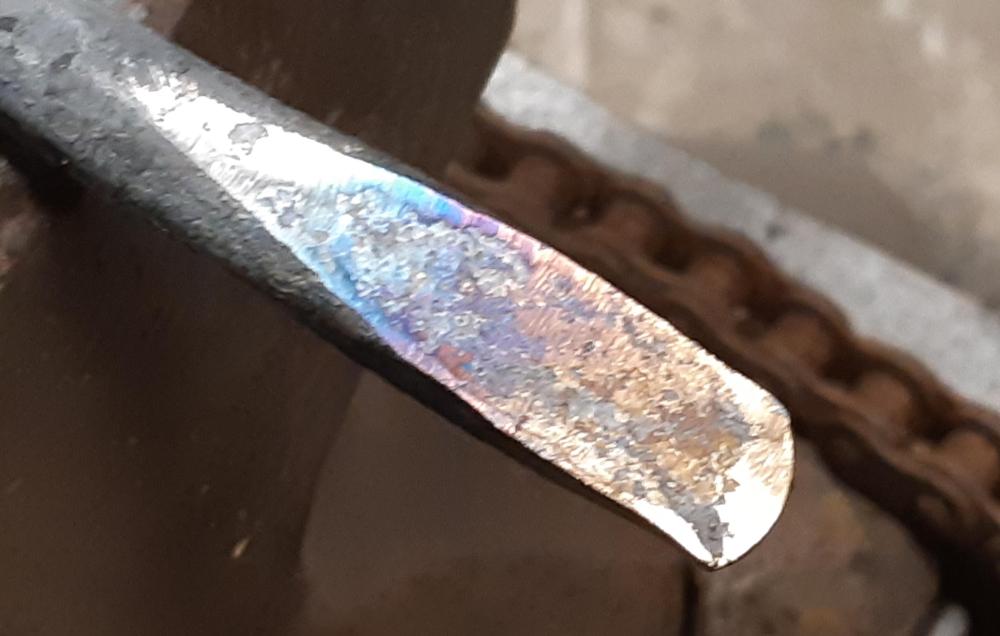
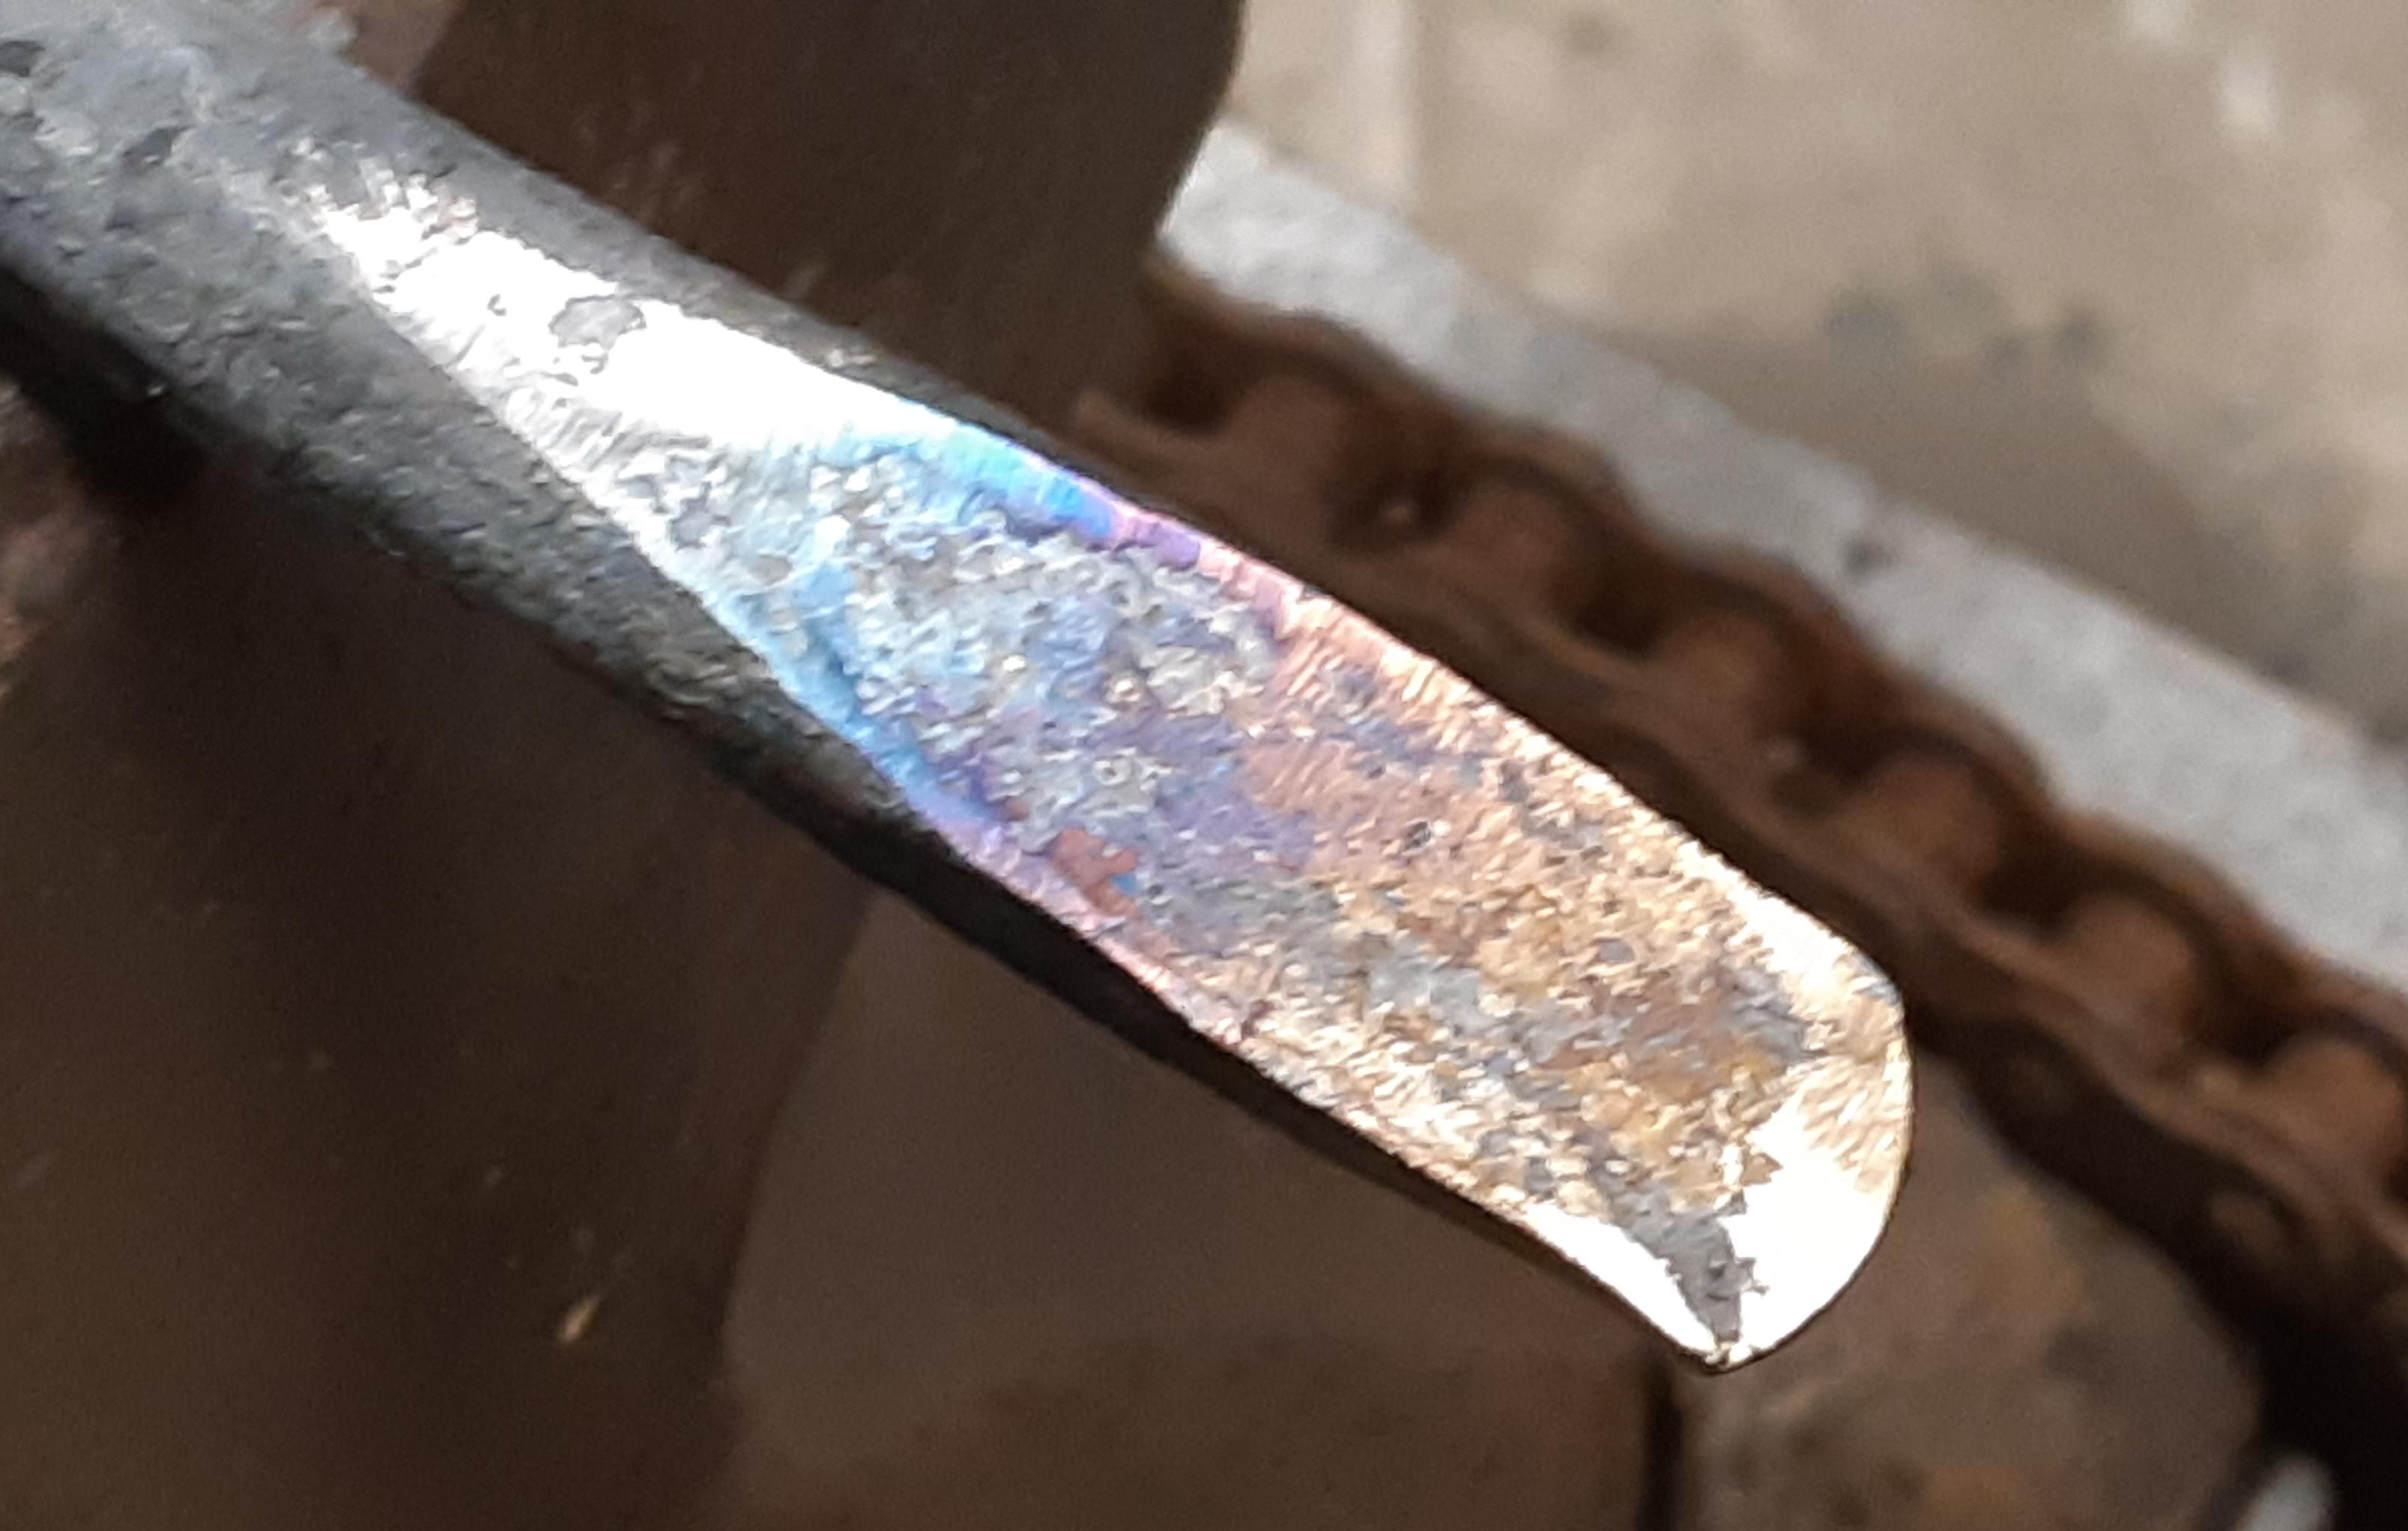
Spent a little time at the forge tonight, finishing a pair of chisel for a touch mark.

Had some nice tempering colors.
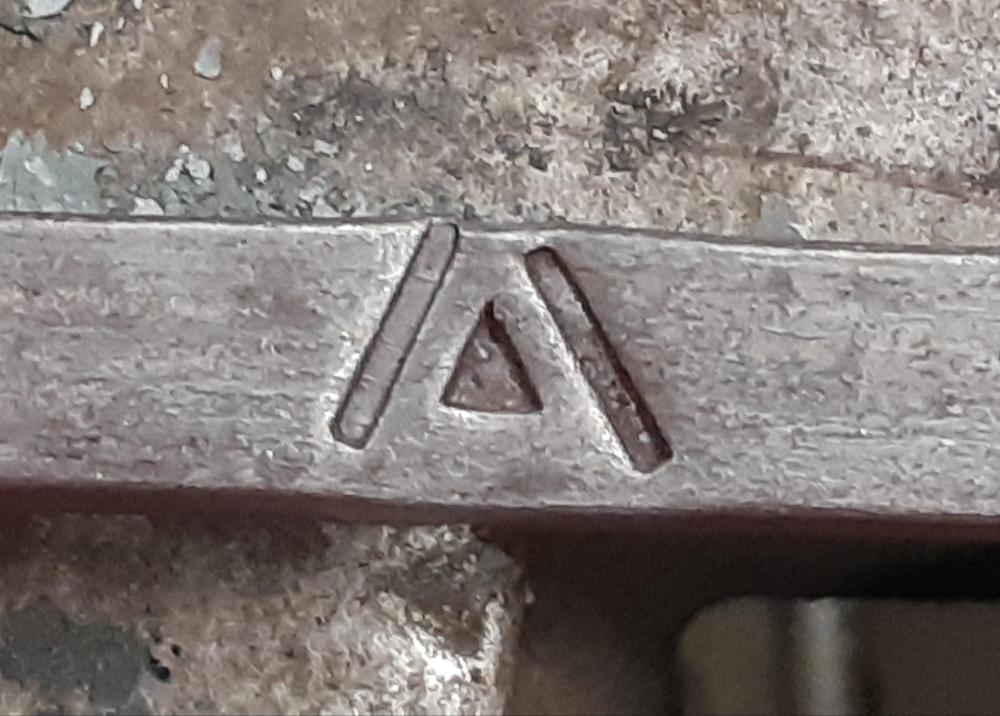
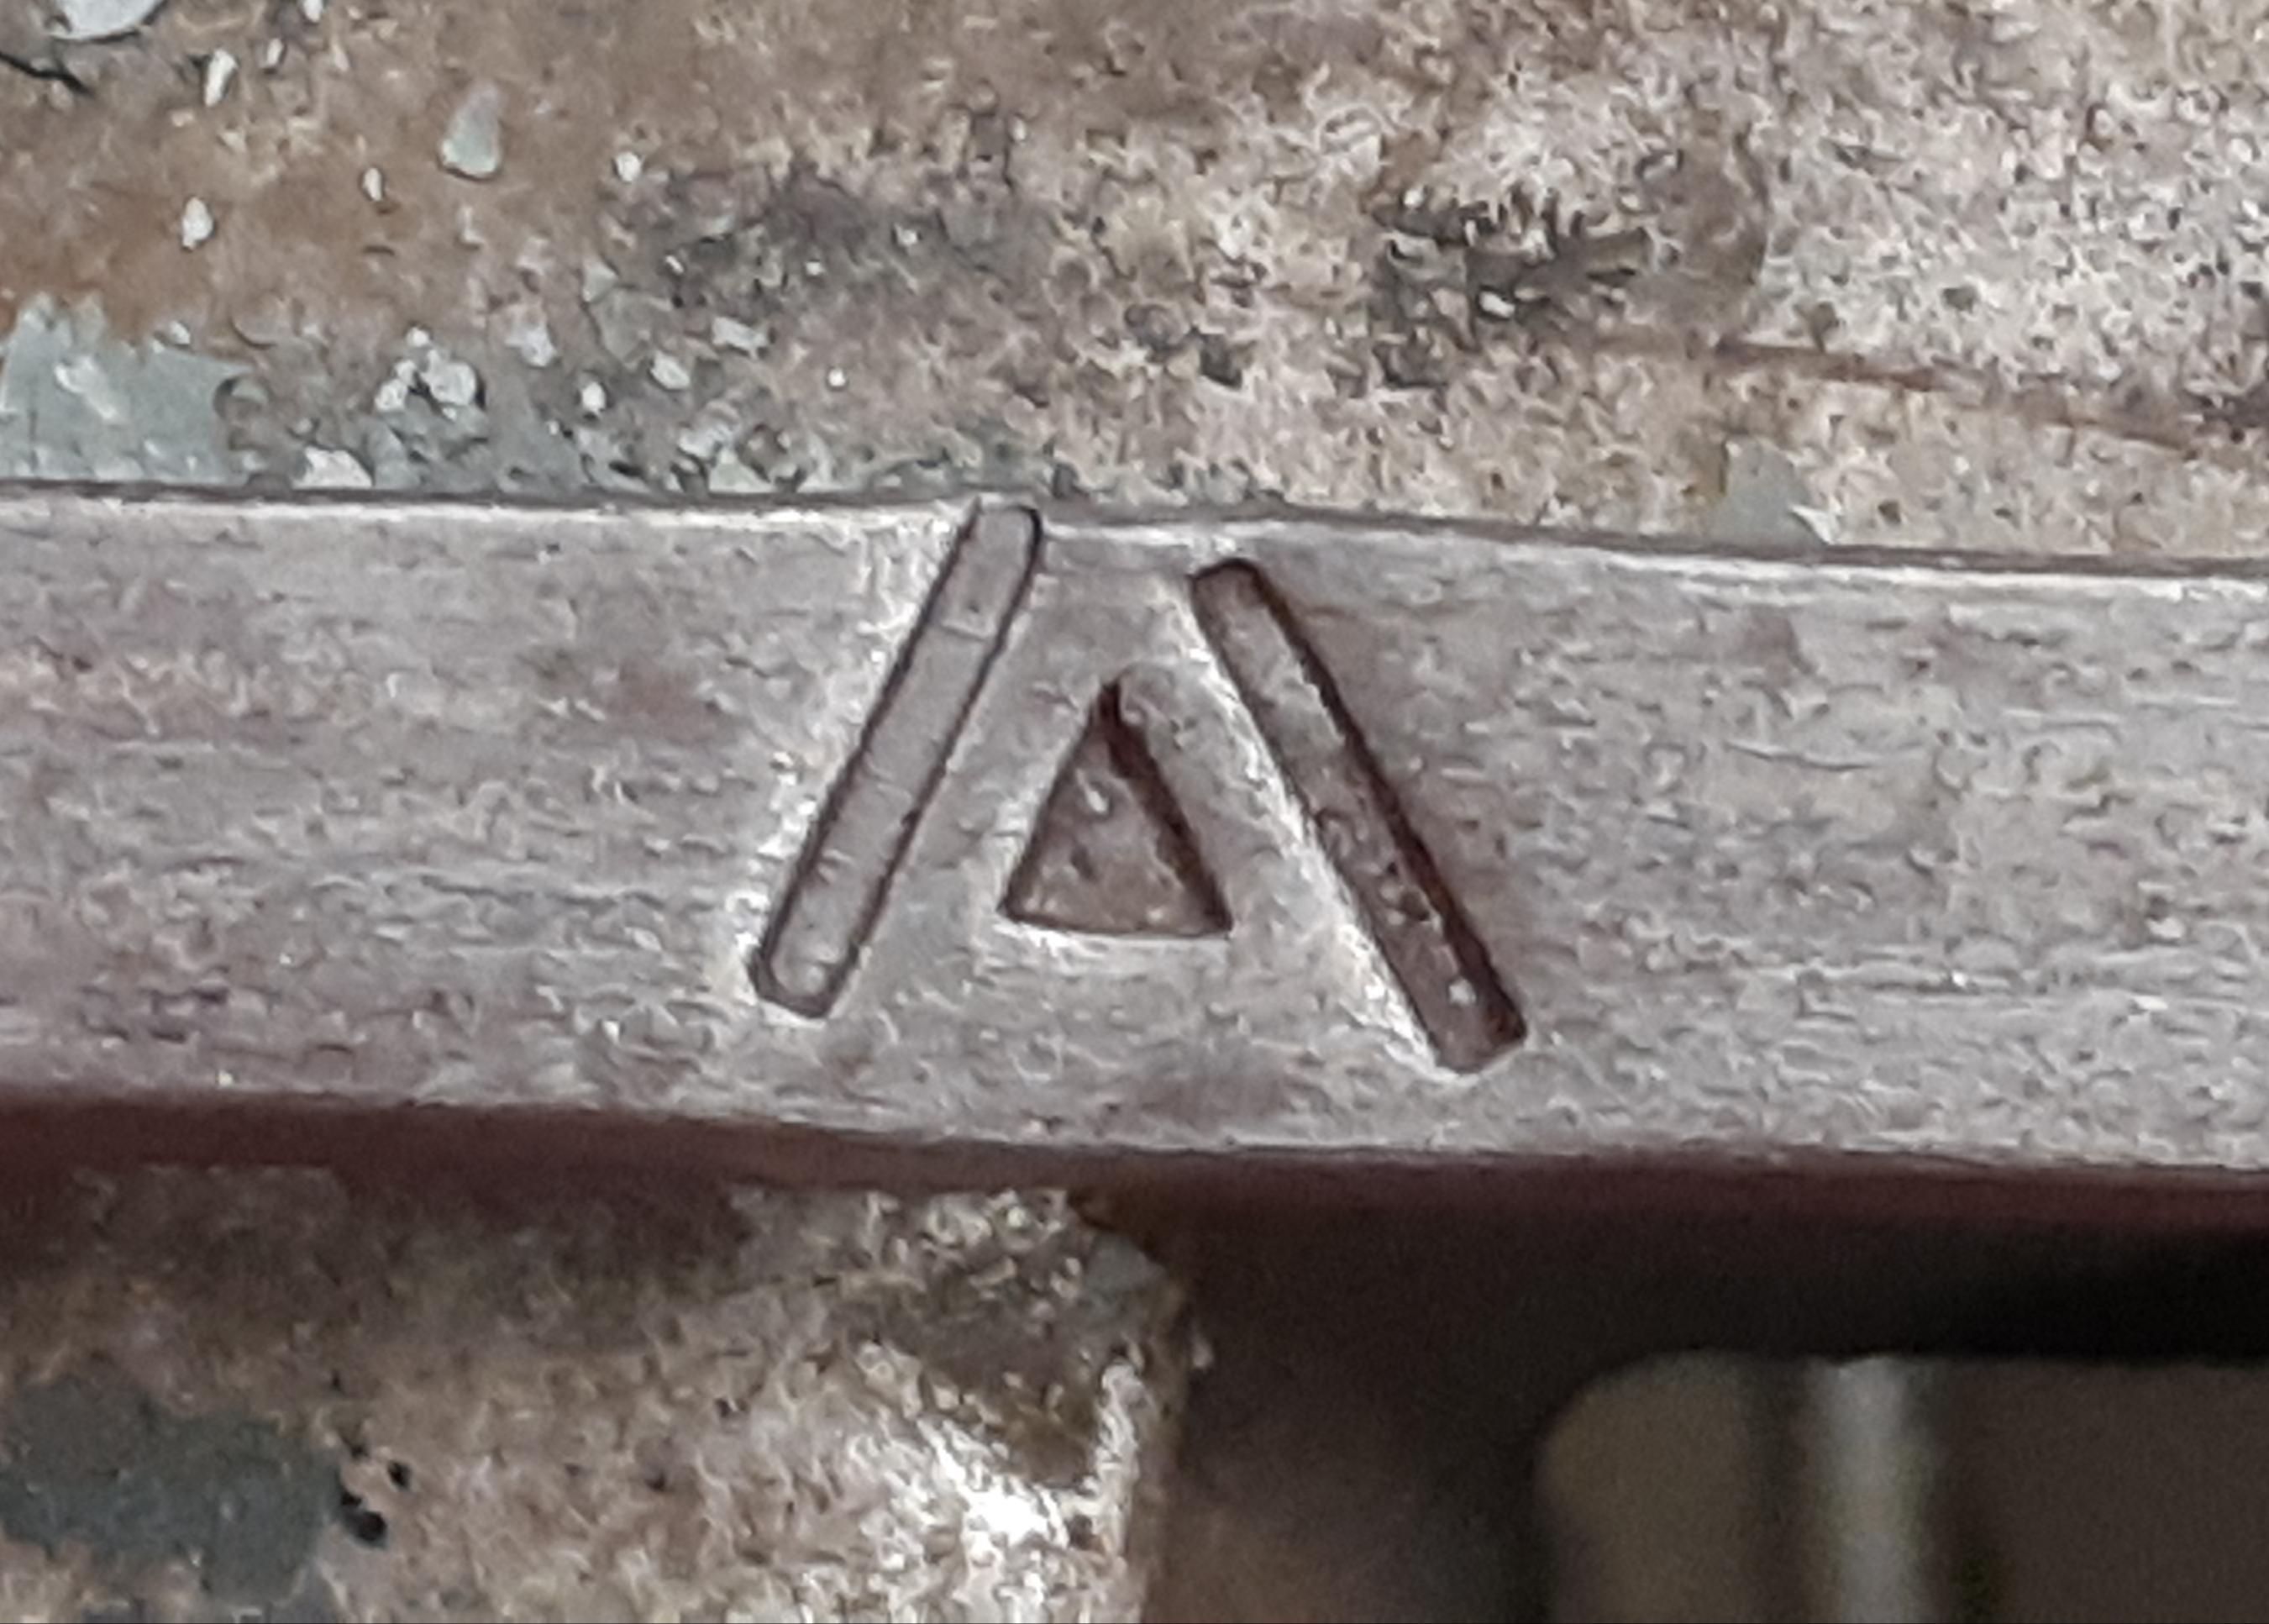
Tested them and the touch mark on a piece of 1/2" square. It is a fairly simple mark, a composite A. The alignment is a bit off, but I should get better with practice.
Then I started practicing forge welding. First attempt was a fail. I think the steel was not quite hot enough, and there may have been a little scale between the pieces - there were sparks shooting from the sides when I tapped them together. Next time I will add a little borax.
-
For most of my forging, my stock is smaller than 1/2" as well.
I burn about 1 kg of charcoal per hour of forging. It takes a bit more when I work with larger stock (take more heat) or if my work sessions are short (getting to an even fire and some wasted fuel at the end of the session).
-
Very nice hheneg!
-
I don't have trouble with fuel blowing away, unless I am running low on fuel in the forge. When it happens, I just add a bit more charcoal (or a small piece of scrap wood) on top of the stock.
Note that I have angled the tuyere down a little bit (about 5 degrees). That may be helping. So is the fact that I am using box bellows. Charcoal likes a gentle breeze.
-
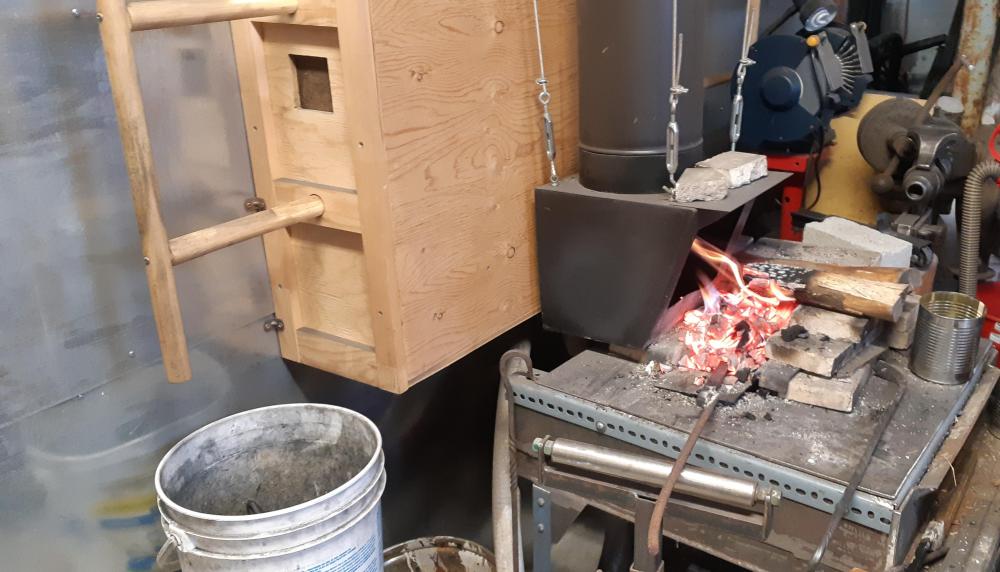
I use bricks on two sides of my firepot to contain my charcoal when I need to pile more on, as you can see on the following picture. For longer stock that I need to heat in the middle, I make a crack between firebricks on the far side so that the stock can pass through. When it is narrow enough, the coal doesn't spill anywhere. (I can take another picture later today showing the fire bricks on the far side if you want.)
If I had to do this often or with much longer stock, I would probably use a larger forge table, with more surface area. This would prevent coals from spilling too far and I could then rake them right back into the fire. Essentially it would be a trench between added fire bricks, with the fire in the middle.
But essentially yes, I am only heating up about 6-8 inches of steel at a time with my current setup. I could probably manage at least twice that long with a slightly modified configuraiton. For longer, I would need a different forge and tuyere.
-
What are the dimensions of your cone mandrel, JHCC? Nice work!
-
I've read several times (and from wise ones) that charcoal works better with a side blast. Which is why I used a JABOD at first. It helped be gauge how much depth worked best for my purposes. When I got tired of repairing the burn area I welded up that side blast firepot. My first version was a bit too deep, using more charcoal, which is why I lowered the sides a bit.
The fire bricks are useful when I need a deeper fire.
-
It works just fine for me, with about 3" between the top of the tuyere and the stock lying flat from one side of the firepot to the other. Any closer and I get a lot of scale on the steel.
I burn about 1 kg of charcoal per hour with this setup, with a piece of wood (mostly maple) added on top of the charcoal once in a while.
-
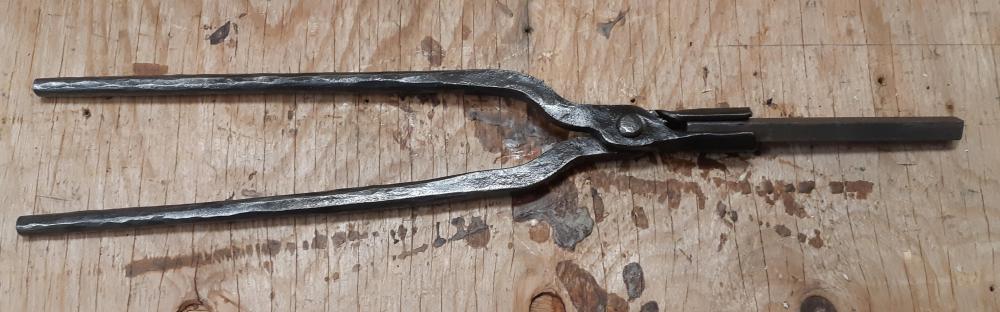
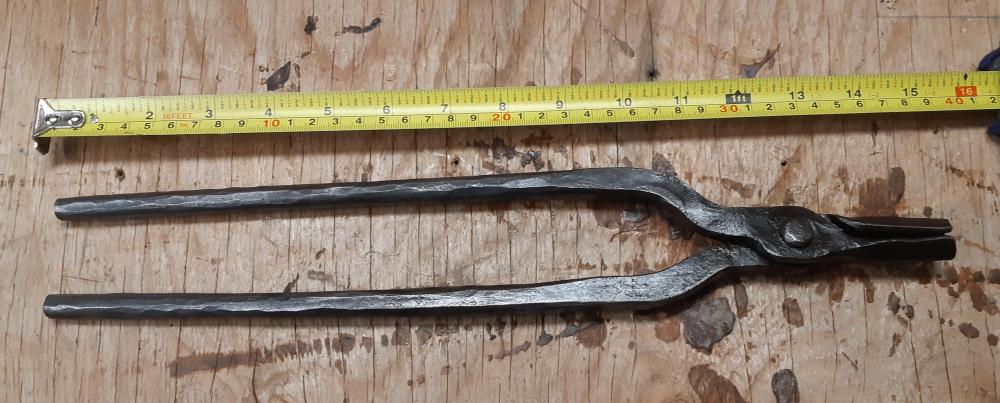
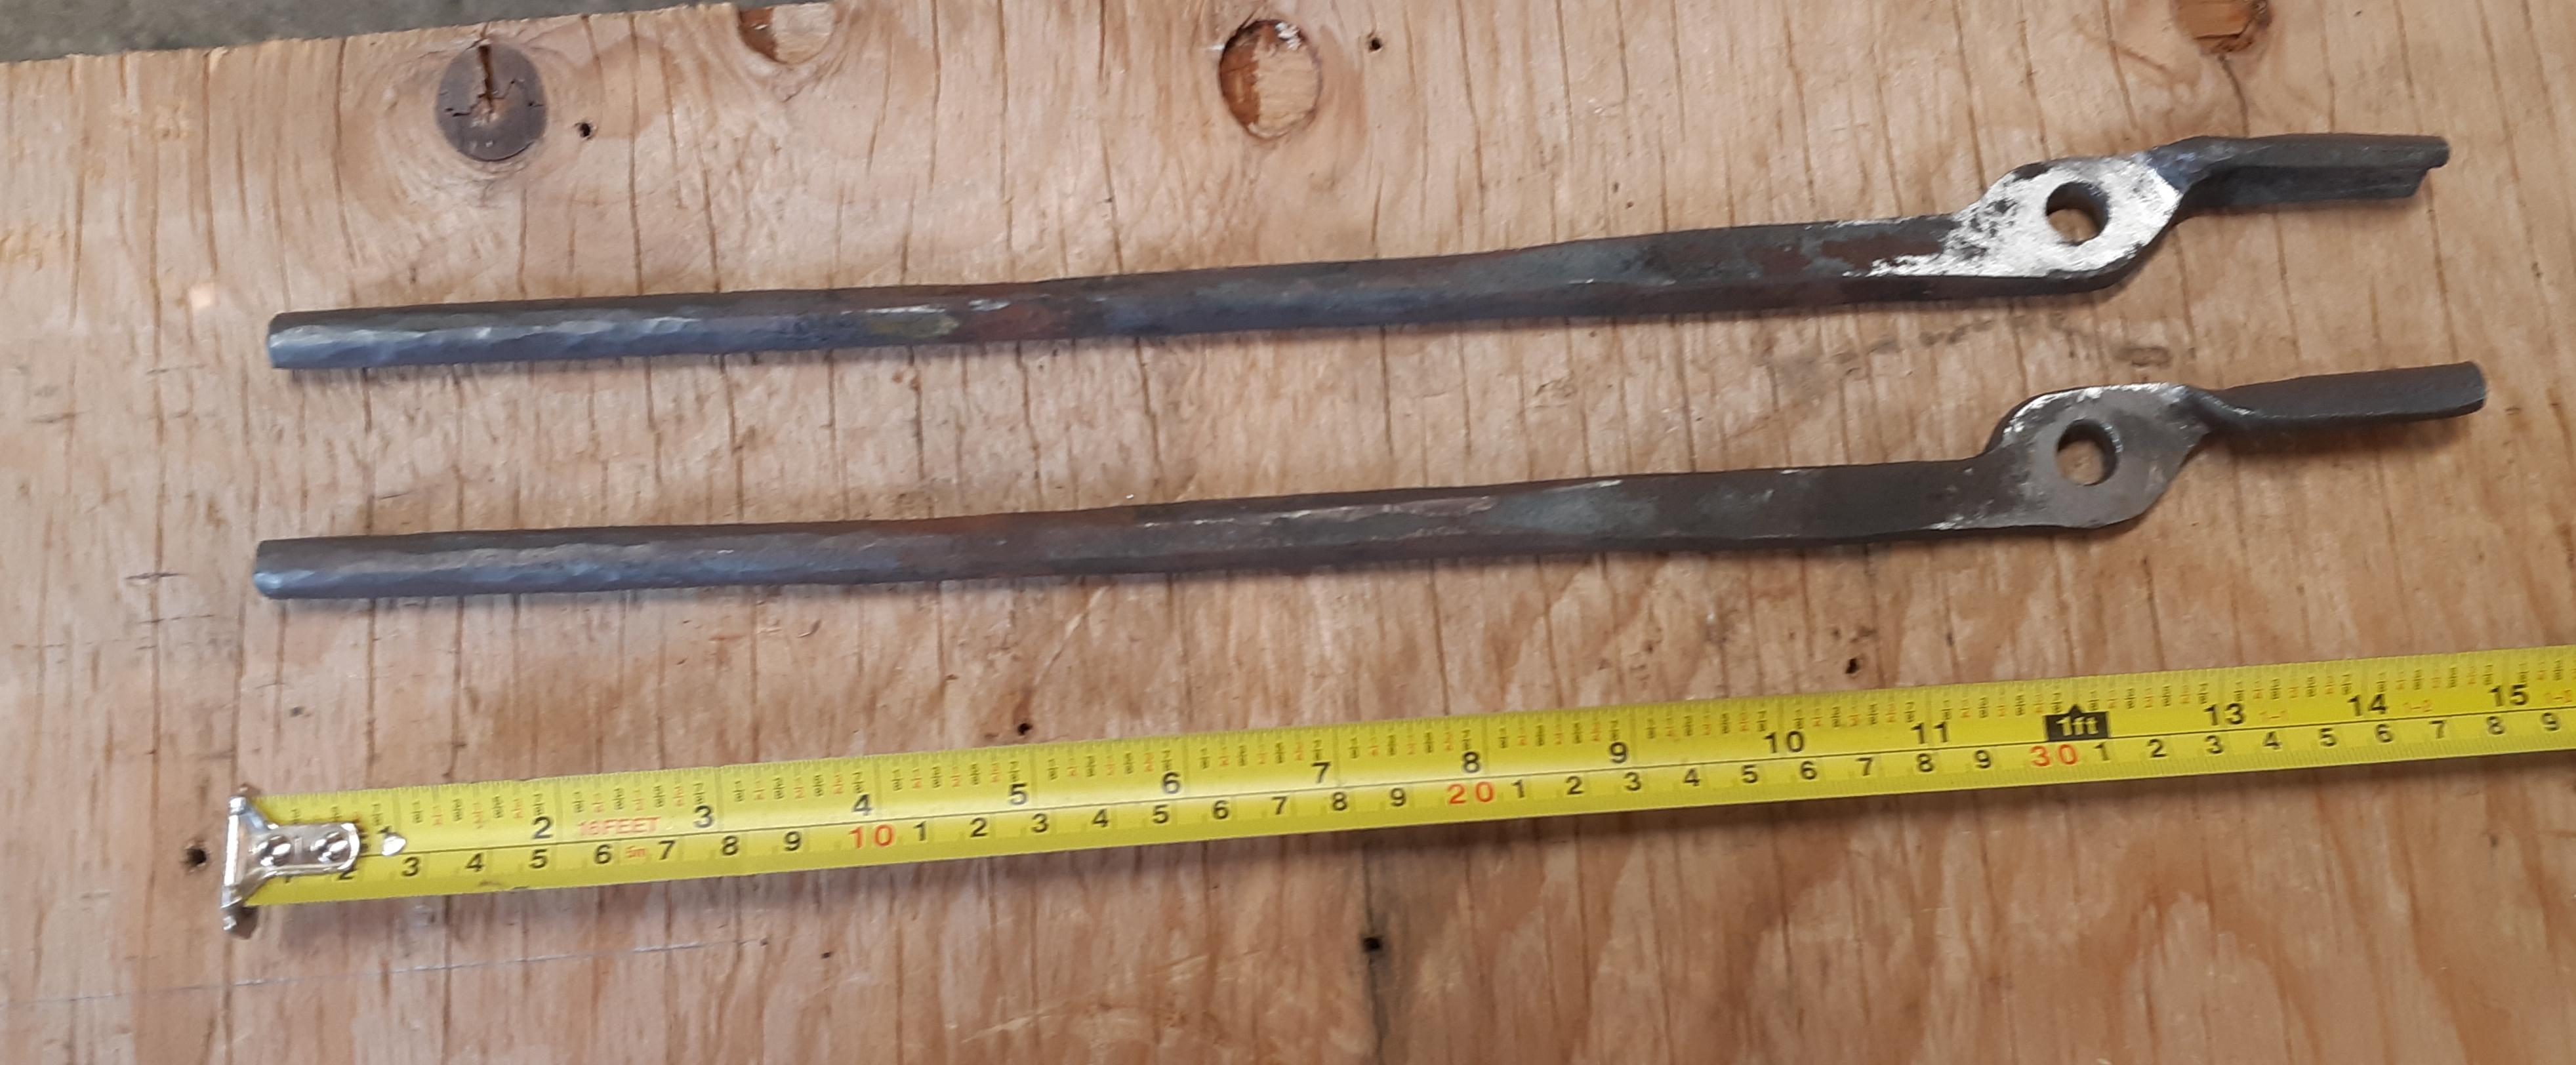
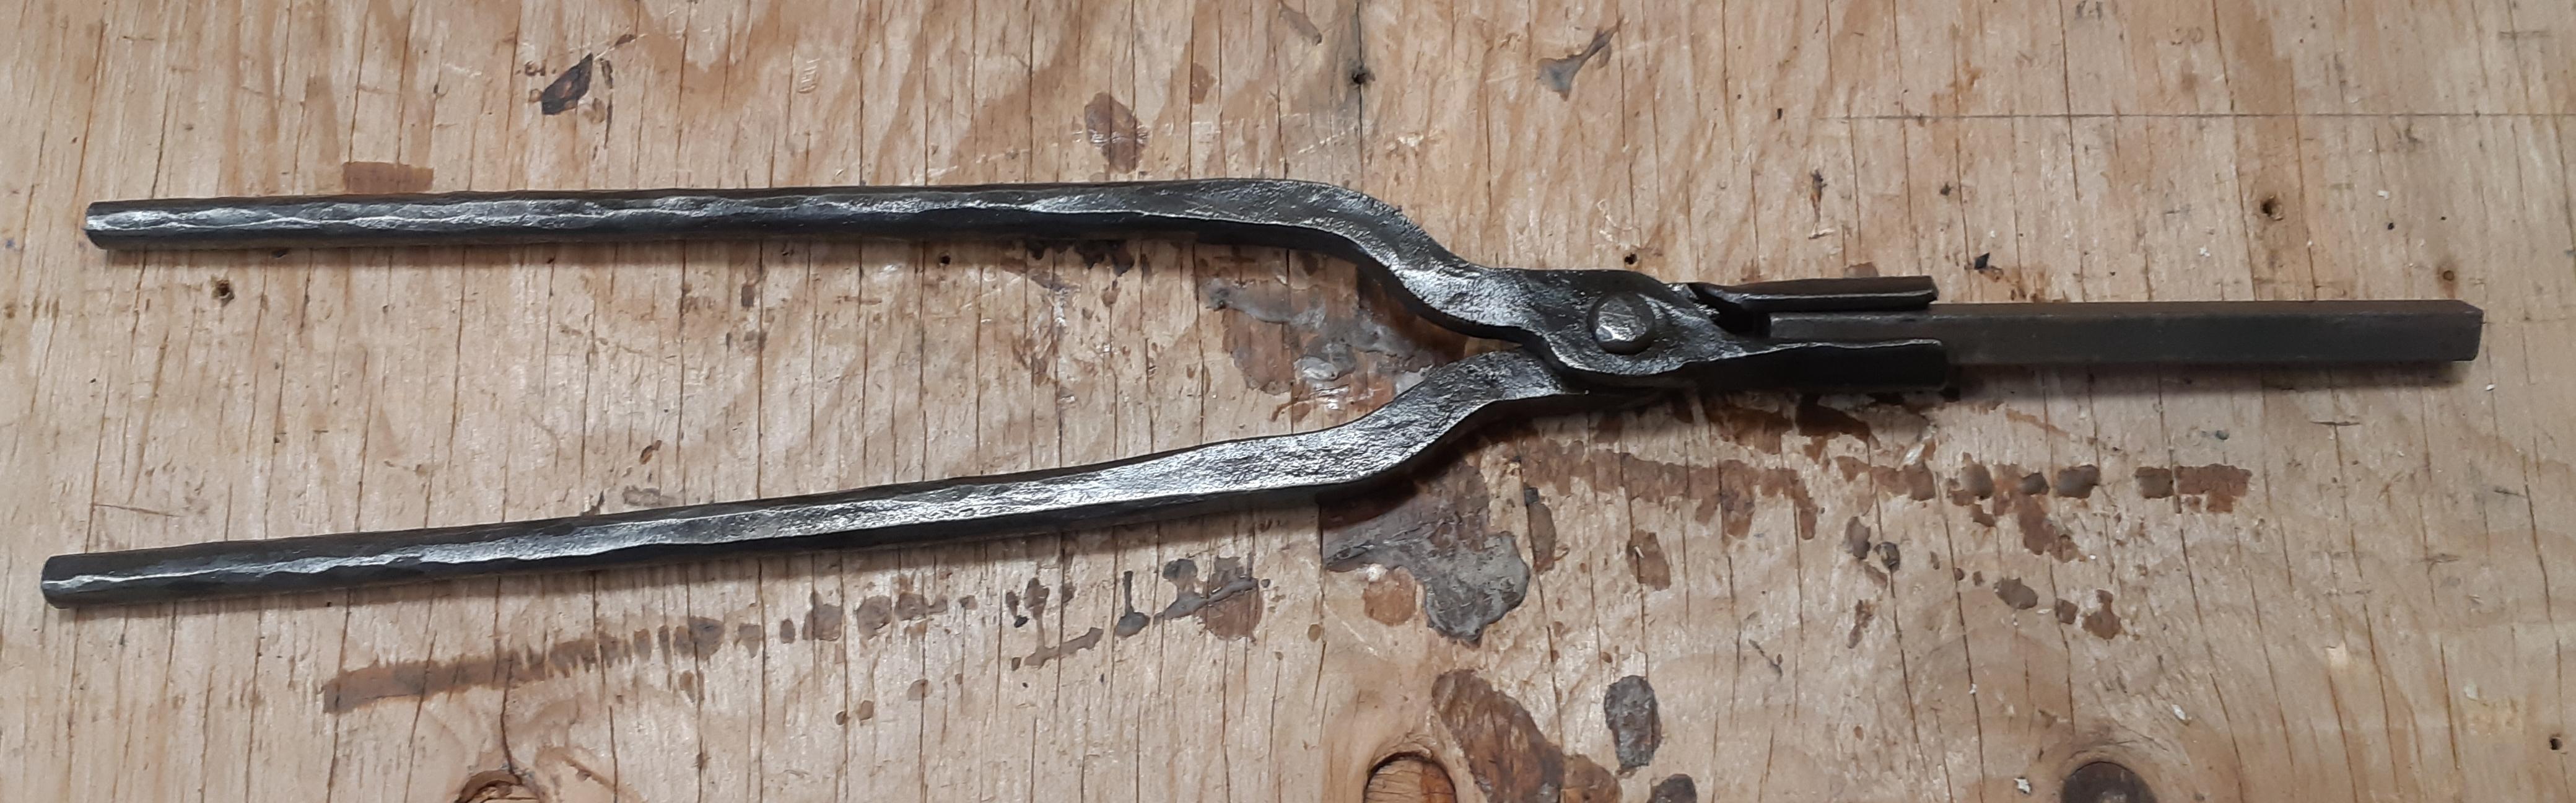
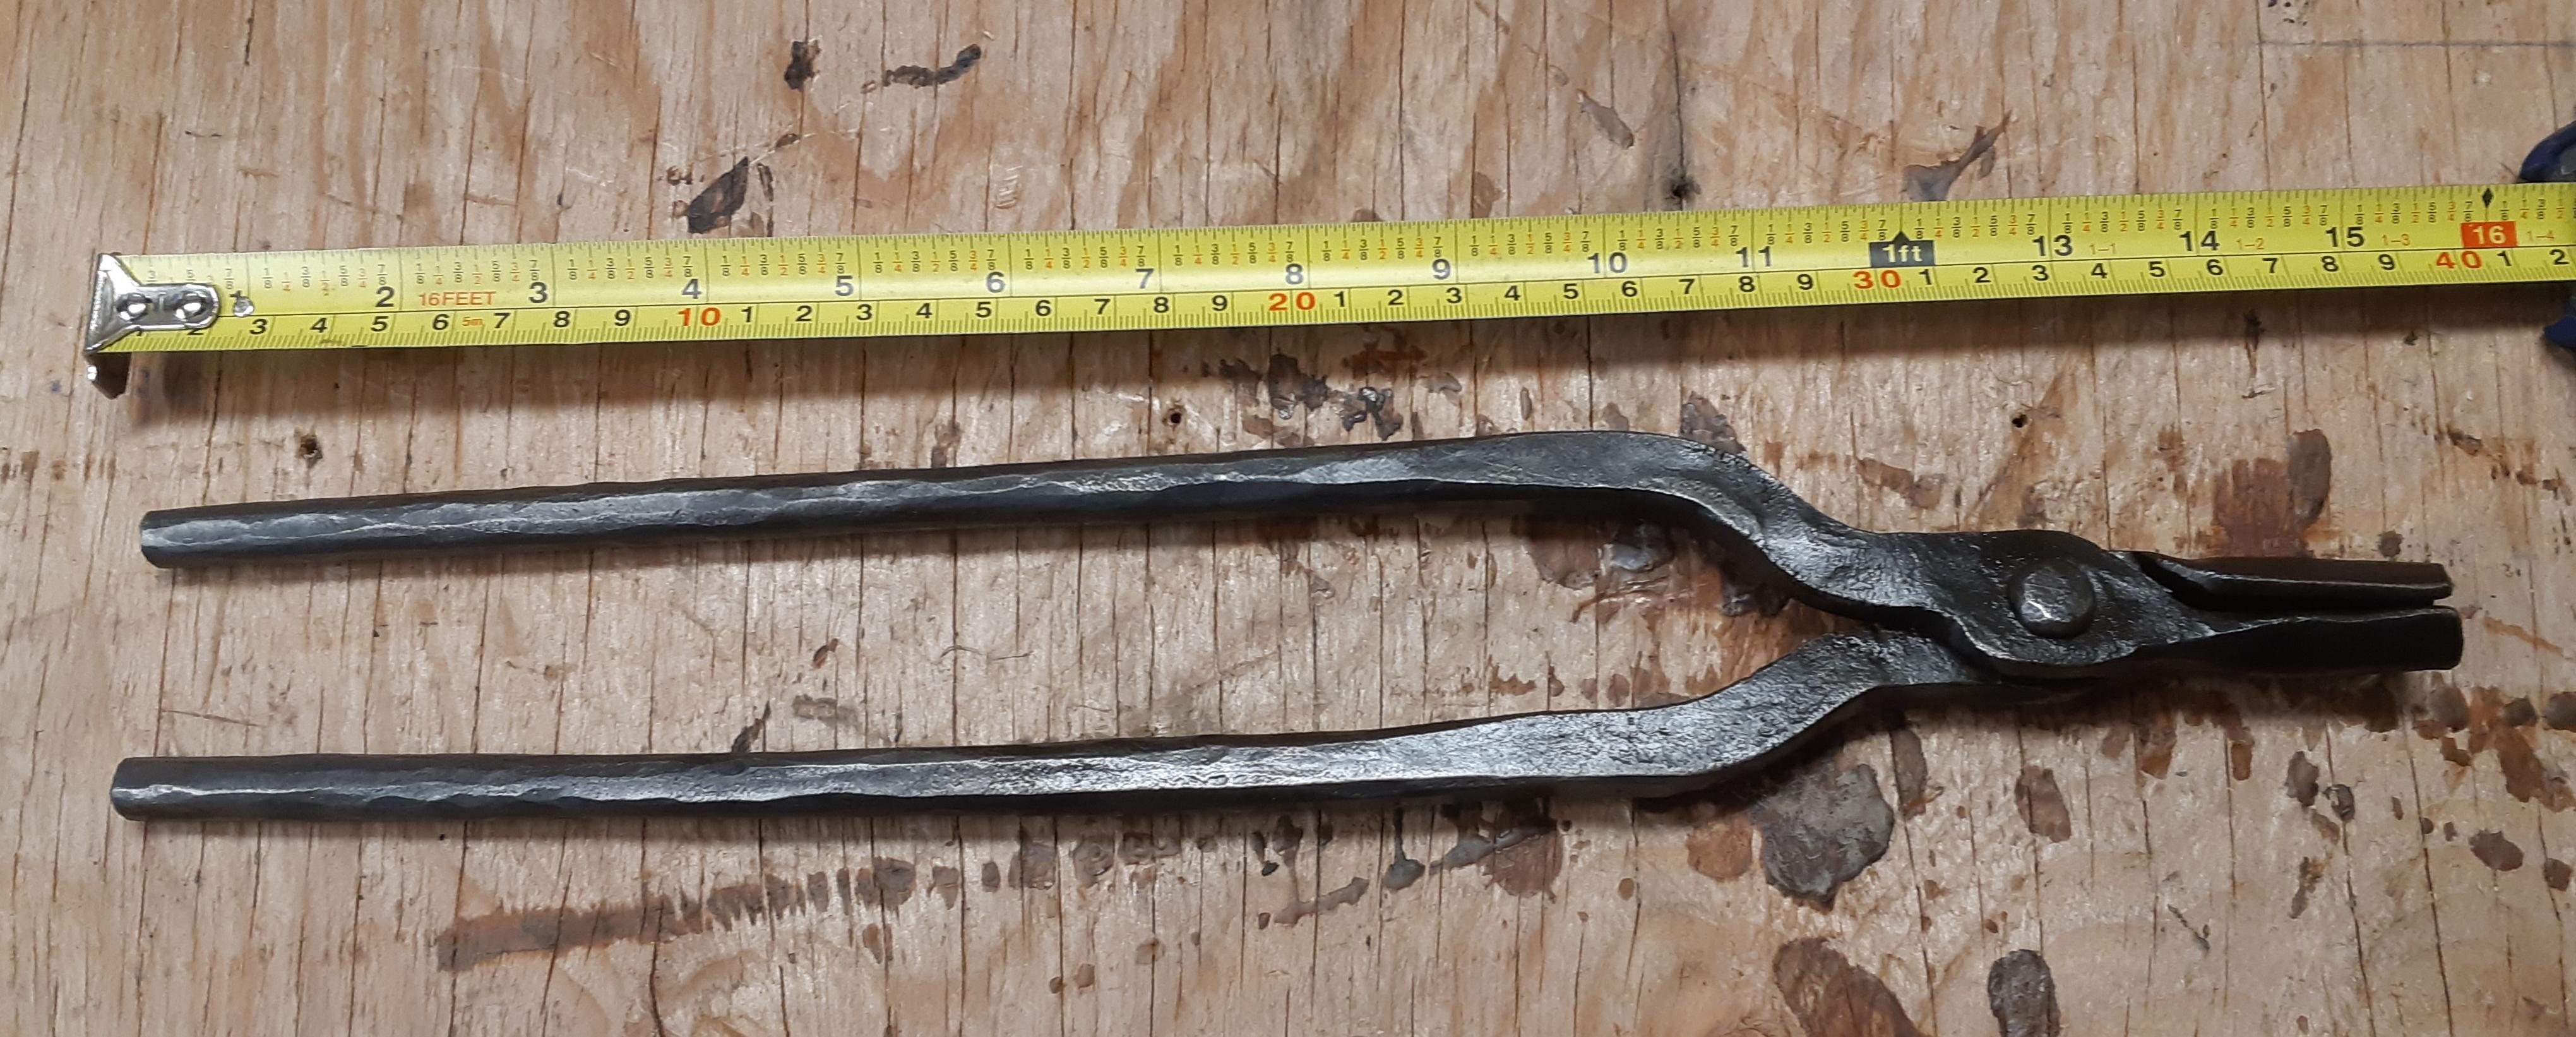
Finished my tongs tonight. I didn't like the way the reins angled, so I curved them a little so that they would be parallel to each other when grabbing stock (next time I will do that before rivetting them). Adjusted them for 3/8" bars. Wire brushed then coated in beeswax.


What did you do in the shop today?
in Blacksmithing, General Discussion
Posted
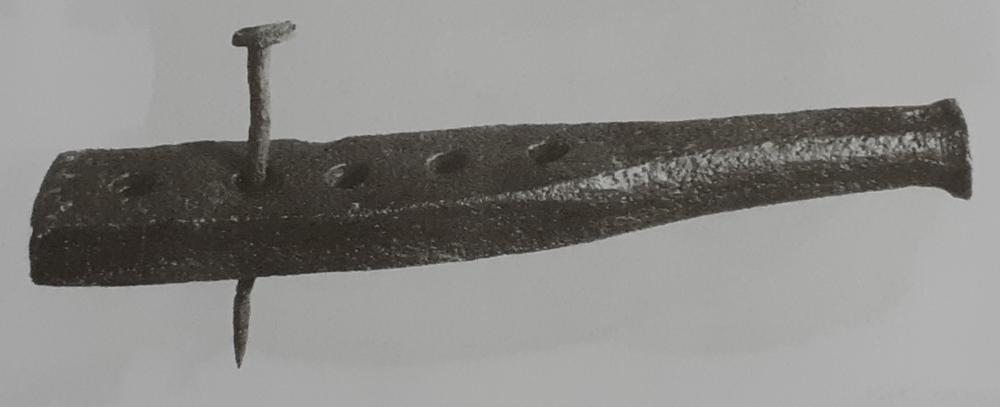
Finished the nail beader based on the Mastermyr tool. This anchor steel was tough to move! Took almost everything I had to bring it to shape.
Drilled the holes, from 1/8" to 1/4". No way I was going to trust any of my punches to make such small holes in steel that tough and thick.