olfart
-
Posts
186 -
Joined
-
Last visited
Content Type
Profiles
Forums
Articles
Gallery
Downloads
Events
Everything posted by olfart
-
And don't let goats kiss you on the face or neck, as my wife can attest. She couldn't figure out how she got poison ivy on her face and neck until I pointed out the 'goat kisses'.
-
These two are connected only by the nails that held them (not very firmly, I'd guess) on the horse. No sign of welding, forge or otherwise.
-
Driving down our favorite path from town, my wife looked down and said, "There's a horse shoe". I stopped and backed up to collect said shoe and discovered it's a two-fer. Strange. I never realized horses got retreads.

-
Stanley's a work of art, Aus! The graceful curve of his tail makes him look alive.
-
Das, that spider is altogether too cool! I really enjoy your creative efforts.
-

What did you do in the shop today?
olfart replied to Mark Ling's topic in Blacksmithing, General Discussion
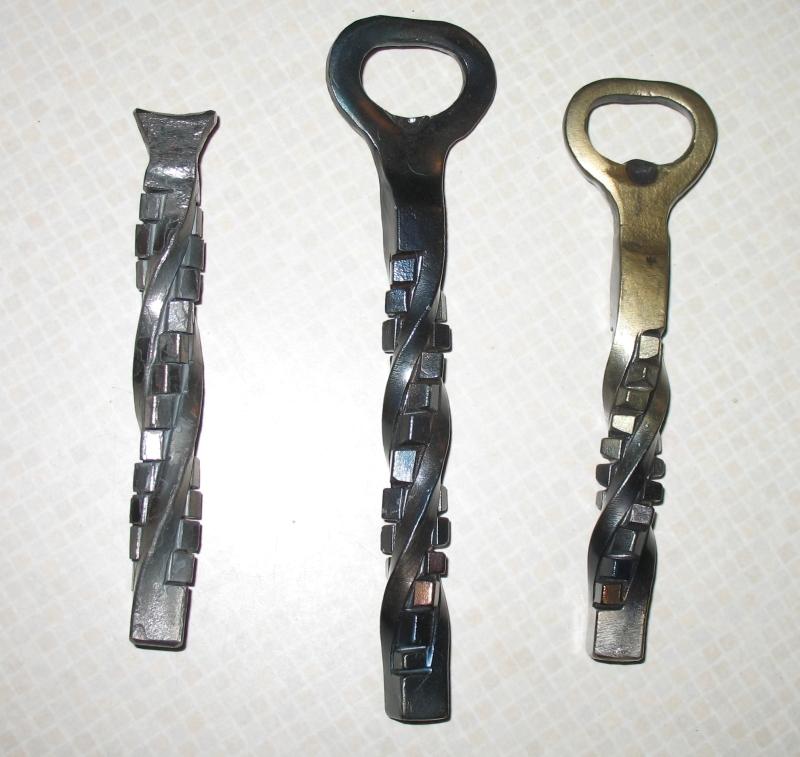
Thanks, Aus! Being a bottle opener noob, I just went with somebody's instructions and hoped for the best. The parent stock was 1/2" (12mm) square, and I beat it down to 1/4" thick before punching. The middle one's tab is virtually non-existent due to my boo-boo in punching the slot, but the third one has a nice robust tab that won't wear out on the first six pack. Nice looking lifter-outers you got there. I like the flat twist in the middle of a round bolt. -
What did you do in the shop today?
olfart replied to Mark Ling's topic in Blacksmithing, General Discussion
Since I don't have any bottles to open, it's anybody's guess. The first one would only open a bottle by breaking it. The second likely would open one with a little effort. The third, I have no doubt will open bottles just fine. It's going to our UPS driver today, so I'll have to ask him on his next trip if it works OK. Thanks. -
What did you do in the shop today?
olfart replied to Mark Ling's topic in Blacksmithing, General Discussion
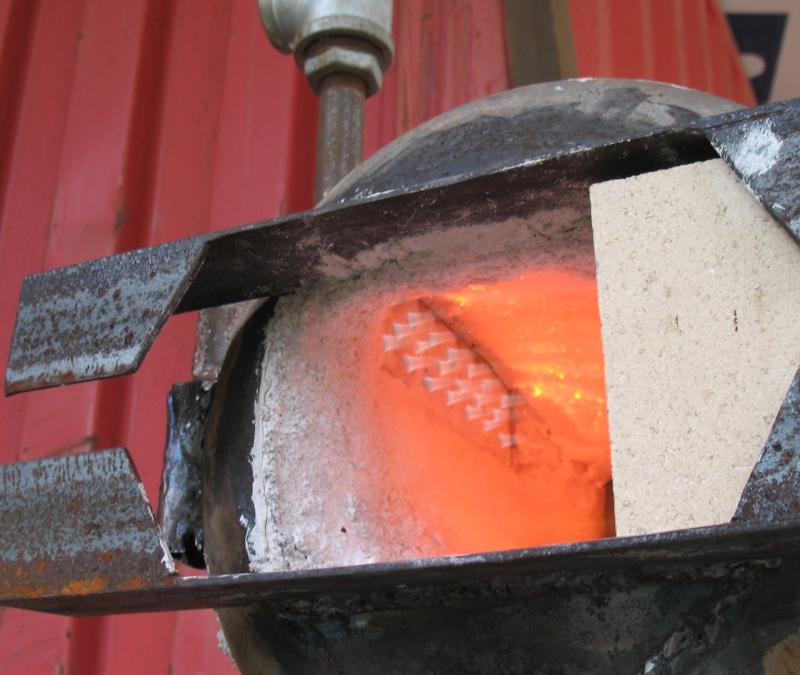
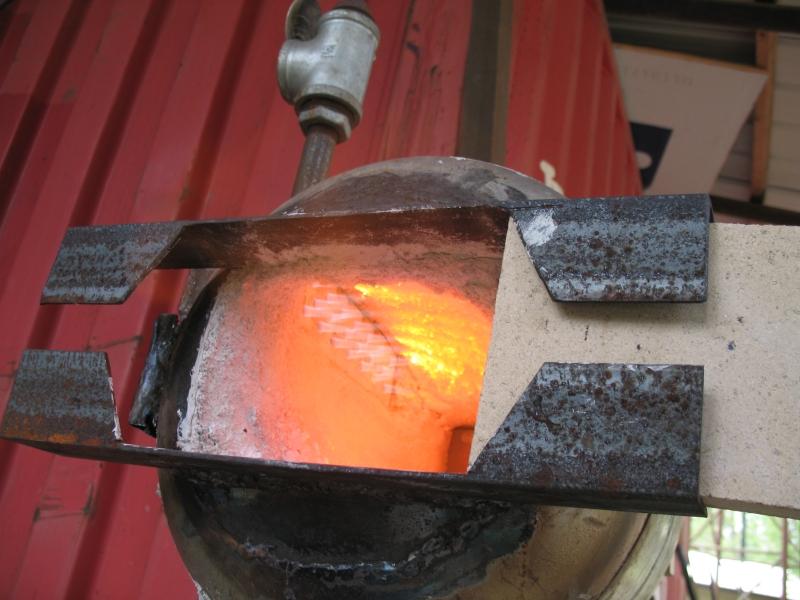
I finally got my new forge with ribbon burner operational, and this is the first project from it. Having never tried to make a bottle opener, I decided to give it a whirl. From left to right, the first prototype, second prototype and sorta-finished project. The first prototype didn't go well because I messed up on punching the slot. Didn't have a proper slot punch, so I improvised. Bad idea. Second prototype I modified the slitter I had used on the first one, but I still punched a sloppy slot. Third one, I made a proper slot punch and managed to keep it pretty much in the same place to get the slot punched. Now all I need to do is build a bunch more of them.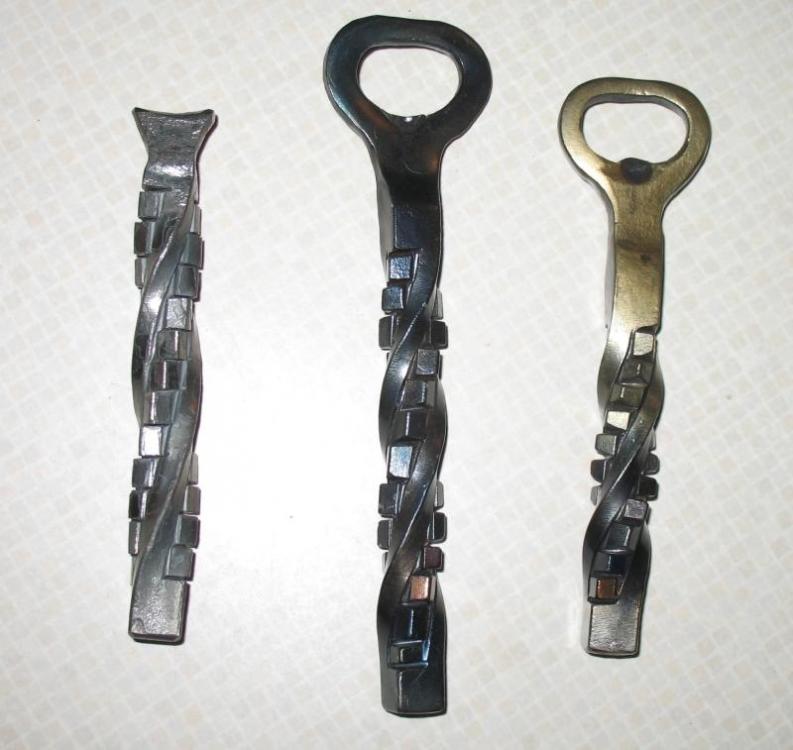
-
NOW you tell me! No problem, I just used my 1" brush very carefully.
-
Thanks for your help, Frosty! Couldn't have done it without you and Mikey and all the research and experimentation you did. Today's project was getting the Matrikote applied. I took the burner out so I could paint the face of the burner with it and not plug the holes. Unfortunately my brush looked more like a mop halfway through the project, so it became more a matter of smearing the Matrikote on than painting it on. All's well that ends well, and now the whole interior is coated with Matrikote... and my hands, and my arms up to the elbows. I hope it doesn't have to be artistically beautiful to work.
-
Here are a couple of pics after installing the NAMPB and plastering the inside of the forge with Kastolite 3000. First is running at 1.5 psi, second is at 10 psi.
-
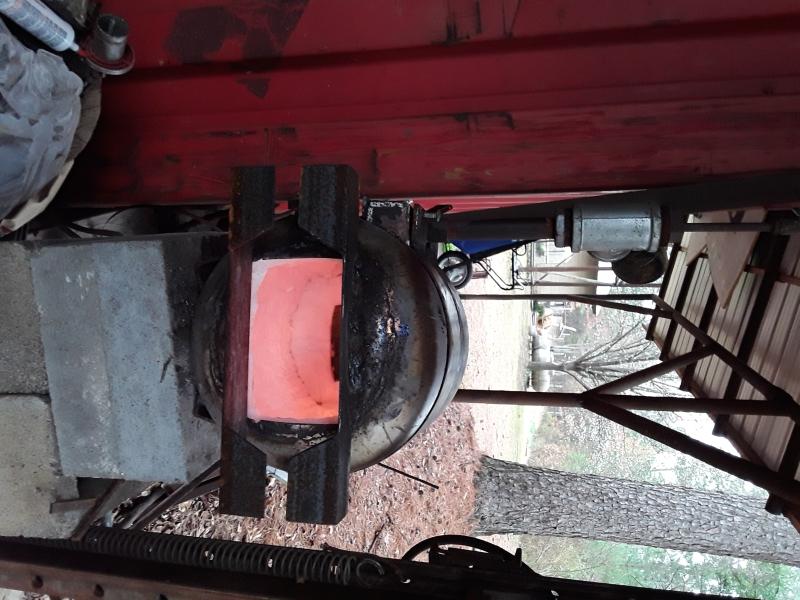
The tang of the hot cut was orange (you can see the end of it under the anvil), and he was setting the shoulder on it. That was a brand new anvil, and he was giving it a workout.
-
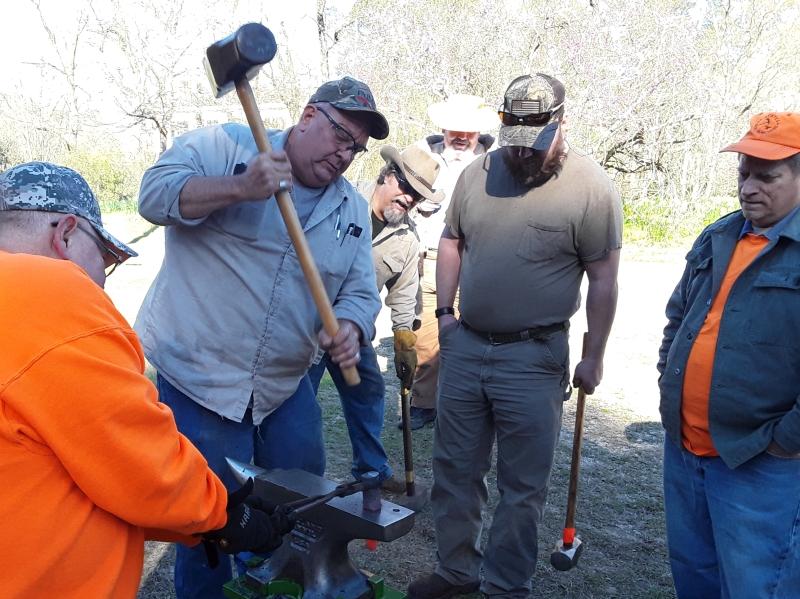
This dainty little thing made its appearance at the annual Jonquil Festival at Old Washington State Park (AR) last weekend. It tips the scales at 32 pounds, and he swung it enough to drive the anvil stand 3" deep in the ground. He was making a hardy hot cut from a piece of RR car spring. Our club, Four States Iron Munchers, does demos at the event every year. A couple of other folks tried the hammer, but I didn't even pick it up. I may be silly, but I ain't stupid.
-
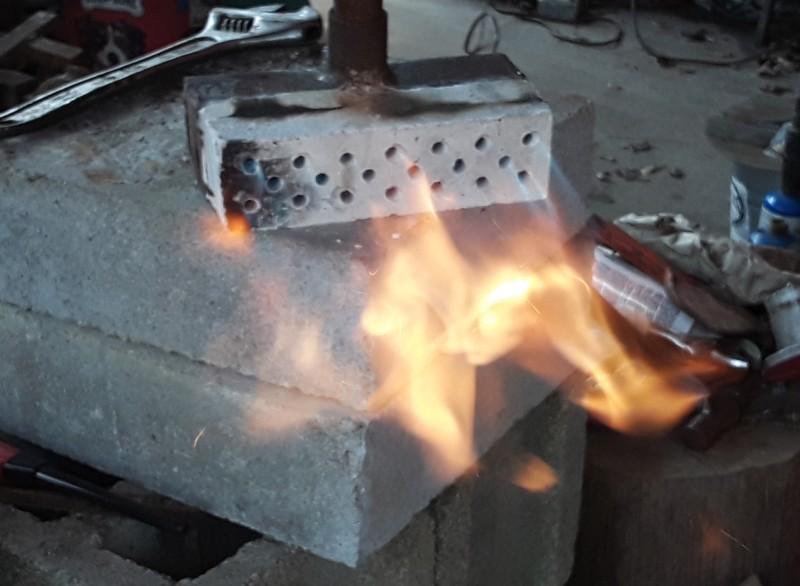
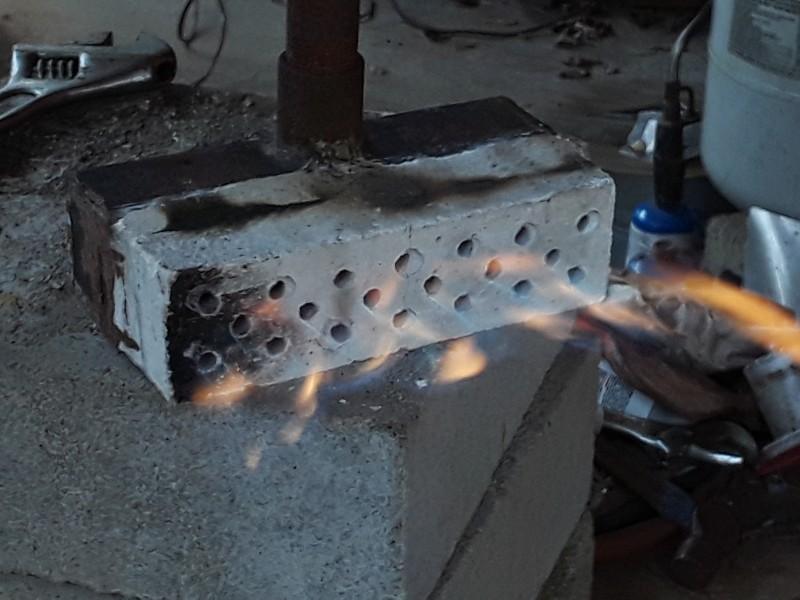
No steel yet, this burn was just for curing the rigidizer on the first layer of Kaowool. There was no visible dragon's breath in daylight at 5psi. It also maintained a steady flame at about 1 psi.
-
First image is the rest of the burner I was using yesterday. The bell reducer was an attempt to streamline the flow into the mixing tube, but it just didn't work. Even after changing to a smaller mig tip, it was running way too rich. The second image shows the new forge with the burner from my brick pile forge driving the multiport burner head. It made a world of difference when I got rid of that bell reducer. I used it to fire the first layer of Kaowool, and the flame swirl in the forge looks amazing. Sorry you have to hold your computer sideways to view the images.
-
Finally got the fittings to connect my burner to the gas bottle, so here are a couple of pics. First is after it warmed up a couple of minutes at 5psi. Second is at 2psi.
-
Spectacular work!
-
Thanks for that bit of enlightenment, Mr. Slag!
-
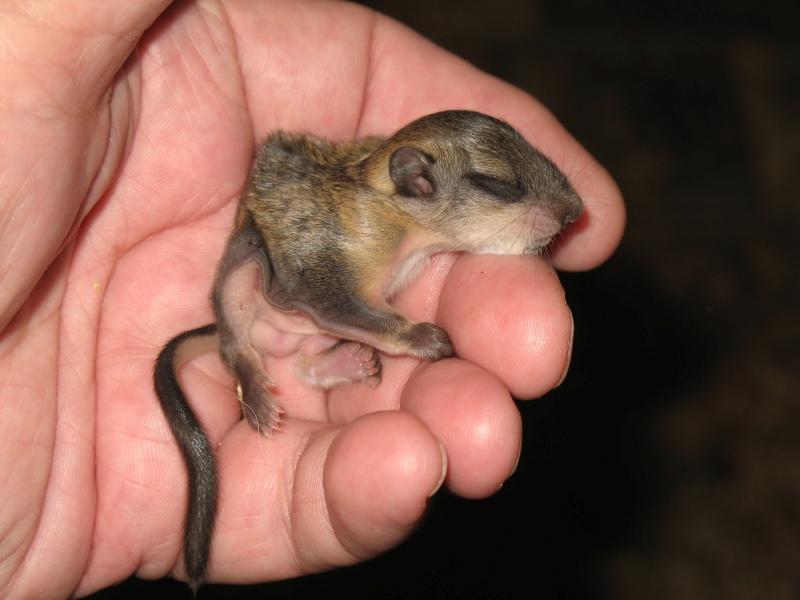
Yep, I'm sure they're distant cousins. Your glider appears to have a longer face and bigger ears. This family apparently lives in a huge pine tree in our goat pen. I've been finding shucked pine cones all over the pen for years. First time I've seen one of the occupants, though.
-
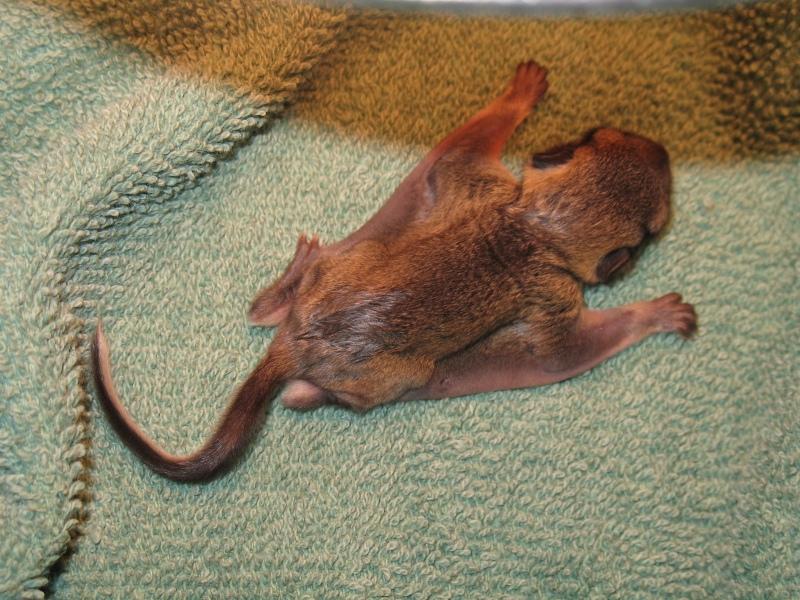
This little guy's not quite in my smithy, but the cats deposited him on the back porch yesterday afternoon. I brought him in and put him in a box with a lamp for heat, and he's eating goat milk. I saw two of the cats on the porch studying something under a hassock, so I went out with a flashlight and looked. I saw the little guy's mama staring back at me. My wife rounded up the cats and put them in the garage while I brought the little guy out and put him as far back under the hassock as I could reach, hoping she'd take him home during the night. No such luck. She was gone this morning, but he was still there. Meet Ruckus, Jr., the flying squirrel... and his mama.

-
One might say that. In fact, you did!
-
That would make a great tag line!
-
What did you do in the shop today?
olfart replied to Mark Ling's topic in Blacksmithing, General Discussion
Or lying on the shop floor wishing Deb had stayed home to call the ambulance... Be careful out there! -
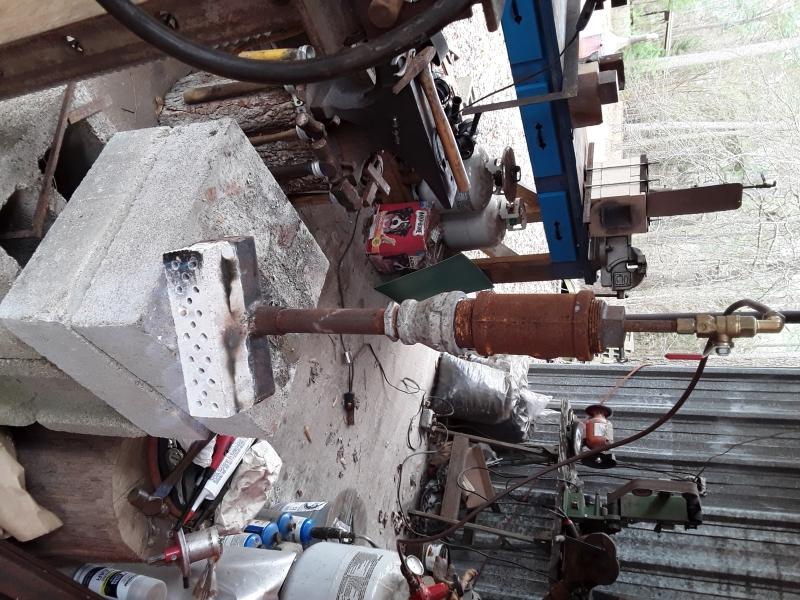
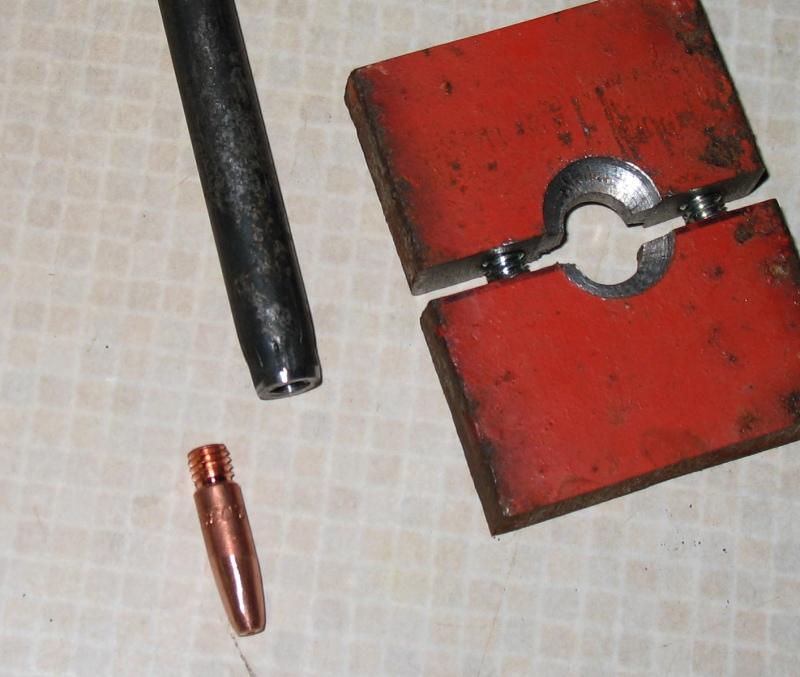
Living in the boondocks, it's often hard/impossible to find some of the plumbing needed to build a gas forge. After looking unsuccessfully in every hardware/plumbing store in this county for a 1/8" schedule 80 pipe nipple, I settled on a run-of-the-mill schedule 40 nipple. The .035 mig tip rattled around like a BB in a boxcar inside that nipple, so I made a swaging die to use in my press and squoze the end of that nipple (after cutting off the threaded end) down far enough to thread it with a 1/4 - 28 tap. Worked like a champ.
-
Al, I followed Wayne Coe's instructions for what he calls Ribbon Burner Castable #2. Wayne's instructions were to leave it in the form for several days, then carefully remove the sides and bake it before removing the bottom. I baked it at 350 for an hour, then went to 500 for another hour and a half. That's about all the heat I could stand in the kitchen. It sat on the kitchen table for another couple of days before I set out to drill it. I bought the masonry bit Saturday and removed it from the package this morning. After chucking the bit in the drill press (set at its lowest speed) and securing the burner in the drill press vise, I proceeded very gently to apply pressure. The bit chattered in the hole somewhat, spitting out a few pieces of what I assume were aggregate, then I saw material spitting out the side of the burner where the hole had chipped out. I'll try drilling somewhere in the middle of the block and see how that does before I break it all out.