Michael Cochran
-
Posts
1,889 -
Joined
-
Last visited
Content Type
Profiles
Forums
Articles
Gallery
Downloads
Events
Everything posted by Michael Cochran
-
That book keeps coming up, I think it's about time I try to get me a copy.
-
I haven't seen that profile before. The only ones I saw were more like the profile of a wood chisel cutting edge, straight on the one side and the bevel/grind all on the one side. Are you planning on doing a laminate style or all one steel? I'd suggest one piece for now, I've heard laminate blades can be quite a headache if you're not ready for them. We have a master bladesmith on here, maybe he'll chime in with some helpful advice.
-
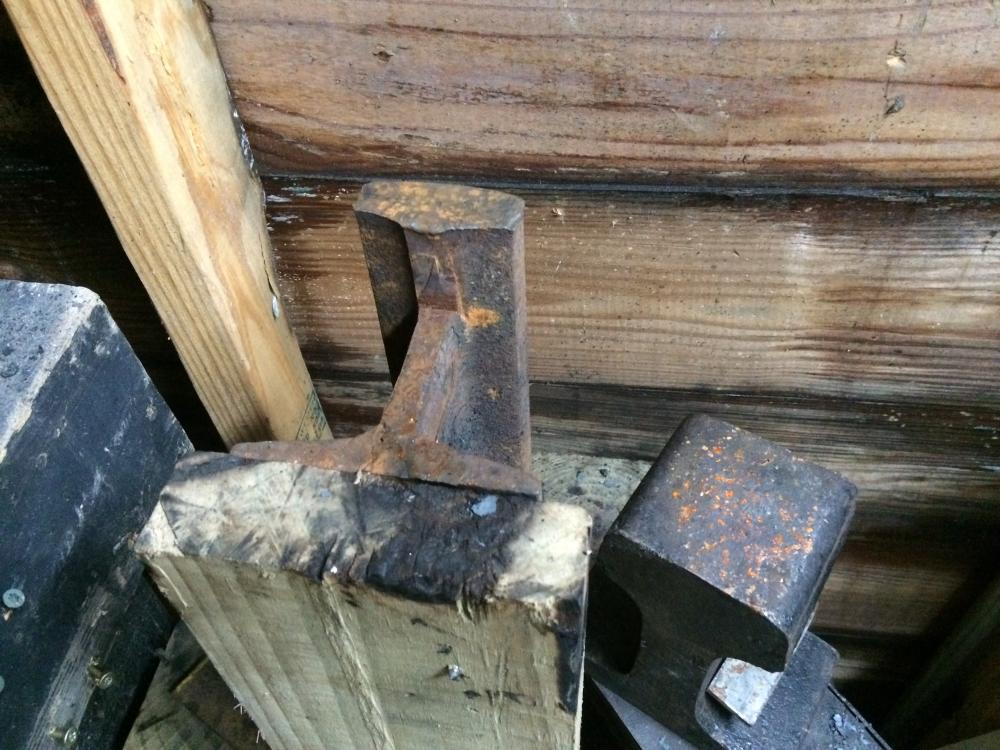
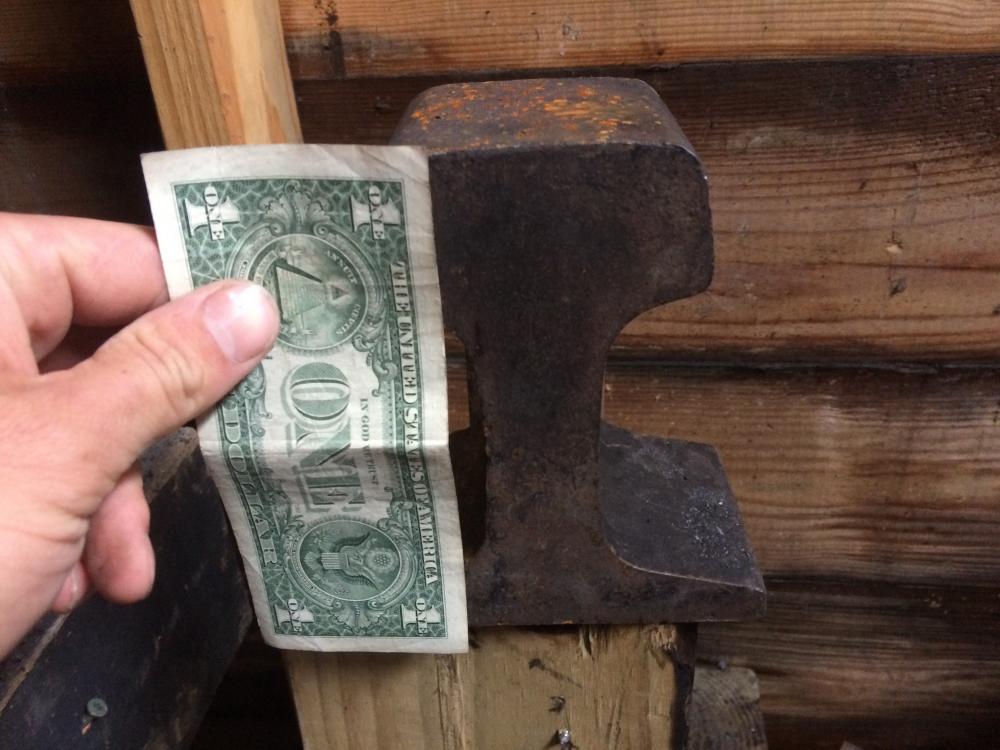
I just got home and went out and measured the t shaped part of my rail. It's 4 1/4"w x 3"t and the base of the rail is about 3/4" tapering down to about 1/4" the web itself is about 1/2" thick. Frosty, I'd like to hear more uses for rail if you have any off the top of your head. You guys have got me thinking about what all I can do with it and now I'm looking for more. i think I'm going to put my bick in a holder like Eddie suggested with the holder sitting in a plate mounted in front of my vertical rail. I'm going to try to cut out a notch from the web on that rail that will line up with the hole in the plate and provide additional support for my new collection of hardy tools. Well I guess it's not a collection since there's only one right now.
-
From what I've seen they are ground on the one side. I've thought about trying to make one of them using the laminated hc/mild technique but have yet to try. If you make one please show us how it turned out.
-
Thanks for that heads up, Eddie, I think I have some stuff at the house I can use to make one of those. Charles, thanks for the ideas about what to do with that rail stock. I really can't give any measurements for the bottom part, I've only measure the total height and the size of the 'head'. If I remember when I get home I'll see if I can't slip out to the shop real quick and measure the rest of it. If I had to guess its closer to 1/2 inch but I'm unsure. Like I mentioned in my intro thread, I'm mostly using it as a bottom fuller right now since the head is so small. I am trying to find the closets rail yard for some mainline as well as keeping a watch on my local scrap yards for something with a little more surface area.
-
Ok, I think I'm just gonna weld it to the plate. I have yet to figure out an easy way to upset steel, I always end up crooked and usually lose most of the upset by the time I straighten it back up. I've got plenty of clean up to do on it before I mount it. I'll share a picture this weekend if I get it done, unless the welds look that bad lol. Charles, are you saying to square taper the end opposite where I tried to make a round taper?
-
Thomas, im mostly doing it for more practice with hammer control. I'm also doing this since I tried forging a bottle opener and couldn't manage to forge the opening evenly or properly finish a fork I was working on. Not having a horn makes some things a little more difficult. frosty, can you make a suggestion how to shoulder it? I'm thinking upsetting the shank some and then forge the lower portion back into a taper.
-
I was wondering myself if I needed to put some kind of shoulder on the shank since I'm gonna be using is in a piece of plate. I'm really unsure how I'd do that so I better get to researchin lol.
-
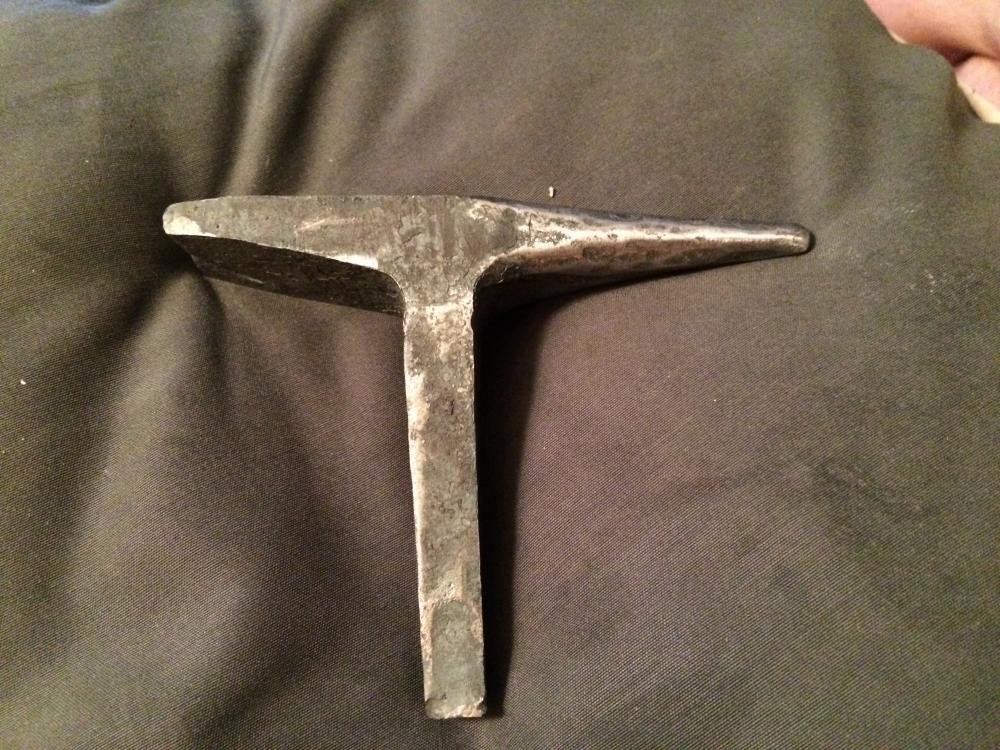
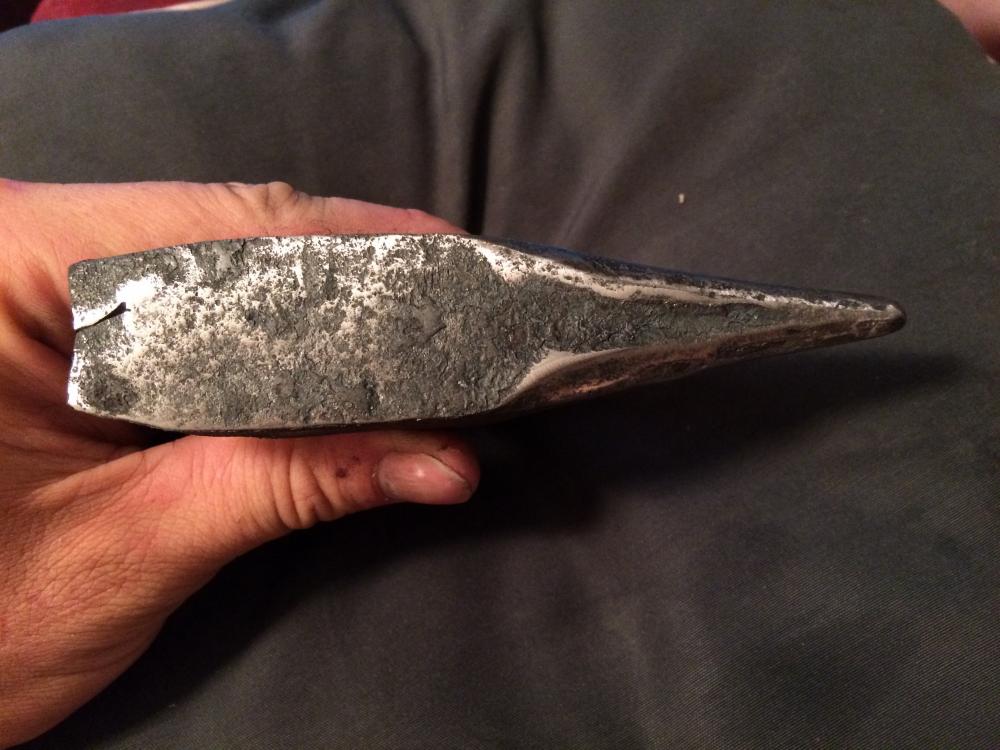
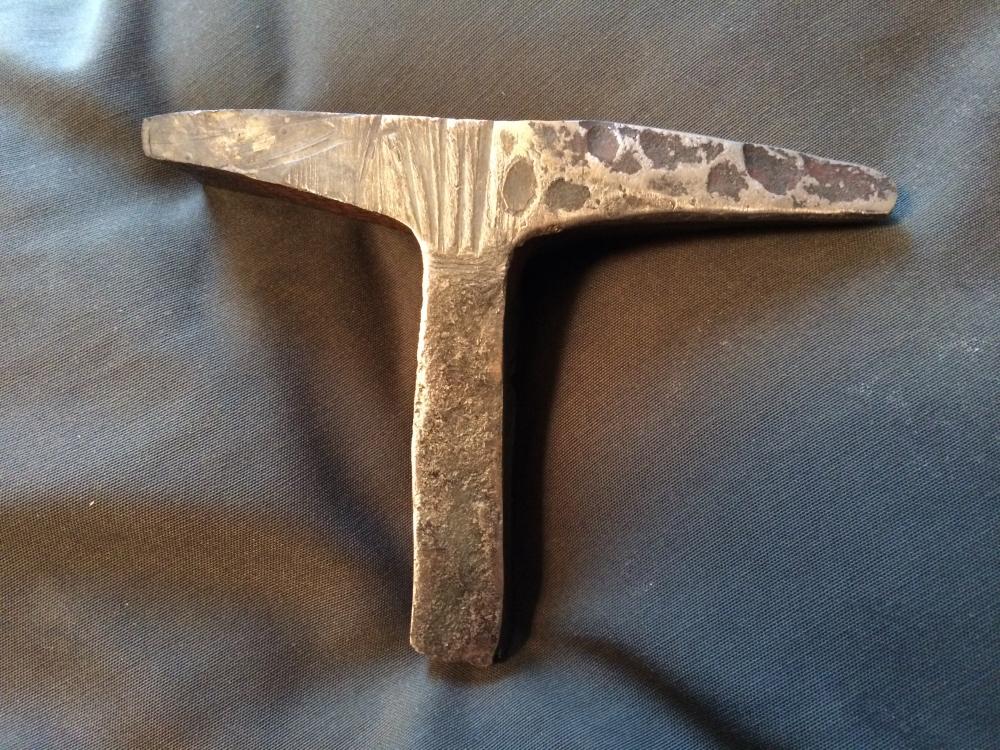
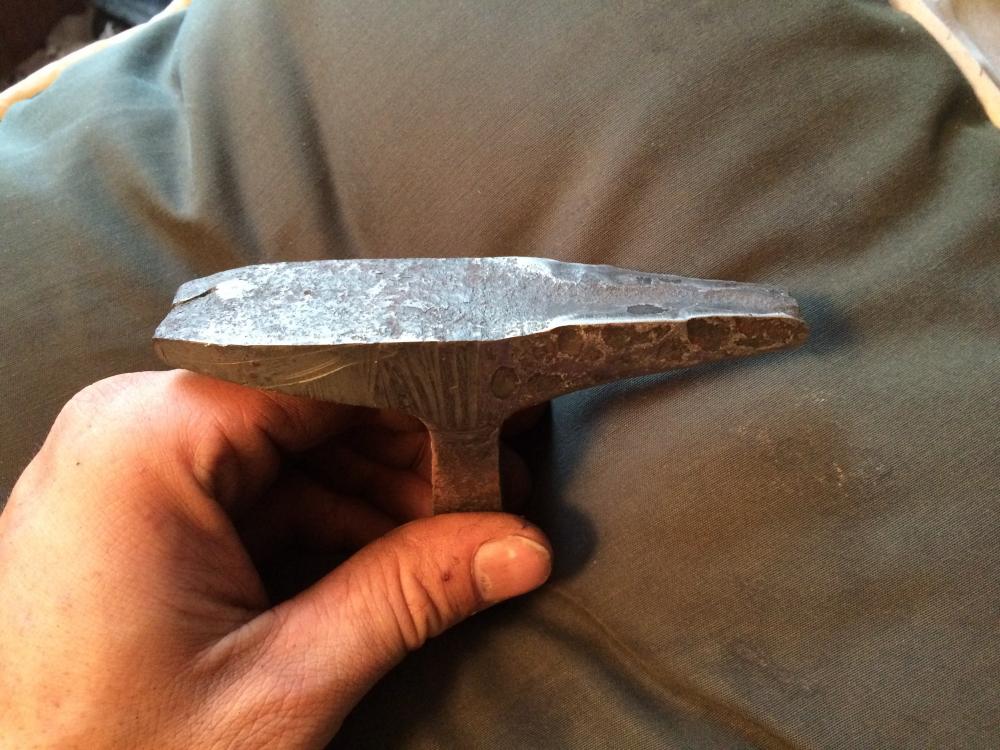
I hate to admit all those answers should've been pretty clear to me and I never should've had to sk such a stupid question. I was gettin a more than a little frustrated and we all know it's hard to think straight when we are. I went back out to the shop after posting and cooling off a little and got an email (on my phone) with the first reply, thanks turbo, and after the urge to slap myself subsided i altered my flat tongs so that they matched the taper on the bottom of the web. After doing that everything went so much smoother. biggun, vise grips were my tongs of choice when I first started smithing and left me with more headaches and ruined tools than I care to admit. frosty, I definitely need to make a few more tongs. I have tried, and failed miserably, a few times. I think I'm rushing myself too much when I'm making tongs. I will look up the tongs you suggested and will try them next time I decide to try tongs again. Heres where I'm at now with my bick. Any suggestions on how to improve it would be greatly welcome. I plan to heat treat next weekend if all goes well. I know I need to bring the shank back to square from the top and do a little bit of grinding to smooth it all out before I do just unsure of anything else I might need to do. Thanks for all your help so far.
-
I dug out the web i cut off my rail anvil when I mounted it upright after it was suggested I could make a bick from it. I put it in the fire today knowing what it was supposed to look like when I got it done but didn't get far when I ran into a stumbling block. I have one pair of tongs and they are great for holdin flat bar but not for tapered stock so I couldn't keep a good grip on the hot iron. I also had trouble when I went to break one square taper down to start rounding it. All that said, can someone please give me some pointers that could possibly make this a little easier. I have attached pictures showing where I got to, I did clean it is some with a sander to give me a better look at what I have. Please ignore the awful hammer marks, like I said it's not done yet.
-
Alloy markings?
Michael Cochran replied to Michael Cochran's topic in Blacksmithing, General Discussion
Ok, I'll keep that in mind. I think for now I will leave it alone to fool with at another (more experienced) time. thanks everyone. -
Alloy markings?
Michael Cochran replied to Michael Cochran's topic in Blacksmithing, General Discussion
Any suggestions then on how to forge down 1.25" of stainless steel to the point I could make tongs and fire tools without a power hammer or a striker? I've tried forging this stuff down and to get about 1" of it 1/4" smaller in diameter takes a lot of effort. I may need to go hotter i was at a high orange when I last fooled with it and the heat doesn't stay long. I'll try cutting most of the way through it about 4" from the working end that should help limit the amount of heat the rest of it pulls from it I'd imagine. -
Alloy markings?
Michael Cochran replied to Michael Cochran's topic in Blacksmithing, General Discussion
Well then I haven't a clue what to do with it. I've tried stainless at the scrap yard and if the magnet sticks I get plain old iron rate so it's not anythin special to them either. If anyone wants a piece let me know, you pay for shipping and I'll let you have it :) -
Alloy markings?
Michael Cochran replied to Michael Cochran's topic in Blacksmithing, General Discussion
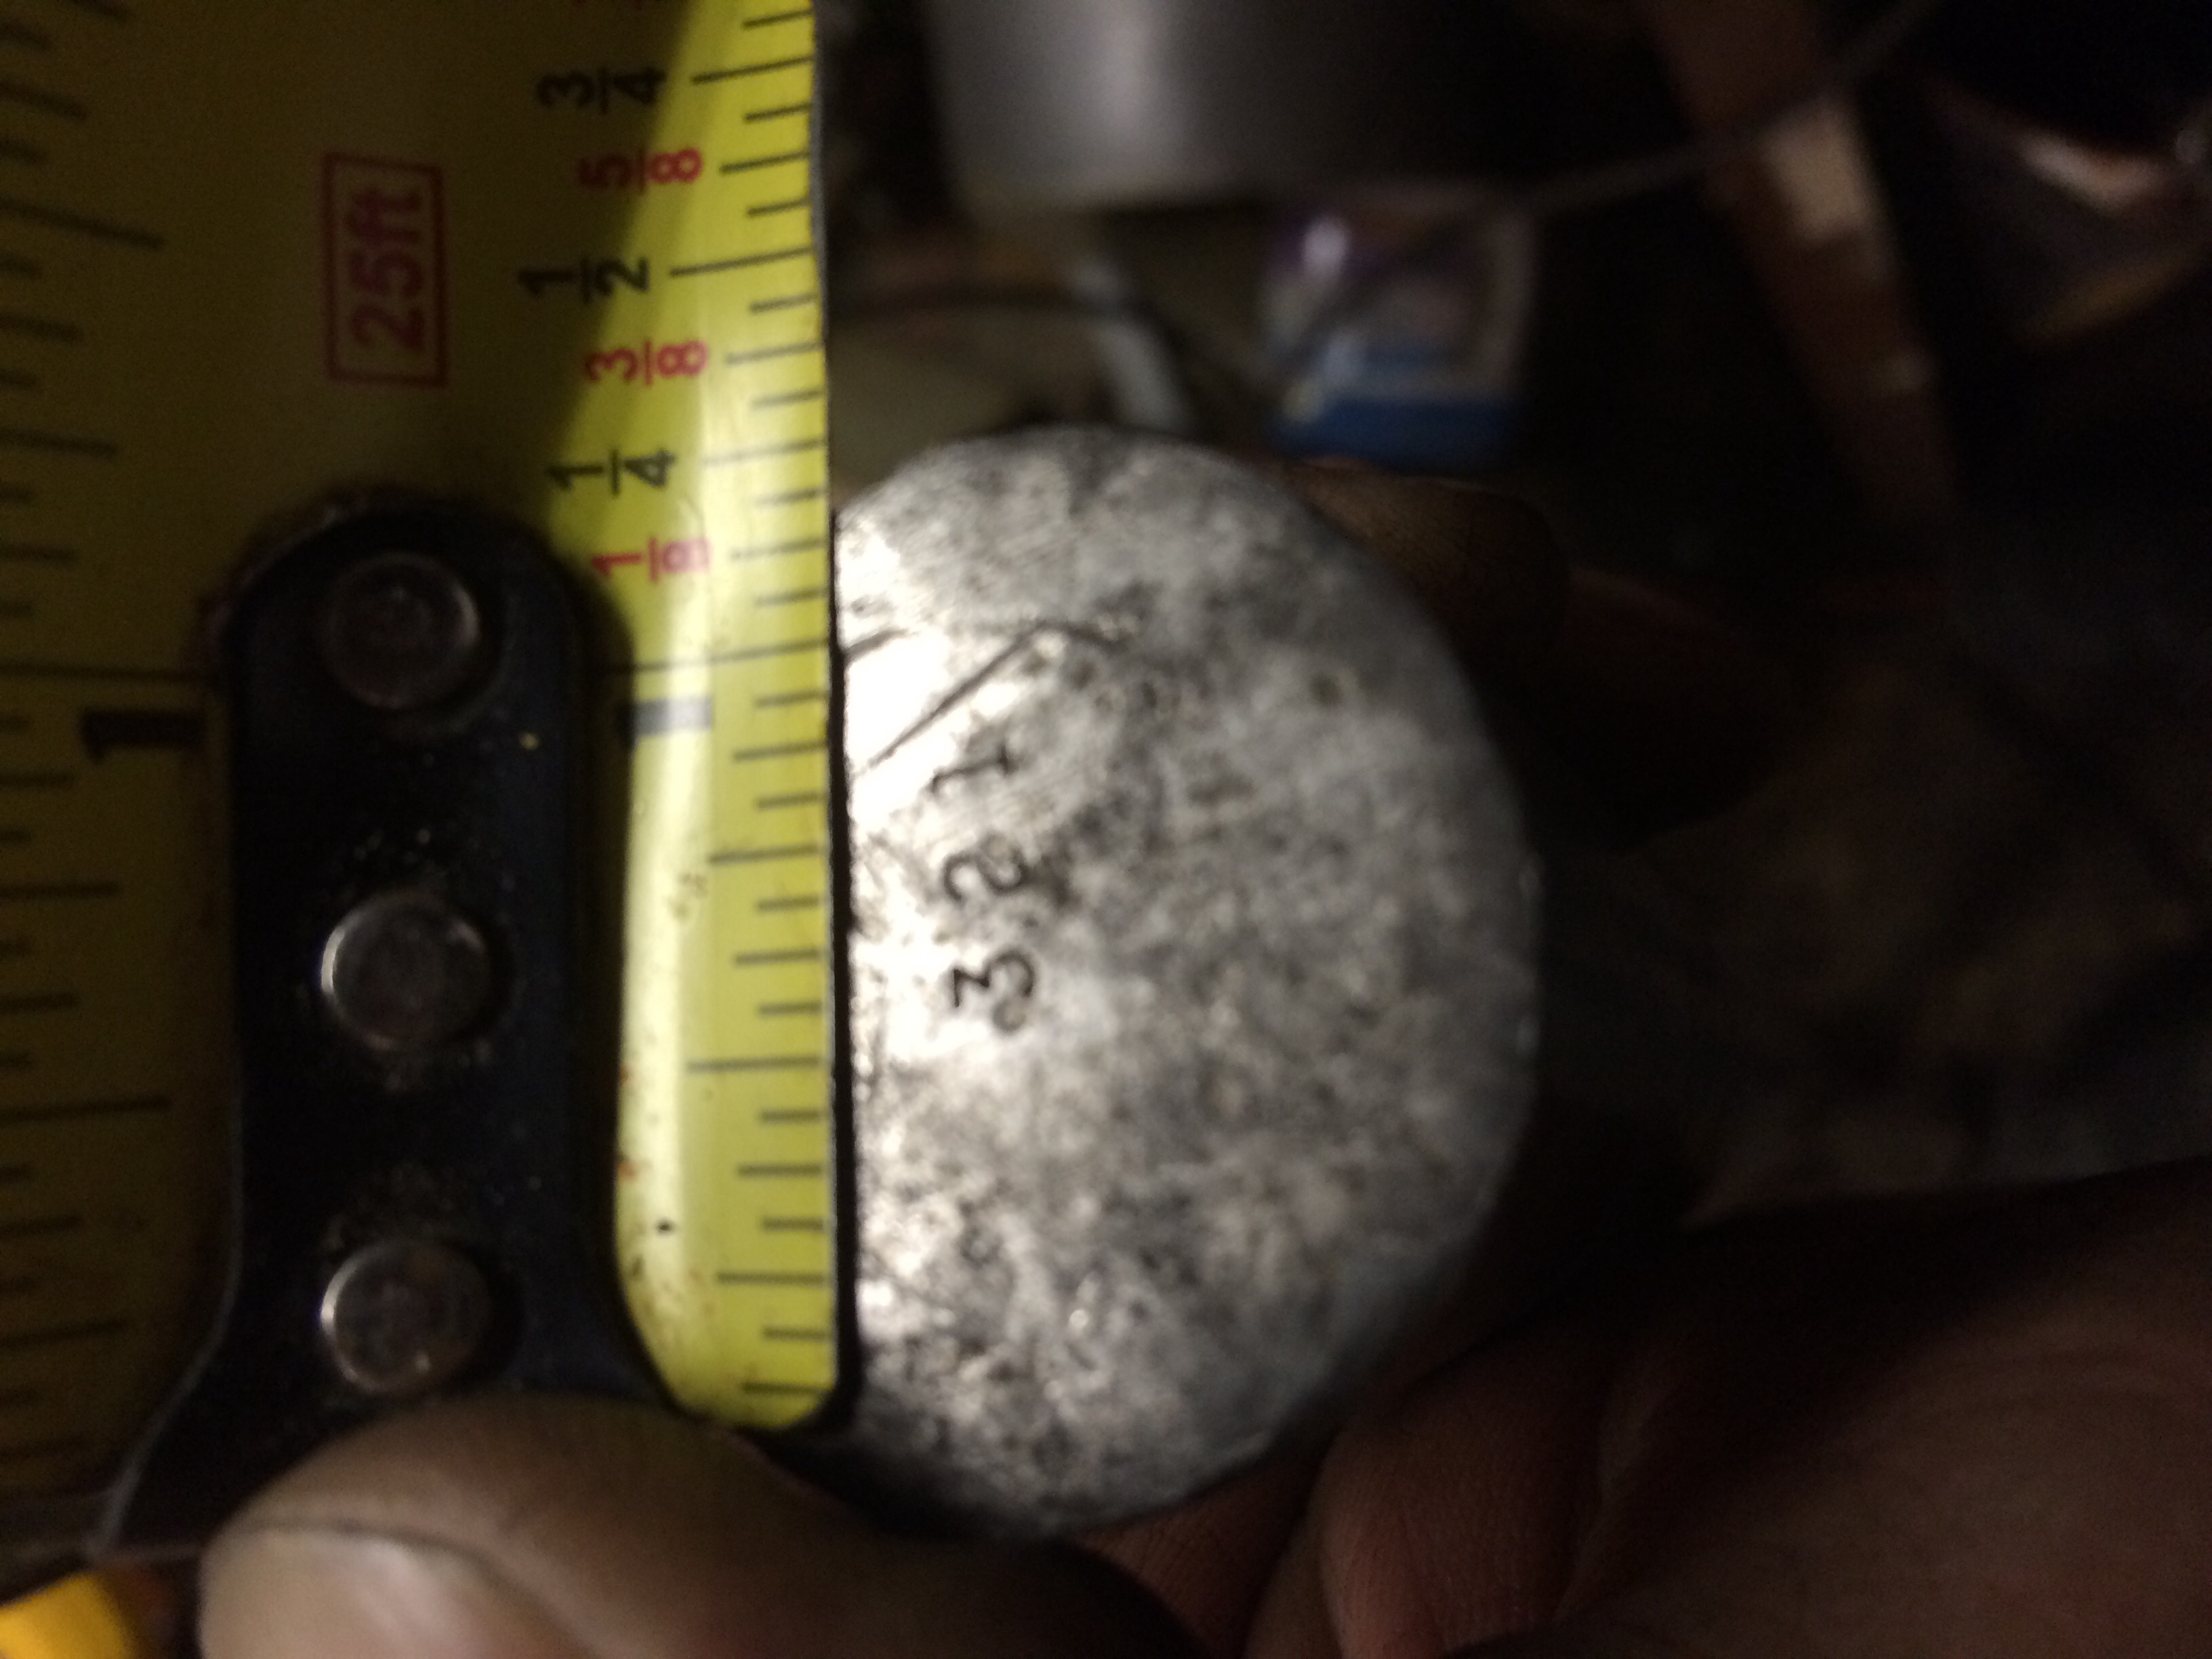
So it is possible that it's 321? anyone have suggestions for tooling to make out of it? I'll have to do some more readin on the alloy before I'd even have a clue. -
Alloy markings?
Michael Cochran replied to Michael Cochran's topic in Blacksmithing, General Discussion
I did look up the number before posting my question. I'm not used to having large new material so I don't know if it's common for steel mills to mark alloys like this or not. I went ahead and got a picture of it so everyone can know what I am talkin about.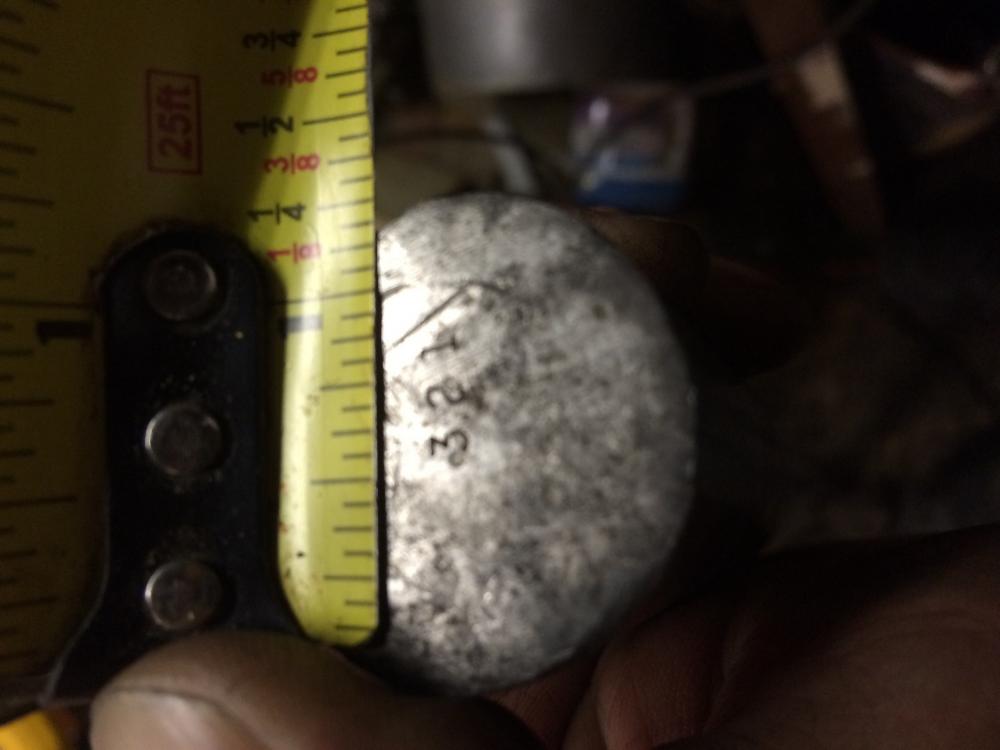
-
I have a piece on 1 1/4" solid round steel with the number "321" stamped on the end of it. I've never seen markings on the end of a bar since I'm not used to bigger stock so I was curious if it might have been an alloy mark or if it was just some random stamping. I can get a picture of the end of the bar showing the size and marking if anyone would like to see.
-
I think it looks pretty cool. I may have to make it just so I can say I have one :)
-
I'll definitely do that. Just a little side notes measured my long piece of rail and the rail itself is about 1"x2 3/8" and it's about 4" tall and about 16" long.
-
Charles, I hope that one day I'll be able to pass along some of this knowledge I've gathered. Frosty, I've heard rr rail could be used like that but I'm unsure of this one specifically. This one is rather soft, I can hit cold 1/4" mild and it'll mark the rail some. I've also cut some of the bottom flange with a hacksaw. I will try to see if the smaller bits I have will harden, I could definitely definitely use a better hot cut than what I have lol.
-
It's somewhere in my 'resource' pile lol. I'll look and see if it can find it. I've been thinking about a work around for not having a horn and a bick might be a useful thing. Thanks for that suggestion Charles.
-
Truth be told, I mostly use the rail on end as a fuller since the rail is smaller than all but my 16oz ballpien. I will remember the tip if I end up getting a bigger piece at a later time. I can get almost as much accomplished on my small piece that measures about 3" long x 6" tall as I can the other. I have the small piece sitting on a block made up of 3/8" steel plate that's about 4x5x7 iirc. Both are sitting on 6x6" bases. I actually used to complain about not having a 'real' anvil until I started paying more attention to what I was doing and im quite happy with what I can get done with what I have. Still want a real one but relatively happy with what I have for now.
-
I'd jump on it if I were you. I'm sure others will say the same.
-
I have a few myself that needs finishing. I forged them out pretty rough and are taking too much time for finish work. I have to learn myself some better hammer control and that's why they sittin on the back burner while I go back to the basics.
-
I figure it's over due but I guess it's better late than never. I honestly done know what all to say so I'll just ramble a little and if anyone is curious about anything I'll answer any questions as they arise. I'll start out by saying I've been blacksmithing (in the most basic sense) for about 3 years. Mostly I mess around with scrap/found materials with the occasional new steel. My setup is rather basic including two pieces of rail, a block of steel (fabricated from 3/8" plate) four hammers, one good set of tongs and misc chisels and files, and an ever changing solid fuel forge. I've attached a few pictures showing of my wonderful tools.

-
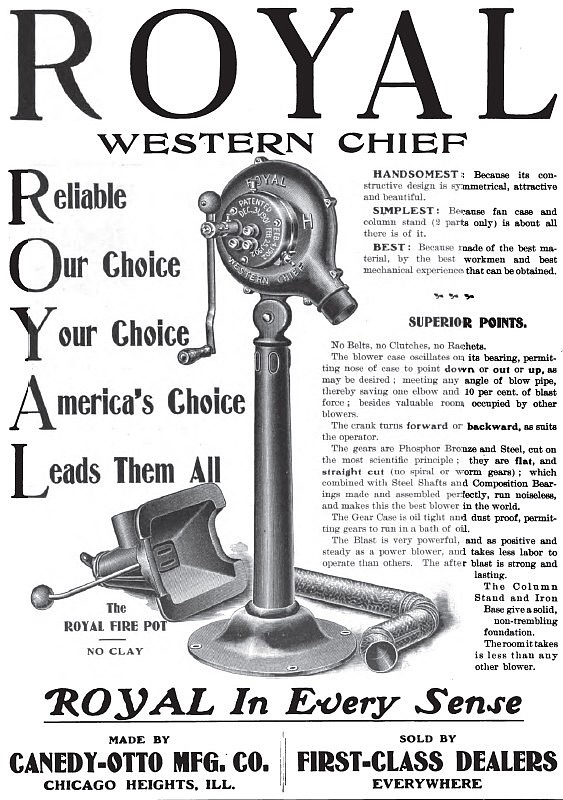
Does this look the same? I can't get my eyes to focus well enough on your pics to see right now. I found this ad with a quick google search.