tylerdewitt
-
Posts
26 -
Joined
-
Last visited
Recent Profile Visitors


-
South german anvil ID
tylerdewitt replied to tylerdewitt's topic in Anvils, Swage Blocks, and Mandrels
Updated my profile location to Toronto Canada. Thanks for resizing photos, will keep that in mind next time. -
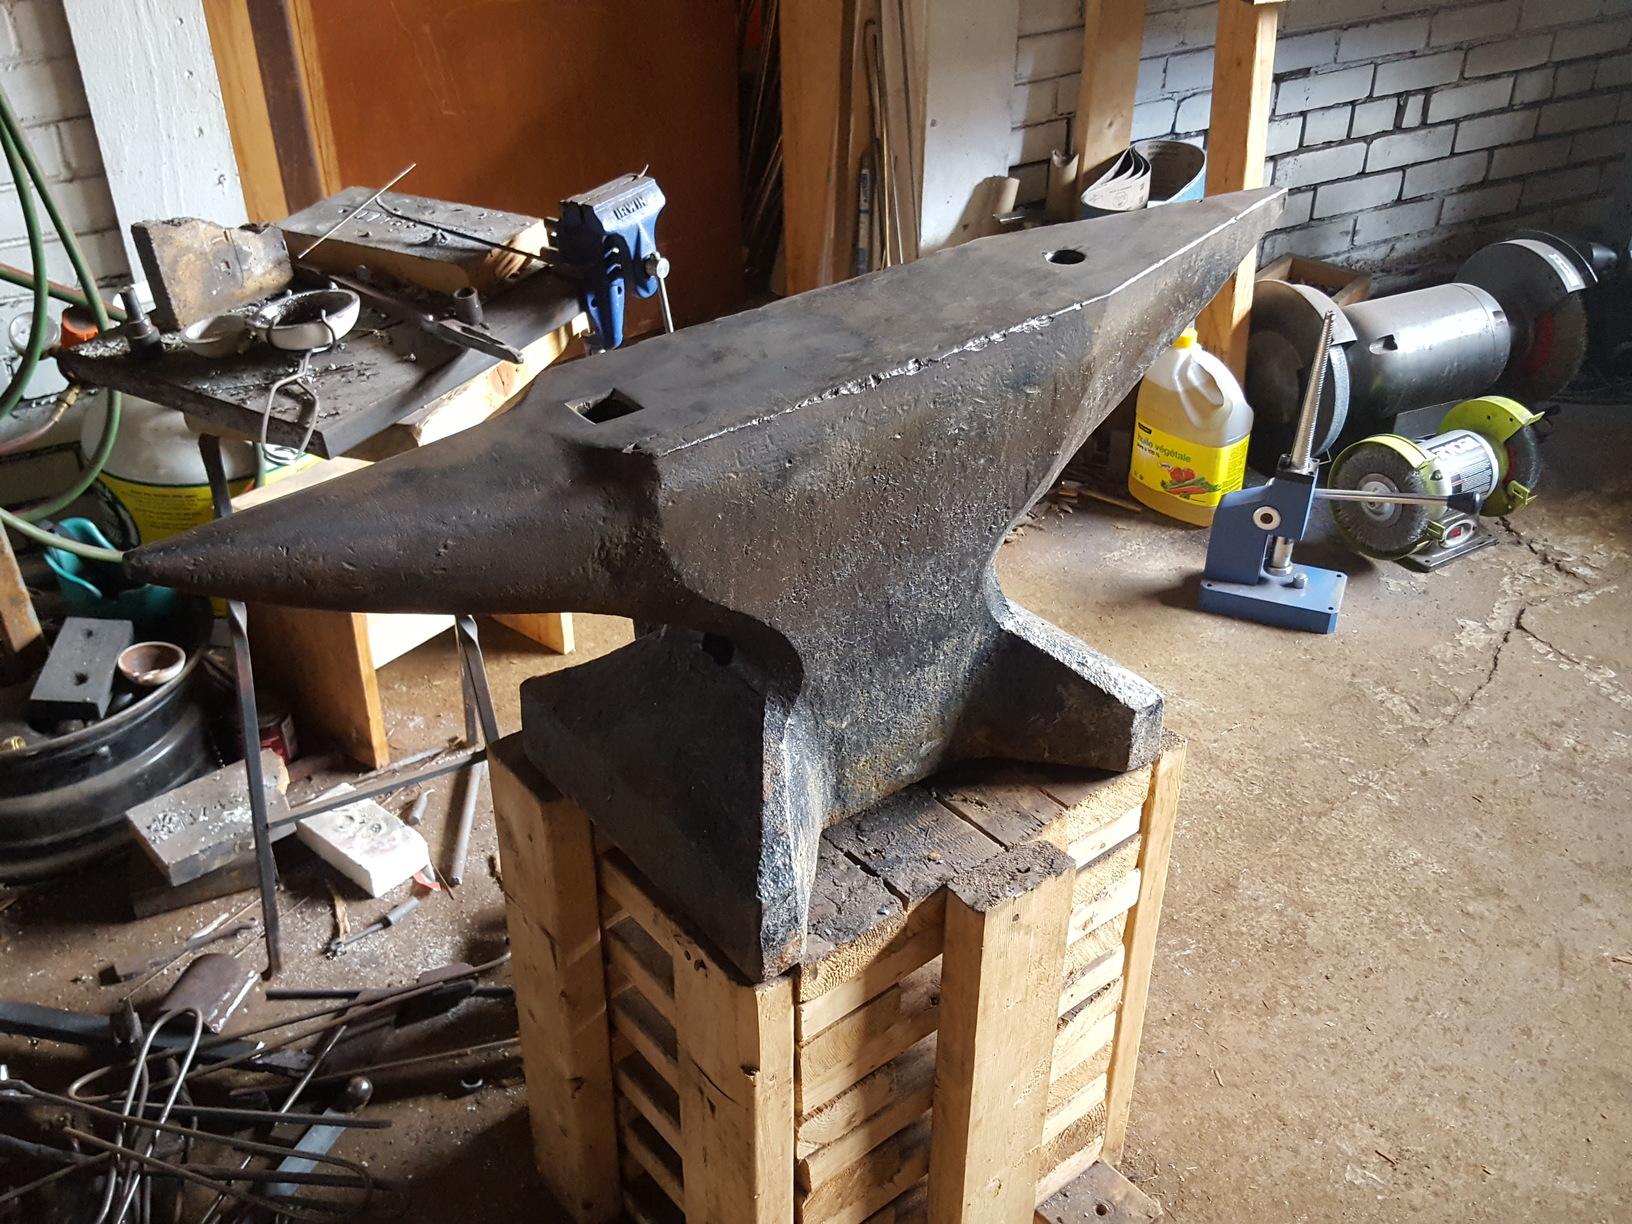
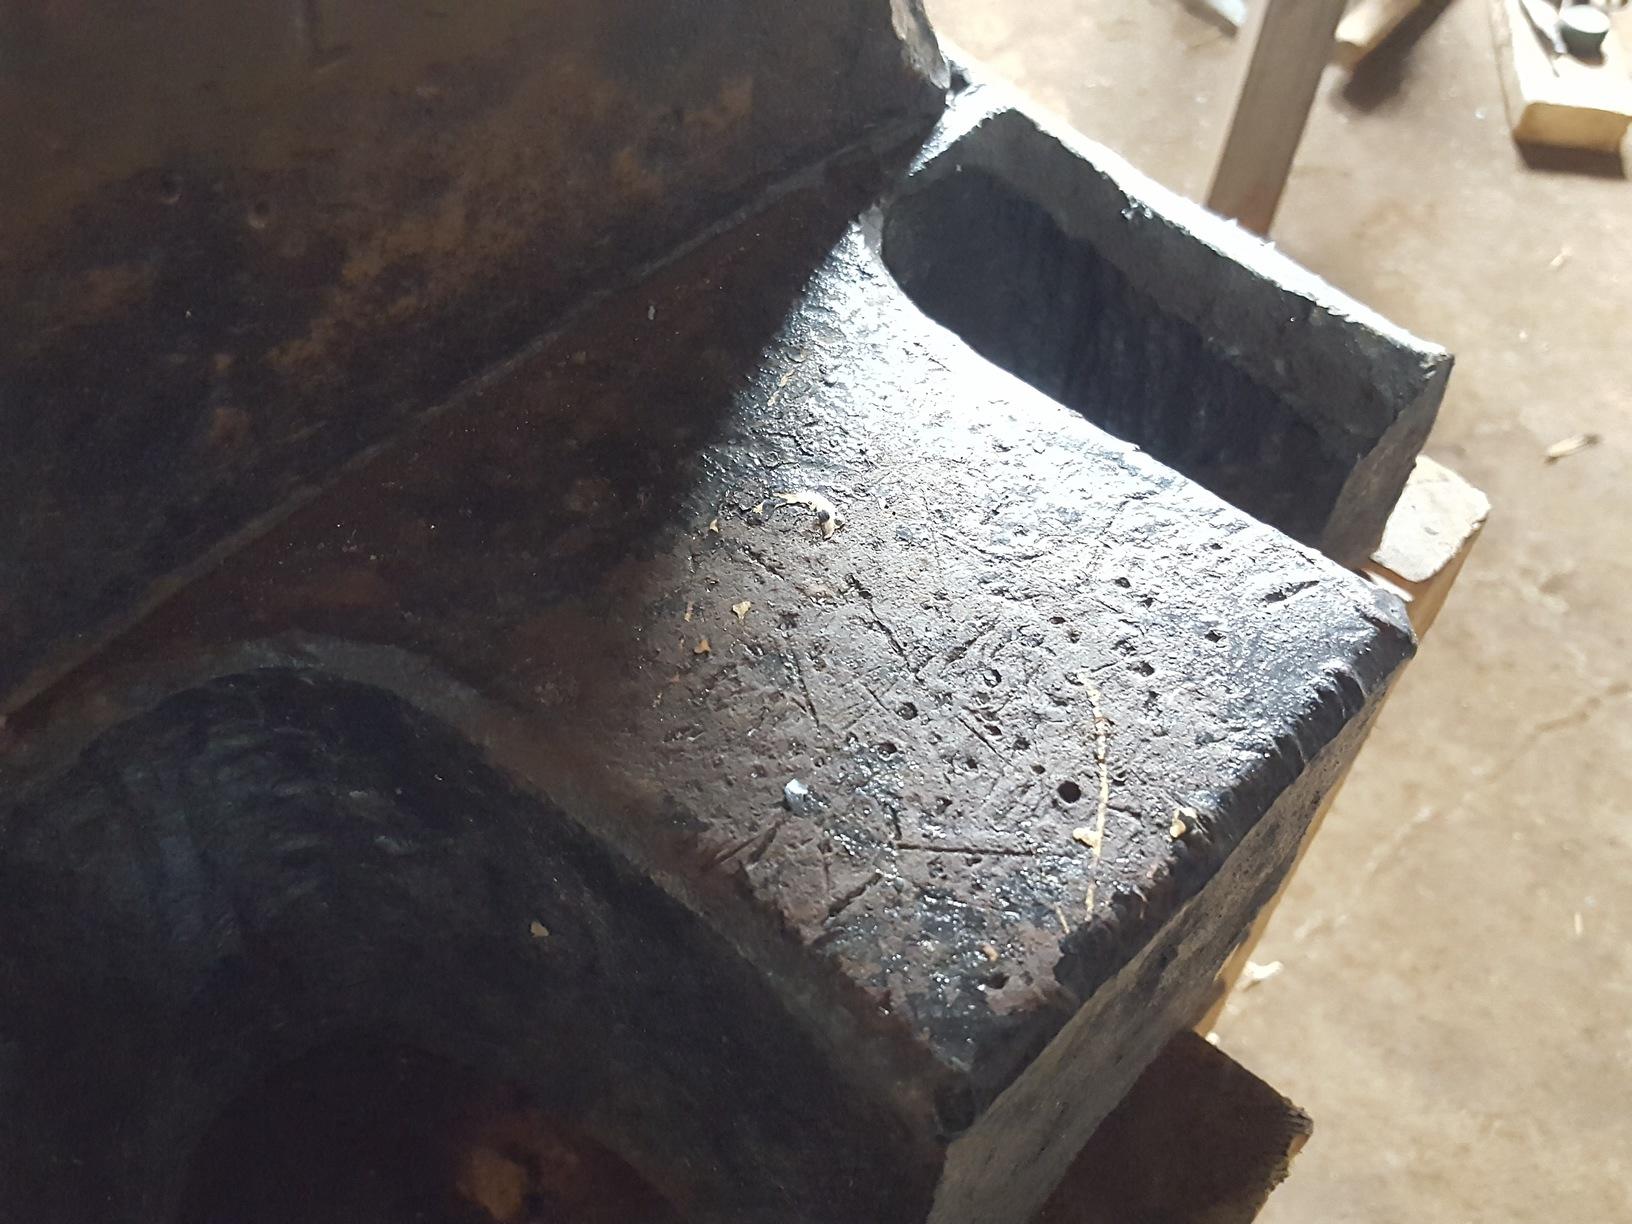
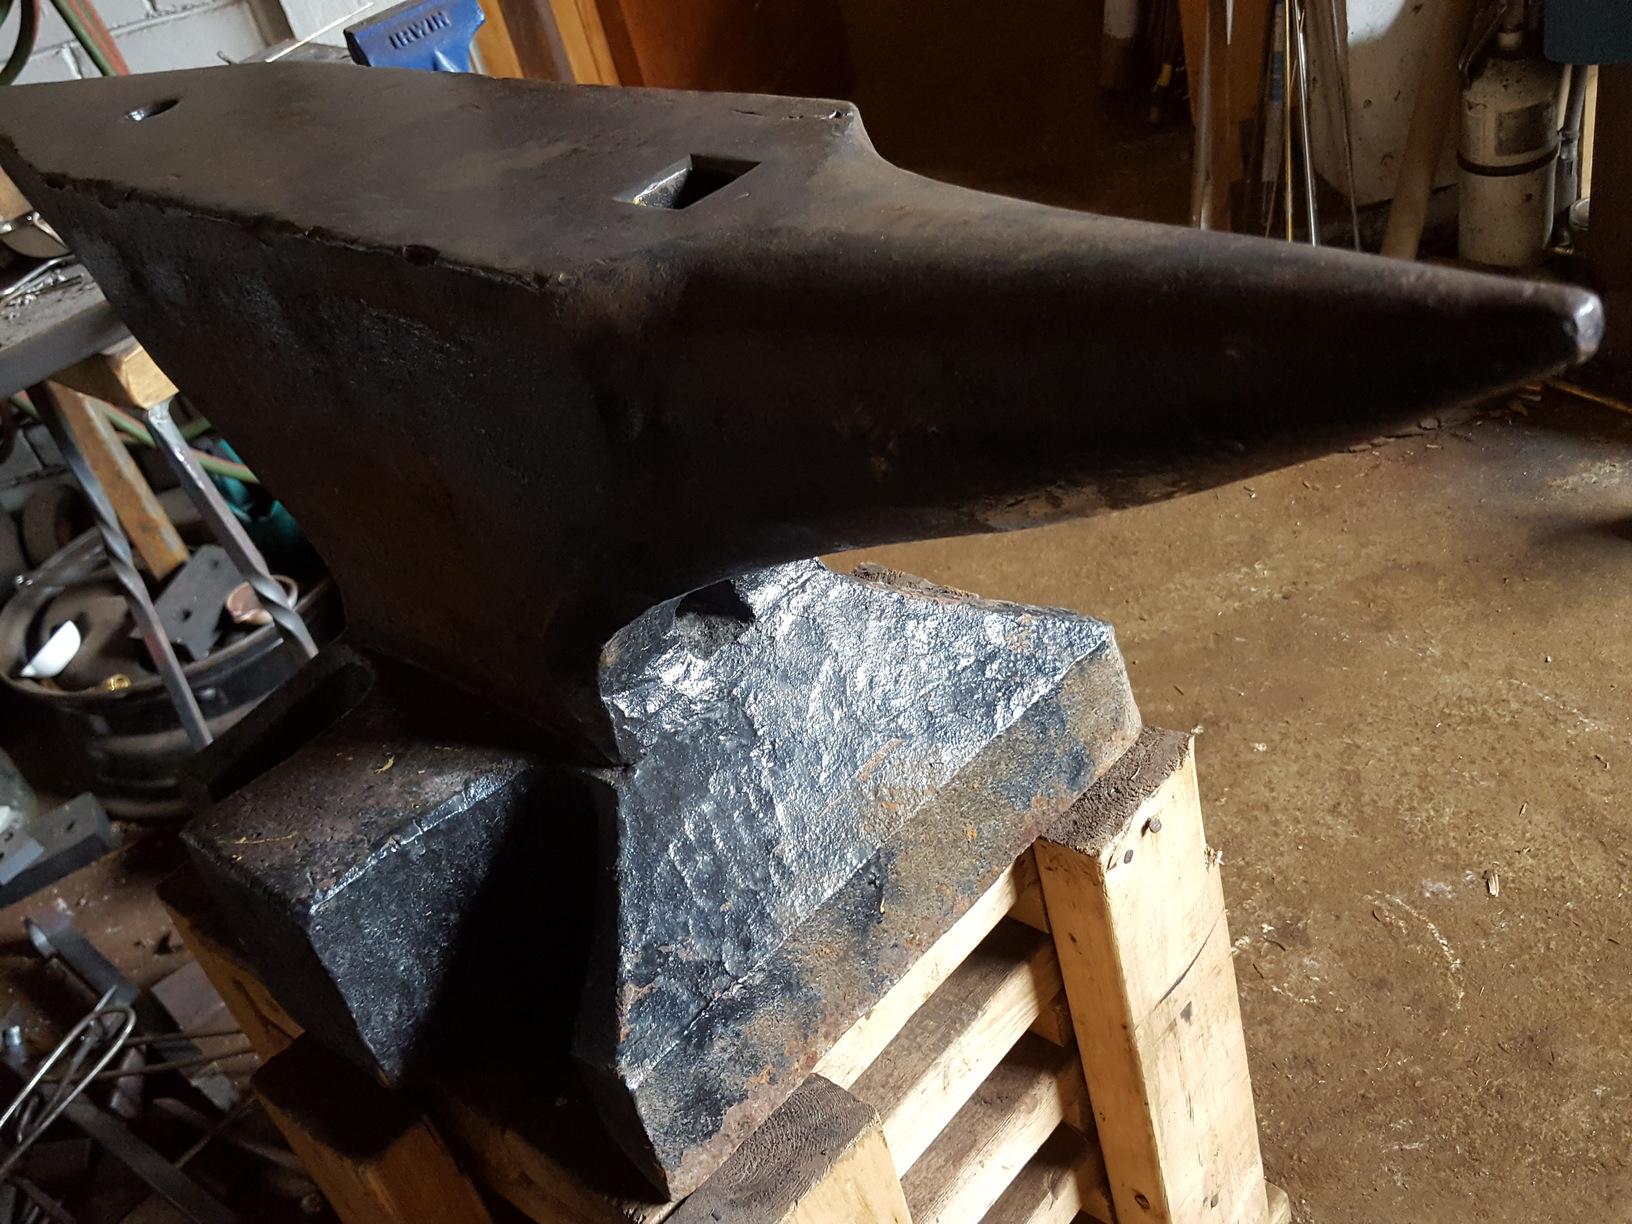
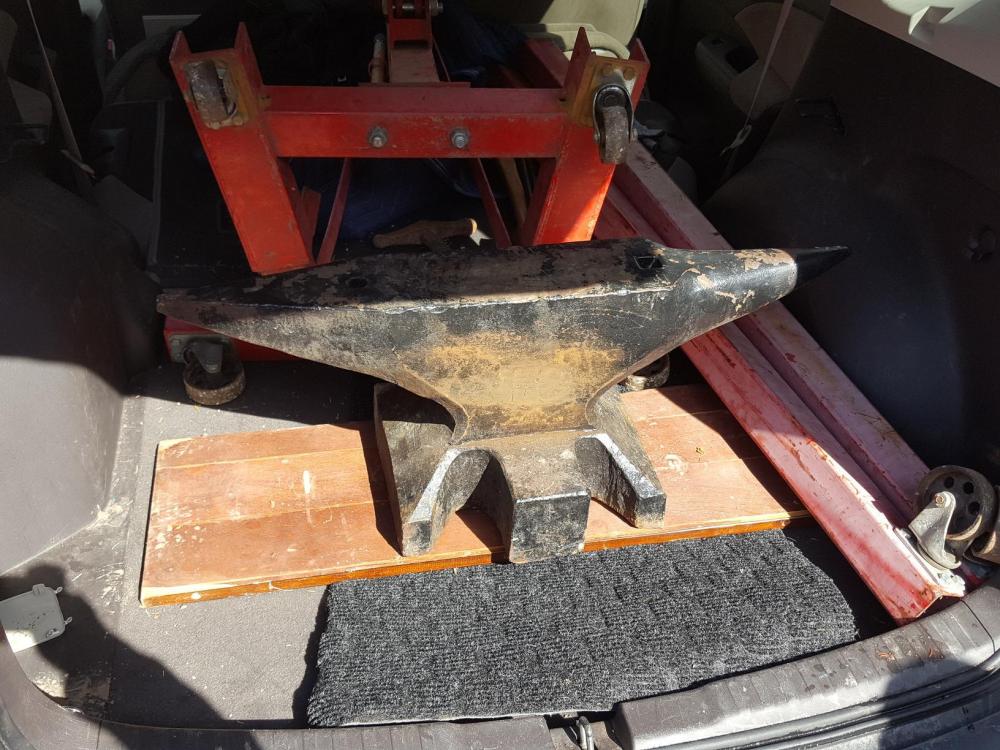
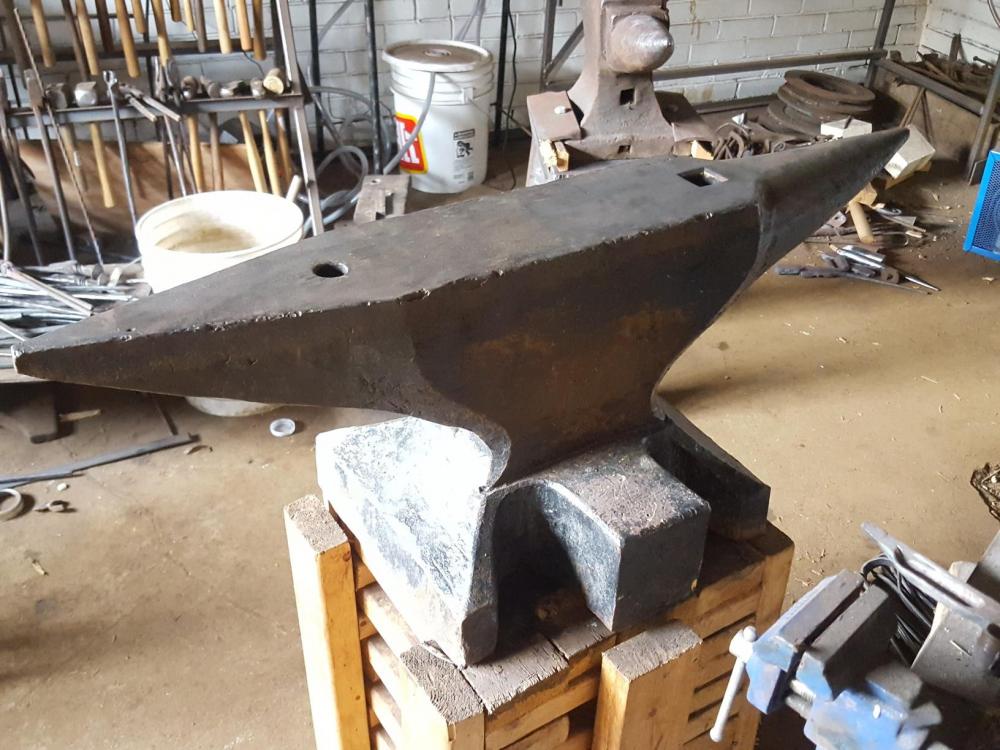
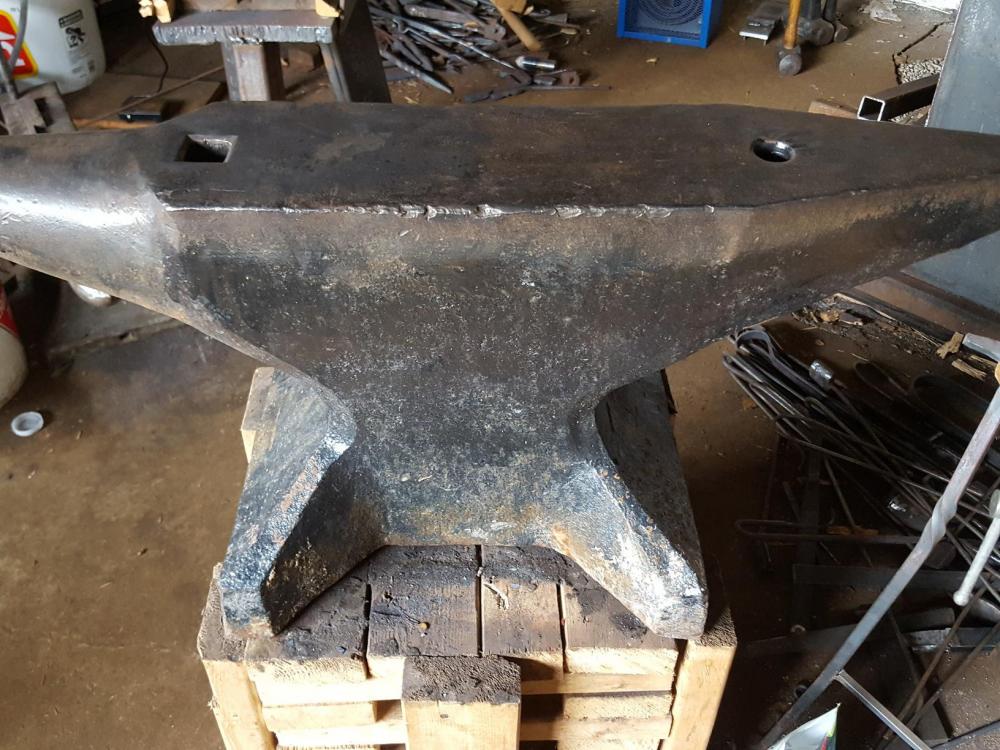
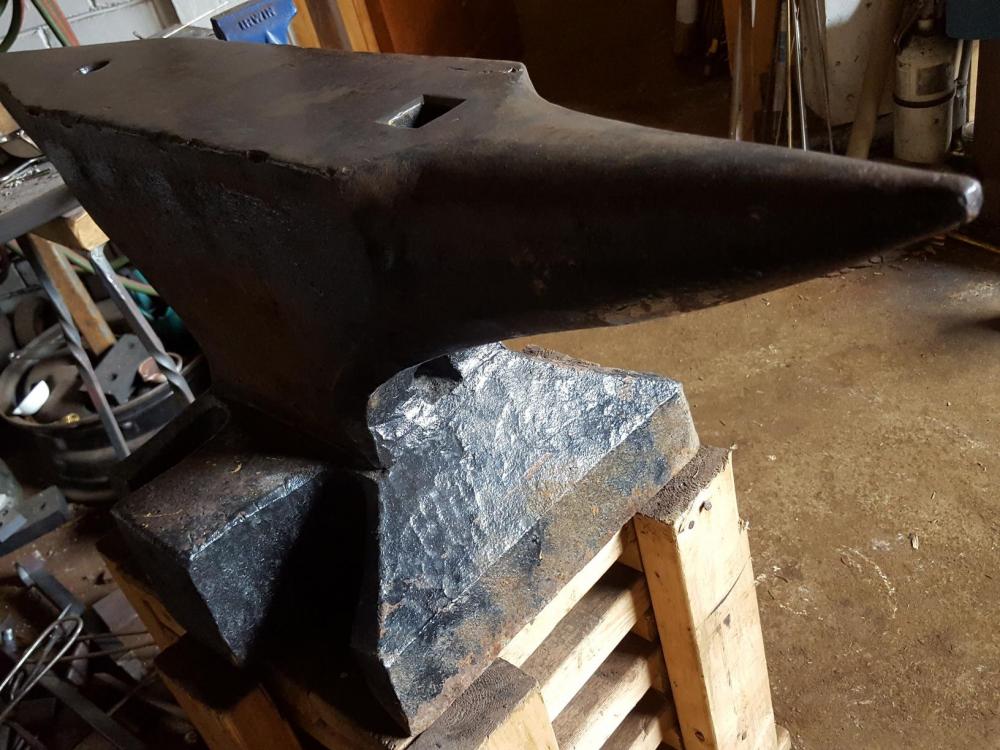
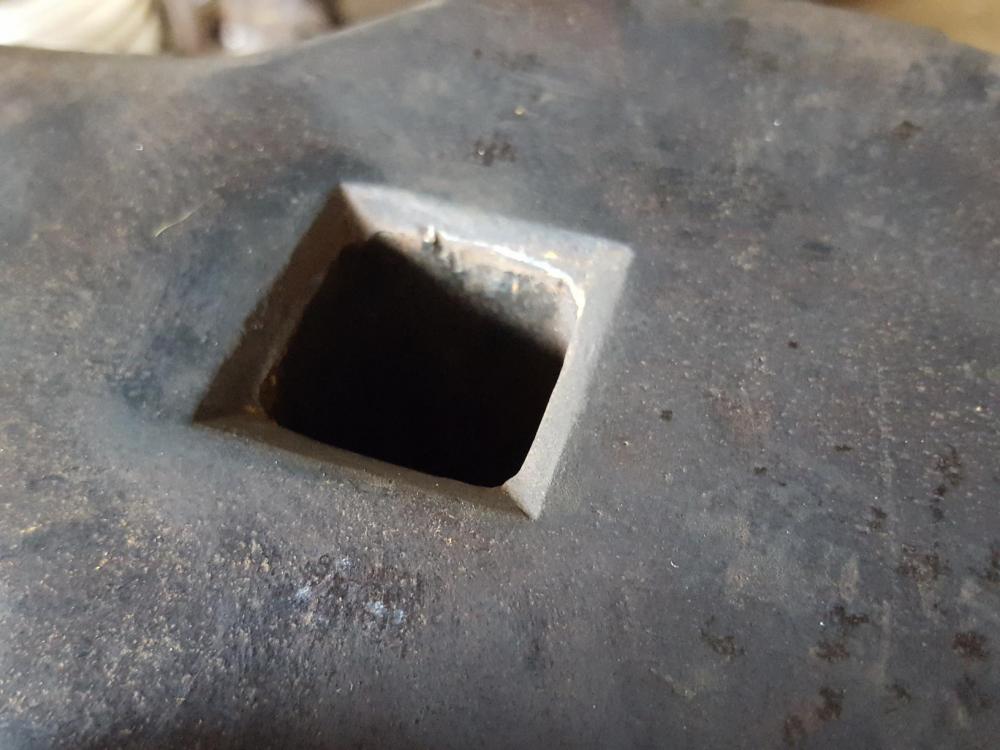
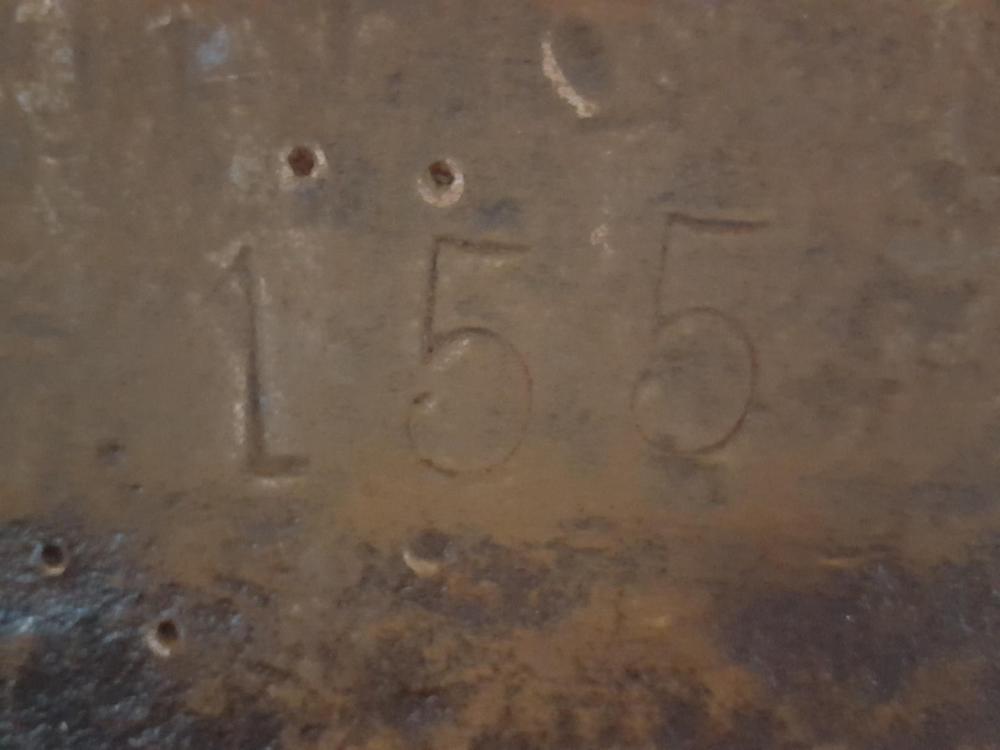
Snagged this south german anvil which come up rarely in my area. It was painted, and I should clean it more to be sure, but it would appear the only mark is the weight. Face is very hard. Any info regarding age,make,history appreciated. 155kg, 5 1/4 inch face, 13" tall.


-
Power hammer build
tylerdewitt replied to Ted Ewert's topic in Power Hammers, Treadle Hammers, Olivers
Not always necessary, but in most cases the most effective and predictable way. I see inertia as a property and purpose of the anvil itself. Better to address the problem here before considering the foundation. If you can easily make bedrock your anvil, then great. In most cases it's going to be a lot more difficult. Reducing shock/vibration is generally hard. Adding mass to an anvil is a no-brainer solution. Readers can decide what's most time/cost effective for them. -
Power hammer build
tylerdewitt replied to Ted Ewert's topic in Power Hammers, Treadle Hammers, Olivers
You claim your anvil is working flawlessly beyond expectations, yet your garage floor and building are vibrating to the point of shaking things off shelves. Are you ready to concede some of your previous arguments regarding inertia? That vibration, aside from being annoying to neighbors, is lost energy that could go to deforming metal. I know you had trouble sourcing and moving a solid chunk, but it wouldn't have been that hard to laminate solid steel plates or bars. You might as well have put the mass here first, before pouring a concrete foundation. A decoupled concrete inertia block will help. But you might as well have put the mass in the anvil to start. In my build, I went to great lengths to design for minimal vibration, because I have neighbors quite near. For a 100lb ram, 1400lb solid anvil, 2" steel base plate, (sort of)decoupled concrete inertia block, and I still wish I would have poured much more concrete. You can still feel some vibration it in the ground outside of the shop. You can read my build thread if interested: https://www.iforgeiron.com/topic/49300-designing-a-50lb-guided-helve-hammer -
Power hammer mechanism choice
tylerdewitt replied to EDL's topic in Power Hammers, Treadle Hammers, Olivers
I don't have any press experience, but I think what arftist is saying is that if you think about the surface area contact 2x2.5 is going to be pretty slow going. Yes in that video he squishes the round bar into a puck, but notice how little the metal moves near the end of the stroke as the surface area becomes larger. It would be even worse as the material gets thinner because it cools faster. I guess narrow drawing dies will help but the point remains that 3HP log splitter will likely be underpowered for working 2x2.5 stock. The examples shown in the video are not representative of efficiently working down a billet of that size. -
Designing a 50lb guided helve hammer.
tylerdewitt replied to tylerdewitt's topic in Power Hammers, Treadle Hammers, Olivers
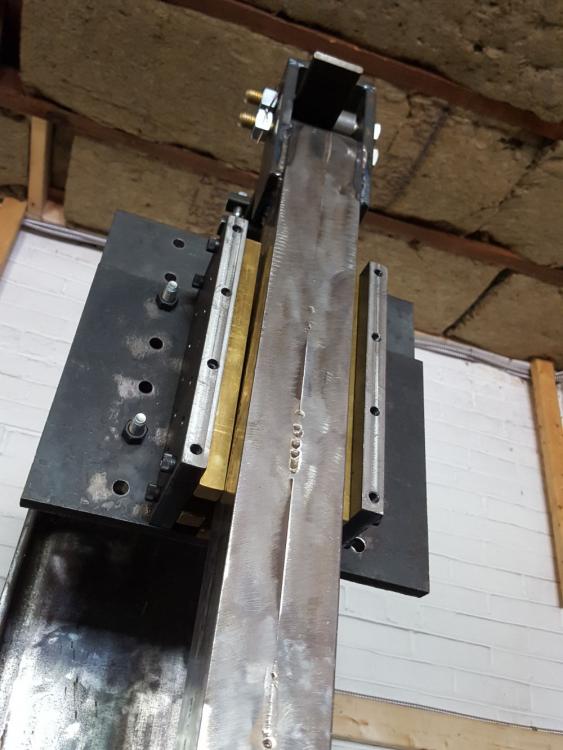
Here's an old photo from earlier in the thread, I've changed the position a bit since then. It's clamped, it doesn't slide. The movement in the videos is from the spring flexing. I think it needs to be stiffer.
-
Designing a 50lb guided helve hammer.
tylerdewitt replied to tylerdewitt's topic in Power Hammers, Treadle Hammers, Olivers
No counter weight currently, but I've thought about trying it to see how it changes the response. Any suggestion or past experience on best practice for implementing that on a helve hammer? The ones I've seen never seemed to require it, granted they have post clutch flywheel that provides inertia. It might not be apparent from some of the videos, but yes I include a gap at tup down, I use a turnbuckle on the pitman arm allowing a great deal of adjustment. I can see what you're getting at with the spring decelerate the ram for soft blows, I'm sure I could set it up like that specifically, but I was hoping for the ability to control that via the clutch. I definitely need to stiffen the spring pack. -
Designing a 50lb guided helve hammer.
tylerdewitt replied to tylerdewitt's topic in Power Hammers, Treadle Hammers, Olivers
Finally got around to filming the hammer in action, videos below. After building a power hammer, I became very busy making jewellery(go figure), hence the delay. Overall I'm quite pleased how it runs, although my only comparison was a few hours on a 120lb Kinyon that I believe wasn't set up correctly (strange control, underpowered air compressor) There's some improvements I'd like to make: run it a little faster, but I believe the spring needs to be stiffer and I'm not sure I'll get around to it. 150bpm is where it likes to run. Good speed for tooling, but could be faster for drawing out heavy stock. A few notes regarding noise/vibration: this was primary concern as I live in the city with neighbors adjacent. Noise was not so bad(shop's in a detached brick garage, I did some soundproofing, filled all steel tubing cavities with sand). However, even with giant anvil, base plate and concrete foundation you could still feel slight impact in the ground outside the shop. Enough that I decided to put 3/4" of rubber mat under the hammer. I don't like the rubber mat, it feels bouncier, but it's necessary. That reduced it enough that you'd have to have your fingers on the ground to sense the impact, rather than through your shoes. It's amazing the lengths that are needed to reduce vibration. I should have poured more concrete. As a benchmark, forging 1" round mild steel on flat dies: Next two videos show drawing RR spikes. I took off the guard to see the spring. I tried to show the control response, a few single hits and softer blows. The jackshaft/flywheel definitely helps, the hammer starts fast and doesn't coast, but you can see the spring flapping around a bit after the treadle comes up. Maybe it's just the overall stiffness, but I think the leaf configuration might also play a role, I'd like to experiment to attenuate some of those harmonics. It's also difficult to do a single soft blow. You can easily feather the clutch to pull the ram up slowly, however it's very sensitive at the "tipping point" and will too readily deal a hard blow instead. It's easier to first deliver one hard blow and then lighten treadle pressure to deliver series of soft blows. I suppose every hammer has it's own personality. -
Motor question- VFD or single phase
tylerdewitt replied to Dan P.'s topic in Power Hammers, Treadle Hammers, Olivers
What model VFD are you using? I bought mine used, and discovered the previous user had programmed a parameter that limits the output current. -
Designing a 50lb guided helve hammer.
tylerdewitt replied to tylerdewitt's topic in Power Hammers, Treadle Hammers, Olivers
Thank you arftist! Will be a while until I have some presentable videos, but I will share them here. Still thinking about the fact that last Monday morning I had an assembly of parts, and in the afternoon after slapping on some temporary mild steel dies, I had a machine with utility. I started using it right away for paid work. Going from no-hammer to hammer was such a leap that I questioned whether I should have just bought one in the past. It made me reflect on my reasons for building at all. Some thoughts to share for anyone considering building: It was a huge investment of time. In my case, hundreds of hours spread over more than a year. Materials were cheaper than purchasing and delivering a new hammer, but if your time is worth anything at all, it's not economical. However: I have a hammer that I can fix/maintain/improve and meets my particular set of constraints. I picked up many new skills and knowledge along the way: machining, moving heavy objects, mechanics, sources for materials. In my case, I treated it as a rite of passage. Being purely a hobbyist at the time, I asked myself if I "deserved" a hammer, cost aside. I definitely could not justify purchasing a new one. I could however justify building it: if I was to be a blacksmith/metalworker, I should be able to build my own tools. So that was the motivation. It seems to have worked out. Now that I'm selling more, not sure if I would make the same decision. I'd likely instead want to put those hours into producing things, rather than tinkering. -
Designing a 50lb guided helve hammer.
tylerdewitt replied to tylerdewitt's topic in Power Hammers, Treadle Hammers, Olivers
12x12 hot rolled, plasma cut. Supplied through Metalsupermarkets, I'm not sure who their supplier is. It was embarrassingly expensive, but they helped with delivery and unloading, and it was a no brainer solution to some of my constraints. The hammer runs rock solid, neighbors won't feel a thing. I'm sure I could increase the ram weight. I've been running it a bit the past couple of days with temporary mild steel dies. Had to make some adjustments to the spring pack, add spacers and stops to keep some parts from slowly shifting/sliding around. Once settled in, I'll try to share some videos. -
Designing a 50lb guided helve hammer.
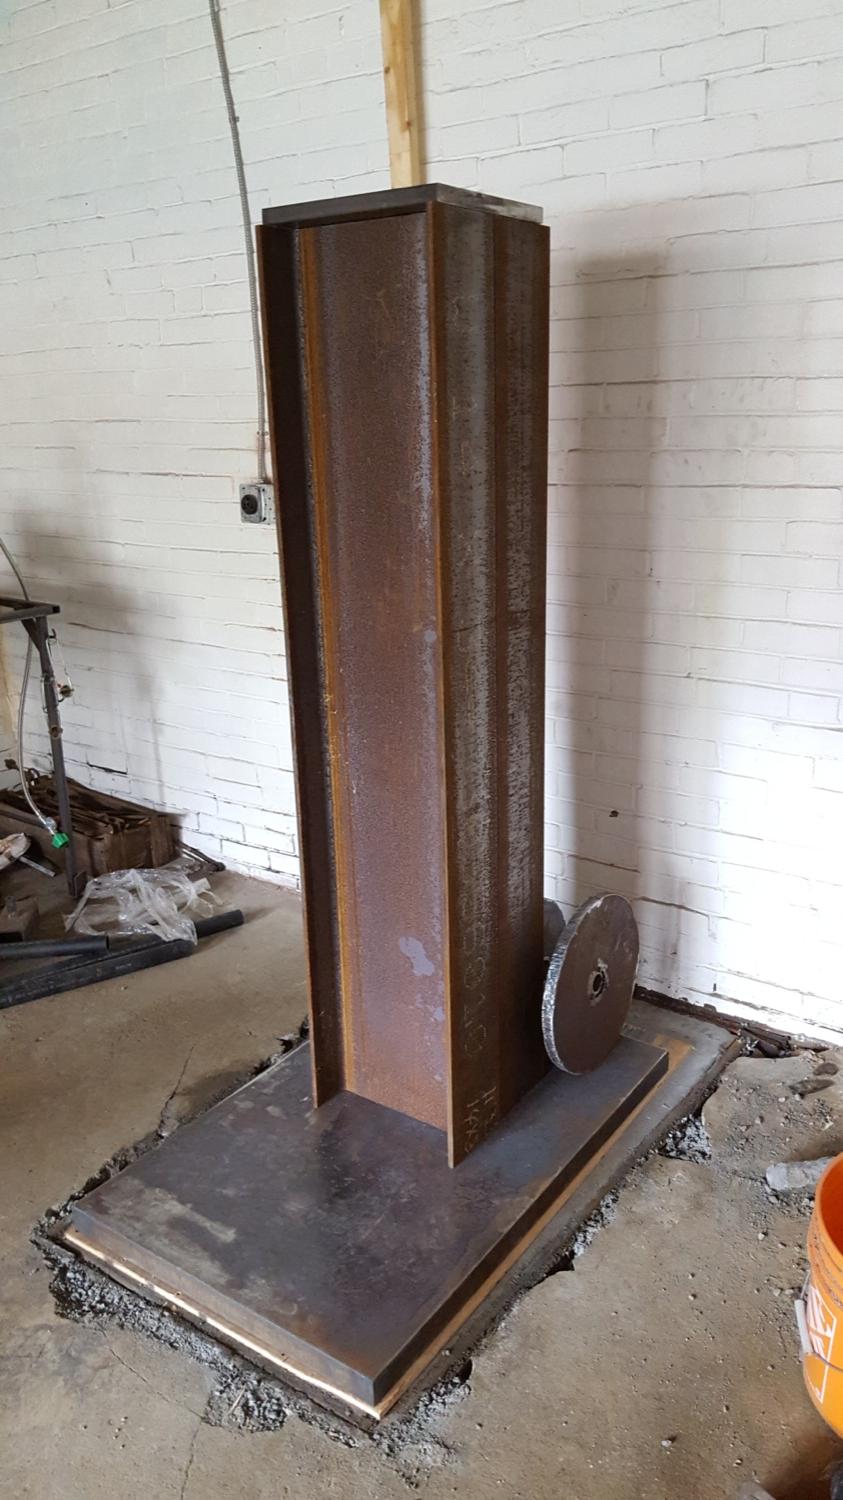
tylerdewitt replied to tylerdewitt's topic in Power Hammers, Treadle Hammers, Olivers
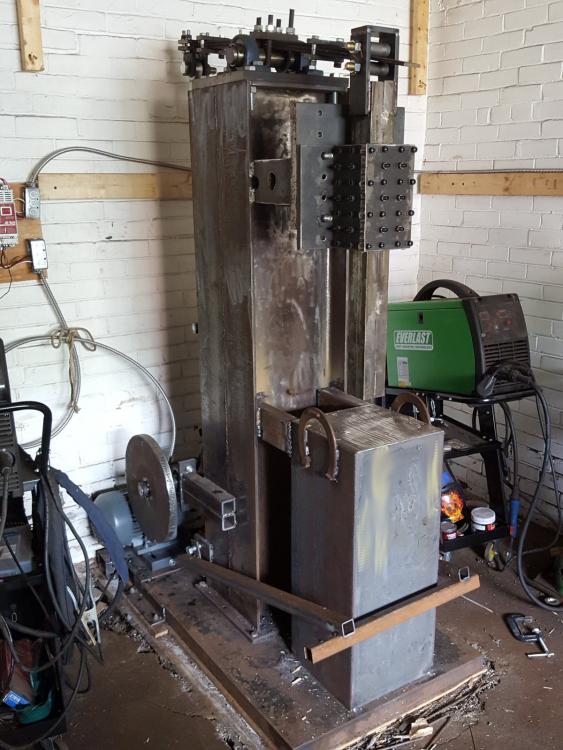
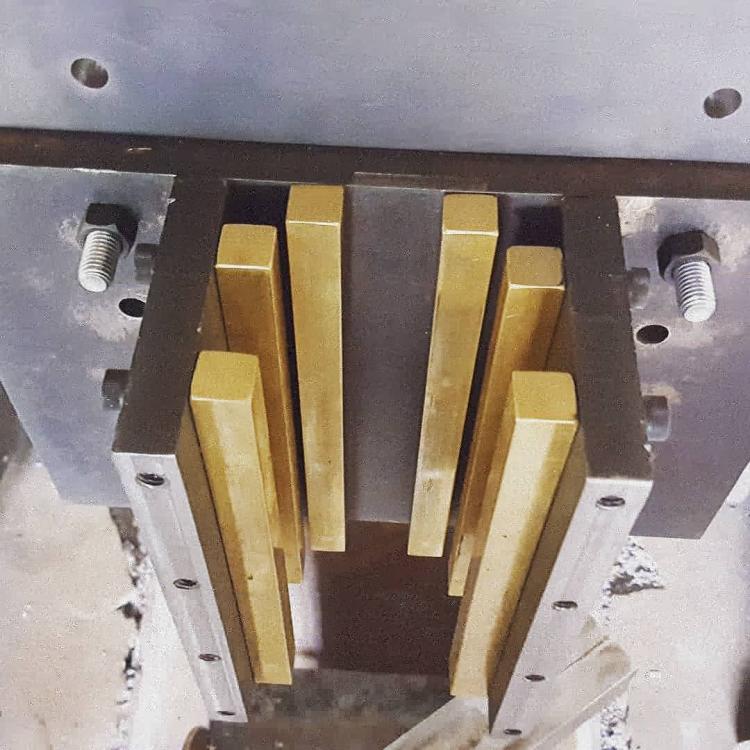
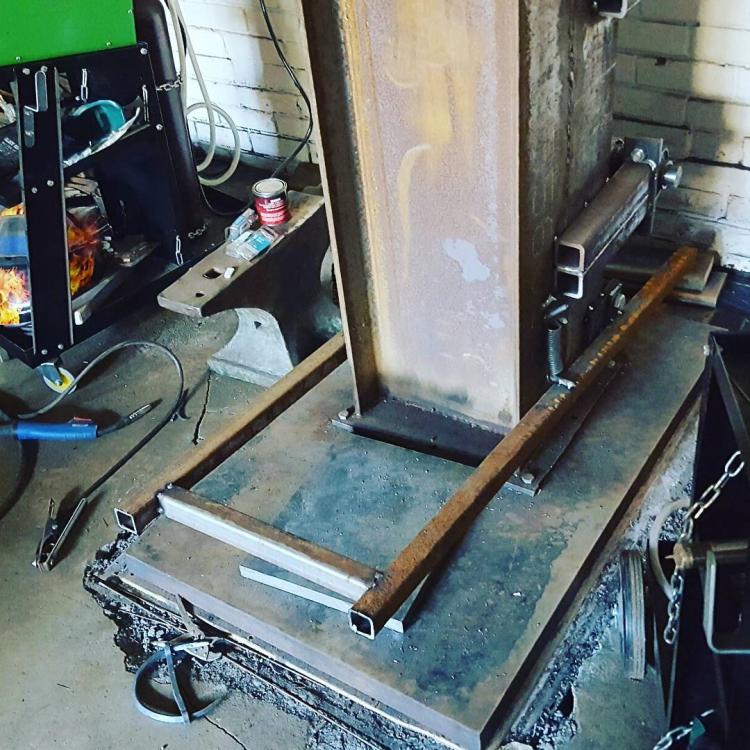
Some photos from the past six months. 3HP motor with VFD. Guide box with brass bearings, per arftist's design. Vertical position of entire guidebox is adjustable with evenly spaced holes in backing plate. Anvil is 12x12x30, overkill arguably. The ram is currently about 85lb, cycles at about 170bpm, very stable, very little vibration. Splintered some 2x4s today. Many tunings and improvements to be made, but very close now to having a working hammer.

-
Designing a 50lb guided helve hammer.
tylerdewitt replied to tylerdewitt's topic in Power Hammers, Treadle Hammers, Olivers
Very helpful, thanks for sharing these photos. Tyler -
Designing a 50lb guided helve hammer.
tylerdewitt replied to tylerdewitt's topic in Power Hammers, Treadle Hammers, Olivers
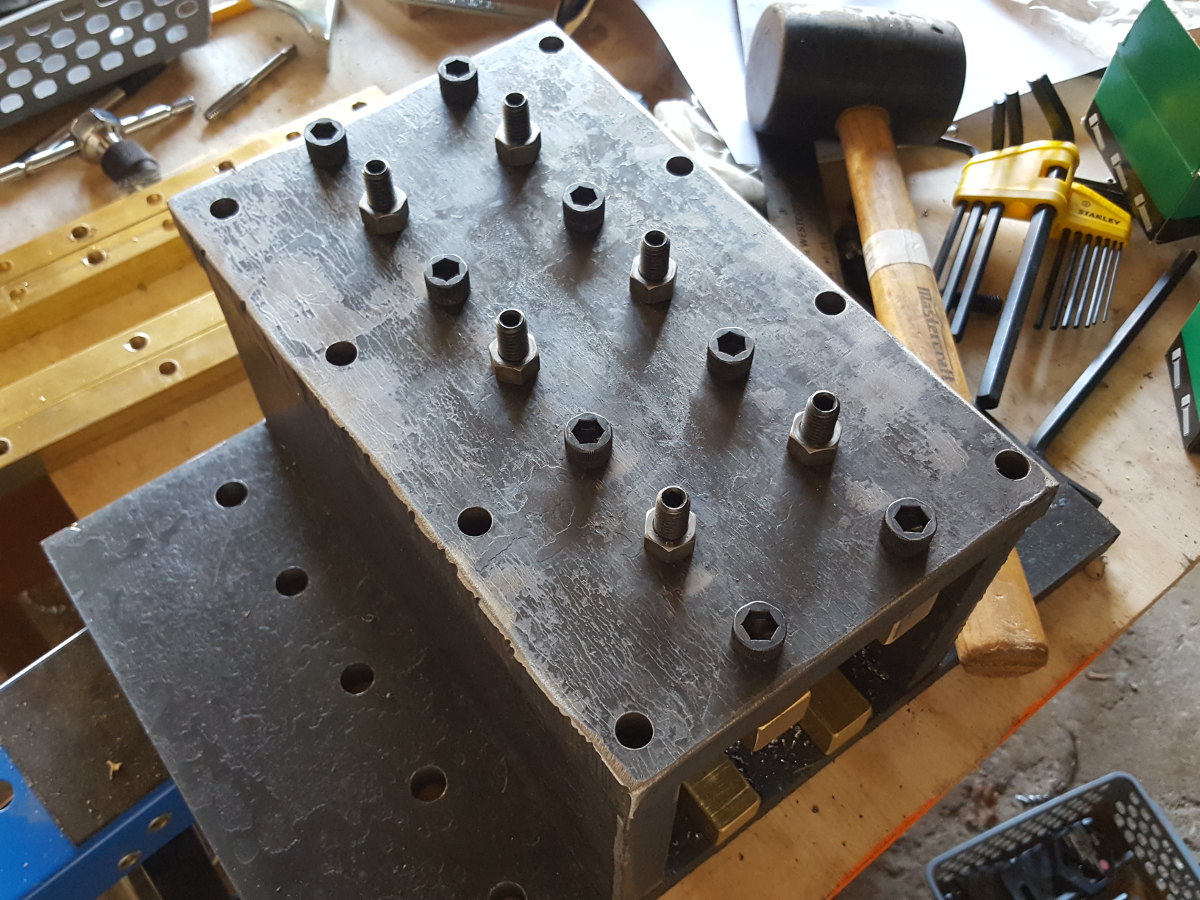
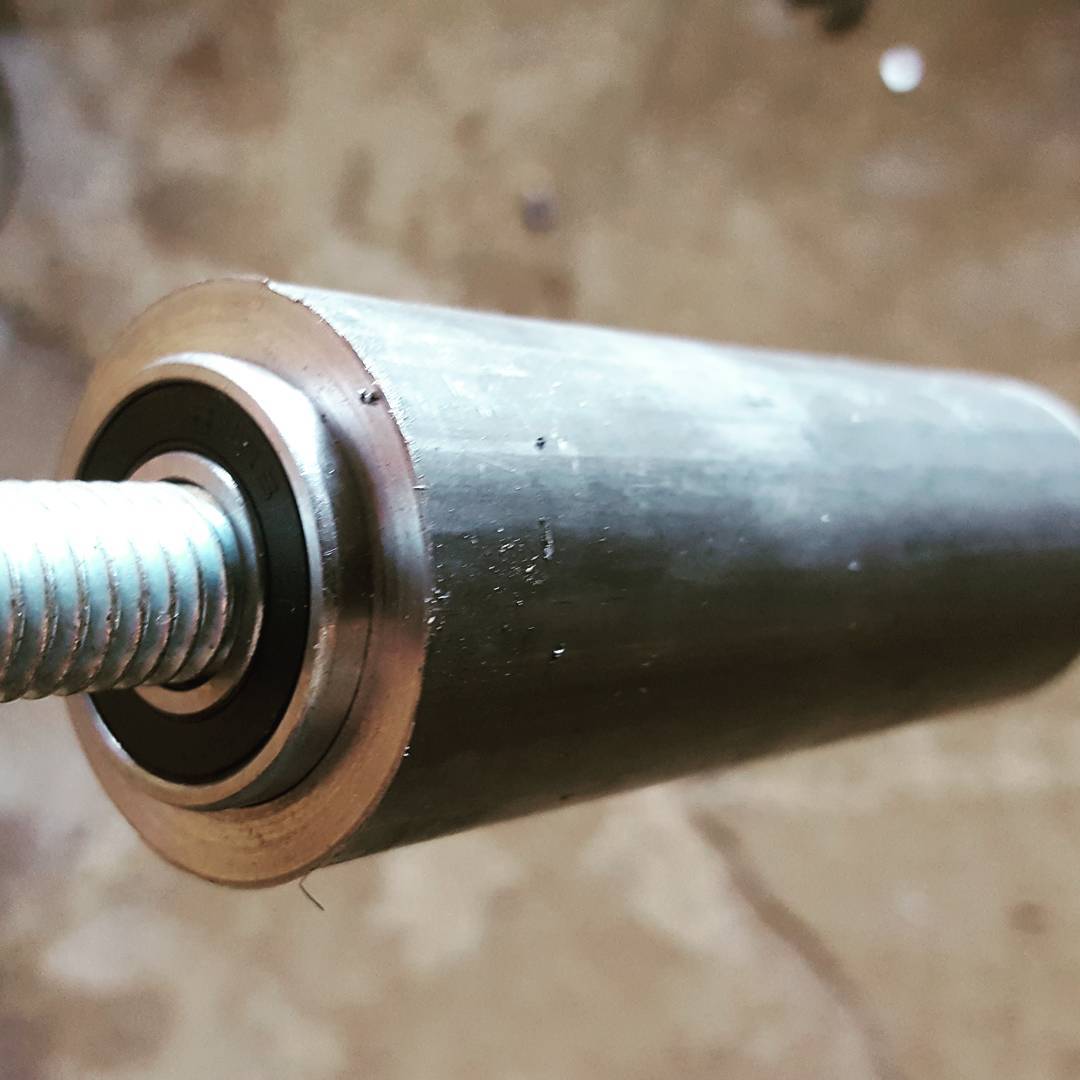
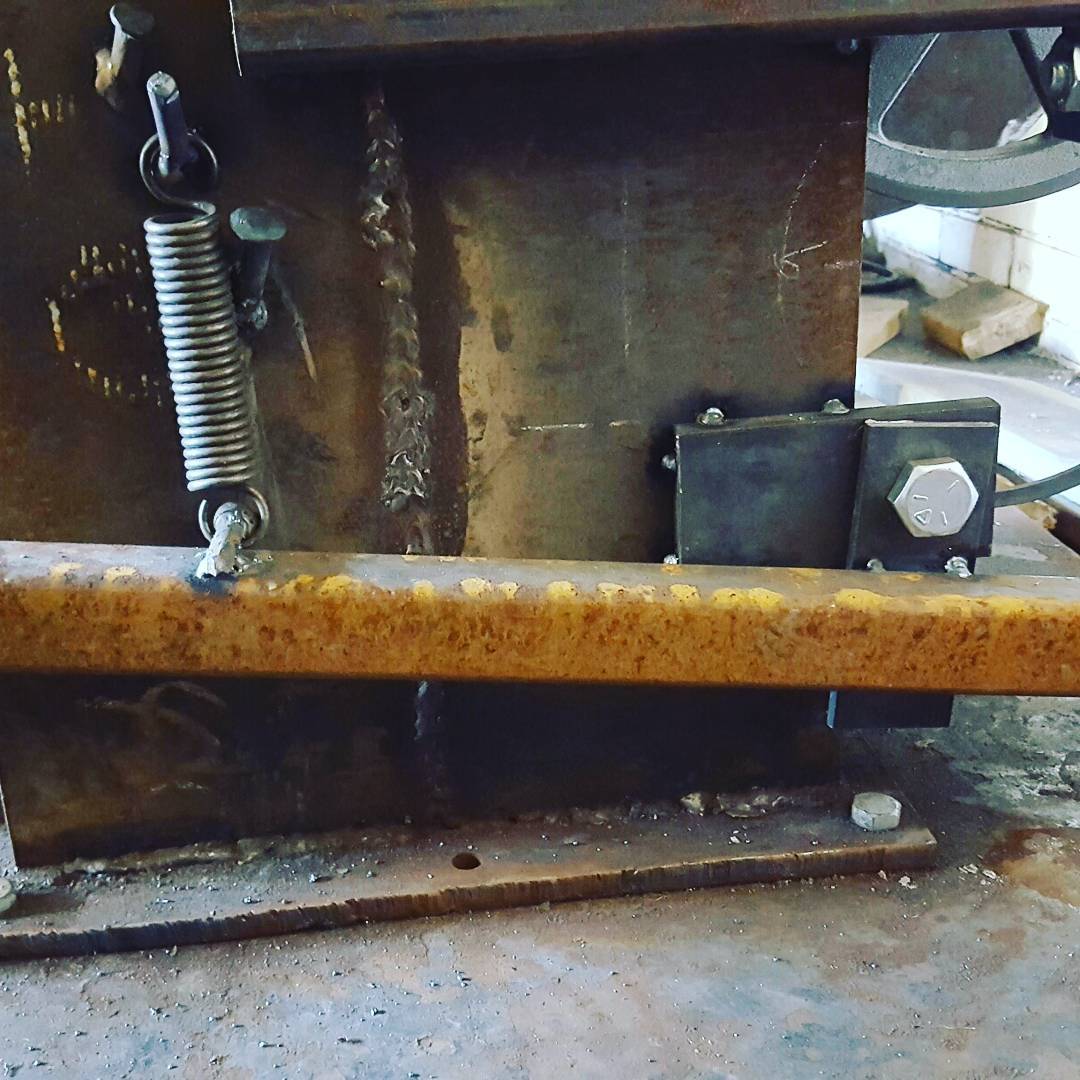
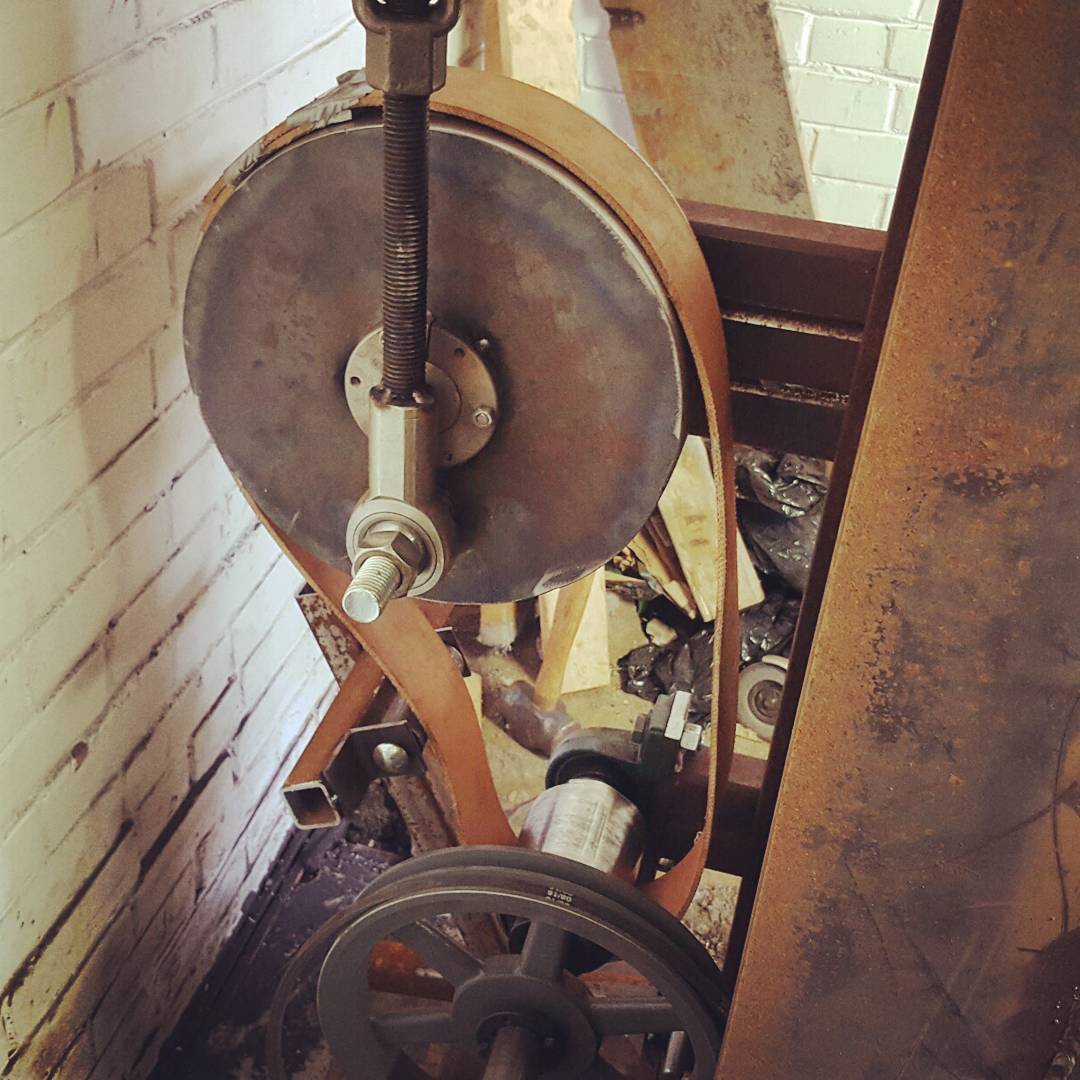
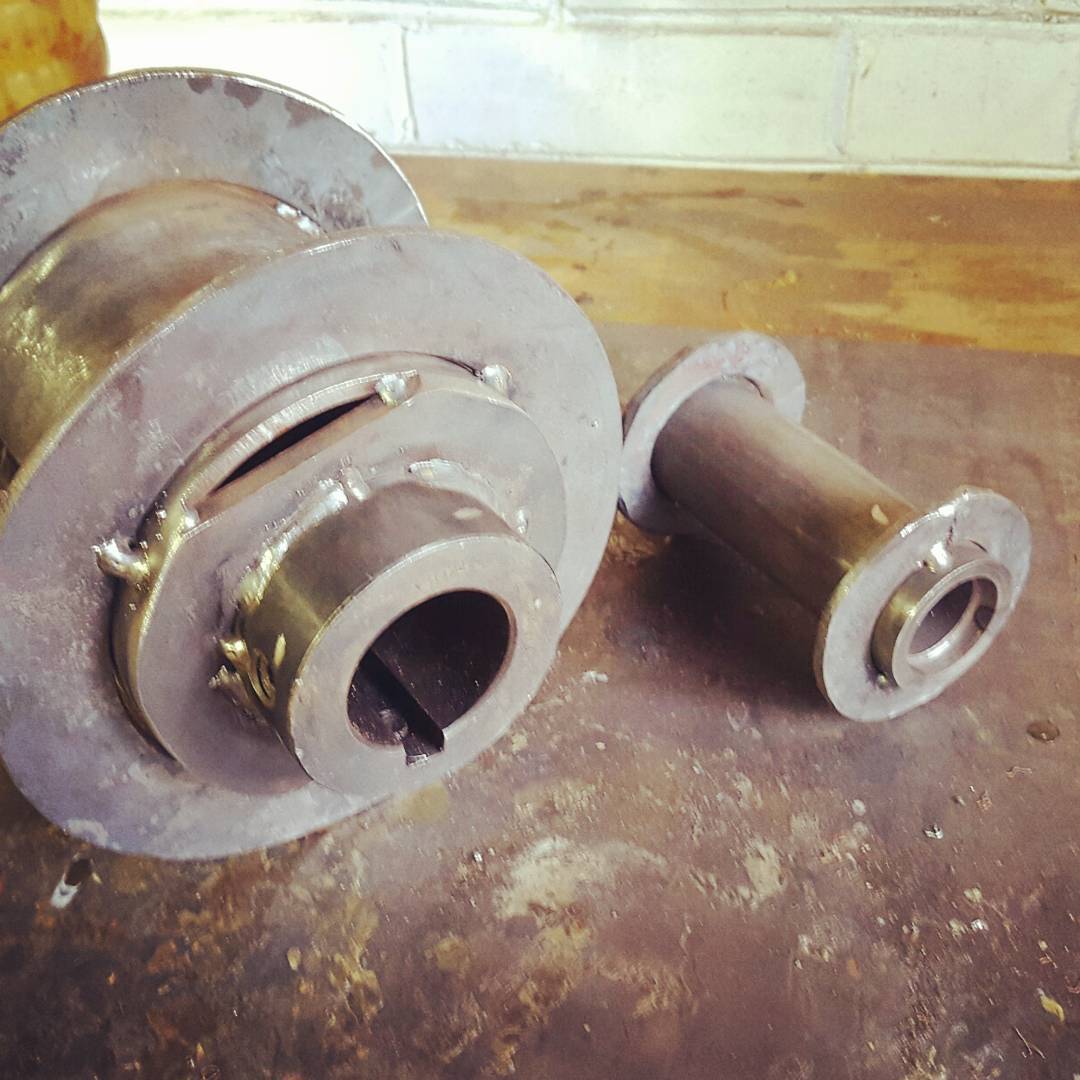
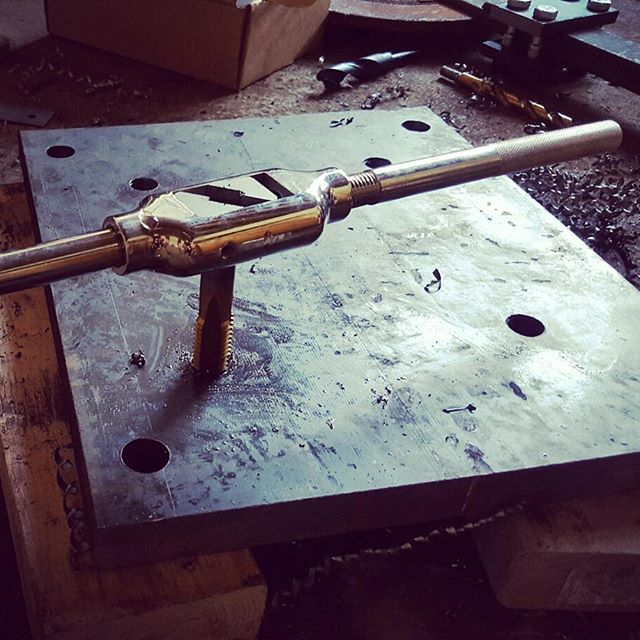
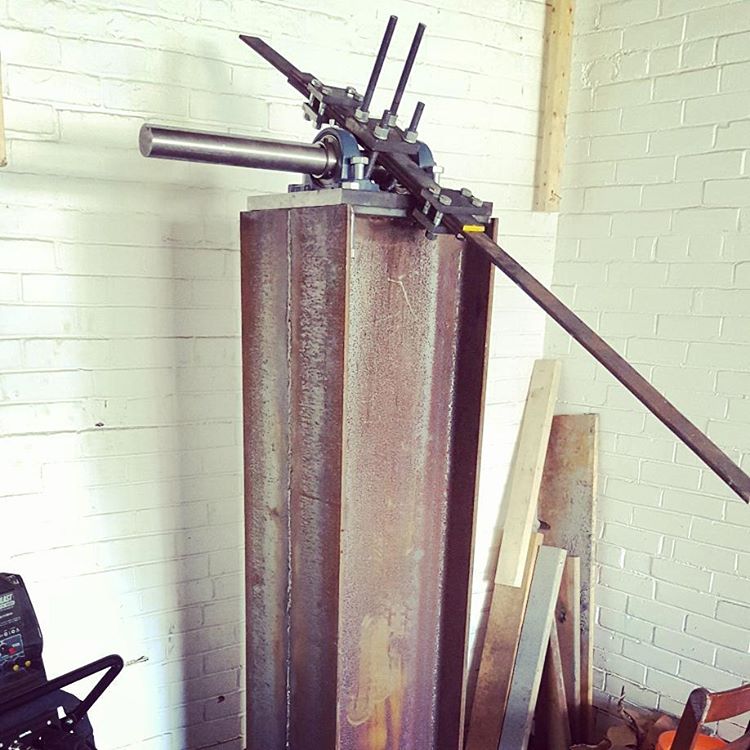
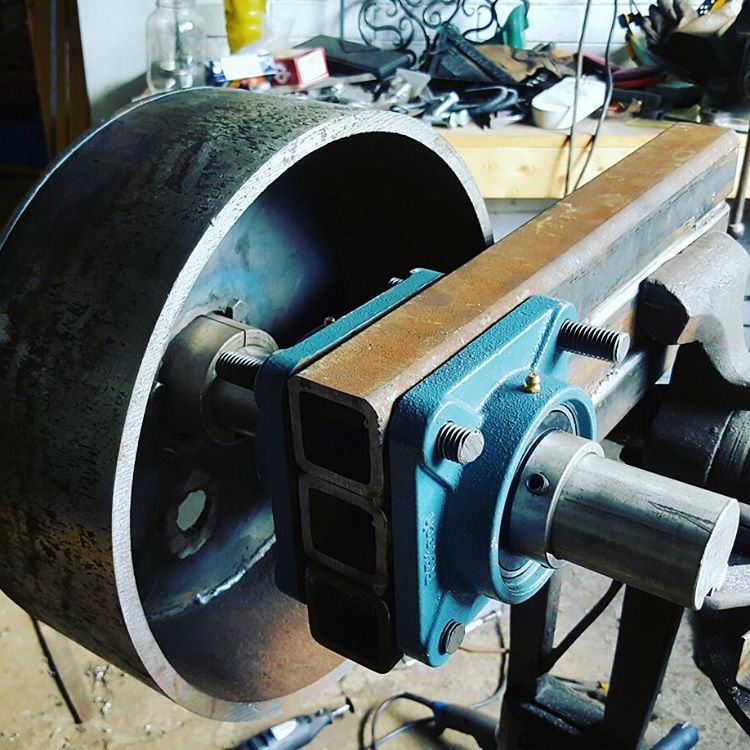
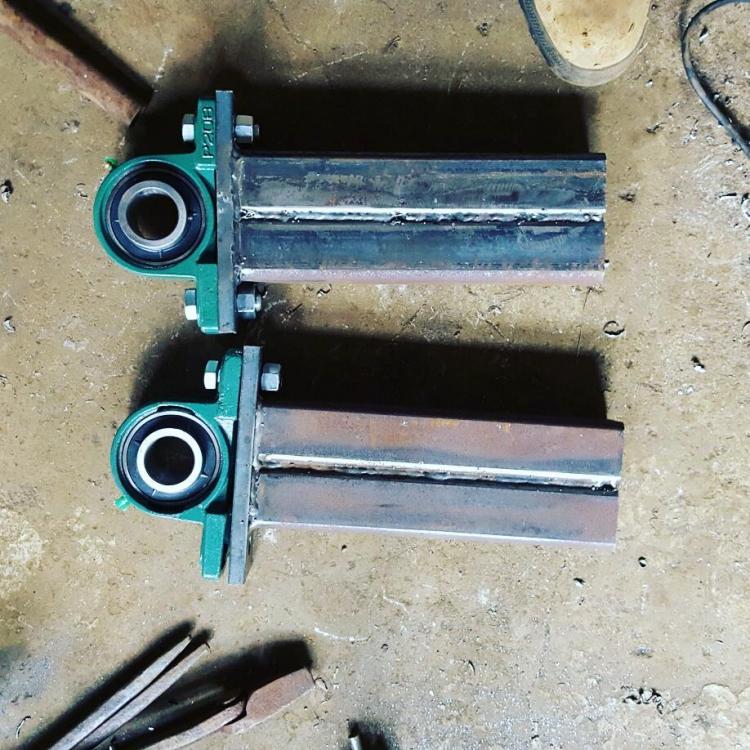
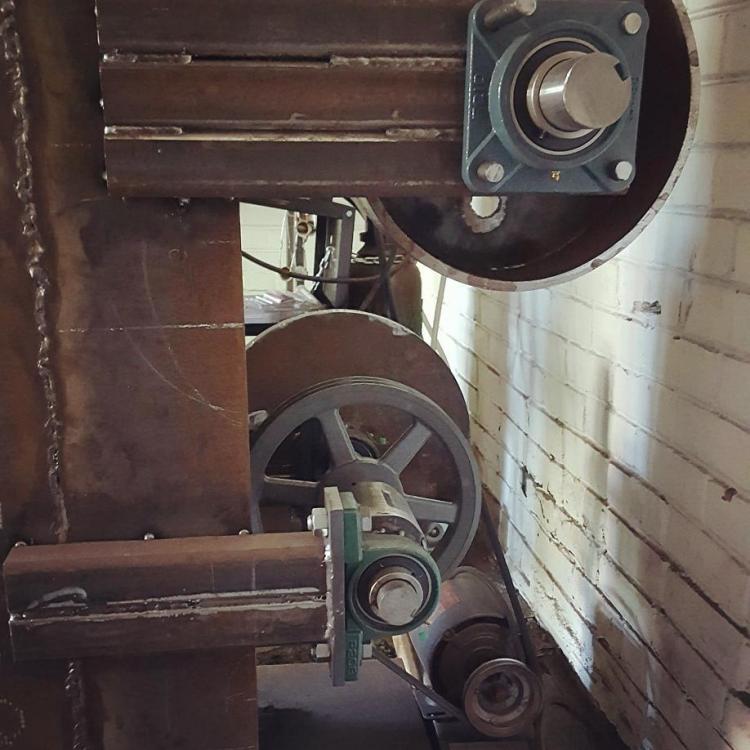
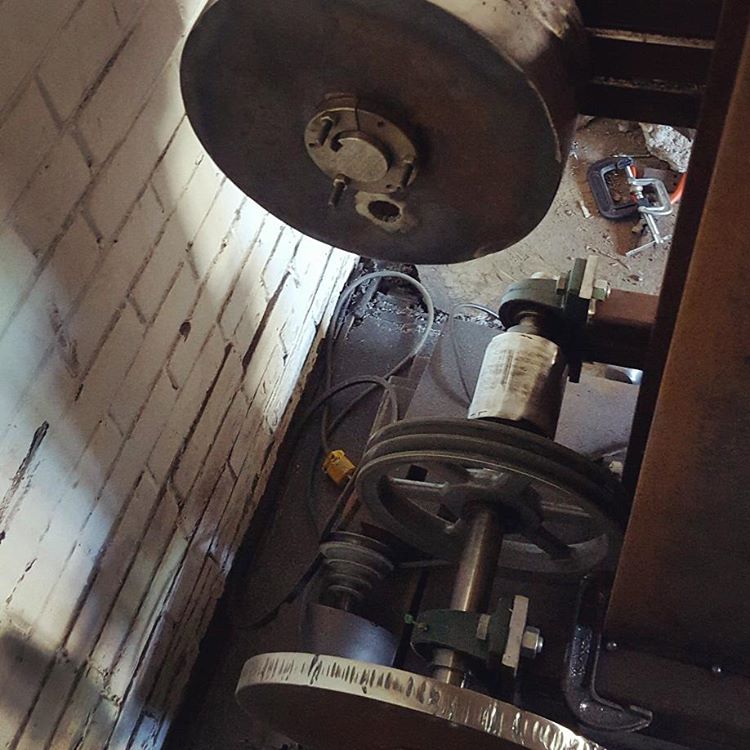
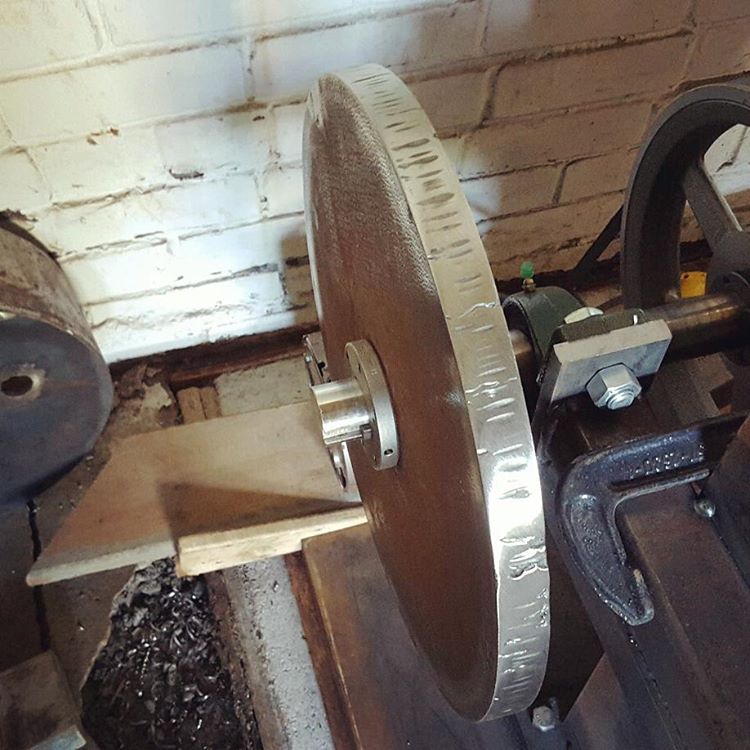
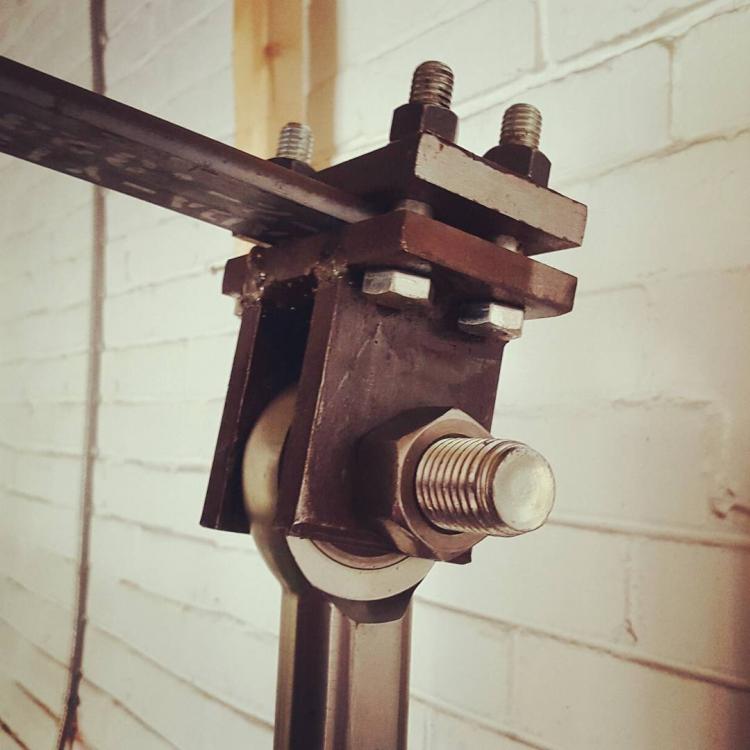
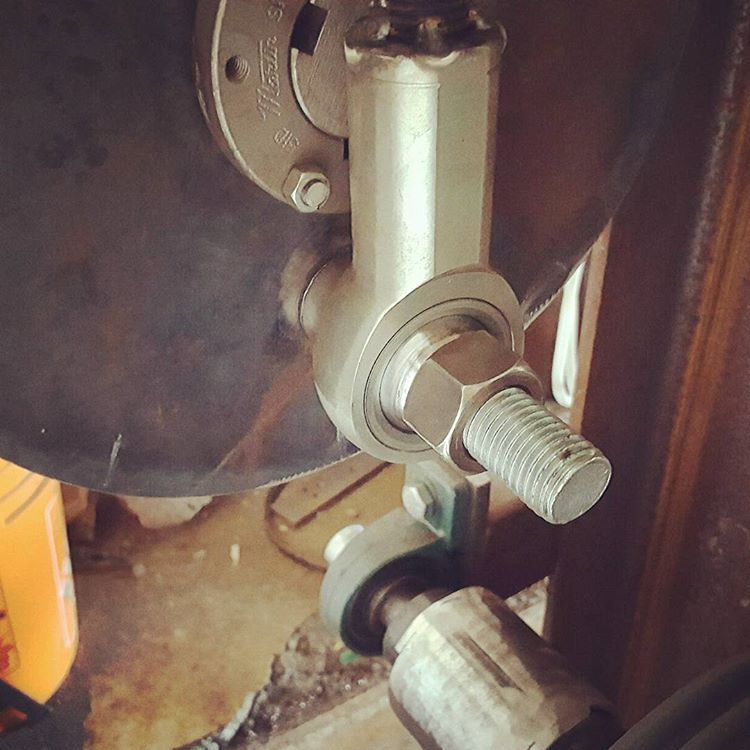
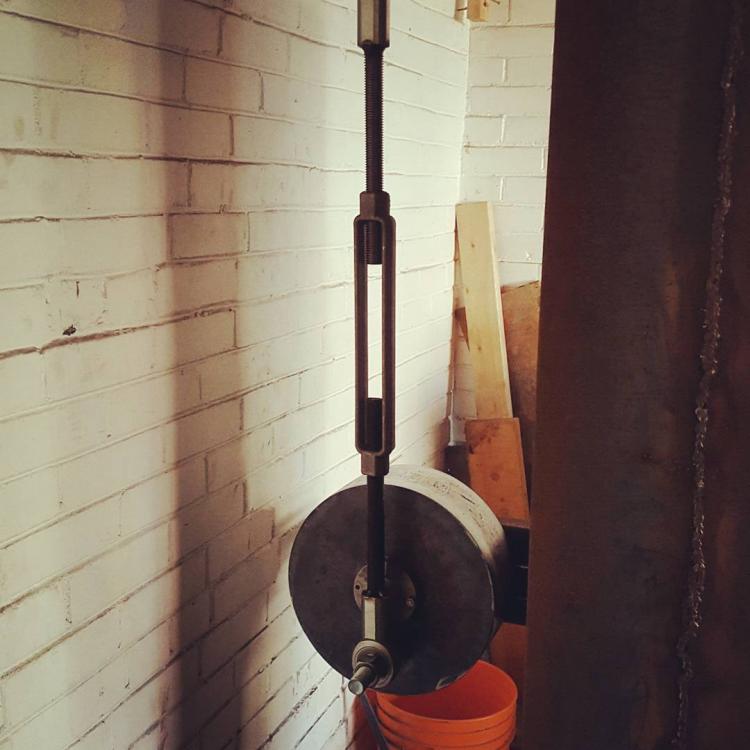
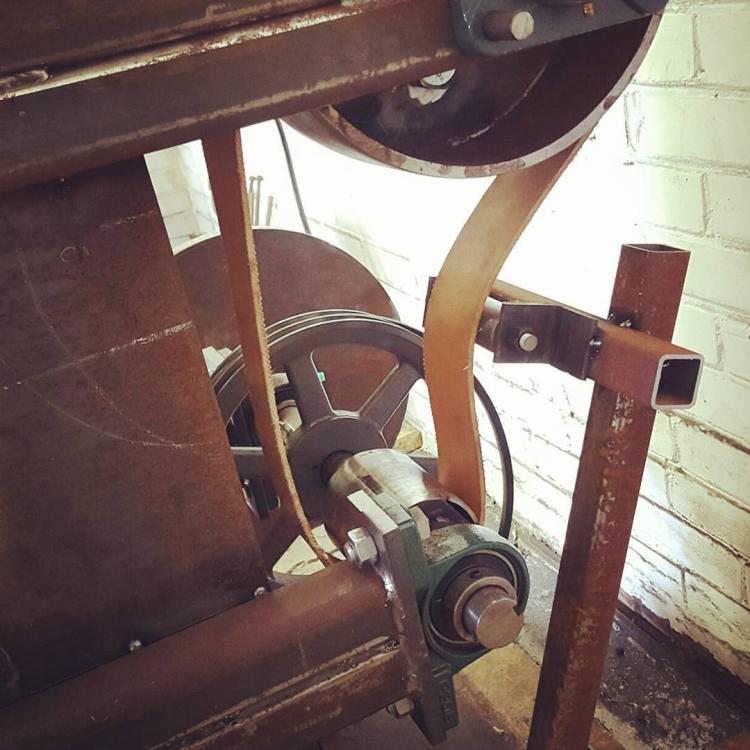
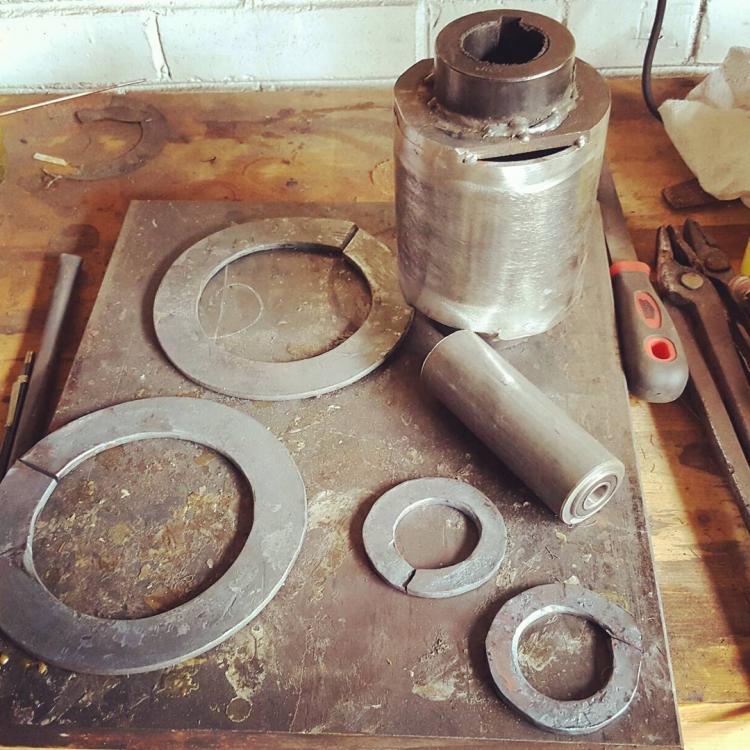
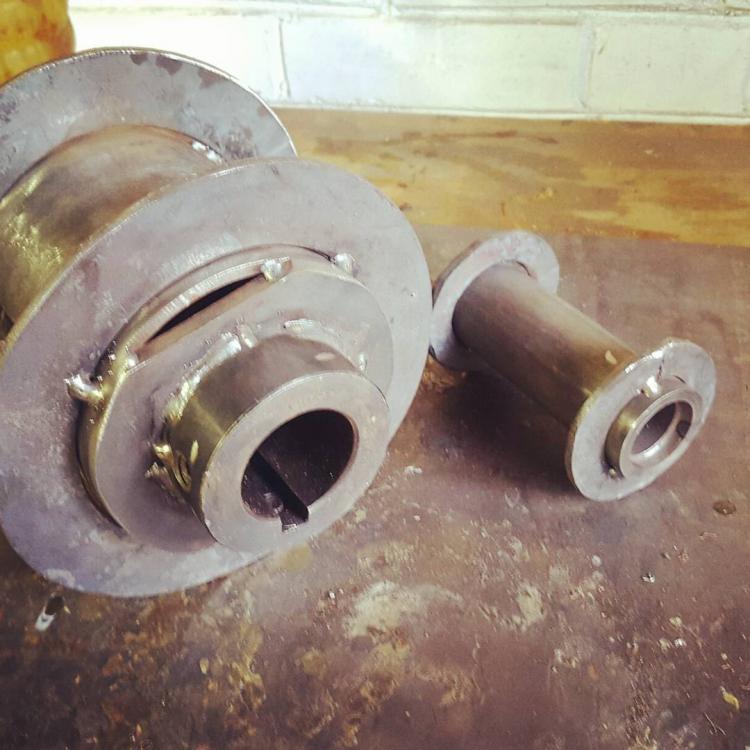
I was sidelined for a while by a noise/zoning issue. City bylaw officer showed up at my door stemming from noise complaint. Long story short, it essentially blew over. I did some sound proofing and the build continues. Top Pivot The pivot is 2inch pillow block bearings, attached with bolts to threaded holes in a top plate. The top plate bolts to the top of the mast with through holes. This will allow optional spacer plates to be inserted beneath to raise the pivot, per arftist's design. I'm also keen on being able to disassemble things if I need to modify or move. The ubolts are bent from 5/8 threaded rod. Drive System The bearing supports are fabricated from thickwall tube and clamped/spot welded to the frame; welds to be finalized at a later point after I'm satisfied that everything fits and works. I spun the jack shaft with a small motor and trued the flywheel with a flapdisc. It was already very close, just the kerf from the torch cutting. It spins true at 800 rpm with little to no vibration. Pitman Arm The pitman arm is 1 inch threaded rod with spherical rod end bearings on each end. The pin is a grade 1 inch grade 5 bolt that passes through a spacer to allow clearance and extra support. Treadle and Idler I machined an idler pulley from 1.5 inch thick walled pipe. I don't really know the range of motion necessary to give adequate tension, so the treadle construction is kind of an experiment, hence the spot welds until things are finalized. Bolts for treadle pivot, spring return. Flat Belt setup I positioned the idler to just touch the belt when treadle is up. Treadle down it jabs inward 4-5 inches. I cut the flat belt long and joined the overlap with duct tape while I get a feel for the tension required. I tested by manually spinning the jackshaft flywheel and engaging the treadle. I had used a flapdisc to put a light crown on both pulleys, and best I can see now tracking isn't terrible, but decided flanges on the idler and smaller pulley could help. The flanges were forged and welded.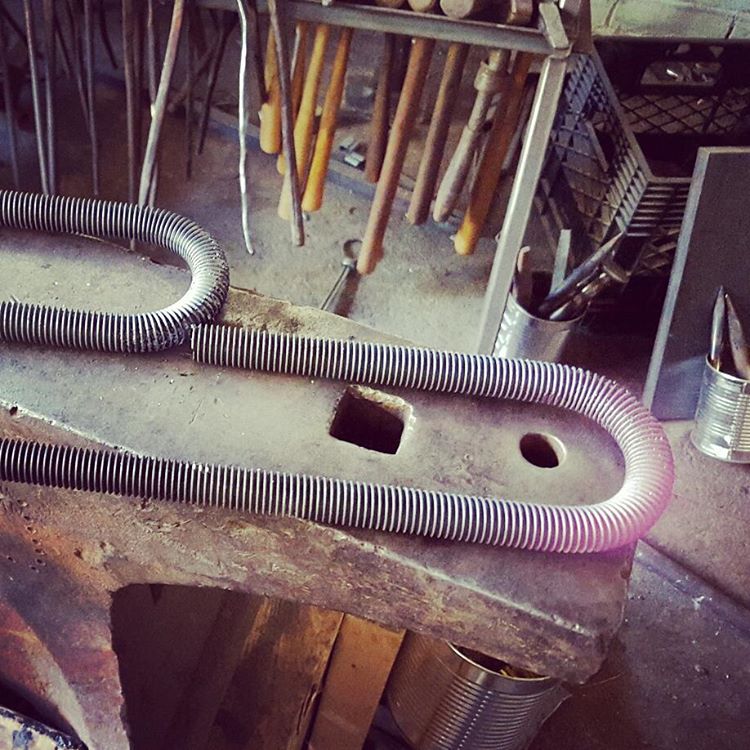


-
Designing a 50lb guided helve hammer.
tylerdewitt replied to tylerdewitt's topic in Power Hammers, Treadle Hammers, Olivers
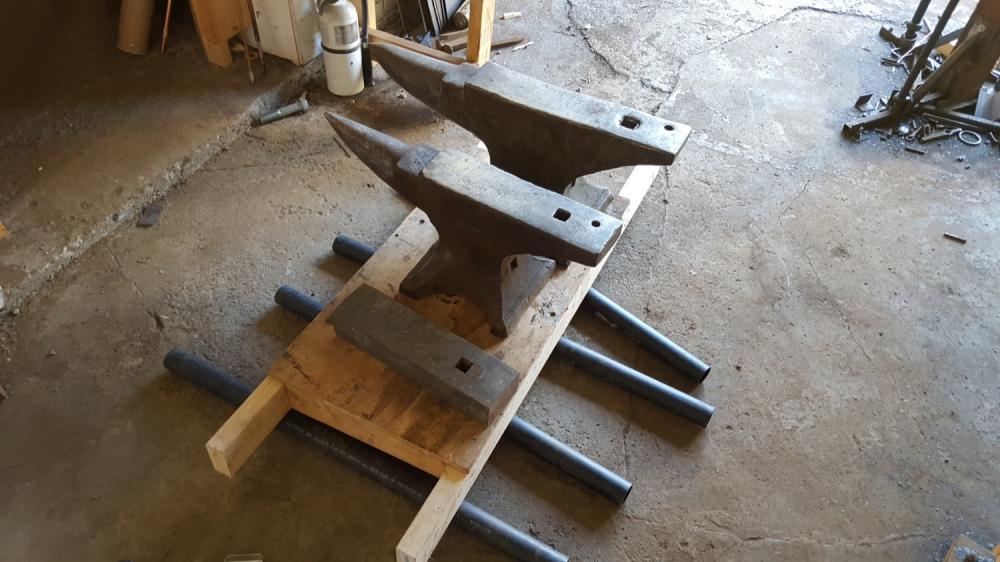
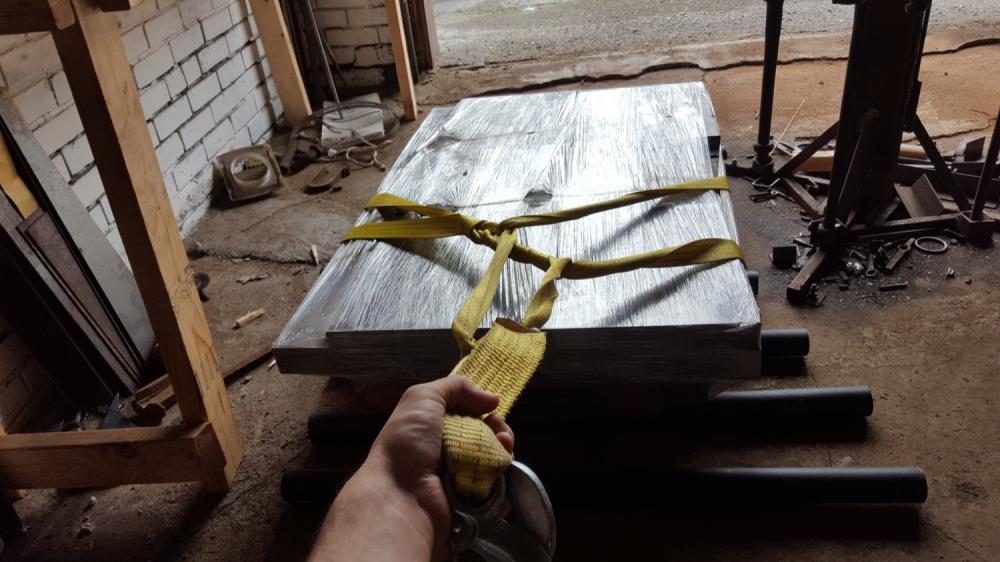
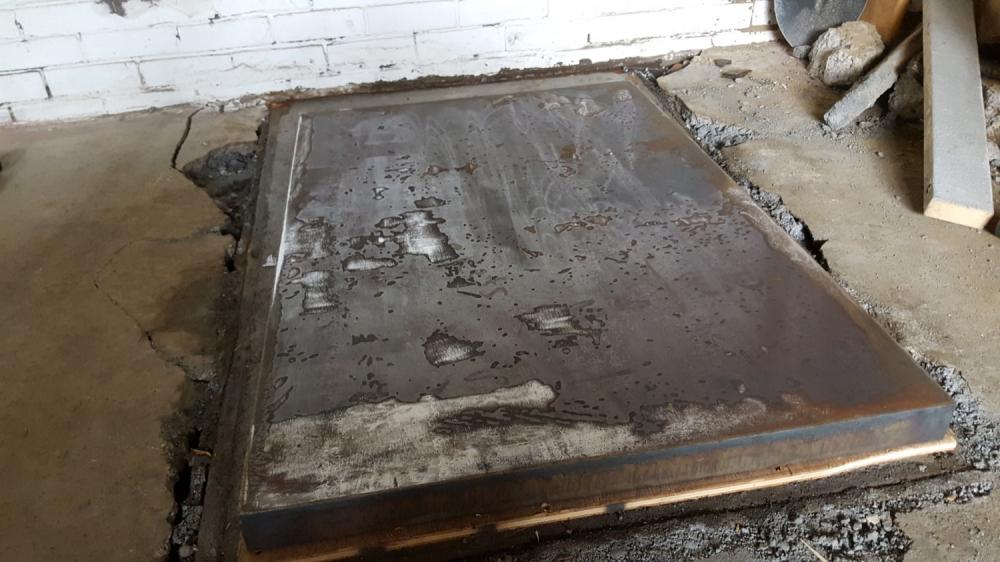
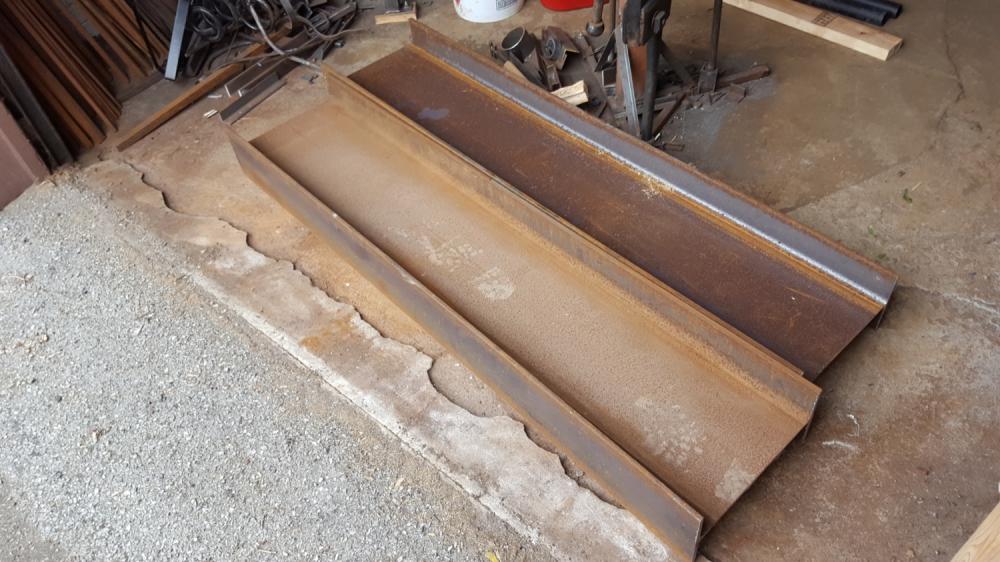
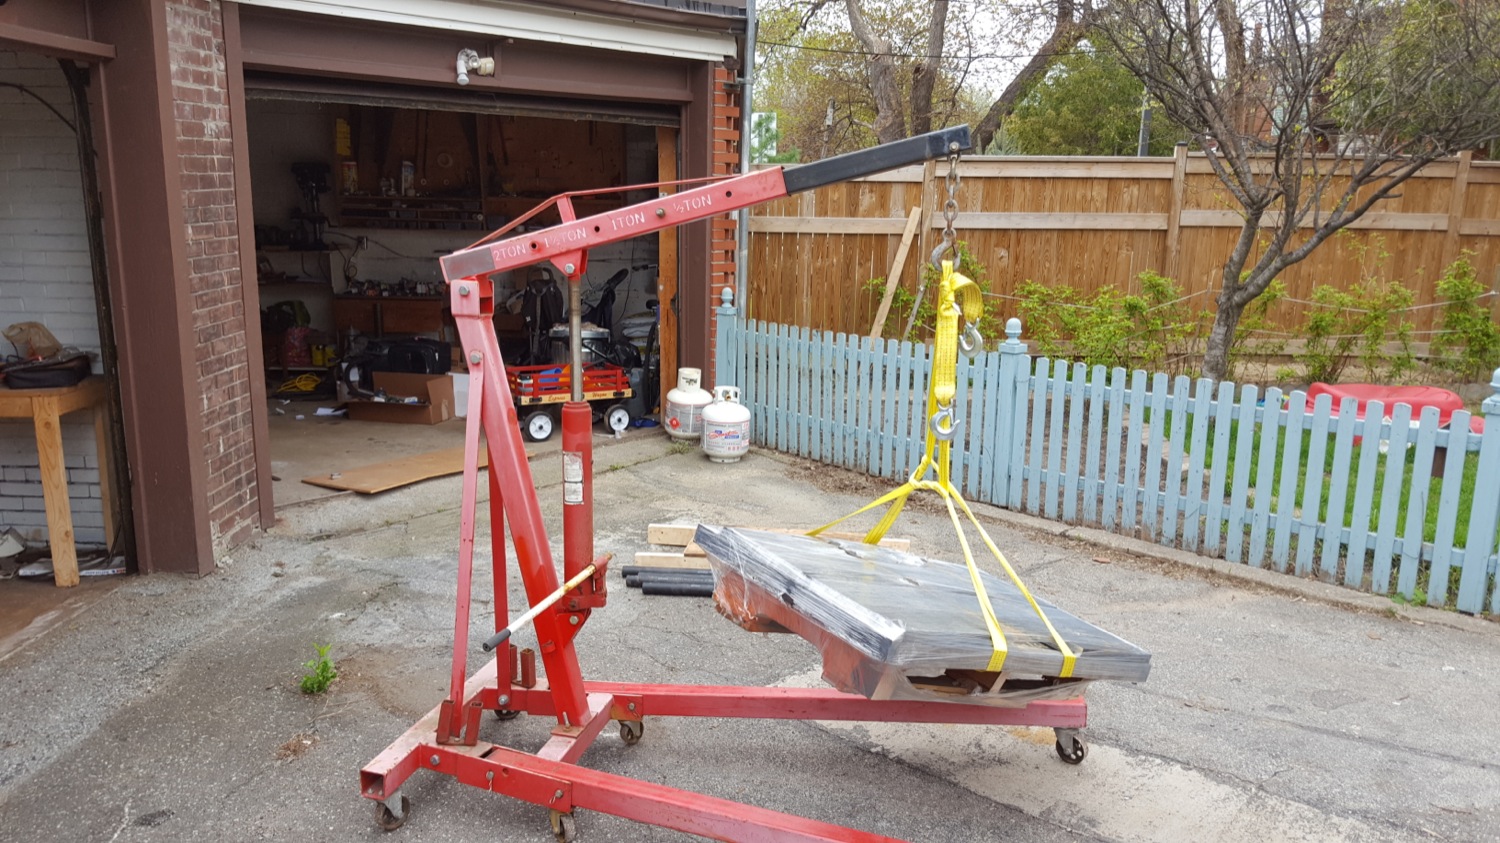
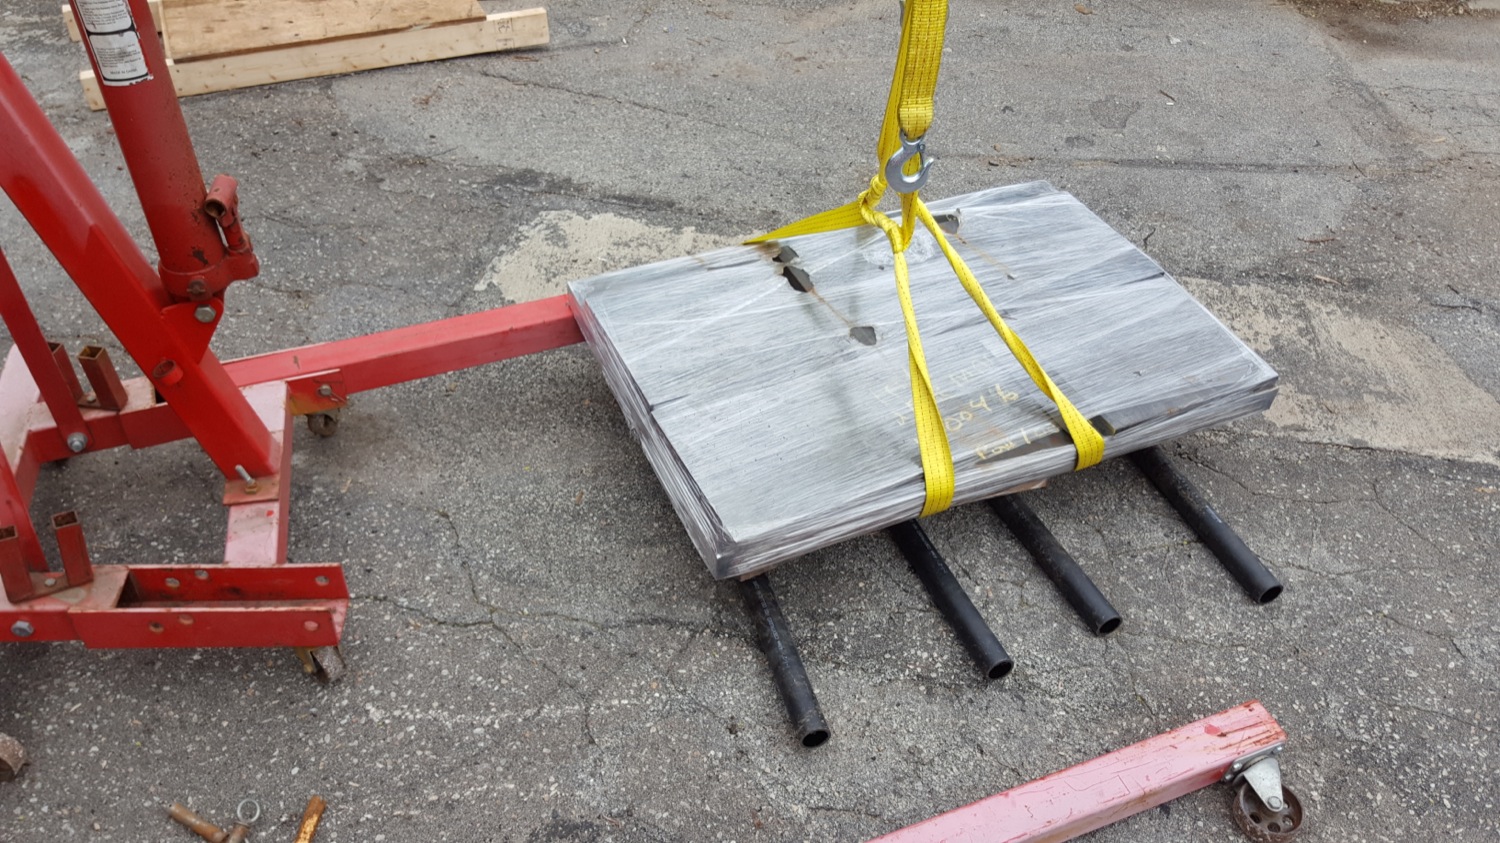
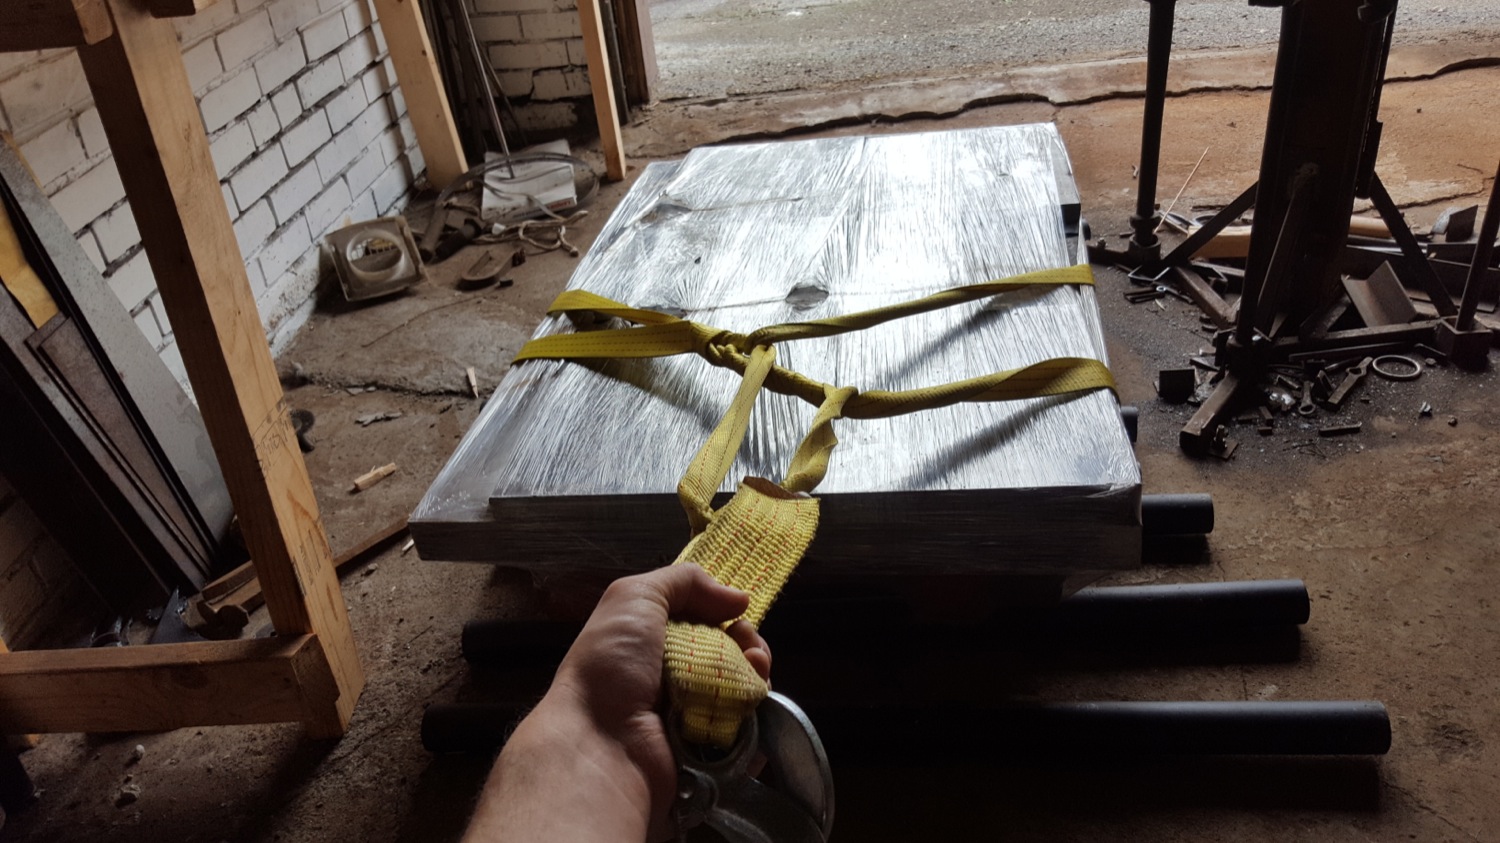
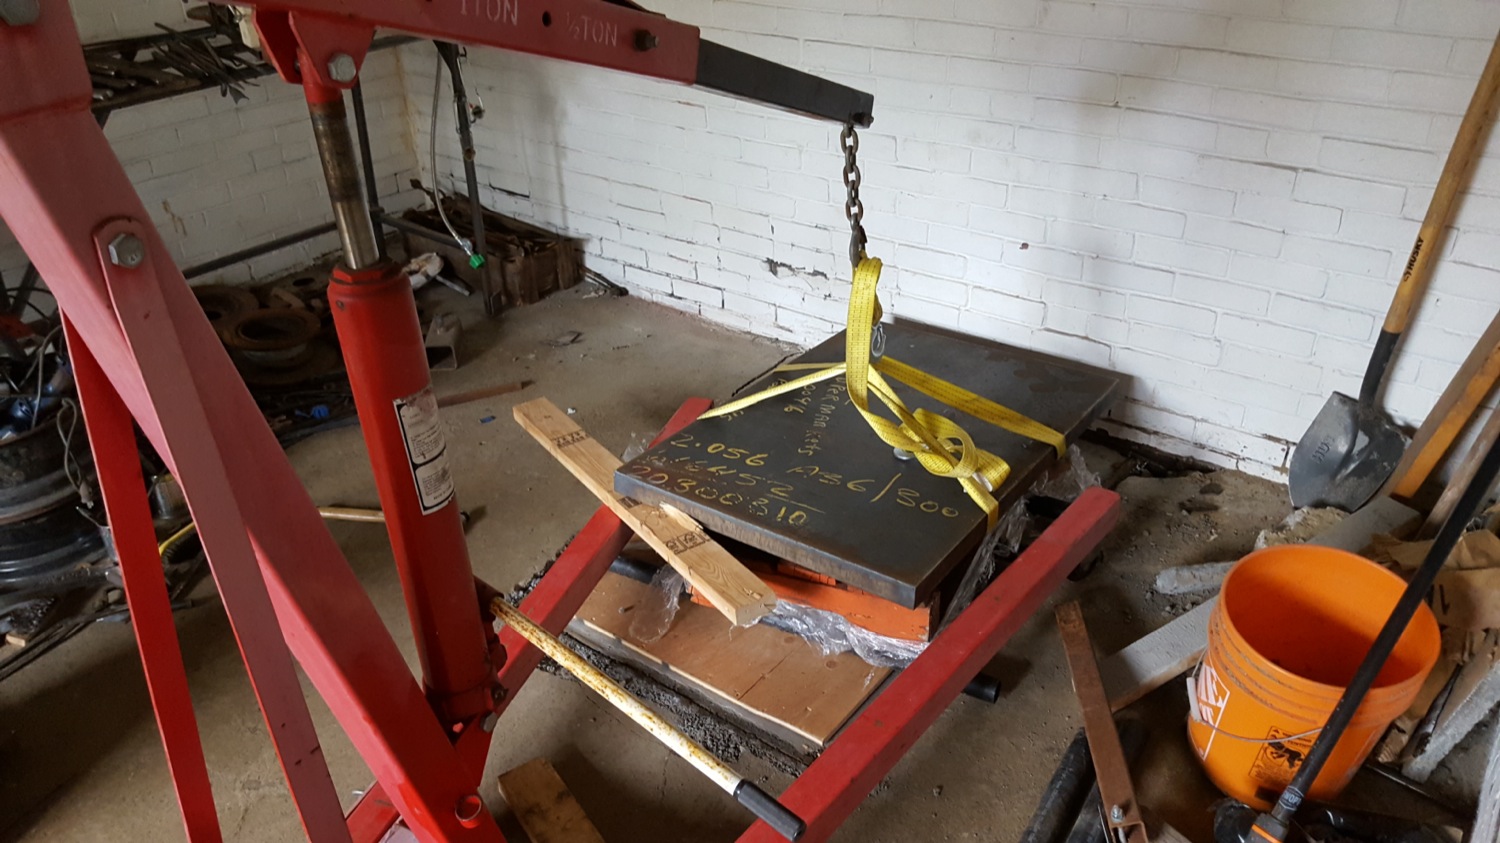
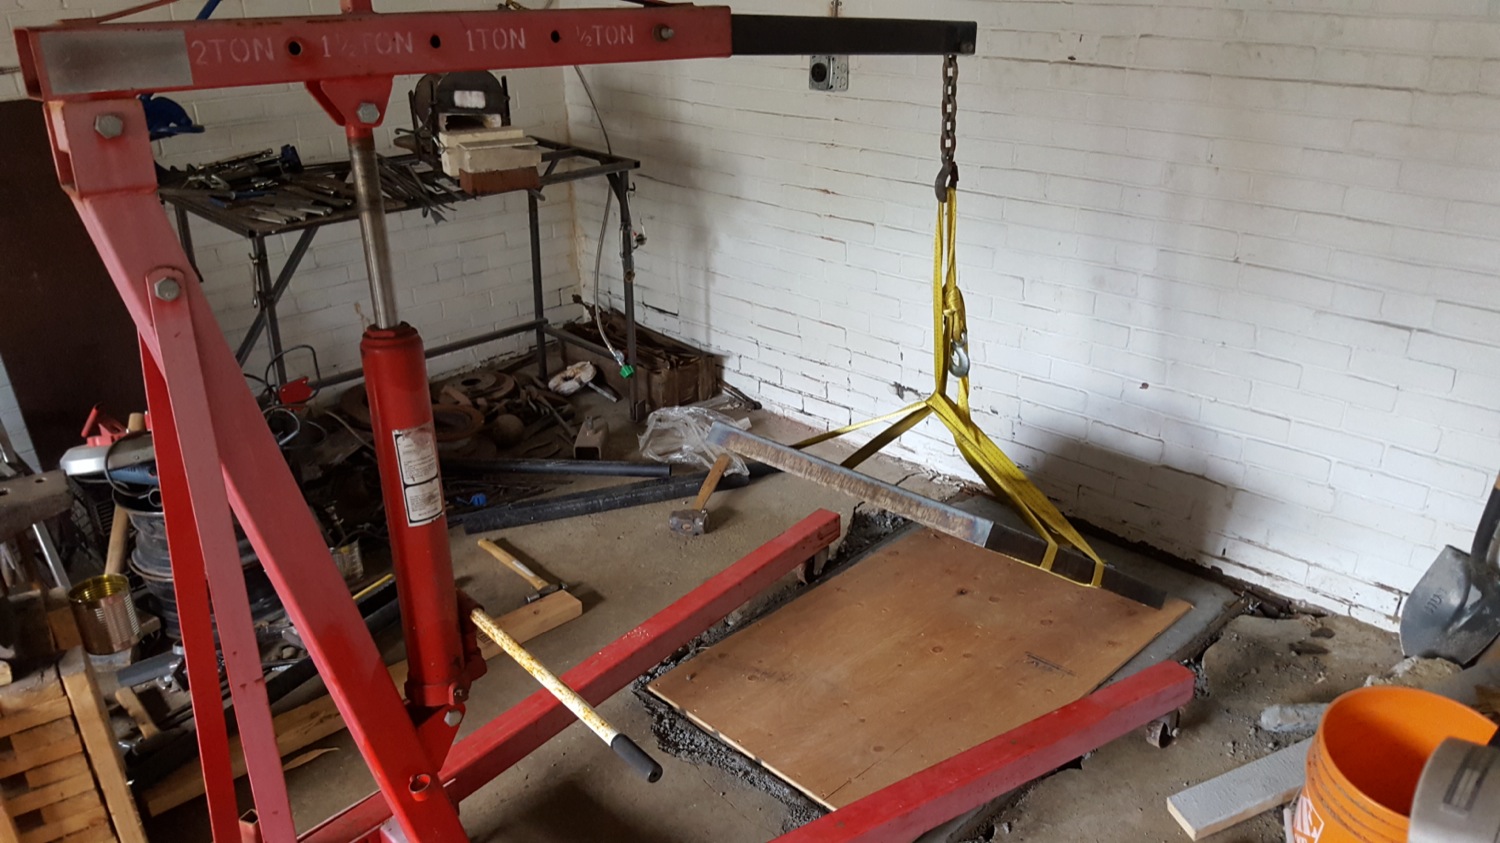
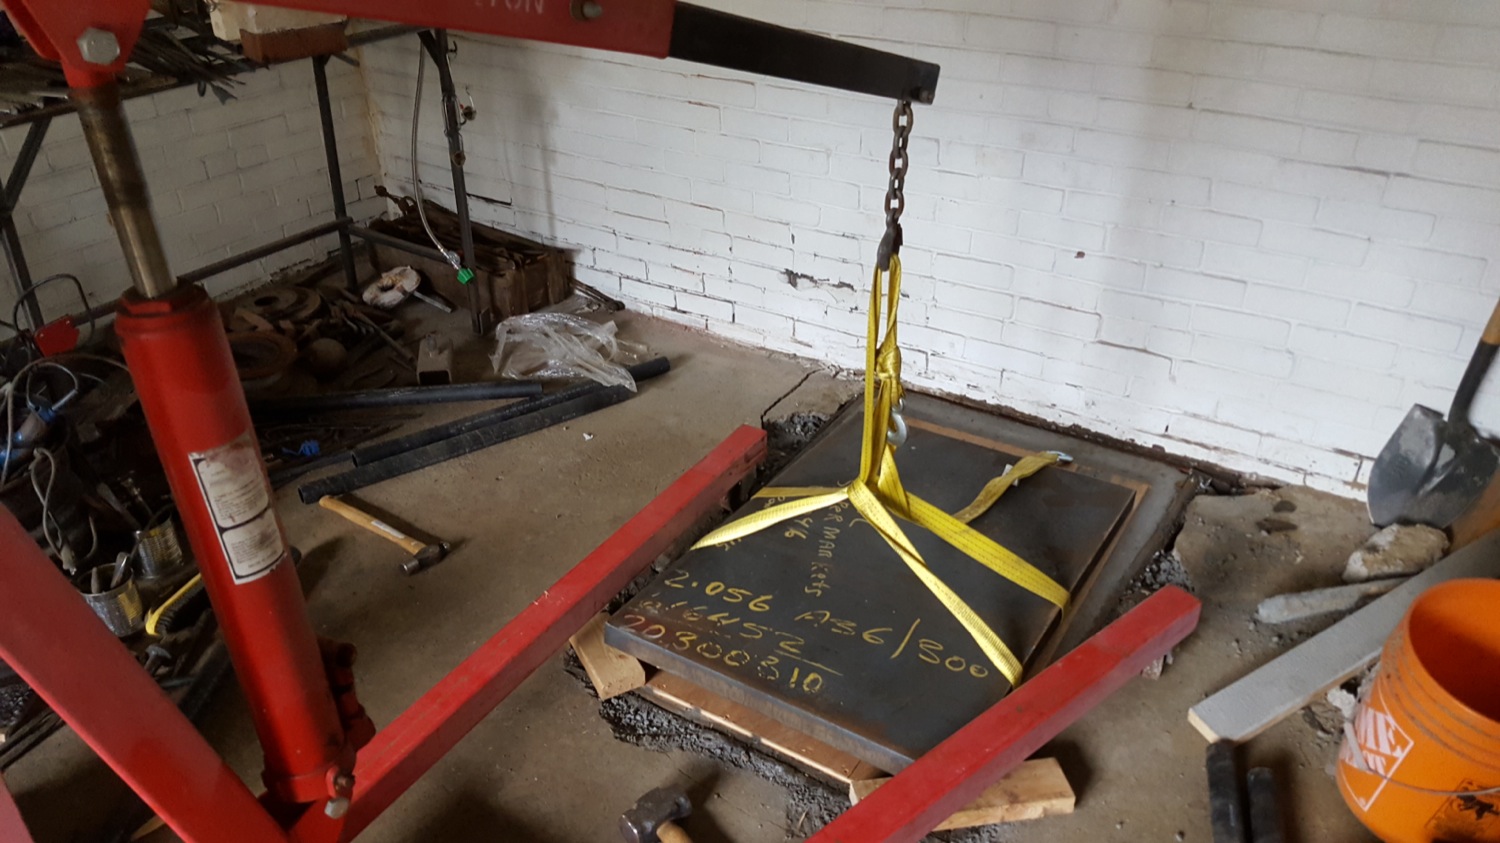
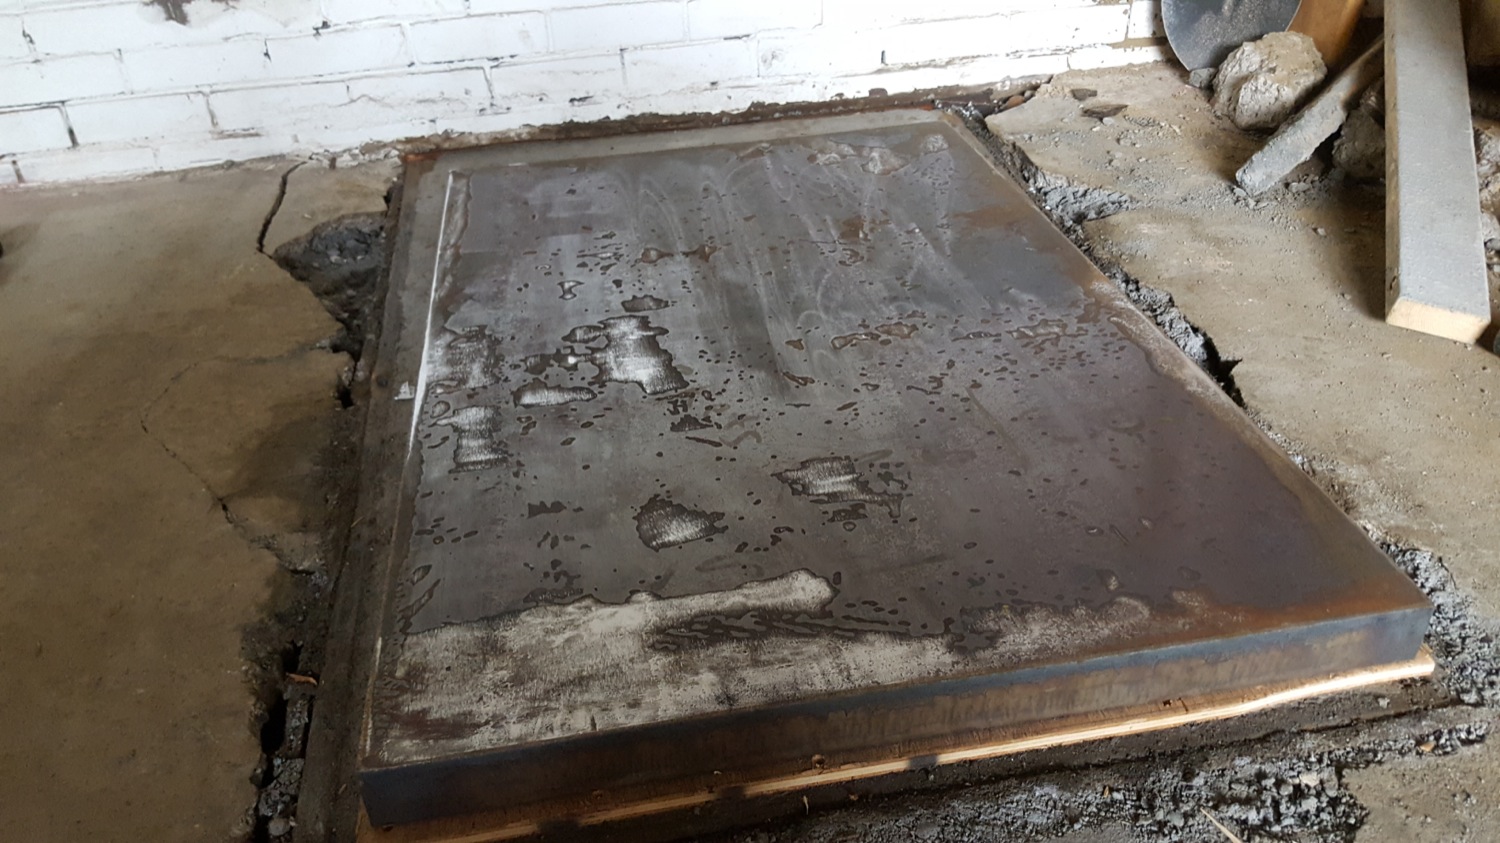
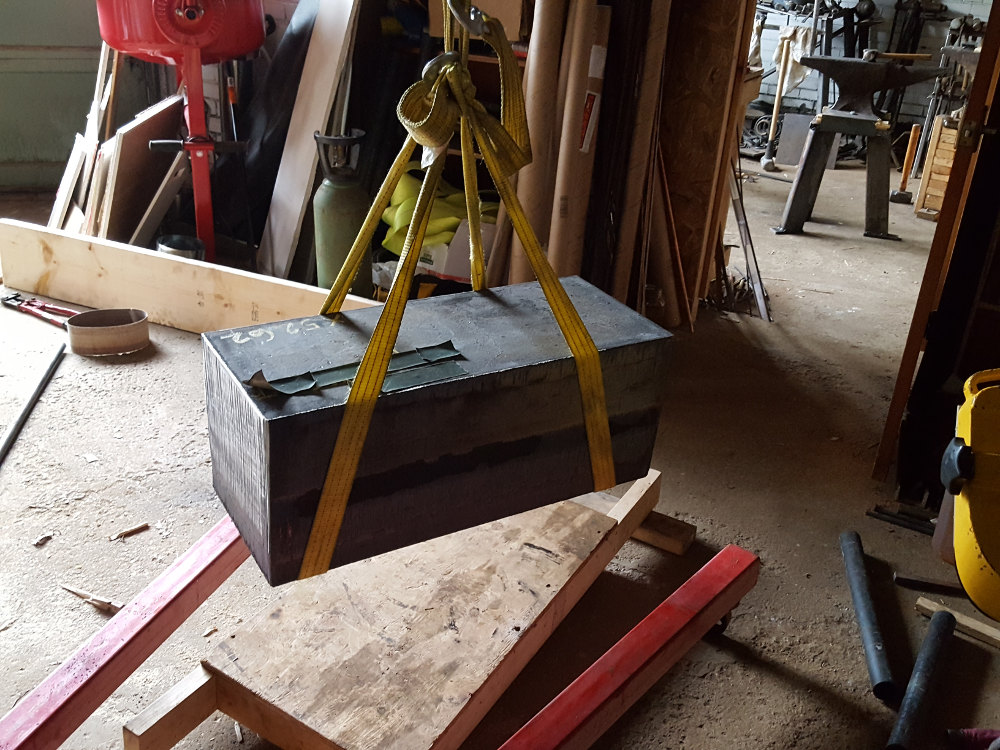
Unloading some heavy steel Had some large pieces of steel delivered today, notably a 2x28x42 plate weighing 700lb. I was responsible for unloading, and was a little nervous having never moved anything of this weight before. I prepared in advance by building a sled and testing it on 1.5" PVC pipe rollers carrying the heaviest items I have. Gratuitous anvil shot: Delivery came in a pickup truck. I was prepared with engine hoist and tow cable. The delivery guy was friendly and helped me rig the hoist. All went smoothly. Plate was on a skid so I didn't need the sled. There are some additional smaller pieces of plate bundled, so the total weight was close to 1000lb. Lowered it onto rollers and pulled it into the shop. Pretty easy on rollers! Reminded me of the strong man competitions where they pull an airplane. Concrete has been moist curing for 2 weeks so I decided just to put the plate in place. First a piece of half inch plywood, then rolled the whole skid on top. Used the engine hoist to lift just the plate, then removed the skid and rollers and set it down on 2 blocks, to allow removal of the tow cable before kicking out the blocks. Actually i used a hammer because I value my toes. It was a pretty satisfying sound when I tapped out the last block. Kathunk. Zero rebound movement, like in the cartoons when they drop the anvil on Wiley Coyote. Also part of the delivery were two 66" long w14@34 beams for the mast. These were pretty simple by comparison to move and unload. Overall I found the entire move wasn't nearly as difficult as expected. If it had been top heavy, fragile machinery it would be a different story. But big chunks of steel rig and roll easily. I didn't order steel for the anvil for two reasons. First, to test my abilities unloading, and second to see what kind of cut edges I have to deal with. The base plate appears to be CNC plasma/torch cut, and it's smooth and accurate. The beams and 1" plate pieces were saw cut, and not perfecting square. I'm choosing between laminating 1" plate vs a solid anvil. Laminating would be cheaper, but that's a lot of welding and grinding, and the plates will not be perfectly aligned to begin with. Might opt just to buy a solid piece, now that I feel more confident unloading 1000lb. Starting to look like a hammer now.