Scrambler82
Members
-
Joined
-
Last visited
-
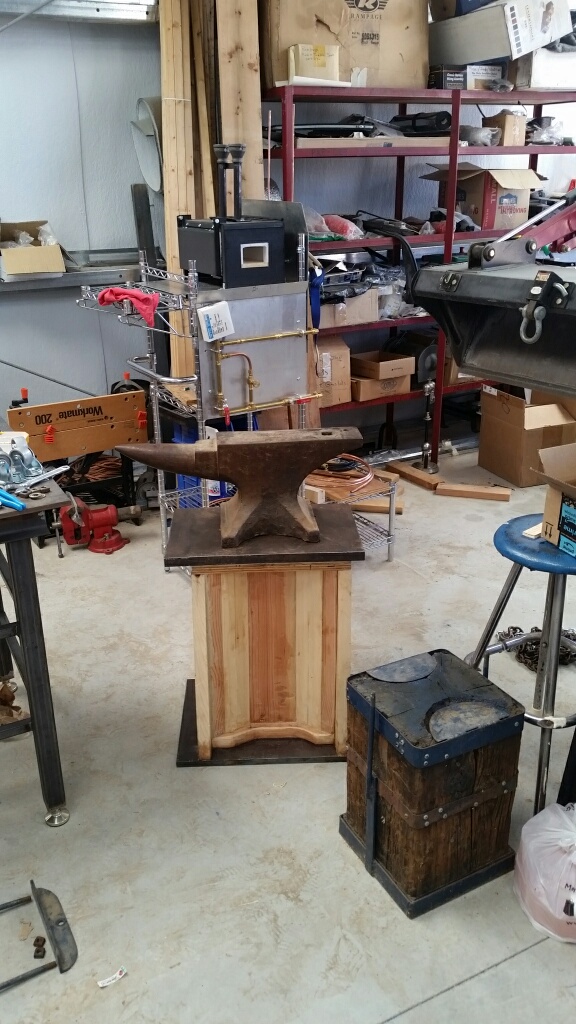
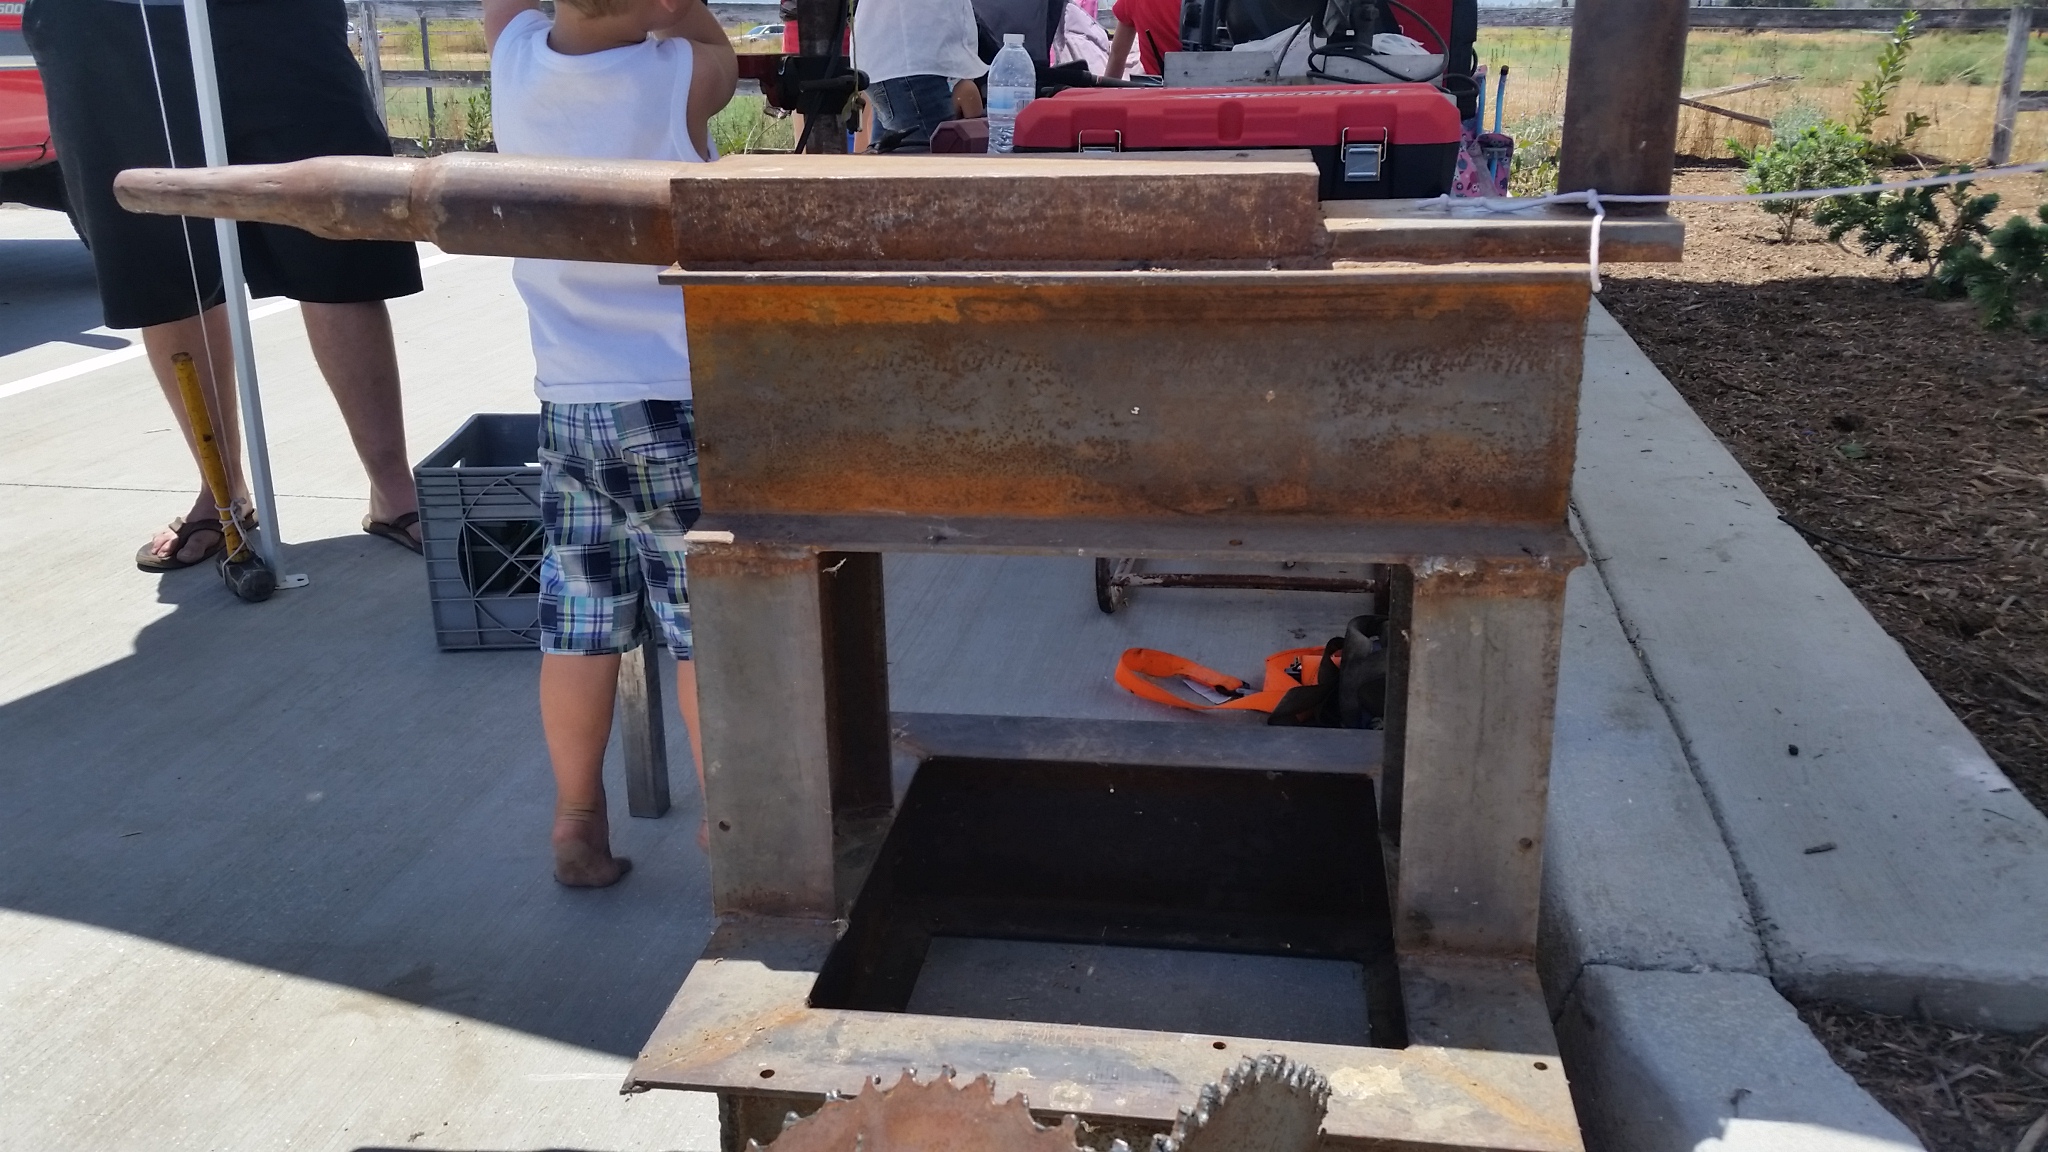
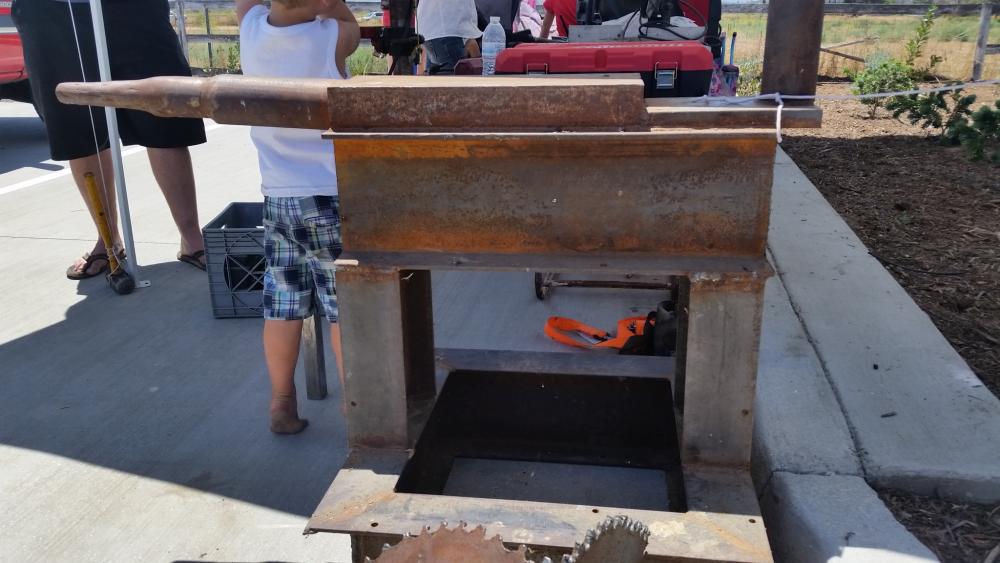
All I need to do is three things to finish up: 1) Add 2-6", 2x2 receivers under the horn area of the new stand. 2) Add Tool Rack, undetermined shape or size, under Tail Area of the new stand will be bolted on but maybe welded if I find bolting is a problem. 3) Clamp the Anvil down, again unknown method, thinking some 2.5" Angle with 1/4" wall, something from the scrape bin AGAIN ! The old stand is there for reference in height, I increased the height, one reason is for working lever, the second reason is from reading here on the site where it was suggest to to keep the height around knuckle to wrist height; right off the top of my head I do not know the actual amount so I won't post it until I remeasure to make sure. The wooden part of the New Stand was decent weight but I could move it around without too much trouble, once the top and bottom plates got put in place I decided to use the tractor to move the stand in place and then once quick movement to get the Anvil moved to her new home.

-
Thanks for the info. When I get back from the wedding I am going straight for the recycle yard and get some numbers flying and check to see if there are any indicators about material. Is one better than another ? If cheap enough I might buy more than one, someone may need one somewhere down the road ! Happy Anniversary to both of you guys, mine anniversary past a while back at 38 years.
-
Thanks Thomas, these aren't damaged in anyway. They are placed,on a pallet towards the rear of the recycle yard and looks like someone placed them there on purpose. I have a wedding this weekend to go to in LA with the wife, won't get back there until Monday, will ask then about the material and cost... we will see ! Thanks again, hope all is well with you !
-
I came across 5 Fork Lift Tines, 1.5 to 2" thick ! I have noticed some people make anvils out of them or stands for anvils. Im thinking one I will cut up to make a Hardie Hole Portable Block and the other four would be for resale ! What material are these things usually made of ? I have not asked about them yet but was hoping to get some idea what these things might be worth in SoCal before approaching the guy ! Does any one have a good idea of what I should pay for these things ? The yard is a recycle yard and usually sells things on the lower side but these are heavy and I was hoping not to pay for weight ! Please respond ASAP, I can pick them up tomorrow !
-
I have looked and looked and searched under every name/member I can think of but I can not for the life of me find the drawing I remember for an "Add On Hardie Hole" ! I remember the drawing was of a large round piece of steel anvil, with a Hardie Hole added to the side made from three pieces (I think) of 1" steel bar welded to the side; it made a perfect 1" Hardie Hole. (I do remember Thomas talking about it but I am not sure if he posted) If anyone remembers the thread or post, or wrote and posted the original post/thread, please let me know, I have told a number of members here on the site about it and wanted to post either the drawing or a link to the thread, so all can use the method of adding a Hardie hole to a chuck of Steel Anvil and getting more versatility out of their anvils ! Thanks to any and all that respond...
-
58er, Nice Mace/Fail... ! Love the Dragon's Head ! Not sure if I missed it or passed over the post but how much did the finished product weigh ? I know there was a release signed on this piece but can the blacksmith be held accountable for its use ?
-
He stated he was having trouble finding an Anvil in a dollar range he could afford so he build one. I too thought there should be more mass under the main plate but he was happy with it ! Since he teaches kids I almost offered my second anvil to him but NO, I looked too long for the ones I have !
-
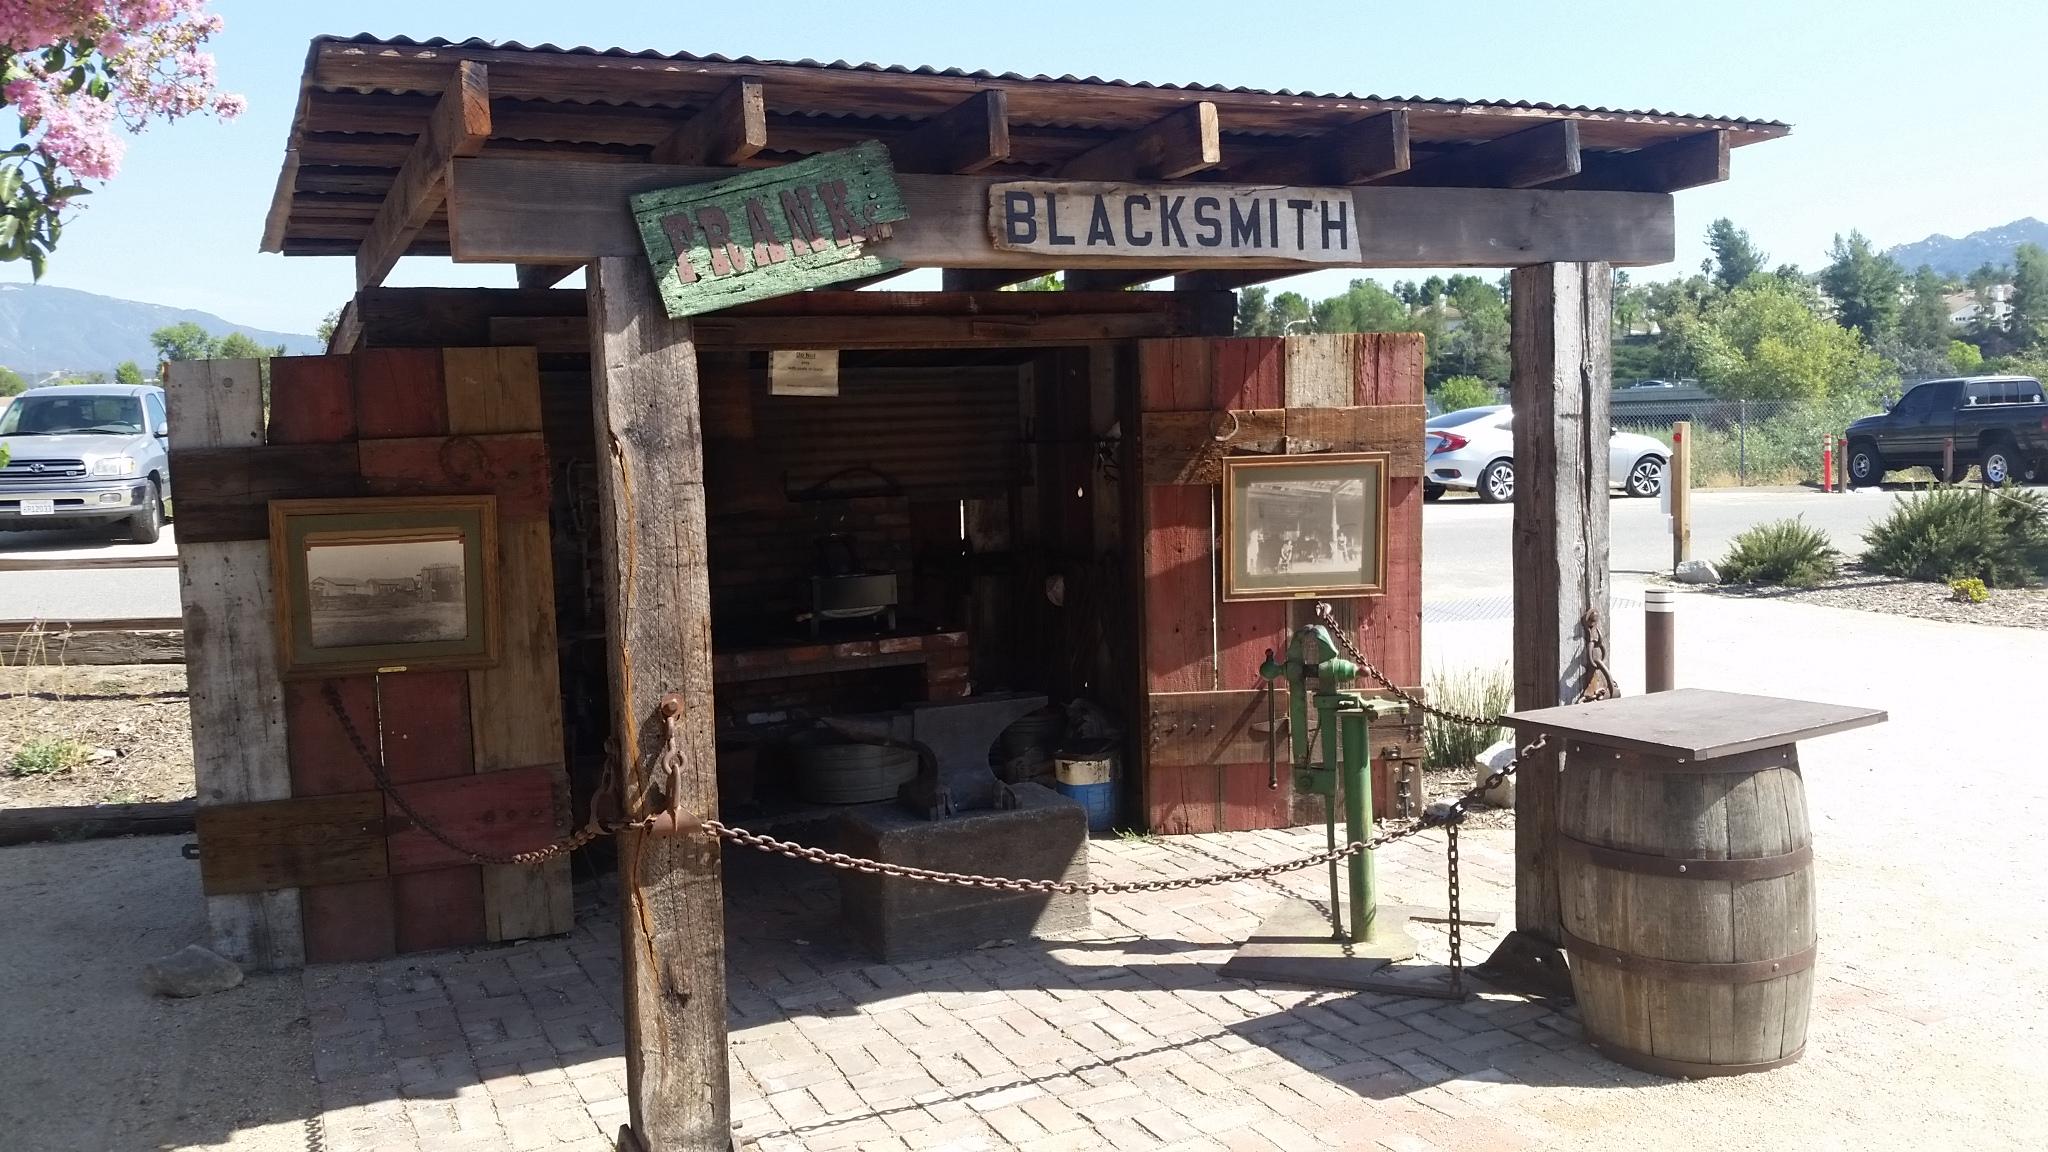
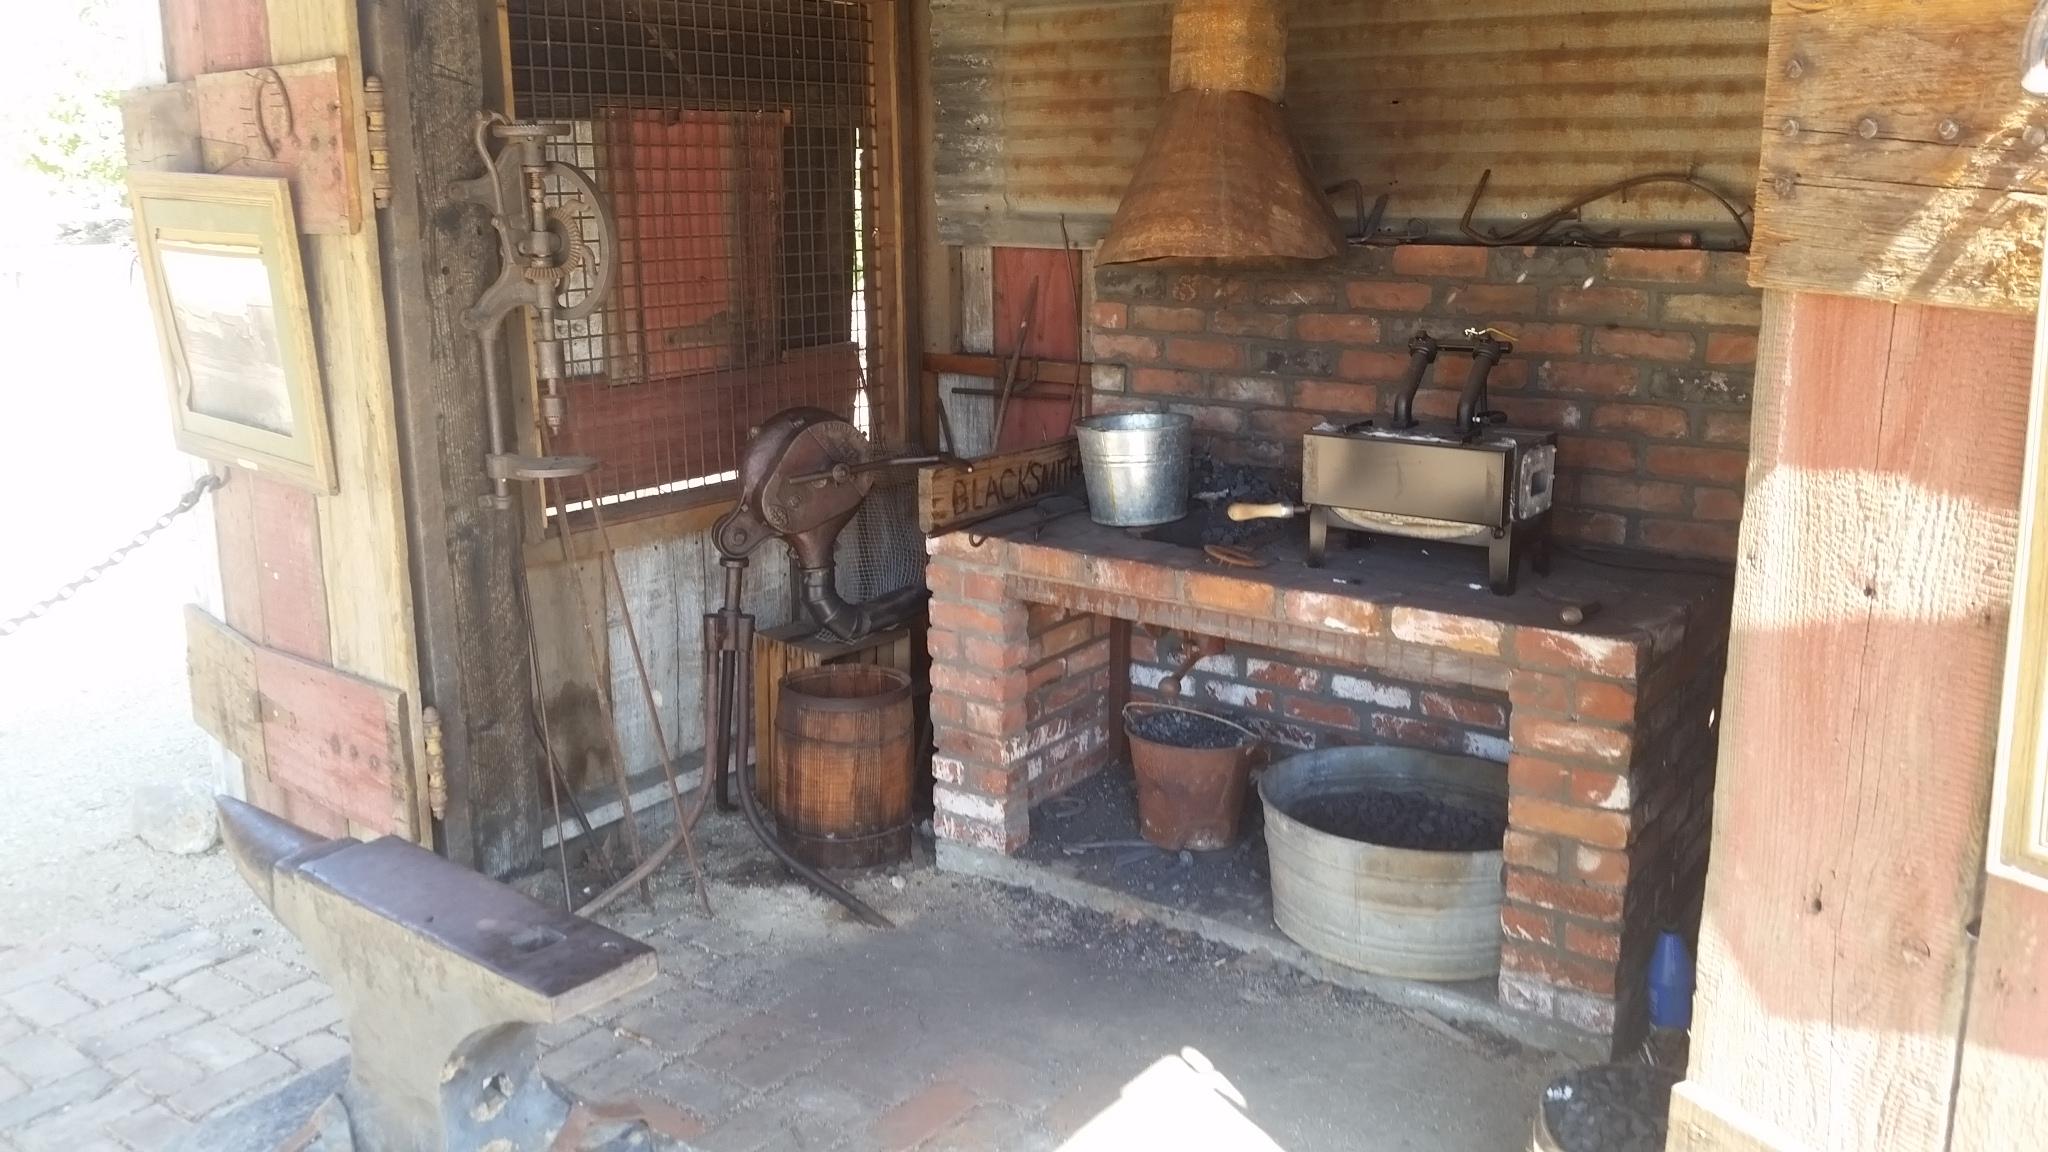
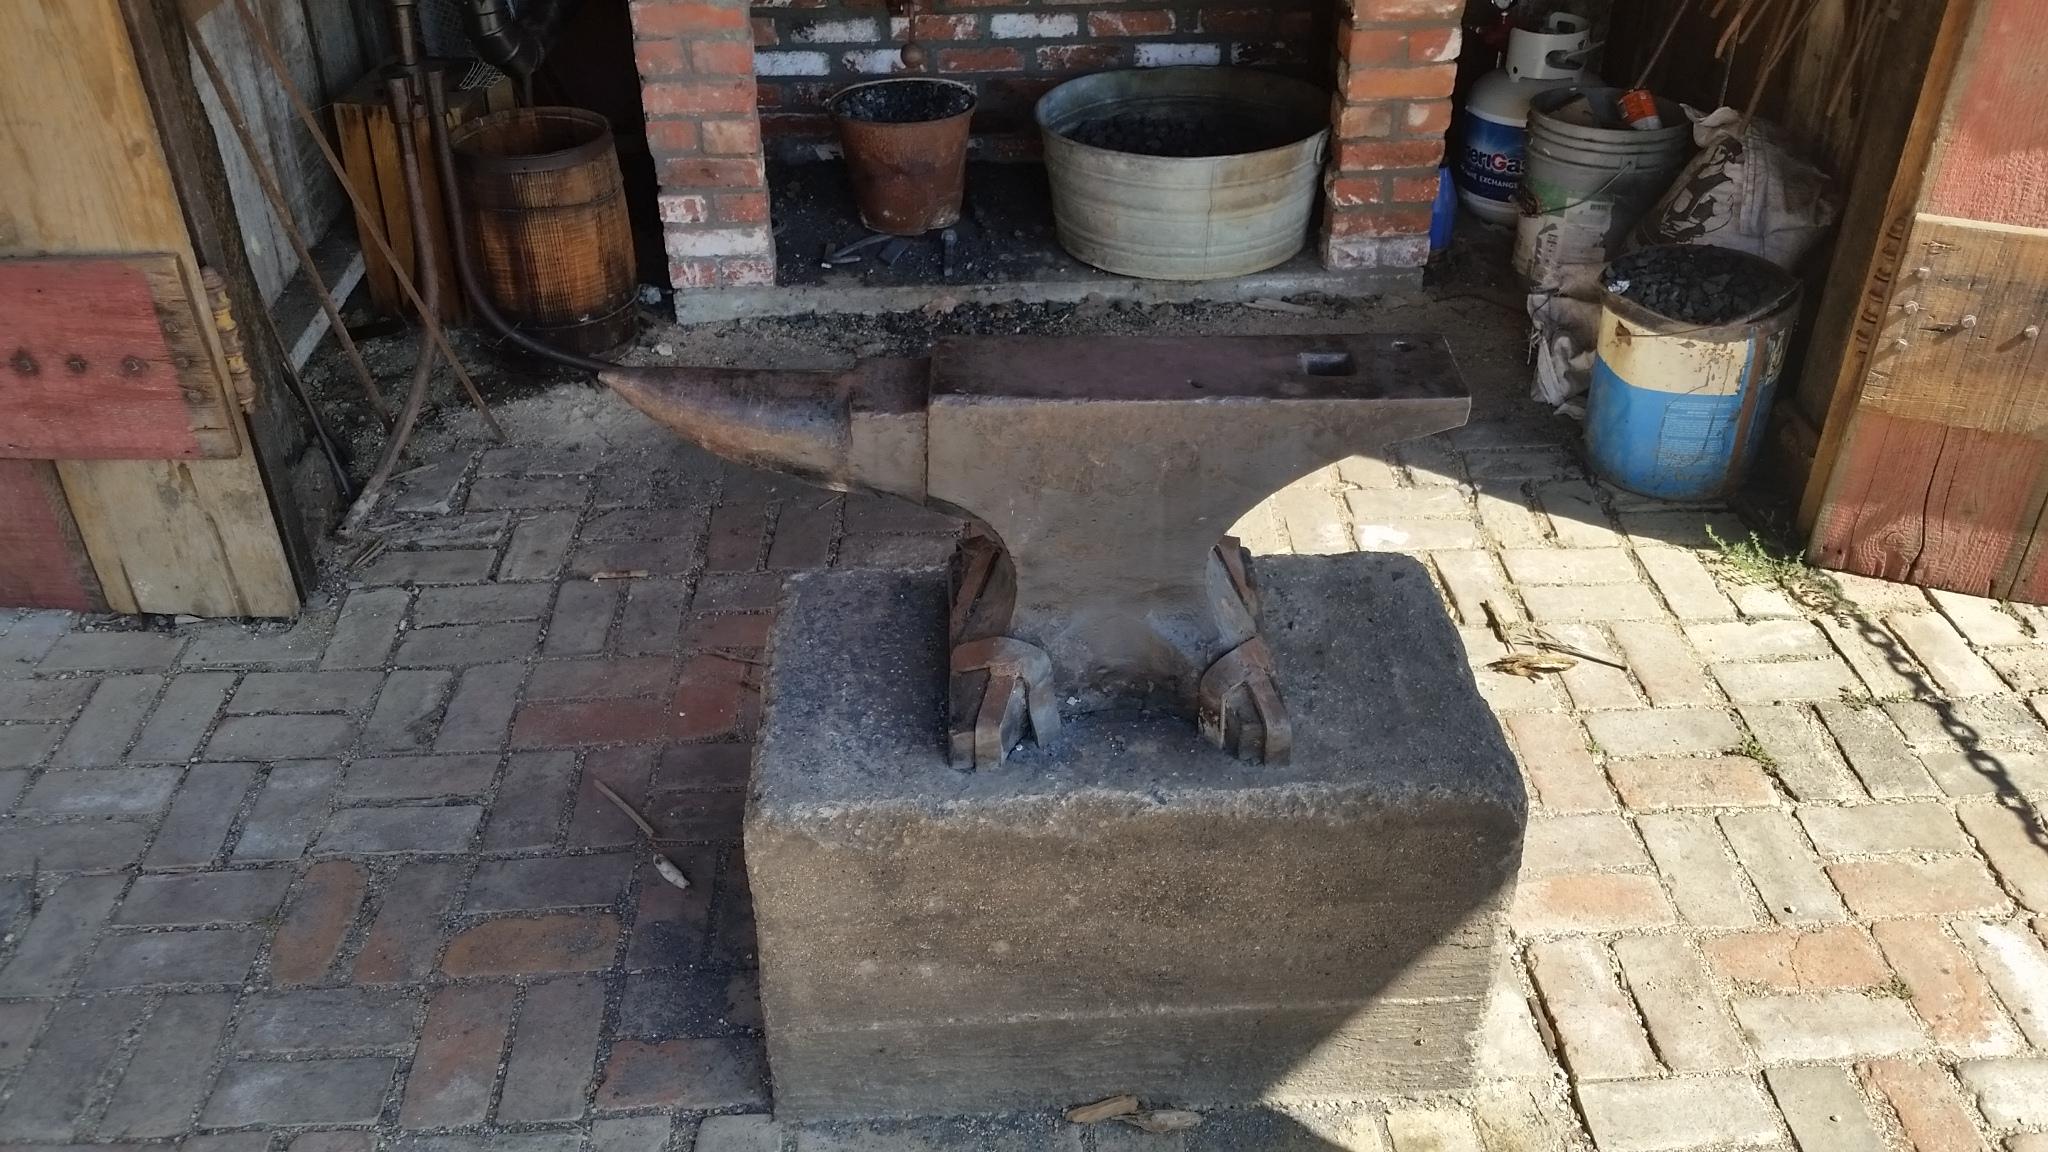
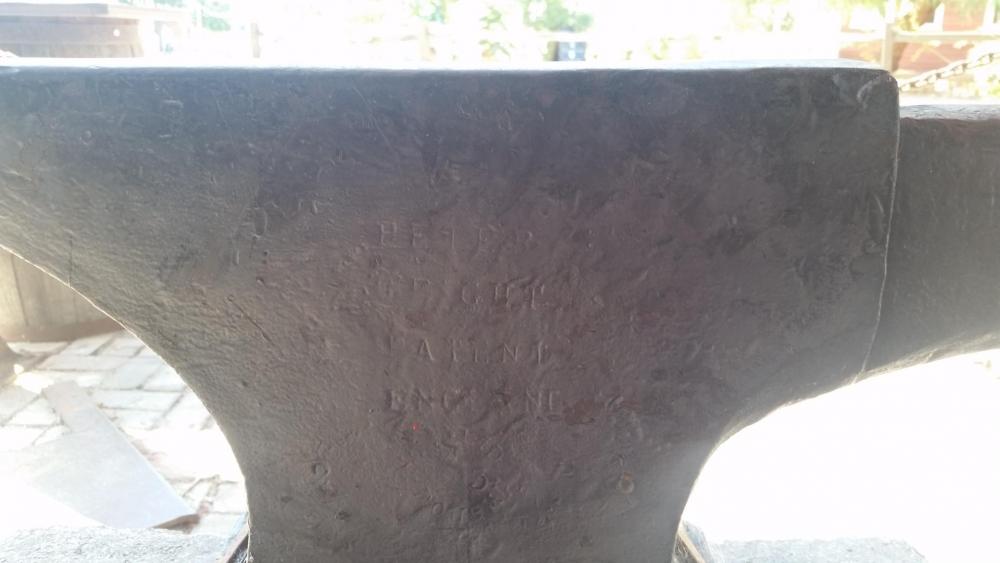
Was out walking on Sunday and came across small layout of an old western ranch, The Vale Ranch, not too far from my land. Took a few pictures but was both surprised and happy to find a good size Peter Wright sitting in the Smithy, had the "England" in the side markings and if I have read correctly on this site that would mean after 1910. Also weight markings were 2 - 3 - either 5 or 25 = (2 X 112) + (3 X 28) + 5 = 313 or 333 lbs. biggin ! Here are a couple of pictures: Demos every Tuesday... Guess where I will be on Tuesday next ! The Smithy Post Vice with 50's era Fordson Tractor in the back ground ! I think the propane forge is a little newer than the Smithy setup ! The Drill Press is nice ! The Peter Wright: Not in bad shape, didn't do a bounce test but it looked in good shape ! Climbed over the chain and got a close up ! Looks like 2 - 3 - 5 or 25, either 313 or 333 lbs, a good size Anvil !


-
Local Tractor Supply had a Grand Opening with vendors and displays ! One of the 4-H Displays was a Blacksmith, he teaches kids only, the Blacksmith says they listen and do as directed ! Here is his Home made anvil, I though a great shape !
-
This one looks old, in its design, just looks older than the usual London Pattern. Me, I don't know one way or the other, I can read up on anvils but I don't, but I like the bulkiness of it. Nice find especially if you can get it for $100 off !
-
Ok it will do ! LoL ! Since the Double Female Connector is machine assembled, I thought it might be a good flare fitting. My problem is coming from not being able to locate any POLs except the valve of a Propane Tank ?!? I have been looking for POL Fittings, under many different names, under many different fitting types, and have not come up with anything except Tank Valves. Mikey, Please do me a favor and send me a message or post somewhere, the links necessary to do a proper POL connection in a Propane feed line ? Assume you are replacing a soft copper tubing feed line, from a manifold, with compression fittings on both ends. Also, at this juncture I do not need the actual brazing or soldering methods. I am not inept on the web, I have built many computers and operating systems, written a program or two, put together data base collection/retreval systems and have searched the web with good results for many items, BUT these POL Fittings are slippery little devils and I can not seem to get my hands on them. Thanks
-
-
TP, you have to wonder who is throwing the switches ! We were at the end of the latest remodel, phase II of III, the county throws in the monkey wrench... "You need another 5000gal fire water tank",. WHAT... 10k later, it's almost done and wham bam the well head pump take the deep six, needs replacing... Another 3k ! These aren't life and death but the idea is the same. Keep the chin up, God Bless !
-
Thks Steve, your method worked out well; I don't think my block would be as level without it. Any more ideas up your sleeves ? LoL ! Thomas, I was more comfortable with the larger holes, my problem arose... I think, from tightening unevenly. With the shape I didn't watch the outside edges, too much pressure and it caused the edges to bow and in turn twist the block but we will never really know, we can only use a different method next time, if there is one ! Didn't even think about not gluing, never thought there should be a reason to disassembly the stand, I guess it would sit better ! I like the idea of the end pieces being higher, helps to keep things in place but I wanted to get a top plate of steel, as thick as possible, within limits... and weld on some tool holders made out of pipe or I could use a heavy bar stock and be a blacksmith and make some hoops. This stand and anvil will stay put, in the new barn to stay, right now... it is sitting flat on the floor even moving it around. The company that did my floor/foundation work for the barn did a very good job, floor is as close perfect, more than I expected. Hope all is well with you, later
-
Thanks Thomas, I was wondering abou the pictures actually posting, I could see them but I wasn't sure otherwise. thougt abou drilling the through holes afterwards but I didn't have a bit that size and I worried about the bit going off at an angle. I figured, since the through bolts were to secure the block together, if he holes were large enough they would allow alignment... and I thought the alignment was pretty good going into the clamping stage. I put together a two piece wooden bean stand for my 100 lb Vulcan, I will be using it most of he time sitting down so is only 21" tall. IF I attemp anoher wooden sand I may uy he required bit and have a go at drillin through the whip thing. Thanks .