Zachary
-
Posts
133 -
Joined
-
Last visited
Content Type
Profiles
Forums
Articles
Gallery
Downloads
Events
Everything posted by Zachary
-
I have recently got into making pattern welded steel and it's being hard on my kast o lite 30 forge floor. I've heard of and found a place to get some greencast 94 and was thinking about using it for my floor as it's supposed to hold up to flux better. My question is with heat retention. It says it has good heat retention but I read somewhere on here that it's more of a heat sink than other castables and makes it hard to get your forge up to temperature and I don't have any heat to waste. I have 2" of kaowool underneath it is it gonna be a problem as a heat sink and will it hold up to flux enough better than kast o lite 30 to be worth it? Thanks Zachary
-
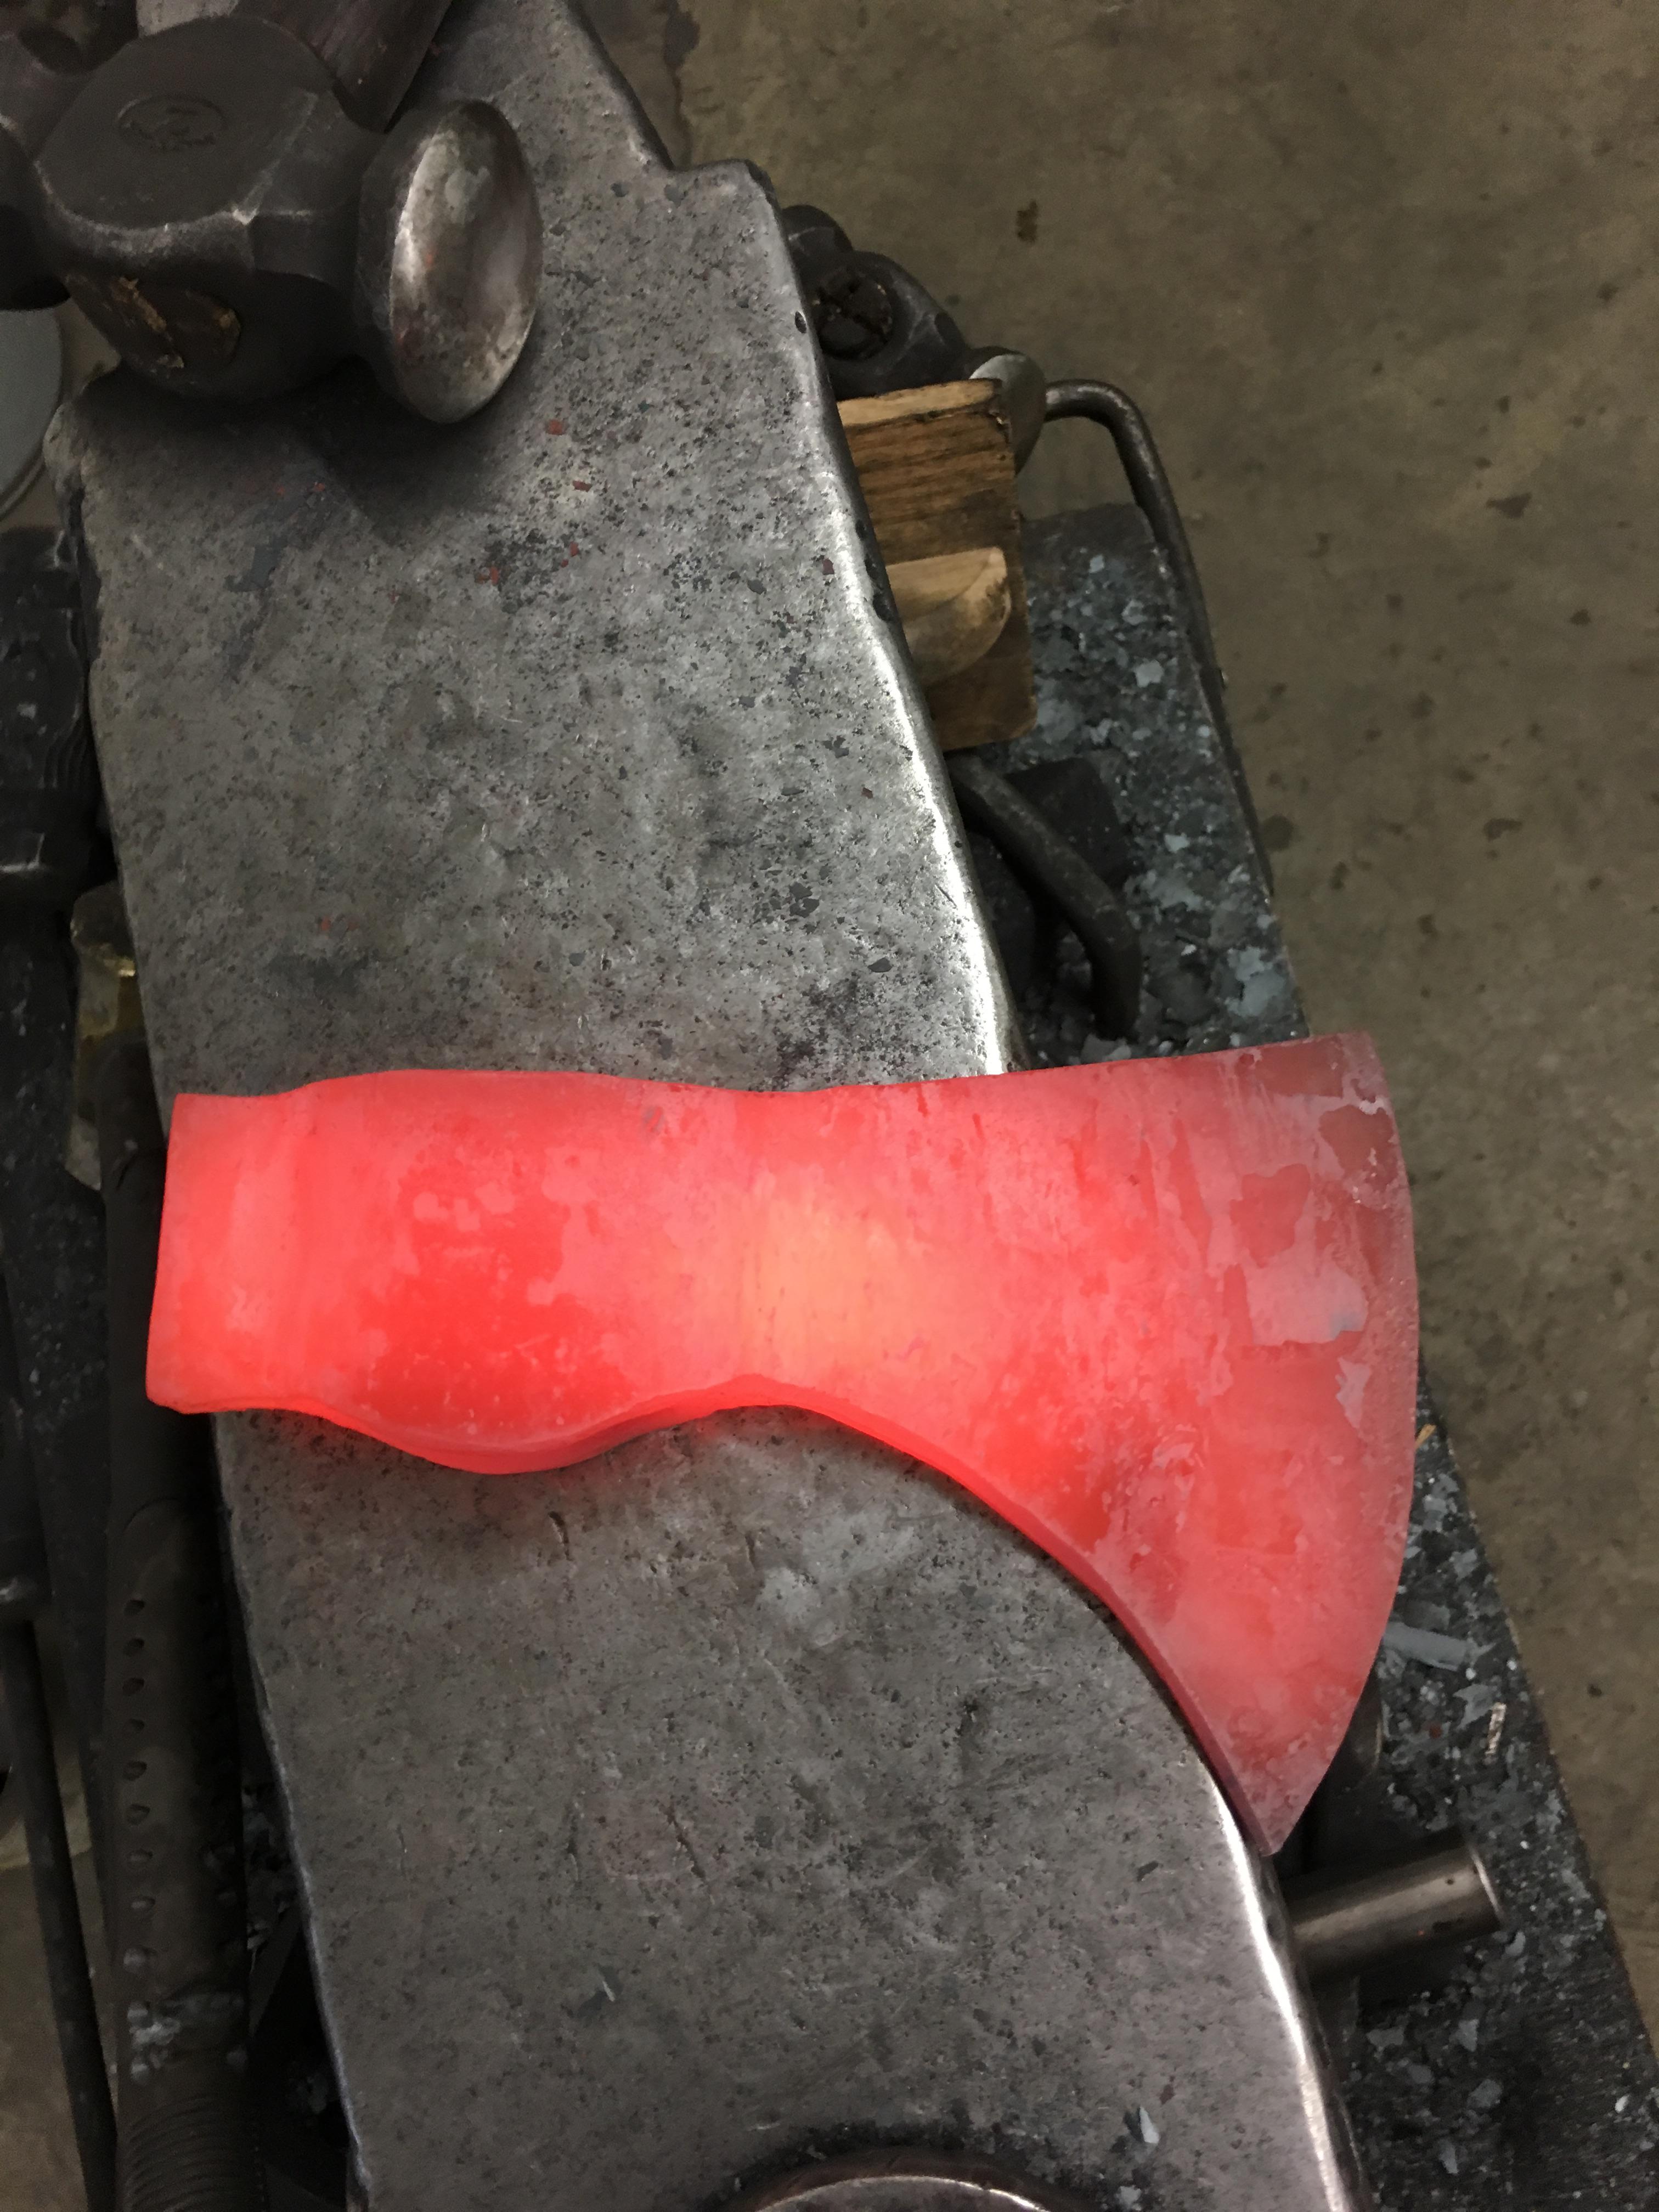
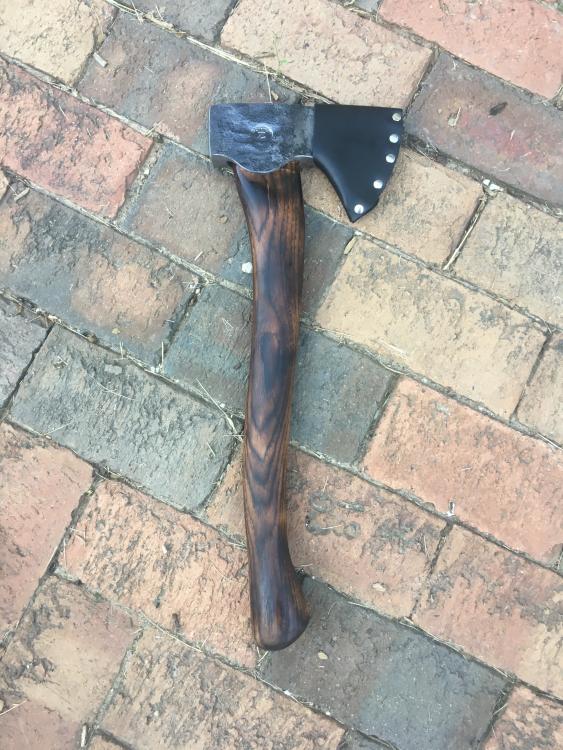
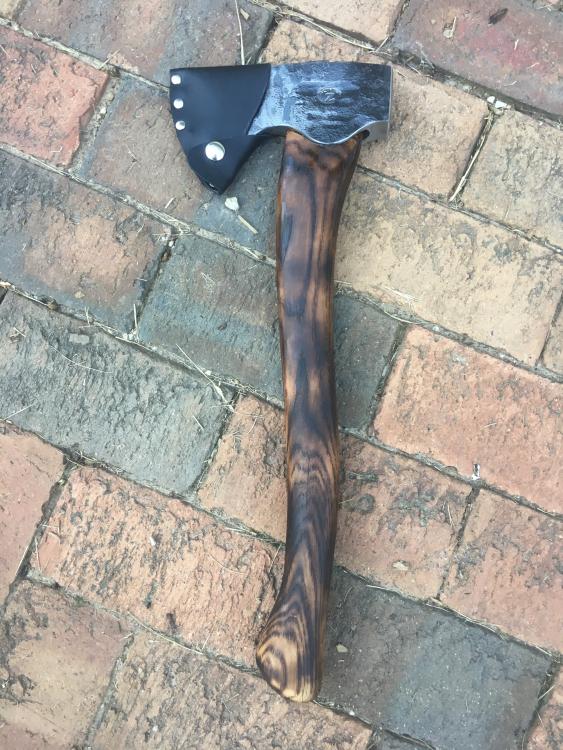
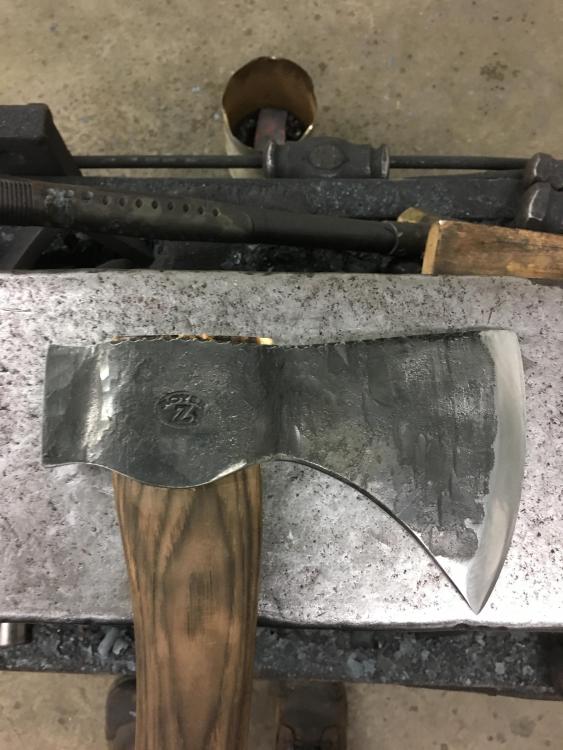
A smaller camp ax I recently finished. I’m happy with it. It started out a piece of 4140 flat stock 1” x 2” x 4”. I just hardened and tempered the cutting edge.

-
I appreciate it guys. I try to stay out of the direct flame if I can but I usually have several pieces in at once so it’s not always possible. I’ll just have to work with it. Thanks again
-
Thanks for the help. Any ideas on what else could do it? I’m not sure what else to do other than just deal with it.
-
After it gets up to temperature I can't tell that adjusting the choke the rest of the way open makes much difference in the dragons breath although it might sound a little different but not much. Once in a great while I'll see a little green flame I read somewhere one time what that means but I can't remember and for the life me I can't find where I read it again. I can't tell that there is a cooler spot under the burner. The thermocouple is a type k I've had it to 2250 I think is the hottest I've seen it. The forge has a 3/16 steel shell, 2" of kawool and about a 5/8" of kast o lite inside that. The floor is 1" of kast o lite on top of 2" of kawool. And it's all coated then with a coating I got from hybrid burners that is supposed to do the same thing as ITC 100. I run anywhere from 14-18 pounds of gas when I'm working it hard. I make mostly hammers and some axes and it get's them hot enough for forging but I don't know if I could forge weld with it or not. There is a 3" square opening in the back that's open all the time and the front opening is if I remember right 3" x 7". Thanks for the help.
-
It has the .45 tip
-
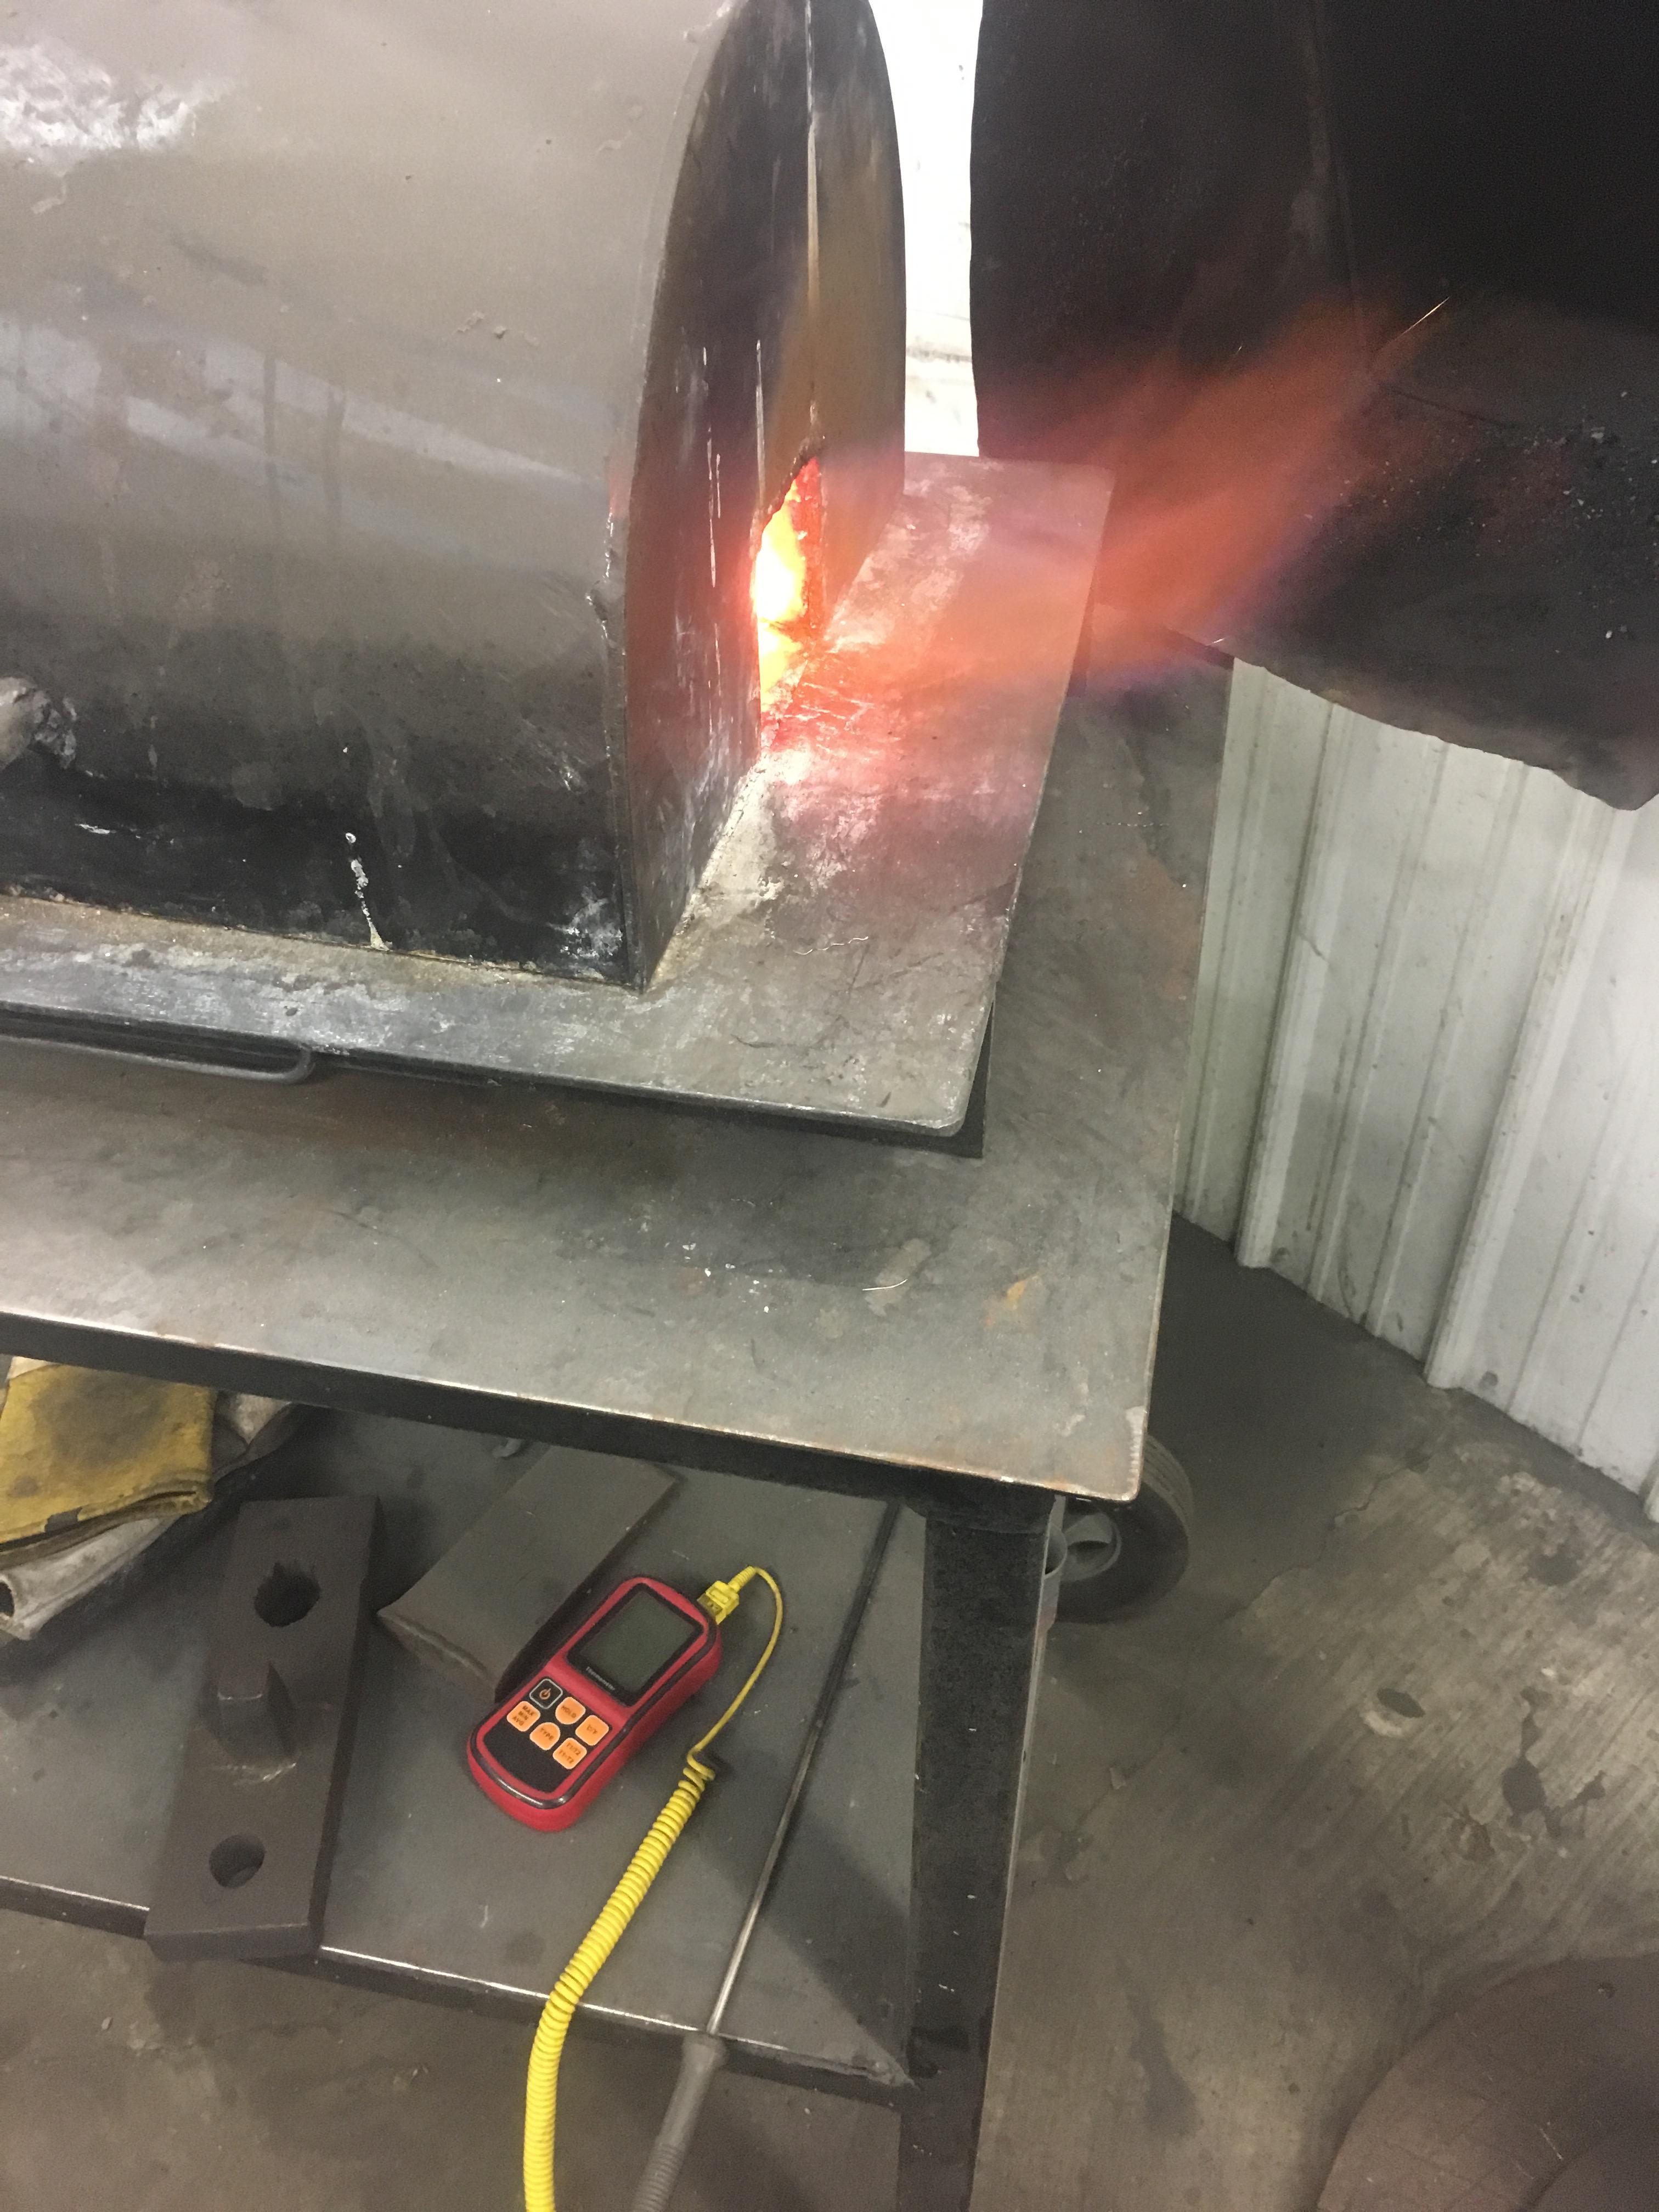
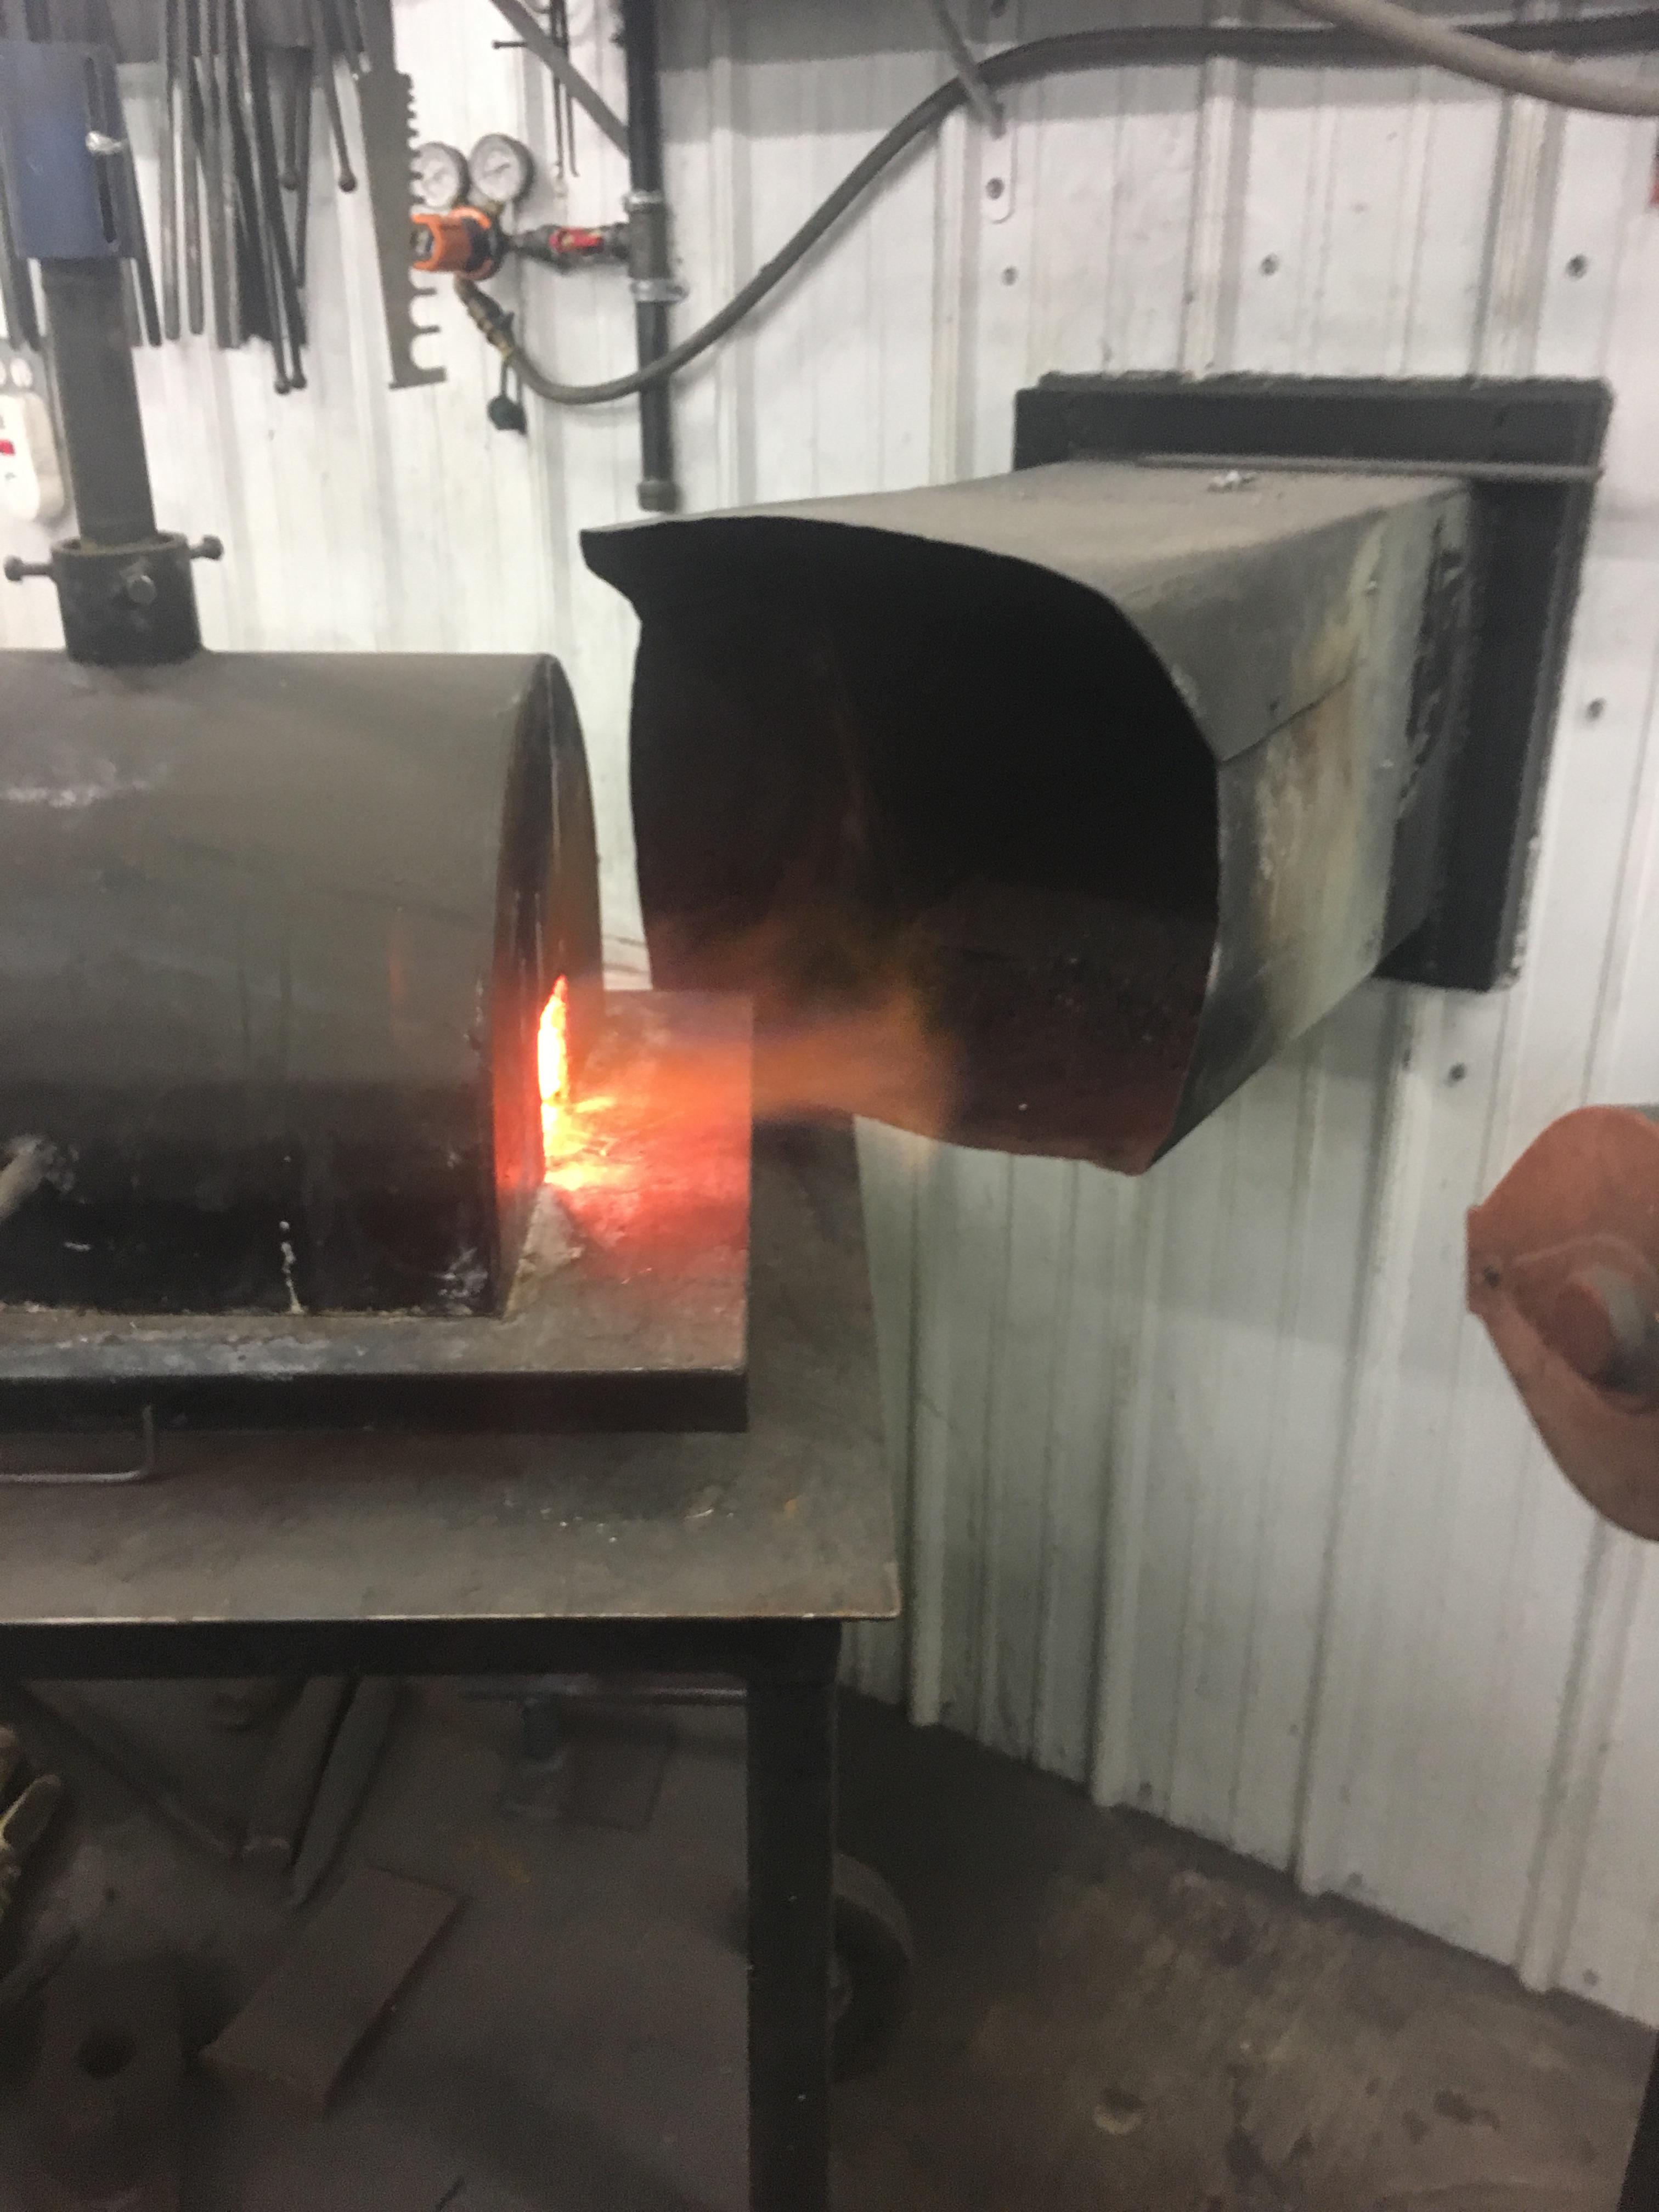
I would like some input on how I’m tuning my burner. I have trouble with forge scale and I can’t seem to get rid of it. I read that to much air can cause it and then I’ve to much gas can to. I’ve adjusted my burner a lot and can’t seem to change it much. So I tried to get some pictures to show you guys see if you can tell if it’s tuned at least close. It’s a 1” burner from hybrid burner so I don’t think it’s the burner. The pictures are at start up and after running awhile.Thanks for any help


-
I was considering one at one time as well and stopped in at his shop and looked them over and talked to him. They appear to be a well built smooth running hammer. I went a different route because I wanted something bigger. If I was going to get a tire hammer it’d be one of his.
-
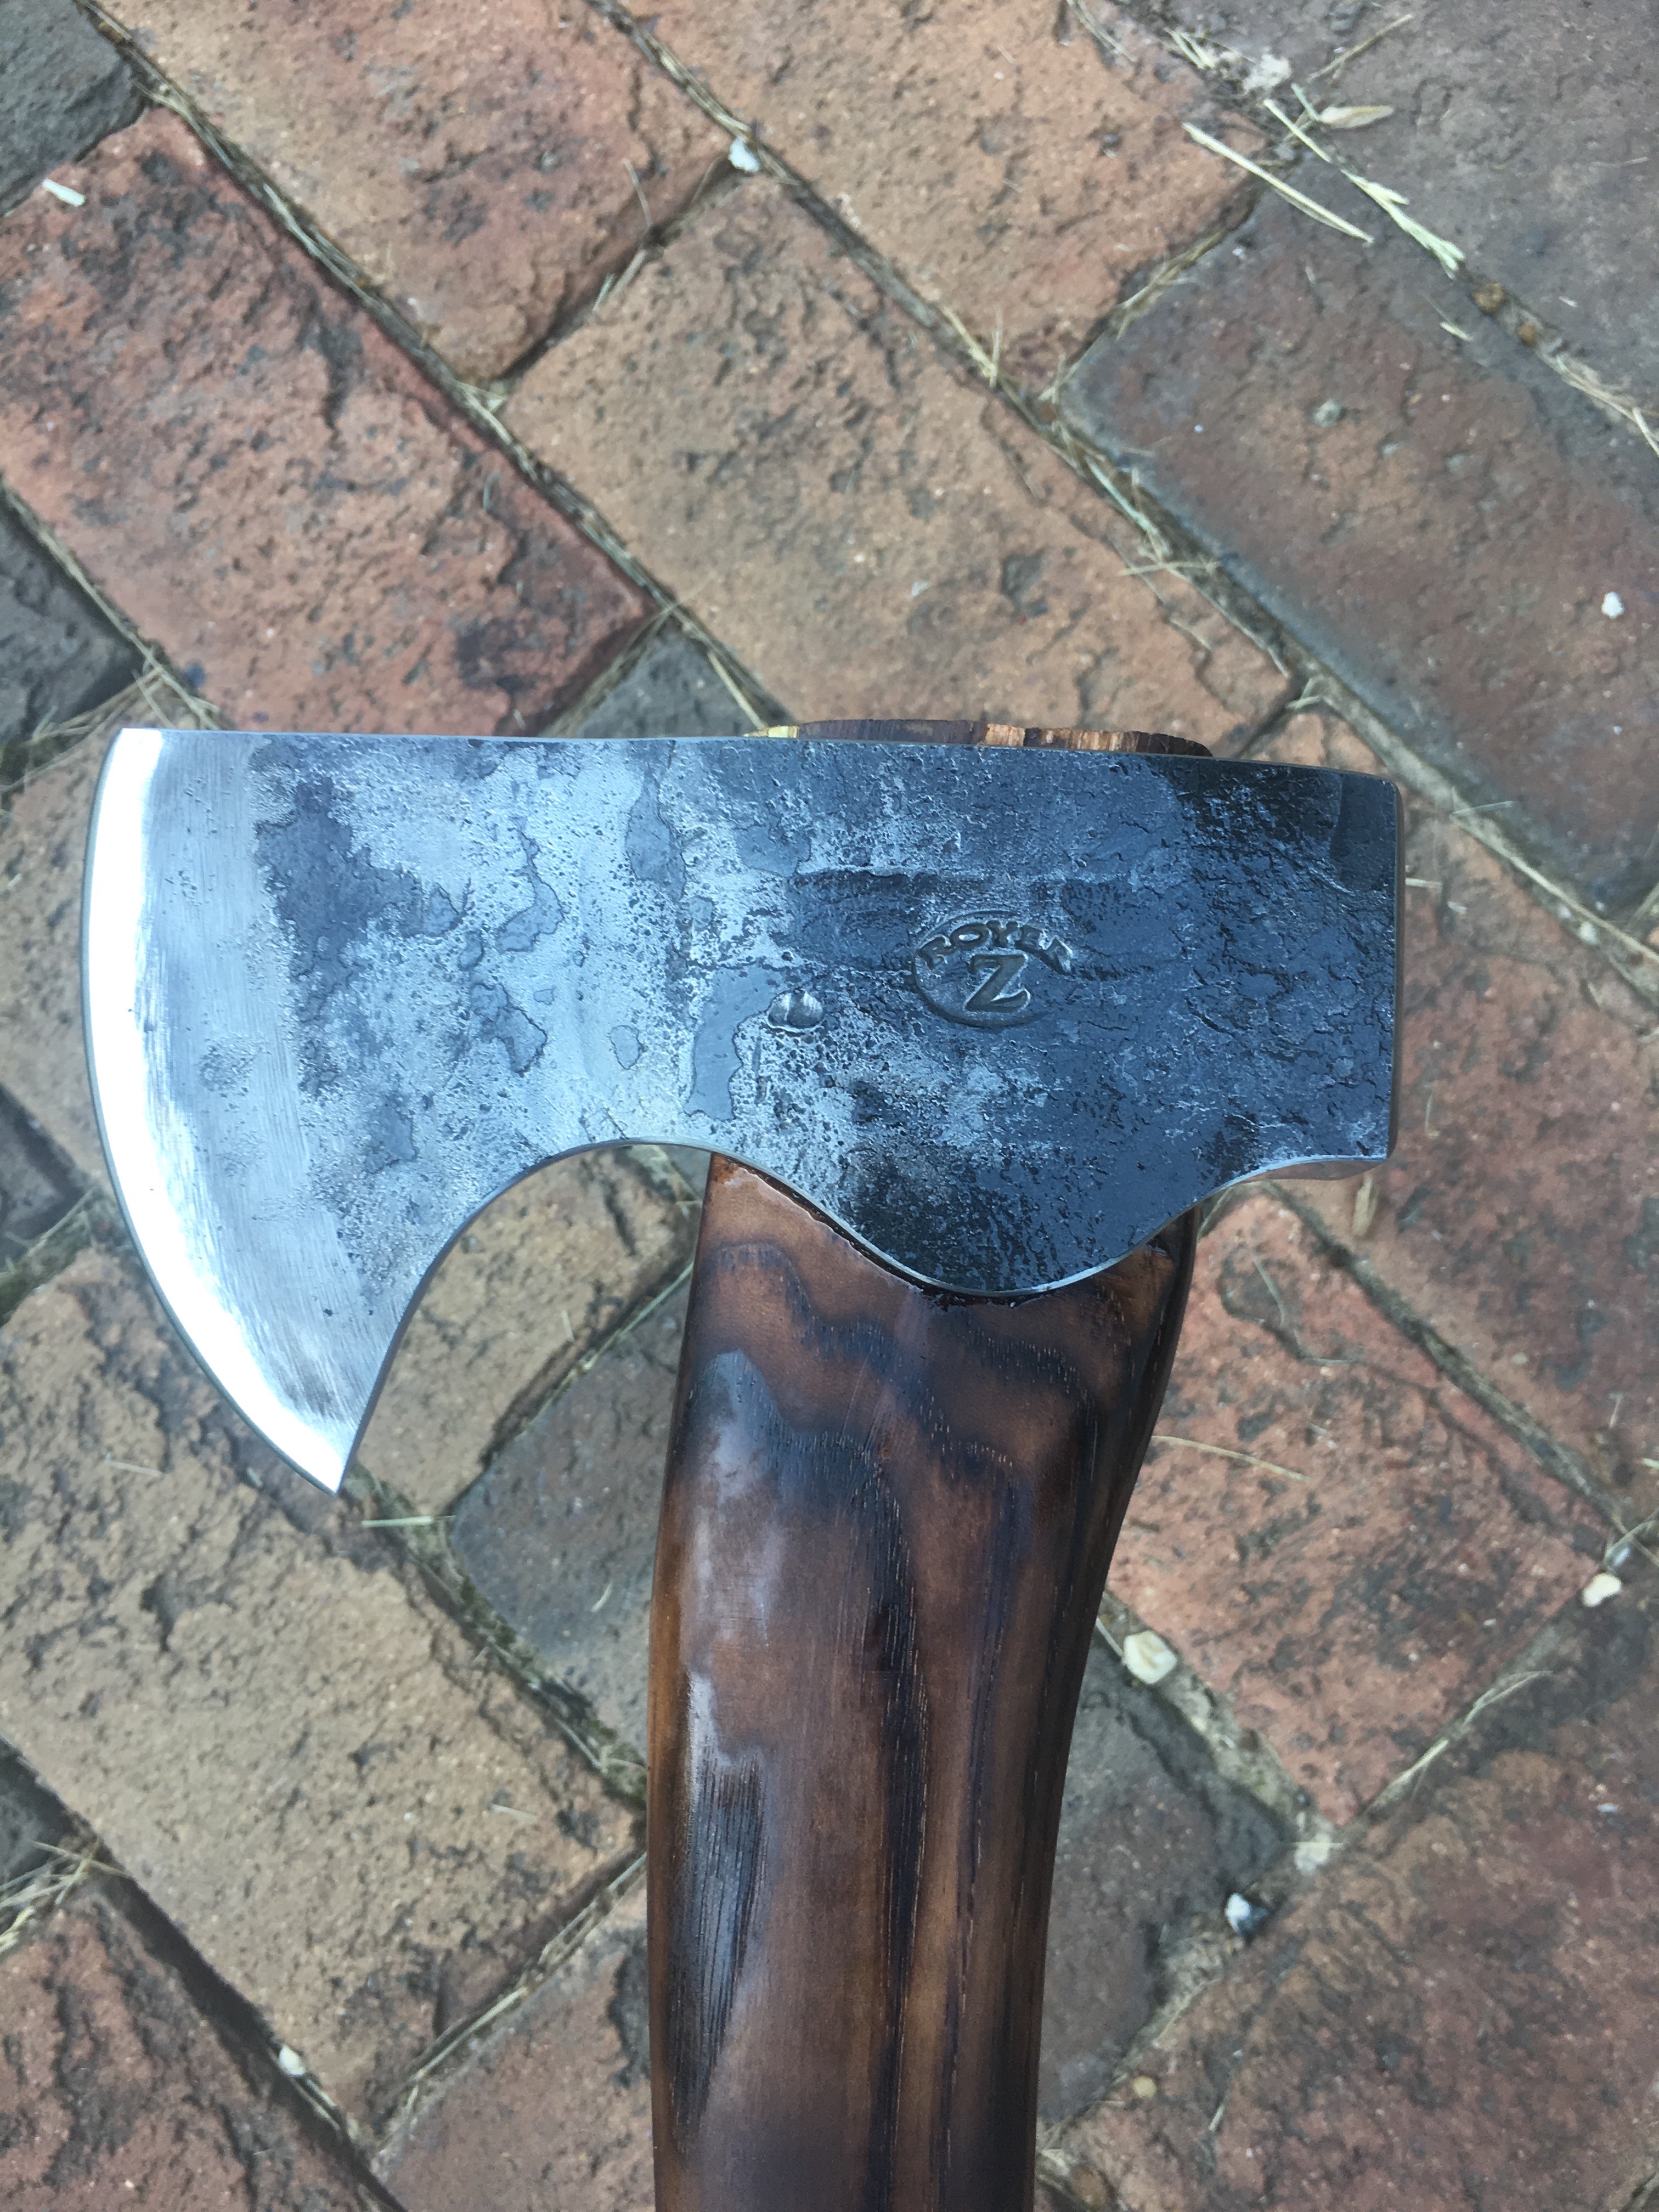
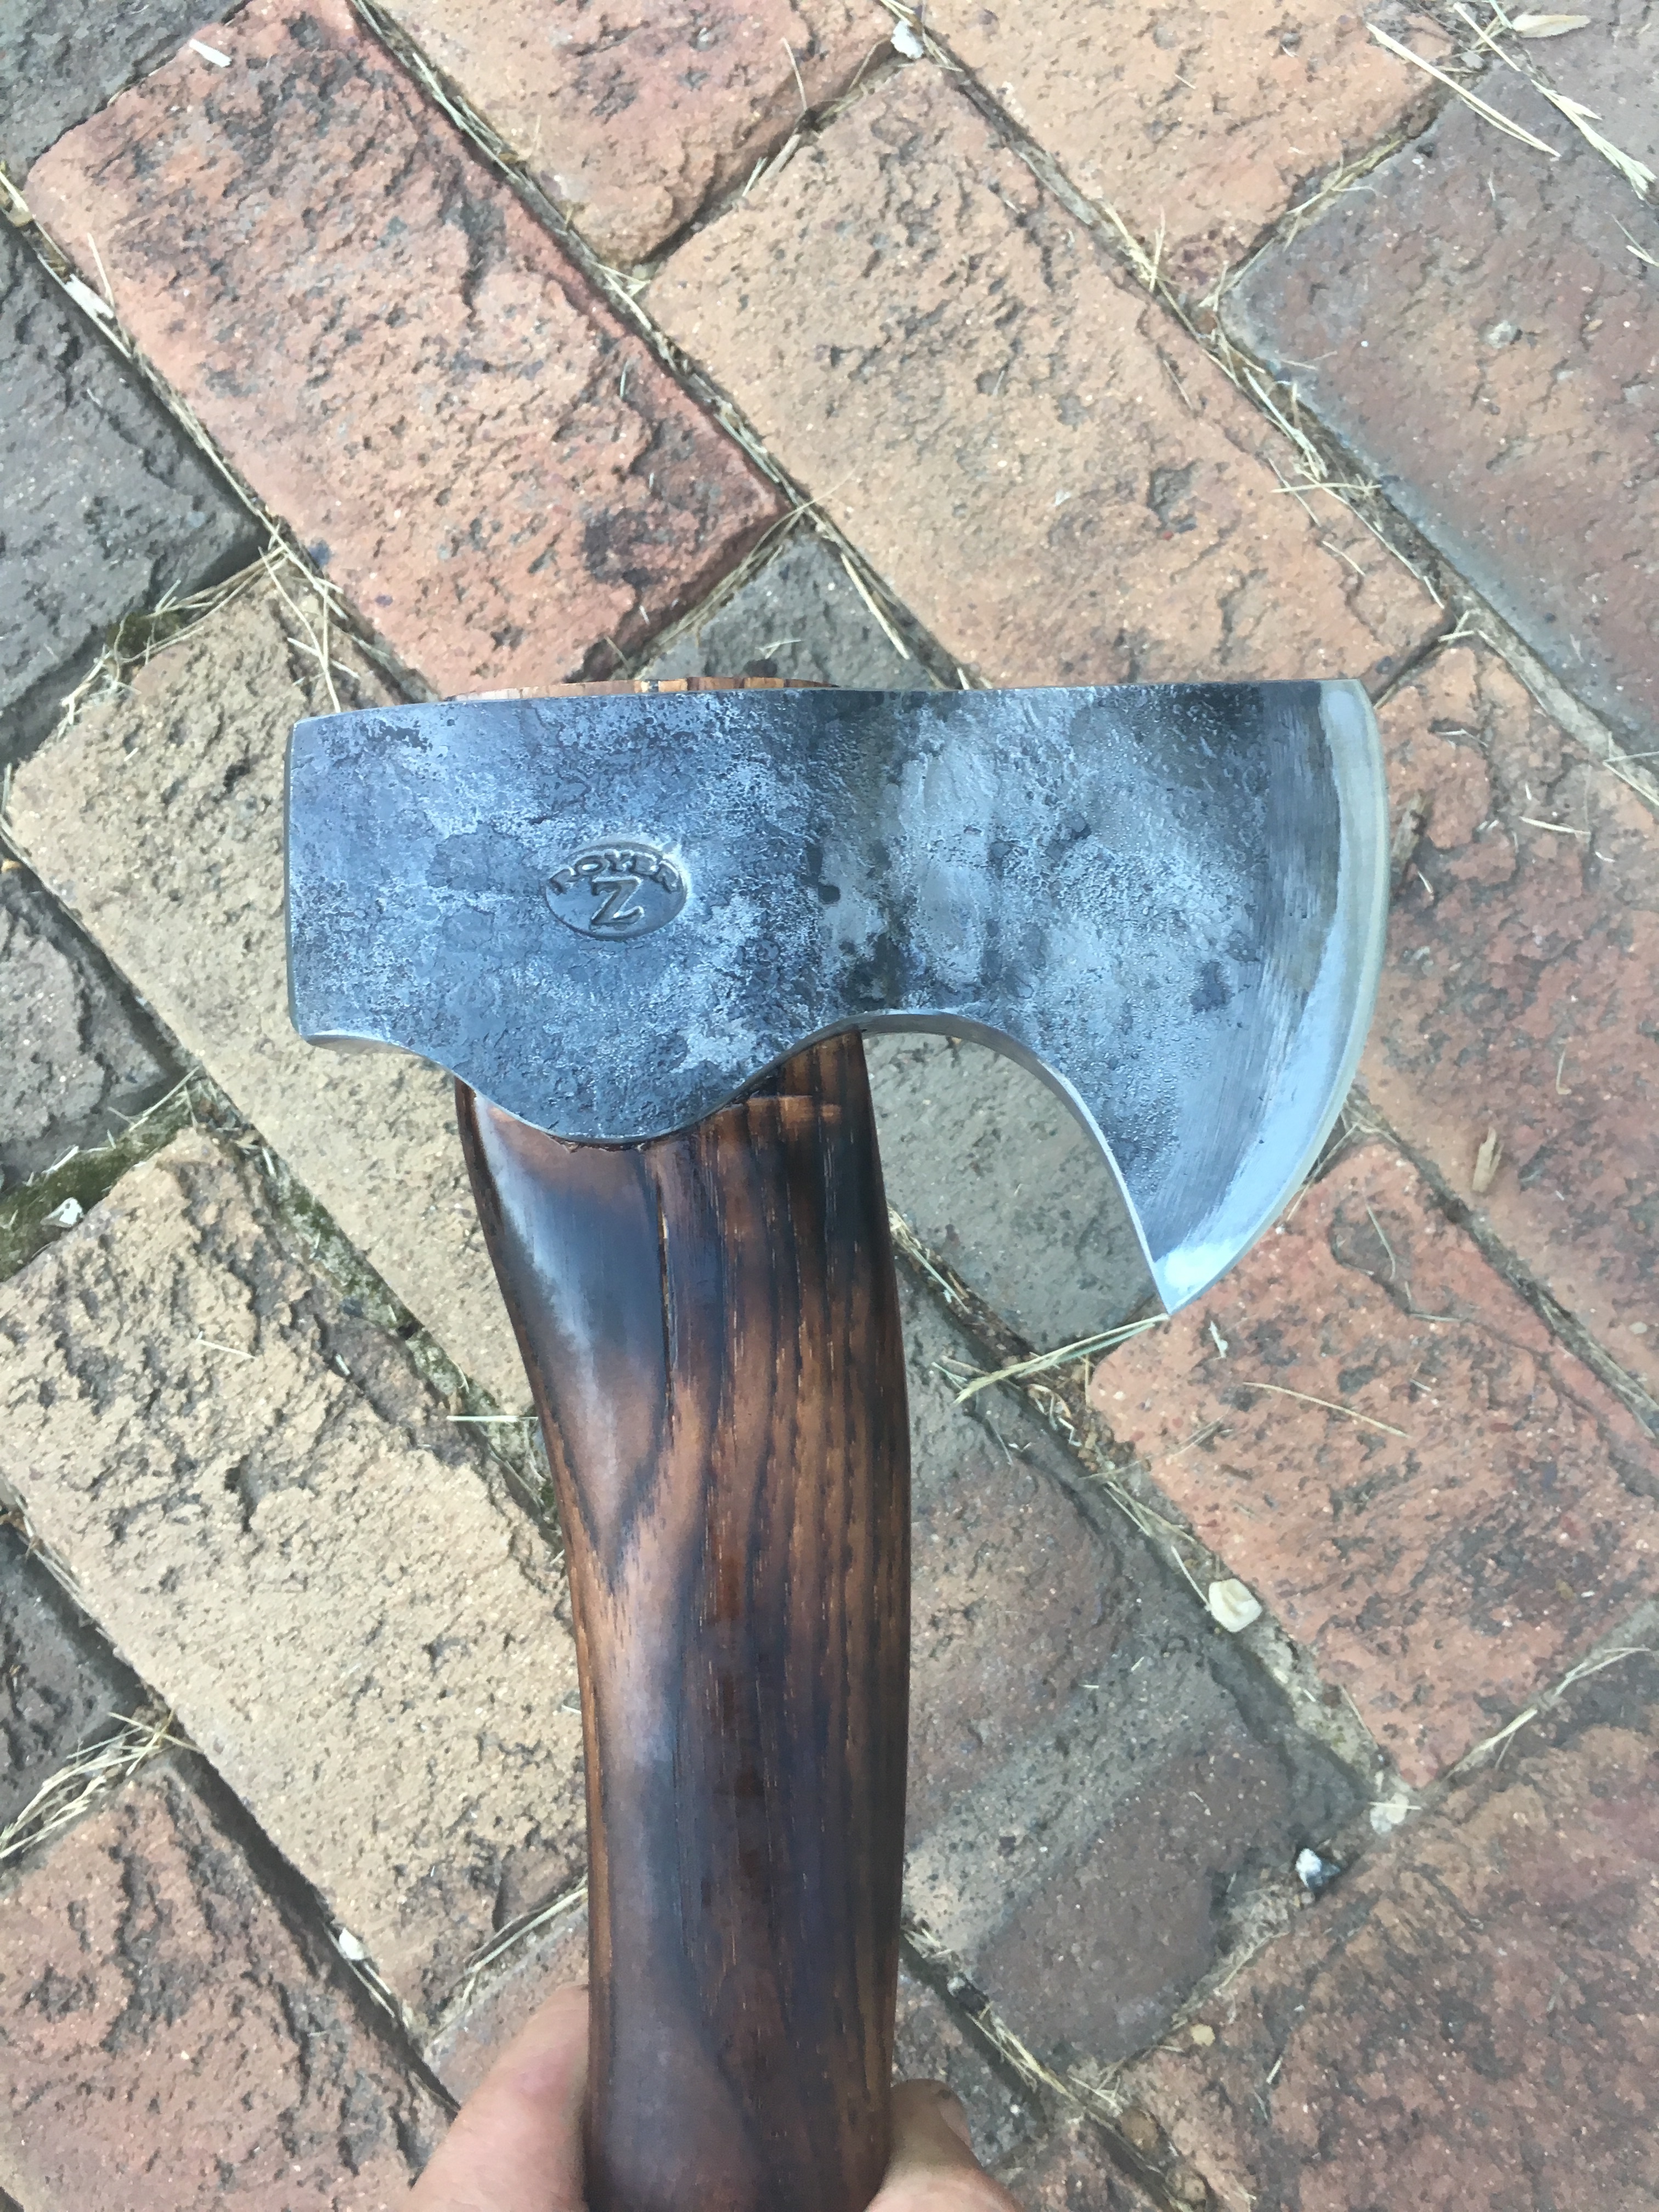
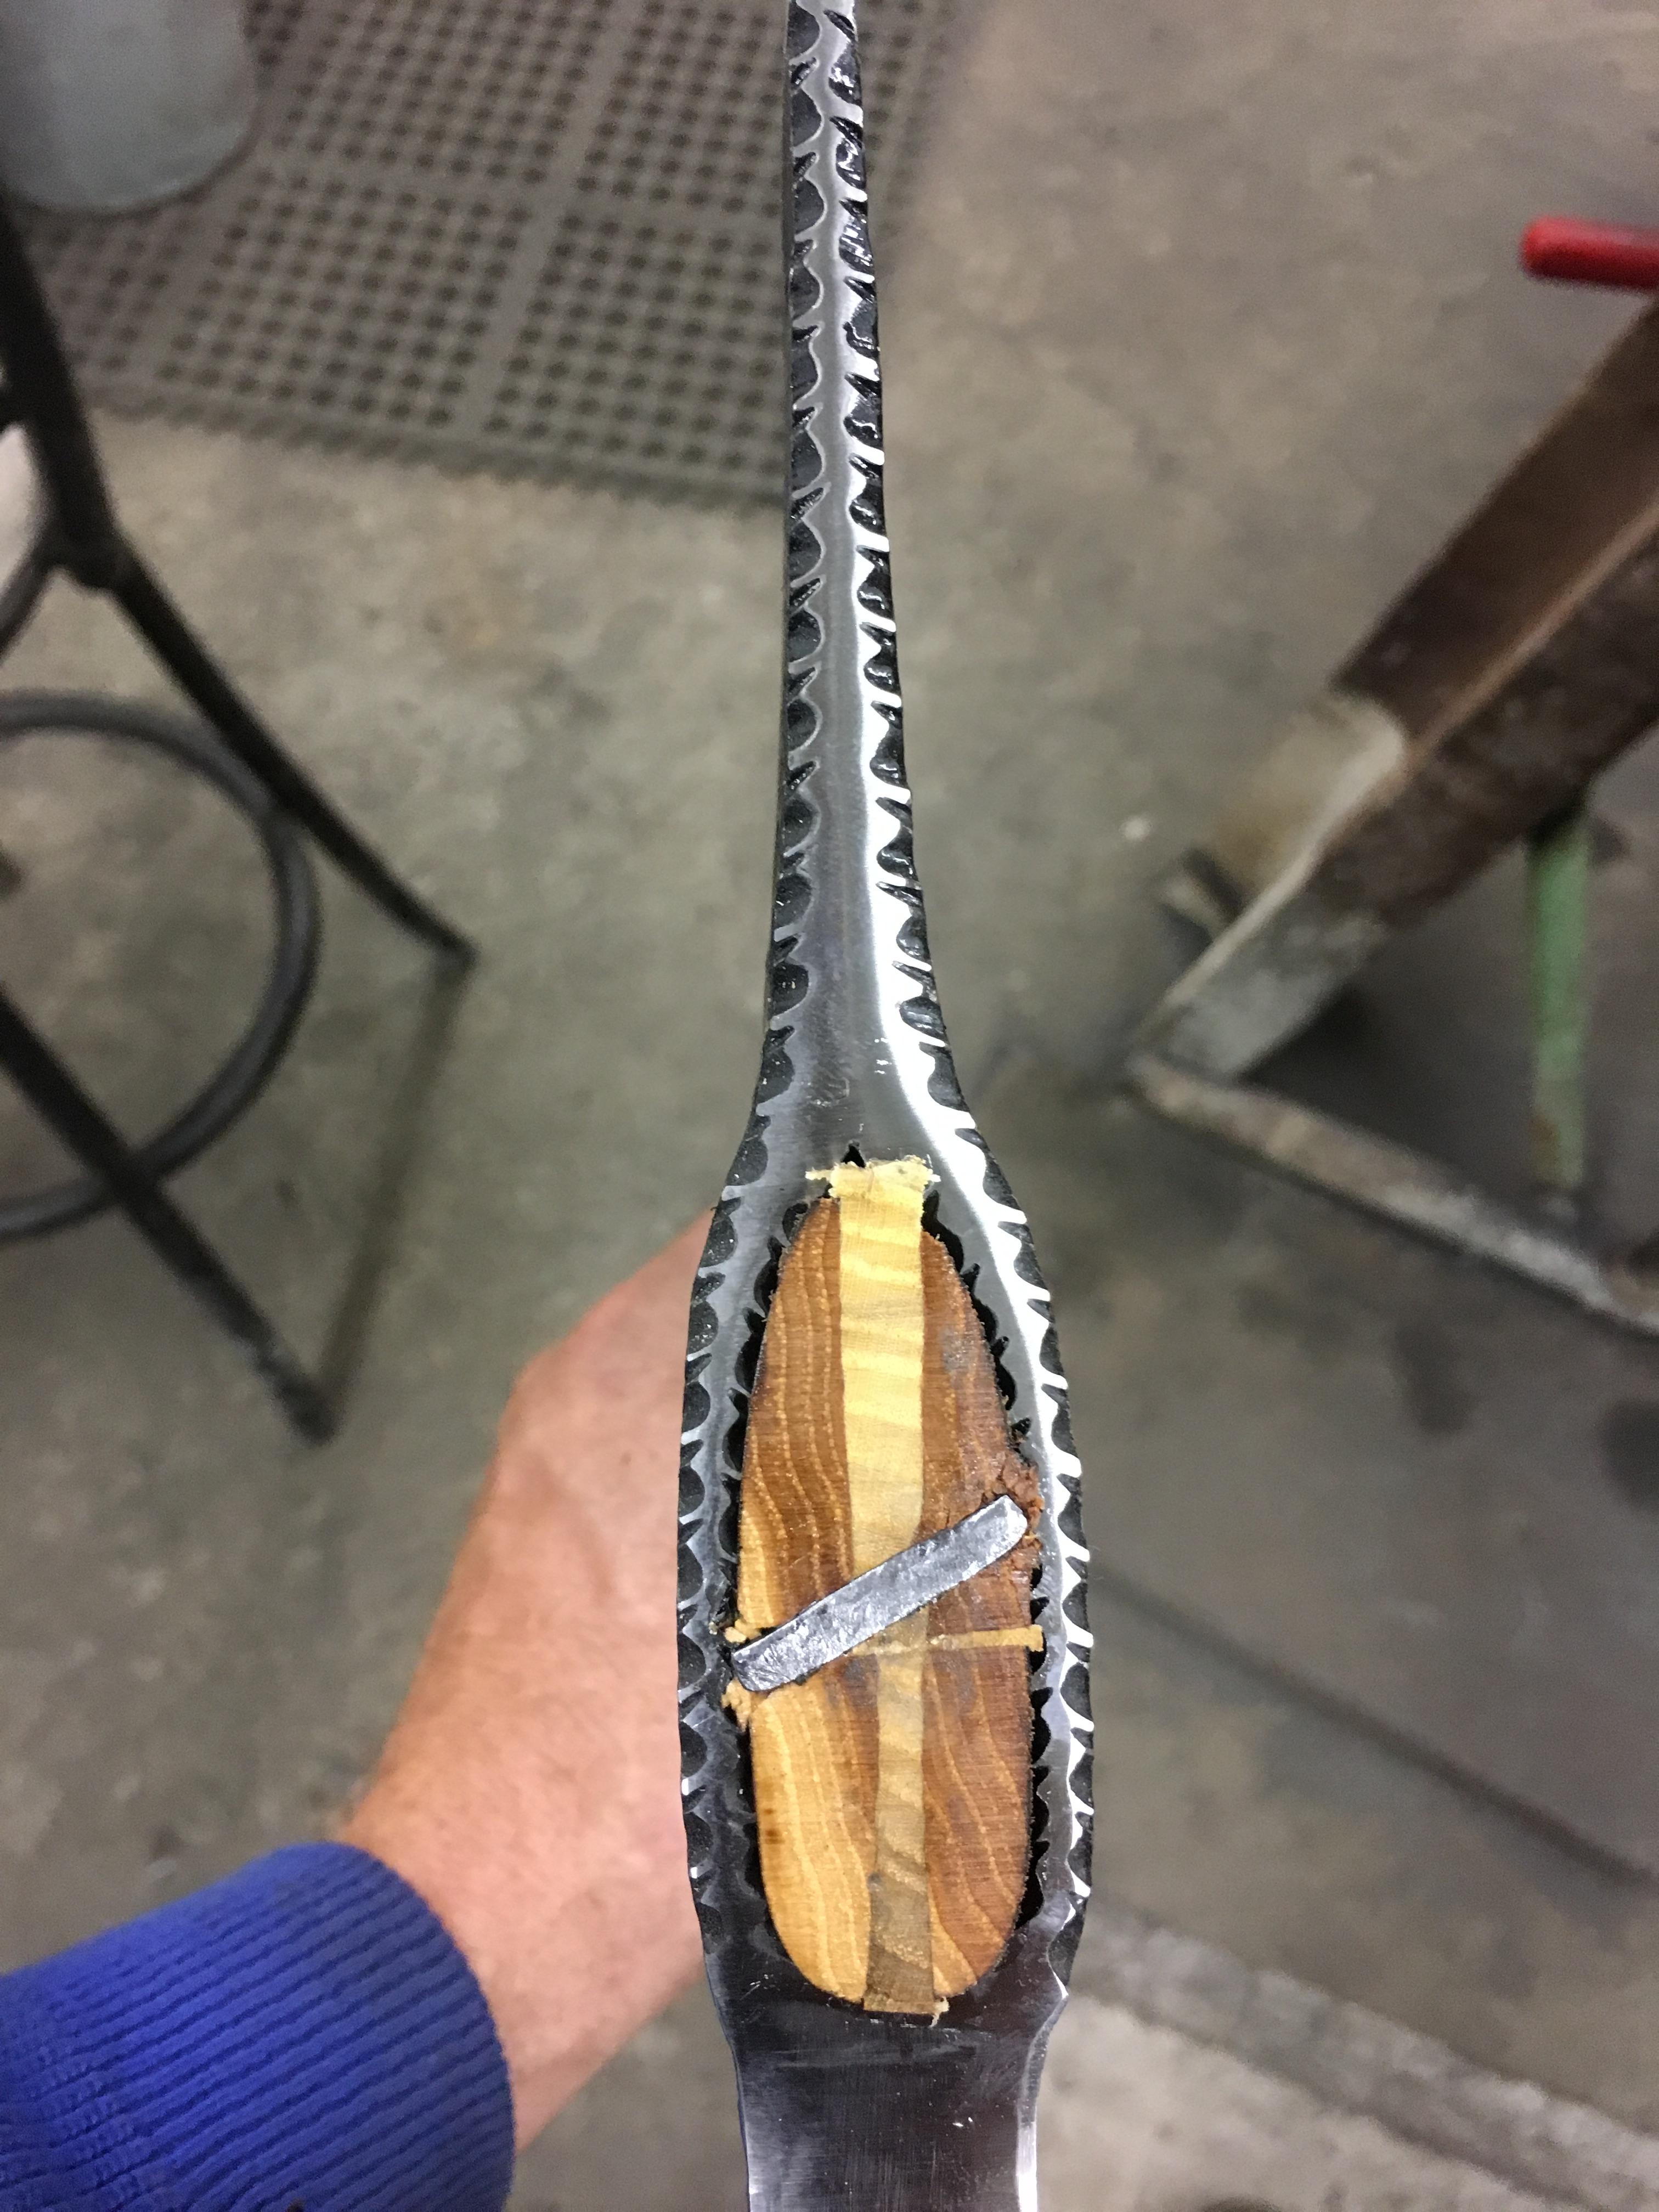
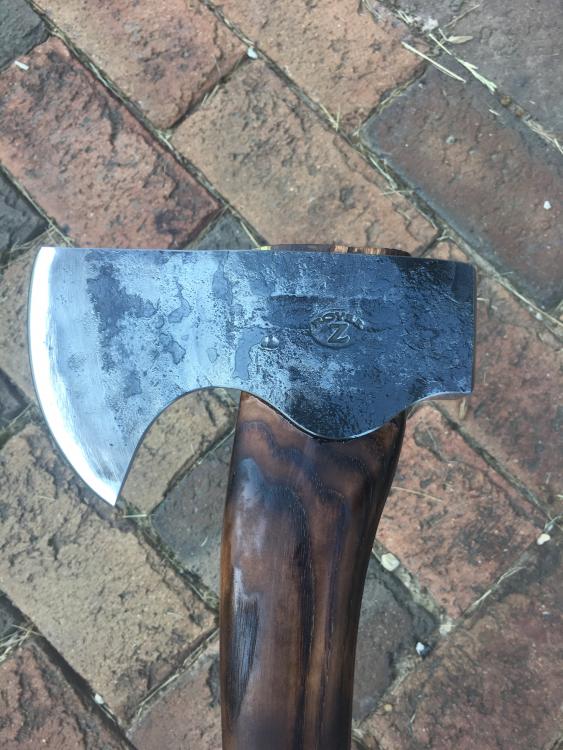
Decided to try an ax with some file work
Zachary replied to Zachary's topic in Axes, Hatchets, Hawks, Choppers, etc
Thanks guys it was my first time doing file work so I was kinda winging it! I used both a power hammer and a hydraulic press for different stages of the forging. -
Yeah I know it’s a little over built. I about just used 1/2” plate then changed my mind..... A hoist would be nice if I had room to move it around. I’m still trying to think of a way to use a bar but haven’t come up with anything yet
-
At this point main strength and perseverance!
-
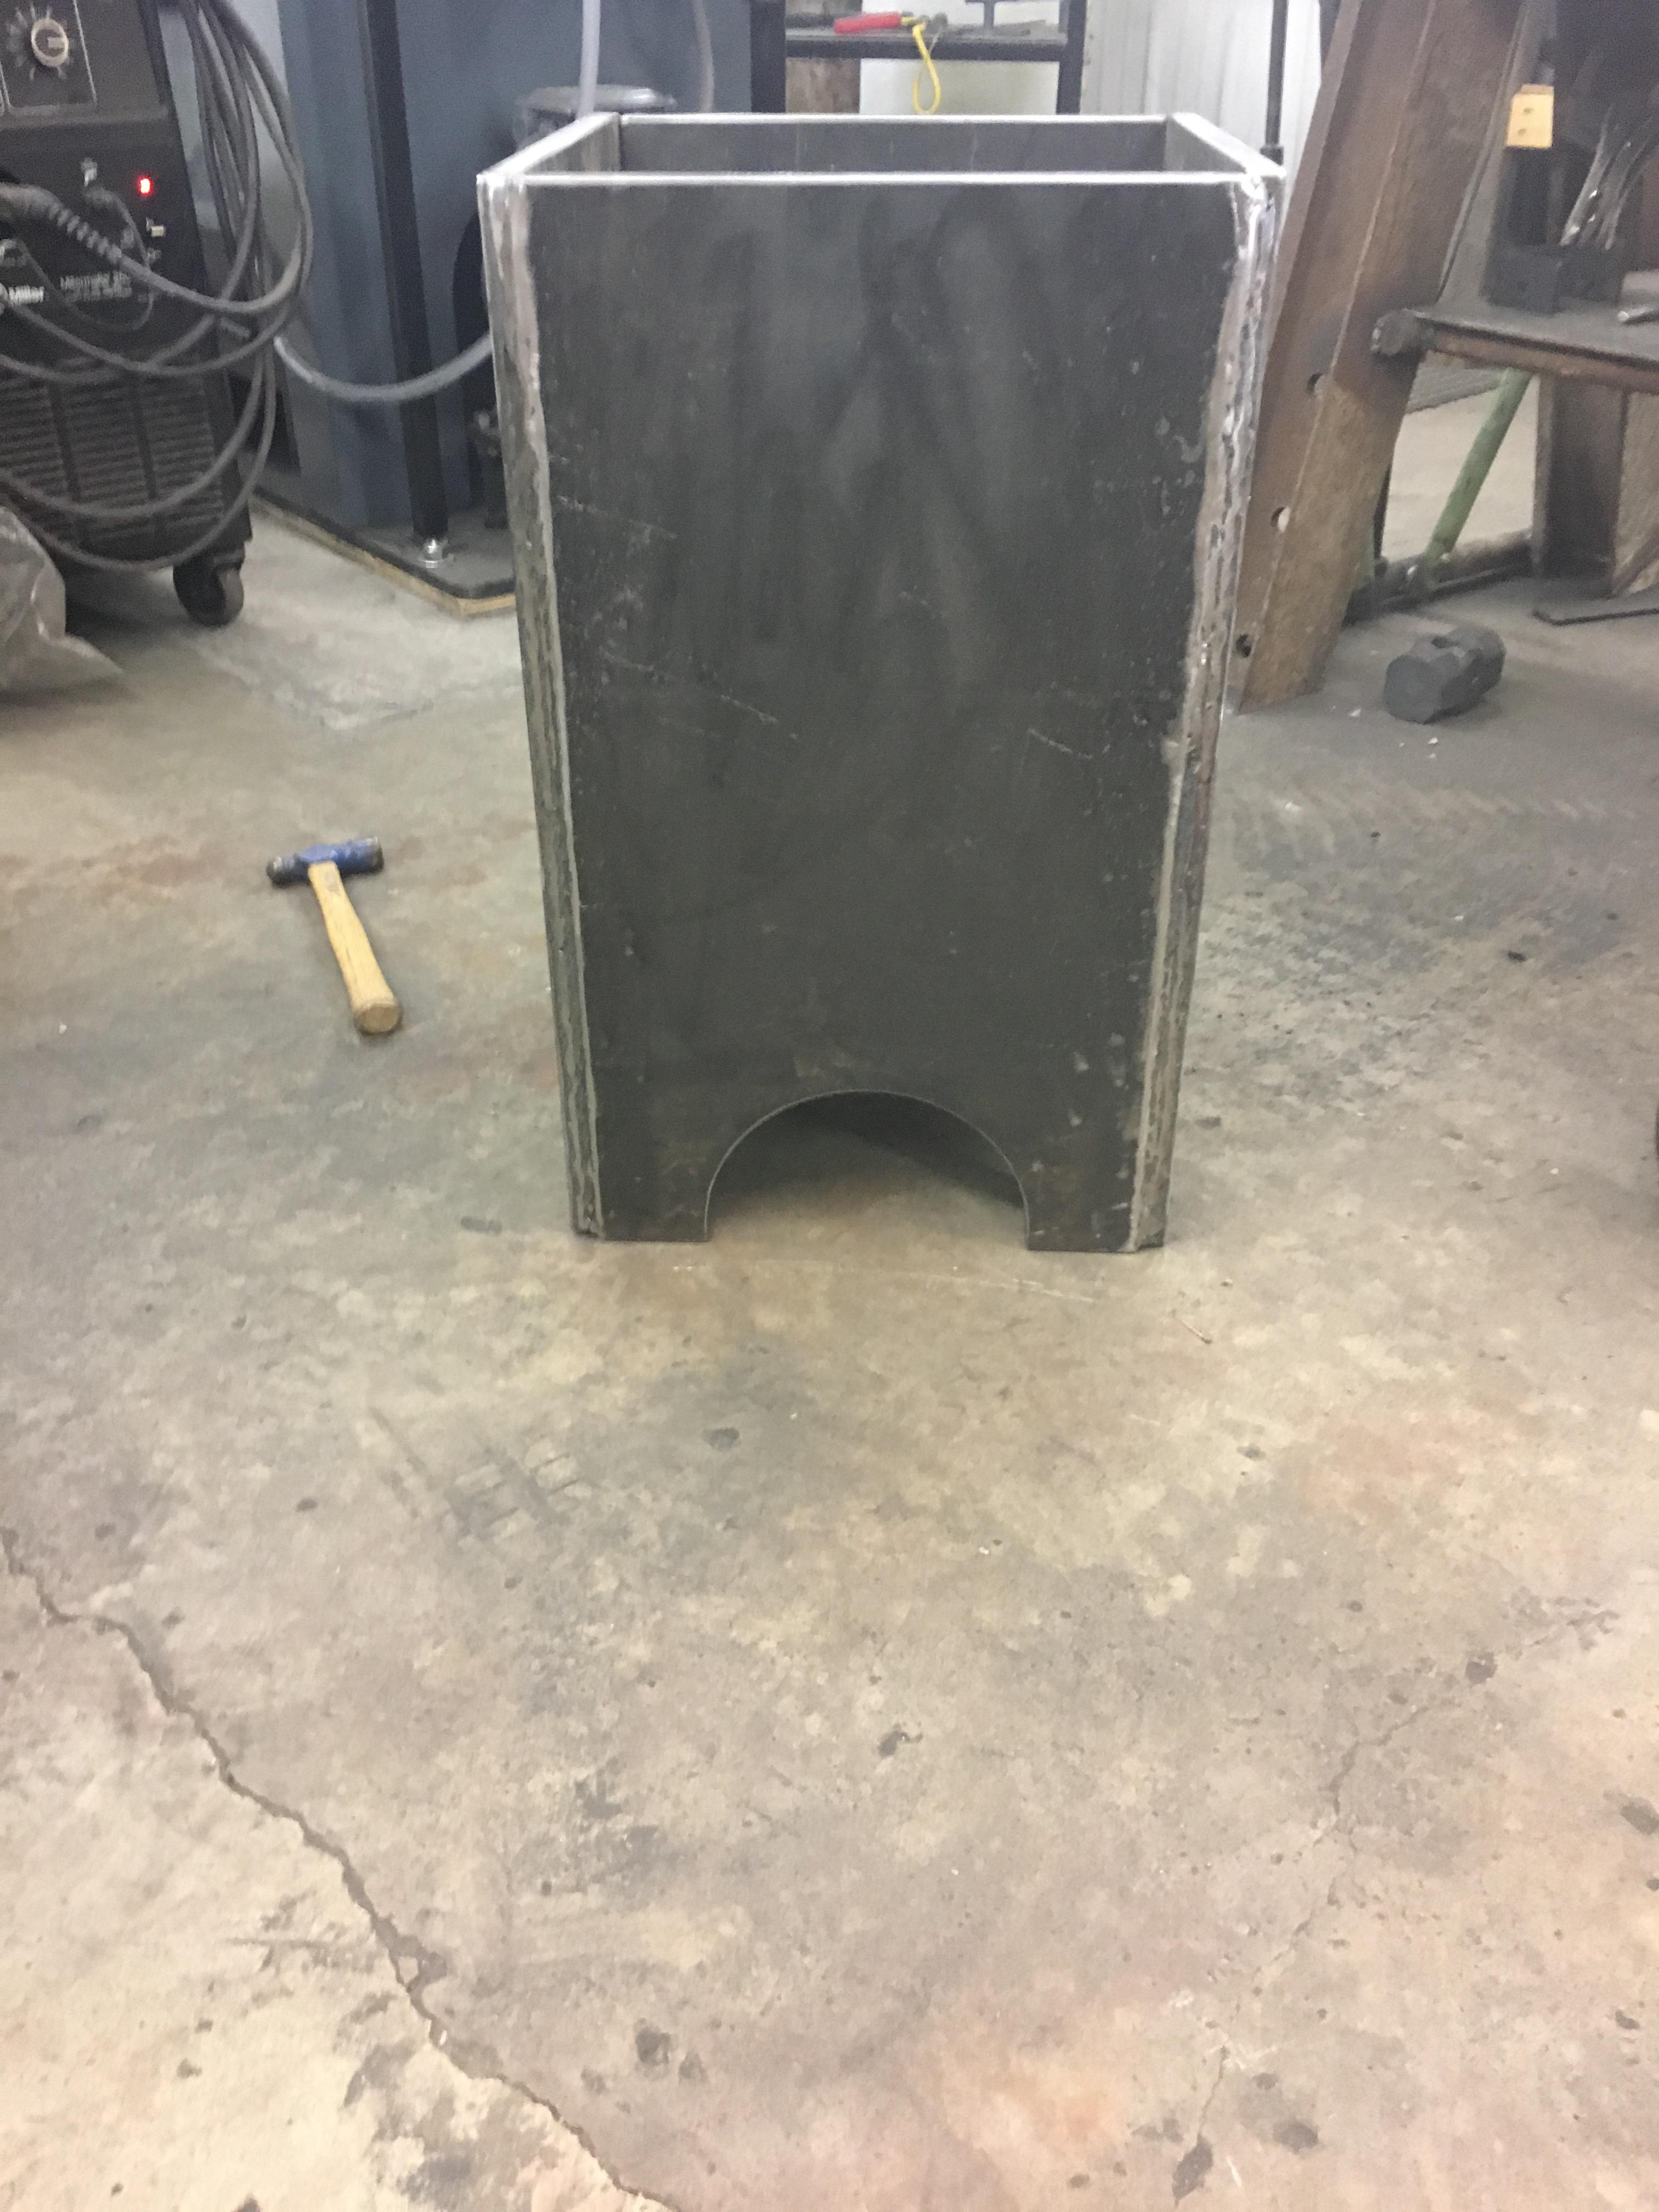
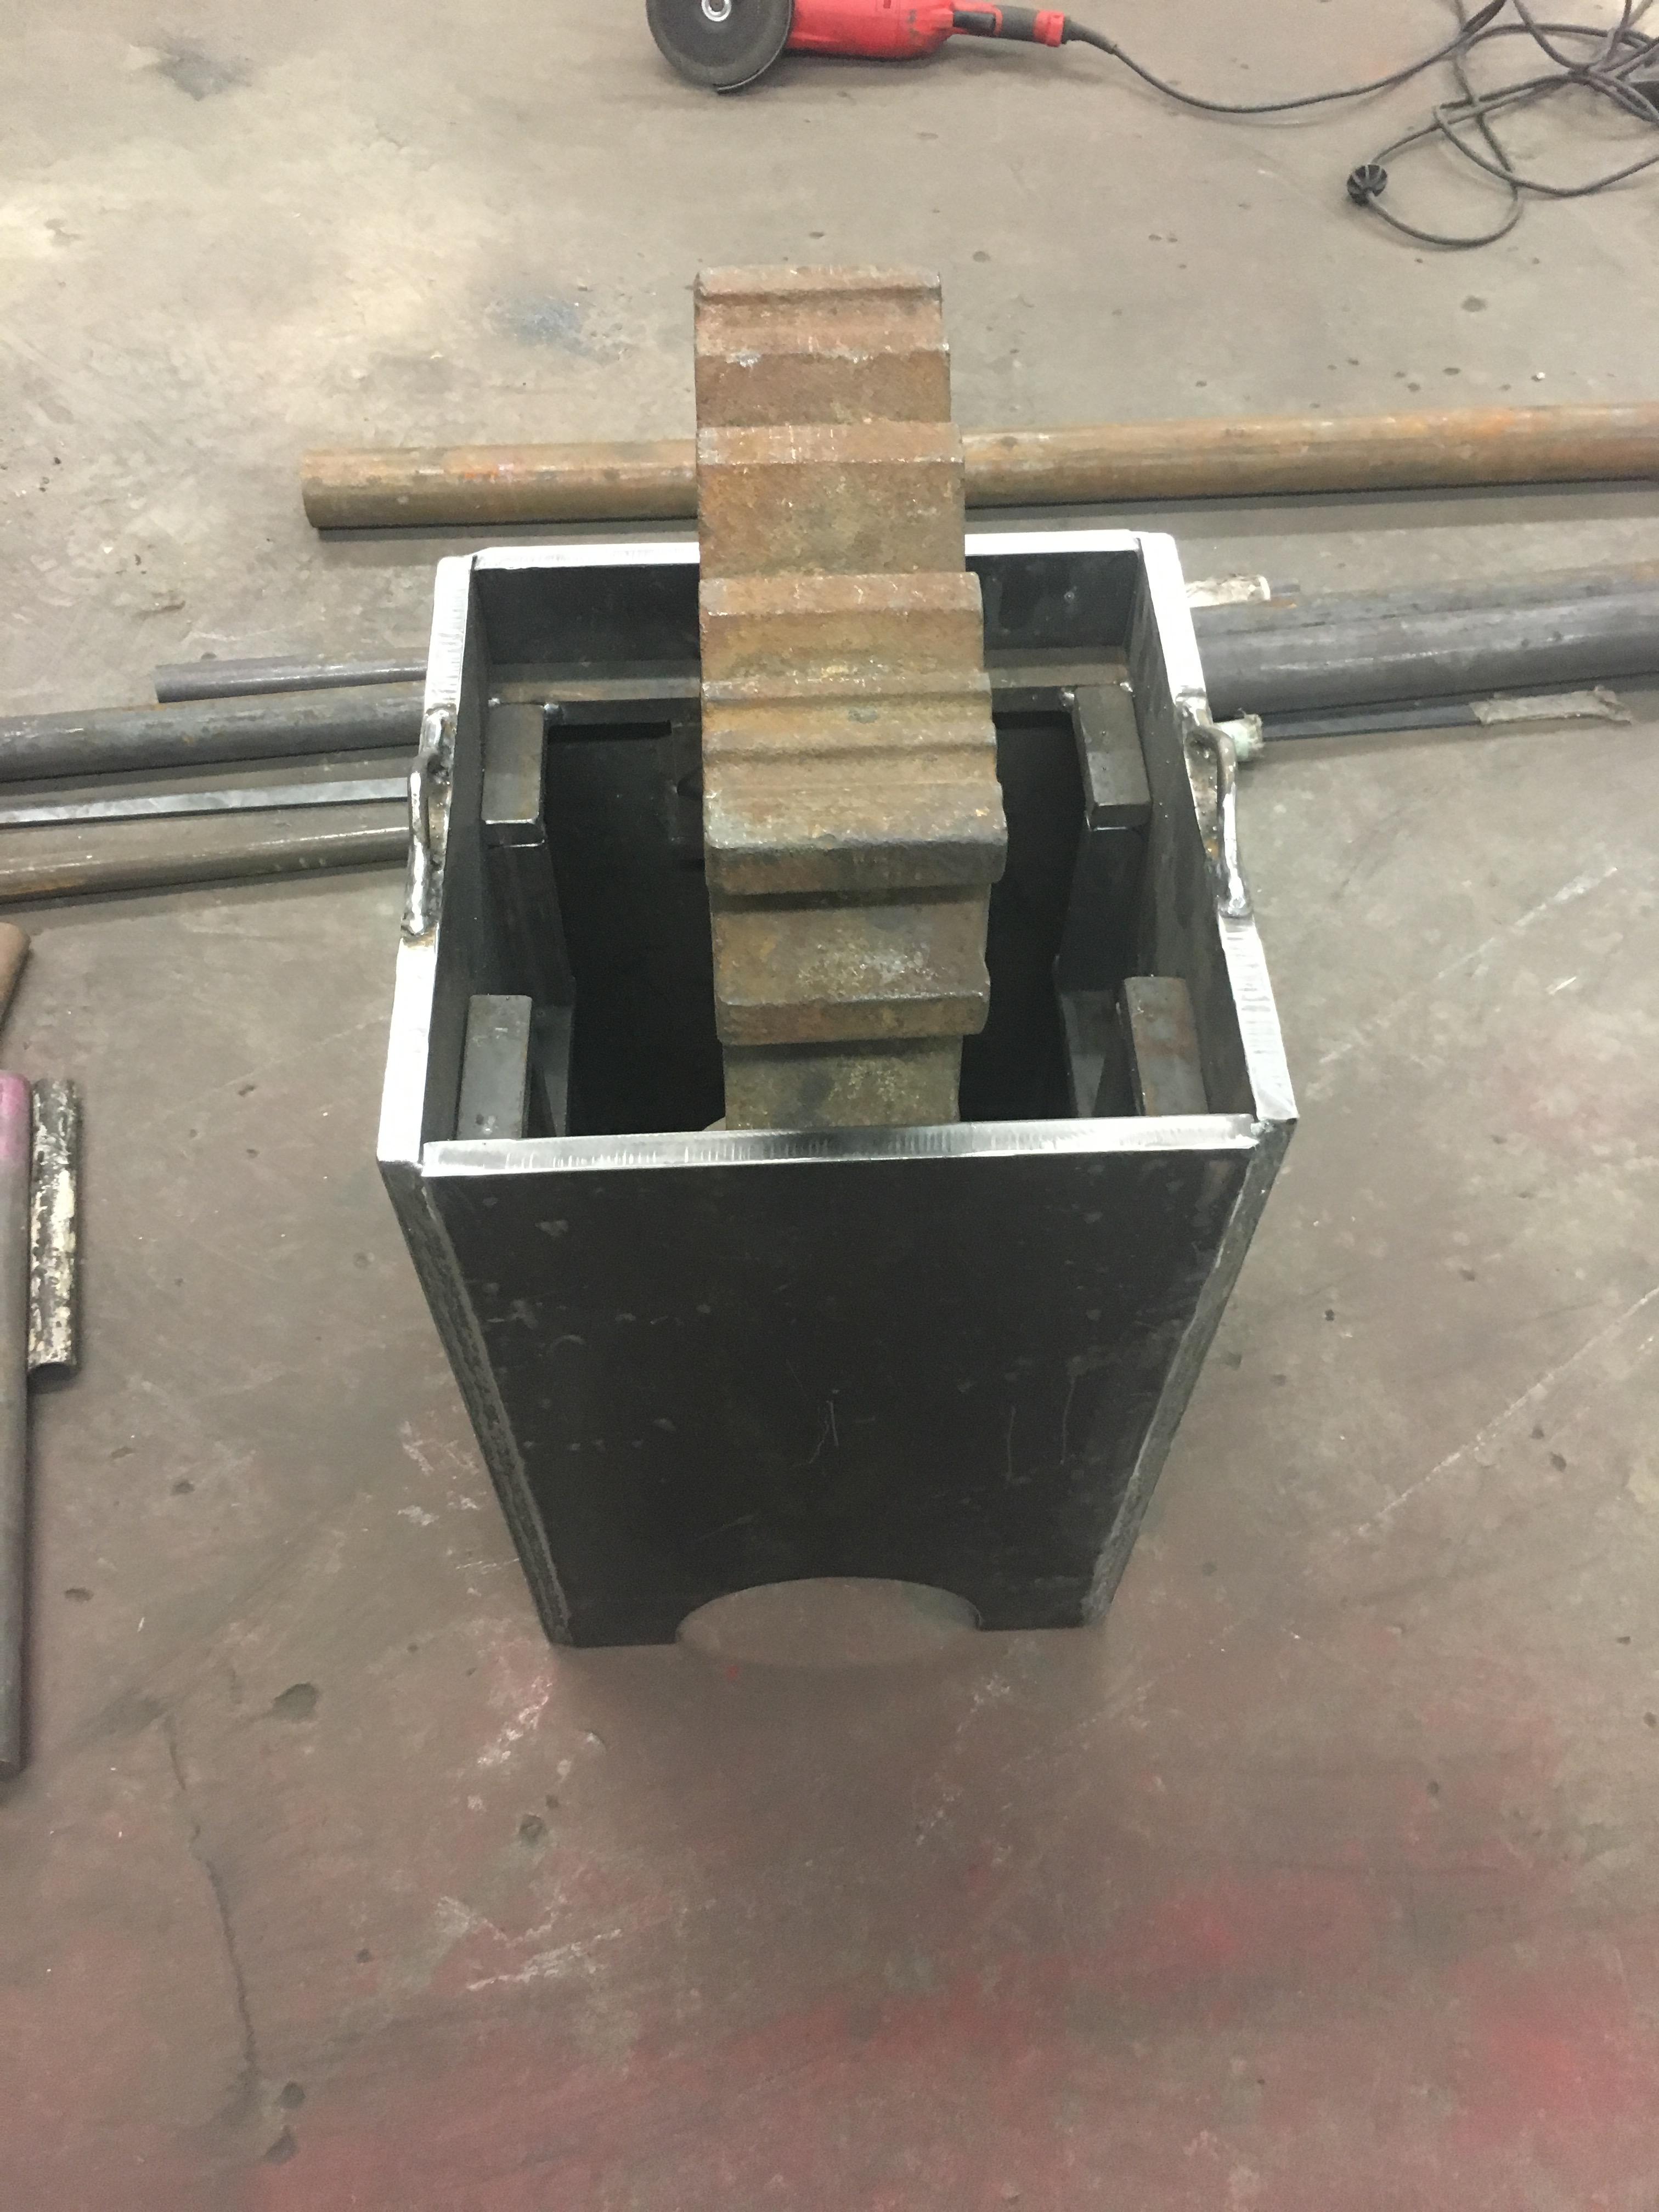
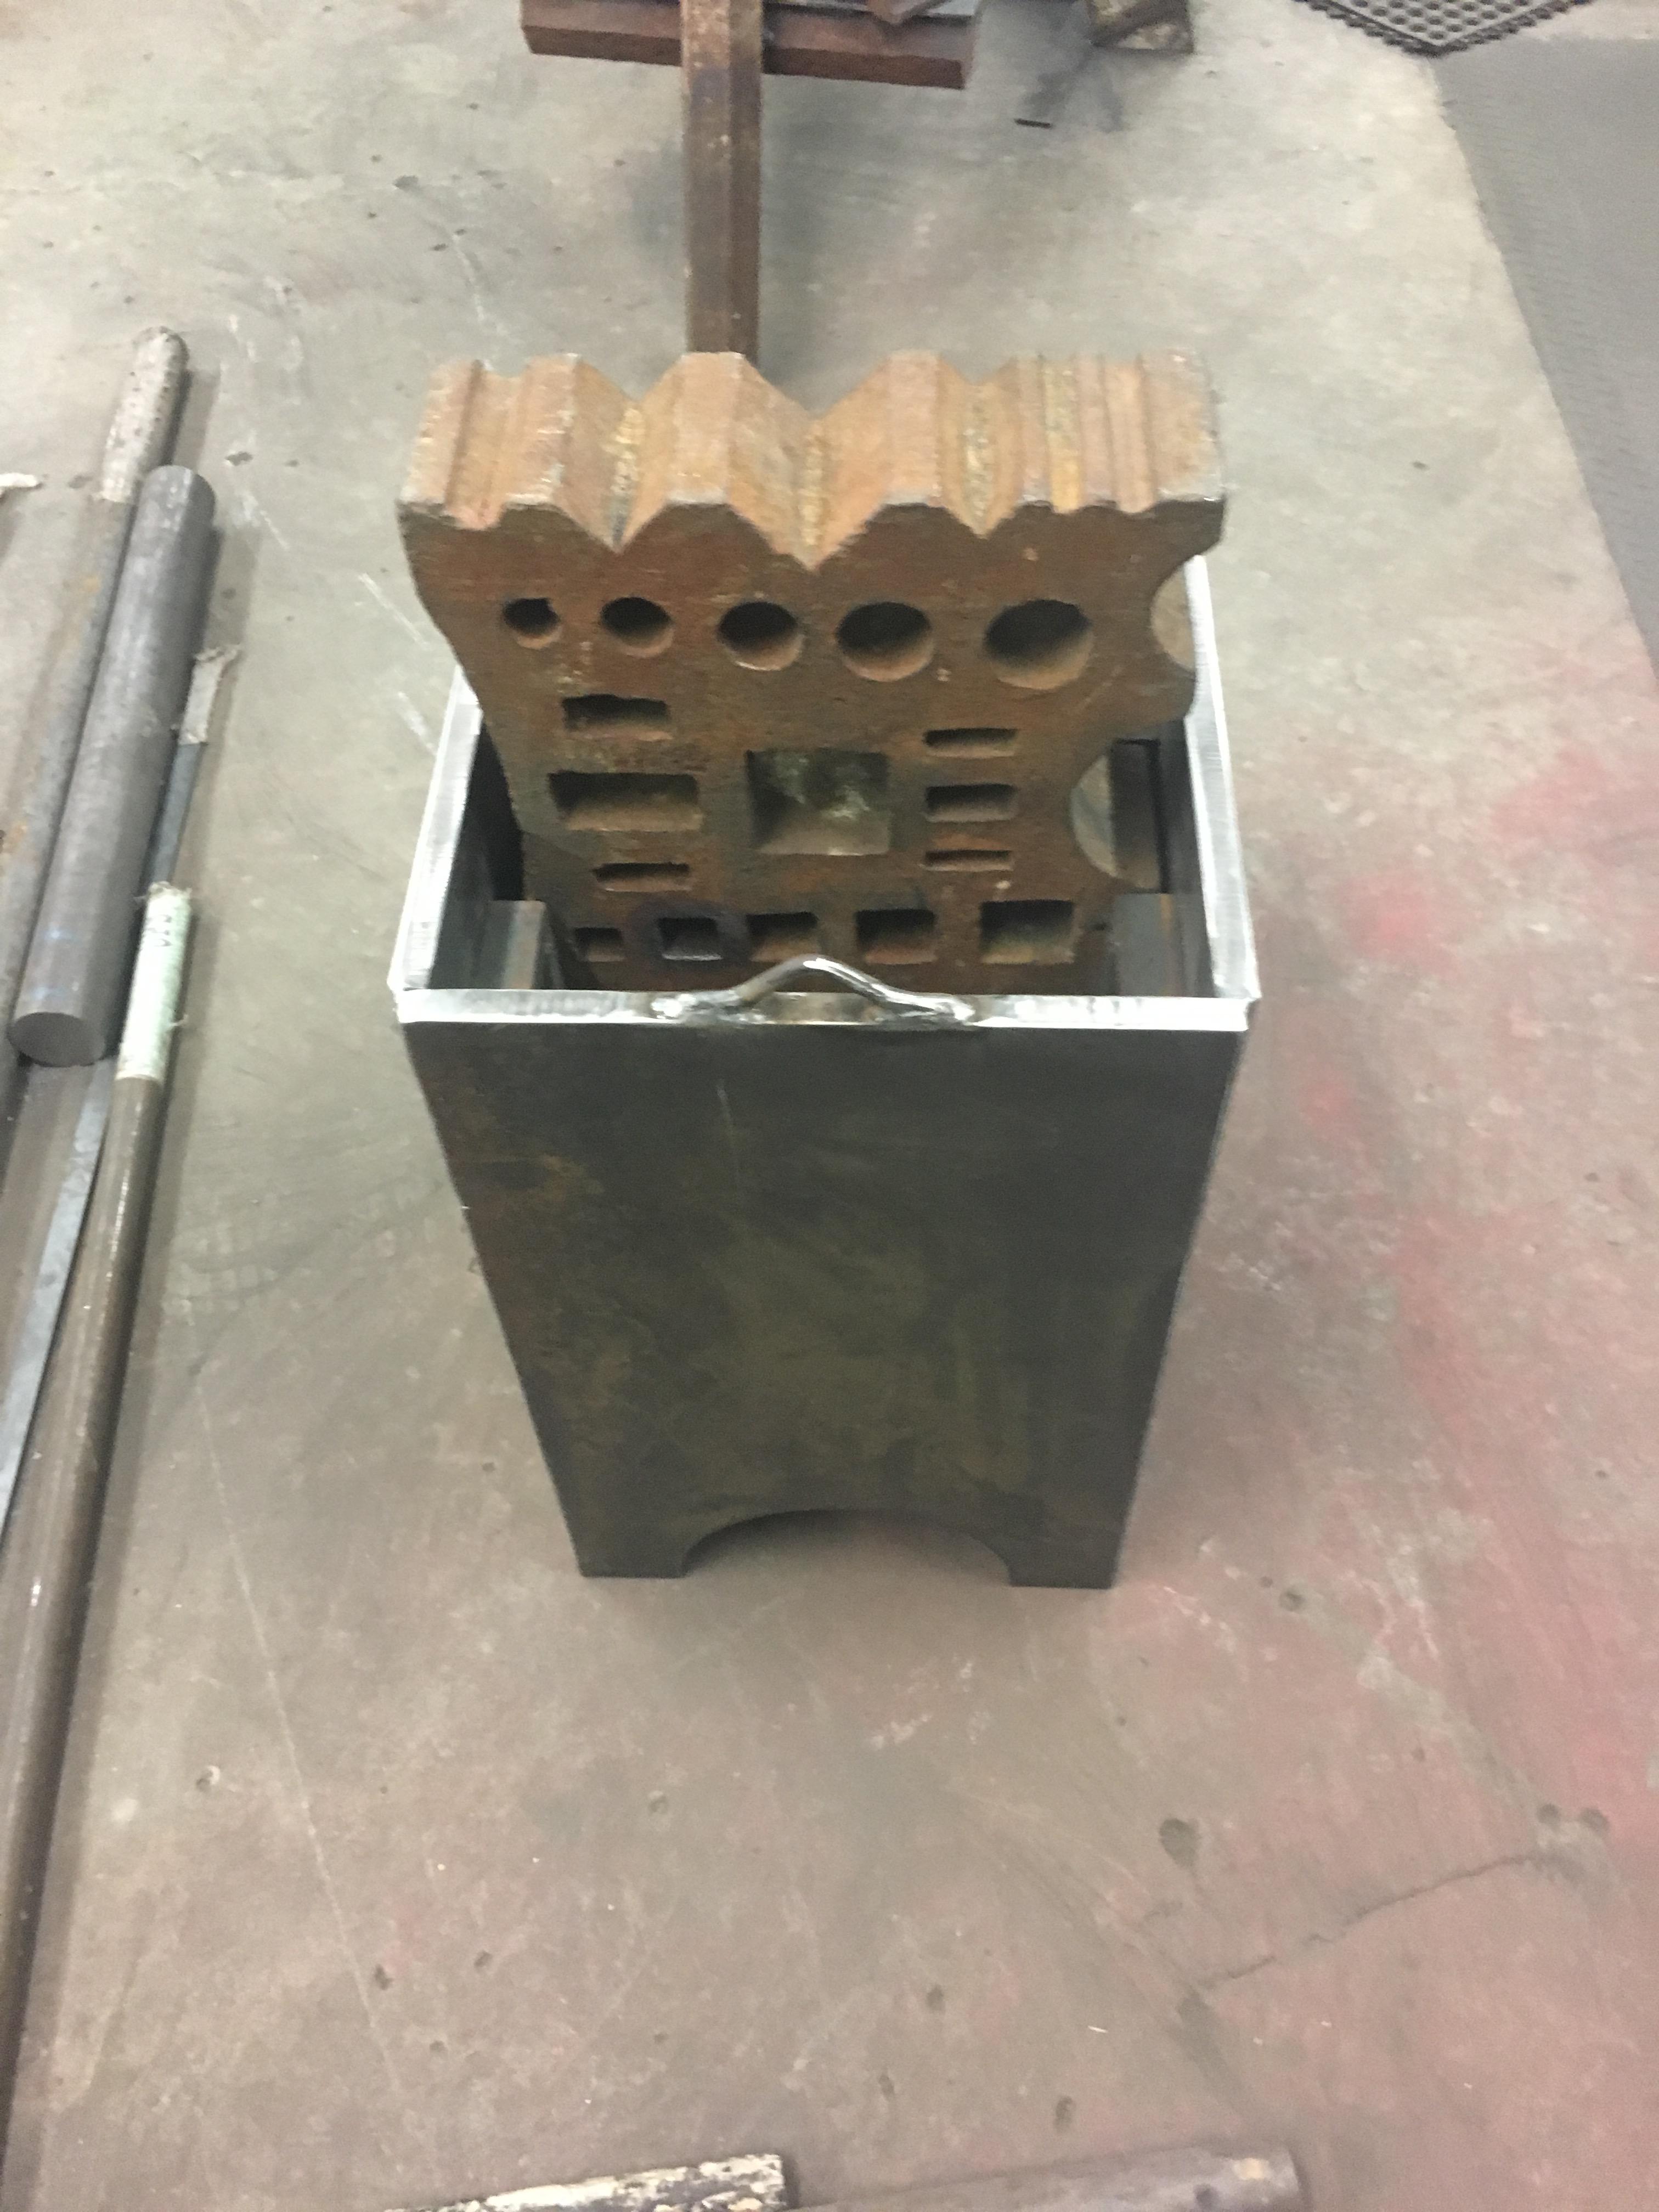
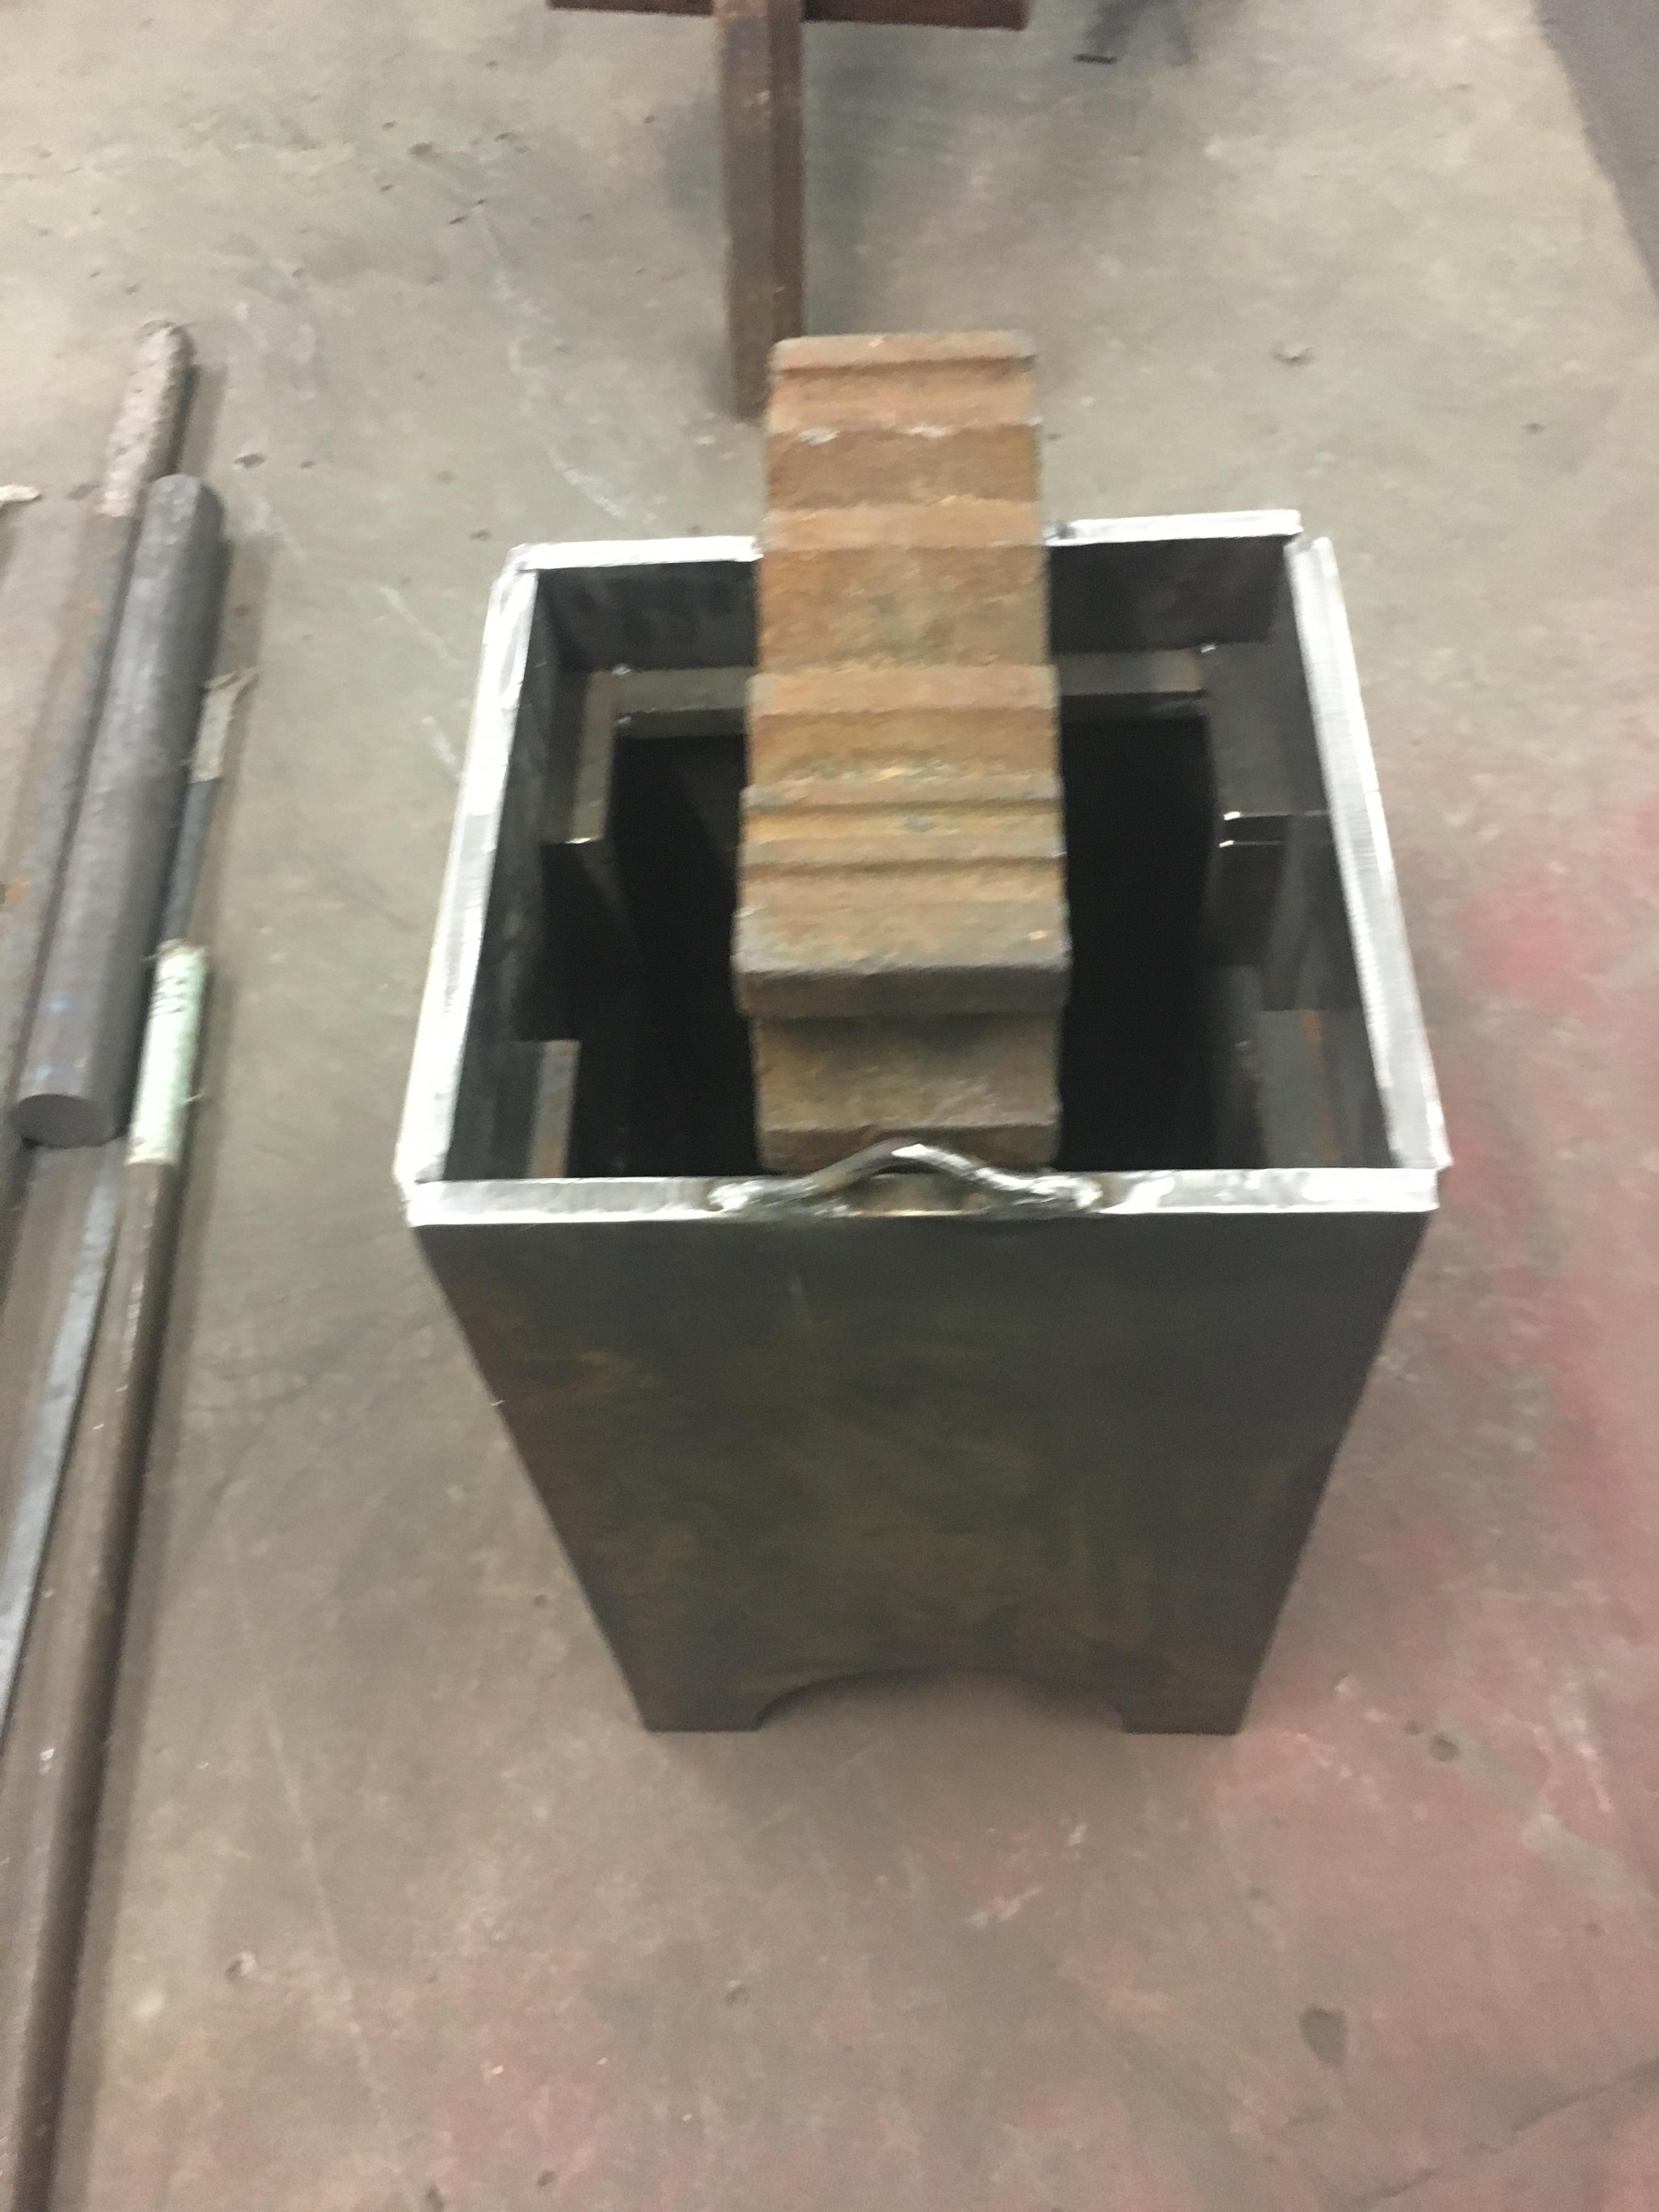
I got tired of my block of firewood for a swage block stand and a combination factory stand and swage block is way out of my price range. I had my cousin cut me four 3/4” thick mild steel plates to my dimensions on his cnc plasma cutter and welded them into this. Close as I can figure the stand weighs around 300#.


-
Decided to try an ax with some file work
Zachary replied to Zachary's topic in Axes, Hatchets, Hawks, Choppers, etc
Thanks guys. The starting stock was 3/4” x2 1/2” by a little over 6” long if I remember correctly. -
Decided to try an ax with some file work
Zachary replied to Zachary's topic in Axes, Hatchets, Hawks, Choppers, etc
Thank you -
Decided to try an ax with some file work
Zachary replied to Zachary's topic in Axes, Hatchets, Hawks, Choppers, etc
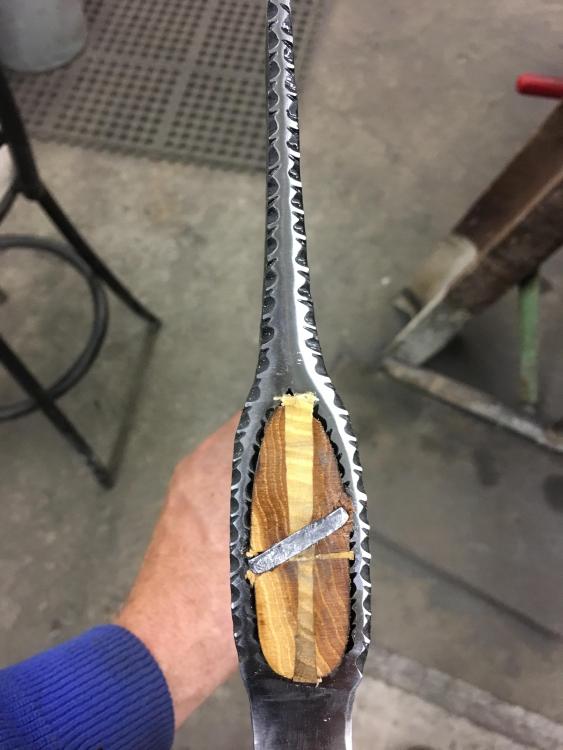
Yes I should’ve used a smaller wedge but it’s what came with the handle so I used it. The hardest part of punching the eye was keeping it straight all the way down through! -
The head is solid 4140 with just the cutting edge hardened and tempered. This is my first try and file work so its not the greatest but I’m fairly happy with it

-
I bought the tank. It was costing me $50 to fill a cylinder and it holds about 24 gallons. I filled my 500 gallon tank for a $1.30 a gallon. A lot of times it’s cheaper than that if you fill around August.
-
I got tired of dragging 100# cylinders in and out of my shop and loading and unloading them so I set a 500 gallon tank and plumbed it into my shop.
-
Air hammer power requirement?
Zachary replied to will52100's topic in Power Hammers, Treadle Hammers, Olivers
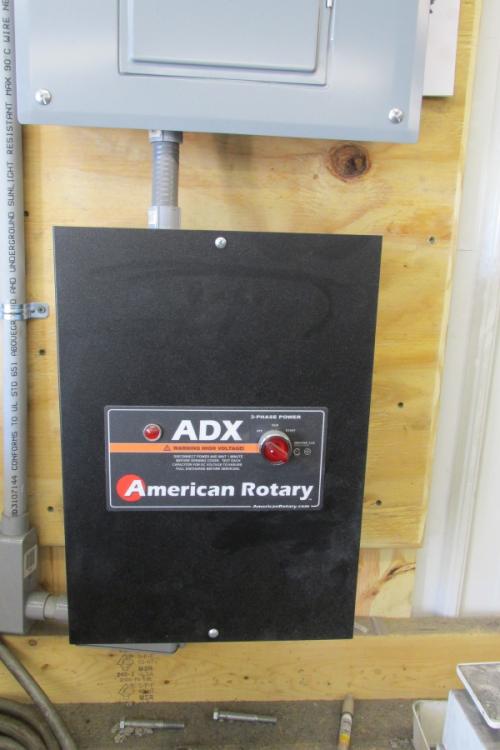
I installed an american rotary 20hp unit and it runs it no problem. The only time the hammer is gonna pull that much electric is on startup once it's running it will pull thirty amps. So as long as you're careful what's running when you start it you probably could get by with it. -
Air hammer power requirement?
Zachary replied to will52100's topic in Power Hammers, Treadle Hammers, Olivers
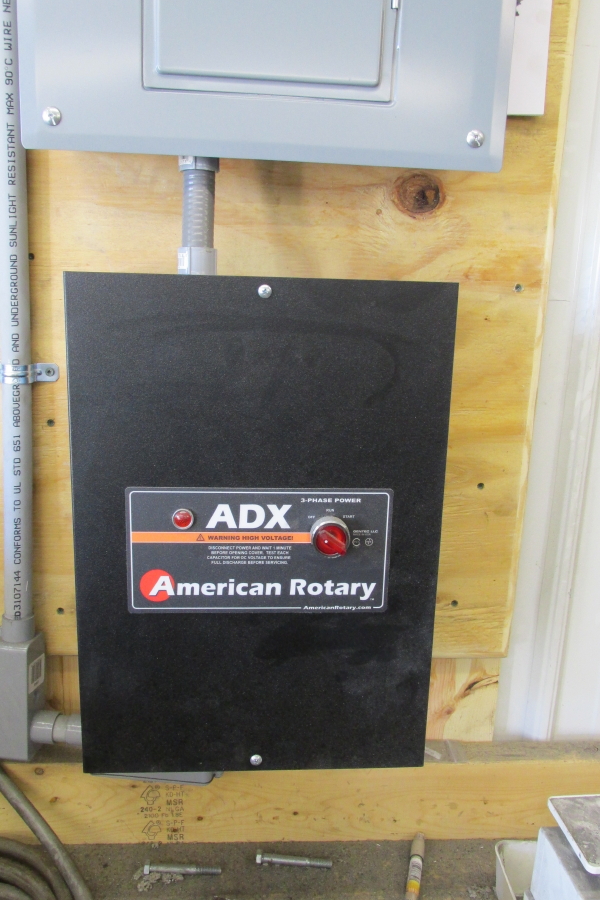
If it helps I just recently installed an anyang 120 and my electrician said I needed a 60 amp breaker. It only pulls 30 amp running but he said you have to put a breaker in twice that for start up. I also just installed a phase converter to run mine as James Johnson said you can't get a single phase motor to run at low enough rpms. Hope that helps some. -
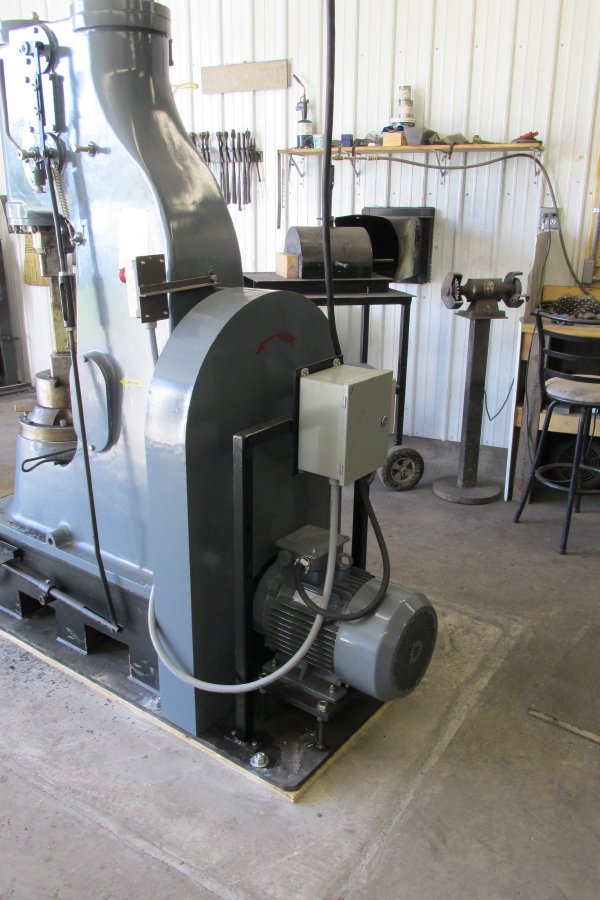
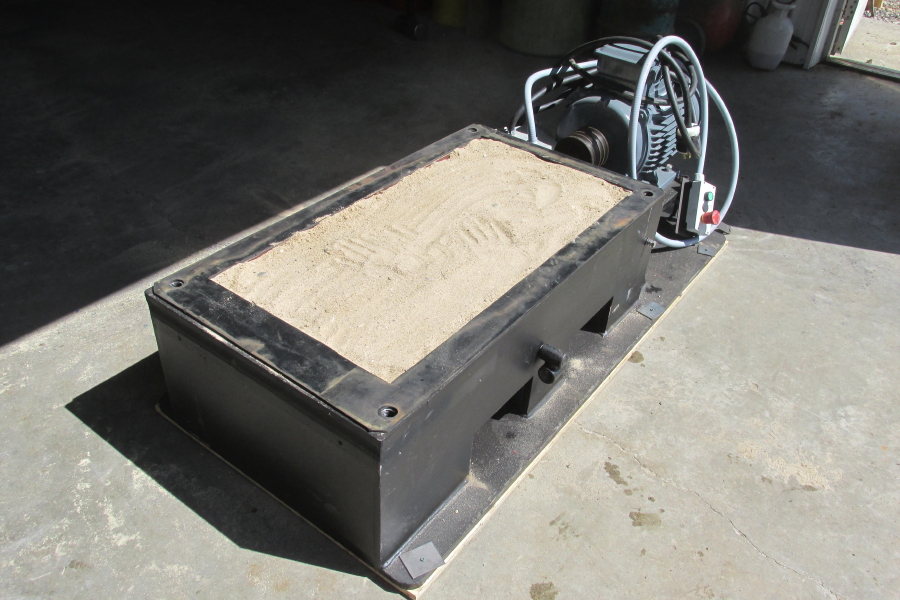
The inertia block is four feet deep. I think I put eight 5 gallon bucket fulls of fine sand in the base. I'll have to check into taking the sow block off and filling that void as well.
-
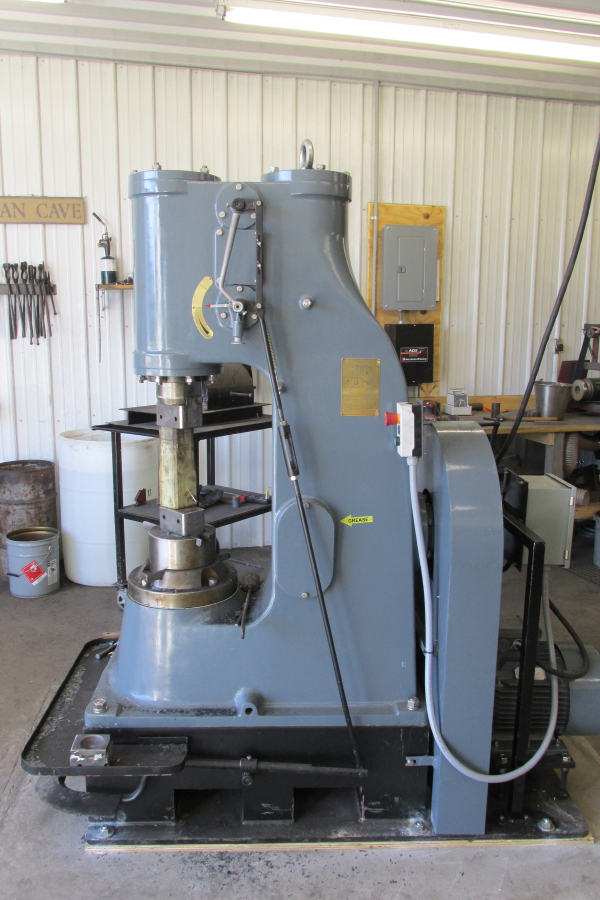
The hammer was $12,900.00
-
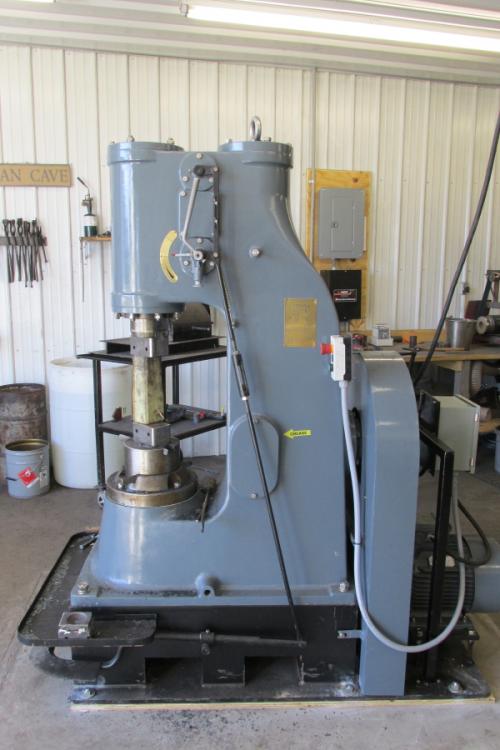
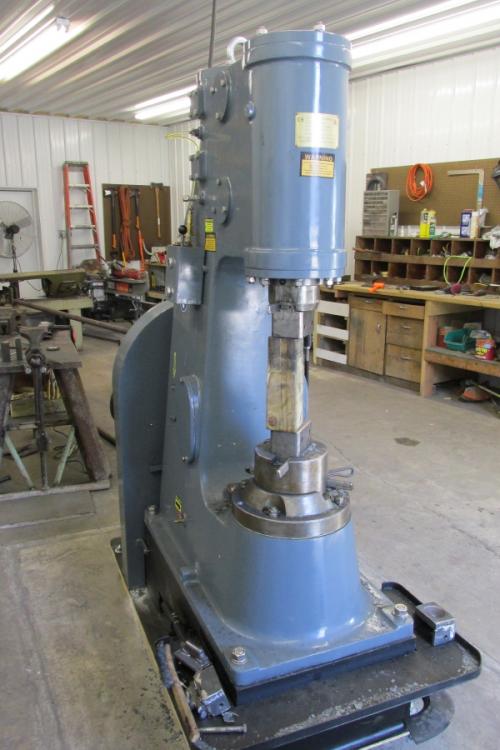
Finally in the last week my anyang 120 arrived and I finished installing it and got to use it a little today. They are nice hammers for sure! I don't have a lot of experience with power hammers but I'm very happy with the control this hammer has. Also dealing with James Johnson over the whole purchase was a pleasure. He answered emails and phone calls promptly and answered my questions patiently even when I hadn't decide for sure if I was going to get one yet. The hammer is setting on an isolated concrete pad 4' x 5' x 7' with 1" insulation to isolate it from the rest of the floor and then reinforced with 1/2" rebar. As you can see in the pictures I took the hammer off the base and filled it with sand per James recommendation to quiet it down which helped a lot. The frame the starter box is mounted to I had to fabricate as the box was just wired in and laying loose on the hammer when it arrived so it could be mounted to the wall. I have mine in the middle of the shop so I went this route. This thing hits hard or soft and anywhere in between with great control and with the concrete pad it really keeps the vibration from the rest of the shop. Just for those who might be interested the last picture is the phase converter I installed to run the hammer. If you have questions you were wondering about these hammers I'll tell you what I can.

-
Very nice hammrs
-
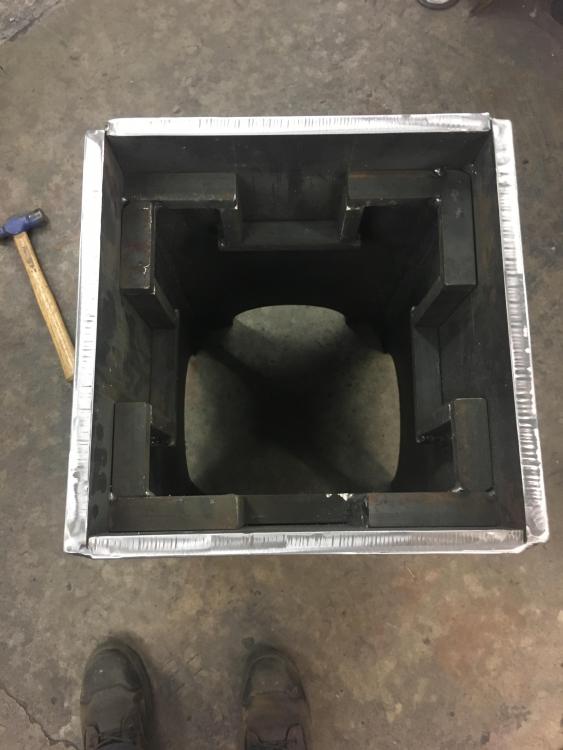
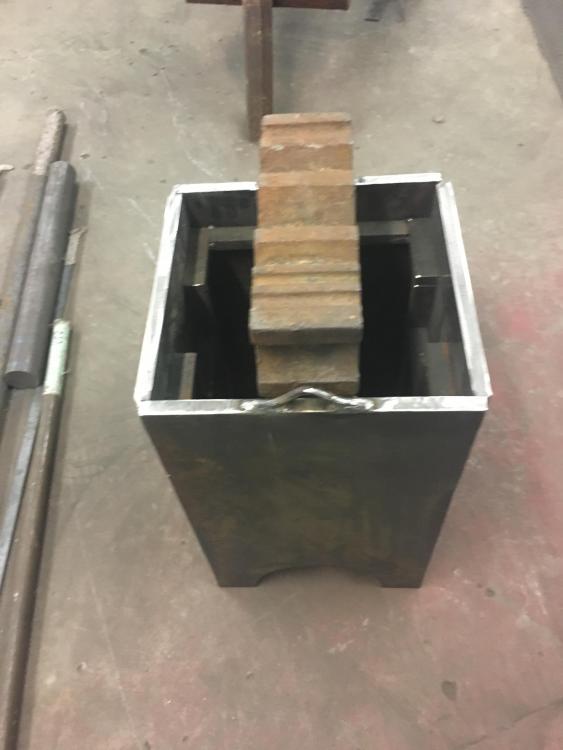
Made a striking anvil and axe handle drift
Zachary replied to Zachary's topic in Tools, general discussion
I marked them out square, drilled the four corners with a small bit, and then drilled the center to the size hole I wanted. After that I took the torch and cleaned out the corners and then finished them with a die grinder and a carbide bit.