

craig
-
Posts
245 -
Joined
-
Last visited
Content Type
Profiles
Forums
Articles
Gallery
Downloads
Events
Everything posted by craig
-
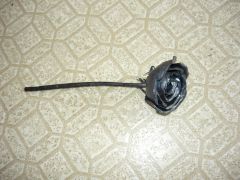
Glad you think so too :-) No, it is not sealed, I just wrapped it around, tied some knots and stuffed the tail back underneath...I know it won't last overly long, but I can always re-wrap it or try something else too.
-
Thanks !! That's kind of what I was trying to replicate...I've seen a few pictures and videos of people using them, and I thought "hey, that seems simple enough" rather than buying or building something only to discover afterwards that I should have made it differently, all I have to do is move a couple of bricks and a few handfuls of dirt...and I was thinking about just using a small stool or maybe a pail to sit on.
-
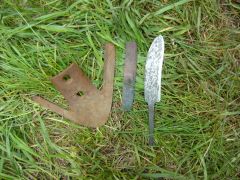
The picture is pretty self explanitory as far as where it came from... I used the angle grinder to remove the piece from the "stock" after that it was only hammer and file...blade is 5 inches long with 3.5 inch tang. It is normalized, just needs sanding, quench, temper, and handle. I'm planning on using some type of scrap wood for the handle to go with the recycling theme PS...this one was the first thing to come out of my new outdoor ground forge
-
Here is one a started a while ago and recently finished. Steel is from a short length of leaf spring I found in a field, so I'm guessing it's from some type of old farm machinery...handle wrap is linen twine made from flax straw a few years back I figured it's about time to put it to use Works good enough for a beater...
-
Here is my temprorary set-up for nice weather...unlike my brake drum forge, the shape is easily adjustable to make it more fuel efficient...anvil is cut off from some type of huge crankshaft nearly 4 inches in diameter. I'm happy I finally got to put my crank blower (thanks to SaskMark) to use !! It get's a little hard on the knees after a while sitting there, and I want to shorten the blower tube a little too, but overall I'm pretty happy with it...that is one EASY set-up !!
-
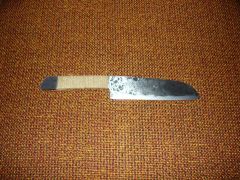 Some type of old farm spring found in a field and flax straw twine for handle wrap...6.5 " blade, 5" handle
 -
 Used angle grinder to cut piece off...the rest is hammer and a little with the file...no HT yet
 -
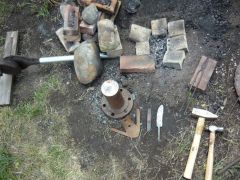 Just a hole in the dirt with a blower and a few bricks...
 -
I tried welding some barbed wire a while ago...a small portion stuck together, but I think it was just too rusty. I hope your's turned out better than mine !! Can't wait to see it :)
-
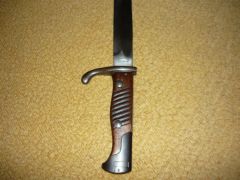
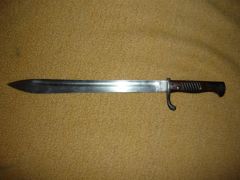
Oh, I saw "bayonet" and just had to look I have one just like that, but mine is from 1918 with "Alex Coppel, Solingen" on the side and the "W18" on the spine...I paid more for the bayonet than the rifle it sits on (K98) Though it is made for the G98(which I don't have) it fits on both. I know some of them had saw-teeth in the spine, some being removed and some intact... Personally, I would not re-finish it...just get rid of the rust and protect it as is. Hang on to that thing, they are not real easy to find !!
-
-
-
Nice setup !! I like that anvil :-) Think of it as "she's letting you build a shop" ;)
-
 ...After
 -
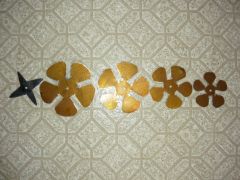 before...
 -
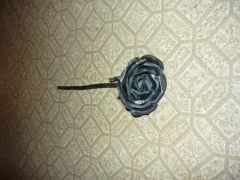
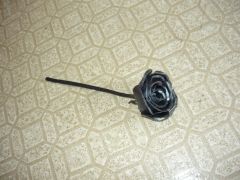 Steel drum and 5/16 rod
 -
 Steel drum and 5/16 rod
 -
Beginners in Saskatchewan and perhaps your area.
craig replied to Jaret's topic in Blacksmithing, General Discussion
Hey, that's cool !! I think I will have to see if there is anything like that in my area :-) Thanks for the info !! -
For removing scale before hammering, I find scraping it off with one of my older "knives" that didn't turn out well enough to bother finishing works very well...I got the idea from YouTube - Murray Carter forging a Japanese blade Part 2 Much quicker than a wire brush.
-
Blueprint is here to what the Tutorial is on your site...I'd have to say, a lot of people here are sure to have already viewed it and been impressed !! At least I have Very good looking knives !!
-
Do you have any pictures ?
-
I don't know too much on this subject, but if I were to guess, I woud say the lack of contrast could be cause by carbon diffusion between the different steels if the tip was heated more times/longer then there would be less of a difference in carbon/alloying elements in that area of the blade since the more heats/longer heats etc. would allow more time for everthing to even out...
-
That's a nice looking blade, sucker rod will make a fairly tough blade, though I doubt it will harden up all that much...should be a bit better than RR spike though. It will be tough to fit a handle that follows the back of the blade... I've only done one hidden tang knife, and like Don said, you should center the tang in the with the blade...give or take a bit. If you really want, you may be able to move the tang down slightly by laying the bottom of the tang on the anvil and top fullering at the transition area with the cross pein... I've only tried this once, and I buggered up the knife I was working on, not trying to discourage you, just a heads-up...more experience people probably have better solutions.
-
First forge welds and first time with coal!!!
craig replied to tech413's topic in Blacksmithing, General Discussion
Awesome job !!! Those look cleaner than my first ones for sure. And cool little loopy twisty thingy there too ;-) -
Heh...on a similar note, I probably shouldn't have assumed he had other options, I never thought of that. Aarongann, what cutting methods do you have available ?