

Gayle Brooks
-
Posts
323 -
Joined
Content Type
Profiles
Forums
Articles
Gallery
Downloads
Events
Posts posted by Gayle Brooks
-
-
I think this is pretty clever! well done
-
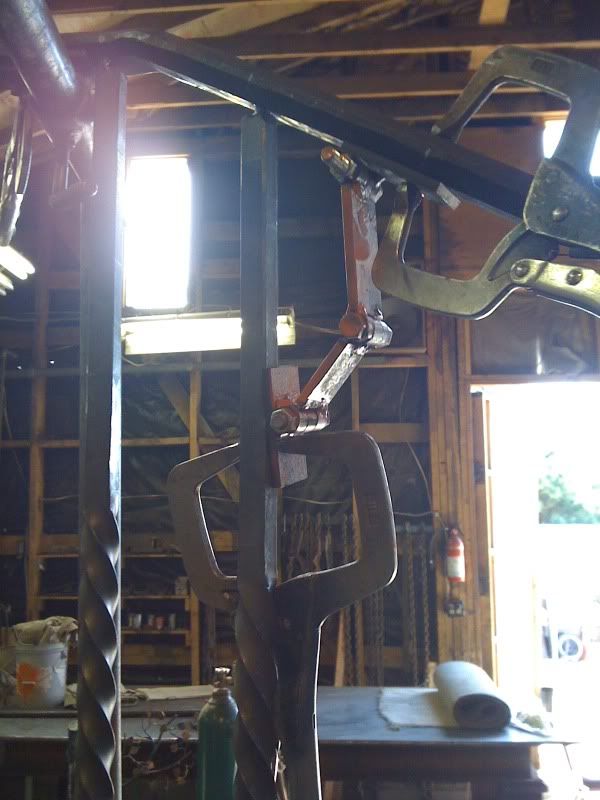
Day 2 of assembly. Had an idea for a extra hand. This tool is pretty rough but does the job right now. I will make a cleaner one when I can. Pretty self explanatory. Each joint can tighten down and lock. Basically hang the picket from it and be able get my hands free.
I had already laid out where the pickets will go. Level them up and start workin down. I did not aggressively weld them being I didn't want the railing to rack from the heat of the welds.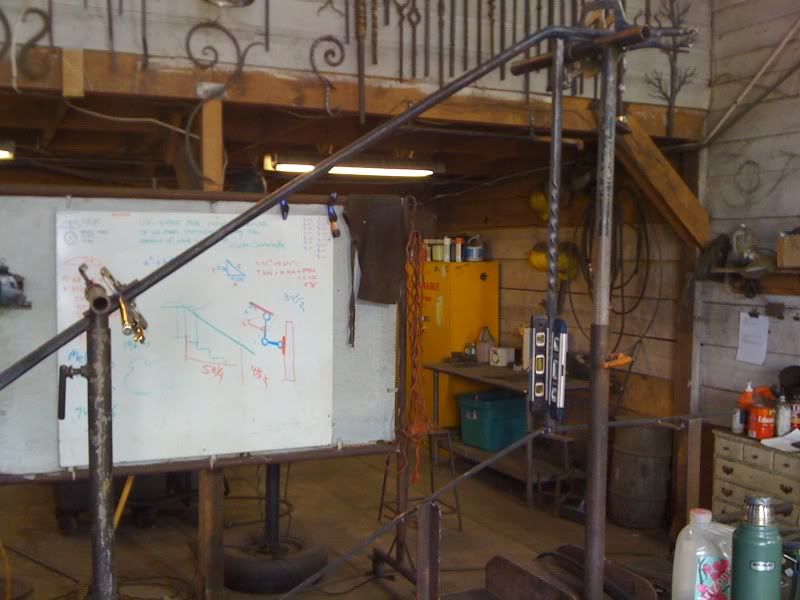
Took me a little over an hour to get these in place. I put the lamb tongue in place temporarily to give me an idea of where this is goin.
The stringer of this rail has been bugin me. I ended up putting it on hot. Keeping in mind this rail has a rake, run and radius, I really didnt want to spend alot of time hitting this.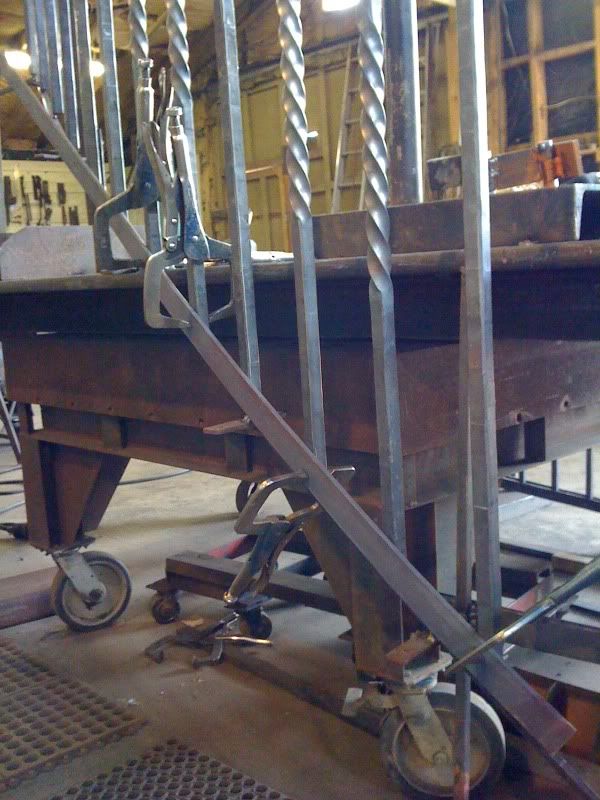
I spent the rest of the time bouncing my welds around, cleaning and detailing. I rough fit the aspen tree in on the base.
Thanks for reading :) -
At Dragon Forge we have been pretty busy with some fun projects. Recently we had a client, on the 11th hour, decide he wanted a railing with some metal aspen trees. With a very short turn around time, I had to get started on the ASAP. So here are some pics of what has happened. Please feel free to ask any questions. Ill do my best to answer.
To start off were the aspen trees.
These have copper, brass, bronze and steel leaves. I forge these a little at a time. Here is around 150 in 3 days. Next is to clean and start brazing clusters of 2 and 3.
One finished tree at the top of the stairs.
I was working on this while at the job site the treds were getting installed. When they are ready I show up to get a template from this set. Because this isnt a common run I need to fit to what is built. Using a piece of 3/8 round bar and some flat stock, I build the template. Putting the rake and run in the round bar, I place the flat bar on the nose of each tread.
When I go back to the studio I place is back as close as I can. My control points are the flat bars and the top where the landing is. They must be level with as little torque as possible on the template.
Thanks for looking :) -
thank you sir! :)
-
Well the asymmetrical one sold so that was some good news. This one was an failed attempted and experiemnt at some chainsaw chain and wrought iron. The etching didnt go to well. It has a rubbed brass and bees wax finish. I am working on a copper bowl and another "experiment" with mixing some of the non ferrous metals.

-
Glad you guys like em

Man I always go through a struggle on pricing this stuff. I typically work on this on my lunch break, so I am husslin tryin to get it done. Lets say I would be happy if I got $200 for the first one and $50 for the second. If they dont sell, I have the option to lower them. I made some candle holders for $15 a piece and the crowd there isn't really movin fast lol. here those are
-
looking forward to seeing the progress of this Bryce!
-
I have been making some more metal bowls. Here is the latest one. Its currently in the little local gallery for sale. I try to make these as fast as I can to keep the price affordable. I use a 50 ton press and a ring, I think it has a 5 inch ID and is 1 3/4" deep, I would have to double check that measurement.
Forged out of a 10" diameter, 1/4" thick Plate. With this bowl I particularity was going for some contrast in shape and design. With the weight of the steel, rivets and color it had an industrial feel. I decided to forge a simple organic stem that starts from the bottom and runs up the side, wrapping its self around the lip. This bowl has the natural colors of the steel with a bees wax finish.
Enjoy

This one was a result of sinking to far. I did this in one heat and didn't control the steel. It was a fun experiment but am not going to repeat this step unless I am going for the look.
-
http://www.integritysteel.com/aisi-h13-hot-work-tool-steel.html
Note: When oil quenched, this grade is as vulnerable to cracking and has the same distortional characteristics as an oil hardening tool steel.
h13 is really tough and can still hold alot of its integrity at a red heat. I would not recommend quenching it and let it air cool. We have 2 tools to rotate through for the process. -
Dragon Forge is hiring! You can send me your resume with portfolio pictures or email Craig directly. Please visit the website or contact me if you have questions. Thanks!
Employer Name: Dragon Forge Ltd (www.dragonforgeltd.com)
Job Available: Journeyman Smith
Salary Level: Wage dependent on experience
Qualifications: Minimum 5 years working in architectural shop
Additional Information:
Minimum 5 years experience in Architectural forging and manufacturing.
Must be proficient in all manner of traditional forging and modern fabrication.
Layout skills needed and attention to fine detail is crucial!
Long term position to the right person.
craig @ dragonforgeltd.com -
unreal! thanks for sharing, too cool
-
-
Thanks for the replies!
I thought it was old, but not that old!
And Ill share the info with the guy about the tool for the star drill. Thanks Grant. -
Before I go to squishing this hammer...is it a hammer? The one end has a slight tapering back, and it not really that well balanced. Am wondering if something attached to it. I got this to make a pipe hawk and just dont have the heart to do it.
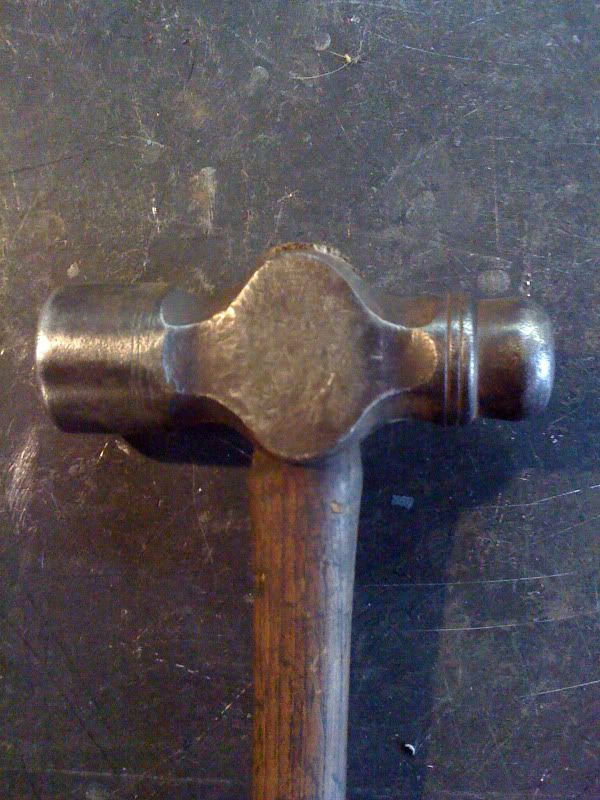
and I have always seen these. One shape or another. I have heard 2 stories: 1-was used to make star chisels. 2- was used for making wagon tires. This particular one was a pic of someones tool in our smithing group who was wondering as well. I have not seen one like this where it was tapered.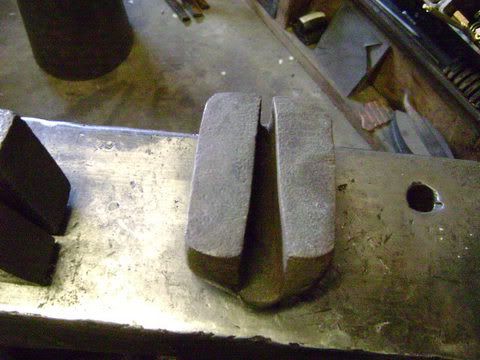
Thanks!
-Rory -
Nice article! Ty for posting.
We rebuilt a couple that way with nuts and new thread. We put 2 nuts in a piece of tubing (one on each end) screw the thread in and welded the nuts. This doesn't happen all in one setting. We take our time to help that the heat doesn't get out of control and warp. Thus making a new box. On the tubing we put a wedge, similar to what the box had, so it would set in the eye of the vice and not spin. Obviously you have to cut the thread off the handle and attached the new one, getting that centered can be tricky. If it is off you risk racking your vise. And if the weld wasn't solid it will fail eventually.
Another thing we have done, depending if the box isnt shot,, is cut the thread off and flipped it. Sometimes the end is just worn, but the meat closer to the handle isn't used much since it sits in the eye.
This being said, 5" leg vises go for $75ish...we put all this work into em and they are still...$75 lol. I would probably not use your vise due to the emotional connection with it, and get another one until your ready to modify. -
Pops and I will be there!
-
I dont remember what oz ball peen it was, would probably guess at least a 12. The larger ball peens obviously have more material in them. I can get the mass to move down for the bearded shape. I try to give them some life and not look like a spatula on a stick.
hahaa Don. I would have cried if I did that! love that hammer.
Ill be attempting a functional pipe hawk soon as well. -
only on days that end with "y"
-
Great work on those R.R. Spikes! How did you do the work on the bent handle it almost looks like wire welded around it.
I used a tenon tool we have that helps shape a 1/2" tenon. I place the handle part on diamond and forge it inside causing the sides to flare out making these little wings. Then a simple twist gives it a dynamic look. Glad you like em thanks!
-
I like working wrought Iron because it's crazy easy to forge weld. In fact, you can't leave two pieces in the fire too long or they'll seek each other out and weld themselves together. OK, maybe that's a little much, but you get the picture.
agreed -
Sorry to read about your troubles

We have the 75lb Bull hammers (older version of the phoenix) and run them at 100 psi which drops to 90 when the hammer is working. Though the only difference in setup we have is a 10hp air compressor, but I am at 8,400 feet as well. There is alot of intuition when we get ours calibrated, so I have not used any math.
Most issues that I have seen are the guides are way to tight causing the ram to get warm and constantly oiling (more friction causing more air to be used to push it so it cycles) and the the back arm from the treadle is not adjusted properly. This arm has a little weight that flips into a slot if that helps where I am talking about.
Dont know if this helps at all, just some of my experience. None the less hope it gets fixed, I do like these hammers. -
nice!
-
tryin to explain that its really ash from the flux and not dandruff
-
I'm working out a very simple latch system that uses an offset round counterweight that pushes a sliding bolt that will go "klunk" when it's opened, and "klunk" when it's locked (think eccentric on a mechanical power hammer). I'll get you a picture when I get it worked out
Nice! Some doors we have done have that noise. Its odd how comforting that noise is with motion to open or close. I don't know, maybe Im weird. Satisfies that voice in my head when I experience it. Other than a jail cell I dont know where I wouldnt want to hear that lol.
I like how clean both sides are, especially the back.
Chandler Railing
in Member Projects
Posted
Well the railing is pretty much done, waiting to instal it this week. Here were some left over pics from various states.


 Probably be a while before I can get portfolio shots after its installed, but will post when I get em.
started carvin little bugs on em
and to go with the railings also doin a fire surround with more aspens
thanks for looking!