

Gayle Brooks
-
Posts
323 -
Joined
Content Type
Profiles
Forums
Articles
Gallery
Downloads
Events
Posts posted by Gayle Brooks
-
-
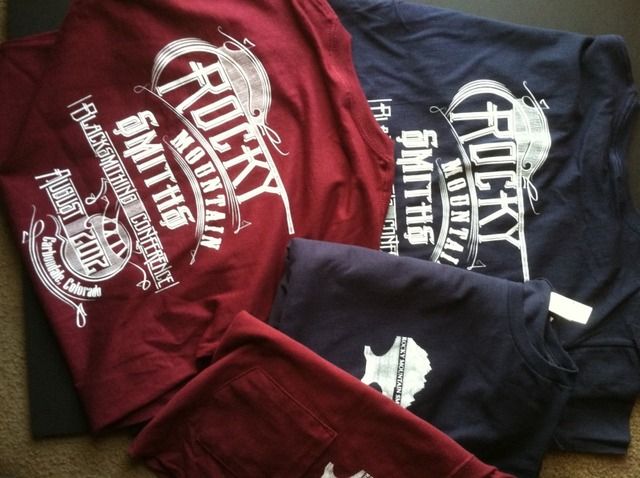
RMS shirts are in and getting ready for the conference
-
I apologize. Had some projects to get done and this got put on hold. Jumped back on it this last week.
Forging the button. Used a 3/4" round bar to reach in between the grill
have a layout to throw it on and see if it is still square. If its not I have welded angle iron anchors to clamp to and heat where I need to straighten it
ended up putting this on its side so I could reach around it easily. I use the crane to help hoist it around.
been placing little set rivets--not all the way through the other side -- to keep certain things from walking, vs just welding it to the bar.
-
The green is from sculpt nouveau called "Universal Green" and the "Rust" was from the same company. When I applied it, it was just orange. I dabbed some Red and a little green dots in there. They are growin on me. Thanks for the feed back :) They would probably hold up outside for a while. Like all things eventually would break down
http://www.sculptnouveau.com/ -
Been a while since I have updated this. I have been part of a couple of galleries and recently pushing some art shows. From watching and talking to others I am attempting at patinas. Since most of my bowls are metal that patinas I am not to crazy about. Example are the first 2 I have been testing this out on.
thanks!
-
from the pamphlet about what Clay Spencer will be demonstrating:
"Clay’s demonstration/presentation: One of sessions will be making a traditional joinery project such as
a small grill. Making tools for use with power hammer such as V block, rope swage, scissors cutter,
side sets or butchers, taper die and fuller-flatter. A flat die power hammer will be used to forge the
tools. Another session will show use of tools on a flat die power hammer to forge various items and
tools. Clay will bring a tire hammer he designed and other special tools needed for his demonstration. "
http://rockymountainsmiths.org/conference/documents/2012ConferenceBrochure.pdf -
nice! love the detail on the twist
-
nice! how much they go for?
-
-
Mount it at a height where it is comfortable for you to crank all day long! Or you could mount it near the ceiling and stand on a ladder or maybe near the floor and crank on your knees. :D
haha! -
our shop has half concrete where the layout tables are and dirt in the forge area. I hear ya about standing on concrete all day. We do have rubber mats that help alot. I always like the pavers and would changed it for the concrete if that was an option.
-
Ah! neat idea, Stalerock! thanks for the links
-
dang Danger Dillon, that looks great!
-
So this week is what I have done. This is on hold again next week since I need to forge some fire doors. Once I get started on assembly I really dont want to stop.
Since I am working at a half at a time I am trying to work each half together. In that I don't have one side that is great and the other mediocre.
One side put together with parts for the other side getting fit. Also made some "keepers" out of 1/2" round, tubing and a 5/16" bolt
"keepers" out of 1/2" round, tubing and a 5/16" bolt
7' wide 7' tall. Axle dog for scale.

-
Yes I used a rollin saw and ripped them. The tenons were done under the hammer with tooling as well and cleaned up at the anvil.
-
I don't particularly like forging square corners though. The square corners, to my knowledge, do not serve any purpose. Just a visual thing I think.
Could say that about the twist, upset ends, etc. Might not serve a direct function but demonstrates some technique and skill. -
love it! gj
-
there is a top here: http://www.iforgeiron.com/topic/25411-beaudry-power-hammer-information/
might help -
love it! good job
-
Yeah. It was a discussion when I was presented with the drawing about doing the slit and drift on the diamond. Though there is always not enough time on the projects and didnt have the time to make the tooling to try it out. So an alternative joint that still does the job.
There is a stop on the bottom die. The piece rides that and keeps the material in a given space so my grove is a line rather than a choppy line. Im using a 75 lb bull. I use this hammer for about everything and believe I could probably perform dental surgery under it given the hours I have using it. (kidding) Also have a tool I hold with some tongs and can walk a line under the hammer as well if needed. That though requires doing the line cold first so you can feel it when its hot under the hammer.
So yes, no stop for the hammer; all treadle control. -
yeeesh! High fiddle factor
looks good. thanks for sharing -
RMS Blacksmithing Conference Registration forms are ready. This year we have great line up of demonstrators: Clay Spencer, Mark Aspery, Alison Finn, Andy Morris and Rod Pickett
Other events are: Iron in the Hat, forging contests, floor space to display your work and a silent auction
Direct Link to the form
http://rockymountain...nceBrochure.pdf -
Thanks for such nice compliments! Feel free to ask any questions or if I did not explain something. I like these kind of topics since it shows how much work goes into a piece. With the amount of sharing, ideas and content, I am wanting to see just how they did it. Which only builds on the life of the project instead of its final resting place.
I had a fireplace door that got put on hold while we were waiting for some details. The project is now live and this grill will be put on hold for about a week. The last thing I did was start on the mounting plates that mount to the face of the door. Straight forward plate with a grooved line. A video of our tooling under the hammer as well.
Mark the top radius cold and then I do it hot by hand
Groovin
http://youtu.be/pi_6r2LL23s -
awesome! cant wait to see more. Thanks for sharing
-
Randy did you sink the skull tooling into a plate and then press the bronze into that? Or press the skulls from the back of the plate? Looks great!
Large Door Grill (progress pics)
in Member Projects
Posted
Thanks Sam :) I love ma bull
;)
Good eye! Yes but I knew there would be some tweaking once assembly started as well.
You are quite welcome, sir :)