rthibeau
-
Posts
2,237 -
Joined
-
Last visited
Content Type
Profiles
Forums
Articles
Gallery
Downloads
Events
Everything posted by rthibeau
-
I had to pay to get these to follow me, but they are nice.
-
From the album: rthibeau
Had to pay to make this one follow me home. -
 recent EBay purchase
 -
Yes, you can put wheels on an anvil stand. The actual configuration depends on what you have to work with.
-
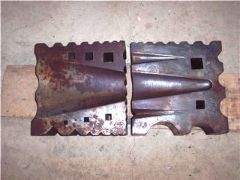
From the latest pictures. I would opine that it is a struck tool, the face is mushroomed, the body is out of alignment, making the "pein" a dulled cutter. Still, you can remake it into whatever you want, so it's still a good deal with all the other stuff.
-
I can't tell from the photos if the "straight pein" has a welded on face or is mushroomed from being struck. I'd go with Thomas and think it's not a sp hammer, but a set or swage, you could make a cutter out of it.
-
-
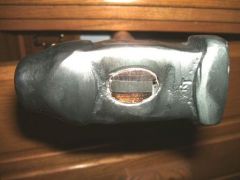
 2# hammer made from the connector end of a sucker rod, ball peen and flat faces. Tempered.
 -
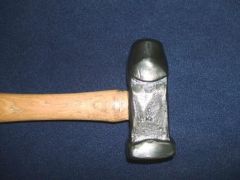
 An edifying artifact - pay attention to what you are doing.
 -
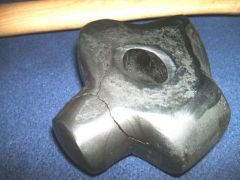
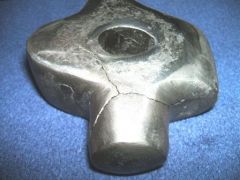 Failure to pay attention: 3# of 4344 steel improperly quenched.
 -
Alan, if any of those hammers are a little too heavy, and they need to be cleaned anyway, use a belt grinder/sander to take a little weight off while dressing the faces. Start on the sides and then the top and bottom, removing a little at atime and keeping it balanced. You could easily remove half a pound and have a polished nice hammer.
-

From the album: rthibeau
-
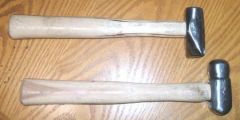
For $75 you done real good Alan. The chisels, punches, tongs, and even the hammers can be reforged to a style or shape you would more prefer. If you reforge the hammers, put a drift into the eye to hold its shape while you work on the ends of the hammer. From left to right, hammer #3 and hammer #7 could be cleaned up with just a flap disk or belt sander instead of reforging. The others, especially the ball peins, I'd leave as they are. #3 is your straight pein, the cross pein only needs a handle, maybe blunt that pein some. #7 could have one end rounded for a dishing hammer. #5 is a rounding hammer, just clean that up with a belt sander. For hammers, the only difference you can get is in weight and type of handle, so don't rush to make your own - use those until you get to knowing exactly what you want for a hammer.
-

-
From the album: Hammers
A 15 ounce left diagonal peen hammer and a 16 ounce chasing hammer. -
From the album: Hammers
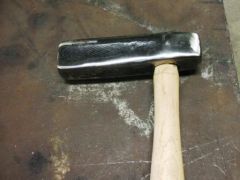
3# 13 oz Cutler's Hammer made of H13 -
From the album: rthibeau
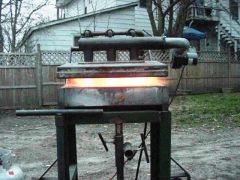
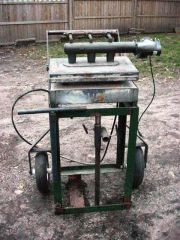
3 burner with blower on a stand -
From the album: rthibeau
recent purchase on Ebay -
IForgeIron Blueprints Copyright 2002 - 2011 IFORGEIRON, All rights reserved BP0380 Shop Beverage Holder by Richard Thibeau A simple, but very convenient shop accessory which will keep you favorite beverage out of the way while you work, yet readily available when necessary. The item is made from only two pieces of steel. In this case, ¾” x 1/8” strapping was used, one 11” long, the other 13” long. Almost any size can be used, round or flat or square, as long as the final inside dimensions are greater than the can or bottle you wish to hold. The basic tools needed are a vise, scrolling pliers, and a jig which is a piece of 3 inch diameter pipe welded to angle iron to be held in the vise. The first piece of material is marked off for later bending. For a typical can or bottle, the first mark is 3 inches from one end, the second mark is at 6 inches, and the third is at 9. Place the piece in the vise to the depth of the first mark, bend 90 degrees Place the piece in the vise to the depth of the second mark, bend 90 degrees. Straighten the piece out so that both bends are actually 90 degrees. Using the scrolling pliers, bend the second piece around the pipe jig and tack weld the ends together. This bend is done cold depending on the size of the material being used. The two pieces ready for assembly. Place the first piece upside down in the vise, slide the second piece over it, use vise grips to hold them in place, and tack weld together. Finish welding and clean up the welds. The piece is now assembled. Rivets could be used instead of welding, there are only two points to connect. Bend the upright of the first piece to fit where you plan to hang it. In this case on the hammer rack which is thin flat stock. Test the fit. It’s almost completed. With the appropriate finish applied, it is now completed and ready for use. A proper color will enable you to always find it in a moment. View full article
-
From the album: rthibeau
-
From the album: rthibeau
-
From the album: rthibeau
-

From the album: rthibeau
-
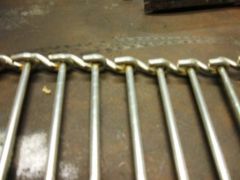
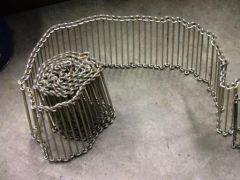
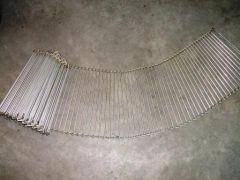
If there was a scroll on the bare end to hang on a rod or to help hang onto it, I would say it was a pot lid holder. You slide the double hooks under the cast iron pot's lid to pick it up when it's hot. I haven't seen one with just a straight handle before, but similar items are commonly used for campfire cooking.
-
Yeah, Dale, that's what I'm talking about.....:D