
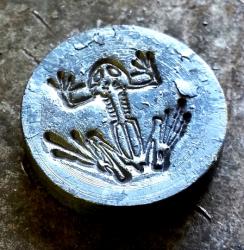
Black Frog
-
Posts
1,623 -
Joined
-
Last visited
Content Type
Profiles
Forums
Articles
Gallery
Downloads
Events
Everything posted by Black Frog
-
It seems the harder I search, the luckier I get... ;)
-
Here's another pic of the Fisher, and of the two blowers I found, and the 288# Peter Wright he has there too. I had to use good ol' spit to get enough moisture for cleaning to make out the make and weight numbers. Edges are pretty beat up on the PW, but for the right price I might snag it....
-
Nice idea- but this place is several hours away, I just happen to be in that area every few months or so. A free day of time is something I do not have. But I did forge him a real nice Brian Brazeal horse head bottle opener that I gave him this last visit. :) He says he has a swage block buried somewhere too, just has to find it, plus Otto and Champion blowers I found. The Champion 400 looks in nice shape, but does not turn right now. I'm wondering if that can be brought back to life... The Otto blower turns and blows air but sounds rather rough. Plus he gave me a lead on another even older salvage yard in the area that probably has even more blacksmithing stuff. Can't wait for the next trip!
-
True, but the place is not close to me, and the anvils are in an inaccessible area to get to for lifting/moving/loading. I had to literally both climb and crawl to get to this anvil to see it. He has to do some major pile moving before I can get them out of where they are. I don't want to hound him or push too hard to get a plath cleared. I'll get it my next trip early July, I'll post pics when the anvil sees sunlight again..
-
He has a 288lb Peter Wright I might pickup as well, I know the guy now so they are safe until next trip. :-) His scrap rate is about .50 a pound, but he knows anvils are worth more.
-
Any place to look for weight makings on a Fisher? He said it is mine on my next visit. I'm guessing cost will be $1.50/lb from him.
-
Salvage yard find of this anvil, been sitting buried for years. I didn't buy it yet, but probably will next trip. I couldn't see any Fisher emblem on the side but I didn't have a wire brush with me to get through crud. I'm guessing ballpark 200#, and it being a Fisher from the cast bolt holes. Not much of a ring, but good rebound. All pointing to a Fisher to me..... Fisher?
-
Anvil 101 - weight
Black Frog replied to ThorsHammer82's topic in Anvils, Swage Blocks, and Mandrels
The more mass you have, the harder the face surface (better rebound), and the more rigidly it is secured to the earth- more energy is imparted to the metal from your hammer. This makes each hammer blow more efficient with transferring energy to the metal. Your arm likes this. -
I'm no welder, and up to last year had been wanting a welder for years. I had been watching CL and you see lots of welders come up for sale. I don't have 220v in my garage, but thinking about wiring it at some point. 110v welders can only work so big... After doing lots of reading and homework, I invested in buying new MIG vs used. I plan on having this thing for decades so I wanted to be happy and satisfied with my decision. I went for the Miller 211 which allows you to run either 110v or 220v on the same machine. Not cheap, but very nice. I run with the mixed gas and love this machine. It even makes a hack like me look like I know what I'm doing at times.....
-
I'm a part-time machinist too, I like this statement! :D I'll have to make a sign for the machine shop- "I'm so good, I can make a 3/4" hole in a 3/4" bar!" ....that outta win me a few beer bets!!
-
Aint that the truth.... I'm doing a planter table right right now with many scrolls (20 or so). I decided to do them all freehand without a jig. Time consuming? Absolutely. But I wanted the practice, and great practice it is. I made the fist one slowly and carefully which I really liked the proportions, and then tried to make all the rest match that. A jig would have been much easier and way faster, but I can do that for the next project. You can learn a lot real fast by trying to match them all to a master, which was the point for me.
-
Speaking of a classical taper to the scroll end- is there a general rule to the taper? For what I've been doing, I thought a general 6x the material thickness makes it pleasing to my eye. Am I in the ballpark?
-
Making a square edge hardy anvil tool
Black Frog replied to Black Frog's topic in Tools, general discussion
I have no idea what type of steel this block may be. Came from a scrapyard. Does it matter too much for this? I know my smaller 3"x3"x1" block is 4140, but this bigger one unknown. I suppose if the edges start rounding over, I could always redress it or machine it down a bit. -
Making a square edge hardy anvil tool
Black Frog replied to Black Frog's topic in Tools, general discussion
I also just came upon a 3"x3"x5" chunk of steel with nice square edges, that may seem a bit overkill for a hardy tool.... But it would be a nice mass to hammer on. -
I like my anvil, very nice rebound and nice flat face, but the edges are poor and have seen better days from a century ago. For doing some forgings I would like some nice sharp egdes to use (which I don't have). So I though about making some sort of hardy mount block that would have my square edges. I have a 4140 block 1" thick, 3"x3" square with sharp corners. I think may be hardened, haven't tested it yet. Think that block would work? Should it be thicker/bigger? My anvil face is 5" wide with a 1-1/4" hardy hole. Now I'm wondering about the best way to get the square hardy post attached. I have a MIG welder, can I weld mild steel to 4140? Can I weld it if it is hardened?
-
Copper tubing or black pipe for propane lines to forge?
Black Frog replied to Black Frog's topic in Gas Forges
Or how about the braided stainless flex propane hoses? -
Copper tubing or black pipe for propane lines to forge?
Black Frog replied to Black Frog's topic in Gas Forges
Is there a certain type of copper tubing used for propane? Like Type L or K? -
I bought a Diamondback forge, Blacksmith model.
Black Frog replied to Black Frog's topic in Gas Forges
I fired it up last night for the first time connected to my 100# propane tank. Doesn't take a lot of psi to get metal nicely orange, 3-4psi might be all I need for forging.... So far I like what I see. Hopefully this weekend I'll get to actually do some things with it. -
I have a heavy duty roller cart with a 1" steel plate on it that I'd like to mount my forge on. Probably fabricate a pedastal on the side of the cart to raise the forge and keep the table top available and open. I'd like to 'hardwire' my gas forge from the idler valve that will be mounted on the side of the cart up to the forge itself. From the idler vavle to the tank will be the flexible tubing. That will allow me to move the cart in/out a few feet without disconnecting from my 100# tank. Black pipe or copper tubing for propane?
-
Due to close proximity of neighbors, I can't use my coal forge at home. So I have to use a gas forge. Of course the question is do you buy new, or make your own? There's a ton of DIY plans out there, and I looked at a lot of them. I would have no problem making my own but I know my free time is quite limited, and I realized I would much prefer to spend my free time forging rather than experimenting on a forge..... So I looked at several gas forges out there and decided on Diamondback. I was torn between the two burner Metalsmith and the two burner Blacksmith model. The Metalsmith has the clam-shell frame design where all three doors can open up for a wide open and easily accessible chamber. The Blacksmith model has three doors as well, but still keeps the corners as part of the structural frame. I couldn't decide. At first I thought I wanted the Metalsmith model which would allow some more odd shaped items if needed. The tradeoff is less gas efficiency on that model. After talking with Dennis about some of the things I might be doing with it, and my being on the fence about which model, his comments led me to get the Blacksmith model. For odd shaped items that may not fit in the forge- he mentioned that a few fire bricks and a propane weed burner can work quite well. What a nice idea to compliment the Blacksmith model. Propane weed burners can be had for $20 from Horror Freight, I picked one up last week. Of course I had to immediatly play with it. With a few fire bricks I had some 1" 5160 glowing nicely fairly quickly. Plus I have my O/A setup as well, so I think I made the right choice with the Blacksmith model. How often am I going to have items that won't fit in this forge? I dunno just yet.... I guess we'll find out as time progresses. My Diamondback forge arrived today, and I'll be unpacking it this evening. I'm quite excited to finally have a forge for home use!
-
Scroll ends and where to use them
Black Frog replied to John B's topic in Blacksmithing, General Discussion
Thanks John! Seeing them all together is nice for comparison. I have not done any beveled scrolls as of yet, but would like to soon. Now I have to start thinking about the steps to end up with a nice bevel scroll.... -
John, thanks for the pics. I'd like to see a closeup of your scrolls example if possible, very nice to see them all close for comparisons. Thanks!
-
Suspicious Columbian?
Black Frog replied to Black Frog's topic in Anvils, Swage Blocks, and Mandrels
Yes I did. After looking closer at it, I didn't want to let it slip by. Just got home today and started the wire brush treatment. There's a really beautiful anvil under all the rust and dirt. :-) I can't find any weight markings on there as of yet. The sellers thought it was around 300#, and I don't think that may be too far off. There's a pic comparison of a 225# Trenton next to this Columbian. Visibly beefier in every regard. I'll get my 300# scale out this week for a better value, maybe it'll bottom the scale out..... -
Suspicious Columbian?
Black Frog replied to Black Frog's topic in Anvils, Swage Blocks, and Mandrels
There is a N on there too.. -
Suspicious Columbian?
Black Frog replied to Black Frog's topic in Anvils, Swage Blocks, and Mandrels
I do have a Trenton with a welded waist, but the inverted pyramid with the C says Columbian. Didn't know Trenton made them for Columbian?