EtownAndrew
Members
-
Joined
-
Last visited
Everything posted by EtownAndrew
-
Choking up on the hammer also helps. If you are holding closer to the head your grip does not need to be so tight.
-
I bought an old Carbon arc torch on e-bay. I hook it to the stinger and ground on my Lincoln AC welder. I have used it for spot heating of bars that I want to bend. It produces a lot of spot heat. I have to keep it moving or I get little melted spots just under the arc.
-
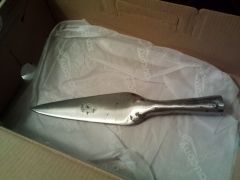
I like it! However, I think you have passed the point of calling it a knife. I thing this is definitely in the small sword category. You got wonderful fit between the guard and blade. I am envious. Also I like the cord wrapped handle that is one to put in the idea box.
-
I think you should go for the electric welder! I first got a small oxy/accy torch set and really couldn't do much welding with it. I needed bigger tanks and bigger tips and my small tanks ran out fast. It's biggest use has been for cutting thicker material. (I have ended up using a $10 angle grinder to do most of my stock cutting.) Then I got a 220V 225A stick welder. I did want to get one that would be big enough for anything that I would possibly want to do. However, I have never yet needed or wanted to go more than 120 Amps and have welded 1/2" plate just fine. I do most of my welding at the 40A, 60, 75, and 90Amp settings for welding 14 gage up through 1/8" material. At around 1/4" material I am at 90 or 120 Amps. I could have done all of my welding with a 110V AC welder like the one on the following link. http://www.harborfreight.com/welding/arc-welders/80-amp-inverter-arc-welder-91110.html http://www.harborfreight.com/welding/mig-flux-welders/90-amp-flux-wire-welder-68887-8494.html If you can find a 110V one I suggest you get a gas MIG welder. Getting the slag out from a stick welder can often be difficult. Also I occasionally think I have got a great weld and then when I break off the covering slag I see that my weld has all gone to only one of the two pieces I was trying to join. The slag can cover up what you are doing. Further it is easier to weld thin sheet metal with a MIG. I has struggled with burn through on 14 ga material that should not be such a problem with a MIG.
-
I'd say we all do a fair amount of metal fabrication in addition to pure metal forging if there is such a thing.
-
I like them. I have never quite seen that handle style before. I might give that a try sometime.
-
http://www.iforgeiron.com/topic/23197-bp1048-side-draft-chimney/ Here is another similar build from this site. Rivets or sheet metal screws would all work. I picked up a used electric stick welder a little over a year ago and have used it to weld together all sorts of things. Forging tools, a coal forge, etc. But I had gone 20 years without a welder.
-
It is a bit of a challenge to try and heat treat a longer knife edge. You should be able to get it all on another try, maybe with some equipment tweaks.
-
My suggestion for a hood would be something similar to the one at the address below with a 10" or 12" galvanized duct stuck on top. You can get these sizes of round duct x 5' long relatively easily at Lowes or Home depot. That may get the smoke up high enough to be out of your face. If you roll the forge under a cover for storage you might want to make it either removable or short enough to fit in the storage space. I have a similar set-up to yours and roll it out whenever I do work and try to keep on the opposite side of the smoke.
-
-
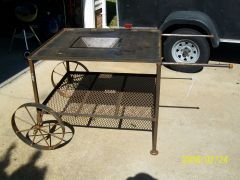 This is nice. I have a similar setup but mine is missing the handy self cleaning shelf.
 -
You did better than me. I went to an estate auction to bid on an anvil. However, no deal, it went for full price and I stopped bidding at $170.
-
My first forge that I started out with was my charcoal grill. I agree with the recommendation to get Wayne Goddard's $50 knife shop. He scrounged everything and trolled yard sales. It was my first guide book to forging as I started out making knives but have moved on to forging other items too.
-
Something I ended up getting from a supplier was a 30" length of 1"x1" cold rolled steel (CRS) for use in making hardy tools. It fits my 1" square hardy hole. I cut off about 2 1/2" each time I make a hardy tool and normally weld it too other parts that I forged. Often when I look into making some new product I determine that I need to make one or two new tools to facilitate the forging or bending of hot metal. I have found all sorts of use for 1/4" square and 3/8" square bar. For basket twist handles some 1/8" or 3/16" round rod comes in handy.
-
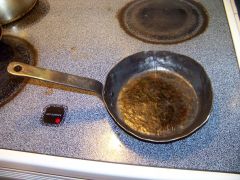
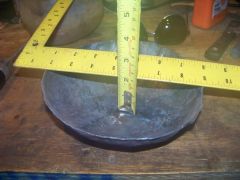
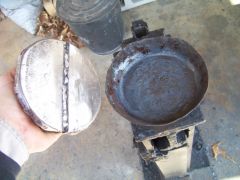
I forged a small frying pan this weekend. It was the first thing like this I had ever done. So I went looking on the internet for advice. The only thing I found was a youtube video featuring Jymm Hoffman. I basically followed his method. The only difference was that he pounded the sheet metal into a dished form. I didn’t have one and so used a 4” O.D. dishing ring hardy tool that I made. It seemed to work well but may have beat up the metal more than using a form. I started out with a 14 ga x 8” round blank. The finished pan was 7” O.D, 5 ½” OD bottom, x 1 ¼” tall inside. The first step is to create a bowl. This is shown in the attached pictures. My bowl was 2” deep. The final step was to flatten the bottom and create the pan shape. I made a 5 ½” round flat form to pound the pan bottom down onto. Jymm Hoffman did not use one of these for the demo but mentioned them. It was also usefull to hammer the pan againt the anvil as a sandwitch to try and create an overall flat bottom.
-
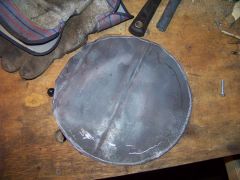
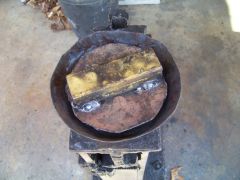
 This was the shape half way with the sides dished and the bottom to be flattened.
 -
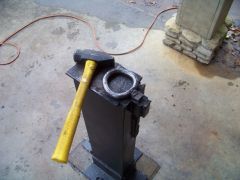
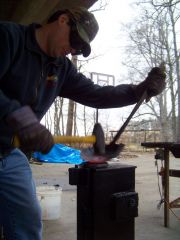
 One of the final steps in flattening the bottom was to heat up the pan and hammer it between the anvil and this tool to try and flatten the overall bottom.
 -
 I made this tool that would fit in the pan and allow me to hammer the bottom down to a solid surface.
 -
 Dished the pan using a ring.
 -
-
-
-
I agree it should work just fine. I was thinking over the work I do on an anvil and most everything could be done with that anvil. In fact it is probably better than my home made anvil that I currently use. You would look like a super experienced dude giving a demonstration with it. I wouldn't bother with the shot blast. It has a nice aged coat of rust on it. The top working surface will shine up a bit as you hammer hot metal. Also don't paint it either. You will just melt off the paint wherever hot metal touches it.
-
Sounds interesting. Looking forward to seeing what you come up with.
-
Go with the largest size you can get to draw better. Probably only 6" or 8" is available. The recommendations I have seen for a forge chimney can run to 12" to get the needed draw for what is often a very open forge area.