
Dogsoldat
-
Posts
828 -
Joined
-
Last visited
Content Type
Profiles
Forums
Articles
Gallery
Downloads
Events
Posts posted by Dogsoldat
-
-
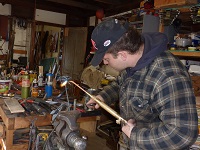
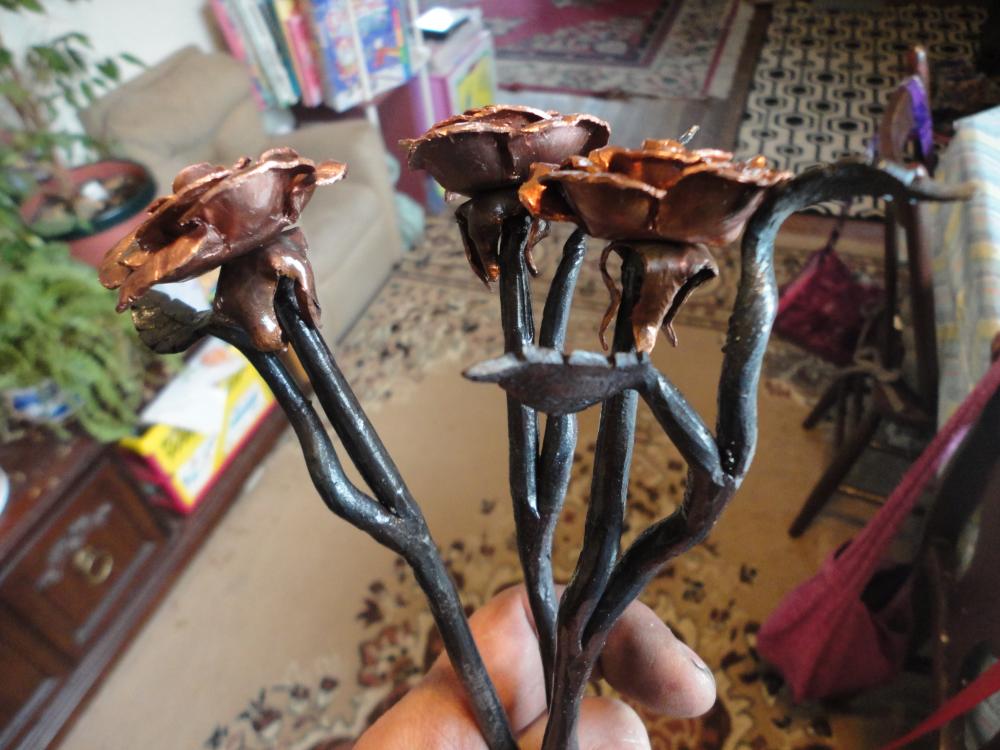
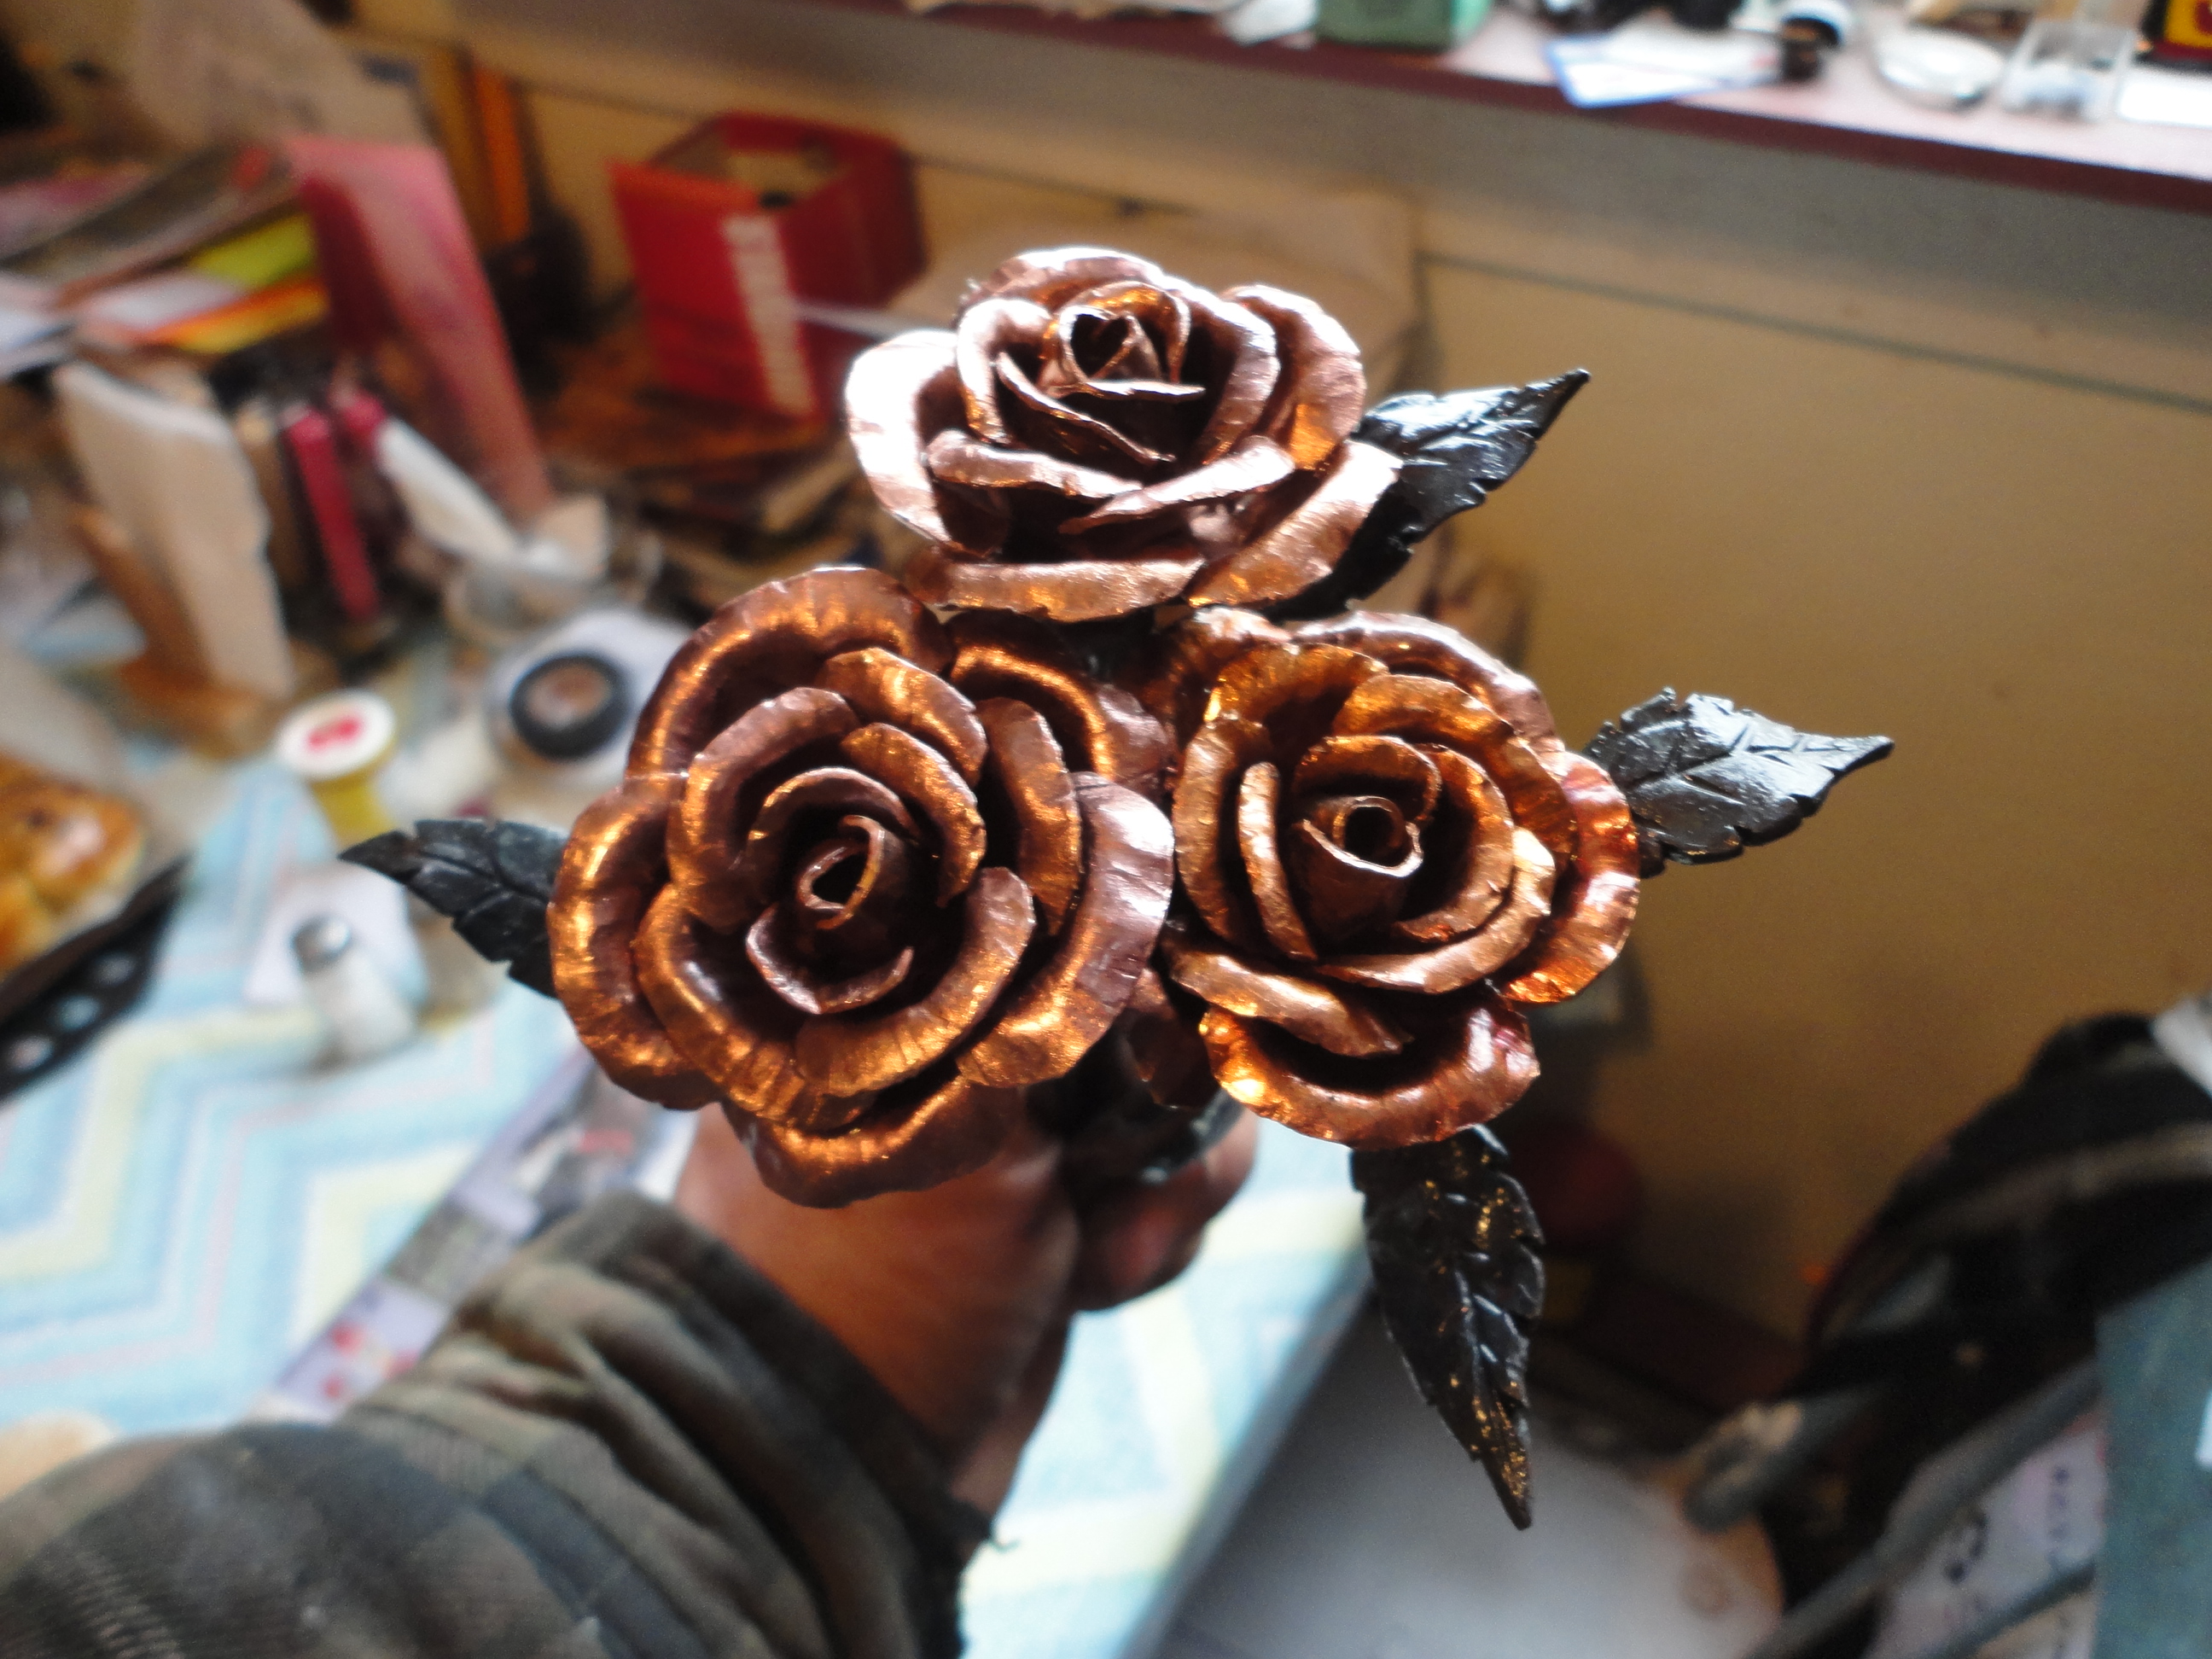
Finally had a little time and finished them up.
-
Not it, but thanks for something interesting to watch.
-
Awesome work, minus the spurs it makes me think of my Dad and his various boots and hats over the years.
-
you have to take into account the included angles of your cutting edge and what it's for. Pretty sure that a cold chisel can get away with being harder and a bit more on the brittle side due to the angle of the cutting edge and the support that that offers. A feather fine edge will be more prone to chipping the harder it is.
-
Was a short video. Maybe 5 min tops. It could have even been a bone handle now that I think about it more. Anyways not what I was after but same idea.
http://www.hewn.ie/blog-content/2015/2/23/making-an-antler-knife-handle
-
Did anyone else notice the dies used in the press to shape the Viking sword last night. Thought that was a pretty slick idea.
-
Been thinking of it all day at work. Nothing that really stands out. Guess I'll keep plugging in variations into the search engine and see if it gets me somewhere. Be sure to post it if and when I find it
-
Pretty certain but, not positive that there was a youtube video posted of a guy drilling out an antler. Fitting the tang in a dowel and epoxying the works together. My google is weak tonight and I was sure I had saved the link to my computer... but have had to format and reinstall since. Have a coworker that is being brought over to the darkside. Gave him a small blade to put a handle on. He's tying to figure out how. Figure that with how skinny the tang was on this blade it's his best bet in the chunk on antler he was telling me about.
-
The small gauge stuff used in the mines around here for the carts might work well in a similar application. Need a little more snow gone and I can go exploring.
-
Maybe design the handle so the horn/antler section can be easily replaced every now and again when needed.
-
Still have to finish grind and polish the blade right? Little sanding and you should be good as new. Keep your eyes open for some used veggie oil. much nicer to work with.
-
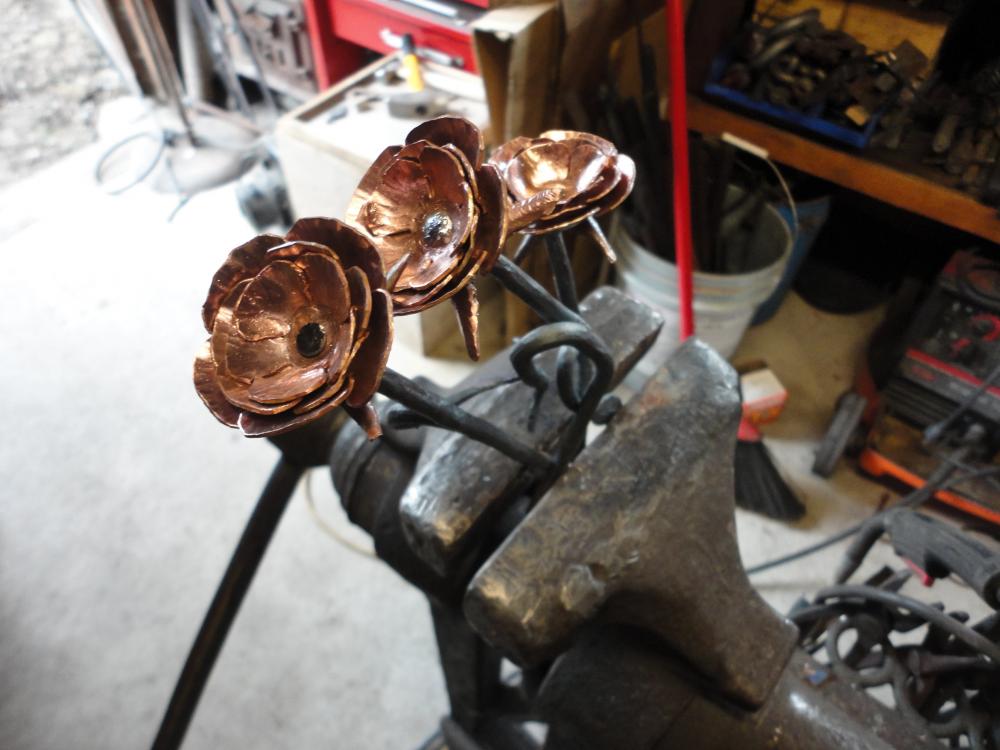
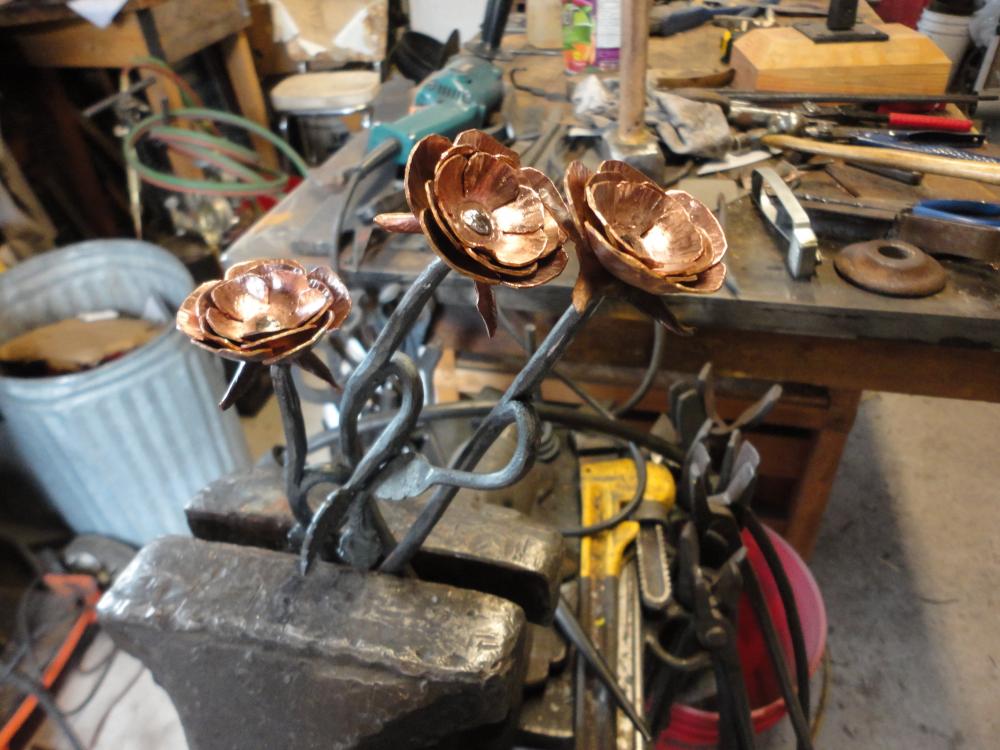
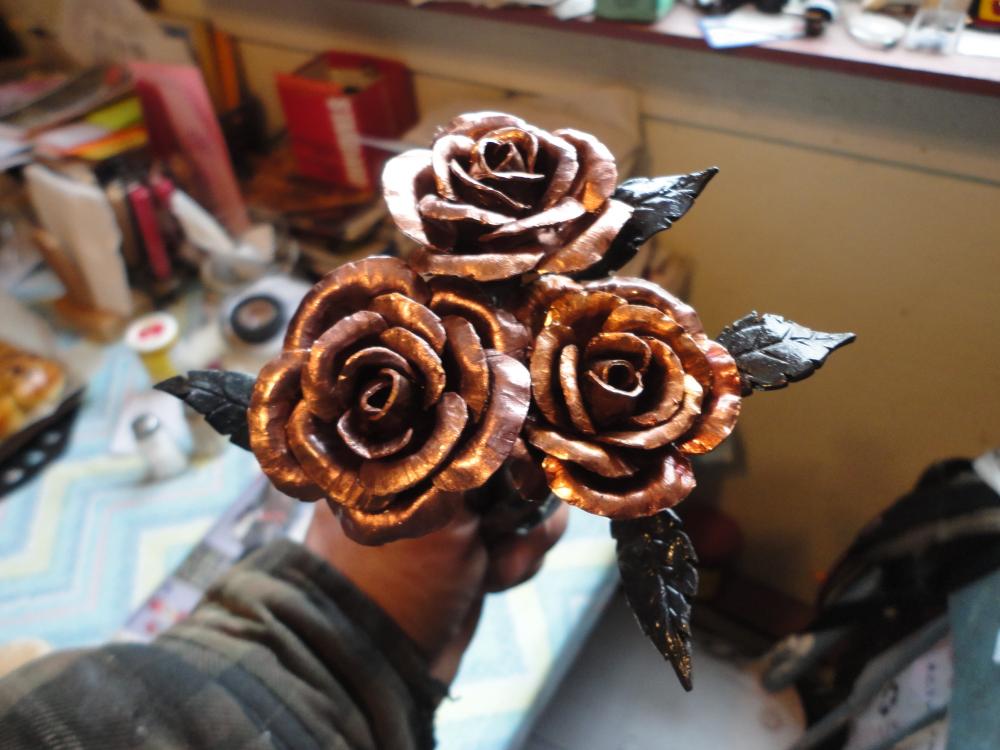
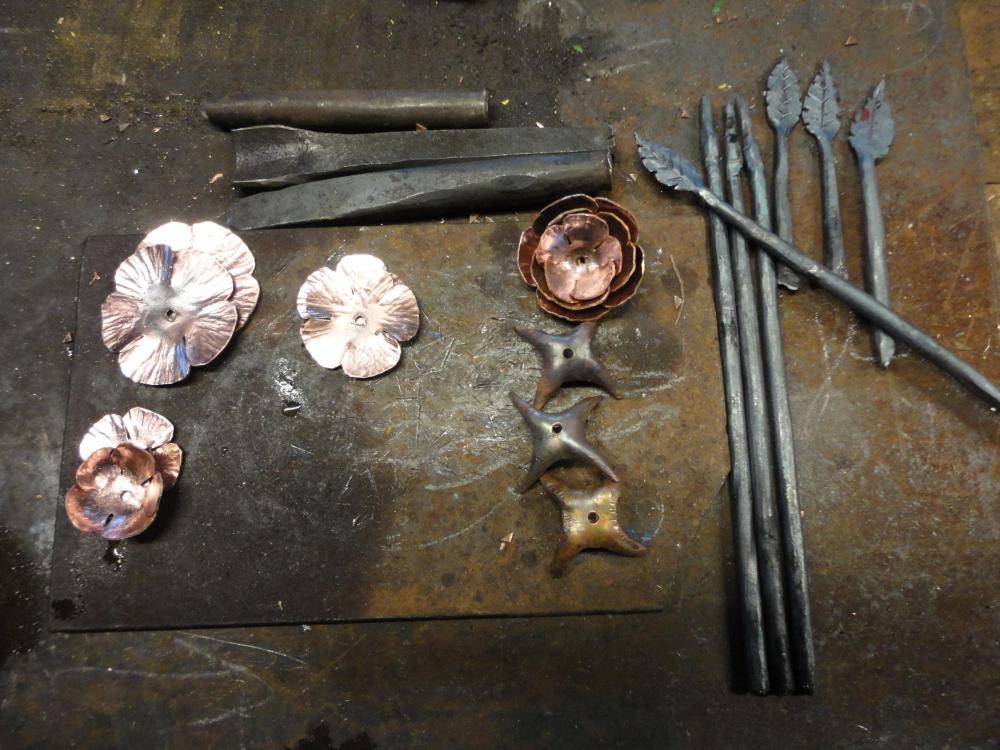
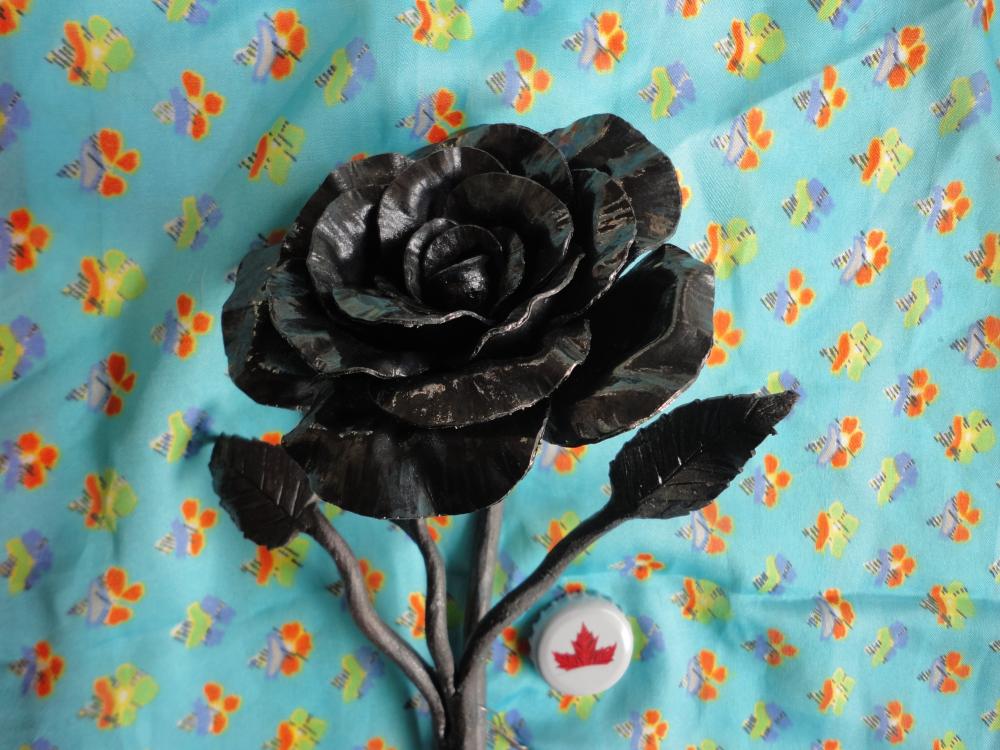
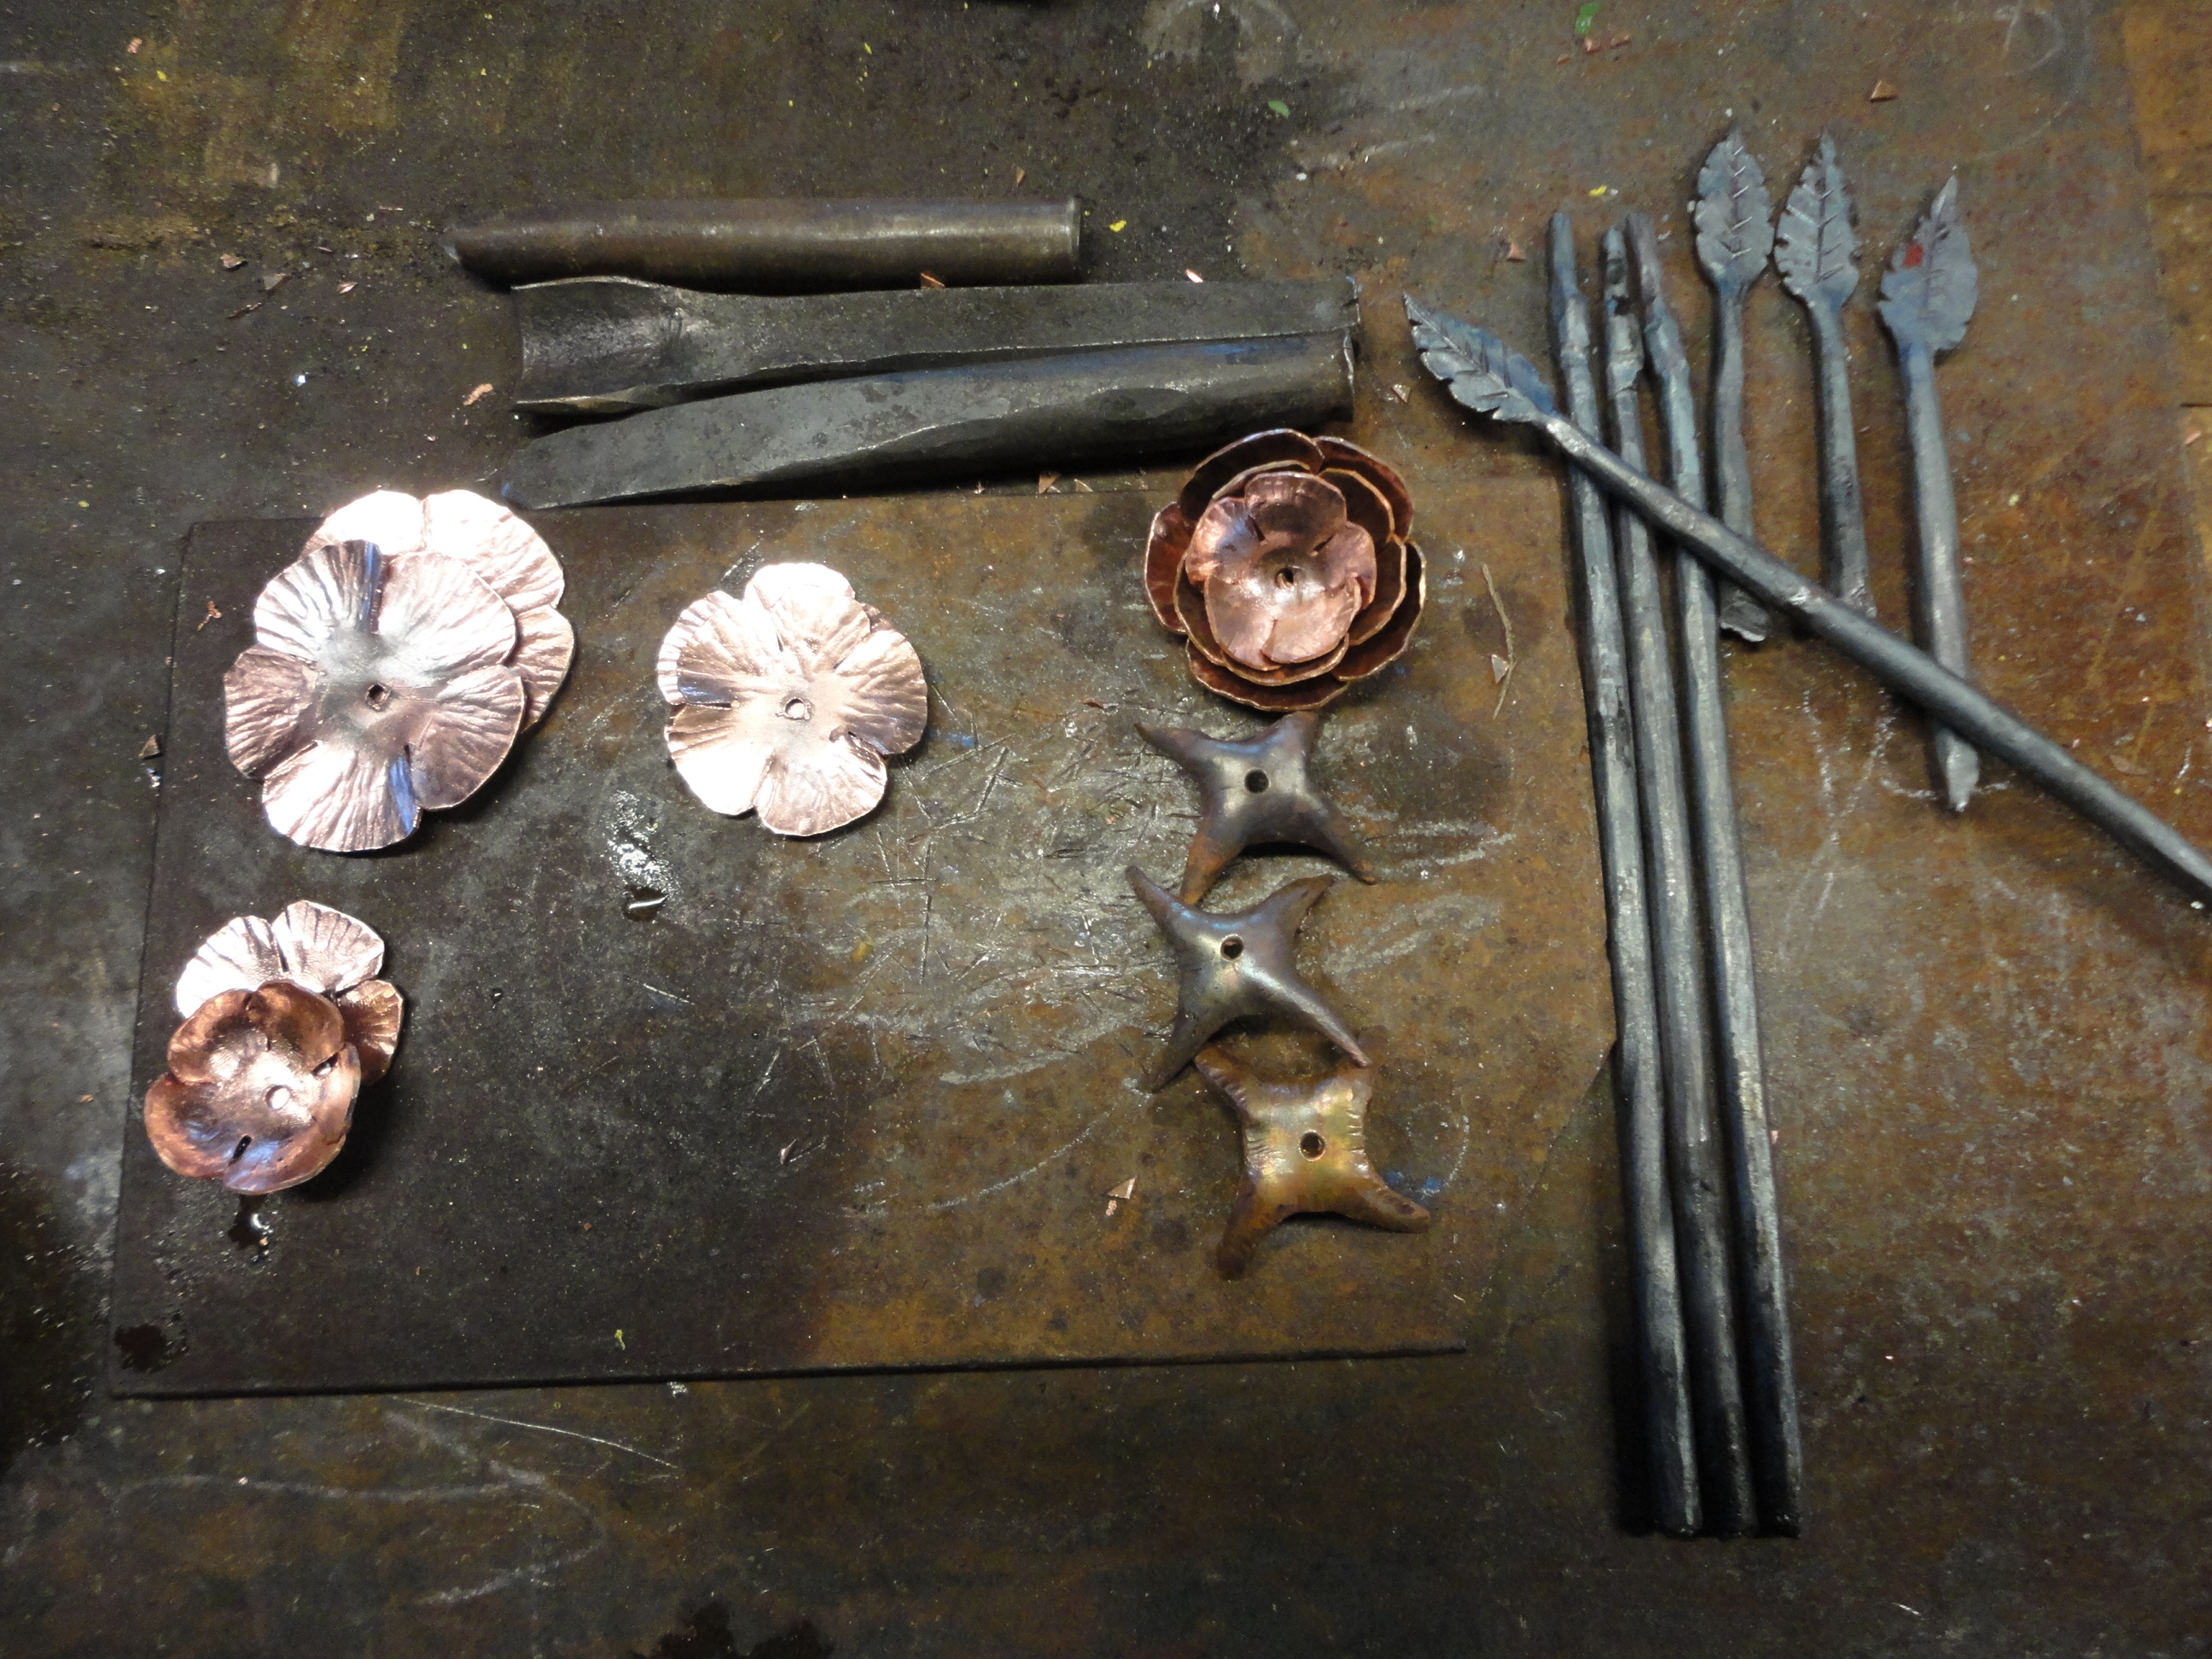
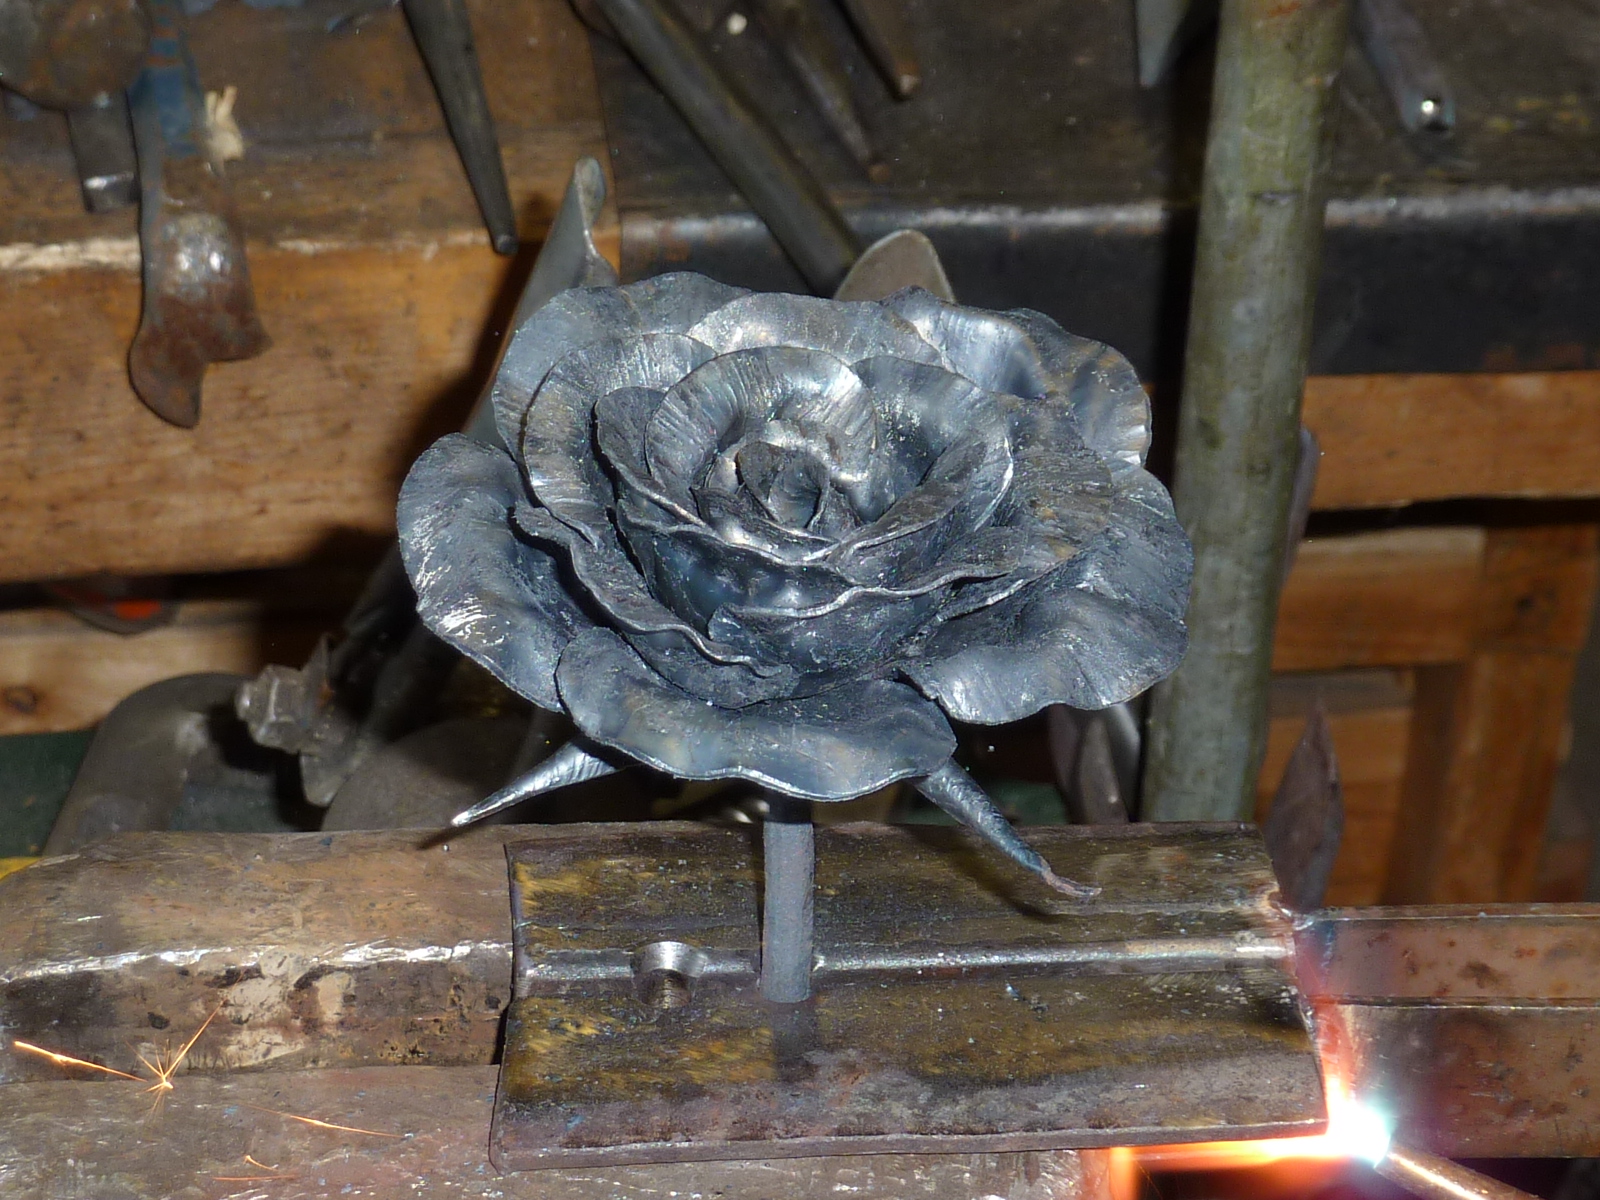
I was trying to remember how I had done it before when I had started a few more this last weekend. I think how I was doing it was step it down behind the lump. and take it to the bench grinder till the tenon fit the monkey tool I had made. Stick it in the clamp and set the shoulder with the monkey tool. You do have to be careful if you reheat the peened end as the copper heats much faster than the steel and you never seem to get a proper fit afterwards. This is were a good known mild steel works best along with a long slow cool down so it doesn't harden any. I do remember I ended up with a piece of medium/high carbon round that would air harden easily being so small. That set of stems ended up in the scrap bucket simple couldn't peen the end over. Can't remember whether that curved chisel was for roses or something else but it does help on the copper sepals.
-
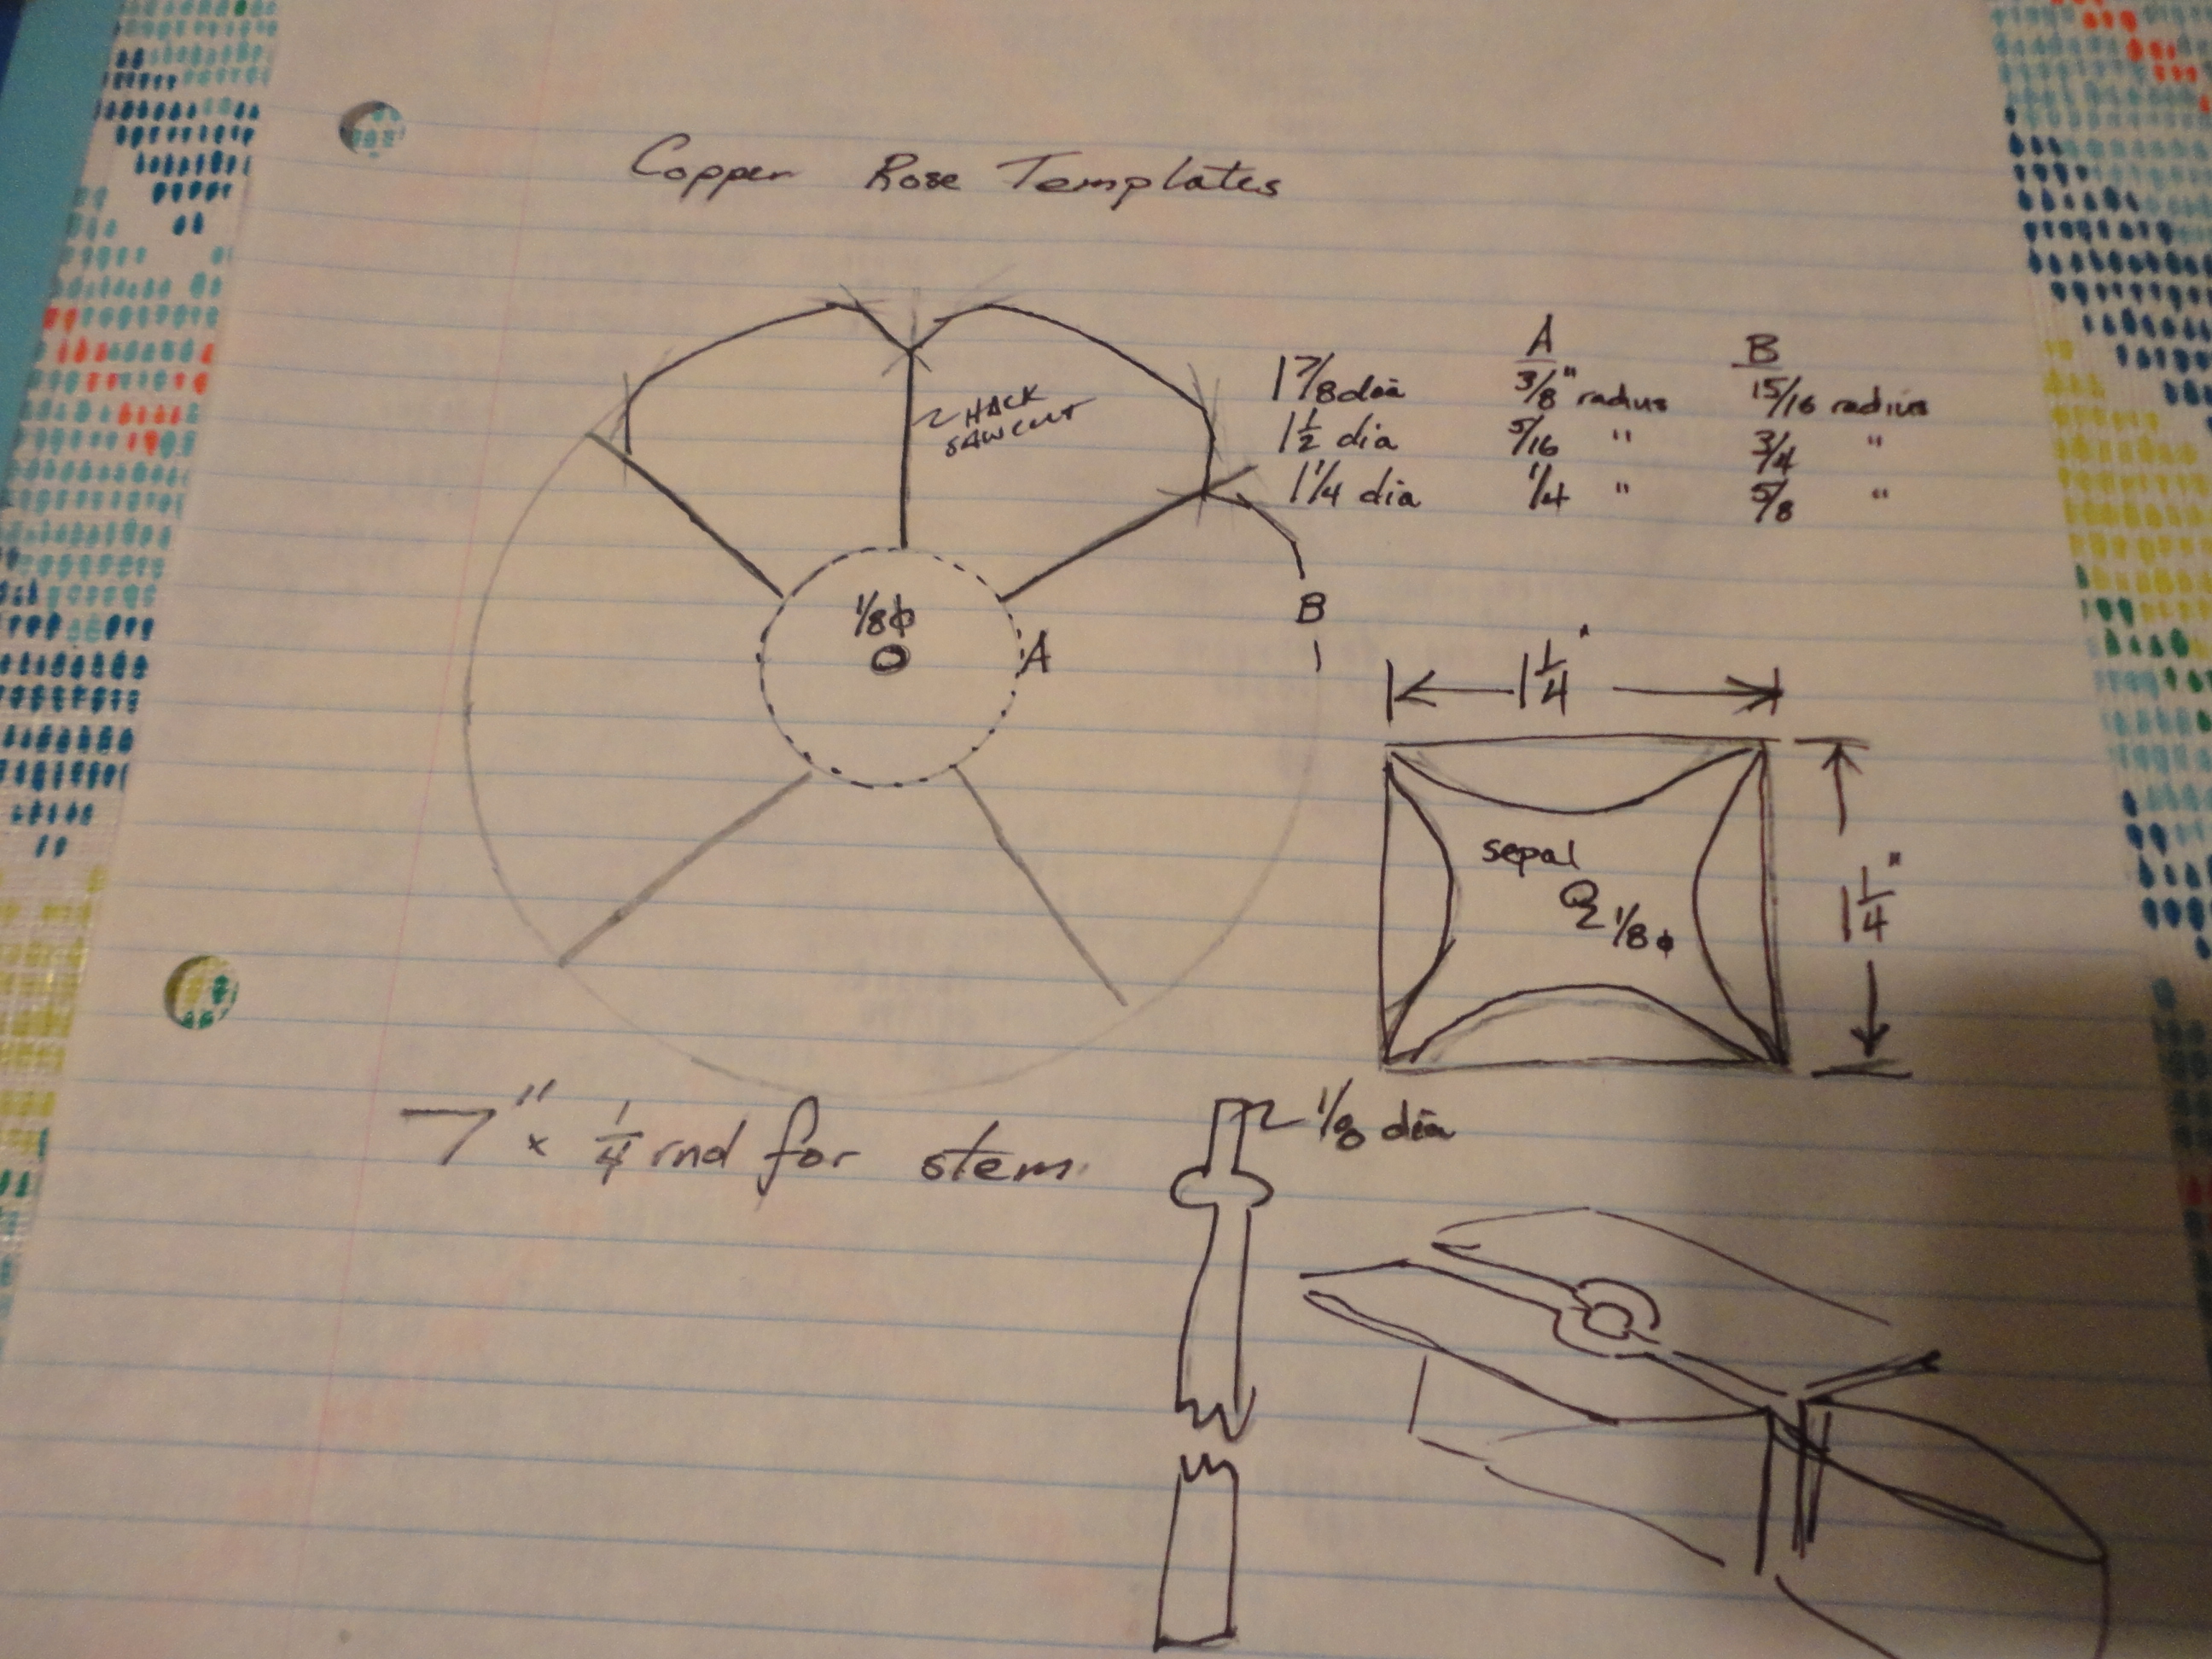
That must be a piece of 3/4" tubing Das. The 1/2" tubing I unzipped this last weekend is 1 7/8" wide when flat. I cut out the circles, drill the 1/8" center hole. Stack like petals together with a nail or drill bit though the holes. Clamp in vise and cut between the petals with a hacksaw. Then a few nips on the corners and the right shape is achieved. Texture and Dish. Anneal,
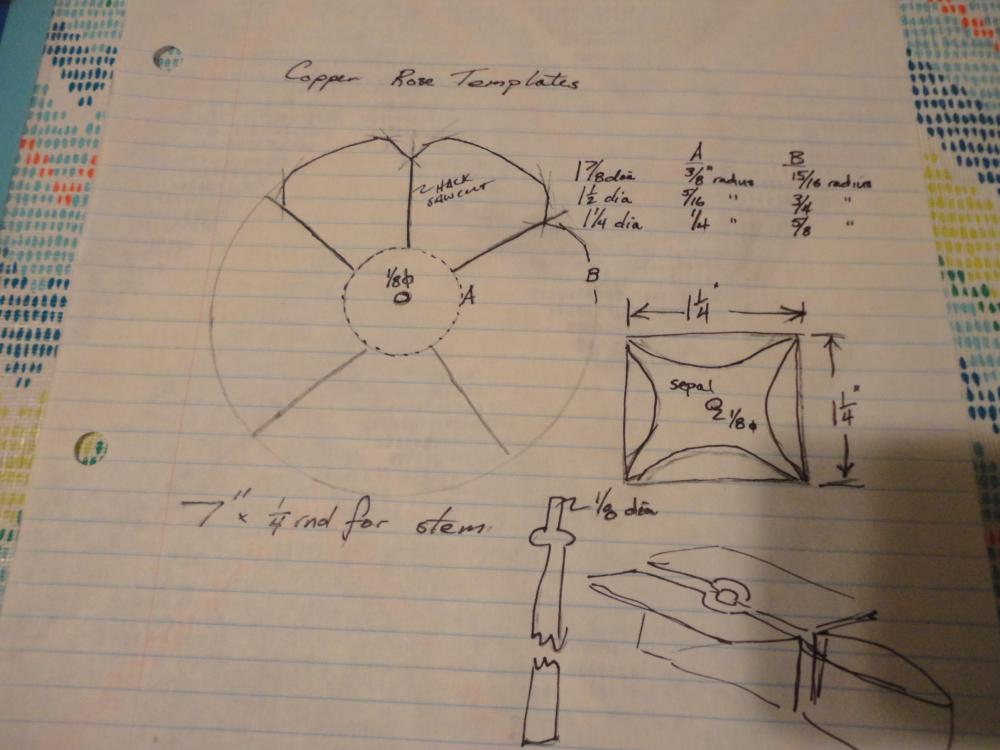 then they are ready for assembly. I hope my plans are clear enough to help out.
-
In the picture of the chisels you can see the start of some small copper roses. 1/4" round for stems and leaves and the tubing I had kicking around was 1/2". with the copper I have been using three layers of petals. I'd have to dig out the measurements for the diameters on the petals but can post if you like. Other thing with copper pipe/tubing is anneal between steps. Comes fairly hard as drawn.
-
I've notched between the petals with the super thin zip disk and made a really narrow chisel to cut out the outside. Not the fastest but does go good once your in a groove. The material I have been using for petals has been a 45 gal drum. the stems and leaves are made from 3/8 round.


-
Looks very much similar to a stake spring or a mudflap spring from a logging truck. in a pinch we have heated the end up and bent whatever we needed for a loop in . They do tend to wear faster or depending on load straighten out. But it does buy time to find the something new.
-
What about a windmill that has something moving. Say a blacksmith and striker/ power hammer come to mind
-
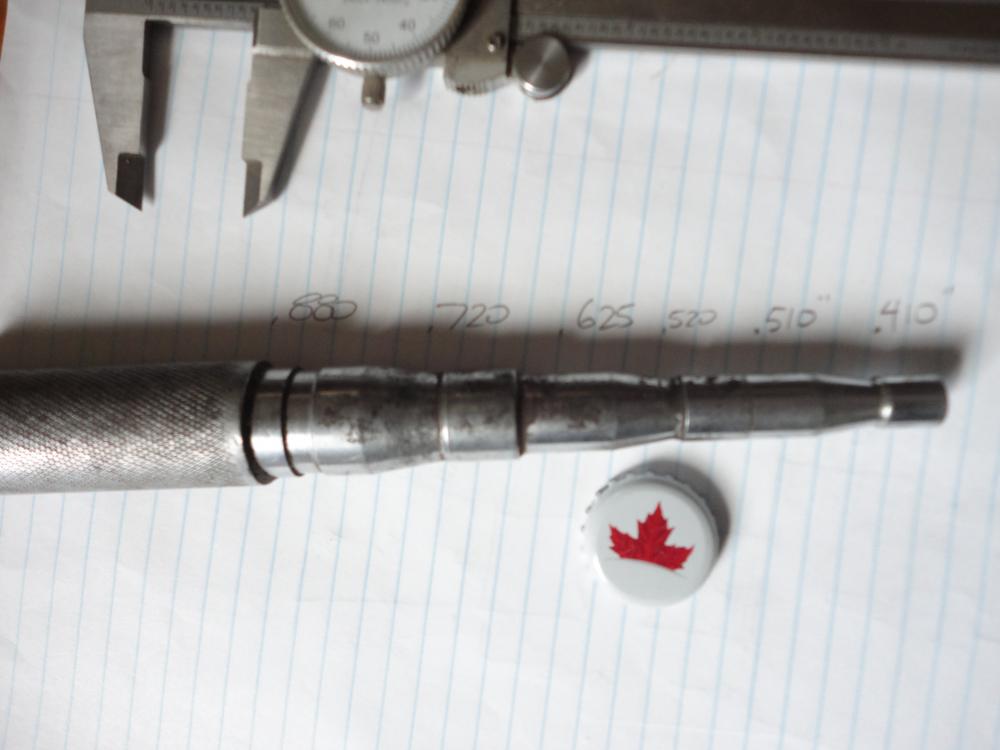
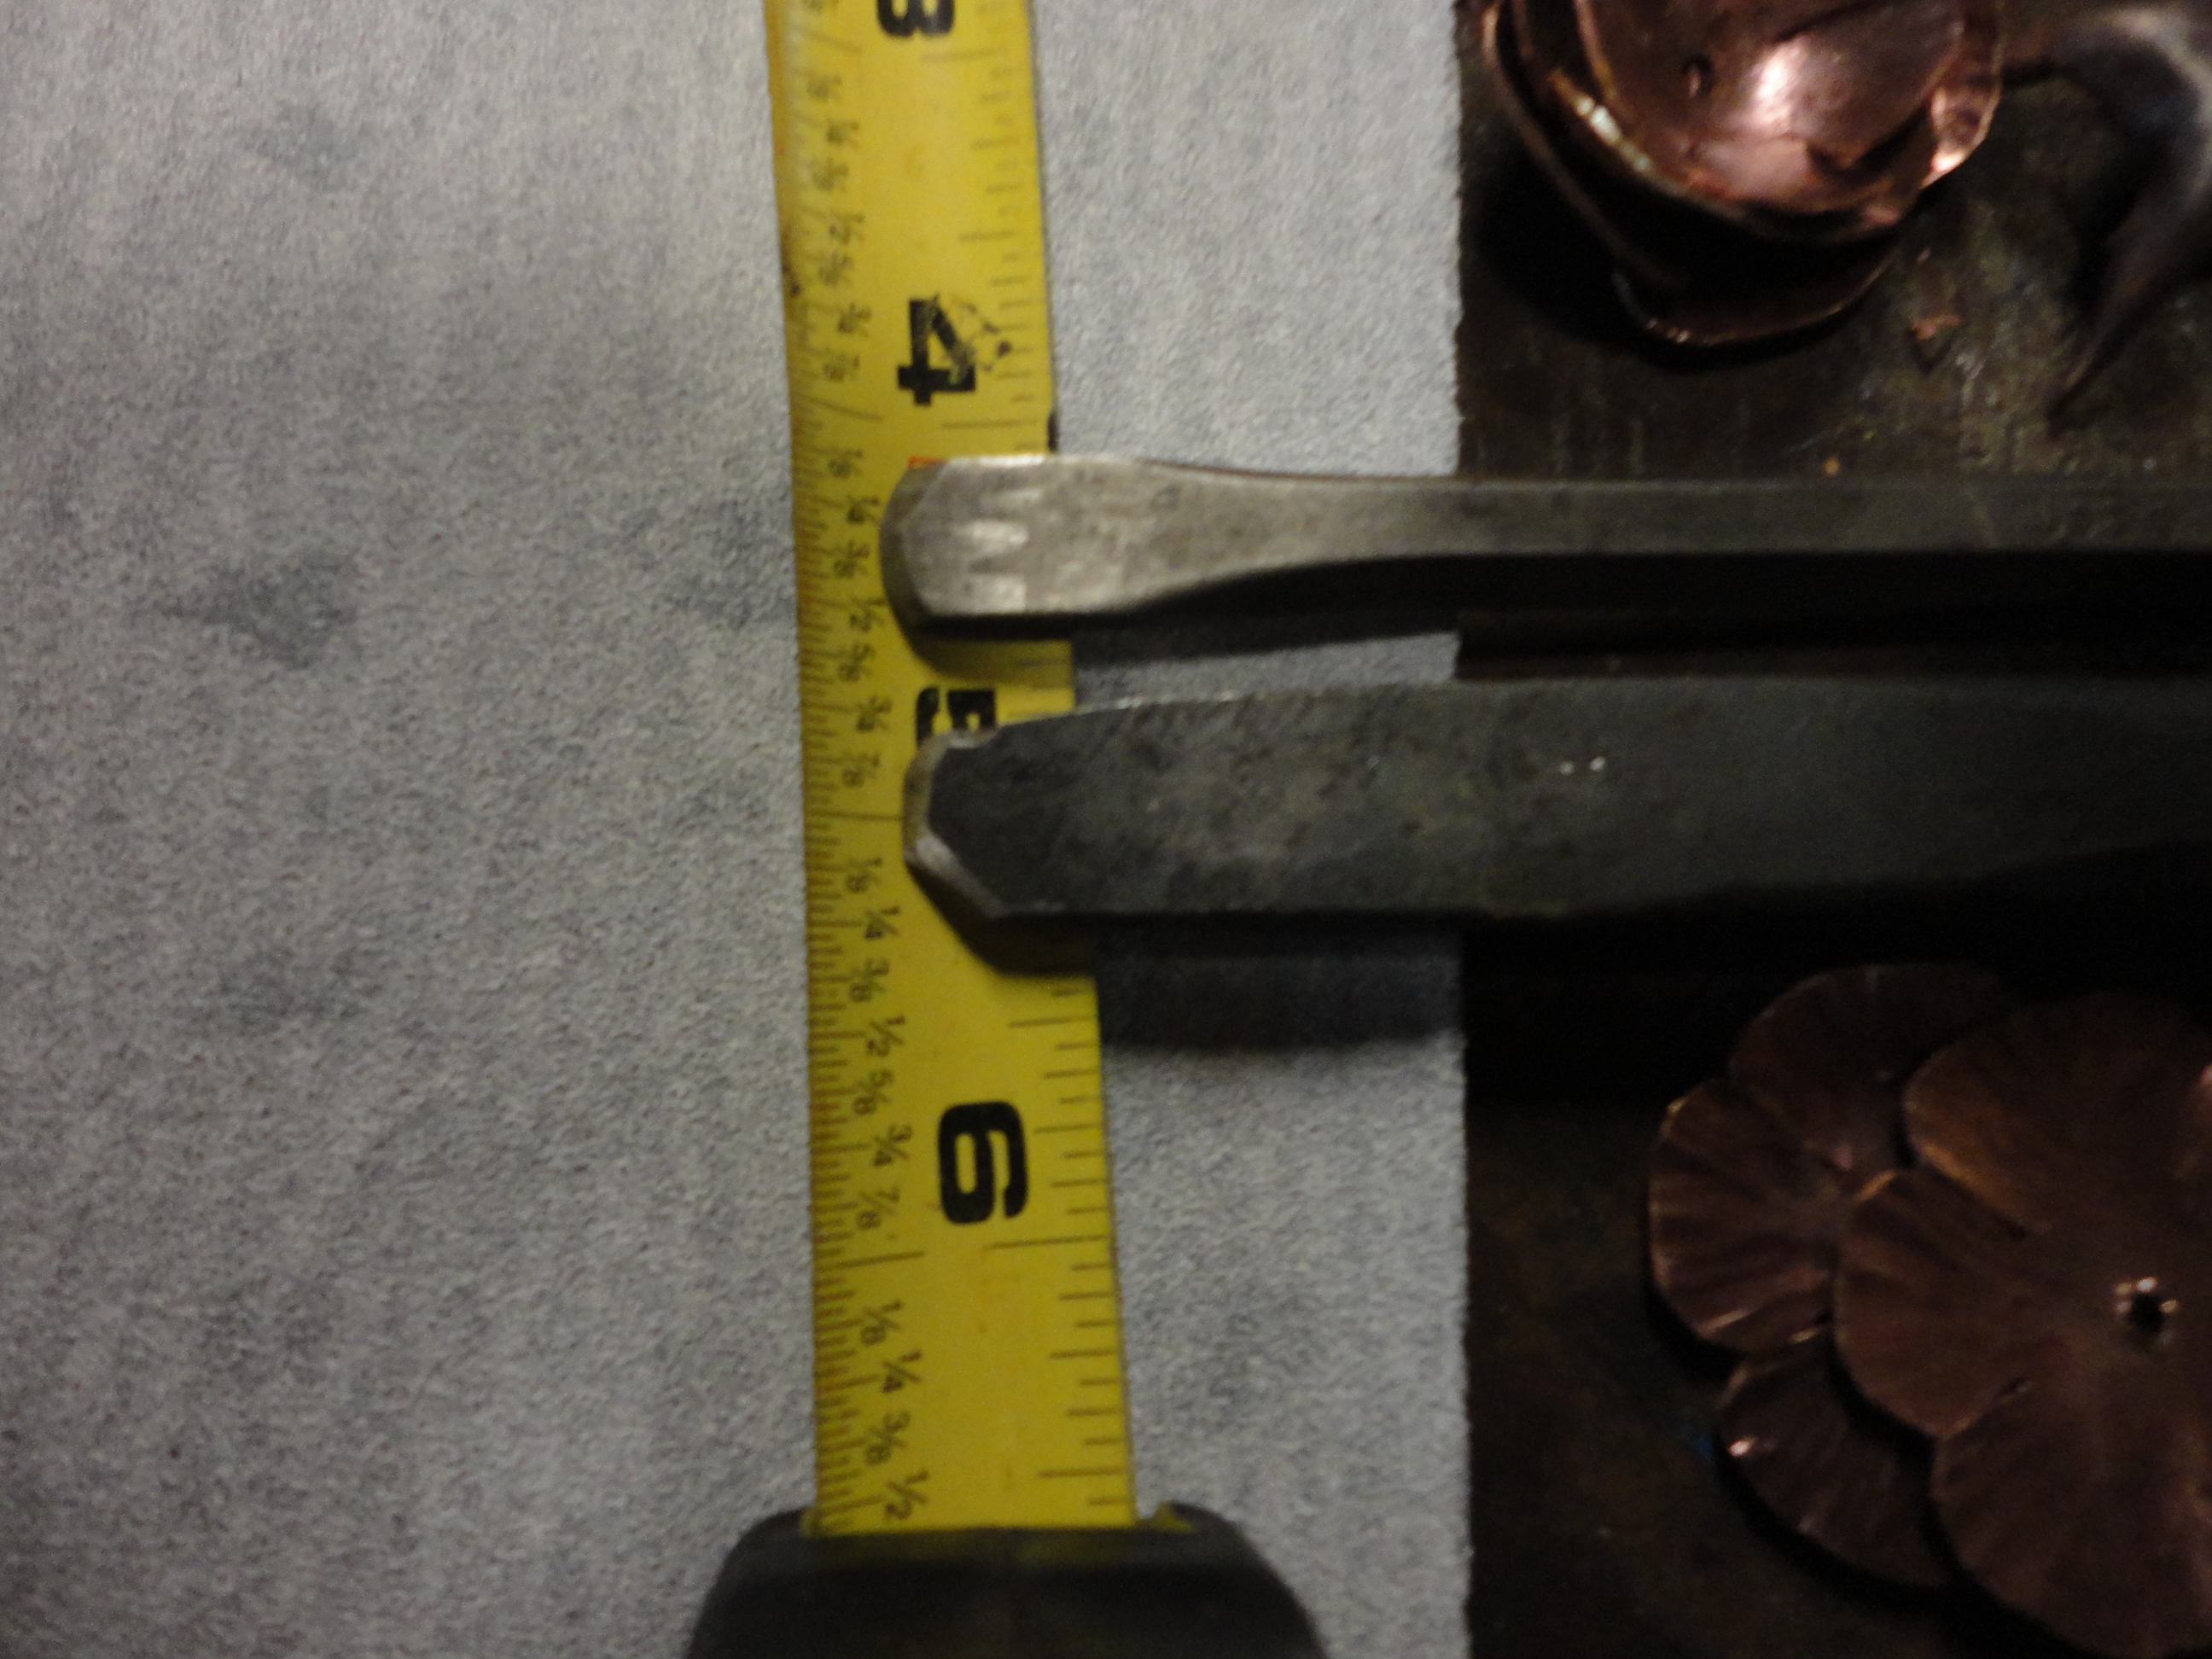
heres mine and some measurements if they are legible. thought I had another larger rustier one but maybe I never bought it.
-
Been through the whole shovel or handle thing a few times... never fails find a nice one you like and the handle gets thrashed.
-
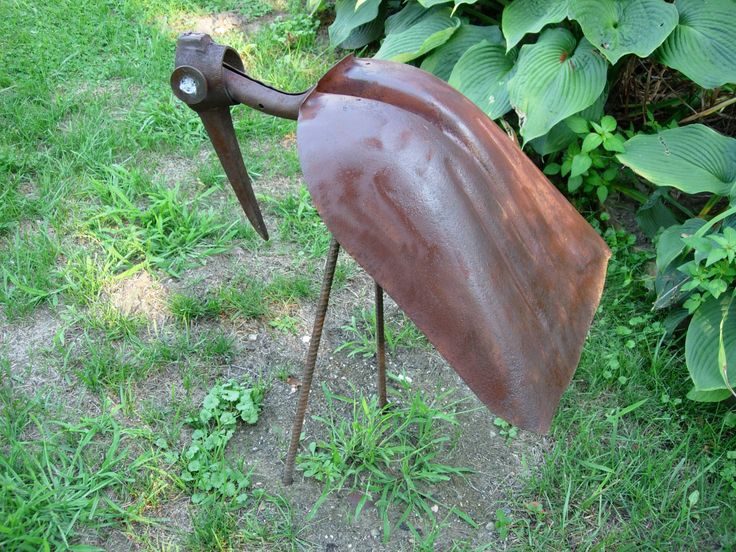
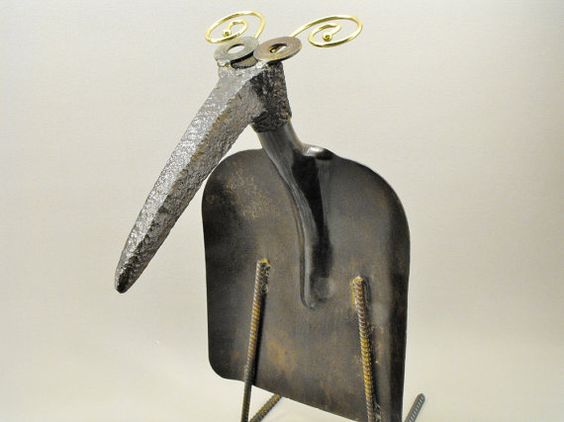
Heres another idea for birds guys. Was looking for axes and these popped up. There was even one painted red and black that looked very much like a vulture. I believe it also had a pick for a head.
-
Be thinking of her and hoping for a successful surgery and rapid recovery.
-
A video comparing different axes. First 15 min has several old hand forged axes. Can see the weld lines in a few of them.
-
I have one or two of these I had picked up from an estate sale along with a big mitt full of punches and drifts. A quick google get me a few ebay listings for P&C Peterson & Carlborg 137-1/2 Swaging Flaring Punch Tool. Doesn't let me know how and what it was used on. But its a start.
-
You bet, have that colonial axe video bookmarked for future reference. It's a nice well done video. That sounds like a little work getting that much nicely stuck together.


Hello from B.C.
in Introduce Yourself
Posted
Hi, there is a guy out in Westbank Summerland area and another out in Joe Rich (BCRob I think). I'm out in Greenwood. That's the closest of us that I can remember right off hand