bmazingo
-
Posts
180 -
Joined
-
Last visited
Content Type
Profiles
Forums
Articles
Gallery
Downloads
Events
Everything posted by bmazingo
-
Good Idea!
-
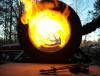
Hey guys, got my face welde on today. I must have got it really tight because it sounds better than before it was welded. I use my fish cooker burner to heat the AR400 and base. Then I used a torch to heat the weld areas between passes. Its been over 2 hours and it is still hot. I could have put one more pass on it but I was tired of flipping it over and turning it. It has 3 passes on the sides and 4 on the ends. I painted the base with BBQ grill paint but left the sides of the face bare. Next is shaping and welding the horn to the anvil. It should be well over 200lbs when it is finished.
-
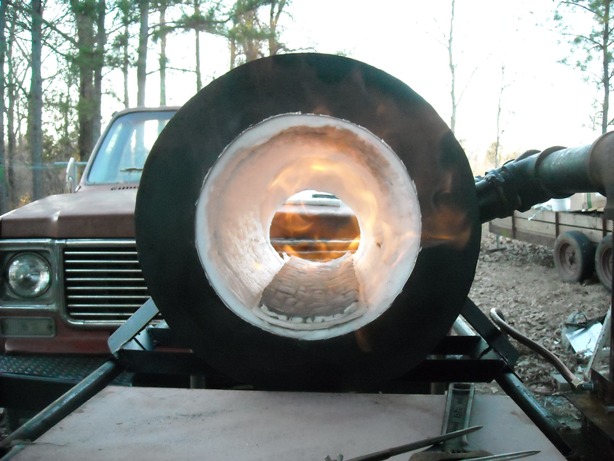
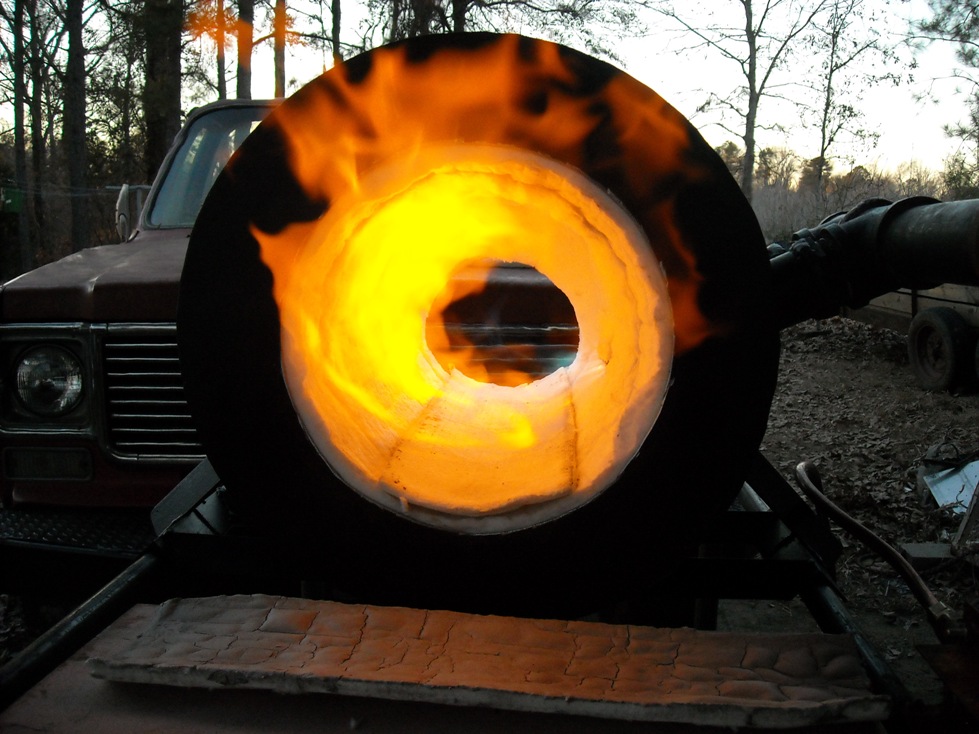
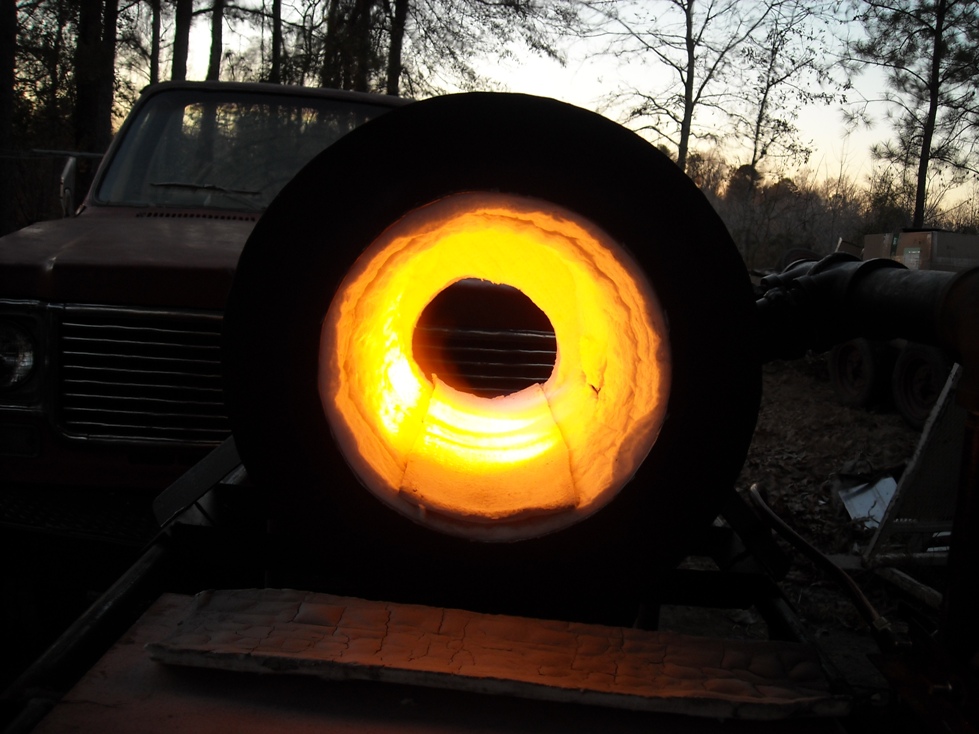
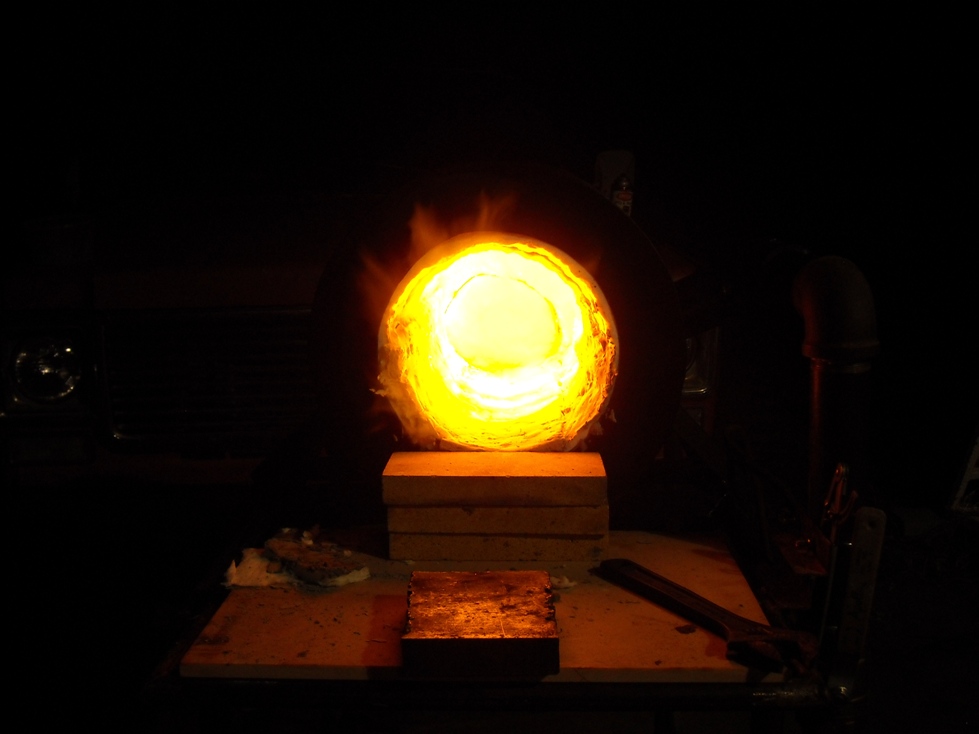
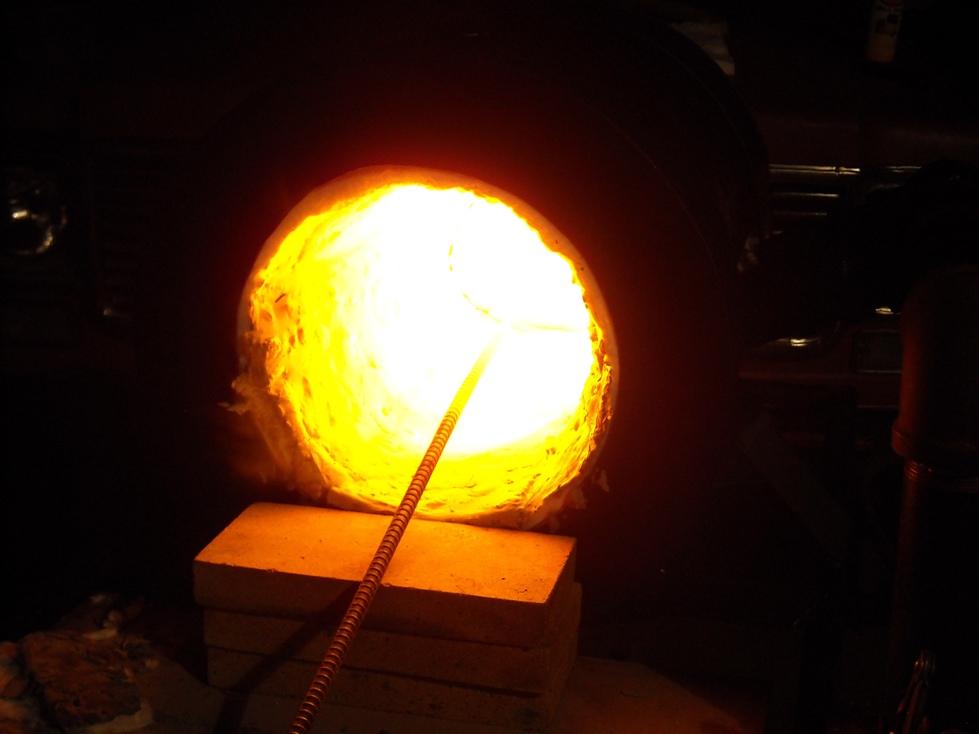
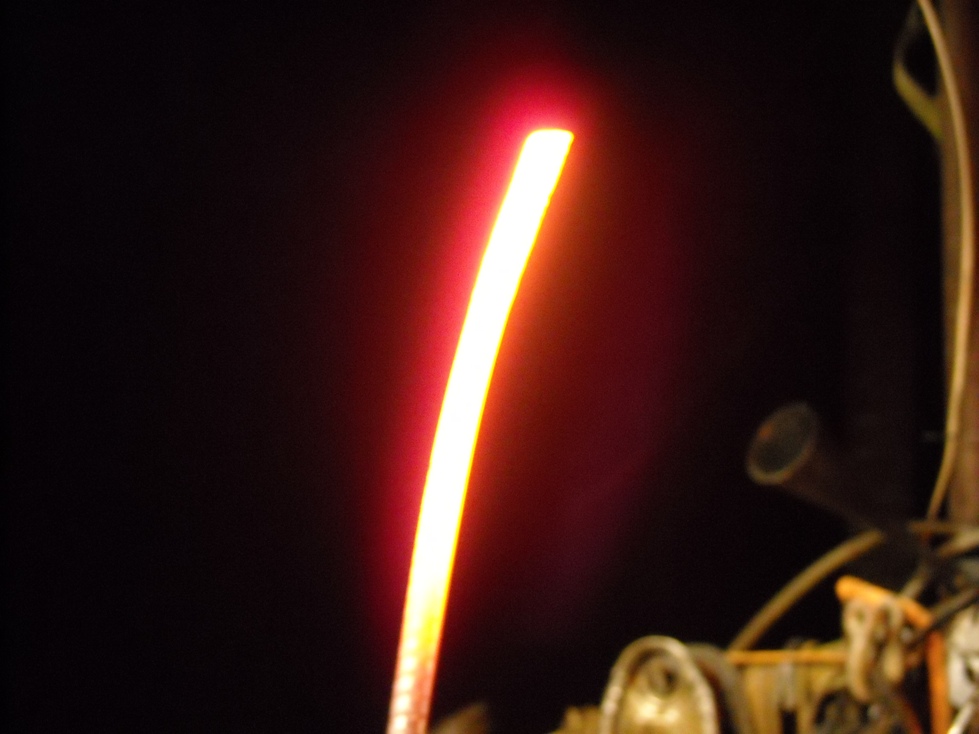
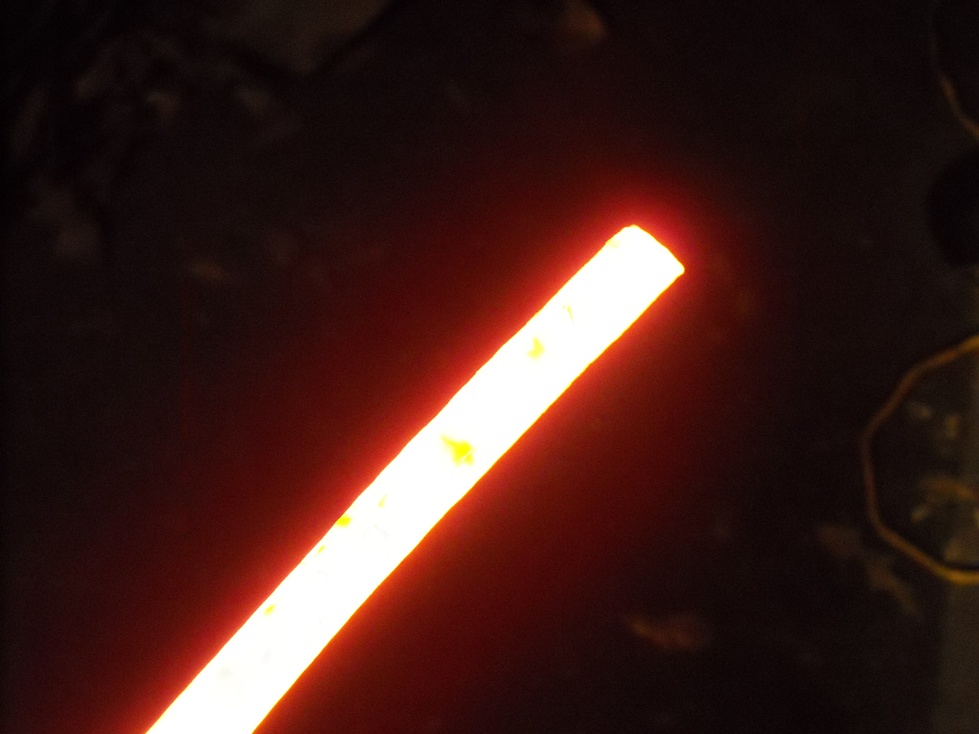
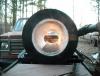
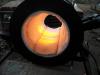
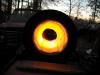
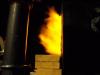
I run my forge for the first time tonight. The first time with real purpose, not just testing. I heated some steal for annealing. Here are a few pics. The forge performed wonderfully. Very easy to get a yellow heat on thin steel, takes a little more time on 1/4". I actually had two pieces of bandsaw blade that felt like they were sticking together. I may try to weld this weekend. Do I need to anneal the steel before I try to it or does it matter? I plan to anneal it befor I use for blades or what ever. I mostly want to see if I have the heat. Thanks for all the help In some of the pictures I had the flash on. The yellow was brighter than what shows in the picture of the hot blade, even though the flash was off for that picture.
-
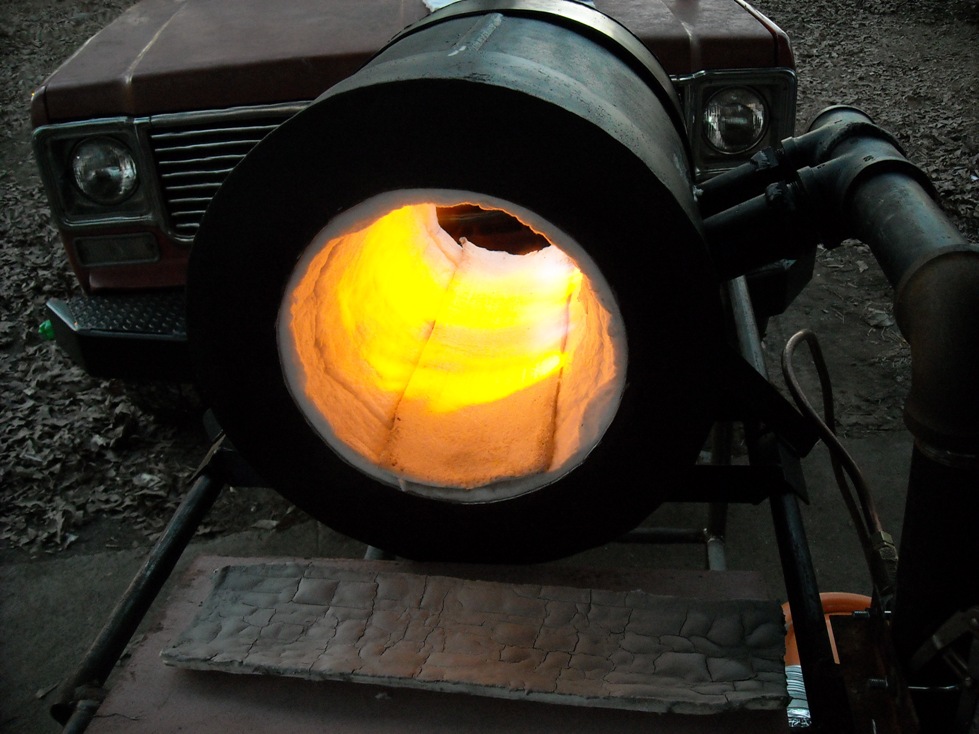
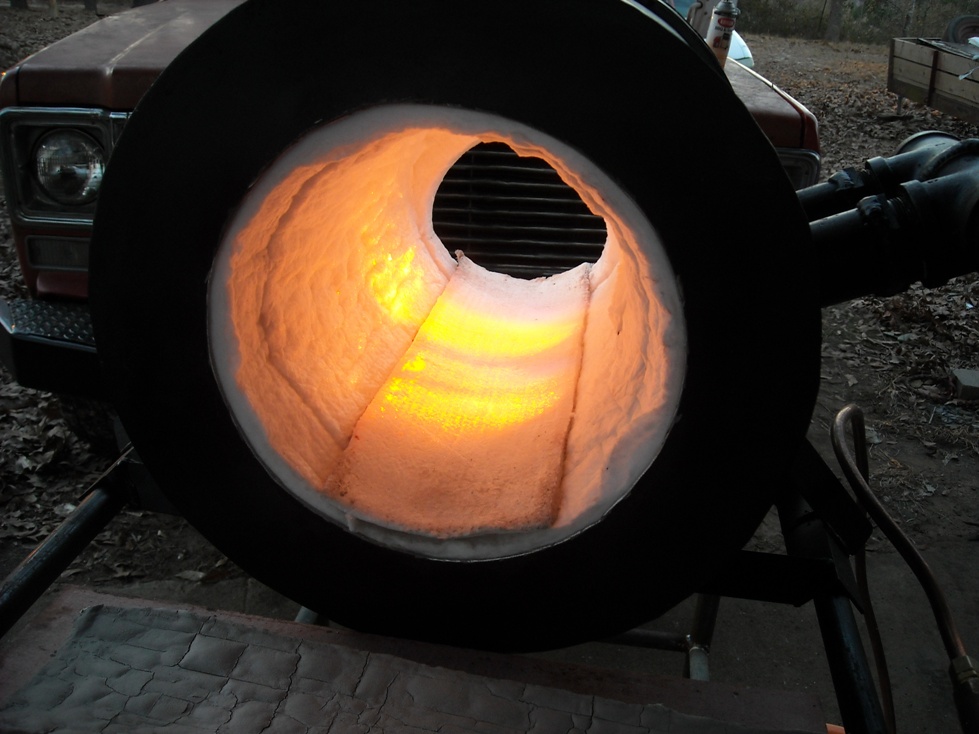
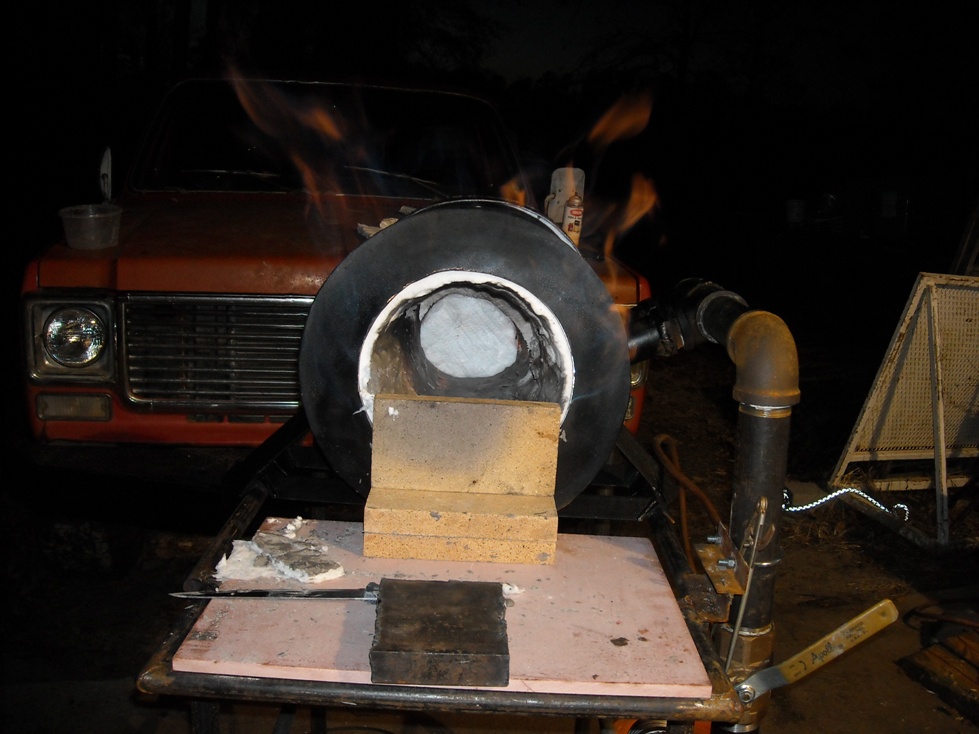
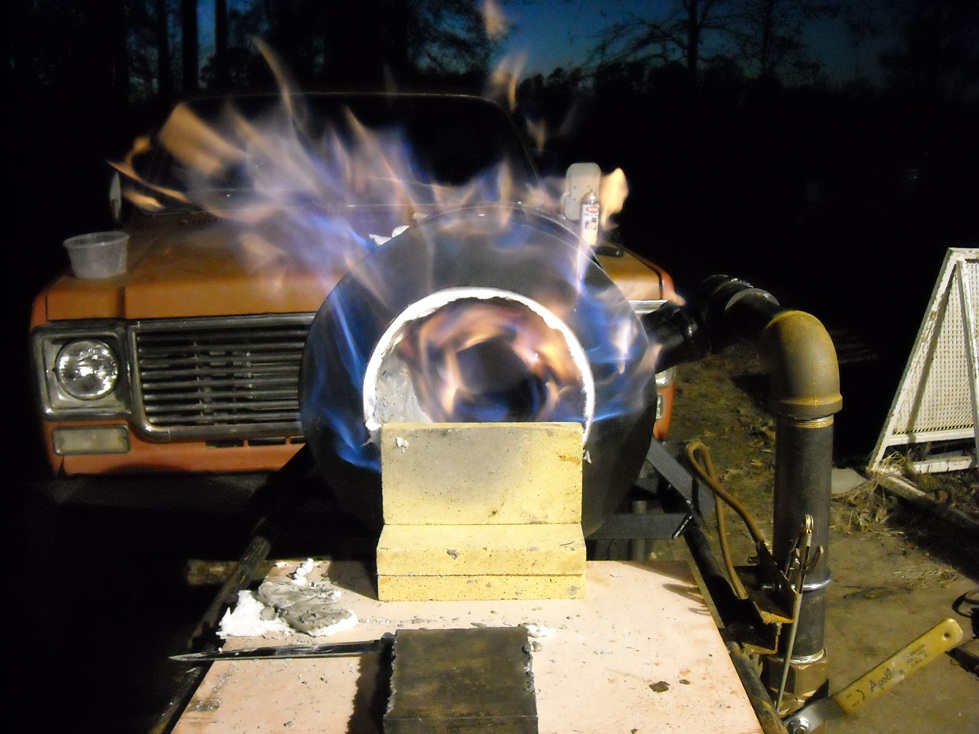
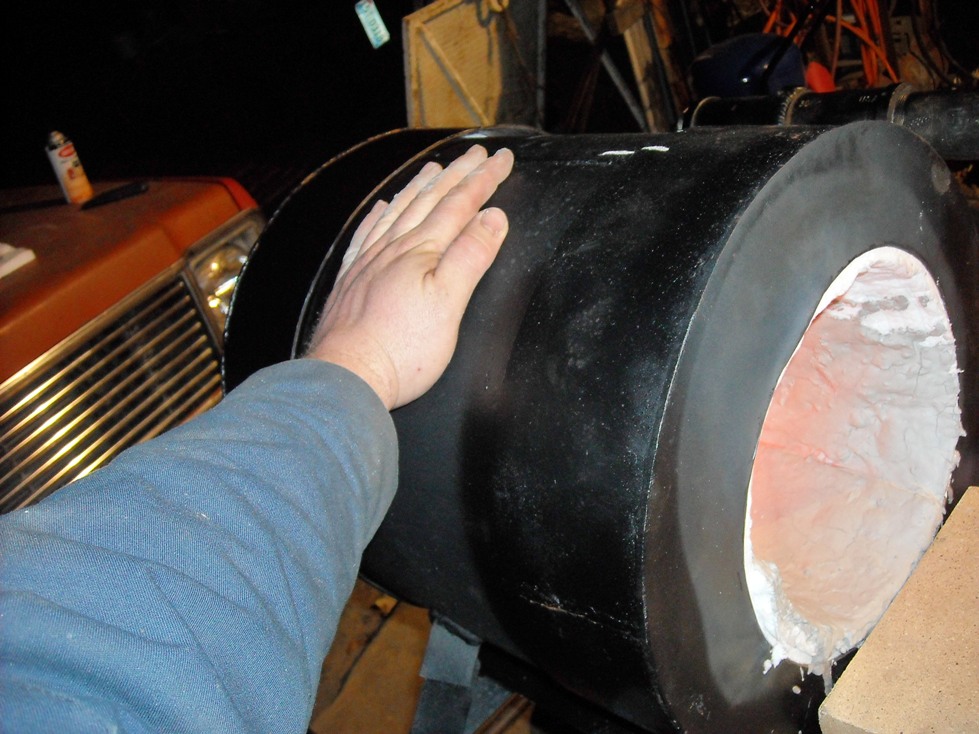
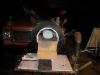
Here are a few more pictures. I am almost done, just have the rear door to do and the rear shelf. The forge takes a few minutes to get up to temp but it seems to maintain the heat with very little work. I am going to anneal some blade material this week/weekend. So I'll know more then. The front door hinges to the right and the bricks can be moved ot to allow wider pieces. I attached the 2" of blanket to the door with wire. I figured that would work and if it burns up the wire its an easy fix.
-
Been working on my big homemade anvil. Got it ready to start welding. I ground, sanded and filed the base. I never did get it perfectly flat but got it to within 0.010" or so. you just can see light at the very ends. Got a piece of 3-3/8" 1045 shaft to make a horn. I am not sure but 1045 is supposed to harden. Not sure if I will harden it though. What do you guys think? Harden it or not? Also got me a small anvil in the works. He had enough of the AR400 to cut the entire anvil out in piece. He said it may be a week or two before he can get to it. Total length will be 18" the face will be 3" wide and 12" long. 1" drop to the table which will be 2" long 3" wide the horn will be the remaining 4" or so. The anvil will be 8" tall. I will weld some feet on the side to keep it from tipping over.
-
I have nothing to drill it with. A hand drill is out of the question, if the bit skips or stops cutting, it's over. And at 3" thats alot of if's. The holes will be in the smaller anvil anyway. I just thought water jet cutting would be the best route, low heat and very precise. I am going to make a jig to hold the hardies on the big anvil. The base is mild steel so I can drill it an attach something.
-
Anyone in the lower Alabama / Mississippi area know where I may get some water jet cutting done. I think that is the only way to get a hardie and pritchel hole cut in this stuff.
-
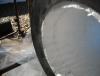
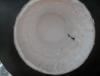
Hey guys got my plate for the face today. It weighs 66.45lbs, just the face. It really rings and rings at a high pitch for several seconds after being hit. I have a little bit of grinding and polishing to do to the mating surfaces befor I weld them. I don't have a rose bud for my torch but I have a fishcooker burner and an old propane bbq grille. I was thinking I could lay the plate over the burner and heat it up. I can weld some temporary eyelets to the bottom section so I can hook my chain hoist to it. Then once a pass is completed I can hang it over the bbq grille to keep it hot between passes. When all the welding is finished I plan to cover it with a box or barrel to let it cool. While I was ae the fab shop I found out the owner was going to haul of the rest of the plate for scrap. I talked him into to cutting me out an entire anvil. I have to draw it out this week end on some of the paper he uses for his shape cutter. It will be 3" wide - I think 12" long for the face, 1" for the table, 4-6" for the horn, I am not sure about the height yet or how wide to make the feet(welded on). I wish I had a way to put a hardie hole in it. I may buy the whole plate from him if he will sell it. I think it would make good tools. anvil.wmv
-
here is video of my forge
-
I think I can get some shaft (4" or 6")that is 1045 steel will this work for an anvil horn I could probably harden it slightly if needed? I was thinking maybe turn it down to a conical shape on the lathe and then cut the wide end on an angle so that the top of the horn is parallel to the floor (level) when welded to the anvil. I'll try to draw it up. Supposed to be cutting the plate for me in the next day or so and I have got to get a temp stick for about 400-500F, thats what he said I should heat it too. And he said 7018 rods will work fine on the AR plate.
-
Yes sir it is, or will be. He was going to cut me two pieces and stack them, then I told him I had something to put it on. Question, does the horn of an anvil need to be hard or will A36 or mild steel shaft work? He has some pretty big stuff, I think I even saw a piece of 6" thick pate at his shop. I may can get him to help me shape a horn and weld it to the body.
-
I went shopping at the local antiques store today. I bought some old monkey wrenches,I don't think that is the proper name but they don't have any teeth and they're old. I figures I could use them for turning square stock and got both for $16. I did not find an anvil but the day was not a waste. Turns out that the owner of the second shop, his father was a blacksmith, as was his grandfather. He said he has an anvil that weighs about 200-250, but it is not for sell. He did say I could look through his tools so that I will have some to go by when I make mine. He was really nice and we talked for about an hour. Now the even better news.... the owner of the fab/machine shop said he is going to be cutting some AR400 plate next week and he will cut me a piece FREE! Now for the best part, "IT'S 3" THICK"!! I figure I'll get him to help me press and weld it ontop of homemade anvil I made last week. This thing is gonna be heavy. Just the AR plate is gonna be 64lbs and the bottom piece is about 125lbs by itself. I know it wont be root welded but I figure we can machine the sufaces flat and press them together untill its tacked in place. I don't have an anvil to get deminsions from so I am just going by what looks right. I am going to make the face 5"x15" there may even be a horn later if all goes well. The picture are of what will be the base. Pay no attention to the "turkey xxxx" welds, I was rushed for time as always and did not prep my surfaces for the mig.
-

Water-powered helve hammer
bmazingo replied to Stormcrow's topic in Power Hammers, Treadle Hammers, Olivers
looks like some type of pick or hoe. ?? -
welded up a new home made "anvil" if you can call it that. Used the 1-1/2" actually turned out to be 1-1/4". Nothing fancy hac a nice ring, but its soft. It will do for now I hope. A local machinist saya he has something for me to make an anvil out of. He says I'll wear out my hammer on it before it needs any work. I wonder what type of steel it is??? I hope to catch him at his shop this week, I need him to price me some rollers for a belt grinder. I will post a pic soon.
-
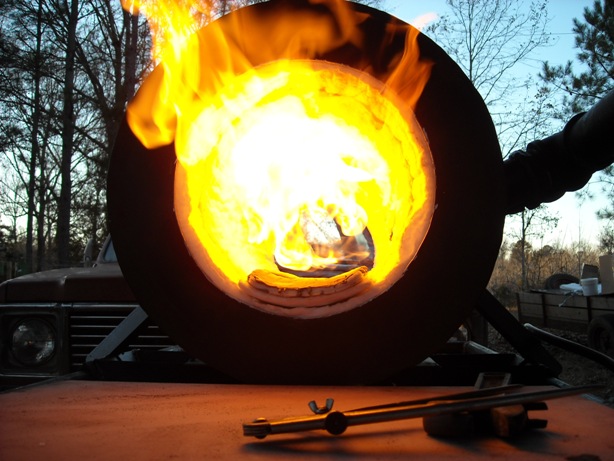
Thanks for the advice. I had my blower choked way down, it is too big for the tips. I will get it tuned soon I hope. I am going to make an insulated door for the rear opening and I have some ideas for the front. I am supposed to be getting about 40 chrome-mag fire bricks from my father-in-law (horse trade). He said they are really good and should last me. I was doubting it at first but once it got up to temp and I got the fuel adjusted to maintain the heat I was relieved. The heat was so intense,I burned the hair of of my left hand when I got to close. I can use this thing to heat my shop, if I ever get sides put on it. Thanks to everyone for all the help so far. I probably won't get to work on it any more until this weekend but I'll post my progress.
-
first stainless knife
bmazingo replied to saintjohnbarleycorn's topic in Finish and Polish for Knives
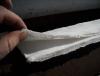
I am decent when it comes to polishing metal, I always start with about 220 then progress 320, 400, 600, 800, 1000, 1500 then 2000 or compound. Rouge works good it you have a buffing wheel but I do it by hand so I just use rubbing compound. I just recently polished some 1911 .45acp pistol barrels and compensators. Use the good water proof sand paper I use 3M. Get you a bowl or a bucket with water and a few drops of soap. Keep your paper wet and clean and it lasts a lot longer and the finish will be nicer. Nothing hightech about my method, lot of sanding. This is an ruff knife blade made from a golfcart spring and here it is semi-finished, not my best work but it looks good. Had a few deep scratches I missed. I still need to finish the handle. -


-
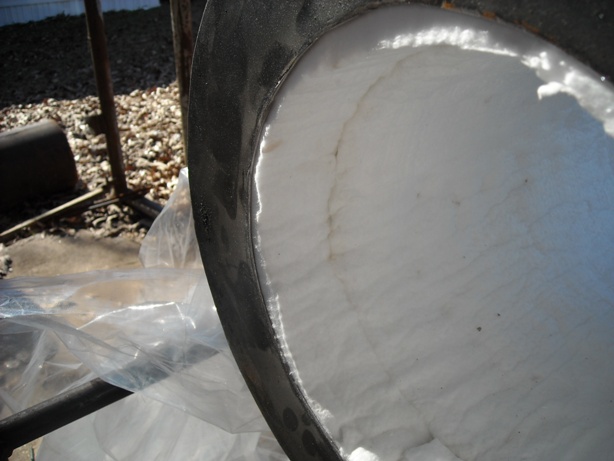
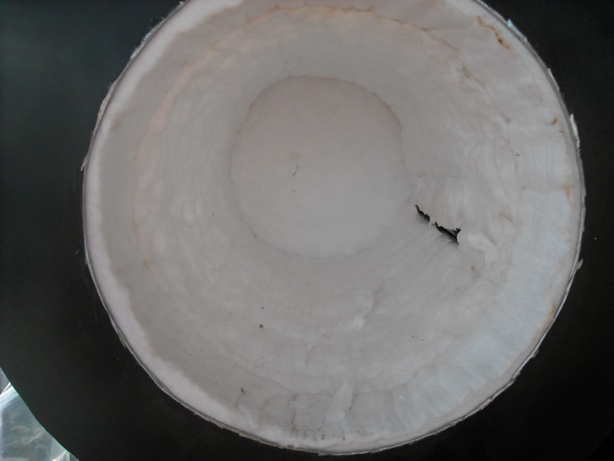
Hello my friends, I have managed to get some work done on my forge. I recieved my wool and mortar monday but weather has not premitted me to work on it. I put the wool in yesterday, and I would like some advice on the burner area, where it is protruding into the chamber. Do I need to put one more layer of wool? Also I am thinkin of just coating the bottom of the chamber with the mortar. I have been told that it has a tendancy to crack and flake. So I thought that just coating the bottom would work or does all the fibers need to be coated to prevent them from becoming air born? Thanks guys.
-
wow, thats one heavy duty forge! I like the door.
-
The serviceman from the company that services out lifts was at the plant the other day. I asked him about some forks, he said he was almost certain there were some at there service yard. He said if he could remember to, he would put me one on the back of his truck next time he came. I also talked to my father in law again; He said the mold cores (terminology) for the anvils were still at his work. He also said what the alloy was the used something similar to or may have been 8640. He said they would be hardened and tempered throughout. He knows more about it than I do.
-
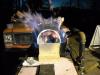
Hey guys, I am still waiting for my materials to complete the big forge. I did however throw together s small tank forge. I got some refractory mix from work (free). It is called ONE SHOT non asbestos ...... That is all I could make out on the bag since it is in such bad shape. They used to use it for the boiler at work. I binged/googled it and I think it is a gunnable refractory mix. Anyway, I mixed it with water like my co-workers said they did, and it turns into a semi putty like stuff. So I smeared it on the inside of my helium tank. Looked pretty good but the roof sagged a little when I warmed it. I had to warm it in my oven since the outside temps are sub freezing right now. Started with a blow dryer then into the ovenat 170 for 5hrs and then up to 220 for a short time. Seemed to set up firm but the roof pulled away from the tank. I think I can just slide the burner down further through the collar. I am going to let it set the rest of today and try firing it at low heat this evening. I think it will work for now. This is going to be fun. I really am excited about the big forge though, I will be glad to see that box when it gets here. I also got my first book about blacksmithing, a Christmas gift from my brother. The Art of Blacksmithing, by Alex W. Bealer. Mr. Hoffman, I think I paid about $100 for the blanket, the shipping is what killed me.
-
I bought my blanket from The Ebay store mentioned in an earlier reply. I think it is called the hightemp store. It seemed to be priced about where every body else's is. I was hoping to hear from Mr.Goedecker, but I had to get something going. I tried the burners out in the shell today, It does seem to burn more out of the second burner, but not much. I will know more when I get the insulation in. I think I am going with the down angle like you suggested, it seems to swirl nicely. The flame travels almost completely around the shell.
-
Case hardening bad experience
bmazingo replied to evfreek's topic in Heat Treating, general discussion
I am pretty new to blacksmithing but I have been working on engines for a while. I thought it interesting how different methods were used for case hardening. The automotive parts industry case-hardens camshafts in a similar fashion to painting on clay. Some actually coat the areas that are not hardened with a coating containing copper, Mopar used a purple paint-like chemical. Just thought it was a neat comparision. -
Merry Christmas and Happy Holidays from me and my bunch here in Alabama. I hope Santa brings me a 3lb hammer, cause I've been sooooo good this year!
-
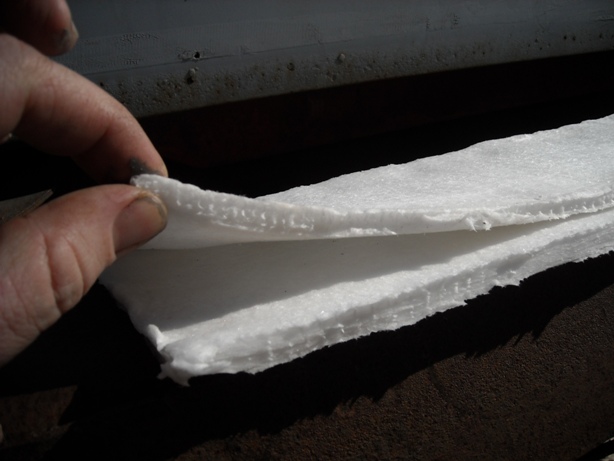
Ordered my blanket today, got the 1" 8lb density. Man that stuff is high, and the shipping is not to great either. I did not get any rigidizer but I got some air dry mortar that is for 3200F I think it will work for the coating. I also got my u-bolts today so tomorow I will make my mounts for the burners. I will be sure to take my time. So far it looks really good. I told my brother I was going to call the gas company and see about getting a residential tank later. I have a feeling I am gonna be using a lot of gas, this stuff is really got me excited. I was wondering if I pointed the burners up instead of down, would it be as efficient? I can do either way. I really dont want to cut my shell in two. The type if pipe I used tends to spring outwards really bad when it it split. I know it will be harder to work on and I will be limited to what size work I can do but I can always split it later if need be. I am planning on 2-3" of blanket and 1/4" of mortar over a thin skim coat. I am sure I will have more questions soon.