
ornametalsmith
-
Posts
221 -
Joined
-
Last visited
Content Type
Profiles
Forums
Articles
Gallery
Downloads
Events
Everything posted by ornametalsmith
-

$15 for one stick of 1/2" square
ornametalsmith replied to KYBOY's topic in Blacksmithing, General Discussion
COOL beans, Frostilio........you know we'll need pix. fwiw....the last 1/2" sq. solid I got.....was $11 for 20', here in FL. That was from a local supplier. IF I'd needed more and ordered from Tampa Bay Steel, I'm sure it would have been less. And I agree it's painful to the hobbiest........but just be glad your not wanting to play with Copper or Sil. Bronze. DOH!!!!!! -
Just thought I'd add this to the mix. There is a wonderful book that might be VERY helpful to you regarding the "period" strap hinges. It's "Early American Wrought Iron" by Albert H. Sonn. with 320 plates from drawings by the author. It would be a great resource for anyone interested in "period hardware". IMO
-
Elmer Roush & Lynda Metcalfe Demo
ornametalsmith replied to primtechsmith's topic in Blacksmith Guild of Virginia
This is gonna be a GREAT demo......I just saw some images of these demo items last week from another demo THEY did recently at the New Salem Hammer In near Springfield IL. Anyone in the area that misses this one..........will be kicking themselves. Wish I was closer, Peyton. -
-

-
120 gallon tank out back...copper from tank to pipe....hard pipe runs width of shop.....then through wall...valves and regulators..flexible hoses to forges, foundry unit and glass torch.
-
anvil?
ornametalsmith replied to Max Mulholland - Tetnum's topic in Anvils, Swage Blocks, and Mandrels
lots of good info. The only thing I'd add is that it is Handy to have a ball bearing with you while your shopping for that anvil. It lets you "test" the hardness or recoil of the face. Hold the bearing about 10" above the face....and drop it....you WANT the bearing to AT LEAST bounce back 7 or more inches. The higher it bouncer......the more you should grin. well that's my two cents. -
mine's just a play on words......took ornamental metalsmith.........and got Ornametalsmith. Used to be just ORNAmetal.....
-
Polishing Wheels for A bench Motor
ornametalsmith replied to Candidquality's topic in Finish and Polish for Knives
the only thing I didn't see mentioned. Stay away from a "leading edge of any piece" only work a "trailing edge". Any "leading edge" can still be worked and become a trailing edge by turning the piece around. And the only place on the wheel that you should work is the lower front quadrant. IF your looking at the wheel from the side, imagine the wheel divided into four quadrants. The center line......could be considered the horizon......stay below the horizon, in that lower front quadrant. Many times folks get into trouble by not paying attention and "wandering" up above the horizon line....and as they put more force on the piece.........it tends to get grabbed and the force is increased at the horizon line...that's usually when it gets Ripped out of your hand. be careful out there. I've heard it said, "it's a poor craftsman, that blames his tools". -
fwiw, here's a link to a site with some info. C. Cook Enterprises - Pullmax Machines Wish I'd have found this before I made a lot of the tooling. Look under Pullmax machine.......for Pullmax dies and accessories. That should give you some ideas for making your own tooling. I also did a search on Ebay for pullmax. might be a source for a manual. There was one for $45, but it was for a P9.
-
my pleasure, Kevan. The good thing is that you can make all your tooling. I think it takes 5/8" sq. stock. I'd suggest some tool steel . the tooling I showed is somewhat basic. I've seen tooling that was shaped like a small leaf (both top and bottom) and with that ........you are able to do "clusters" of leaves VERY FAST. Which is great if your doing.........a 3D tree on a gate(etc.).......enables you to do large clusters of leaves that are then cut out and welded to your branches. I thought I was Green with Envy before............I heard how much you paid that was a DEAL. I found one years ago for $500.......thought no one knew about it....so I dragged my feet for a few days............MISTAKE. That weekend I went into the shop I worked at......saw IT standing there in the shop. YIKES......I was in shock....someone else had found it....bought it and drove it over and sold it to my boss for $2250 if my memory is correct. I learned a valuable lesson ......NEVER.....leave a DEAL. NEVER.
-
-
-
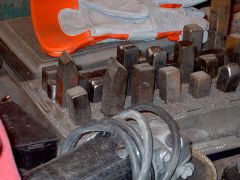
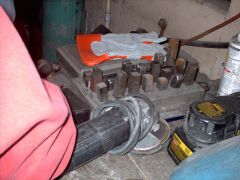
Kevan, You've got a great machine for doing decorative sheet metal work. And that's "besides" the basic nibbling and punching operations. Maybe you could also show some of the tooling that you got with it, and we can discuss their applications. A lot of the tooling you'll want to make yourself. To do specific operations like dishing and "running lines". here's an example: somewhere I've got a photo of some tooling that I made. I'll find it and put it in my gallery. AND post it with this reply. congrats on getting an awesome tool. I'm GREEN with envy. :)
-
 here's a sample of the lining and dishing done on a pullmax.
 -
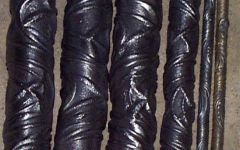
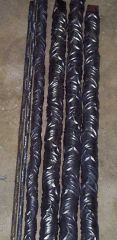
as has been suggested........twisted rebar has many decorative uses. Here's some different sizes that have a series of reverse twists. the smallest rounds are the "viney" round that's available.
-
-
-
Great point, John. It's an important step in using any swages like these. You need to isolate enough mass to make the component. And your TIP on a sample ROX.....:D
-
-
-
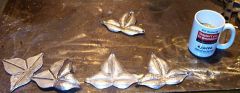
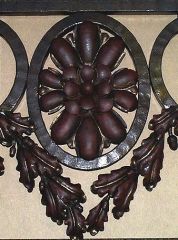
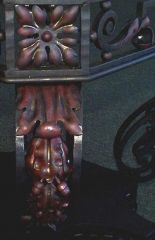
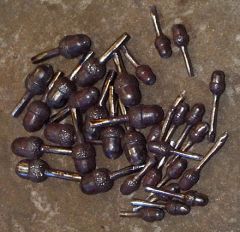 these were some of the forged acorns for the 14' table base.
 -
I was just about to add some photos of some acorn swages I'd made for a HUGE table project that I did. .......but........after reading the "trying it" post........that link to Artmetal has the same images. sweeeeeeet FWIW, I used a grinder and file to make the acorn masters. AND..Stretch's advice of "softening" the edges of the dies before using them is very important. here are a FEW of the many acorns that were needed for the table project.After forging.....in the swage I went back and added the lil detail on the "caps". and a shot of them finished: Don't forget to send pix of your spring swage when you get R dun.
-
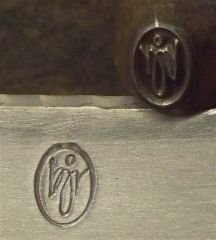
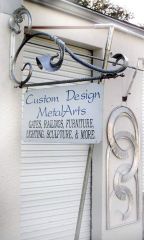
here's a shot of the sign outside my shop.
-
 forged aluminum and copper.