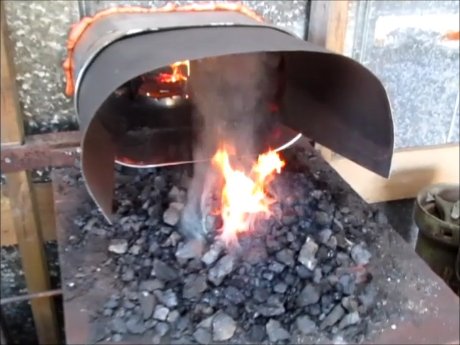
norrin_radd Posted April 15, 2015 Share Posted April 15, 2015 (edited) I've started to work on hinges for my shop doors. I want to make them to where I can use the same 5V tin that the walls are made of and they will over lap just like if there wasn't a door there. Not to hide them but so they will seal better.I came up with this design and am trying to make them:Started working on the barrels.Not sure how well they will work out but I'm giving it a shot. I am recording the process too.After watching the video I realize I would have been better on the other side of the anvil. I still have a lot to learn but I'm having fun anyway.Hopefully I'll get them done sooner than later. Edited April 15, 2015 by norrin_radd Quote Link to comment Share on other sites More sharing options...
Frosty Posted April 15, 2015 Share Posted April 15, 2015 Radd dude: Nice video production quality, well done. Your camera angle is outstanding and the lighting prevented the hot steel from glaring out the pics. Well done.Not a bad job on the hinges. There's an easier way though. Your first step over the edge results in a longish section turned to a curved 90* Yes? Then you fold it downwards and have to refine it into a tube over the anvil's edge. Yes?Next time try starting the end 3/4"-1" over the edge, then turn it end up, change your grip from inline with the stock to 90*. This lets you lift the standing end. (Yeah I'm sure there's a proper term but I don't know it so I'm just going to call it that for purposes of discussion) Simply lifting the standing end lets you forge the tab end over in a roll from the start. It's the same basic action as you used over the anvil's edge but the anvil and hammer are reversed. This lets you determine exactly where the force is applied.Force always takes the path of least resistance, this is why any unsupported stock hit with the hammer will bend rather than forge. How this applies goes like this. The force from the hammer impacting the bent up tab will travel directly towards whe anvil as that's what's stopping the movement. With me so far? However, the force doesn't have a straight line to follow, it has to conduct through the steel. Yes? This means all the force WILL stop at the anvil but the steel can't stop it because it's unsupported. Where? In the middle between the impact site and the anvil. THAT is where it will bend.To roll the tube simply start the bend over the edge but before it gets to 90* flip it up and start rolling it with hammer blows on the tube. If you keep the tongs in line with the stock you'll end up with your left arm over your head so just shift the tongs 90* so they're comfortable and go to town.You can roll and drift the tubes in two heats max with practice. This really goes fast once you get the knack, It's a real head slapper.I trust you're bending the 90* angles in the hinge plates in a vise NOT trying to forge them on the anvil. This is EXACTLY the kind of job a blacksmith invented the vise for.Frosty The Lucky. Quote Link to comment Share on other sites More sharing options...
jeremy k Posted April 15, 2015 Share Posted April 15, 2015 Watch your video a few times or more - You will see that you are not moving the metal along with hammer blows hence your always hitting the metal in the same spot creating a flat spot. What Frosty says above is true - but again re-watch your video a few times to see a couple things that you can easily fix - like, keep the ears hammered in on the end that you rolled from the start - then the whole barrel end will set on the anvil during the drifting without having the corner keep it up off the anvil. Looking good though - keep it up. Quote Link to comment Share on other sites More sharing options...
Jim Coke Posted April 16, 2015 Share Posted April 16, 2015 Greetings Norrin,The boys above have already covered suggestion that will help you along the way... Another that I might add is make your anvil more solid ... It moves with every hit.. I might also suggest that you make a mock up of your design.. I think you will find with the pin off set that it will require a larger than normal door gap.. Just an ol boys 2c.Forge on and make beautiful thingsJim Quote Link to comment Share on other sites More sharing options...
norrin_radd Posted April 16, 2015 Author Share Posted April 16, 2015 Frosty, thanks for the positive critique of the video. I'm not a wizard or anything but the videos are pretty fun to fool around with, just learning that too.Frosty, Jeremy and Jim, thanks for all the info and advice. I really appreciate the pointers and it gives me a lot to figure on but I think I get what ya'll are saying.Jim, you are right I need to do some more drawing on these doors. Everything on this shop has been done on the fly in the field. I have this vision in my head, but I think I need to get some lines on "paper" for these. thanks guys, guess there may be a "Shop Doors Part 1.1" Quote Link to comment Share on other sites More sharing options...
Frosty Posted April 16, 2015 Share Posted April 16, 2015 I understand the pictures in your mind and needing to get it out in the light. I keep graph paper handy for exactly that purpose, colored pencils are really handy if you have different components or systems over laying each other. Say, walls, electrical: lights and outlets, 120v & 240v. It's a snap to sketch in a legend in the color and it really helps keep stuff straight.Graph paper makes scaling really easy, you can sketch and later put it in CADD or enlarge or shrink it to need. The only reason you might need a ruler is to draw a straight line that isn't part of the grid. I keep a compass handy too, it has a silver streak for a pencil, I don't just use it on paper you know. 3D CAD rendering programs are neat but can really mess a guy up when what we really need are 6 plan drawings and ONE elevation. I messed with Sketchup for a week trying to draw a simple box I could haul my tools to demos in. Nothing fancy, 2' wide x 3' tall x 1' thick. casters on one end and a retractable handle on the other so I can roll it to and from the pickup then lever it in or out with the handle. Oh baby, Sketchup would let me render it with wood grain texture, brass hardware, animate the lid, handle and wheels. None of it of any use at all, I needed a simple plan view and a couple elevations. took me maybe an hour including three complete re-draws.Remember when CADD was faster and easier than T square, triangles, scale and pencil?Sorry for the rant, I just get going sometimes. Must be the old fart in me eh?Frosty The Lucky. Quote Link to comment Share on other sites More sharing options...
norrin_radd Posted April 16, 2015 Author Share Posted April 16, 2015 (edited) I understand the pictures in your mind and needing to get it out in the light. I keep graph paper handy for exactly that purpose, colored pencils are really handy if you have different components or systems over laying each other. Say, walls, electrical: lights and outlets, 120v & 240v. It's a snap to sketch in a legend in the color and it really helps keep stuff straight.Graph paper makes scaling really easy, you can sketch and later put it in CADD or enlarge or shrink it to need. The only reason you might need a ruler is to draw a straight line that isn't part of the grid. I keep a compass handy too, it has a silver streak for a pencil, I don't just use it on paper you know. 3D CAD rendering programs are neat but can really mess a guy up when what we really need are 6 plan drawings and ONE elevation. I messed with Sketchup for a week trying to draw a simple box I could haul my tools to demos in. Nothing fancy, 2' wide x 3' tall x 1' thick. casters on one end and a retractable handle on the other so I can roll it to and from the pickup then lever it in or out with the handle. Oh baby, Sketchup would let me render it with wood grain texture, brass hardware, animate the lid, handle and wheels. None of it of any use at all, I needed a simple plan view and a couple elevations. took me maybe an hour including three complete re-draws.Remember when CADD was faster and easier than T square, triangles, scale and pencil?Sorry for the rant, I just get going sometimes. Must be the old fart in me eh?Frosty The Lucky.Yes I do. I'm not that good with Sketchup either, but it is a good program, its challenging. I tried some CG video with it, posted it in my mace post. I'm an AutoCAD dude to the core. I didn't do much CAD drawing for my shop though, a few pencil sketches on scraps is about it. Like I said most of the shop was done out there just looking at what I had to work with at the time, I got lucky and it has worked so far. I've been thinking about these hinges for a long time, now I need to focus on the doors before I get out there and get into it. Just got to take my time I guess. Thanks for the input. Edited April 16, 2015 by norrin_radd Quote Link to comment Share on other sites More sharing options...
Recommended Posts
Join the conversation
You can post now and register later. If you have an account, sign in now to post with your account.