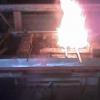
Eddie Mullins Posted November 9, 2013 Share Posted November 9, 2013 I have wanted a Guillotine tool for some time. Seen lots of designs, couldn't decide what I wanted to do, so today I just picked the most suitable material I had on hand and started at it. I think the design is similar to one I saw on a Blueprint here. No stabs at my sloppy welding please : ) . I ran out of wire so did not finish and have not cleaned it up yet. Stock I believe is 5/16 x 1 1/2. It has a 3" wide opening and stands 6" tall. I plan to put it in the hardy so that it sits in about the center of my little anvil. Next step will be making dies (and finishing up the welding). Any other feedback or suggestions welcome, particularly on die shapes, materials and fabbing. For my first go round at a tool of this type, I'm pretty pleased. Can't wait to use it. Quote Link to comment Share on other sites More sharing options...
John B Posted November 9, 2013 Share Posted November 9, 2013 Hi Eddie, couple of things to query, 5/16" seems thin and limits the uses you can put it to. Secondly, access to hit the top tool, you are going to have to be pretty accurate with the hammer blows between the side pieces, and you will end up burring over tthe top of the blade. I would suggest trimming off the top end and use this tool for small work, then make a more comprehensive one later. The benefit of these tools is you can have a variety of tooling for just one tool This is one I used and found to be satisfactory for my requirements, the dies are 2" x1", as I find those more useful for tenons, rivets etc than the 1/2" or 3/4" more commonly used, I also find it easier to use at the 45 degree angel to the anvil face. The dimensions are on the pics are for an updated version, using single side plates, This one shown was a trial I made many years ago, You can see where I modified the original one with bits of straps welded across to strap the sides together rather than leave open like the one you are making, and it is still in use today, feel free to use them if you wish, or ask any questions. The base where it locates in the hardie is a piece of flat bar that fits across the corners of the hardie hole, this also means I can use it in a vise if I go to shows or competitions etc without my usual anvil (more versatility, less tools needed) Quote Link to comment Share on other sites More sharing options...
Eddie Mullins Posted November 9, 2013 Author Share Posted November 9, 2013 Thanks for the feedback and pics John. I looked through my notes, BP0065 was my initial inspiration for this design, although my assembly is quite different. I guess I should have looked at it again before I made it LOL. I did go too tall and will shorten this one. I also agree this set up will probably be best suited for smaller stock but that is what I am primarily using now. I do plan to weld a thicker piece to the top for hitting on, as well as adding thicker material for most of the top and bottom dies with the 5/16 basically serving as the guides. Perhaps your beefier design will be round 2 : ) . Quote Link to comment Share on other sites More sharing options...
windancer Posted November 10, 2013 Share Posted November 10, 2013 You won't believe all the things you use it for once you have it done and remember that it is available :) Dave Quote Link to comment Share on other sites More sharing options...
Chinobi Posted November 10, 2013 Share Posted November 10, 2013 Are you planning to use that stock in the photos as your die stock? It seems like having your die wider than it is tall may make it unstable in operation. For instance, an off centered blow that impacts on the right side (for instance) will cause the right side to experience more force and will drop more than the left. This is compounded by the stock which acts as a fulcrum and can force the upper die to rotate in the channel rather than just sliding up and down. If your die is taller than it is wide it will be supported on a longer length and cannot jackknife in the groove. Seems like that stock would lend itself more to the construction of a swing are fuller, where one side is pinned rather than the freely traveling guillotine. Other than that looks like a good tool, and very serviceable once you get the top knocked down or the die built up so you have clearance for your hammer to not clip the rails. Quote Link to comment Share on other sites More sharing options...
Eddie Mullins Posted November 10, 2013 Author Share Posted November 10, 2013 More good feedback. I was planning to use this material for the dies, but with other material welded on for the desired shape. I realize this is not ideal, but is the material I had available and I wanted to avoid buying a 20 ft stick of something before I even knew what I wanted. Since this stock was in hand and no use planned for it, I consider this at worst a learning exercise. I was trying to provide flexibility by making it as tall and wide as I did, but see that this does pose some challenges or possible issues now. I may very well just build another, but want to put this version to some use at least first, as I have never used one. One thought I had was to maybe and additional bottom dies as spacer to allow for height adjustment, at least while I am feeling things out. Quote Link to comment Share on other sites More sharing options...
jeremy k Posted November 10, 2013 Share Posted November 10, 2013 Eddie - your on the the right track, you are the one that will be the first to know what you like/dislike about this project when you use it. We all work on slightly different projects, so each needs slightly different needs. Once you have a tool like this - you will "find" uses for it because you have the base tool - it's just making a different set of dies to do what you need. Have Fun. Quote Link to comment Share on other sites More sharing options...
DWyatt Posted November 10, 2013 Share Posted November 10, 2013 Eddie, I don't have a lot of experience in this yet but that sparked a great idea for me as well. I was just looking at these and they're a little out of my price range atm so I appreciate the pics. I might try to do something like this in the near future. Good luck with it and please post your end results. Quote Link to comment Share on other sites More sharing options...
Chinobi Posted November 10, 2013 Share Posted November 10, 2013 You could weld two pieces together to double the height. That will reduce any jackknifing and bring the die height closer to the top of you guide so you won't have to cut it down so much. Quote Link to comment Share on other sites More sharing options...
Recommended Posts
Join the conversation
You can post now and register later. If you have an account, sign in now to post with your account.