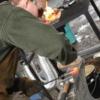
June 19, 201313 yr Hello, so I made my first rose a few days ago and ran into a bit of a problem. I was using 1/4 in round for the stem and the holes in the rose blanks were also 1/4 in. I needed some kind of shoulder the blanks would rest on and rivet the top over them so I just upsetted a bit of the bar about an inch from the end. This worked ok but I ended up torch brazing the bottom piece onto the bar just to secure it better. Is there any other way of doing this? What is everyone else doing on their flowers?
June 19, 201313 yr I start with 3/8" round, draw out the rivit part, and then draw out and texture the stem. I leave the 3/8 as is at the connection, and actually drive it into a 1/4 hole to get a good shoulder. I usually MIG weld the "star" part just to make sure I have a good connection that will not move later. I also leave the 1/4" rivit part a bit oversize and not round, and have a made a tool to drive the layers of the flower down.
June 19, 201313 yr I use 1/4" but will MIG a washer and 1/4" bolt to the end. Weld enough on the backside of the washer to form the 'rose hip'. stack and stager your rose petals and use a lock washer and nut to secure. I cover this with a piece of felt to hide the nut, bolt, and washer. The felt holds the rose oil better. Then I pose the petals and color with the torch. I have a few pictures of this in my gallery. Forgot to mention I make copper roses and this is how I attach to stem. Steel roses can be done this way also if you wish
June 19, 201313 yr I use 3/8" round upset on the end where a square-section tenon is forged. I lose a little material when forging the tenon. The holes in the calyx and the petal centers are square, and when the tenon is peened up, this keeps them from ever twisting. Sayings and Cornpone "I can read readin', but I can't read writin'."
June 19, 201313 yr I forge weld a piece of 1/4" square stock around the stem and then shaping it. This gives a good solid base to seat the rose components against. I learned this from Mark Aspery's Youtube video:
June 20, 201313 yr Author Great thanks for all the ideas, Im going to try some of them this weekend and see how it goes...
June 21, 201313 yr Gary Huston [on you tune] actually drill the end of the rod, threads it to the bottom of the hole, then uses a screw to hold everything together. I square the end of the rod and drive the petals with their round holes over the square rod. This prevents things from turning and peening the end down locks everything up solid. Hate doing the final shaping and having a set of petals come loose. Those end up landing at the far end of my shop. Pick a way and try it for several roses. If you are happy keep that way. if not, select another way and try it for a few roses. Where are the PICS!!!!!!!!!!!!!!!!!!!!!!!!!!!!!!!!???????????????? Dave
June 21, 201313 yr Author Great ideas by all of you, thank you. And another question for all of you, I've been buying the rose blanks from blacksmith depot or pieh co tool, is there any way to get them cheaper? how hard is it to make them? I have a cutting torch with some really small cutting tips. Do you think that would work if I just bought some thin guage steel plate?
June 21, 201313 yr There's a seller on ebay that usually has them for sale. http://www.ebay.com/itm/BLACKSMITHING-ROSE-BLANKS-12-Sets-Flowers-Blacksmith-12-Flowers-Roses-Forging-/281120439345?pt=LH_DefaultDomain_0&hash=item4174157c31 I have a plasma cutter and 18 ga steel in my shop and I still wouldn't try cutting my own when I can buy these instead. For the amount of time and consumables required, I would rather buy these blanks for under $5/flower.
June 21, 201313 yr Author awesome thanks for the link, I think that sounds like a much better option....
June 21, 201313 yr Do both! Buy some and make some. When you use someone else's stuff it give you a starting point. Then cutting out your own gives some more parts of personality. There are lots of things to be learned here. Such as keeping your plasma unit in tip top alignment, as well as holding your torch properly while passing over or next to a previous cut. Sounds simple un til you cut out a hundred petals and leaves. Cutting out the leaves is only part of the tricks...when assembling you find out just how much metal is really needed and what is not required. The store-bought ones are great to work with but you will not be learning "why" to shape a petal a certain way. And removing the small amount of slag stuff from a properly set up plasma does not take too long. But it does take a few minutes. Some of my friends think hiring a cnc waterjet to cut multiple layers of the same outline is "the" way to go, especially when cutting copper roses. In a few weeks I will know. But this is for certain, if you desire different shaped leaves for your project the personal plasma is a nice tool to use. If you want to do it differently you may go back to a sharp cold chisel. Carry on
June 23, 201313 yr Author And that brings up yet another question, how different is copper to work with vs steel. I like the look of copper but I have never dealt with itin terms of forging or brazing. Can a standard brazing rod work to braze it to a mild steel rose stem? I have the oxy/acet welding torch and proper tips to do it, Im just lacking the experience.... Also where do you all get your copper from?
Join the conversation
You can post now and register later. If you have an account, sign in now to post with your account.