Absinthe
Members
-
Joined
-
Last visited
-
""" You know if you wait to mount your angle you'll have to BUY the hardware!! """ What? I can usually figure out autocorrect stuff, but I am seriously having a hard time figuring out what you were trying to say here. Actually, now I have to decide if I am going to mount my anvil and vise on the same contraption, or each individually. But since I have a bench vise and not a post vise, I am wondering if I might now wait until I find a post vise I can afford. I thought I wanted to try some twisting with the vise that I have.
-
Thanks, Frosty. (Doing a cruise in August up your way, not sure if you'll see me wave or not ) That sounds like a reasonable way to do it. Every time I see the 3 legged portable ones, they look sooooo wide, seems over compensated, (or perhaps just camera angle) since a short round log appears not to tip over, I can't imagine feet needing to be wider than that. Anyway, I have a greenhouse to build before I will be getting back to this anyway.
-
This is the 66lb Vevor. The base flairs in a way that would be convenient enough to secure with some angle iron or strapping. I just haven't done it. Nor have I taken the advice of just using some silicone to stick it to the log. As I mentioned, the log seems to nicely stay put on my pavers without any assistance. So I may simply add some silicone under the anvil and see if that stays put. Currently my vise is a 6" pony bench vise. I attached it to a chunk of 2x8, and for other purposes I would place it on a bench and clamp it down rather than permanently affixing it to anything. It is not my first choice for use in the forge, since I am still keeping my eye out for a post/leg vise, though I haven't found one I can afford yet. This was intended to replace a smaller 3 or 4" one I use in the shop for holding stuff to cut with a hack saw or cold chisel. Or to hold things while I angle grind them. Interestingly enough, that one is simply attached to a piece of plywood and sits in the top of a rolling tool cart. It is just a bit small, and over the years the jaws don't meet all that well anymore. But it is still fine for what I use it to do. So ultimately whatever I do with the pony will be temporary at least until I can get a reasonable deal on a leg vise. I do have some 4x4 wood left over from several outdoor projects, and putting together something that could mount that vise is probably going to happen sooner rather than later. Who knows, perhaps a vise on a dedicated stand is something that would make sense in the indoor shop anyway. The only thing, I kind of wish it had a spring of sorts. The runout on the lead screw makes it tough to use with one hand quickly. Perhaps that is a complaint for the Pony Jorgensen folks on their design. Anyway, I had a local fellow come out to the shop to give me some pointers. He hated that the anvil was on a log, and was quite strong in his suggestion that I make a metal stand or it. I am not one to ignore advise, especially when given face to face. Since I have several pieces of 18"x18"x 1/4" sheet stock laying around from which to cut a mounting plate, it sounded like a simple enough project if I could find something to use as legs. I picked up 10 or 12 of 1/8" walled (maybe 3/16) 1-1/2" tubes that had been miscut to 30 something inches for like $12. I figure if I put an angle on them and slap the magnets against them it would go together pretty fast. Worst case, if they are not heavy enough, I could probably double each one. I have enough other scrap that a stretcher would be no big deal. All in all it seems like a simple enough project. And it will be good welding practice Lord knows I can use the practice.
-
Now, just to be clear the 18 degrees is from the center of mass. As well it is the minimum and I think it is relative to "static loads", certainly not accounting for bending forces, or possibly not even for striking force. When I see those tripod farrier stands that I think look so cool, the legs all seem to come together at the extents of the mounting plate. I am currently using a cherry log. But the anvil is not attached by anything other than gravity. Nor is it stuck to the ground with anything else. I don't have so much issue with the log dancing, as the anvil itself seems to walk across the top of the log and needs to be re-centered from time to time. I have a benchtop vise that I had mounted to a chunk of 2x8 but there was a log I placed that on, and there was no satisfaction in that at all. So, I decided I will be needing to build a stand for that vise at least. I thought, while I am at it, make another one for the anvil. Although I have seen ones for farriers that have both the anvil and vise attached to the same stand. So, I am considering that as well. Funny thing, while looking for images, I find that they sell aluminum stands for anvils. That struck me as odd in a non-intuitive sort of way. I would never have even considered aluminum. I think, pretty soon we will all get to see how bad my mig welding skills are. It will definitely be interesting to see what kind of penetration I can get on 1/8" walled tubing and 1/4" plate steel.
-
Okay, I found my notes. Since no one answered, I will assume that either no one knows, or at least doesn't know well enough to explain it to a 5 year old In case anyone else would like to design something top heavy that won't tip over I will put enough of an answer here that it will jog my notes. To start with the magic number seems to be 18 degrees. And, it is really that times 2. Here is the concept 1. determine the center of mass for the item, for example if you wanted an 10" tall anvil on a stand that placed the top of it at 30" off the floor, it would be ~35" assuming the stand had no weight to contribute. That assumption will simply place the center mass higher and calculate a base perhaps a little wider than necessary. Let's just call it a safety factor 2. Making an 18 degree right triangle the height of the center of mass in both direction for 2d or conically for 3d will make the minimum stability circle. You can do some calculus or trig to calculate this, or simply draw it and measure. (I simply use Inkscape) In this example the base would be 11-3/8 from the centerline out. So the base width would be almost 23". (A circle with a radius of 11-3/8) 3. All leg points in contact with the ground need to fall outside of the above height. Regardless 3 or 4 or more legs, or full block stand. The implications are that wherever you attach the legs will actually determine the splay angle. In theory, if the mount plate were as wide as the stability width then you could have zero splay legs at the outside corners zero splay. As the mount points for the legs move more towards the center the splay will increase. Since the mount plate is below the center of mass, then it would be potentially possible for the splay to reach beyond the 18 degree point. 4. This really only gets trickier when what you are trying to put atop the stand is significantly taller. That would raise the center of mass requiring a wider stability circle. But I digress. For short items (relative to mounting height) like an anvil, swage block, or a lathe (where the original calculation notes came from), one might simply assume the "center of mass" is actually the top of the item, and work with the wider base that such would calculate. Fudge factor/safety factor if you will Hope this helps someone else.
-
Is there a formula for the leg angles when making a 3 legged anvil stand?
-
This is a 2 burner gas forge from vevor. They include a 30psi regulator on a rubber hose to connect from a propane tank to a central yoke that feeds the two burners all directly vertical to the forge body itself. When I place the tank a reasonable distance from the forge it does stretch the hose laterally away from it, but I always feel like it is getting heated, especially since baffling the back and front... The dragon tends to breathe in its general direction. I do have a ceiling but would need a longer hose in order to hang it up. If I buy a longer hose does the steel braided one offer any benefit? I am outside so I have considered it as a deterrent to critters snacking on the hose in general, but I wonder if it offers any heat shielding? I am also considering yoking multiple tanks to perhaps avoid frosting, and could be looking for all sorts of hardware to accomplish that so hard plumbing may also be a possibility. Ideas? Suggestions?
-
I am using a 2 burner vevor forge with 20# propane tanks like one might use with a gas grill or patio heater. Once the tank gets down to a certain point the outside lower 1/4 of it frost's and eventually the pressure noticeably drops. I have some thoughts, and have received some suggestions. 1. Use larger tank like 100# or at least 30# The cost of a tank seems pretty high, and the idea of schlepping the bigger tanks to get filled in my Prius make me feel as though, this may not be an immediate option. Besides, I currently have 3 tanks dedicated to forge use, and one other available if needs be, since we really only use it for our patio heater at Thanksgiving. So this is a maybe someday, but not right now. 2. Put the tank in a water bath I have done similar with canned air. It is messy, and I fear when the weather cools it will be more trouble than it is worth. Now that I am refilling rather than exchanging tanks, I am also not wanting to rust or otherwise damage tanks any sooner than necessary. 3. Use a bucket warmer "band heater" (like an electric blanket but made for buckets) I currently don't really have any electricity at the forge. I am also reluctant to have an active heat source associated with a propane tank. It seems wrong and potentially dangerous. 4. Use a wye or tee to connect 2 or more tanks should reduce the speed of the flow similarly to a larger tank. This sounds good in an intuitive sort of way. I don't know for sure but it sounds like a good idea. I'd love to hear from someone doing this successfully. Even with the suggested hardware configuration. Other ideas would be helpful or information/experiences about these would be cool too.
-
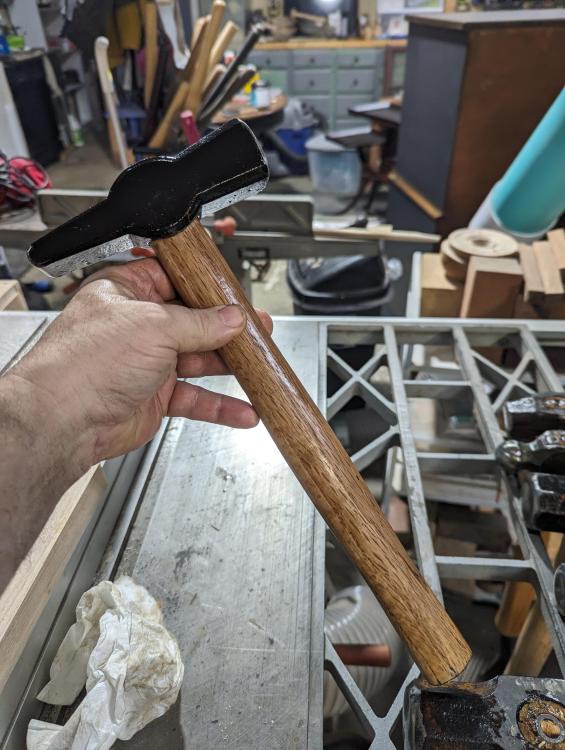
I missed the engineer. You can't really tell the one round face from the finished picture (top) but the pre-handle replacement (bottom) shows the profile pretty well. I did it by eye so I couldn't say for sure, but maybe a 10 or 12" radius?? It does move stuff pretty well for its size, so I find myself reaching for it. I have a second one of the Piccard style ones but as the replacement, the handle is definitely mounted well. Unfortunately, the cross peen is almost squared off flat, and the face, although they are calling it a round-square will be seeing some spa time with the angle grinder before I put it into service. For now, it sits next to my work desk in my office.
-
The ID on those tubes is 1" before the flair. They are 1-1/4 OD and the walls look less than 1/8 so it might be 1-1/8 ID but I don't have a good way to get calipers at it to be exact. Also back in my pictures of the steel, my last image was something I picked up. I think it is a drill or something that you drive with a hammer? Anyway, I kind of assumed it would be similar to a jack bit. I think it was $0.50 so there's that
-
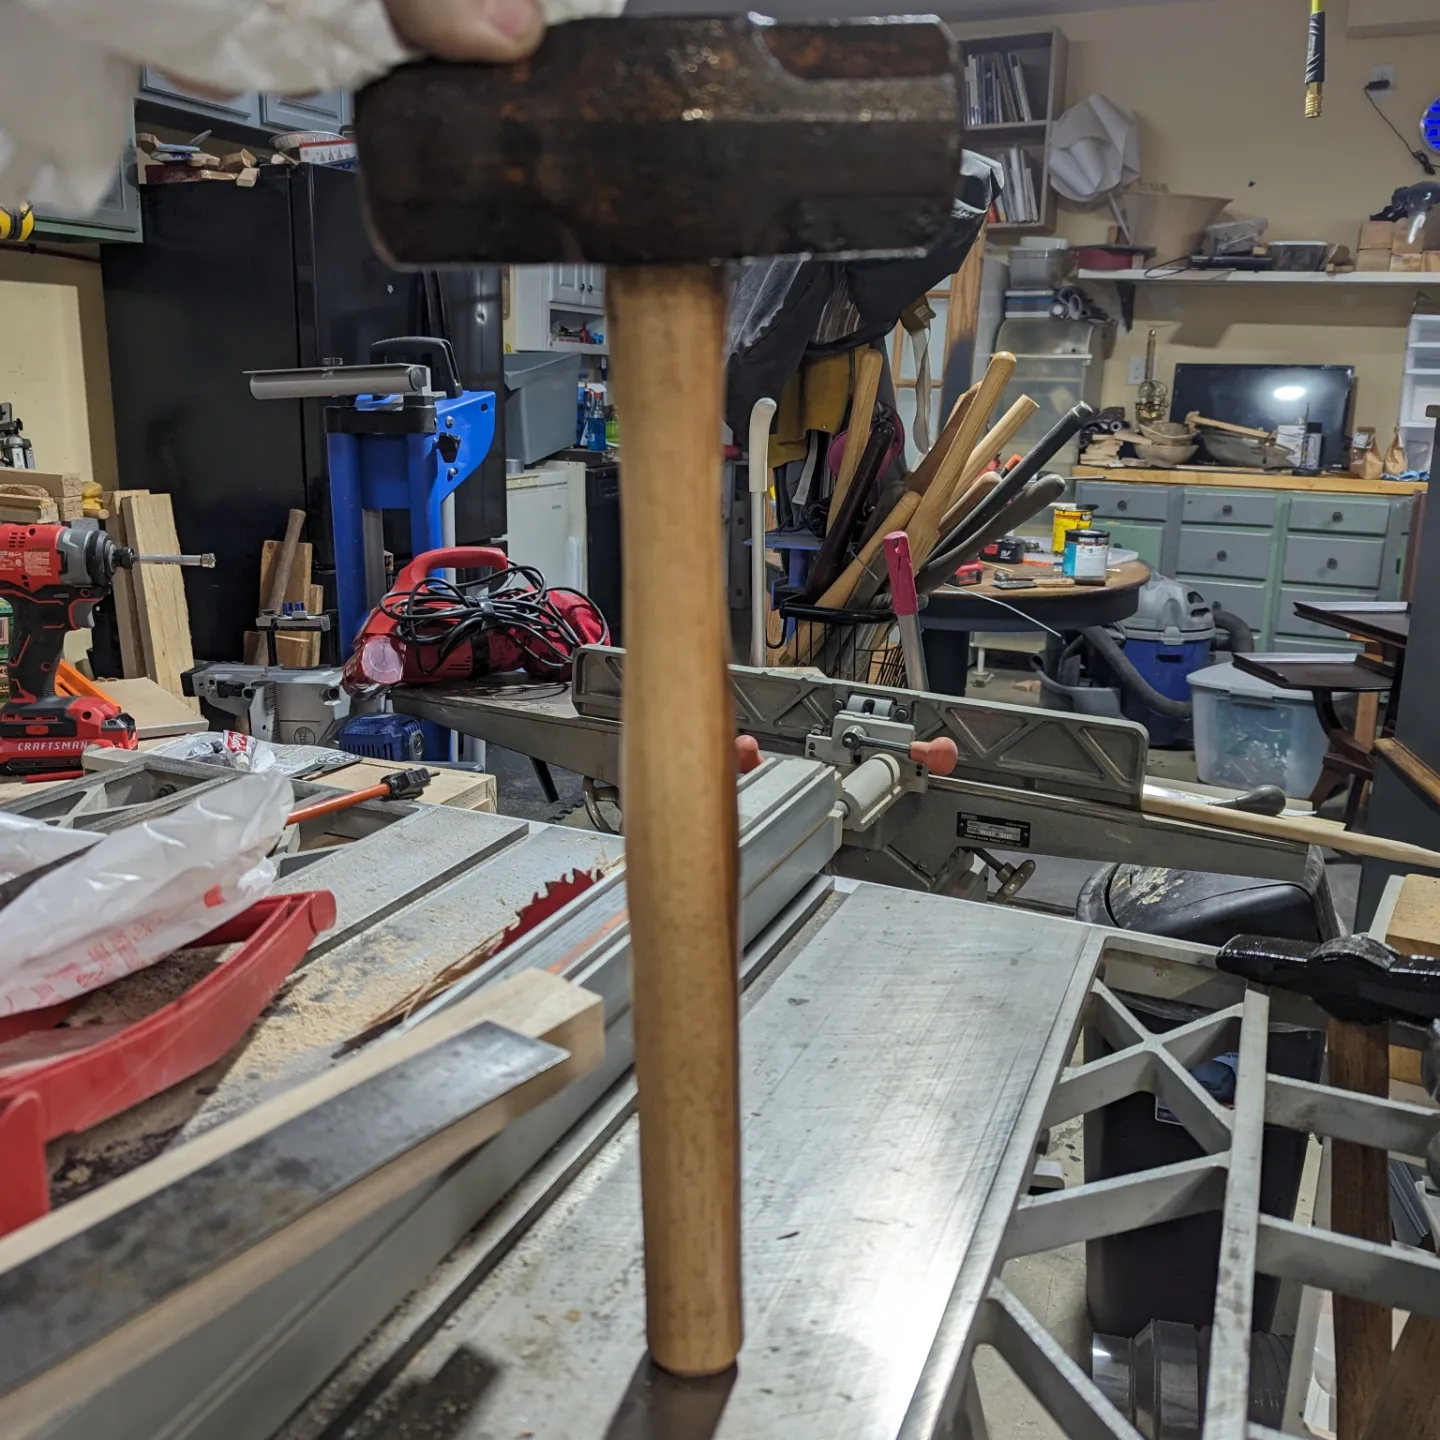
Here is a quick tour of the 4130/4140/4150/1045 then lastly the S7 and then all the odflot 1018. The biggest rounds of 4130 are 1-3/4. Most of it I just put the hook rule against. As for hammers I have from a little under 2lbs up to 8lb. Several are cross peen in the 2-2-1/4 range. One that I am enjoying is an engineers sledge in the 2+ range that I flattened one face and rounded the other. I find myself reaching for this often. 32oz ball peen that I polished and flattened one face. 4 lb sledge that I polished and flattened the faces, and a 7.something lb sledge head that I assume some day I can convince someone to come swing with me as a striker. All in all I have 10 dedicated to this space and one more ball peen that I think is around 24 that lives in the wood shop but I could bring it out if needs be. All the ones in this "area" have been re-hafted, and the handles stripped of any varnish and had lots of BLO applied over several days. As well their faces are all polished, profiles, and shaped one way or another.


-
I will keep my eyes open. My hardy is only 3/4" . I have stuff that big or bigger in all the metals I have. I have even considered some of the stuff I used for these huge tongs. I was kind of hoping I could do it with the S7 or the 41xx stuff. I do have some reasonably thick rounds of 4130 that I was hoping to make a hammer from, not to mention a good couple chunks of 1045. But first hammer eye punch and drift.
-
the 4130 seems to move okay. I have done a few things with it so far. Punches and chisels and stuff. I have not tried to do anything with the S7 yet, but I got it because it was one of the listed steels that was supposed to make good tools. I just haven't even tried anything with it. The stuff I have been having issue with is the 1018, and I honestly believe that is because I am starting off with too large of a piece, and as you know my fire was not cooperative. And 1018 is my current focus until I am ready to do a hardy tool or something of that nature. But I am also considering simply fabricating something along those lines. For now, I have a railroad spike that I have been using as a hot cut. Seems to work okay, and still has a pointy edge so there's that. I assume for hot work in geenral, I can just use 1018 anyway, and just be prepared to keep dressing it and be ready to replace it sooner. I don't seem to have access to all these springs that people love to recommend. Perhaps some day, but for now, I have what I have, and access to what I have found. Seems like it should be plenty for a while. And if needes be, I have a big long chunk of 2x1/4 5160. For now, I just want to make some hooks and leaves and whatever other fluff all the beginners make, but I keep taking these little side trips
-
Can't change the email to my hotmail address. When I do it says it is sending a verification email, but it never does, and locks me out until I verify by clicking on that verification email that never arrives to my hotmail account. I have to change it back to my gmail email in order to get the verification email, and unlock the login. When I did this, it gave me an area to "contact us" or something like that where I messaged about it. But so far, no feedback. Oh, I am trying to draw those reins on the horn. And, I am finally seeing them move somewhat. I just got interrupted yesterday with my wife wanting me to go visit the neighbor, and the bottle running out of gas. I got one of them to start drawing out so it's working. I found a local metal place and they have a big drop rack. Most of it is 1018 and 4130. So, I grabbed anything that was 4130 in whatever shape or size was there. Then I grabbed the 1018 in whatever many different sizes and shapes I could because I had no idea what I was going to need, or what I would be able to work with, and so on. So, I have a bunch of various stuff. (I also met with another fellow that is like a drop picker that sells on marketplace by the lb and got a bunch of different S7 and some other 41xx and some 1045... and some other 1018). So, I have what I have, and it is a mess So I have just been grabbing stuff that "looked like it would work" and it is fairly obvious that I don't have the experience or frame of reference yet to do so effectively. I do have some 1/2 or 5/8 (can't remember right now) round bar, and I will probably use that for the next attempt. I just feel somewhat committed to these big ones. I think at some point I will decide I actually have enough and cut them off but not quite yet. Getting there. I will try other fullering. Like a regular red brick? Or a fire brick?
-
Long winded... perhaps we might share that trait. Anyway, unless the board changes how it works with my email, I will likely get banned before I get any good kind of warnings. So, now, back to forging I was able to draw out perhaps an inch or so maybe even two. The boss and nib are kind of ugly, but they are also still pretty thick, so I may get a chance to clean them up. This stock was pretty near 1x1 I think it is 1x7/8 or 1x3/4 ... in any event, I will complete these some day but if I try with this stock again I will visit the band saw and split that thickness first. I am guessing by the heft, that each side of these is well enough to make both tongs anyway. But I digress. Live and learn. I'm getting somewhere, especially that I have a little better grip on the heat aspect of this forge. Next, just ever so more control and I might not run through a bottle of gas so quickly.