Florida Man Metals
-
Posts
55 -
Joined
-
Last visited
Content Type
Profiles
Forums
Articles
Gallery
Downloads
Events
Everything posted by Florida Man Metals
-
Your right i should of told you to drink the acid and do the world a favor. You are gullible enough to believe anything. Tastes like kool-aid with the addition of the windex. Oh yeah I got some magic beans for sale as well....
-
Ignorance is bliss... Stay ignorant. No skin off my back.
-
They are trying to tell you not to listen to anyone. Trust but verify. Do your own research and then follow proven steps. The great thing about this site is anyone can say any dumb thing they want, but someone will correct them if they are telling you the wrong information. It is called peer reviewed work. You don't know enough to ask the right questions or the understanding to follow. I'm not trying to beat up on you. When you asked if you could stick your hands in acid I decide I was out. I know absolutely nothing about etching blades but I have a working knowledge of the procedures. You are hodgepodge different ideas together trying to make it work. Ever heard of two ways to skin a cat? You don't understand ph and no one is going to hold your hand and spoon feed you. For instance we are talking about neutralizing acid. We tell you baking soda raises the ph. Then you mention windex/ammonia which is fine and can also be used to neutralize acid as well. Ammonia is a base which will raise the ph of acid when mixed. Add enough base till you bring the acidity level to 7. See two ways to skin said cat. One way or the other. Not a combination. We don't have to guess who doesn't know what they are talking about. There is only one person i wouldn't listen to and unfortunately it is you. Any suggestions a member gives is an opinion that you should double check. I mentioned I wouldn't use hydrogen peroxide in any of your solutions. I maybe wrong, but did you verify? Research or understand why? This isn't just specific to you. It is for everyone. Always trust but verify. To keep yourself safe.
-
No worries, I explained the difference further up on the thread. Just add baking soda until it stops fizzing and you can dump it in the yard.
-
I can't help you with the finish of your blade. No experience. Others I'm sure can. I can tell you that you don't need to worry about the other metals in solution if you're essentially working with iron. A little rust never hurt anything. As to dumping the solution in the yard you can once it is neutralized. You want to add sodium bicarbonate/carbonate until it stops bubbling/reacting. You are trying to bring the acid up to a neutral ph. Don't dump it on anything you care about. Salt hurts most plants.
-
Nice tip about neutralizing/killing off your used acid solution George. Normally to eliminate other metals in solution you would use the series of metal reactivity. Pick a metal that is more reactive/higher up on the chart than the metals in solution. Put a piece of that metal in the solution. It will go into solution/dissolve and precipitate out all metals lower on the chart. Filter out the solids and then kill off the acid. For very acidic solutions I use sodium carbonate. I buy pool ph up from Walmart. It will take a lot of baking soda and many additions. Whatever you choose to neutralize the acid with add it slowly because it will bubble up very high. Make sure your contained has a lot of head space to keep from overflowing and spilling.
-
I haven't done any etching but I have pickled a lot of silver. What you describe sounds like a pickling solution I use vinegar and salt in an electric crock pot with heat. FYI if you mix hydrogen peroxide and hydrochloric/muratic acid the peroxide will act as a powerful oxidizer. I believe they call it piranha solution. They mainly use this solution to dissolve circuit board parts for gold recovery. Don't know about etching but I would suggest you don't use hydrogen peroxide.
-
Frankenburner, did you search Simond Store or Simone store?
-
why did my angle grinder stop working
Florida Man Metals replied to GhostTownForge's topic in Grinders, Sanders, etc
Not sure but have you tried to locate the part in Dewalt. Dewalt and Bostitch are basically identical. They are manufactured by the same company. -
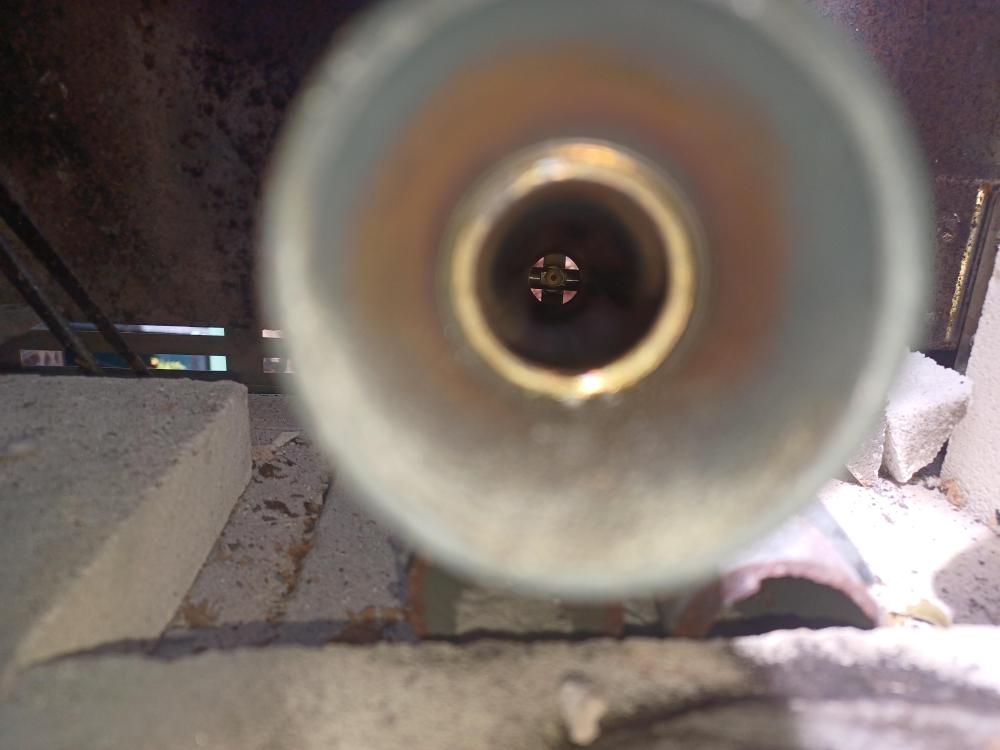
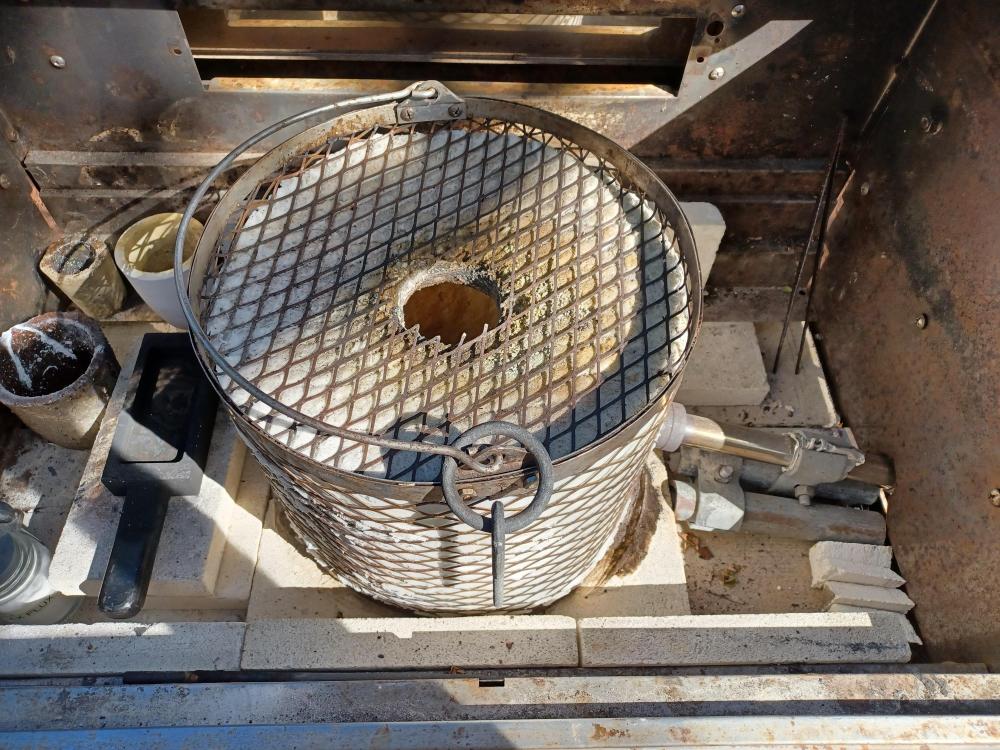
Frakenburner here is a photo down through the burner so you can see the orifice if you zoom in. The only reason I have direct impingement aimed at my plinth is because I was trying to use an existing hole in the grill body for my burner placement. No other reason. The tophat is two layers of one inch ceramic fiber blanket with ITC 100 for the flame face. I didn't attach it in any way. If you put the top in first and then the sides they will hold up the top once you rigidize the blanket. *Frankenburner * man I suck with names today
-
Good eye Frosty. I agree with your assement. Initially when I placed the burner through the grill body I tried using an existing hole vs cutting my own. So yes the burner is at an angle like you said. Me and my darn short cuts. That is why I put such a large plinth in it to compensate. The way the burner hits the plinth seems to give it sufficient swirl and hang time in the furnace. At some point I will reposition the burner thou.
-
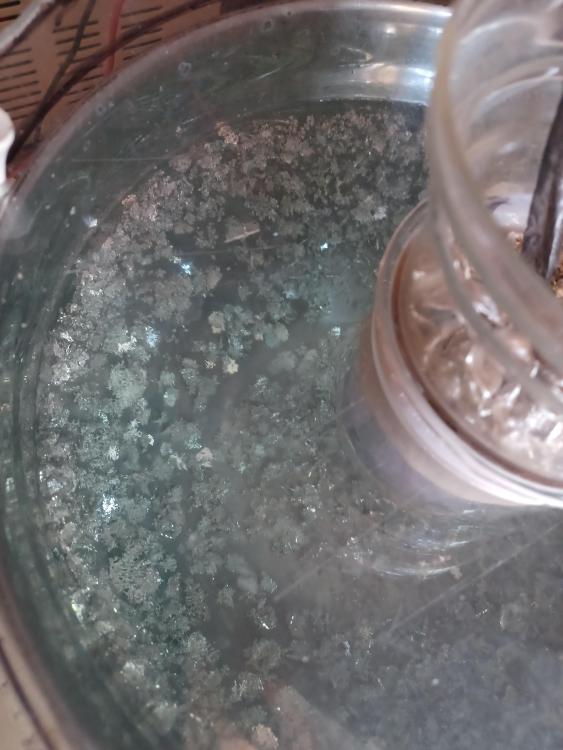
Yes George those are the pure crystals forming in the bottom on the stainless steel bowl (cathode). I generally start out with silver and copper nitrate as a byproduct of inquarting gold. I then use the series of metal reactivity to precipitate only the silver out of solution. To accomplish this I use copper bars that I pour and suspend them in the solution for the silver to plate out onto as the copper goes into solution. I take that cemented silver and melt it into impure shot to add to the top of the cell basket (anode). Once I run all of the cement silver thru the cell I will start adding scrap silver (.800-.925) to the cell basket until the electrolyte becomes to saturated with copper to continue. I then do a clean out of the pure silver crystals. They are easily scraped off and I rinse them thoroughly with distilled water. I then melt and pour them into shot or bars. The crystals aren't really plated onto the ss and are more of growing on the surface of it. If a jeweler is trying to silver plate something they use a silver cyanide as the electrolyte. If I need to sell the silver I pour it into bars and stamp them with a purity and weight on them and receive spot price at the pawn shop. They have an xrf analyzer and verify everything. On Etsy they charge a nice premium for the exact same hand poured bars that I produce. Those stories about florida man was the inspiration for my name. I suppose I should mention that I use pure silver nitrate as the electrolyte.
-
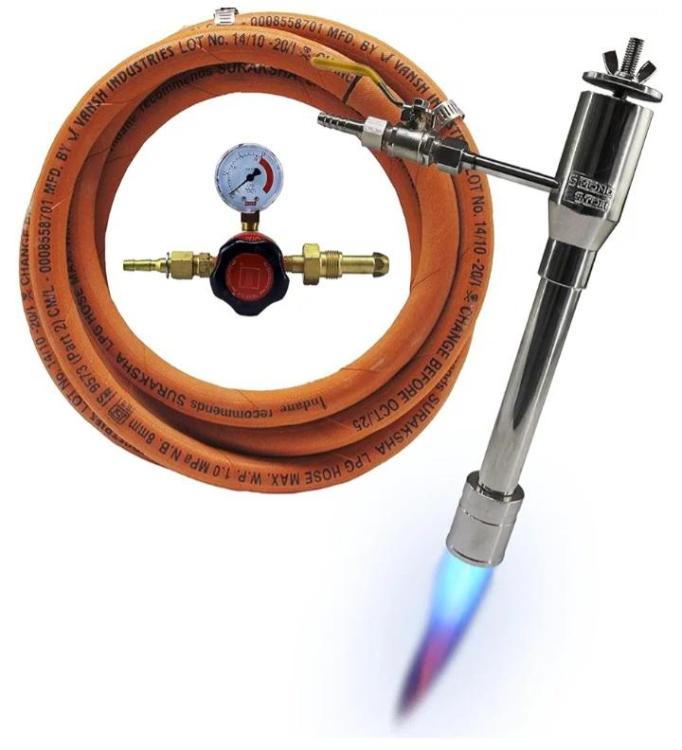
I appreciate the input Mickey. I wanted to share a store bought burner that was good enough and at a decent price for begginers. I felt this qualified as an option. I have no problems melting copper with this burner and haven't had any problems with it. It also came with a second gas orifice and a tool to replace it. Nothing compares to making your own burner thou. *Sorry I meant Mikey
-
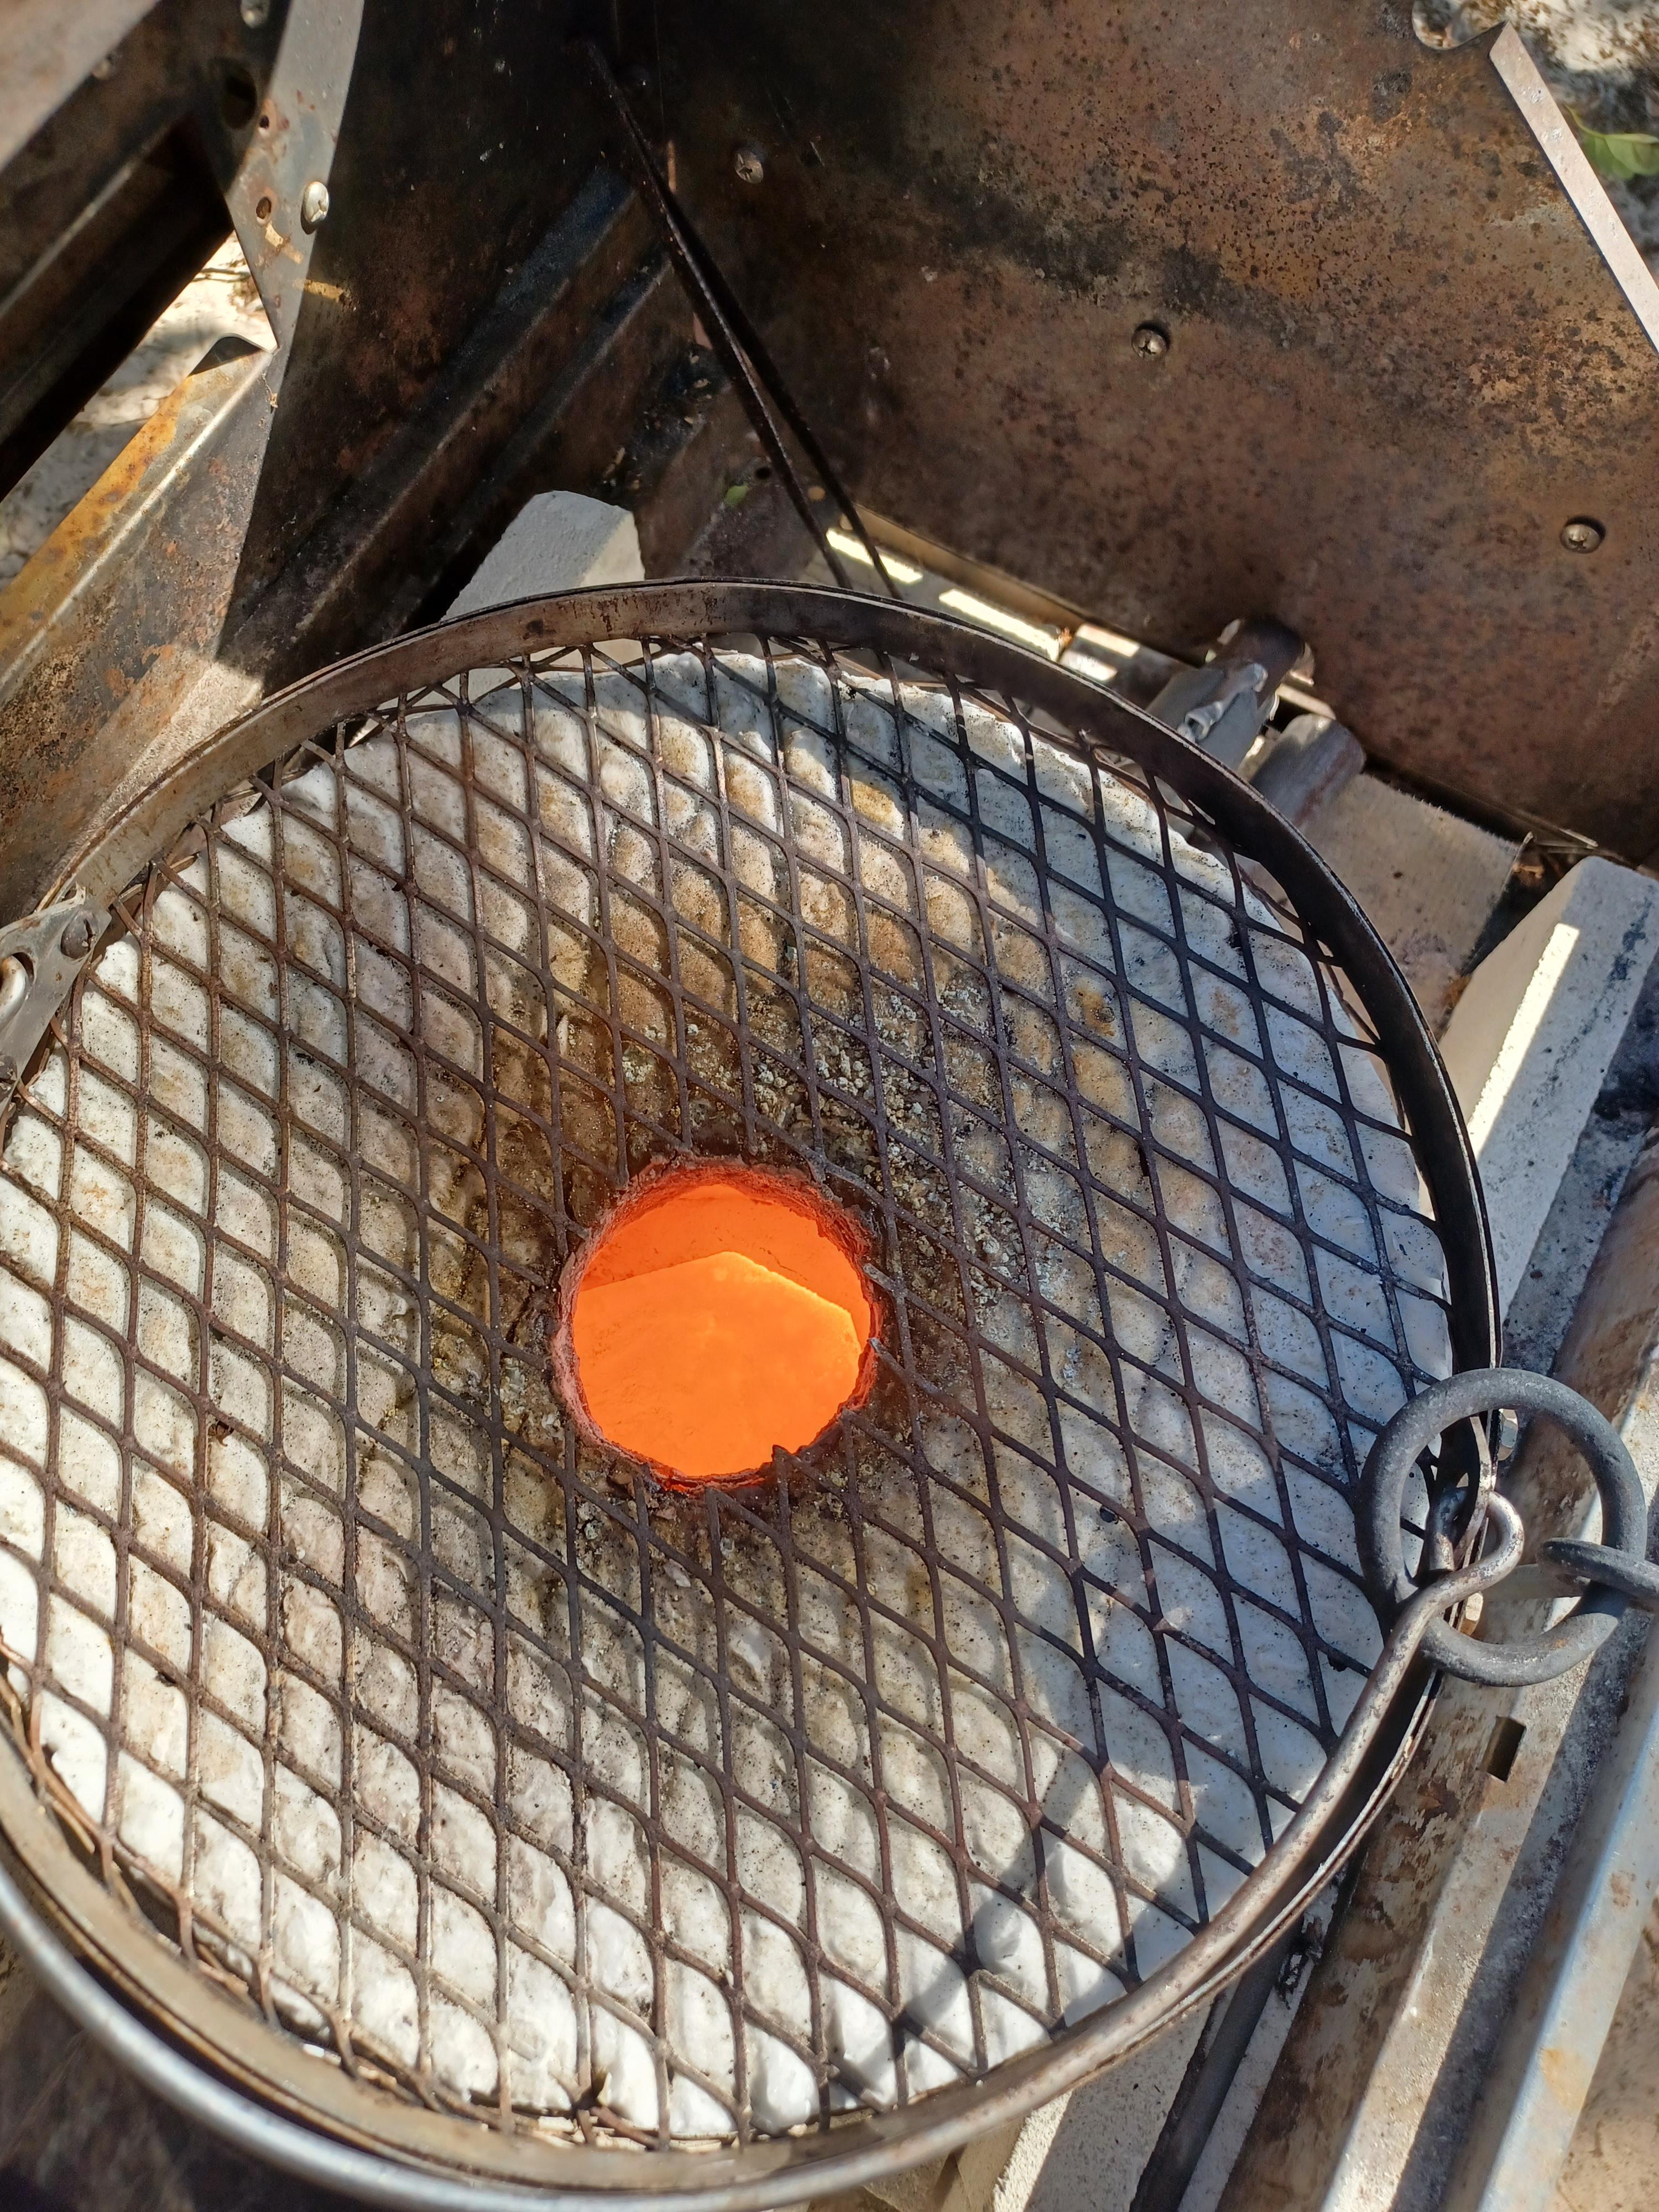
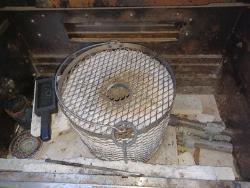
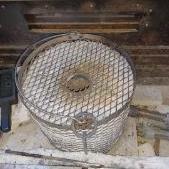
Since I was out in the shop trying to take some photos of my burner I figured why not show you what else I'm doing. Currently working on another run of my silver cell. Impure silver goes in the top and pure silver forms in the bottom. Electrolytic refining is the only way to make .9999 fine silver.

-
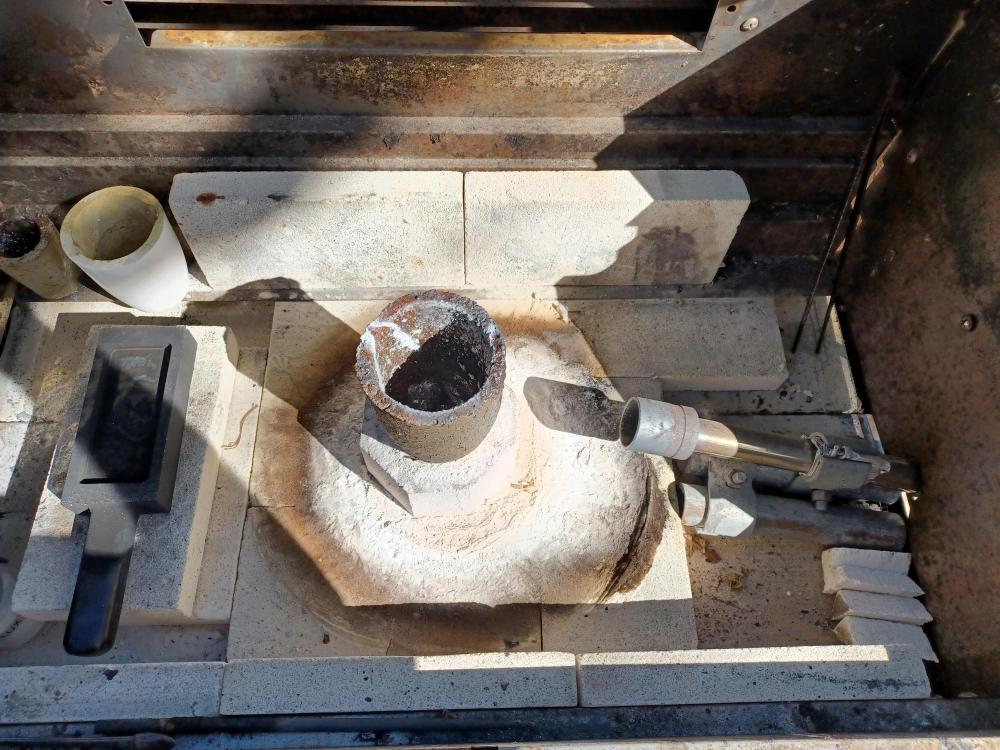
Tried to take some pictures of the burner but found it hard to capture well in the full sunlight and due to my design. The only decent photo I could get was it operating outside of the furnace, so no back pressure. Hard to get a photo thru the exhaust port. It was running for about 10 minutes in this photo. The burner was made in India. My furnace is a version of a Top Hat Raku Kiln. I built the entire thing in an old stainless steel grill body. It is all at a working height of around my belly button. Once the metal is molten I remove the furnace (top hat) and set it out of the way on a nice piece of steel. This allows for easy access to the crucible. Eliminates a lot of the unneccesary moving around of the crucible. Just pick up the crucible once, and pour it into the mold in one simple movement. The last two pictures I added are pretty much cold just to illustrate how everything works together.


-
I started reading some of this very long thread the last few days and still have much to read on it. I'm one of the people that just wanted to start melting metal and get out there. Just reading some of the exchanges between Mike and Jerry I can tell you it would take me quite awhile to get a grasp on making an adequate burner. Not a good burner but, an adequate burner would be all I could hope for. I didn't want to try and build one only for it not to work well and need constant fiddling. Although that is how I generally learn. A LOT OF TRIAL AND ERROR. The prices on pipe being rather expensive these days. I bought this one a couple of years ago for $85 dollars and came with a real regulator. It has worked well for me. It was all made in India. I would consider this the better bargain for the money for me. Kind of feels like cheating now. Like you gents mentioned I'm not sure that even if I did build my own burner that I would truly understand why I was doing what. Just following the directions would be all I could hope to accomplish. Like you folks said a good burner is one that works for you. This one works for me. I am curious as to what the actual experts think about this burner. It is sold on Amazon and says Simond Store on it. You folks have a much greater understanding of what the necessary criteria is for something to be called a good burner.
-
Since we're on the subject of proper terminology the only melter I have is a wax melter. Have you ever seen a tilt melter or assay melter? They are referred to as furnaces.
-
You can also place it in the area where you are casting as well instead of a sand box. I guess this would technically be considered the foundry?
-
Yes, the bottom of the furnace/melter. I hope your shop doesn't get hot enought to burn bone to ash. You would definitely need some crazy PPE.
-
It is important to protect your foundry from metal spills and flux. Putting a 3/8 inch or so layer on the bottom makes for easier clean up of any spilt materials and prolongs the life of your foundry. I used to use a layer of fine silica on top of my fire brick to protect them from spills. I recently switched to bone ash. It is much finer than silica and works better. More of a powder than a grain consistency. Technically the books calls for calcined bone ash. I used bone meal from Lowe's garden department. Initially it turned black upon the first firing, then turned into the desired white ash.
-
What did you do in the shop today?
Florida Man Metals replied to Mark Ling's topic in Blacksmithing, General Discussion
I read a while back that pyrite actually contains nanoparticles of gold in it. More recently I read about lithium being in pyrite. They are looking at it for industrial lithium extraction. -
Excavations at Sheffield Castle
Florida Man Metals replied to Scott NC's topic in Historical Ironwork
I was confused as well and realized I might have committed this fauxpar. The only difference that I could come up with was that he was the one that originally started the initial thread. Correct me if I'm wrong. -
The most useful blacksmithing ideas
Florida Man Metals replied to Glenn's topic in Shop Tips n' Tricks
I appreciate the time you took to research the coal question George. I mainly came to the same conclusion but figured I would ask the right person their opinion. I know you're a recovering geologist so who better than you. Like you said it is murky water when it came to trying to research online. Not to mention throw in the confusion about true coal or charcoal aspect and all the warning to get rid of any bags that have gotten wet only muddied the waters more. -
The most useful blacksmithing ideas
Florida Man Metals replied to Glenn's topic in Shop Tips n' Tricks
Goods you figured out my plan. Hey an asset is an asset. This coal question might be another misnomer like the back flash suppressor that Frosty schooled me on so I thought I would ask. -
The most useful blacksmithing ideas
Florida Man Metals replied to Glenn's topic in Shop Tips n' Tricks
George Do you have to worry about spontaneous combustion due to oxygen absorption from the air? The oxidation causes a hot spot deep in the pile possibly causing it to ignite. I don't deal with coal I use propane in my foundry? Just curious thought this would be the best place to ask others opinion.