OlavFairhair
-
Posts
10 -
Joined
-
Last visited
Recent Profile Visitors
67 profile views


-
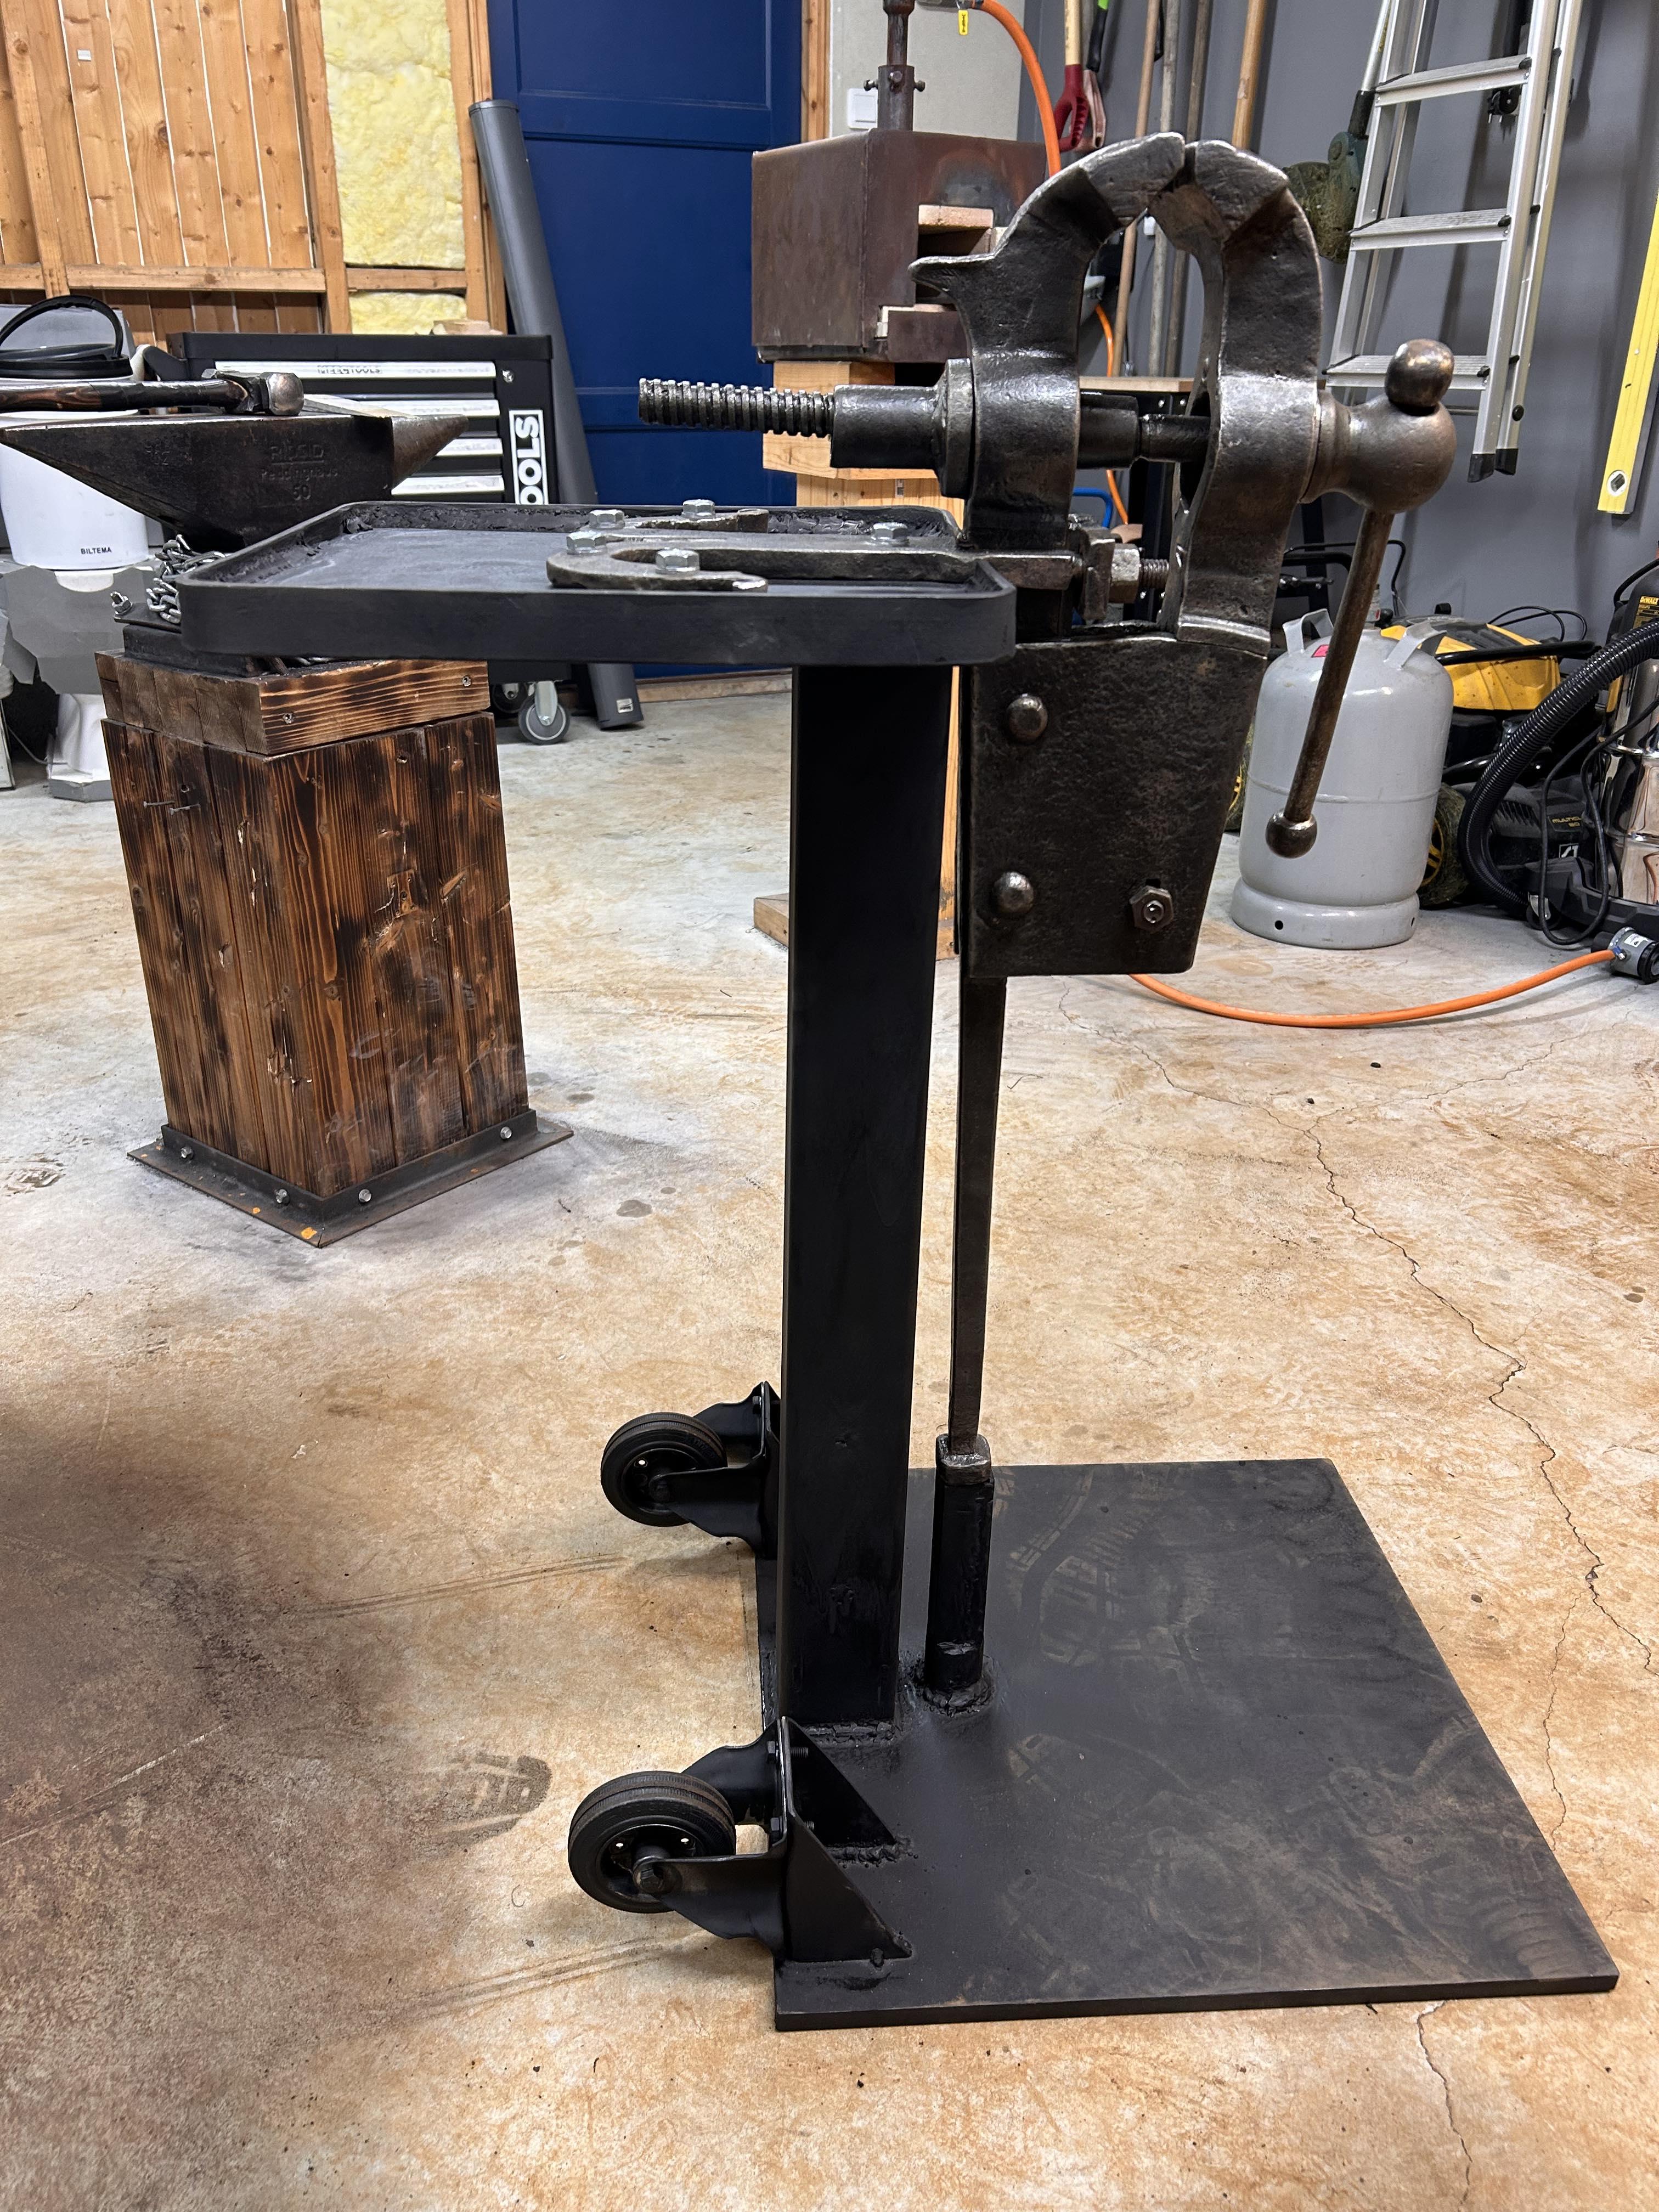
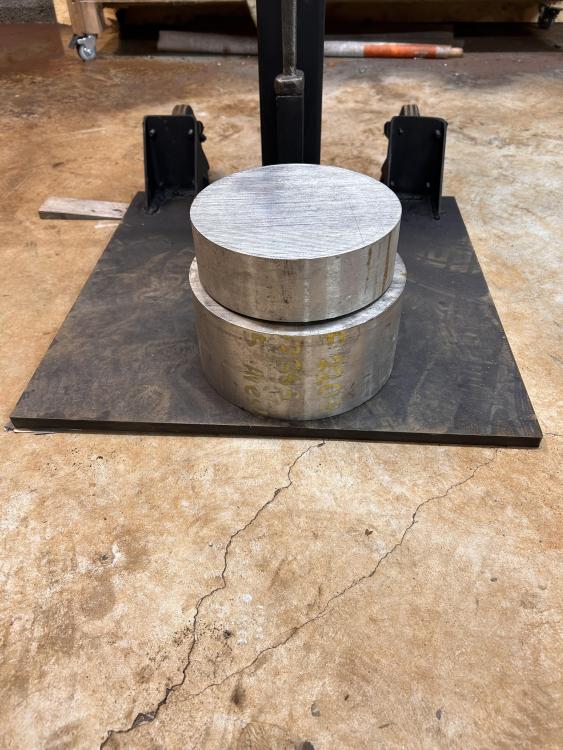
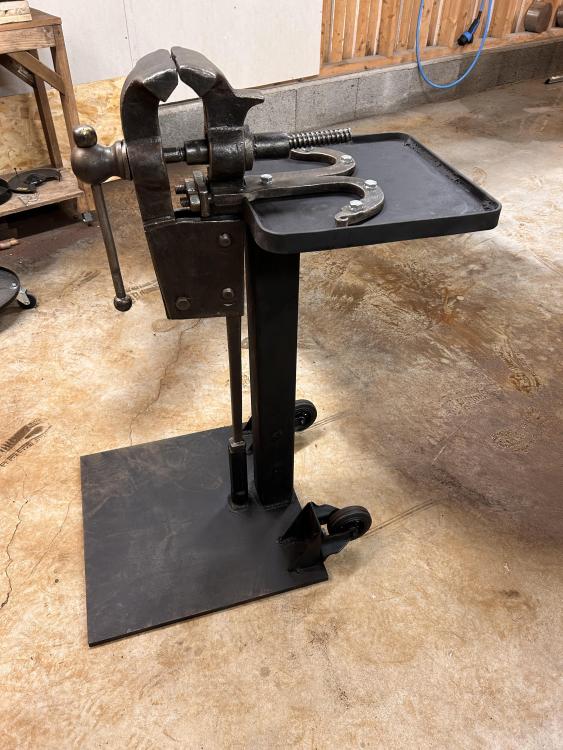
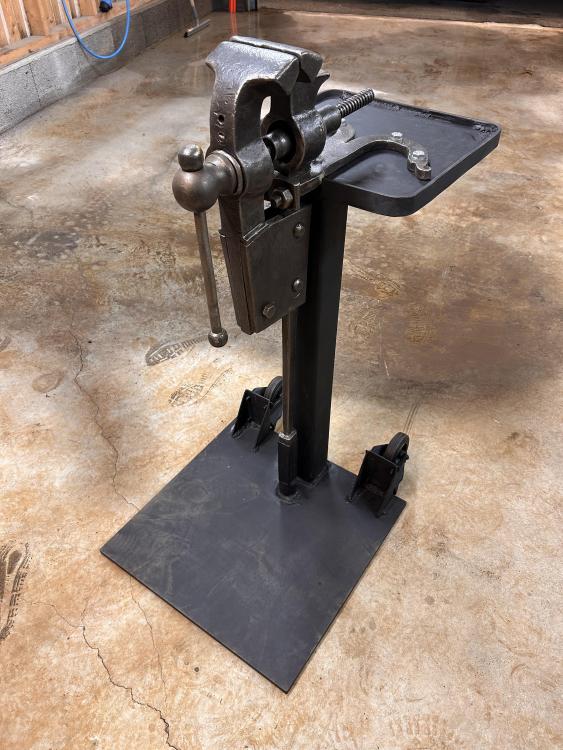
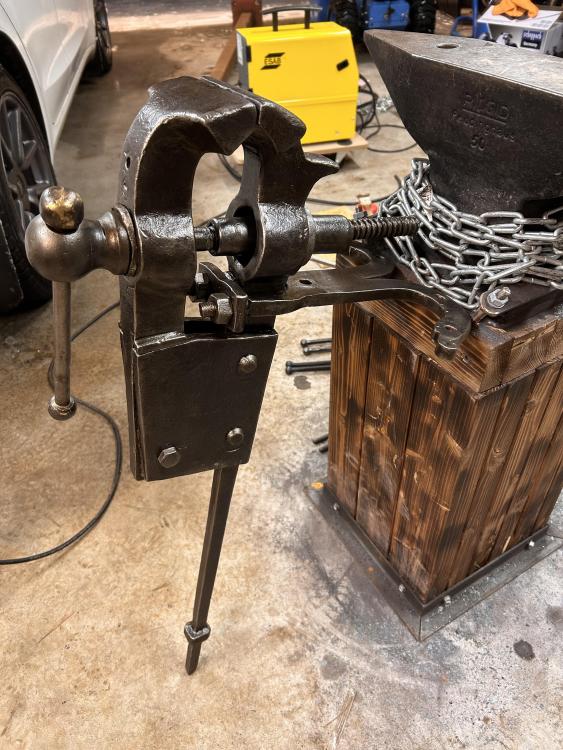
Frosty, I did make a thrust washer and it turned out very nice. It works like a charm now. I also finally got around to finishing the stand for my vise today. Never had a post vise before nor have I made any similar stand so I didn't quite know what NOT to do. But I did my best. The wheels as you can see in the picture works like a CHARM. I can just roll it around. The only downside is the base plate got crooked while welding it due to the heat perhaps? It might also be my floor, but either way it wobbles unless I use a wedge. I already kinda knew this however.. Everywhere I read about post vise stands, people said it won't be truly solid unless you either bolt it or dig it down. I even tried to put some extra weight on it as you can see below, but it didn't help one bit. Either way, I'm really happy how it turned out. Also learned I can't weld at all. I tried adjusting power and wire feed but it ended up as small "balls/bubbles" that won't stick, if that makes sense. This is with flux wire and reversed polarity so it should in theory work.. Maybe I either need argon mix with solid wire or more power. Or both. Or just proper technique. Now my plans are to make a shroud/cover for the screw and create a tong rack around the table.

-
Thank you guys for all the replies! As you said Daswulf, any lube is better than none at least, but as several of you mentioned it would need to be cleaned from time to time. So next time I'll make sure to get some chainsaw oil or something similar and try that instead as lubrication. That's interesting Frosty, and I agree, shouldn't matter much. Besides, I'll attempt to make some inserts for it and see how that works. And as you guys say, I should probably figure out something to cover the screw. A lot of good suggestions here so I'll try to figure something out. As for the stand, I'm going for a portable type stand. I'm currently set up in my garage and it's not possible for me right now to have something set up permanently until I get around to building a shed for smithing. I have a 20x20 inch base plate which is around 5/8 inch thick. I'll attempt to weld a square steel tubing to this plate, and put a 5/8 inch plate on top which is slightly under 12x12 inches. I also forgot mentioning that the vise lacked a thrust washer. I didn't even know that was a thing when I got it, but I noticed the vise jumped and made noises when opening after tightening. So I did some research and found out about the thrust washer. I took some piece of scrap metal I had, drifted it large enough and made it fit the shape around the hole of the vise and it worked perfectly to my surprise
-
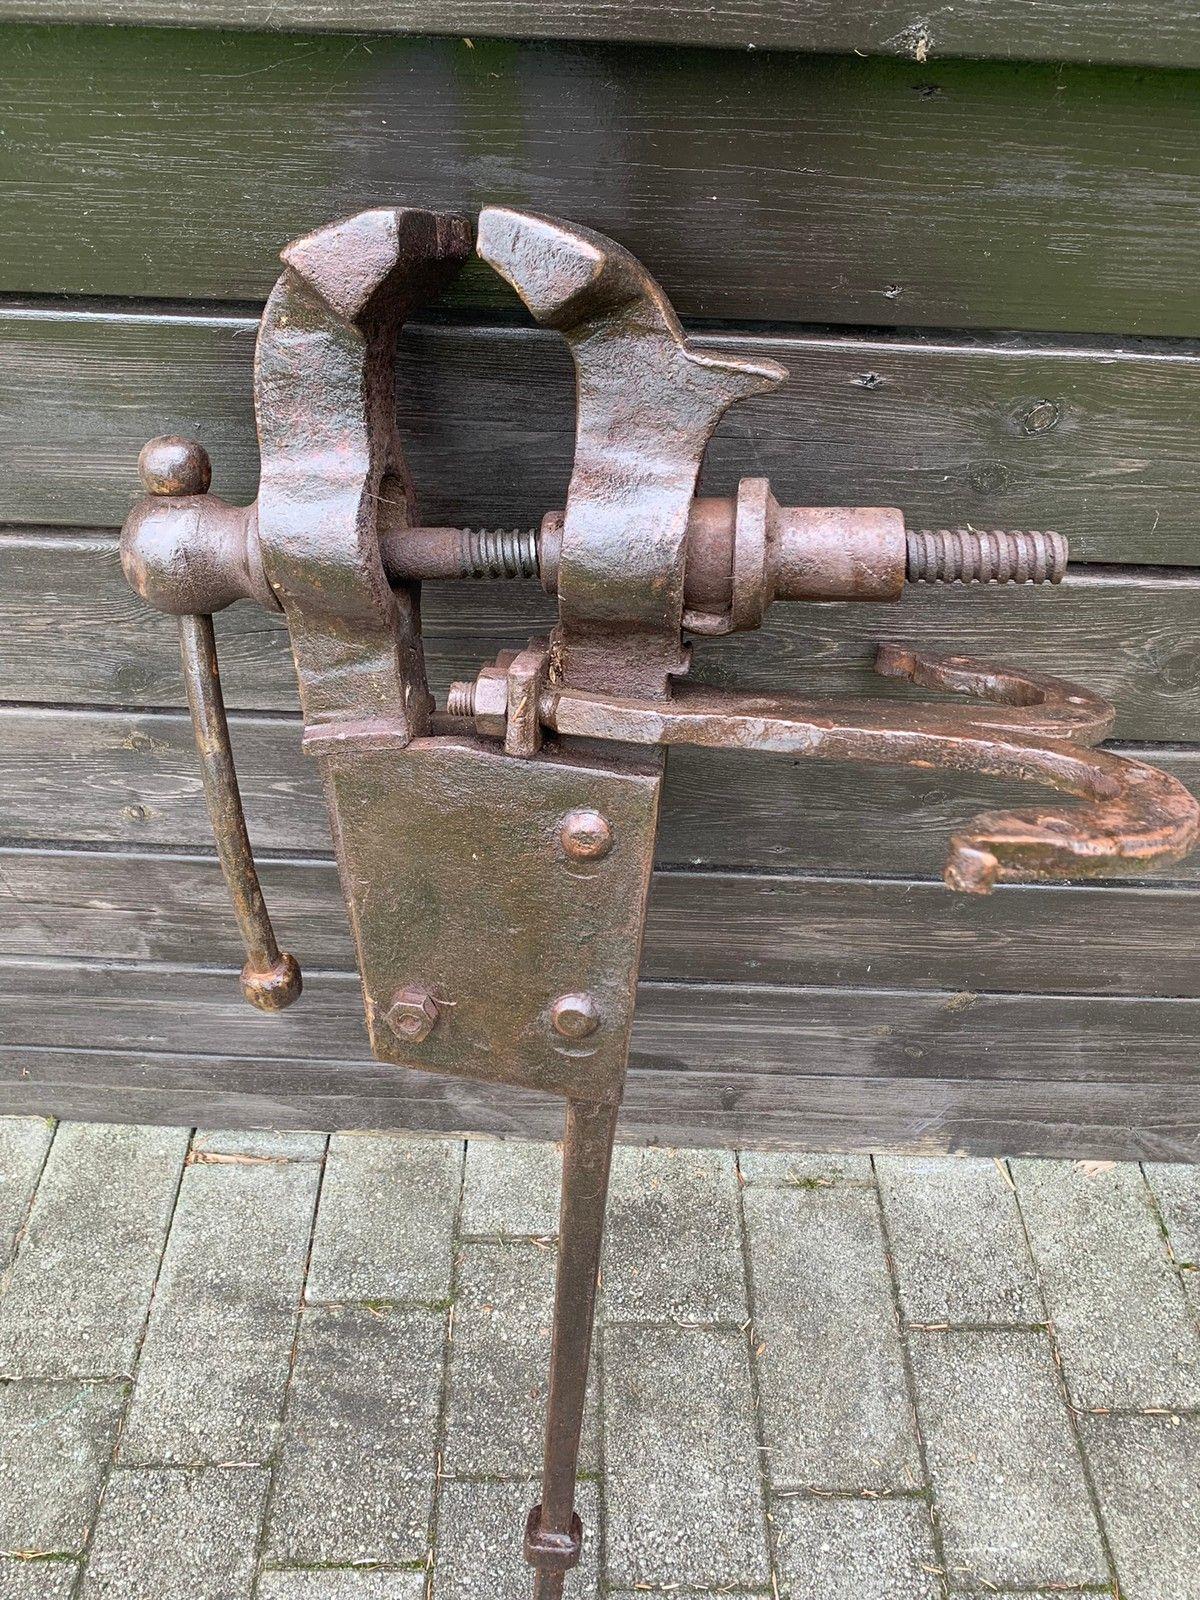
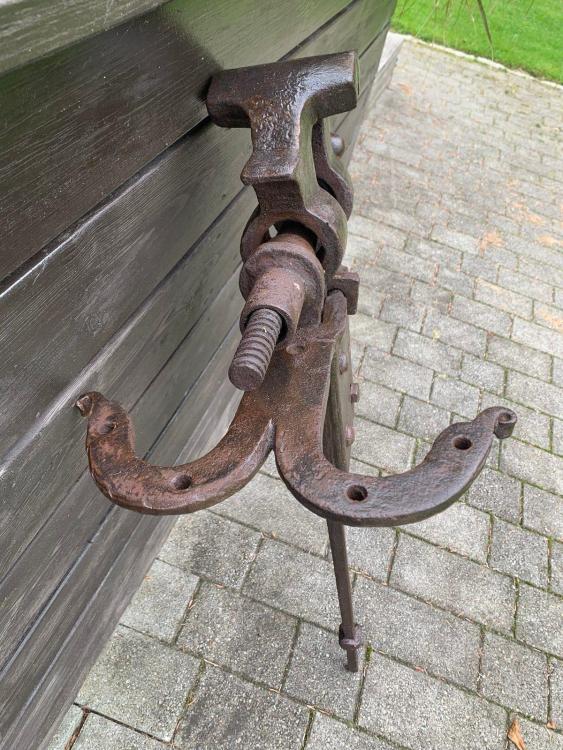
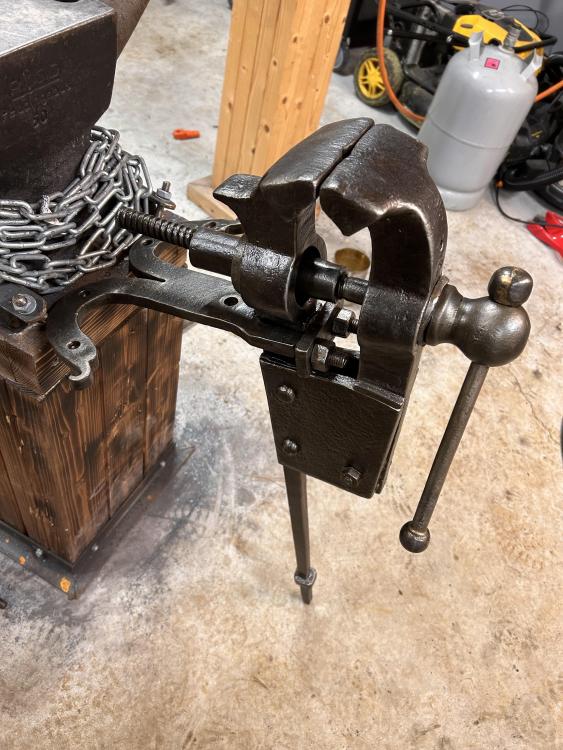
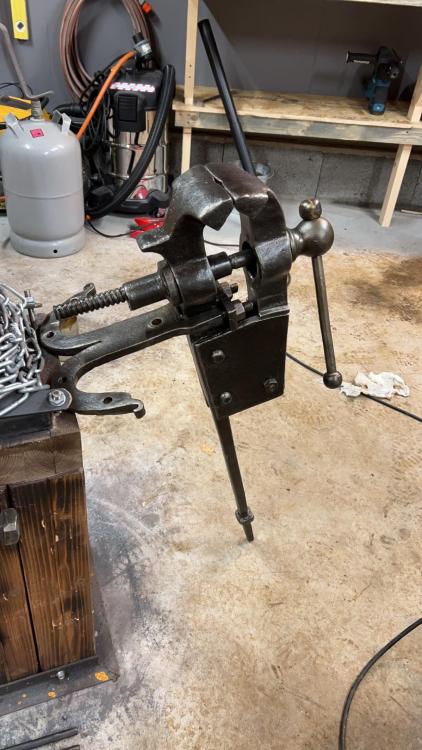
Hey guys. So far I've been using my smaller Peddinghaus Matador machine vise for all purpose use. With regards to blacksmithing it's mostly been used for twisting and adjusting. I haven't been hammering on it a whole lot because it's mounted to my wooden bench, so it makes everything rattle. That's why I've been looking for a post vise. It's not easy to find where I live, especially one that is close and not too much fixing necessary. I happened to find one where the seller was actually able to send it by mail. So I don't know the brand or anything, but the seller said it was around 25kg/55lbs. It's a 120mm/4.7 inch vise. After getting it, I was contemplating "maybe I should've gotten a larger one" but oh well, I'll make this one work for now and get some experience with it. In my opinion it's in good condition. The spring is fine, everything works. The screw looks fine. The only downside is that one of the jaws are SLIGHTLY lower than the other, and as you can see in the photos, both jaws have this cavity in the middle. In addition, from watching videos, it appears that most vises have this cover attached to the read part of the screwbox to cover the protruding screw in the back. Regardless, I took it apart, wire brushed it, straightened the handle a bit and covered it in boiled linseed oil/terpentine mix of 50/50. Also cleaned the inside of the screwbox. I tried figuring out of the screw should be oiled or greased but everyone had different opinions, so I just greased it. Please let me know if you guys have any thoughts on greasing. I know it attracts debris though.. Now I'm working on the stand, and I'll update this thread with the progress. So if anyone of you even read this far, I'd like to hear what height you guys prefer for the jaws for all-purpose use. Currently its going to be around 37 inches (with a small extender that will rest on the knob on the leg), not sure if that's too low. I'm contemplating adding up to 1-4 inches.. I'll put in the before and after pics here.

-
Thank you Frosty and Mikey for all this information! It's very helpful. I also didn't know of this "buttering" so I appreciate that. My burner was halfway through the soft brick, meaning it's half a brick plus 1" wool into the forge. So a LOT more than 1/4"! I tried pulling it up as well as removing the thick floor brick and it seemed to heat up faster. Still not 10-minutes-hot though. Although I have a lot of the soft bricks on hand, they don't really last long with all the friction and wear of moving pieces in and out, so I guess I'll have to get some refractory to make up a floor if I want to remedy that. At least if I understand correctly from previous threads I've read is that you guys prefer a little thicker refractory in the bottom to act as floor. Regarding the burner; thanks for the explanation Mikey. I found another company named BurncraftBG that produces burners in Europe and ships to me. They have a video of the burners (not sure if I can show or link videos here), and it looks powerful, I'm not sure if it's too big? No idea if this is better or even as good as the Devil Forge one. I don't know what assessment you may do from a picture but it looks like this:
-
Well yes, actually, I wanted to replace the forge BECAUSE I didn't know what to do. My thought process was if I buy one, there would be less time spent fiddling with it and figuring out what wrong. And besides, from what I've read, brick forges will always slower to warm up, or somehow less efficient. Could you elaborate on replacing the burner? Is it too small? I'd rather not build one for the reasons stated above, and there are few opportunities for me to buy, which is why I ended up using the Devil Forge DFP burner. Is the burner that bad? Picture below.
-
Yes, I'm pretty close. Shipping from Sweden is also likely less of a problem. Which manufacturer did you find? Thanks for the suggestions Frosty. Is it safe to cut in the bottles after emptying them and filling them with water? Makes me wonder why mine is so slow relative to your example here. Is it because of the flooring, that my high alumina 1.25" thick brick floor soaks too much heat? Or can it be the burner placement? The Devil Forge looks nice with doors, but I'm wondering, is it more problematic? Because in the picture below, the door is entirely filled with ceramic wool. If I were to have a layer of castable on top, the door would struggle to shut properly. Do I remove some of the thickness of the wool to make up for the castable refractory?
-
That's right! We don't, unfortunately. It's still very possible to order stuff from abroad but the shipping costs varies a lot! You bet. It's a flat 25% tax fee on anything you order outside of Norway as a private person. A bit less for companies.
-
Thank you for the suggestion. Unfortunately, I cannot seem to find it on Amazon. None that would ship here anyway. But I guess an oval/round forge with offset burner such as the Mr Volcano would distribute heat more evenly than the Devil Forge forges. But I'm not sure how big of an issue that is.
-
Lee: They are not fire bricks (hard), they are insulating bricks (soft). I have used some refractory cement between the ceramic wool and the insulating bricks. So the wool is safely behind the cement, behind the bricks, so I hope it's safe! The floor (high alumina brick) is a hard brick. I'm not sure I can get a Mr. Volcano forge to Norway. There are at least no local suppliers.
-
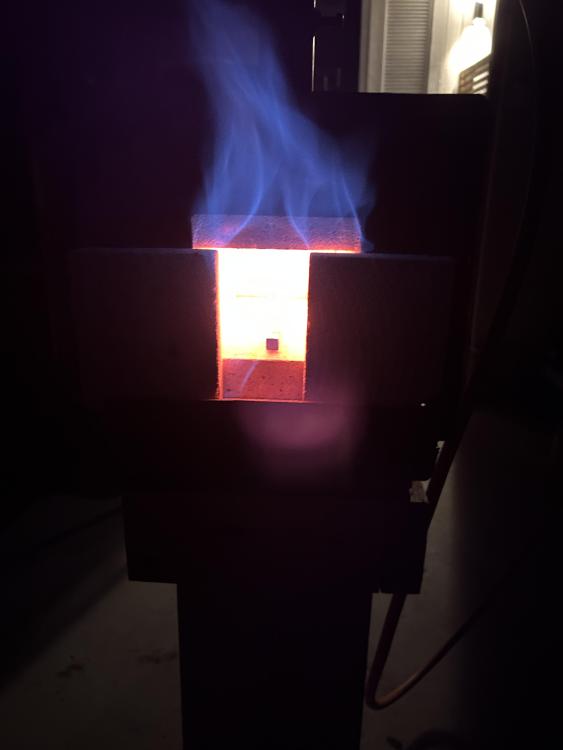
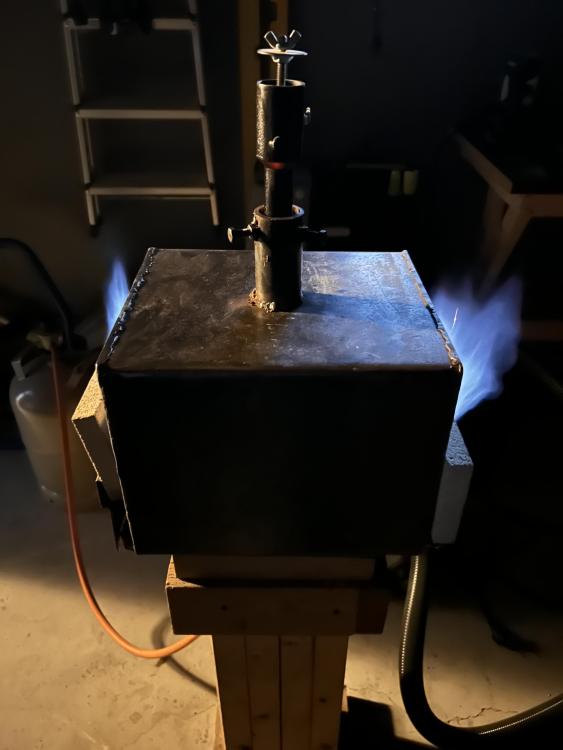
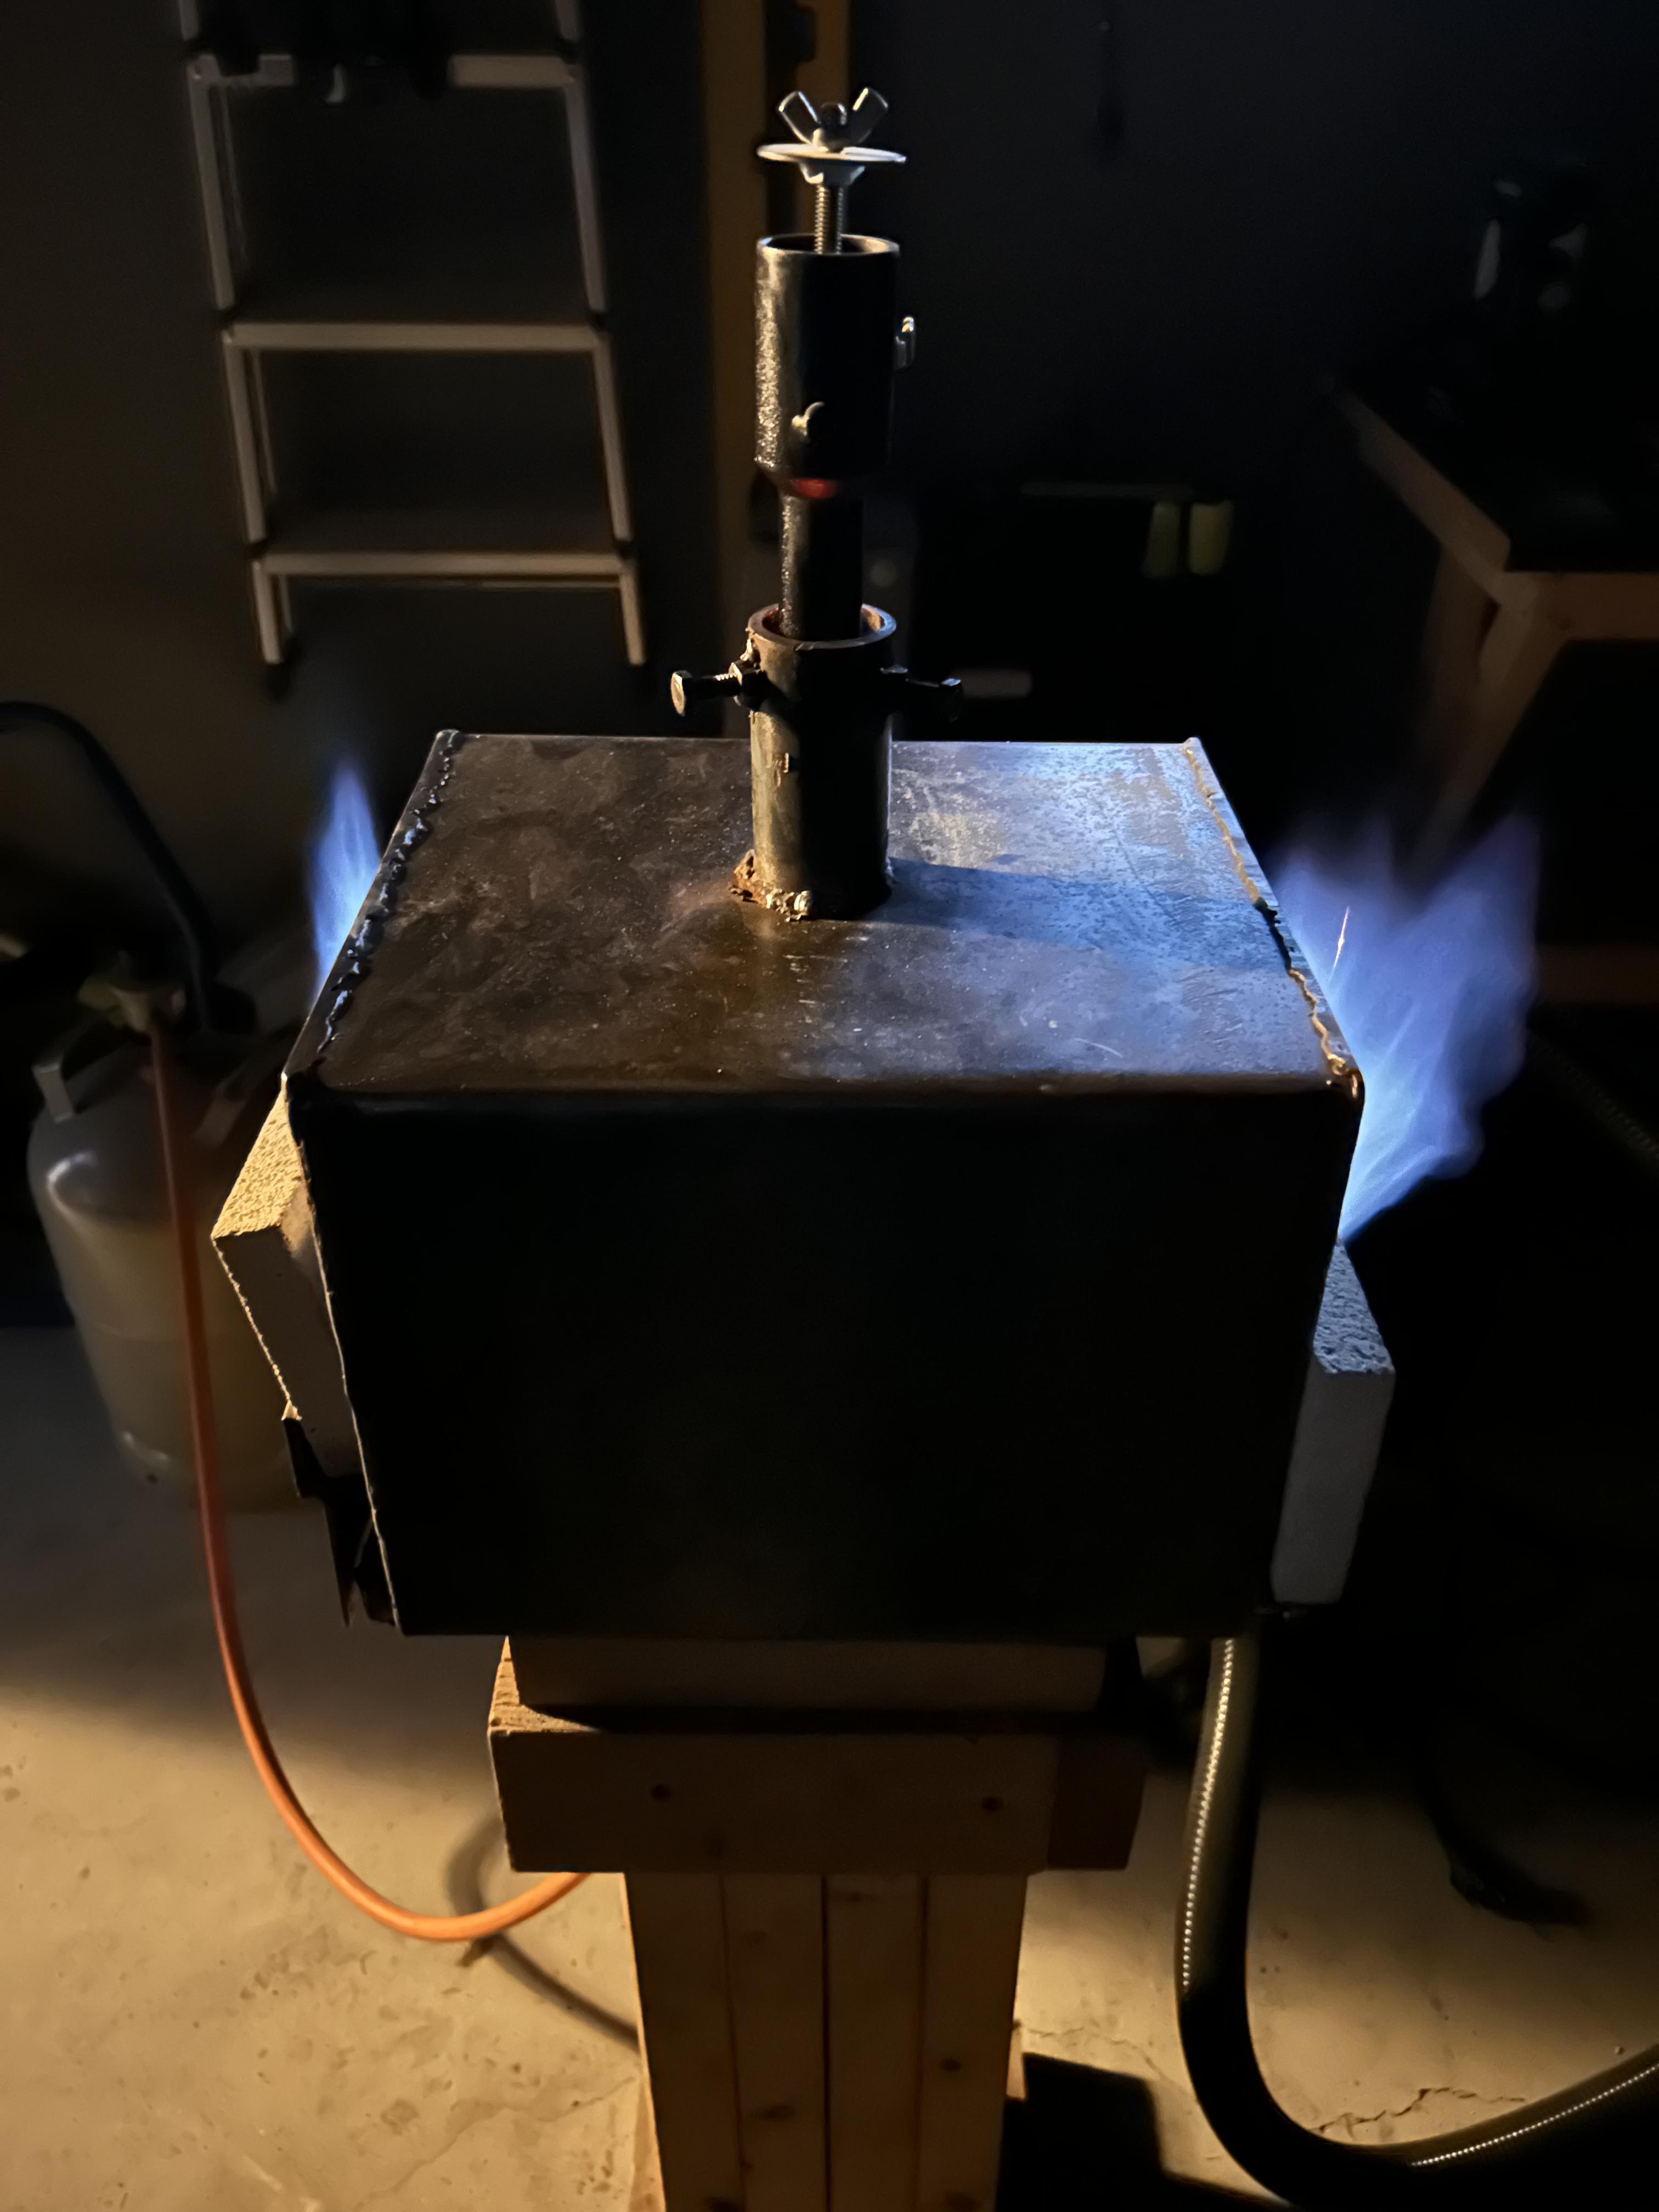
Hello guys, I'm new here. I'm a beginner blacksmith from Norway. I have built my own first forge, but I'm now considering buying a forge. Unfortunately there are limited options for me where I live. A little back story on why I want to buy a new forge. My current forge is based on isolating bricks. It has a steel shell with 1" of ceramic fiber, followed by isolating bricks. I also use a high-alumina brick as the forge floor. I use a Devil Forge burner (the 80 000 BTU one). Once it's properly heated up, it works fine in my estimation. Mind you, I'm a beginner but it heats steel up to yellow fairly quick. The thing is, it takes forever to warm up. It's probably at least 45 minutes until it's hot. And that's a problem because I have a fulltime job, and this is a hobby so I only really have a couple hours after work and on Saturdays. Maybe I'm using too low of a pressure, but I don't think so because the burner is running fine. I don't use a pressure gauge. The other problem is I have a lot of dragon's breath. Most of the time it's blue. I've tried reducing the pressure or open the choke to no avail. Nothing I have tried makes any difference, so I'm guessing it's something with my design. I do have a CO monitor just to be sure. I included some photos of my forge and its dragon breath. I also end up having quite a "scaly" surface even with frequent wire brushing. So I'm confused because I thought scaly steel is a result of oxidizing flame, while blue flame is a rich flame. It's internal measurements are 4.5" wide, by 3.1" high, by 11.8" long. All these reasons lead me to wanting a better forge, primarily for 1) heating up faster and 2) hopefully more fuel efficient. I don't have access to an old propane tank to make a forge myself, I'd have to buy a new one and cut that up. However, it'd be really nice to buy something that's already proven. Currently I'm only considering single burner forges as a two burner forge would consume a lot more fuel, which I think is expensive enough as is. But of course I'm open to suggestions! It seems like most people use two burner forges. 1. The first option is a really expensive, high quality forge. It's a Nargesa H1 (made in Spain). They boast a whopping 75% reduction in fuel consumption (compared to other forges in same category), operating 100 hours on a 35kg (77lbs) cylinder at 1 bar or 14.5 psi. Comes with electronic ignition, stainless steel hose, 0.002% CO emissions, anti-return valve, thermocouple safety valve and the whole nine yards. But it's $1400, so fairly expensive. Single burner. Using compacted vermiculite as isolation so it's not hazardous. This is very expensive but provides the whole package, and uses a lot less fuel. Apparently reaches temperatures of 1300 C / 2372 F. The single burner version has a fairly small volume. Double burner is much bigger but costs $500 more. 2. Second option is a Devil Forge gas forge. I'm considering DFPROFK1. This one has 2" of ceramic fiber and costs around $500. This is obviously a much cheaper option, but it would require me to put some castable refractory in there. This also has a gas savings system using a bypass, but I'm not sure how effective it is? It also uses a much larger burner of 180,000 BTUs, so I suspect it's going to consume a lot of fuel. It also comes with bricks to fill the inside, not just floor but sides as well. Does anyone know why this would be? I think it would be better to just coat the ceramic with castable and ignore the bricks. The DFPROF1+1D/2" model does not have a front door but 2" of isolation and a smaller burner and almost half price (but much smaller) which might be a good choice. The larger burner (180,000) consumes a lot more fuel, which makes me fear it's going to be expensive to run. My current forge runs around 8-12 hours on a 11kg propane bottle (24lbs) depending on the pressure. The devil forge would probably heat up a lot faster but use more fuel, while the Nargesa would last at least 3 times longer than my current forge according to their numbers. However, it's a big expense, especially for a hobby with limited time. At the same time, I could get the Devil Forge and a variable speed belt grinder from for example Vevor for the same price of the Nargesa H1! Bit of a wall of text, but I guess I just wanted to explain my predicament and pick your brains about it, and see if any of you guys have any opinions or advice on the selection or the forges themselves. I don't feel like I know enough to be able to make a good decision on this. Any insight is greatly appreciated!