gastlyTree
-
Posts
7 -
Joined
-
Last visited
Content Type
Profiles
Forums
Articles
Gallery
Downloads
Events
Everything posted by gastlyTree
-
Decided after ten years to finally build a forge
gastlyTree replied to gastlyTree's topic in Gas Forges
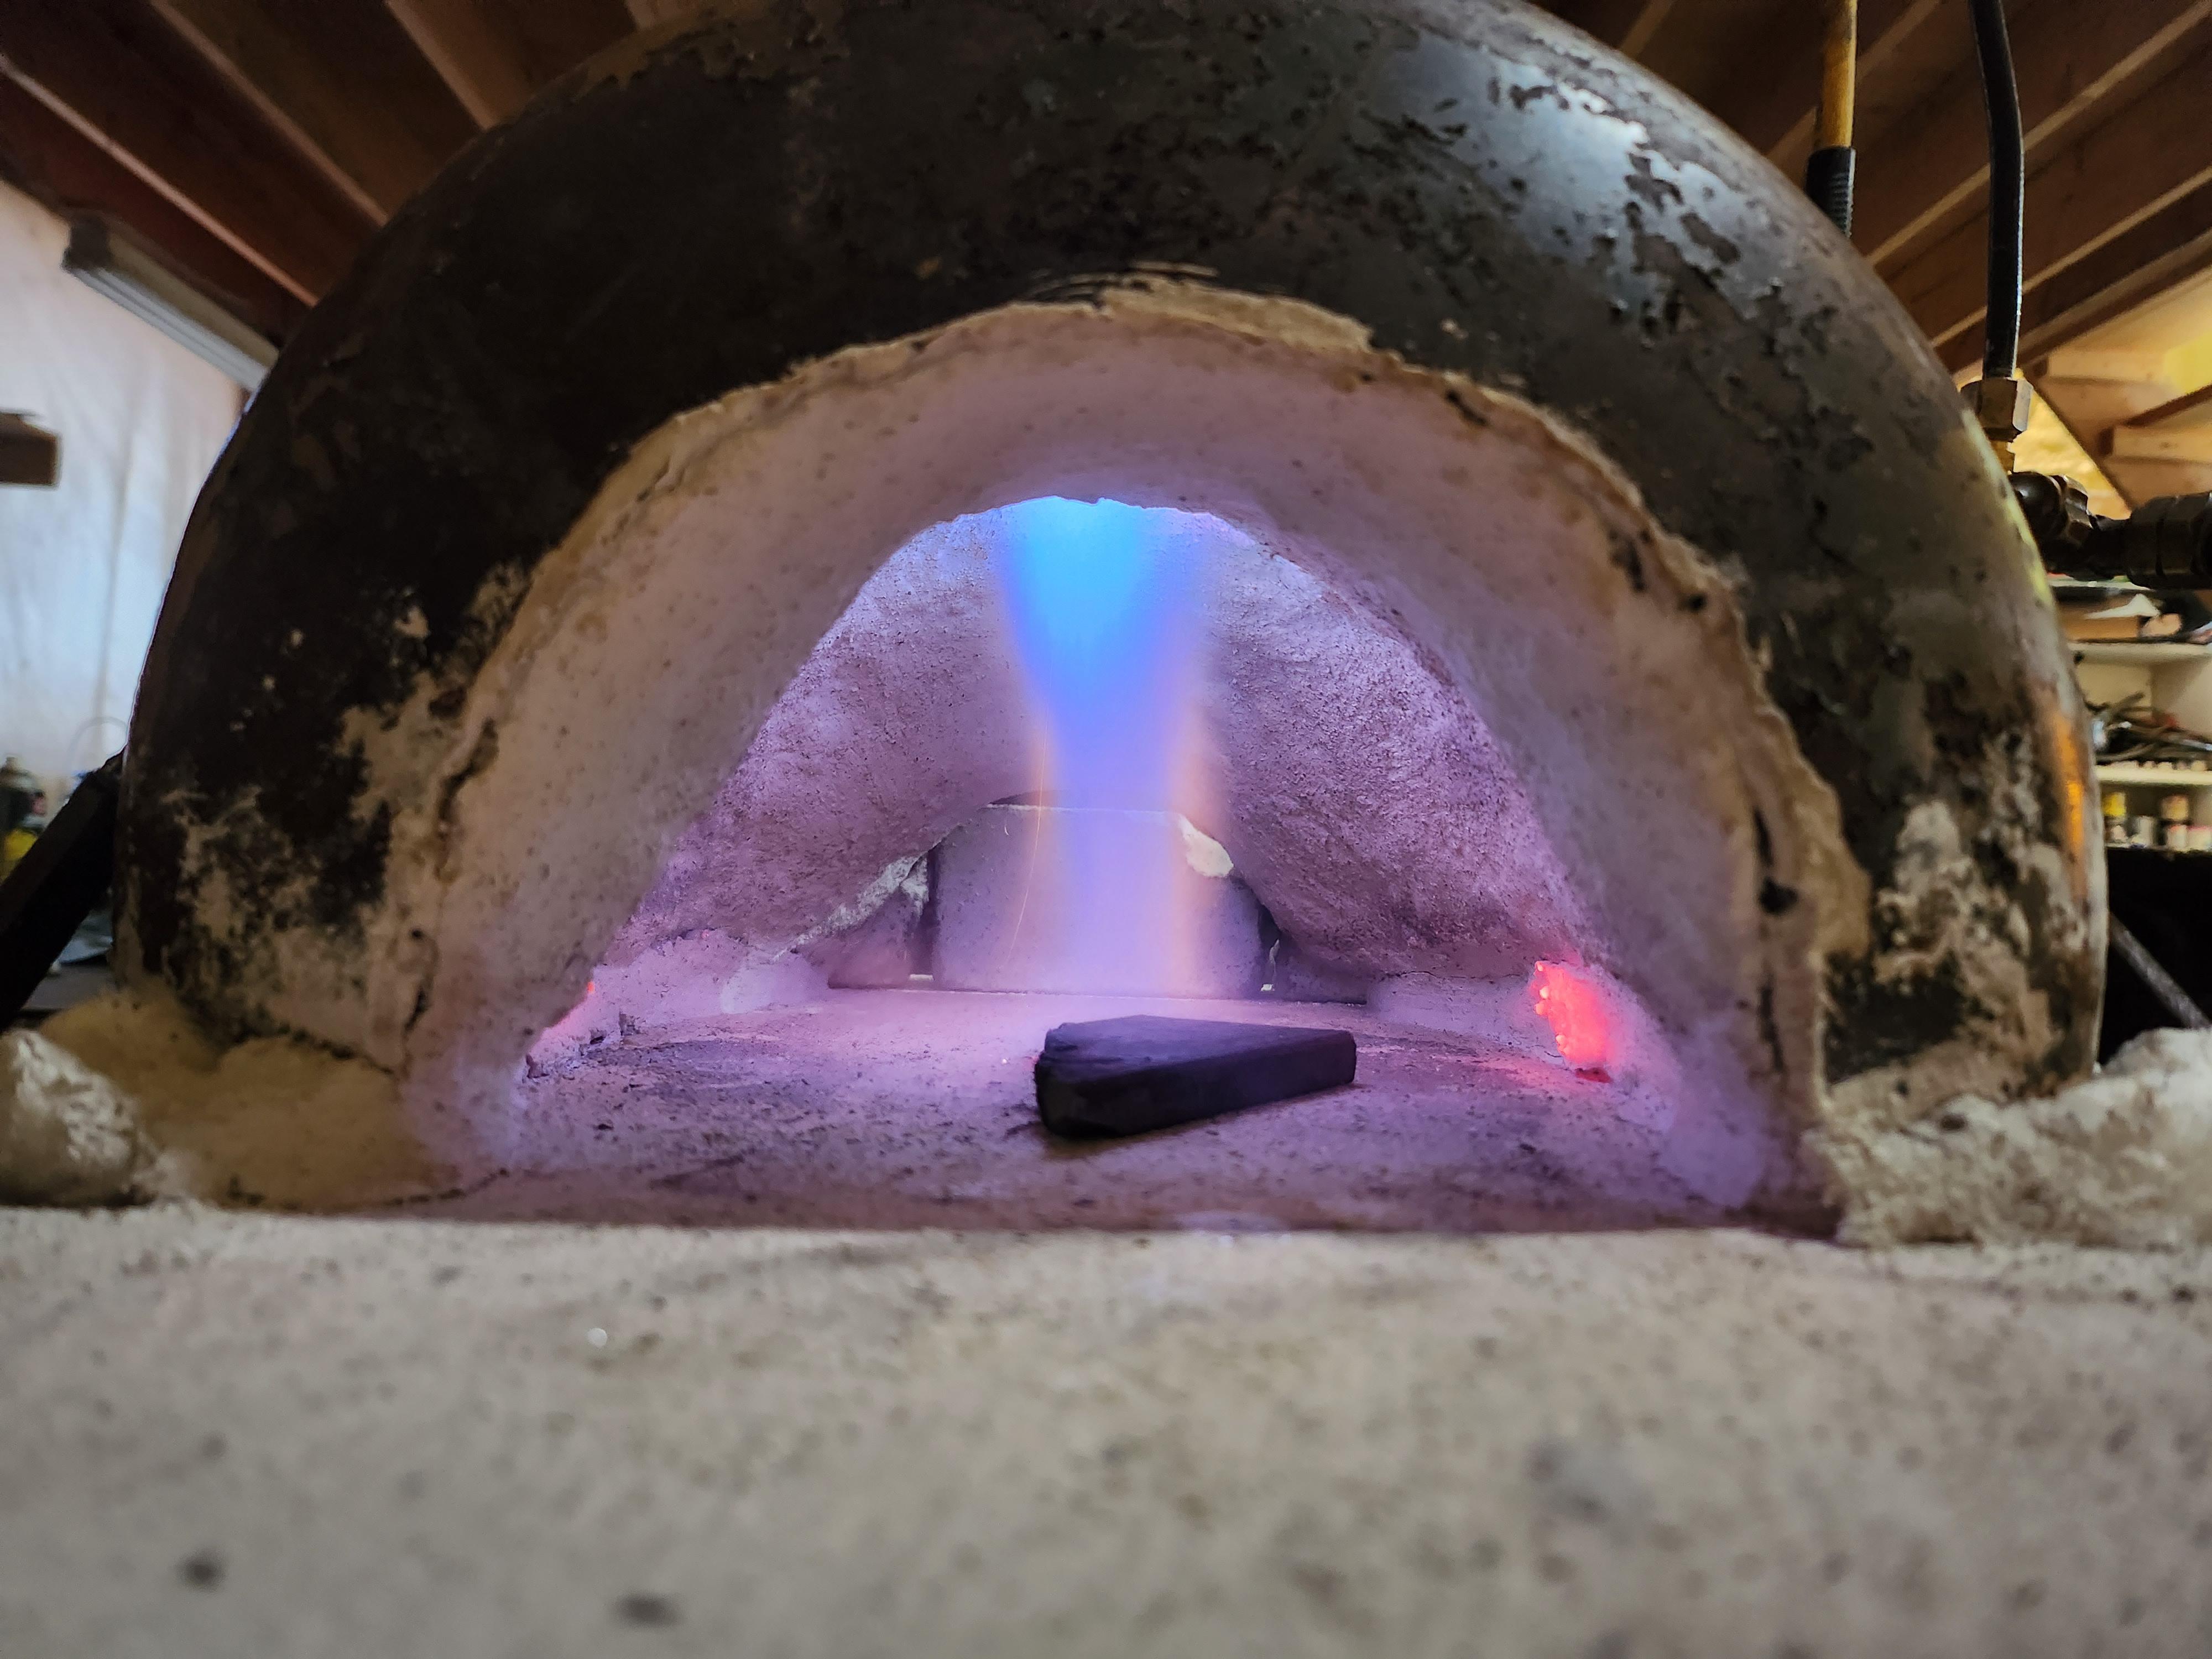
I had never heard that about the hoses, but noted. The plan was to buy a propane regulator and hose anyway. I don't know if the regulartor I used counts as modern, it's about 40 years old. Here's the pictures. Just lit in a cold forge. As for unburnt fuel leaving the forge I wasn't able to capture it in a photo even with the lights off, but there was a little bit wisping out. Running at about 5 PSI and I've got the needle valve turned down a bit
-
Decided after ten years to finally build a forge
gastlyTree replied to gastlyTree's topic in Gas Forges
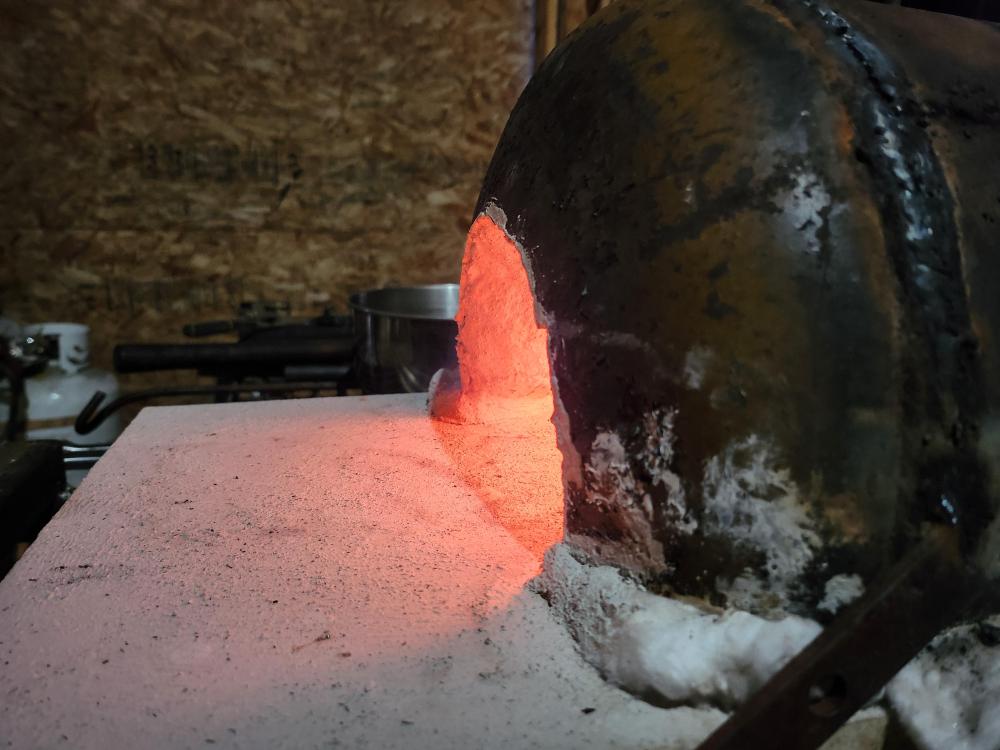
It's been way too long but I finally mostly finished the forge. Two layers of 1" kaowool, a castable refractory layer, and then layer of ceramic refractory coating. The whole thing is sitting on a 1" kiln shelf with a layer of kaowool underneath for cushion and insulation. In the video the flame sputters a couple times but afterwards I took a 10th of a inch off the mig tip and it was running smooth. It also seemed to me that it was burning a lot hotter as well. Thanks for all the help. Also my brother in the background helped quite a bit. He was inspired to make his own forge (he's making the body in the video). He's making a smaller one that he wants to run with a 1/2" Frosty T burner. For those times when you don't need a big forge. -
Decided after ten years to finally build a forge
gastlyTree replied to gastlyTree's topic in Gas Forges
This is a little late. I had built the burner and in testing I was disappointed with my results. I went trough a few mig tips trying to tune it and tried some different ends. Then I left it on the back burner for a while, and then winter has has me not going into the shop all that much. But today I finally decided to throw the materials I had together and see how it works. Now I had heard that the burner doesn't work optimally unless it's in a forge, and I should have taken that to heart back in august. So I threw together the insulation I had on hand and tested it, and what do you know it worked. Now I know the forge is ugly as sin, inefficient, and will degrade quickly. But for testing purposes and not spending more money and waiting for things to arrive, I'm quite pleased. I did a few quick tests and then decided to try something big in it. It's about 1"1/2 drive shaft from a combine, so it's got good carbon content. Took a little time to heat up, but it was within reason. -
Decided after ten years to finally build a forge
gastlyTree replied to gastlyTree's topic in Gas Forges
So I got my friend to do some lathing for me and built the T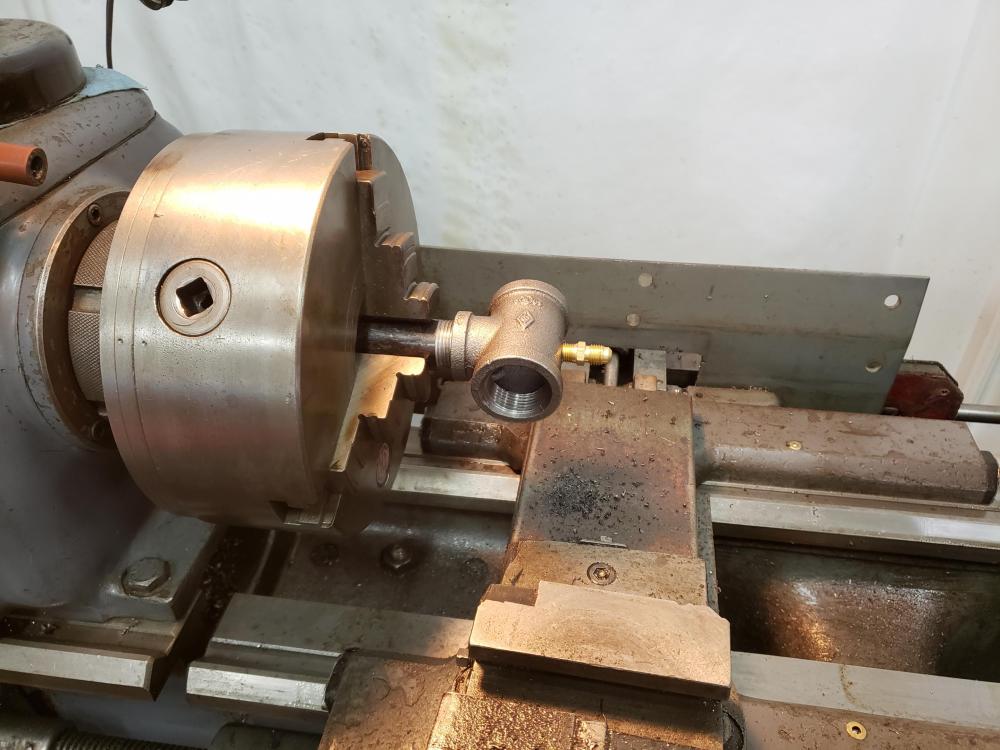
-
Decided after ten years to finally build a forge
gastlyTree replied to gastlyTree's topic in Gas Forges
So I picked up some of the piping for the new burner. I've got a friend with a lathe so it should make the work that much easier. I found male 3/4" to male 1" Schedule 80 pipe that looks like it might make a decent flare. It's much more gentle that you're typical cast iron 3/4" to 1" coupler, and it would be easy to modify on a lathe. I'm gonna do some experimenting with it once I get the T built. Would grinding down the threads in the openings of the T be beneficial at all? -
Decided after ten years to finally build a forge
gastlyTree replied to gastlyTree's topic in Gas Forges
Thanks for the tips. Yes the burner was cobbled together in a day. It was mostly just to get hands on with it. I find it easier to grasp these new concepts if I've done some experimenting of my own to see how stuff doesn't work. I didn't let it on in the post and video, but I had a hunch that the whole thing wasn't gonna work. After some preliminary reading in Burners 101, I think I'm gonna build a Frosty T burner. And Frosty, The fire brick I ordered is listed as an insulating fire brick, but gives no more details than that. I can always skip the brick if it's not going to work. I just thought it would be a good reference point for adding the insulation. Thanks again for the replies. I'll be updating once I make some more progress. -
So I've been meaning to build a forge for a long time. Around ten years. I finally decided to just do it. I'm trying not to spend too much money, but I have an advantage of having a lot of junk to work with. Total I've spent so far is around $10 on a couple 1/8th pipe fittings I didn't have. Those could probably be optimized, but I went with what I could find at local stores on a Saturday. So what I've got so far is the preliminary forge blower, and the skeleton of the main forge body. The blower is made from a 1" ID x 10" piece of pipe that I found in the junk pile. I flared the ends to make a venturi. This was done with an oxy/propane torch and an old clapped out anvil horn. Then I cut some holes in the back flare, with a plasma cutter, to accommodate some 1/8th" fittings for the propane. A small hole was drilled into a coupler and pointed down the pipe. I'm not sure at the moment if the coupler is blocking too much airflow, But all I had access to the time was 2" nipples so a coupler was necessary. But anyway, these fittings are connected to and old oxy/acetylene torch hose and regulator I had laying around, and plumbed to a propane tank. I plan to solder the fittings in place so they don't move, but only after I'm happy with it. The main forge body I built out of an old air tank that has been condemned. It's not suitable as a pressure vessel anymore. I shortened it and am going to use the end cap as a door that swings up. I have an opening cut out so a hole of about 4 1/2" x 2" is open when the door is shut. I'm going to be lining it with refectory wool, and then covering with KAST-O-LITE 30 LI G PLUS, and then coating with a ceramic refectory coating. The entrance will have a firebrick at the base. I'd love to hear some feedback and suggested improvements.