wirerabbit
-
Posts
139 -
Joined
-
Last visited
Content Type
Profiles
Forums
Articles
Gallery
Downloads
Events
Everything posted by wirerabbit
-
Steel wheel JBOD charcoal forge project
wirerabbit replied to wirerabbit's topic in JABOD - Just A Box Of Dirt
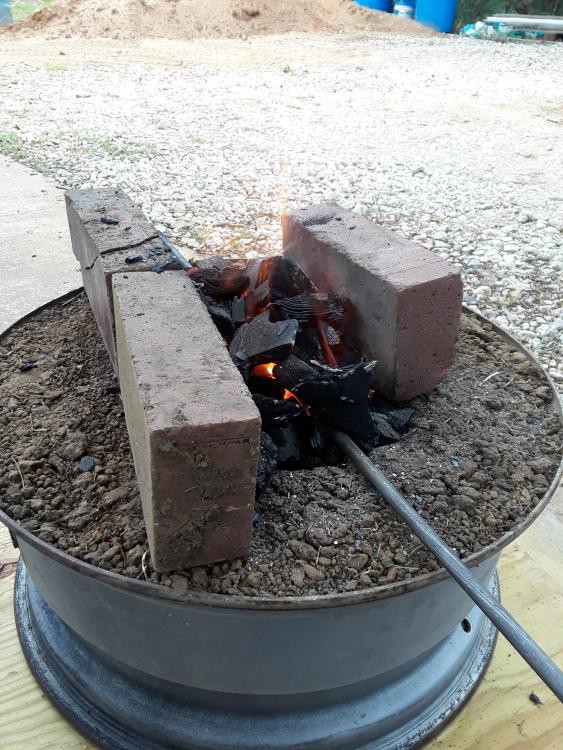
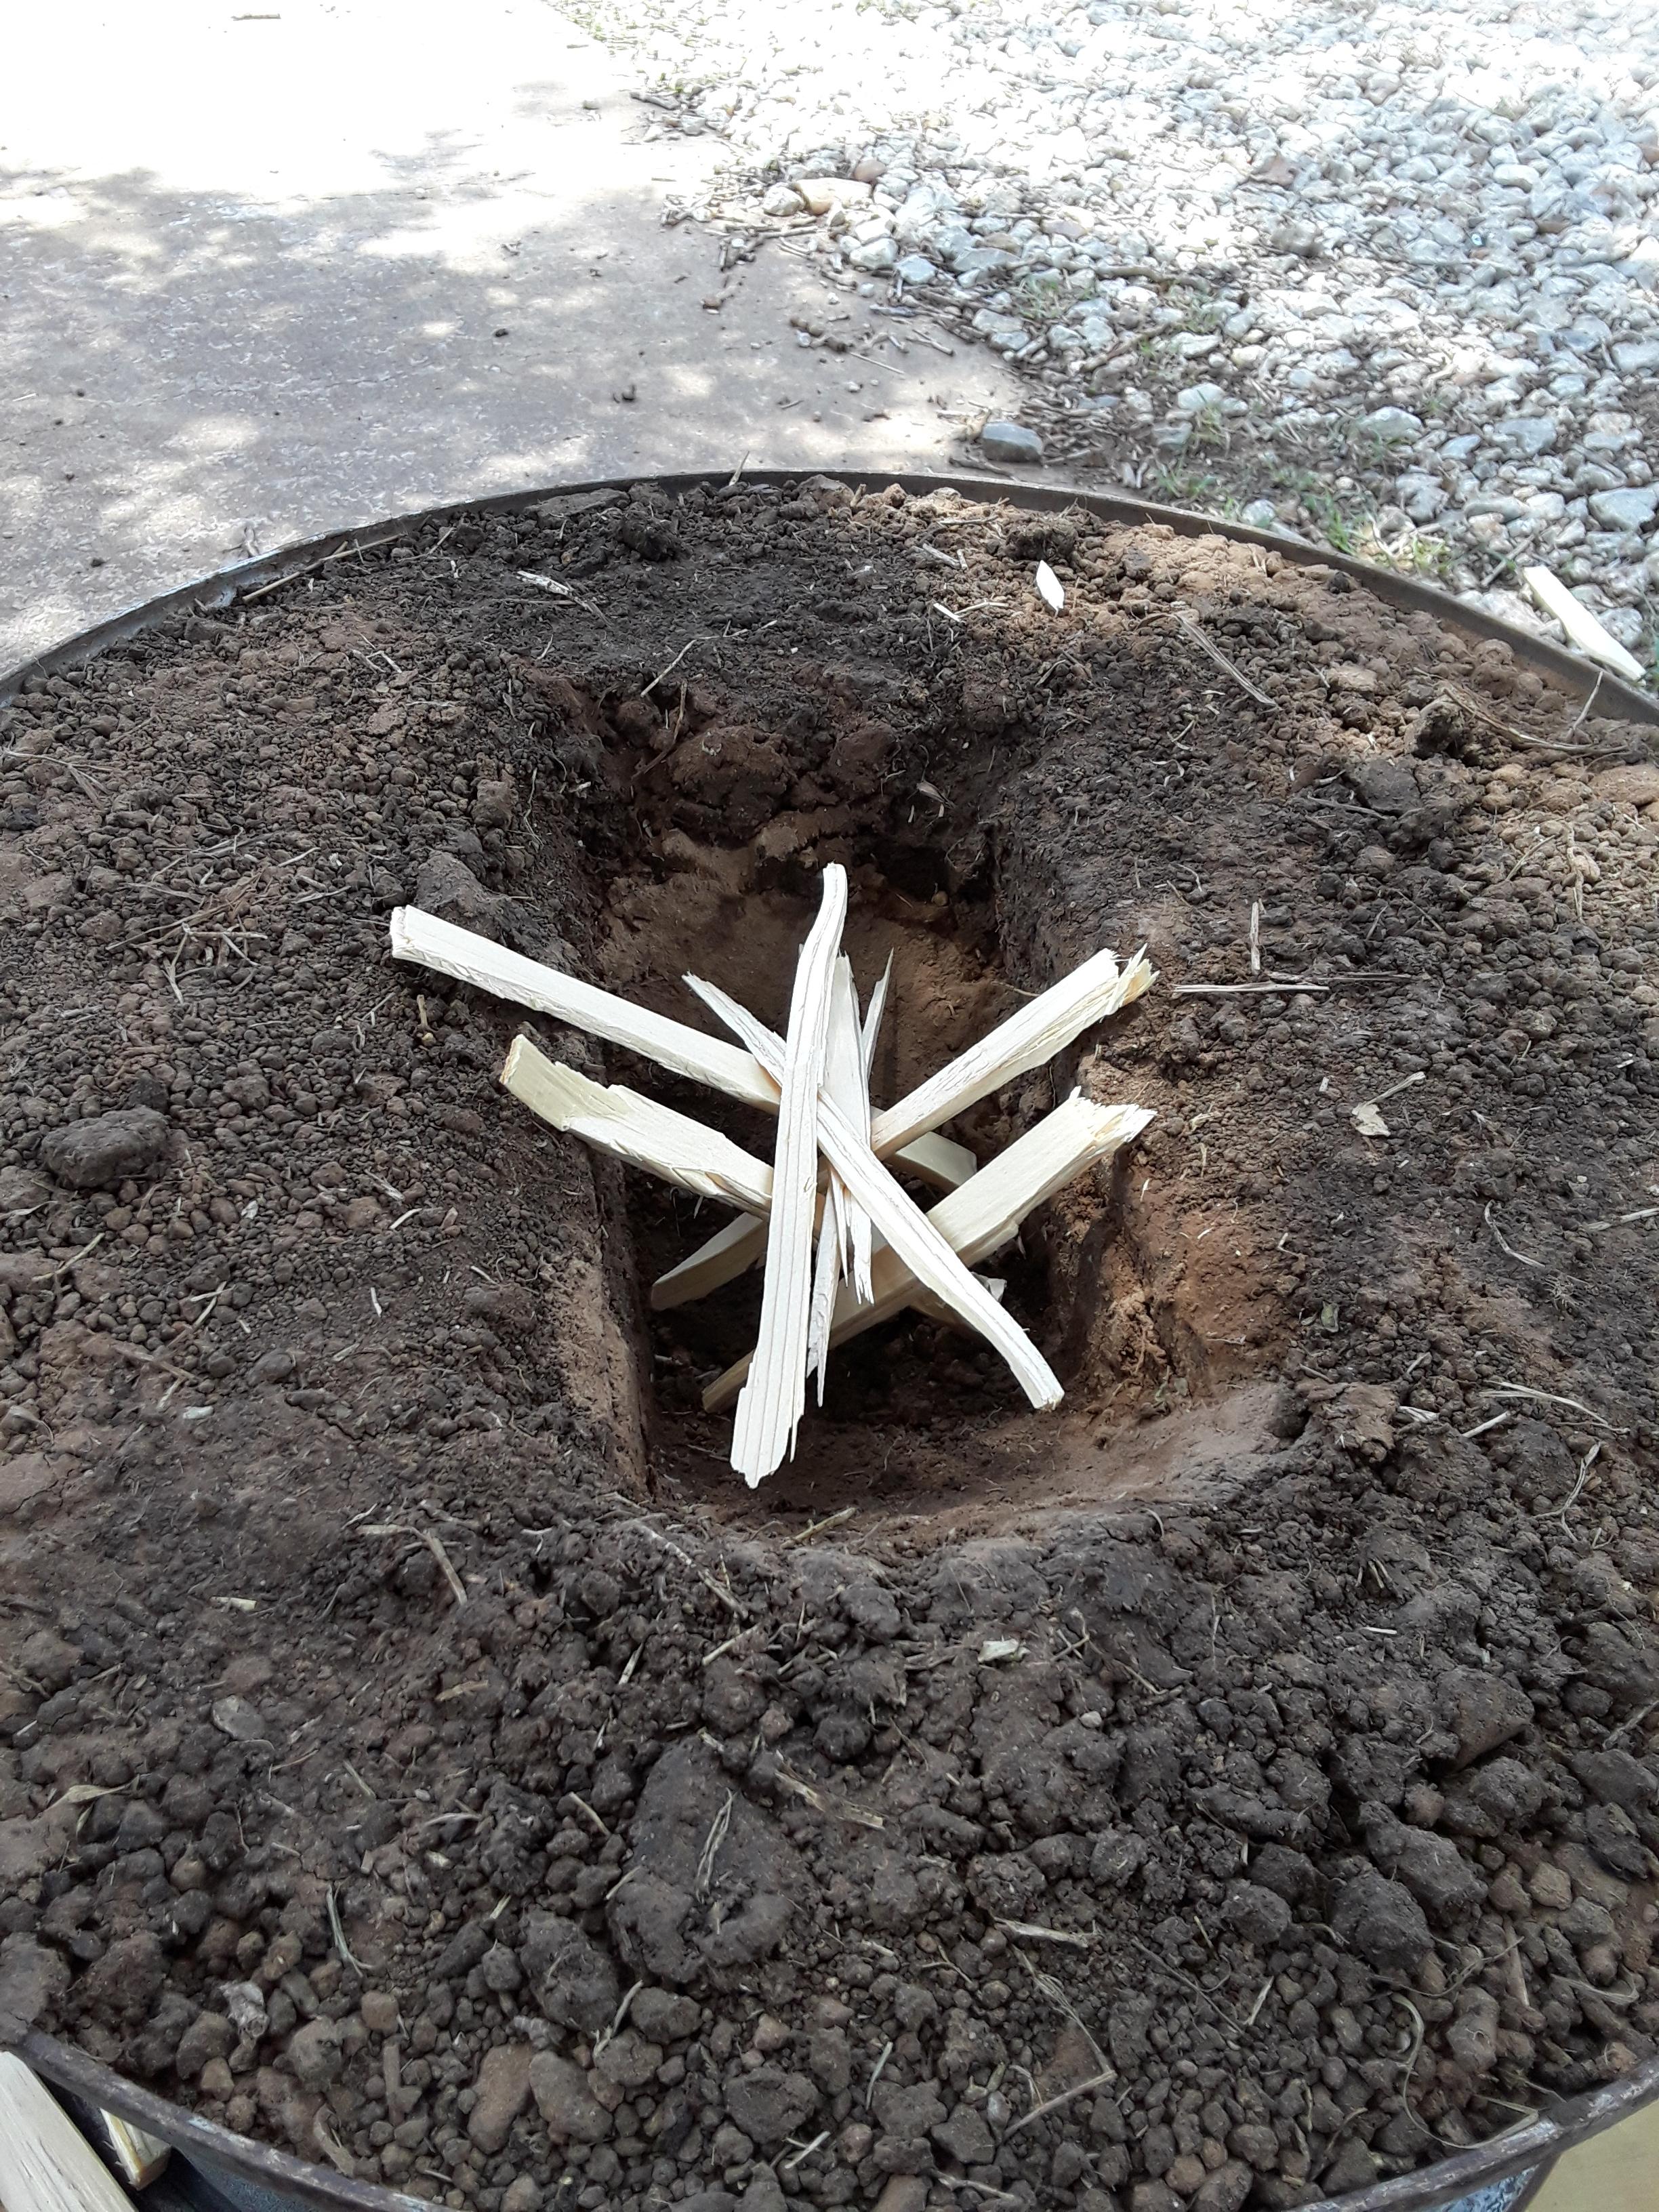
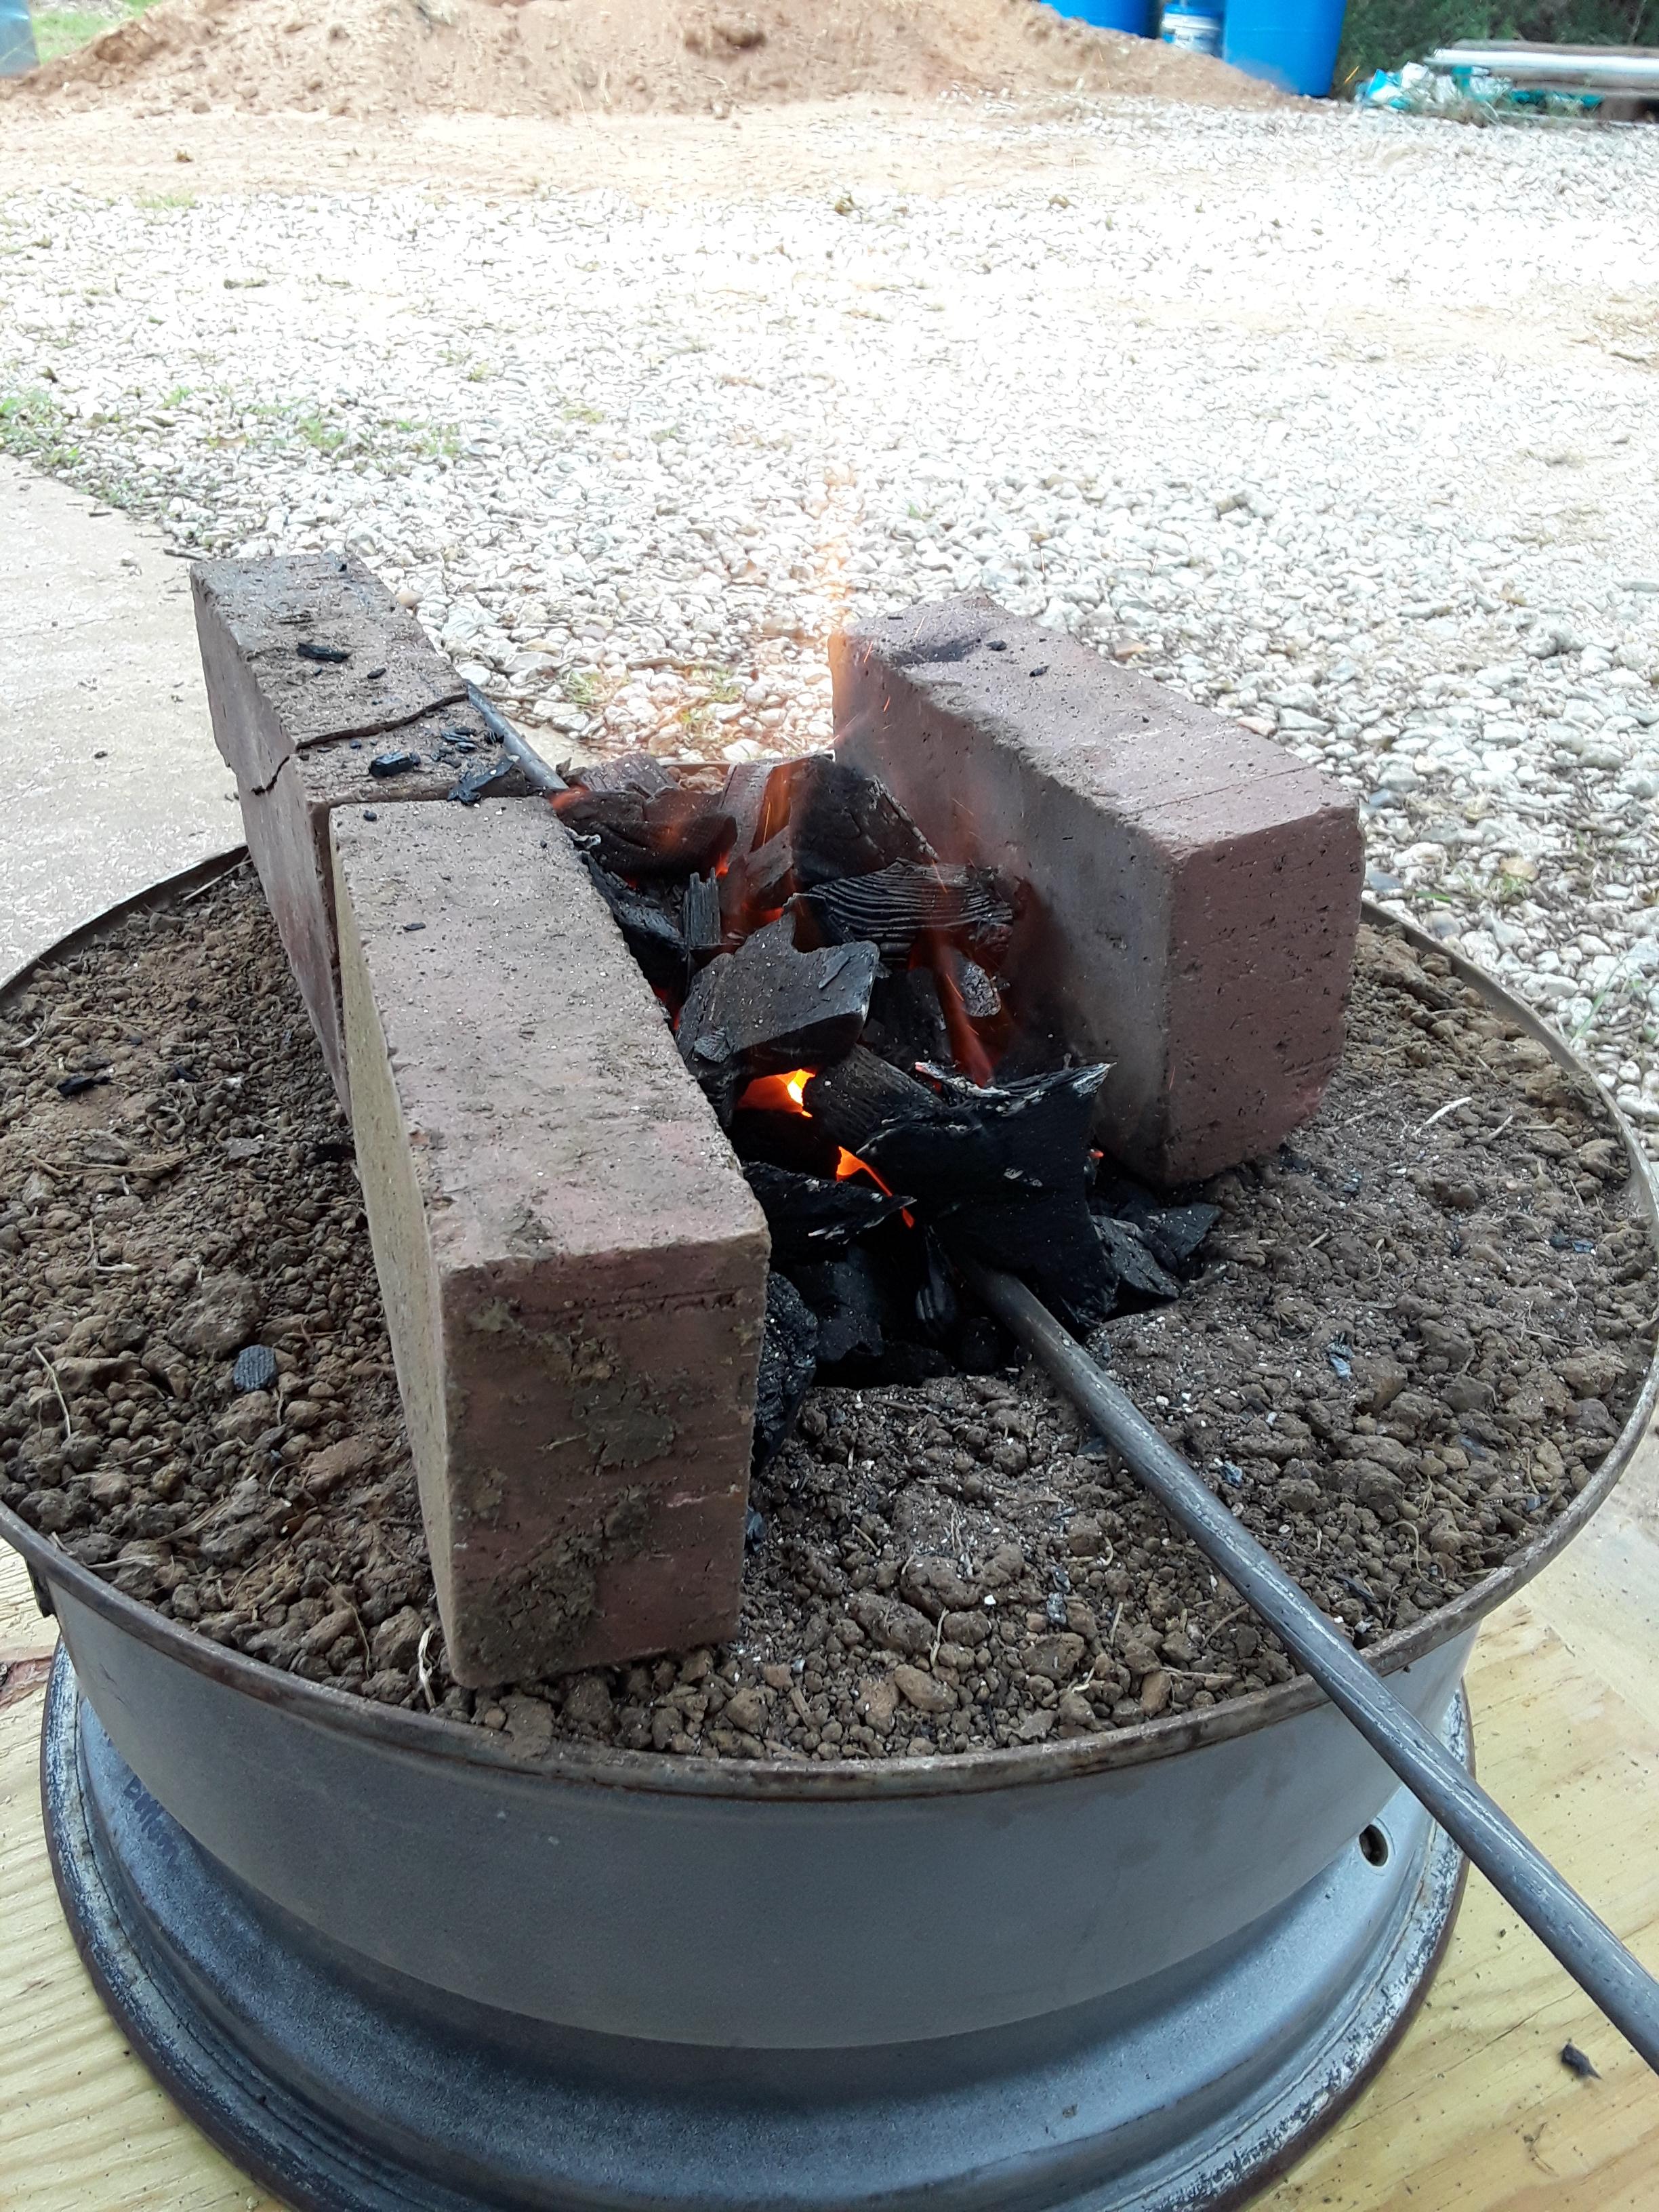
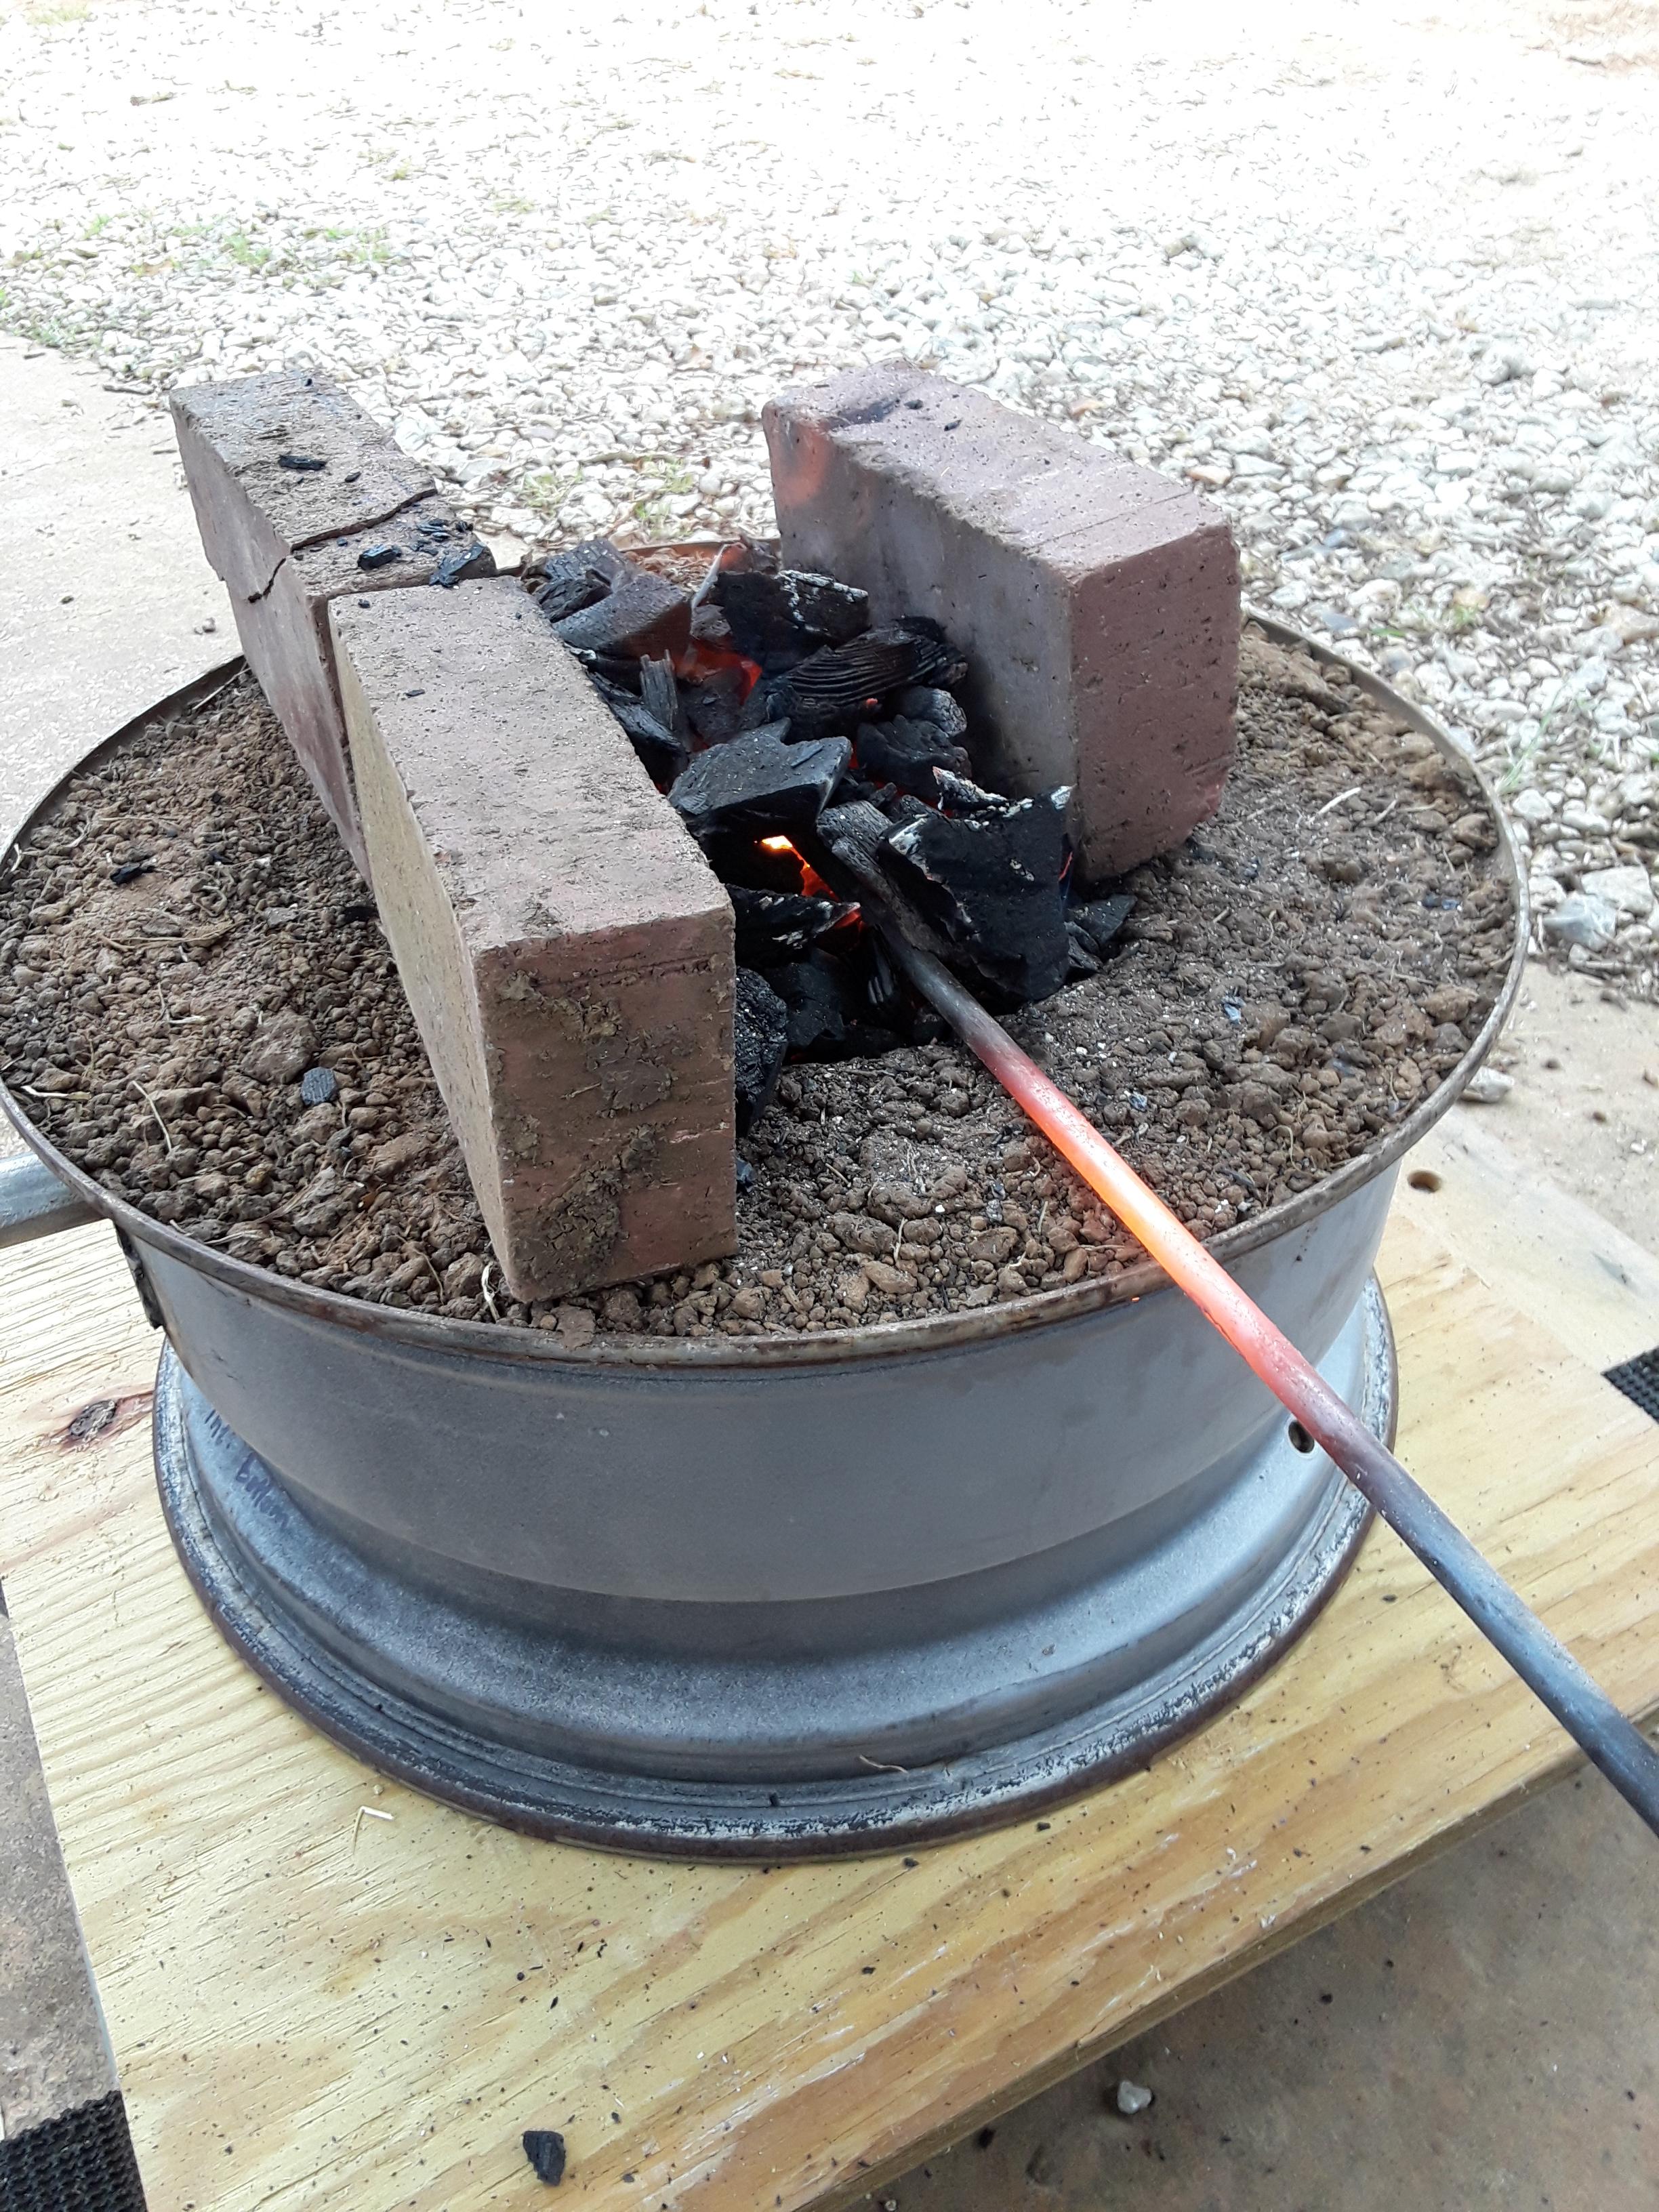
I know I should be changing the oil in the wife's truck, but I needed to see some fire. It's been so long. So I wheeled the HEAVY steel tire charcoal jabod forge to the edge of the driveway slab, under a nice post oak. I split up some pine construction waste I keep for starting the wood stove, and crisscrossed the wood in the firepot. I found my trusty propane torch I use to dry pots while throwing and lit the wood. Good so far? I fiddled with a small fan and a funnel to see if I could provide enough tuyere air to get that wood hot so I could throw some big box store lump charcoal on top. Boo, didn't work and the wood was now charcoal itself. Pulled out my air hose, put walnut sized pieces of charcoal in the pot, and fired up the torch once again. That worked. Some sparks flew about until I found the touch with the air tool, then a nice low roar and much sooner than I thought, I had orange to yellow heat. I think it's going to work, ladies and gentlemen. Now I need to figure a way to hold it up at working height, sort out the air supply, and pull my anvil up close. Taylor near J TX

-
Nice, Nolan. Hope to see some picture of what your doing with your tricked out forge. Taylor, near Jeddo TX
-
Steel wheel JBOD charcoal forge project
wirerabbit replied to wirerabbit's topic in JABOD - Just A Box Of Dirt
Oh don't I know it. It is normal for me to see 1 inch cracks in my yard deep enough to put my hand. The traditional method of countering excessive shrinkage is to temper with a non-shrinking ingredient like sand, organic material, grog, or even calcined material. In my research I have not found a problem with any of those tempers (organic stuff might not be a good fit) if the fuel is only charcoal. Someone correct me if I'm wrong. Now I have always used grog made from fired earthenware, smashed up IFBs, or calcined kaoline in my other work, but I don't want to use that stuff just yet. Let's see how this first go turns out. I can tell you that consolidating this packed earth is both easy and a pain at the same time: too much water and it will shrink horribly, too little and it stays crumbly. I have to hit the sweet spot with the moisture. Might be able to put some fire to it today. Will post pics if anything interesting happens. T near J TX -
Steel wheel JBOD charcoal forge project
wirerabbit replied to wirerabbit's topic in JABOD - Just A Box Of Dirt
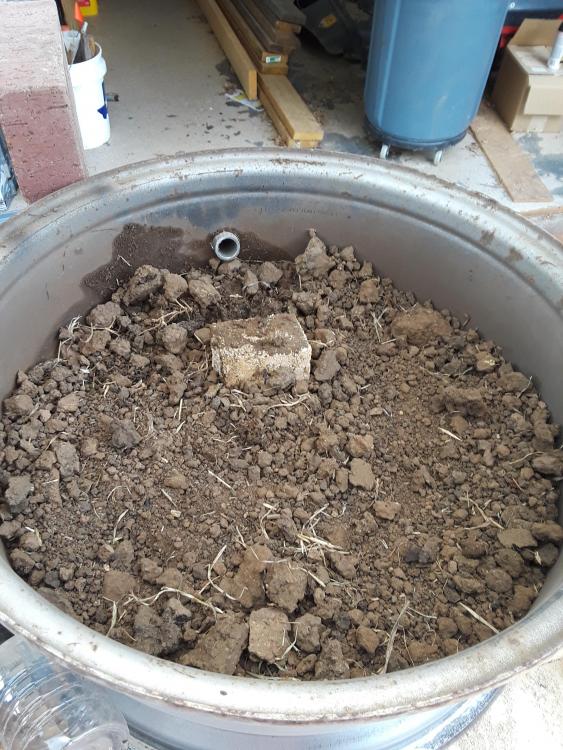
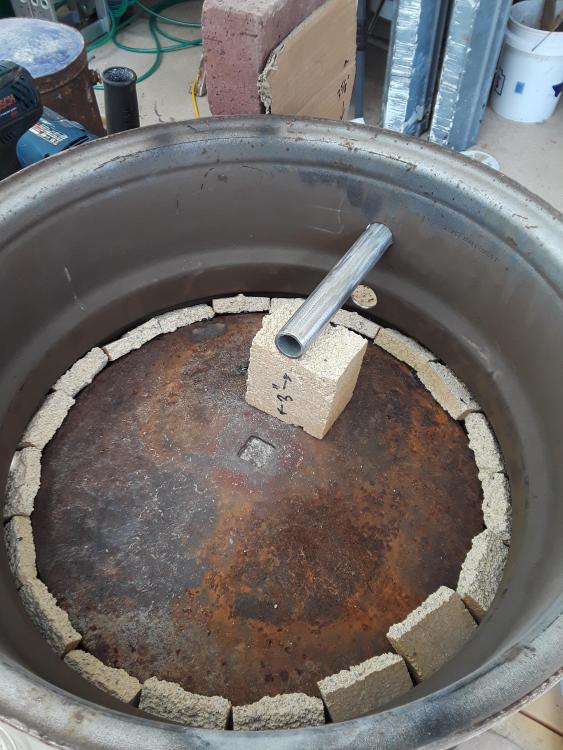
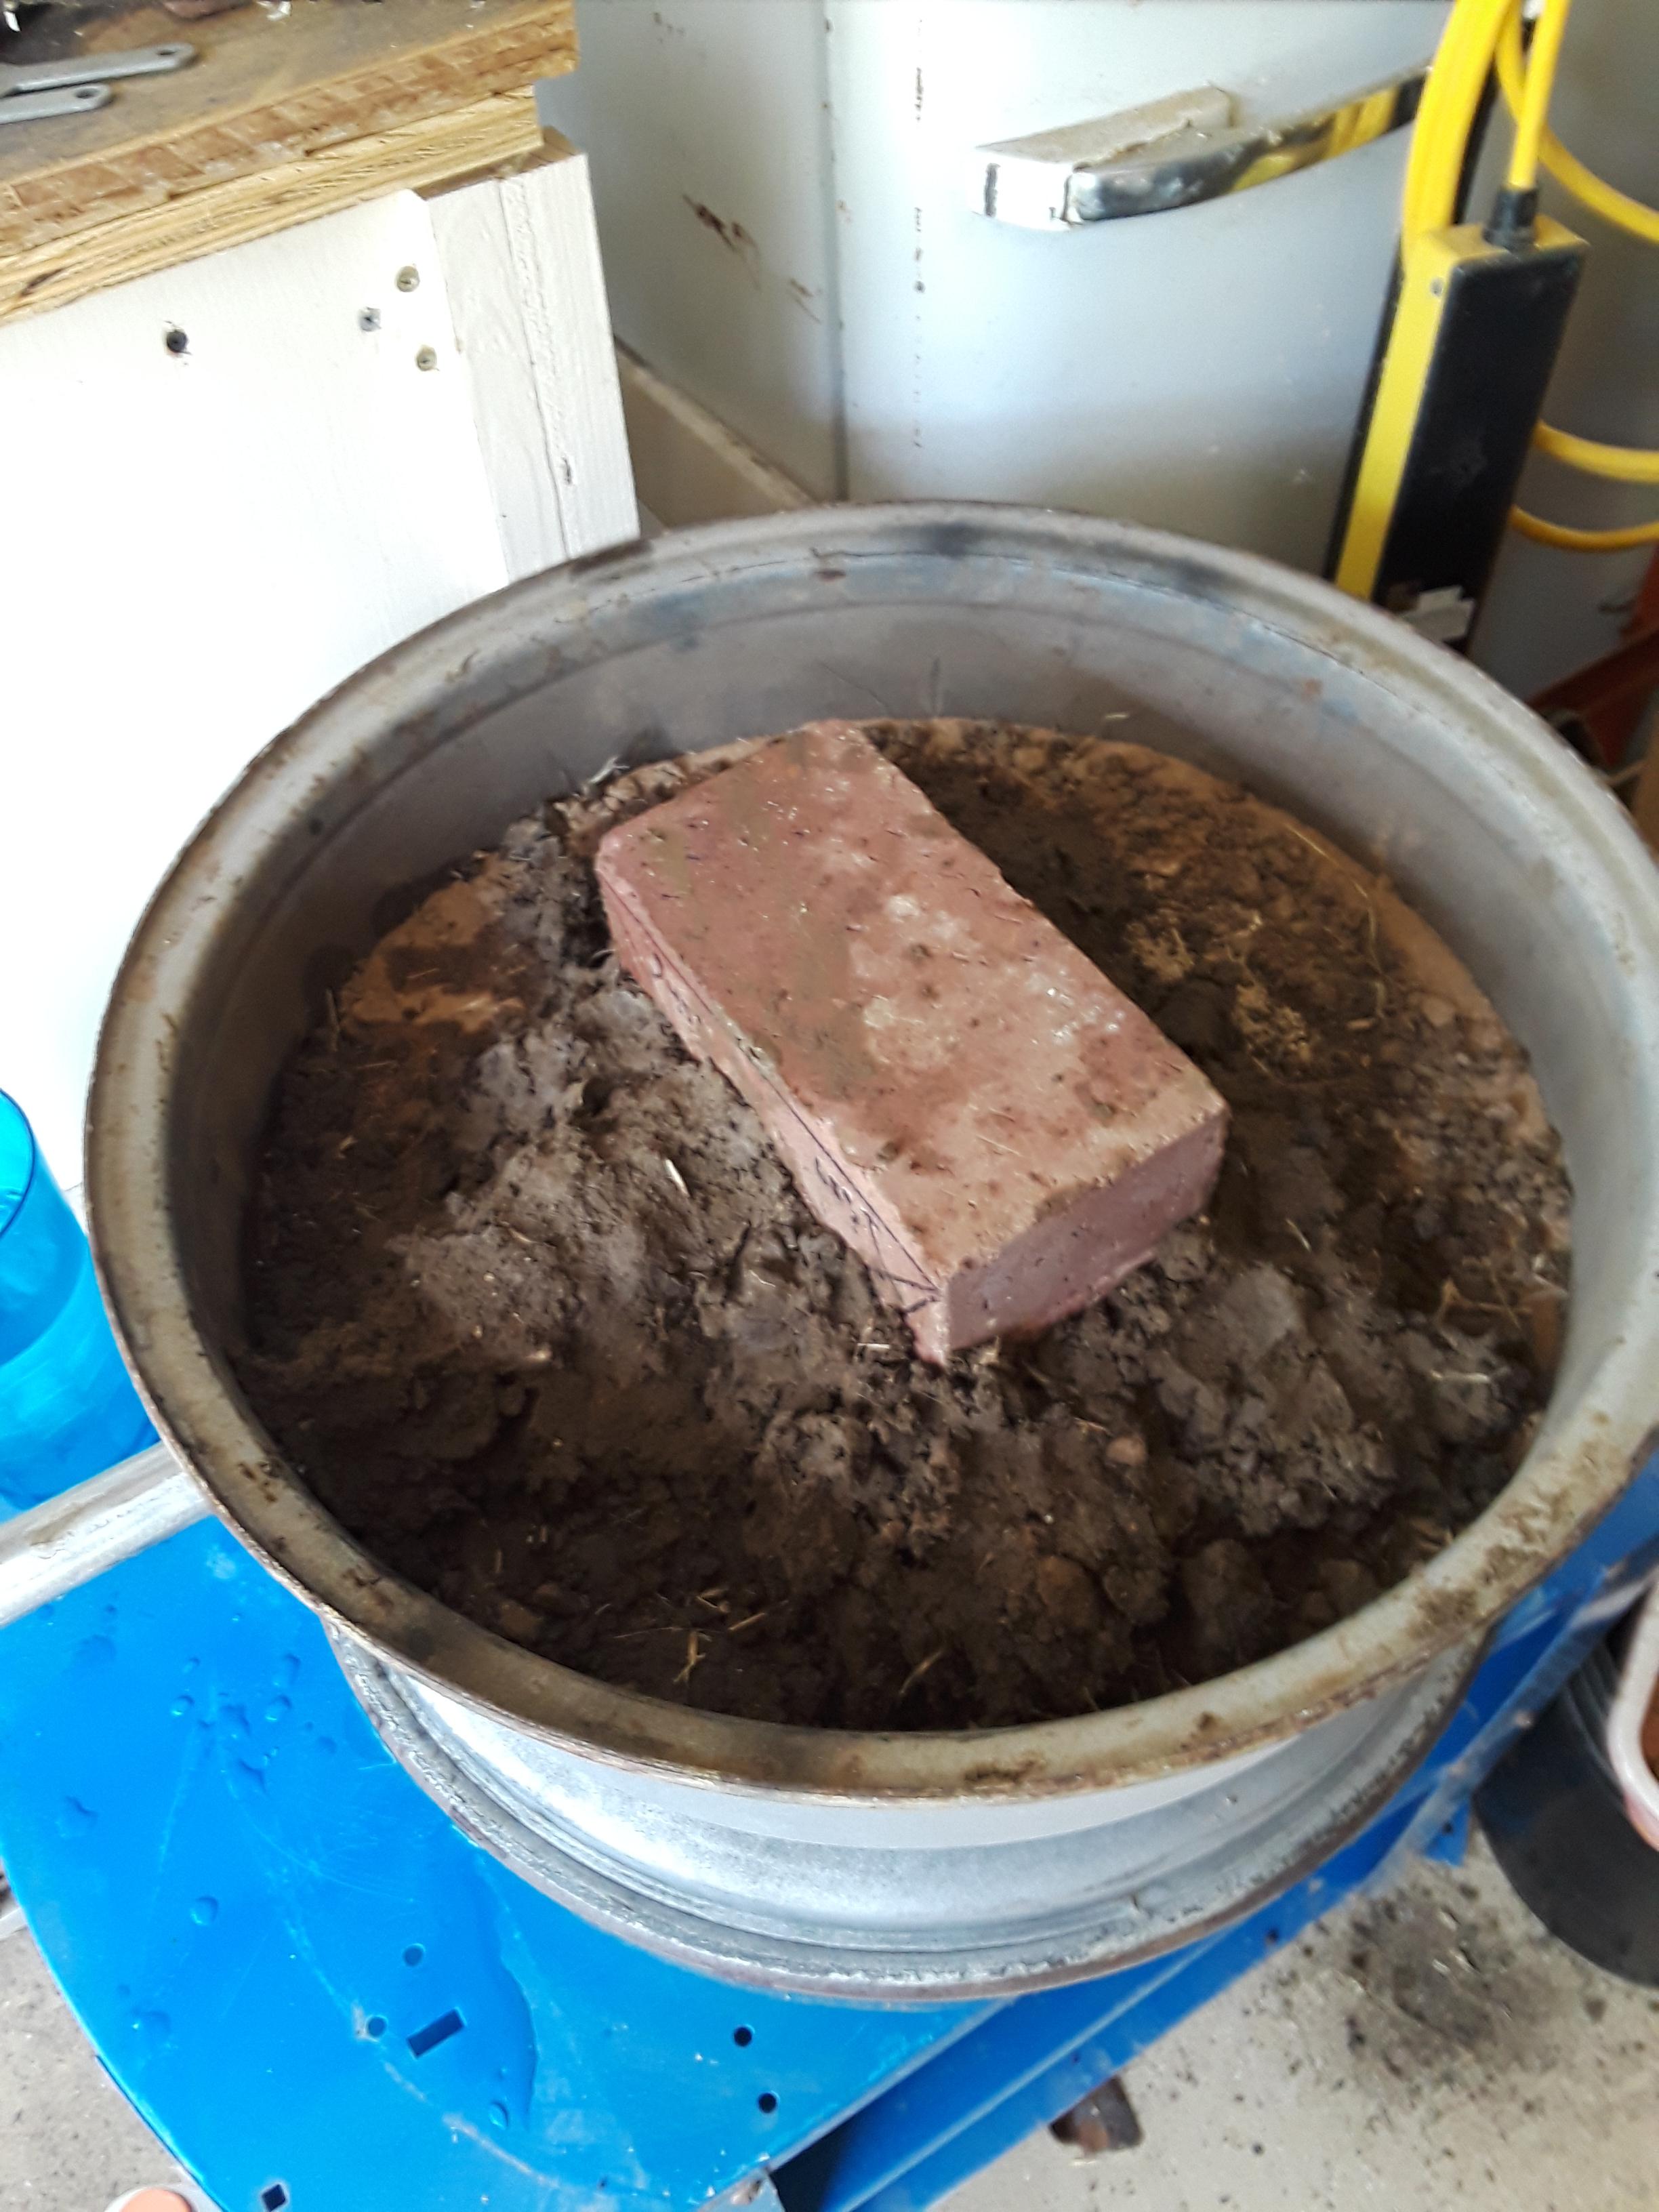
Packed local soil around tuyere and some bricks. This stuff is very very picky. Either it is hard as stone or it is slippery and sticky, very little in between. I'll think about a tempered skim coat when I pull the bricks and slope the ends of the fire pot. half filled. Piece of brick will hold the pipe at level. Tuyere is now covered and bricks placed to reserve space for fire pot. Done, top screed and spritzed with water. I'll let things dry a bit before I knock out the bricks and finish forming the pot. Taylor
.thumb.jpg.309edeb83c8d4b3ca1e9ac7aa108cf72.jpg)
-
Frazer, was mostly recapping what has already been said on this thread. I was hoping the member who rigged a dc motor with a controller would chime in. He may be busy. Are you anywhere near RIT? Ah, back in the day, Shop 1 was a flagship fine craft spot. I mostly know if from my clay life, but I'm betting metal folks will remember it as well. Does anybody else have a battery powered motor being used for bellows? I'd be interested in seeing the setups for this type of hack. All the physical hacks are great and simple and well documented here. Taylor near Jeddo TX
-
This thread is a bit old, but it is on my radar these days. I'm in the process of building a charcoal side blast and I think I will be using a hairdryer for the bellows. I think the easiest solution to the problem of excess air is a simple mechanical exhaust of some kind. It is easy enough to rig a movable hose/pipe that has infinite adjustment from directly inline with the end of the blow pipe (maximum air) to complete bypass blow pipe (zero air). The tried and true shutter methods for blocking off portions of the air flow are also simple systems. I, however, want to alter to hair dryer to remove the A/C components and leave the simple DC motor. A battery, a switch and a speed controller is all it will take to make a nice little electric bellows. This does away with dimmer switches, GFCI issues, and other bugbears associated with line voltage. I have found numerous youtube videos about hair dryers: how they work, what each part does, etc. so the correct information is available. Simple DC controllers are very cheap online and come in several flavors. I think I priced a simple one at 4 bucks. Hair dryers are pretty easy to find at goodwill or other such resale places for very little money, as well. I have seen someone on IFI already do this mod, and I am hoping he updates us on how his rig is serving him over the long haul. Taylor
-
Steel wheel JBOD charcoal forge project
wirerabbit replied to wirerabbit's topic in JABOD - Just A Box Of Dirt
IronDragon, right you are. Found the posting and I inverted things. Sigh. No worries. Welding on a tab shouldn't mess things up too much. Right? Remember, you haven't seen my welding yet. T -
Steel wheel JBOD charcoal forge project
wirerabbit replied to wirerabbit's topic in JABOD - Just A Box Of Dirt
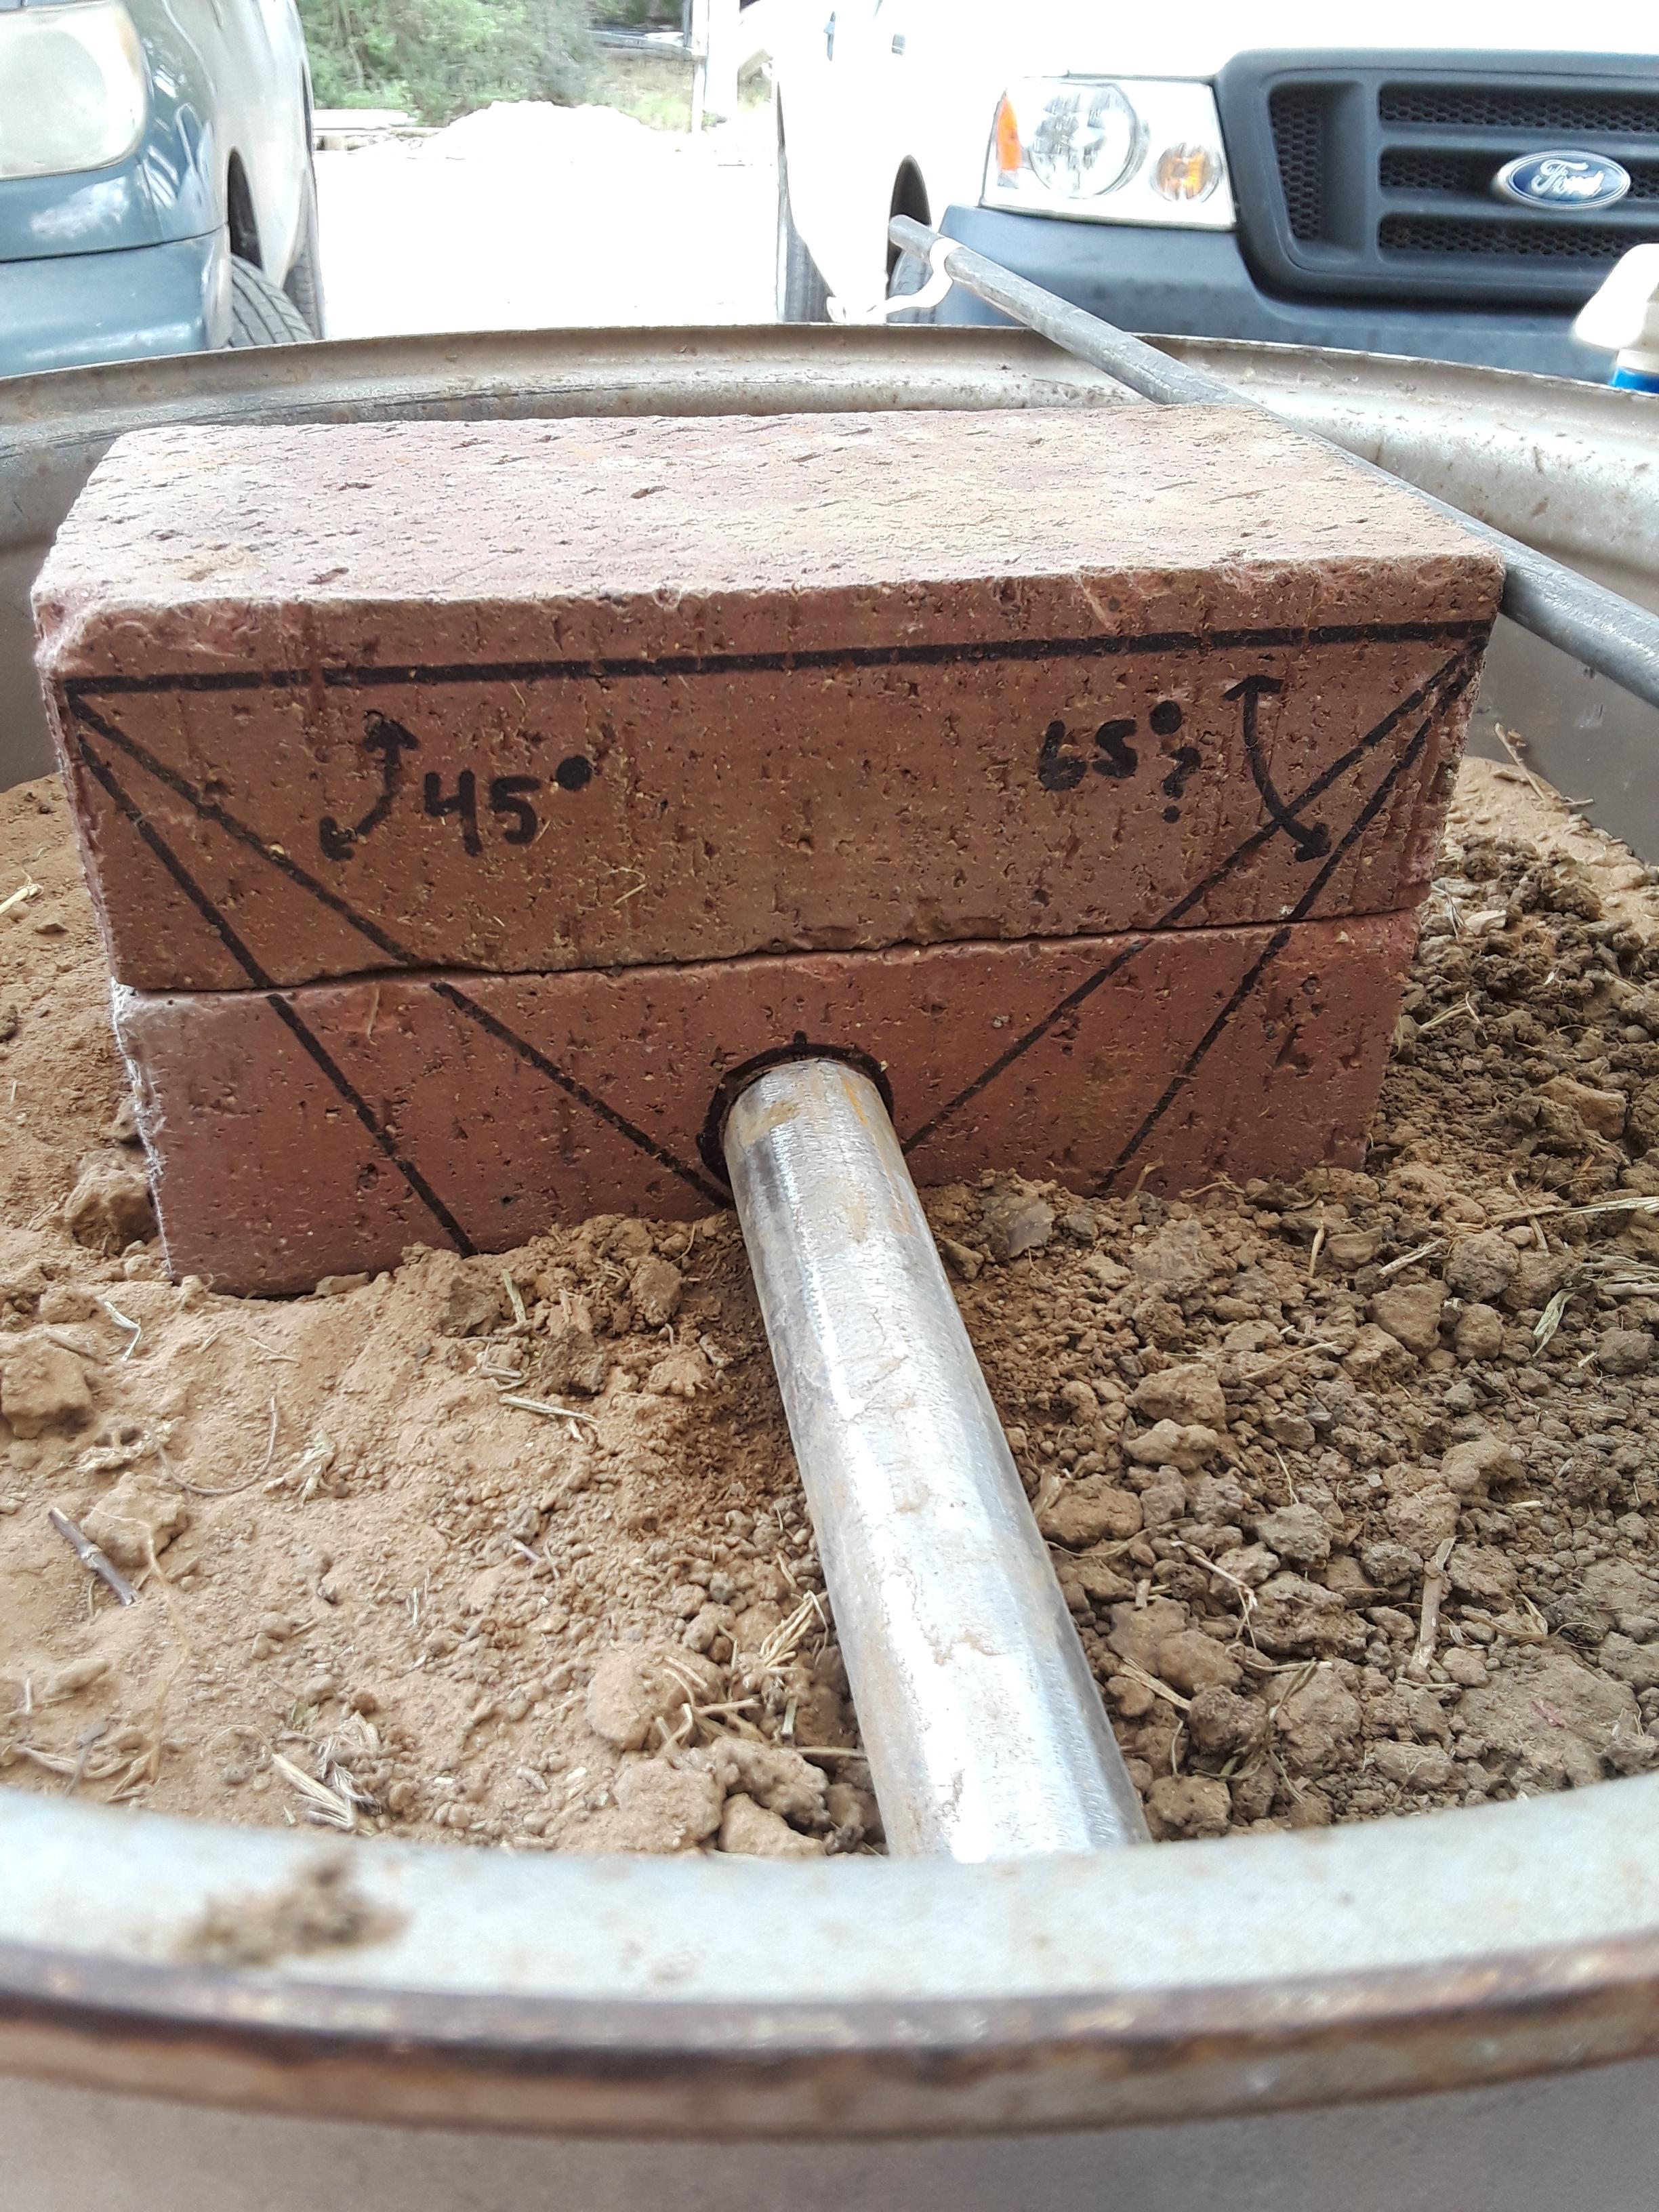
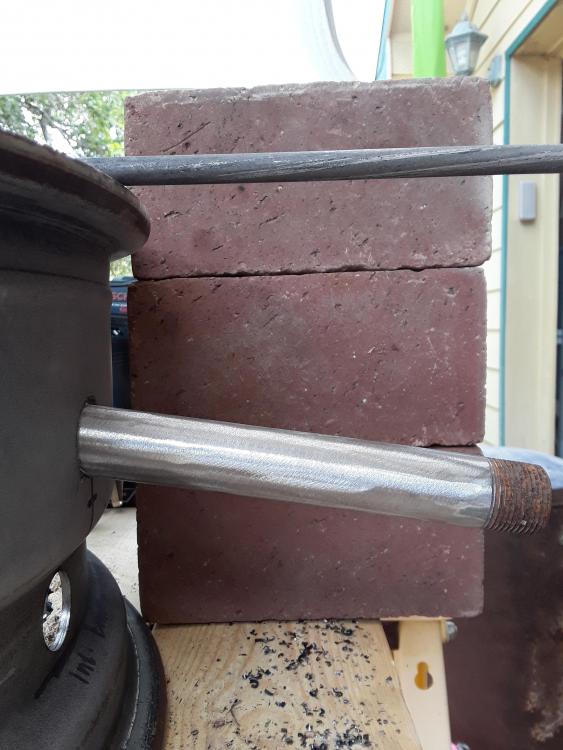
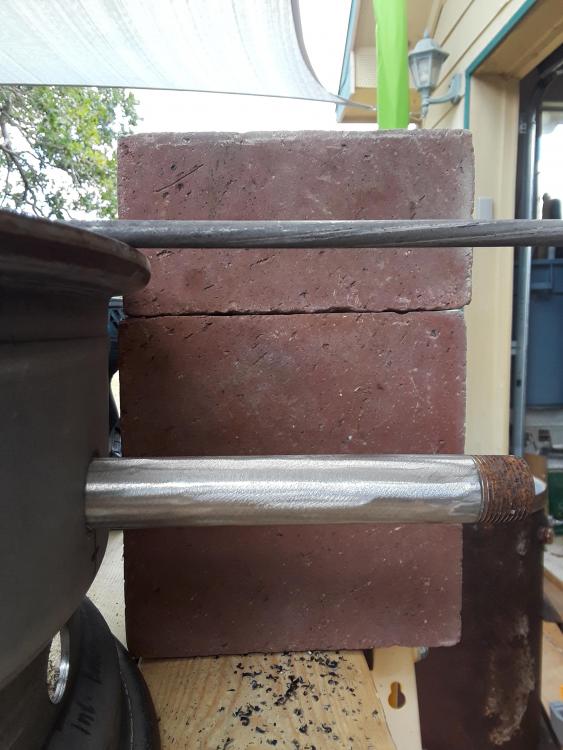
Picture to aid in my firepot shape question: I have drawn some lines on these bricks to get an idea for the bowl or pot shape. These bricks are sitting on the current level of soil. Note the 4 inch depth line spot on the hearth guide I placed along the right side. I have seen bricks forming the pot, making it a rectangle with square section. I have read that the long sides should stay somewhat vertical and the shorter ends slope towards the tuyere to allow the charcoal to stay centered. I would love to know what to shoot for. A 45 deg. angle brings the slope just under the pipe. A 65 deg. (guess) brings the slope down to a 4 inch square floor centered on the tuyere.
-
Steel wheel JBOD charcoal forge project
wirerabbit replied to wirerabbit's topic in JABOD - Just A Box Of Dirt
Quite right, Frosty. I was being lazy. Here are some pics. I re cut the hole so that the bottom of the hole was at my 4 inch mark. Now, to allow the pipe to have a slight rise into the forge, I should have placed the hole a bit lower, but I was not up for doing that math. Anyway, I'm not allowed, I'm an English major. In some posting I found a suggestion that the tuyere could be sloped up about 5 degrees. A little bit of searching yielded 5 deg equals 1":12". So a series of side picks showing what various pitches would look. I settled on a piece of 3 inch brick under the inside edge of pipe. This gives me a 5 deg. slope to the tuyere. If this is not necessary, for goodness sake, don't tell me. Finally, rocks out, pieces of low duty firebrick in. I'm about to go collect dirt which seems to be about 95% clay with very little sand or stones. This I will dry pack. Feel free to keep the comments coming. T near Jeddo TX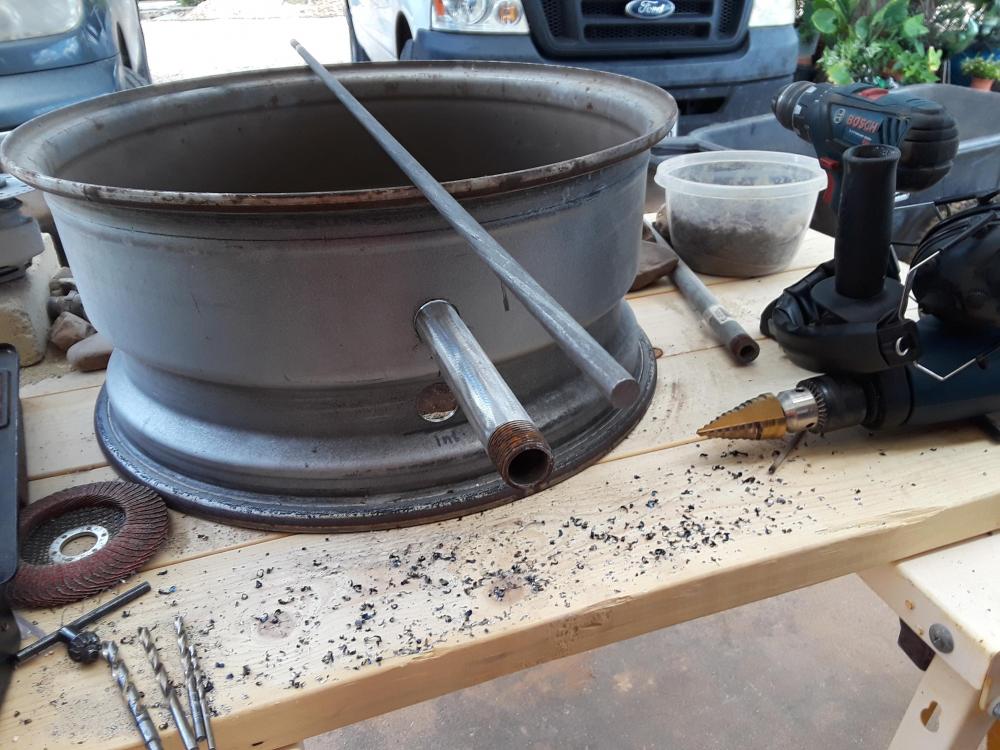

-
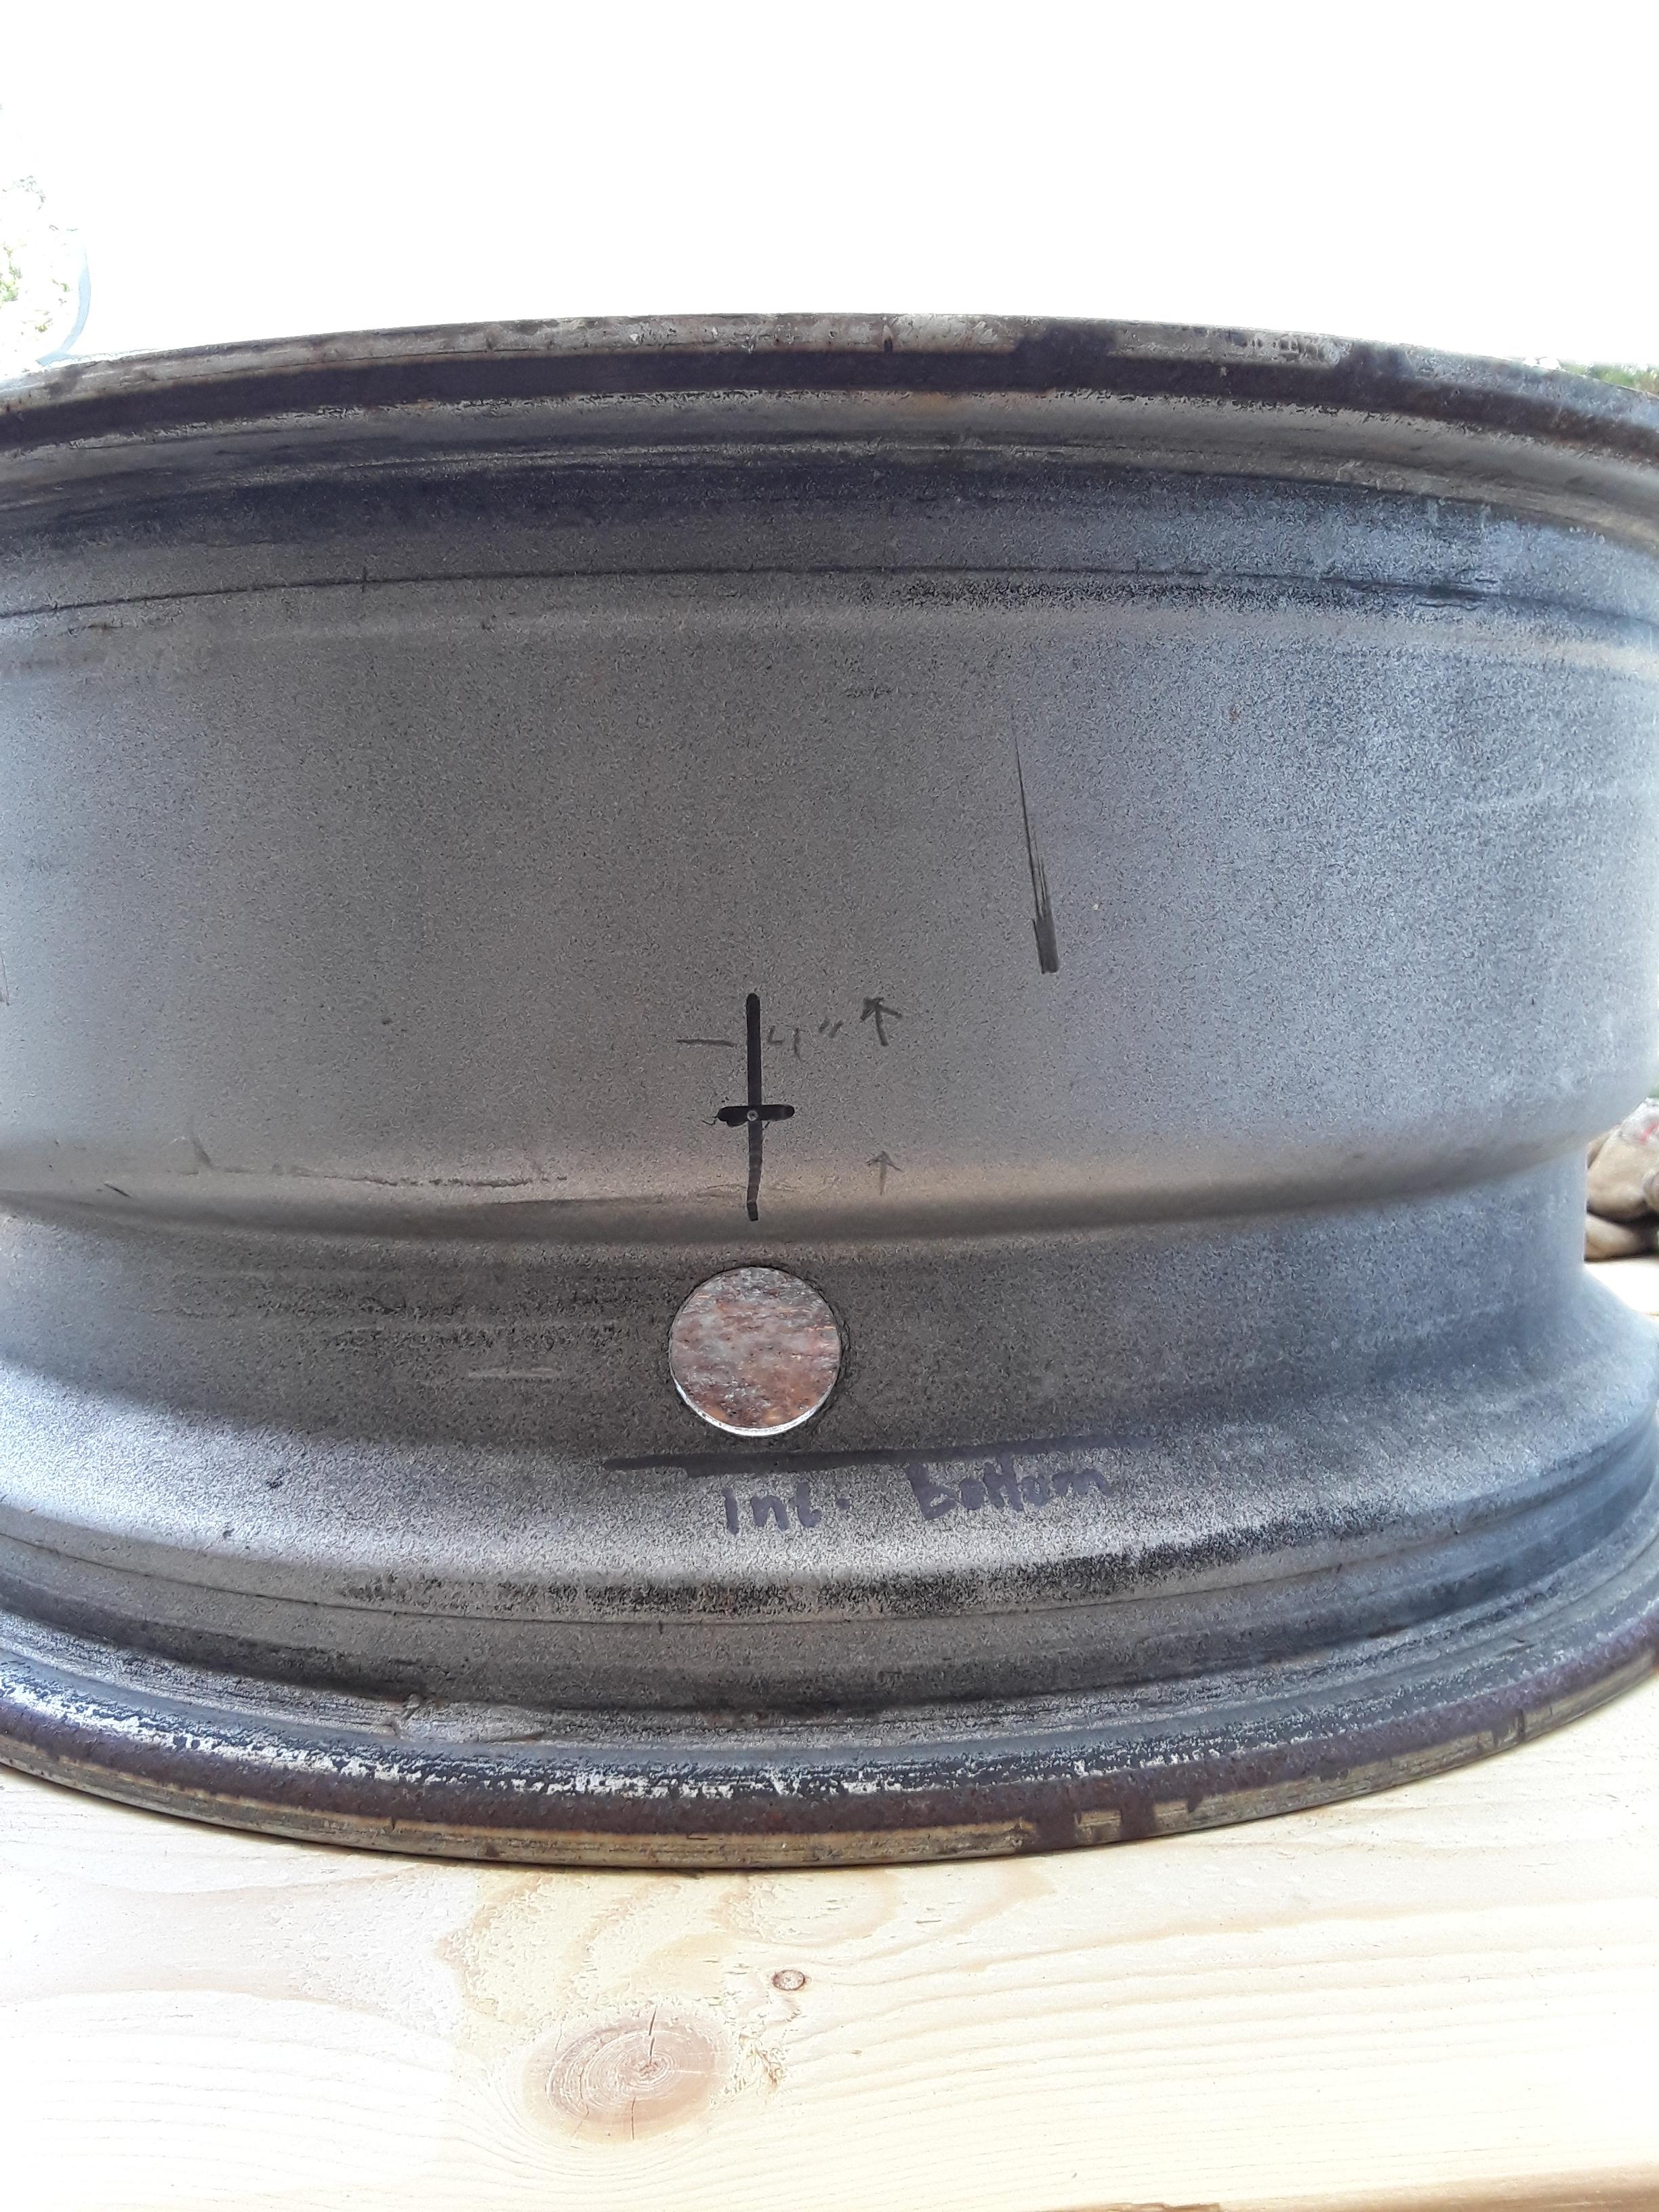
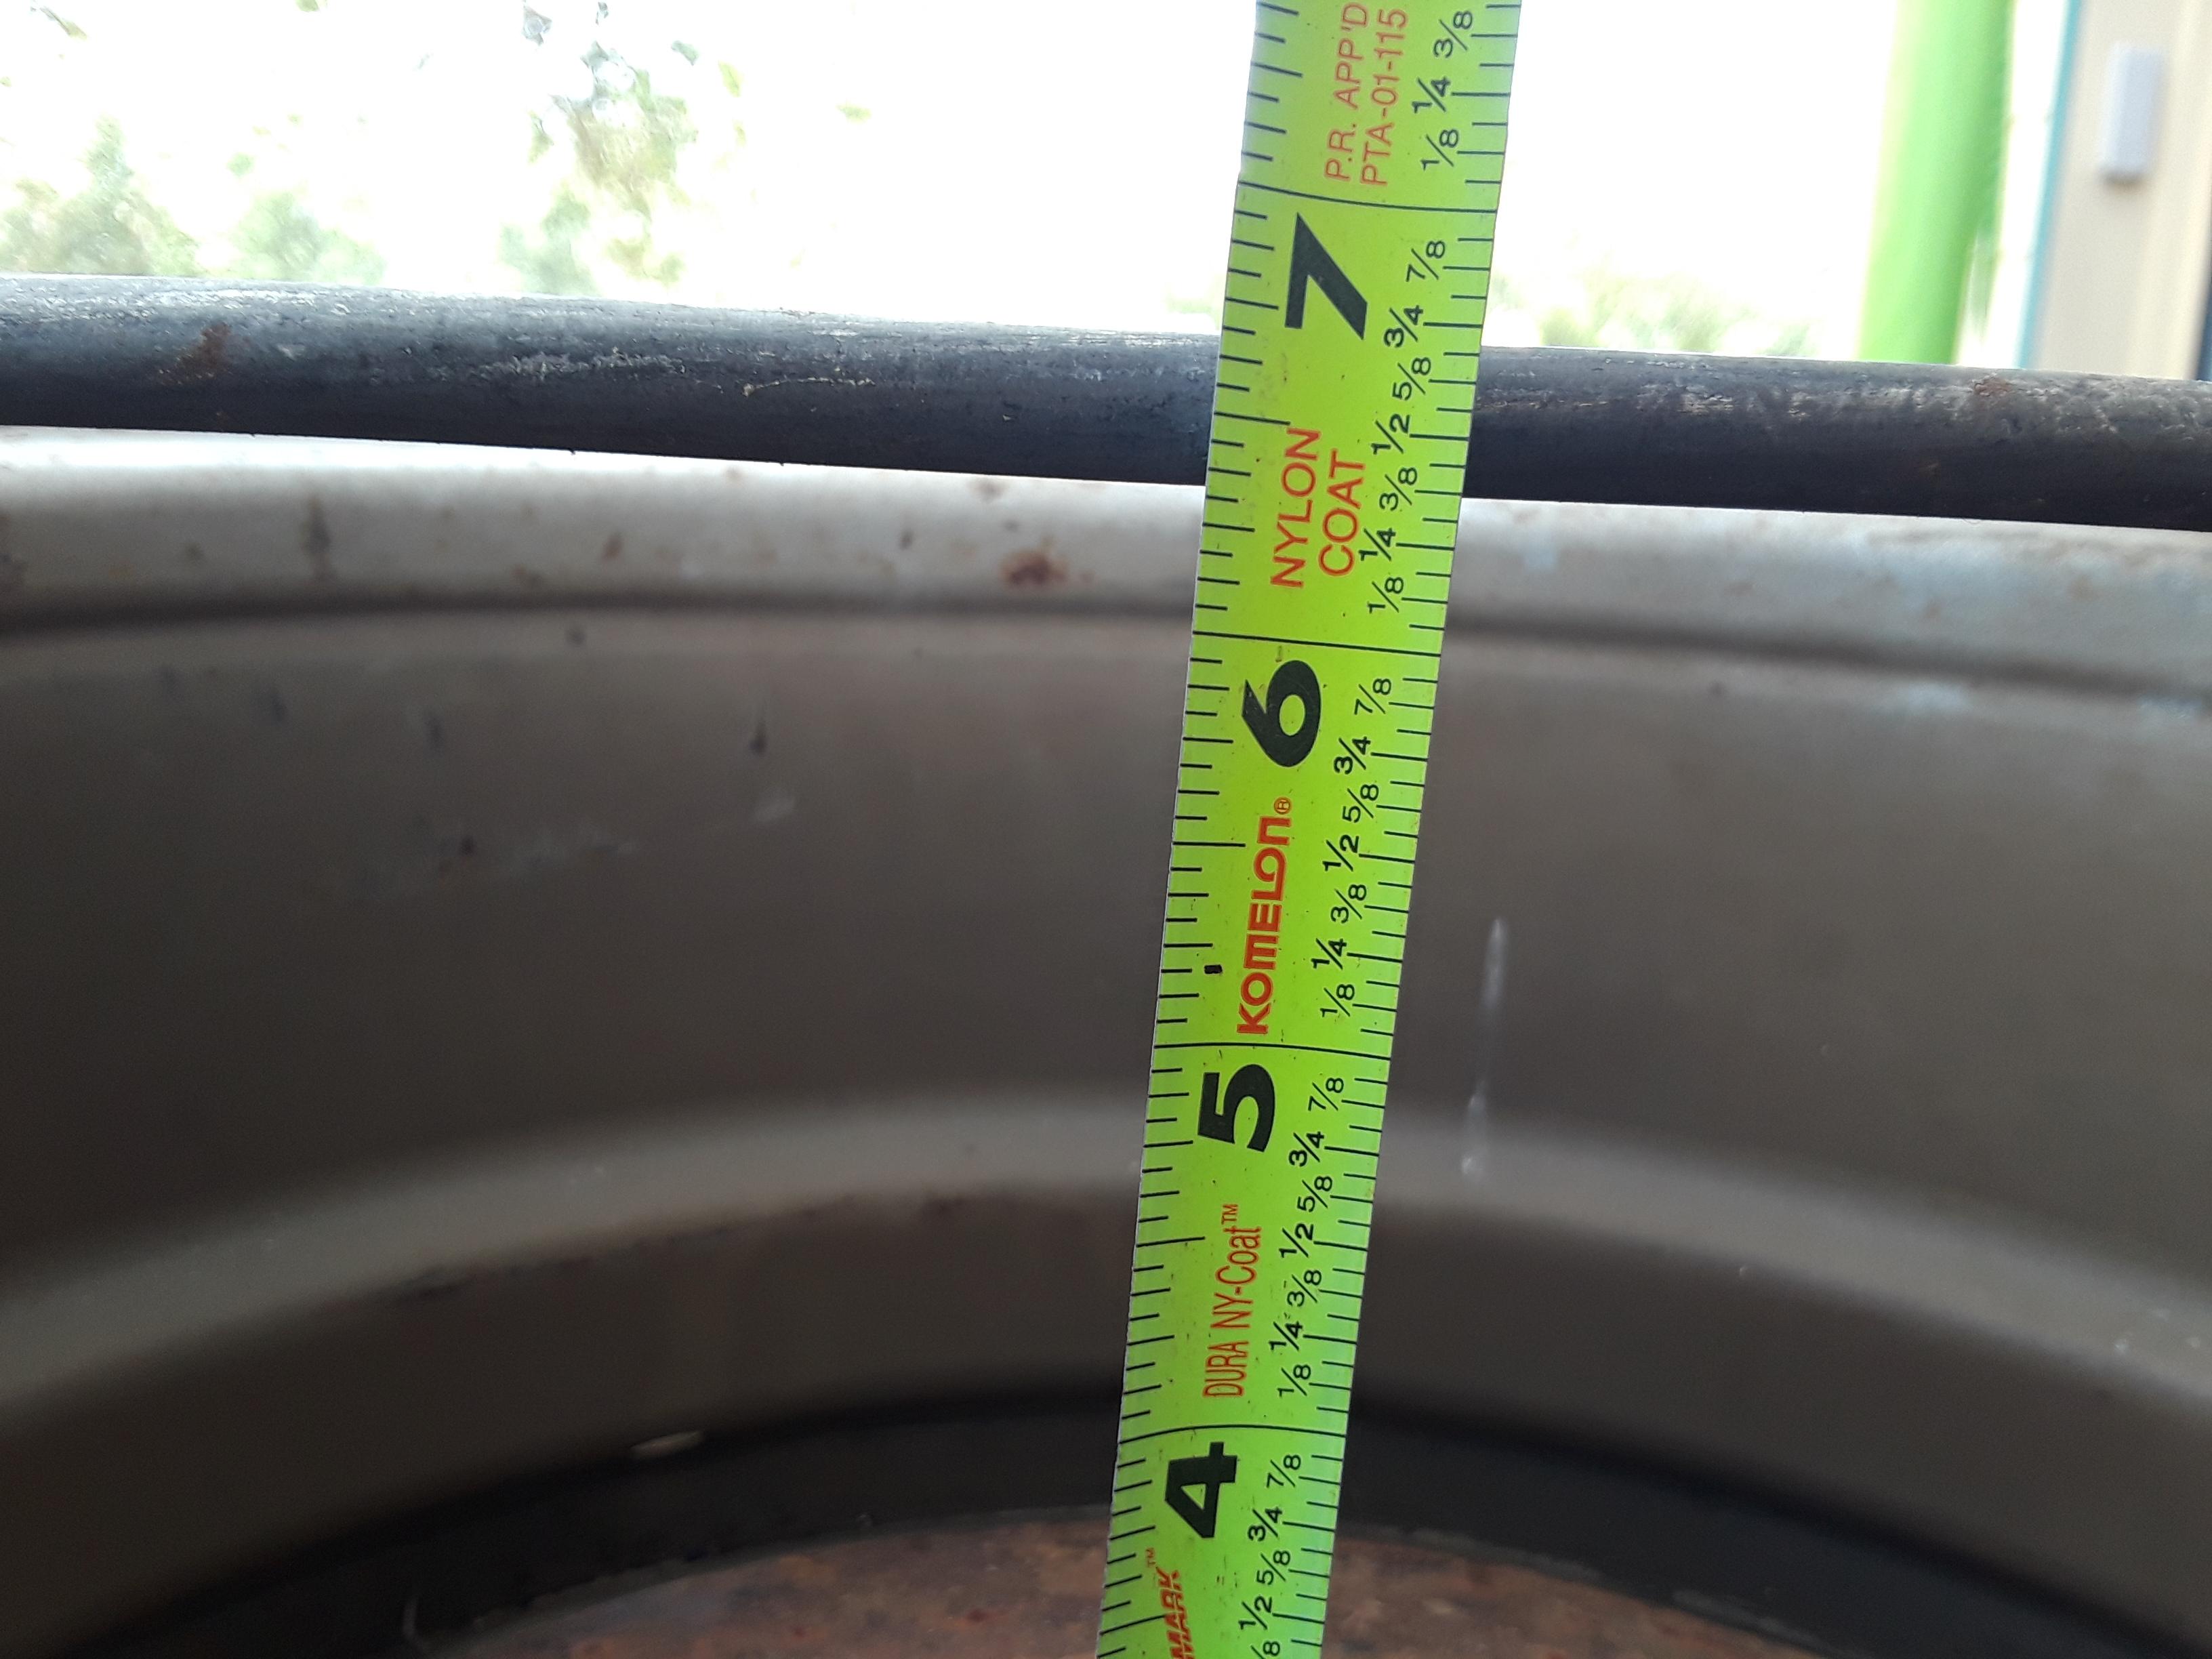
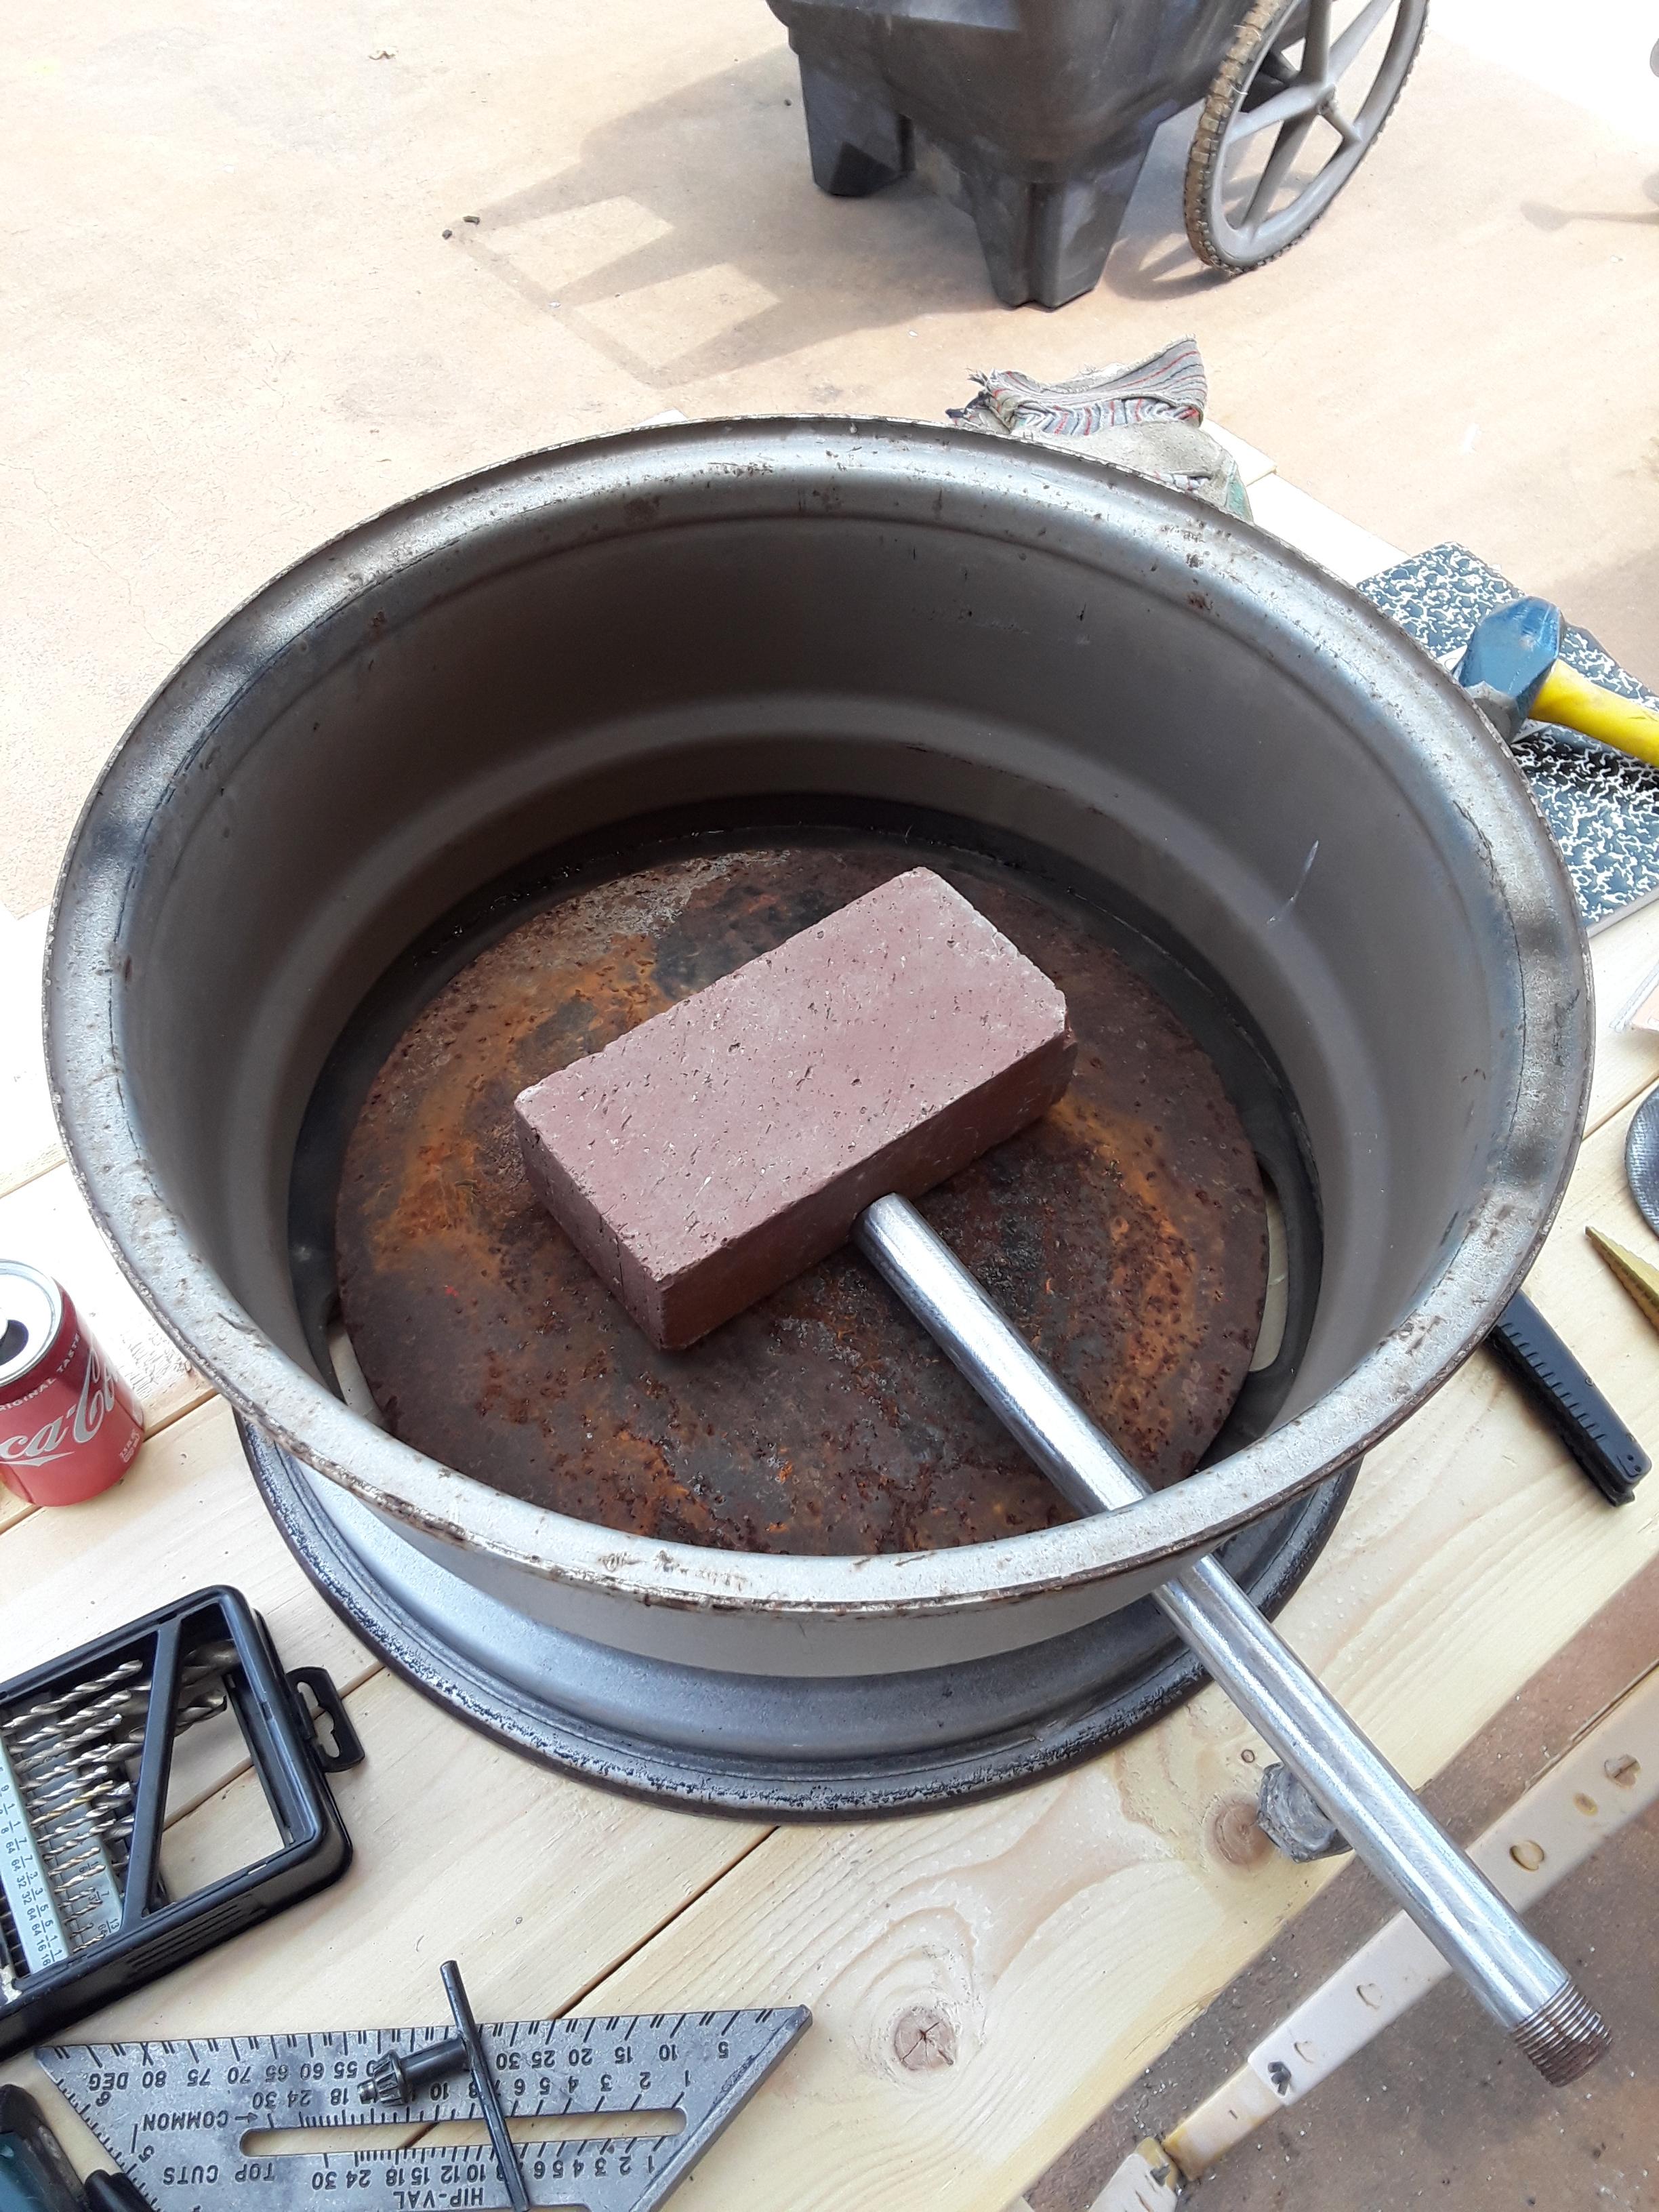
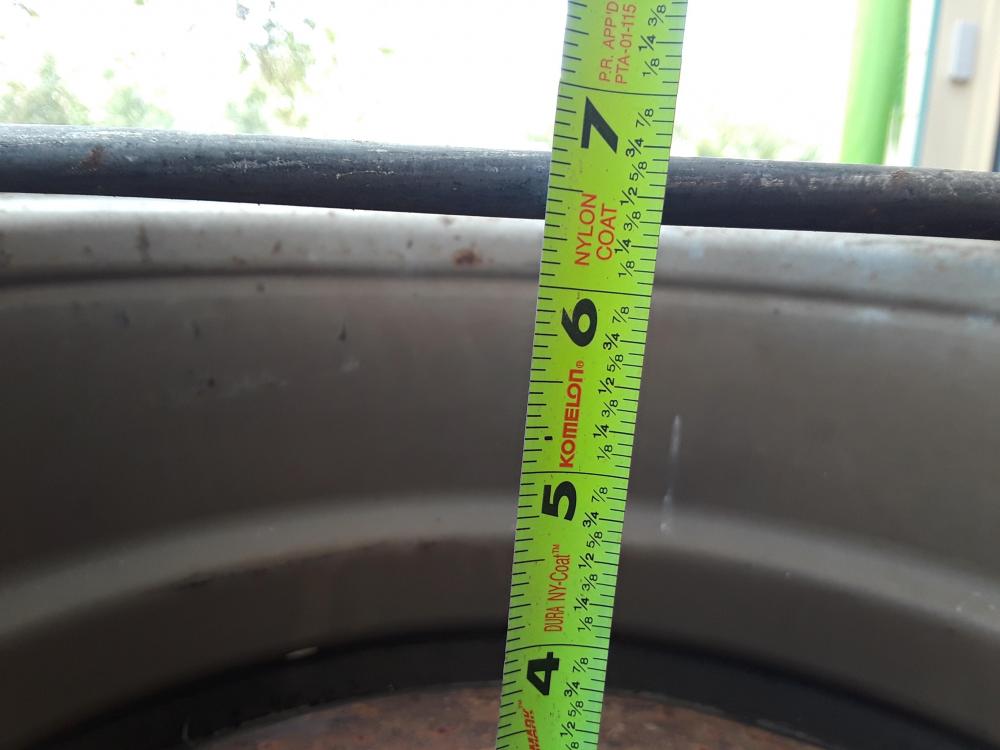
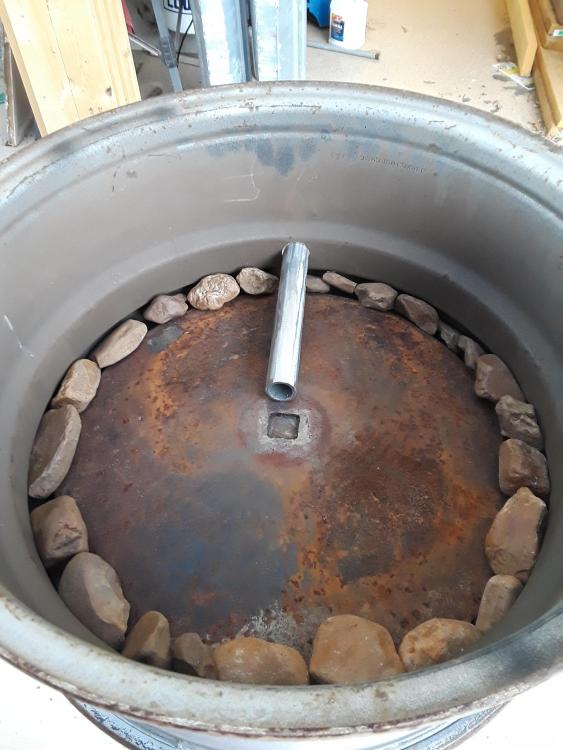
I have started a simple charcoal forge project because, let's face it, I don't have enough work to do around here! I thought I would post progress as I go. My research has lead me to a side draft forge for charcoal, and as any container seems to work, I decided to use one of the steel wheels I have stacked about from the boss' Toyota truck. As you can see from the picture I decided to place the entrance for the tuyere just above the bottom of the container created by the wheel. That would be the central portion of the wheel where the stud holes etc. are located. Marks I placed on the side of the wheel show the interior bottom and 4 inches from the top. The top of the tuyere hole sits just under 5 inches from the top. My measuring tape shows a bit over 6 inches total depth to work with. The width, not shown is 17 and 3/4 inches interior diameter. Because this is the first forge for me, I have decided not to weld shut all the typical holes in a steel tire in order to hold the rammed earth I'll be using, Instead I found an old plow disc that fits inside, and with a few river rocks, I think I have closed up the bottom for the addition of my local dirt. When the time comes I should be able to just knock everything out and start over. Here is the pipe, subfloor and stones in place. I will be sizing the fire pot 4 inches wide, 8 inches long and about 4 inches deep. Here is a pic of a 4x8 brick for relative location. I will not be using any brick below hearth level. This one is just in here to help me visualize the volume of my fire pot. It seems I won't have a large amount of real estate on the surface, but I will have plenty of room for the mounds or bricks at hearth level to contain the charcoal. I'm anticipating needing to enlarge the hole to raise the tuyere and thus the fire pot. We shall see what we shall see. Taylor, near Jeddo TX


-
My first forge: charcoal JABOD build
wirerabbit replied to ClintMakes's topic in JABOD - Just A Box Of Dirt
Hey Clint, How is the battery operated blower working out these days?It has been several months. Have you been forging? I think I'm going to copycat that blower set up with my first charcoal forge build. The truck rim is sitting on the sawhorse right now. I just had to pop back inside to find some suggested measurements for the tuyere location and tilt (if any). Taylor, near Jeddo TX -
...and grinders. T, near Jeddo TX
-
Hee haw. Right you are. Of course I anticipate several mistakes, melting something one of the possibilities. Some great information on the forum. Thanks for the welcome, you two. Now I need to get back to surfing the forum. So many pestering questions... T in TX
-
Nice to find this collection of forums. I will be reading through things in the coming weeks. By way of introduction, let me say that I am a potter, living in the Post Oak Savanna of Texas. Harvey moved me from Rockport TX to my current location, and building a new studio has been an ongoing process. As part of my clay education I have always wanted to include blacksmithing for both the tool making and the object making possibilities. My kiln yard is next on the build list and I have made sure to include some space for metal working (anvil, forge, welder, etc) and am looking forward to melting some metal! I will be asking a bunch of questions as I sink further into yet another way of making things. Taylor, Jeddo TX

.jpg.b253230b002f205adb9c83e9c52956b3.jpg)