wirerabbit
-
Posts
139 -
Joined
-
Last visited
Content Type
Profiles
Forums
Articles
Gallery
Downloads
Events
Everything posted by wirerabbit
-
What did you do in the shop today?
wirerabbit replied to Mark Ling's topic in Blacksmithing, General Discussion
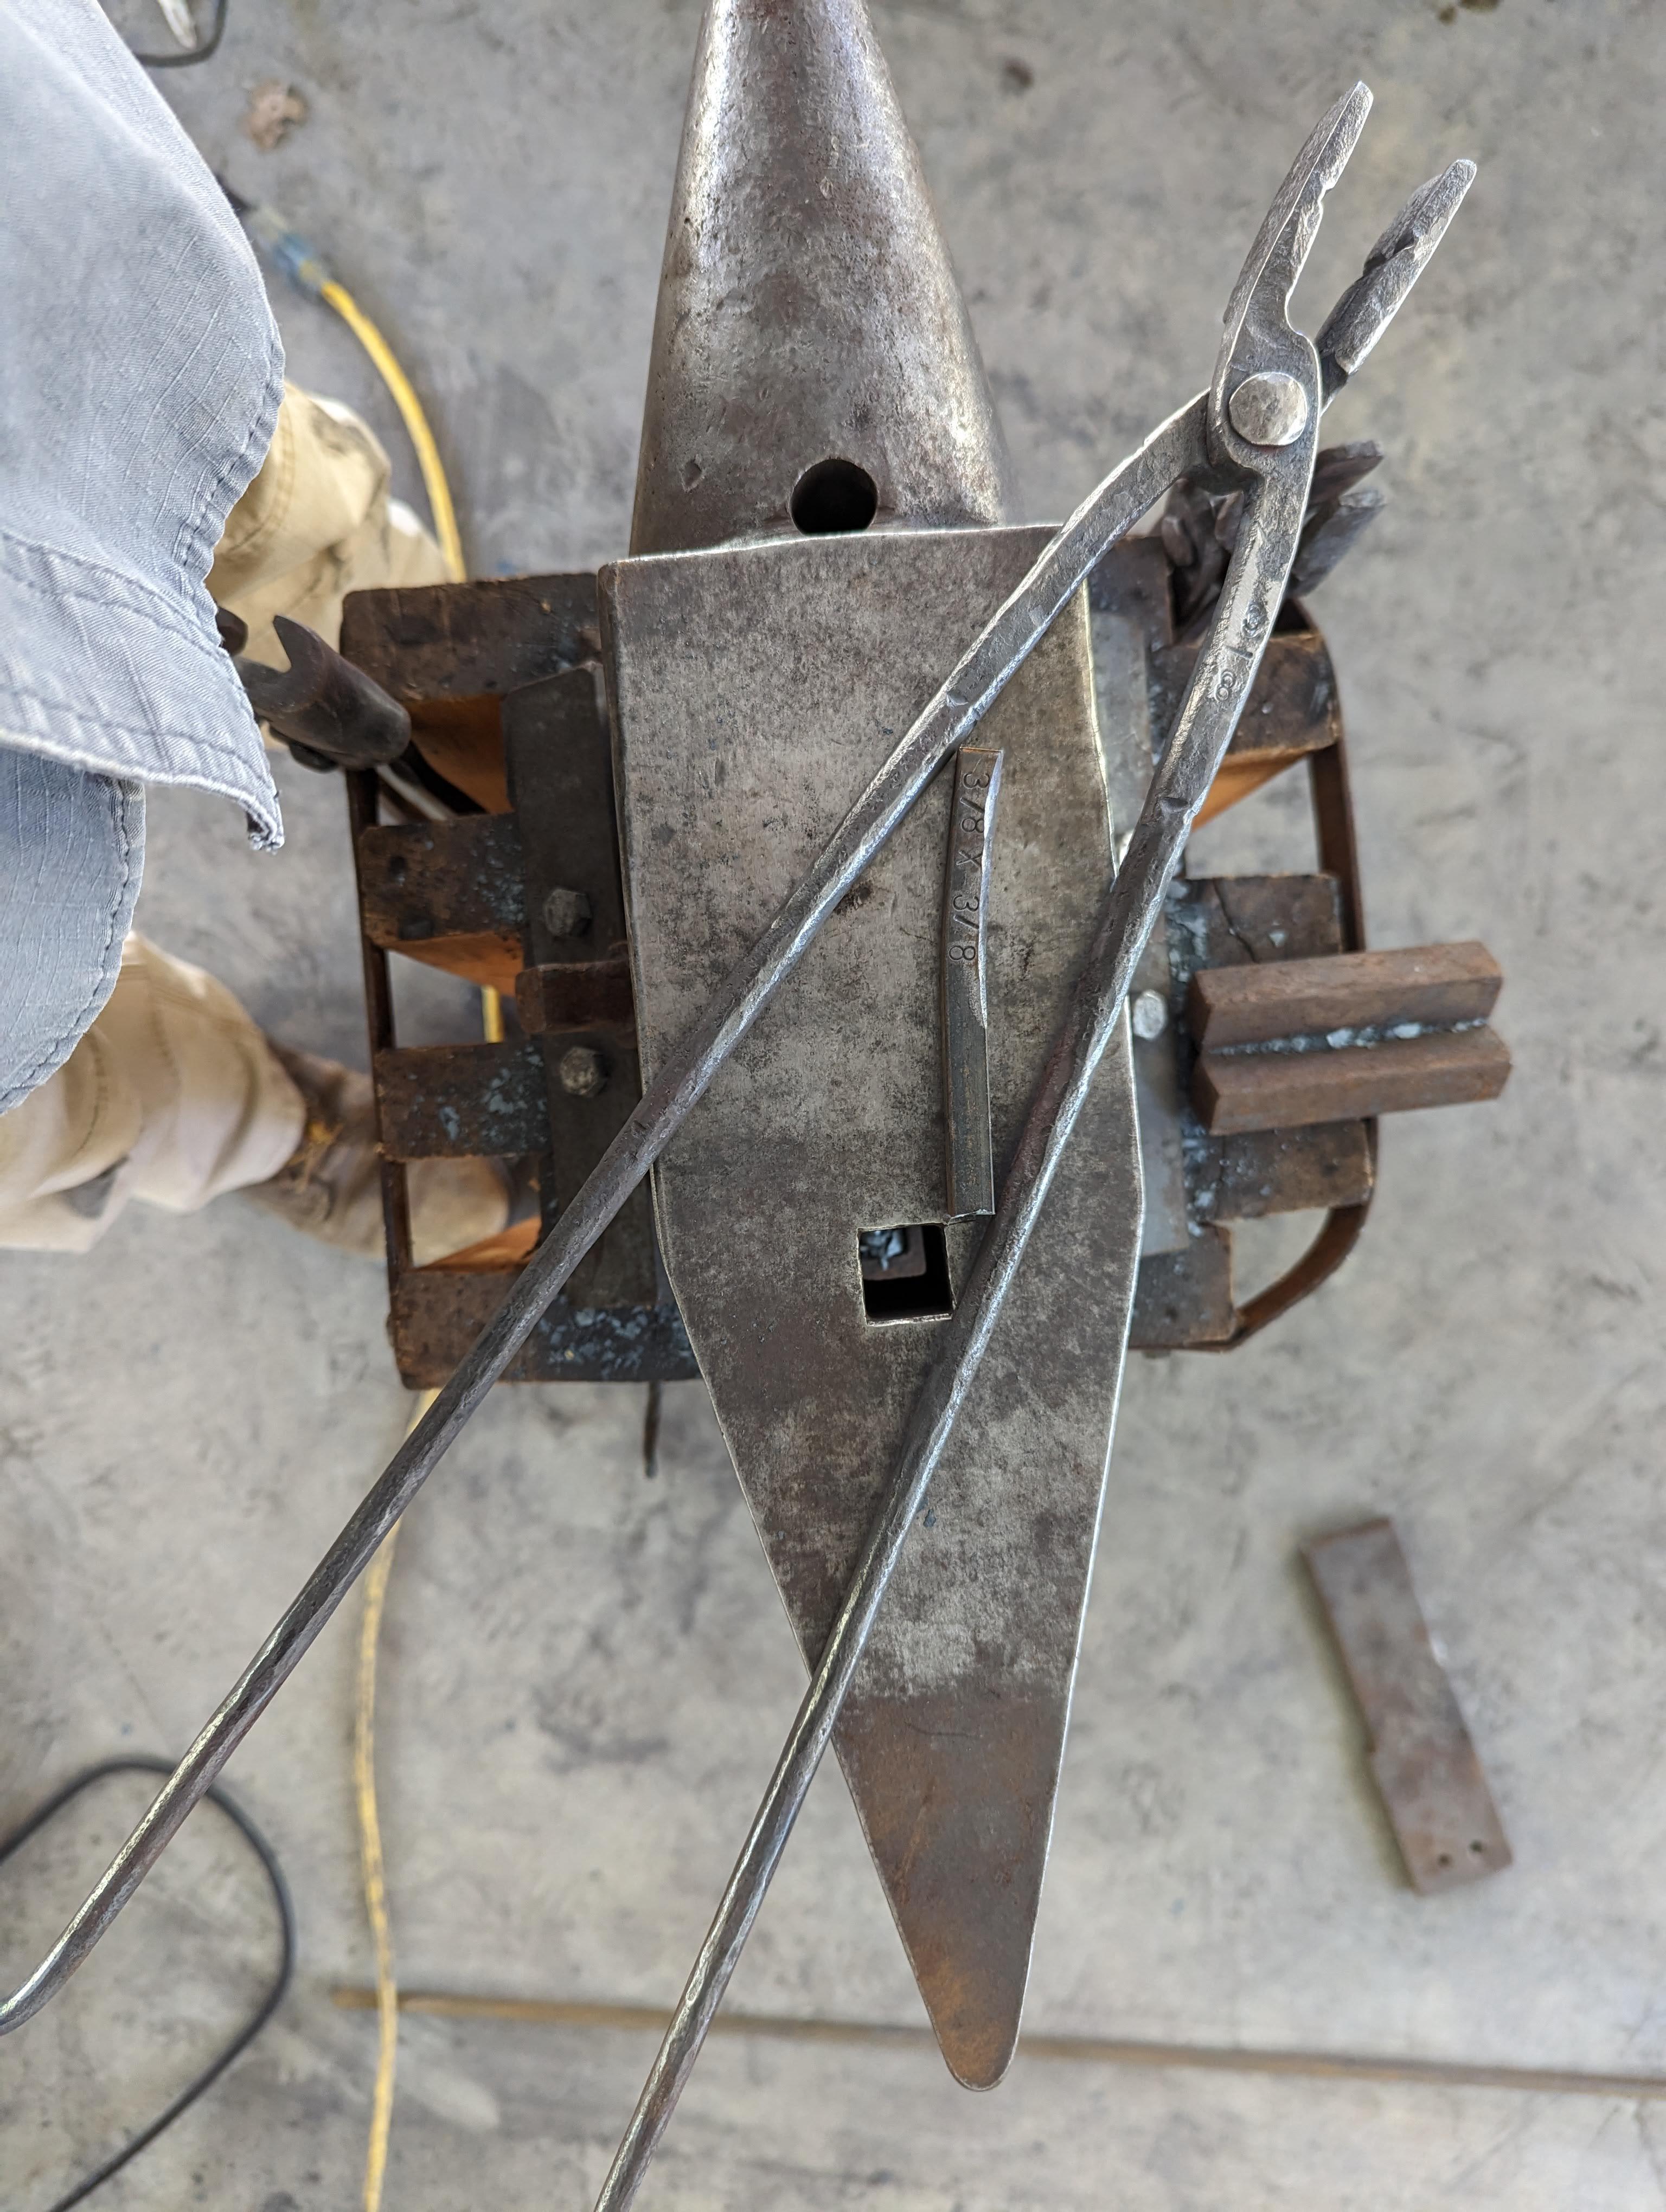
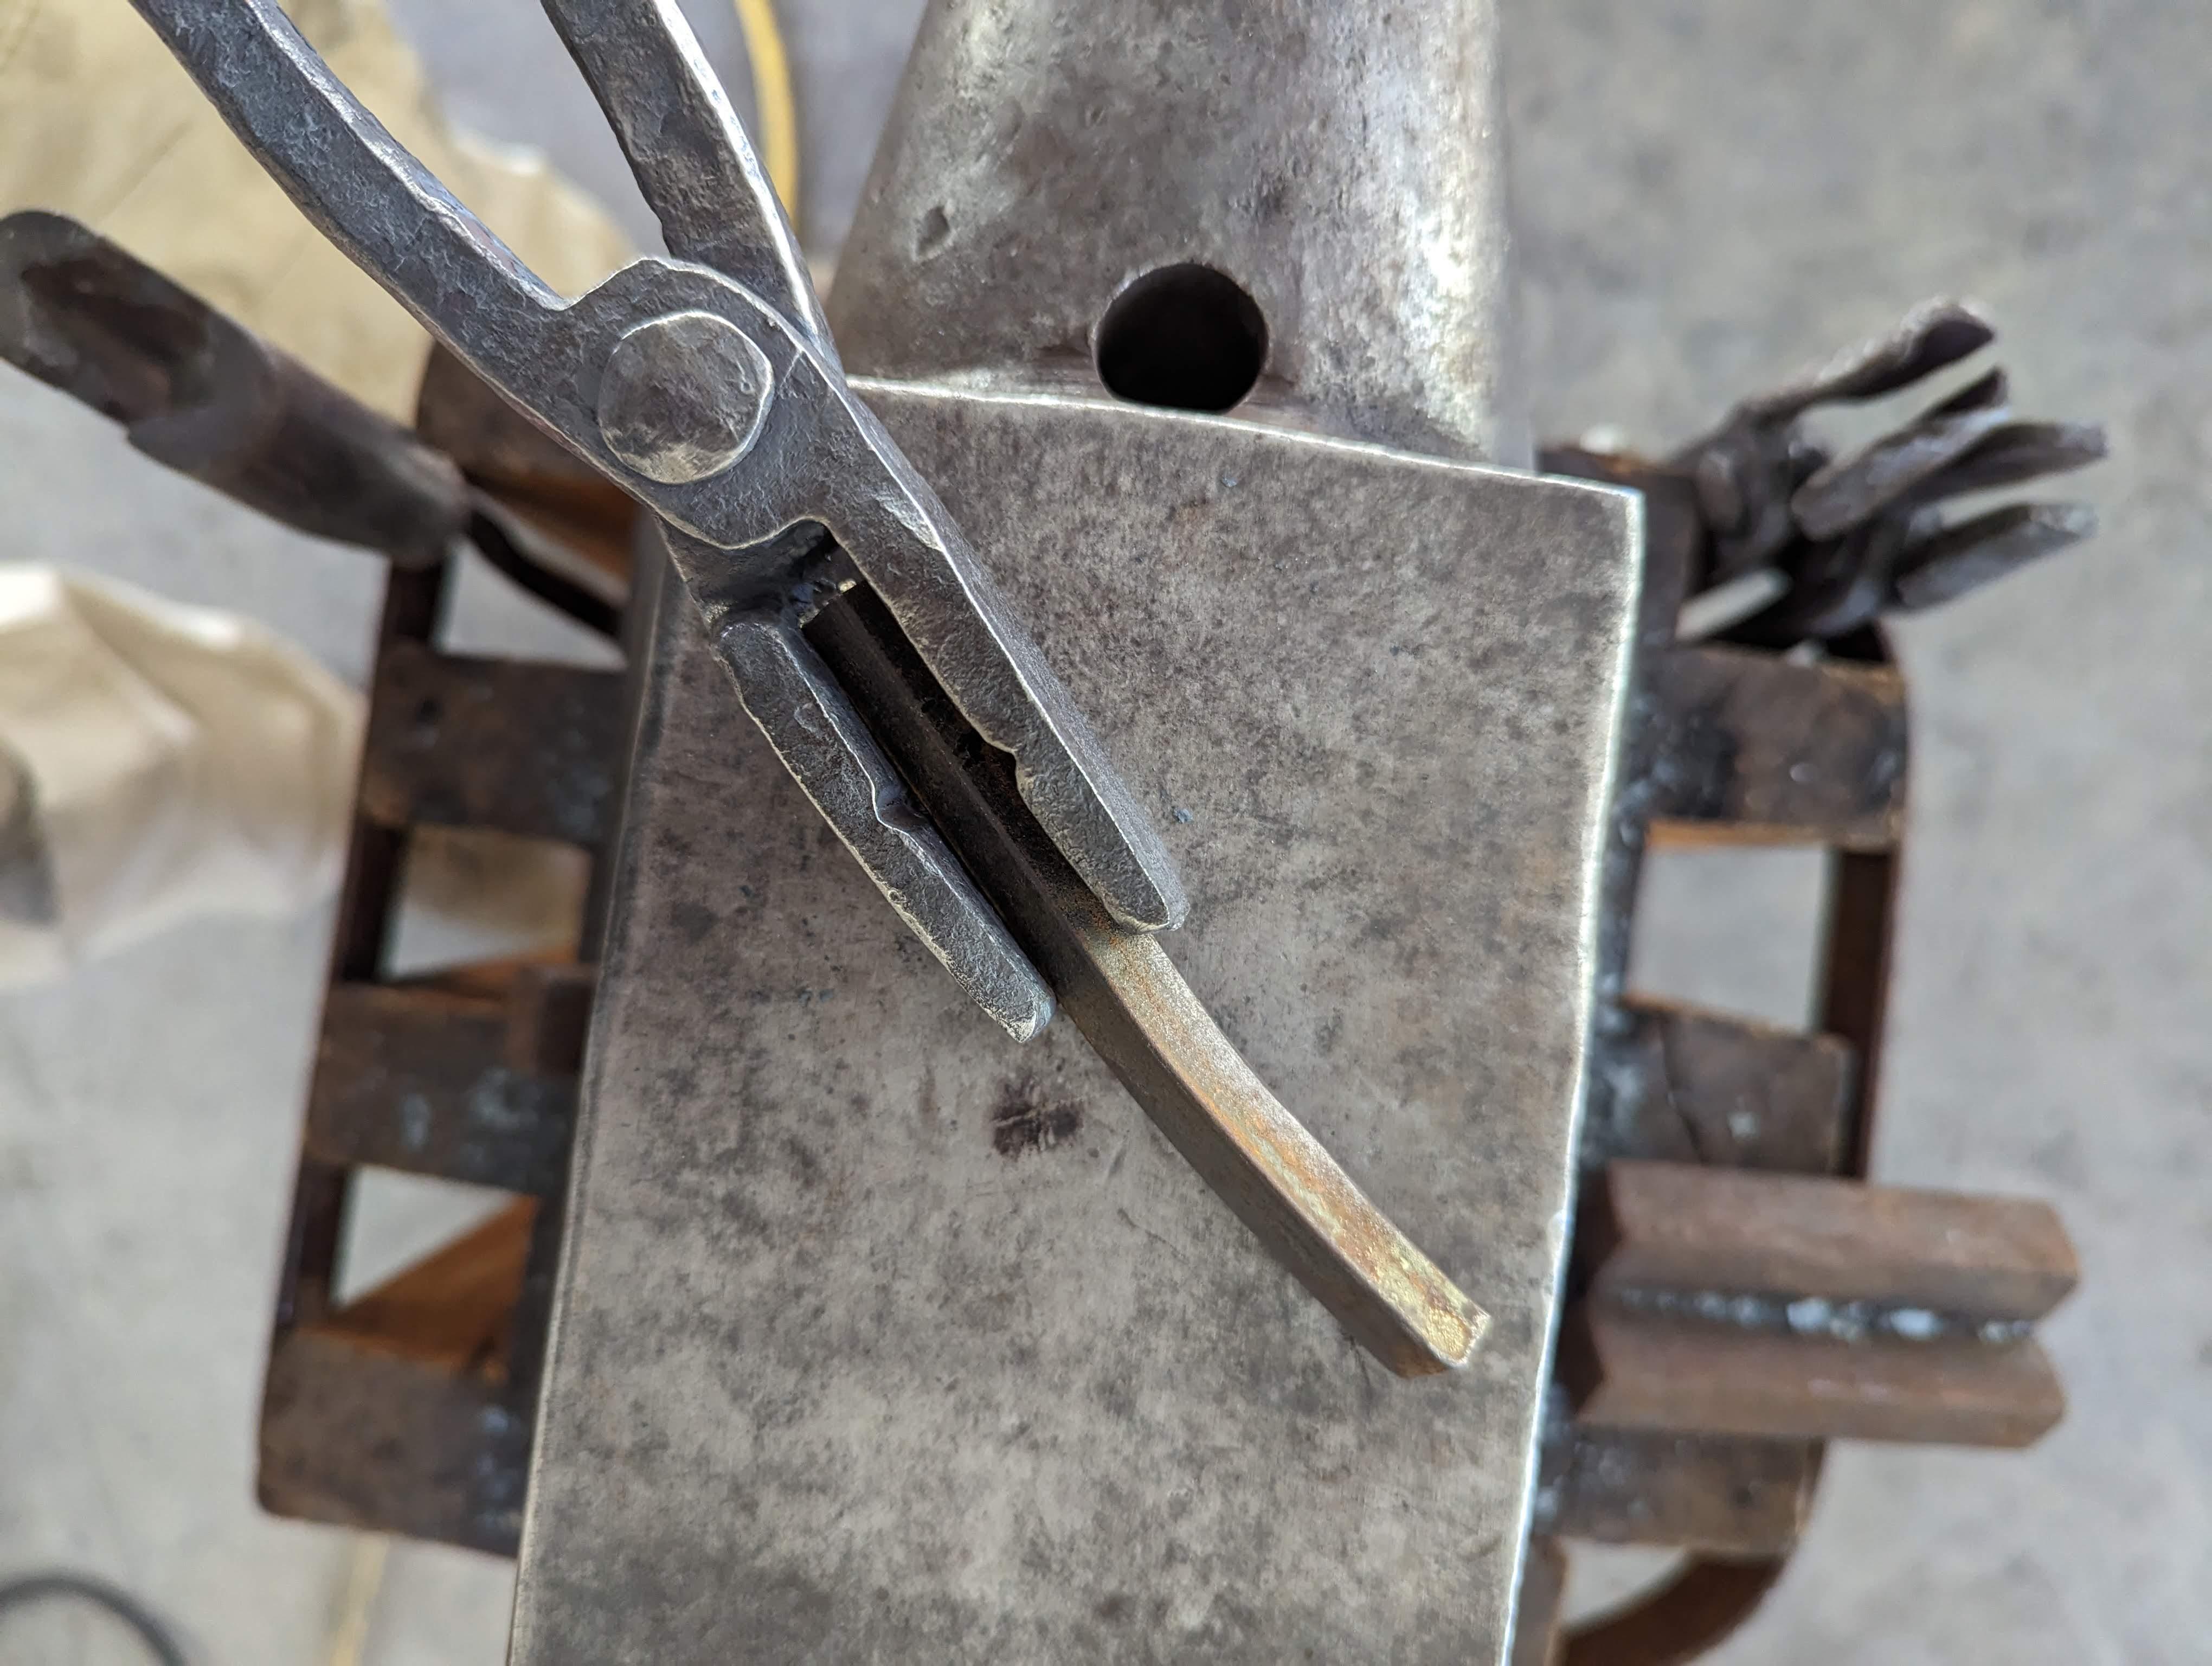
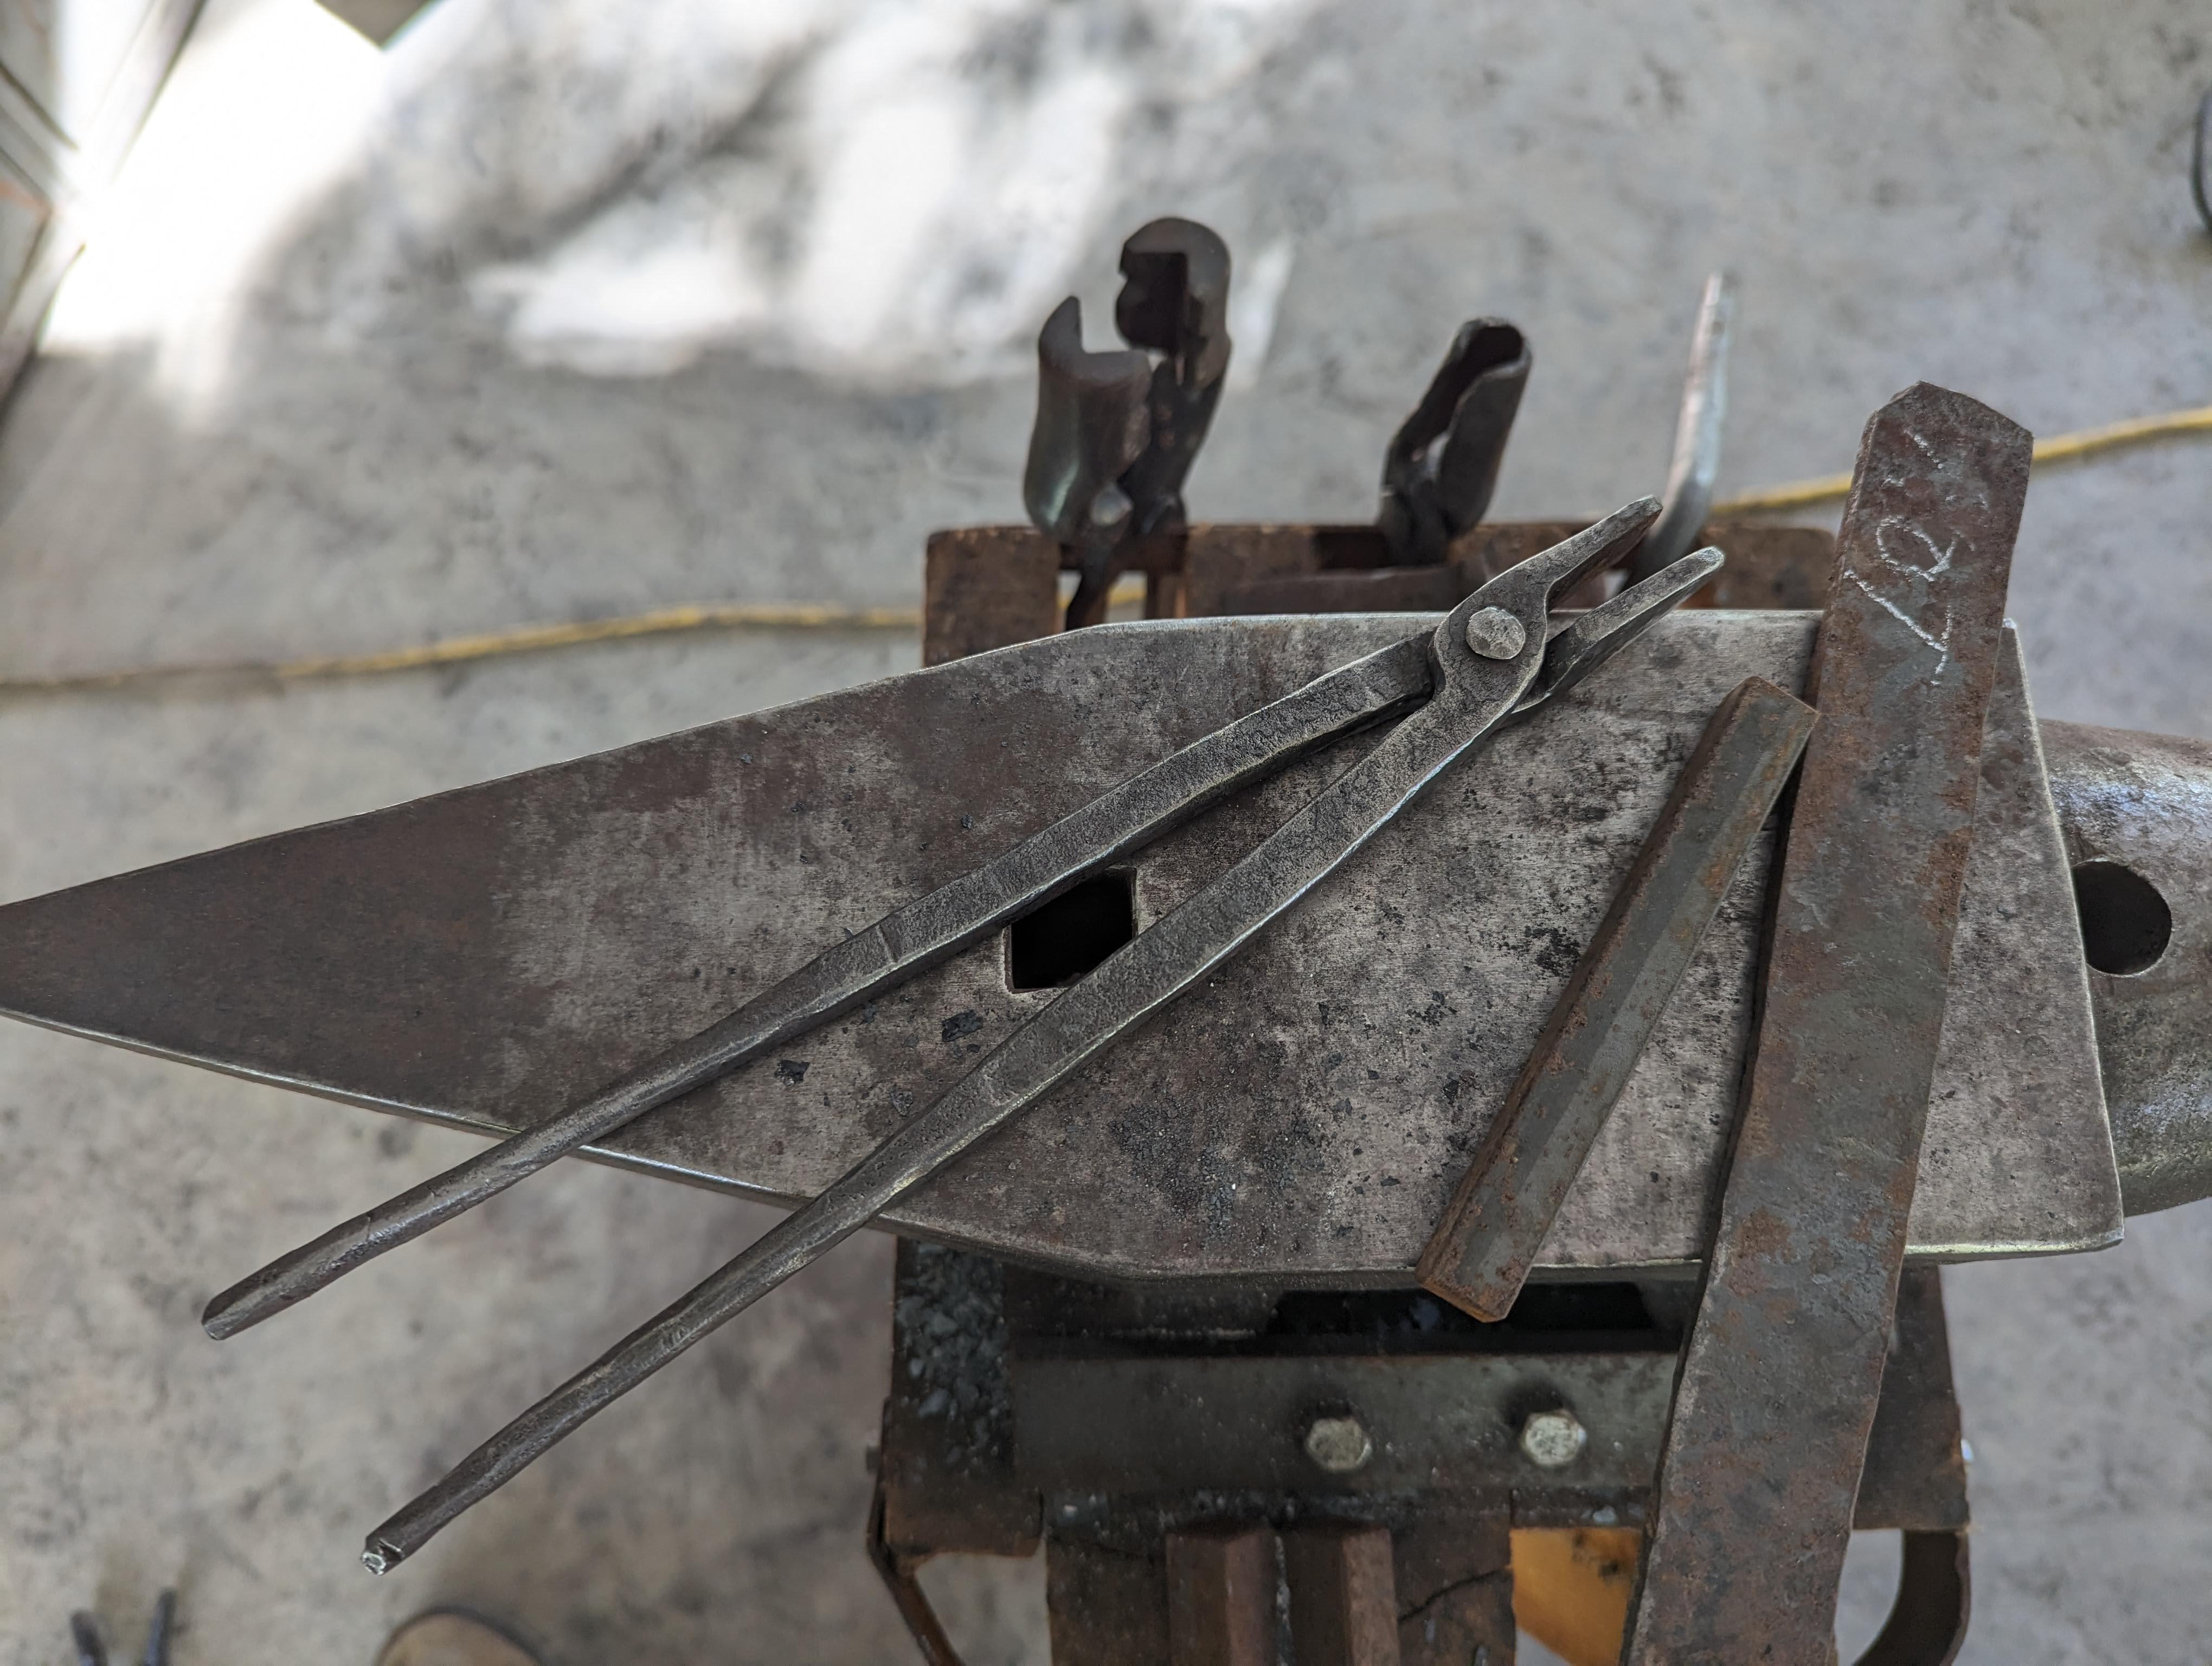
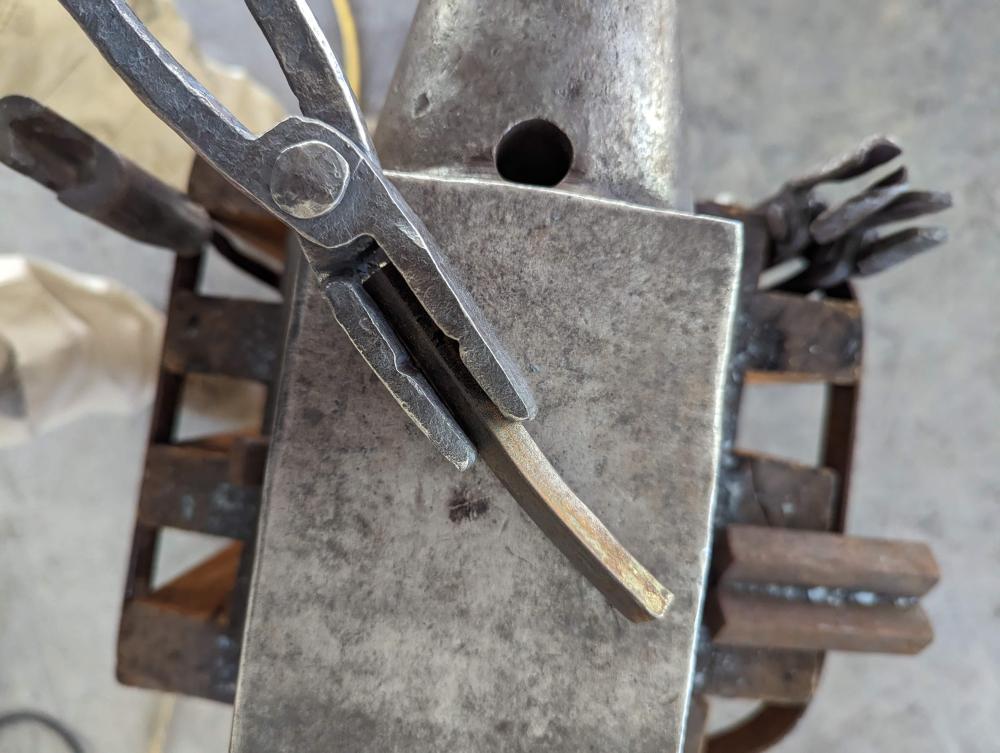
Now, that's a nice space, Buffalo. I could never keep my space that organized, though I try. 4th set of tongs finished. I do realize now that my sucker rod punches are not any better than my HF punches, but I got the two halves punched. I still don't have stock to make my own rivets, so ended up using another bolt (zinc removed) for a rivet (5/16"). These are made from two pieces of approx. 8 inches of 3/4 sucker rod. Several things I still don't like about these tongs: The boss is still too different between halves and at times the section is not fully parallel, especially when it moves into the bit. The boss is still a bit longer than high, on other words, not roughly a square. I'm finding it difficult to "square off the rhombus" as it were. The transition from bits to boss are also very different resulting in one side of tongs having lots of clearance (see picture below) and the other side being too snug, requiring a bit of filing. These flat bits have the v notch for holding square and round bar. My chisel marks were not accurate and thus the finished jaws are a bit out of wack but they will do until I make new ones. I tried to make a smart transition where the rains move from rectangular to round in cross section, but set downs were not the way to do it, and I couldn't really hammer them out. BTW, no more eyeballing, I'm marking up cold after measuring! These are set for 3/8 inch bar.
-
Crazy thing, Frosty. None of the blisters broke. I work hardened them!
-
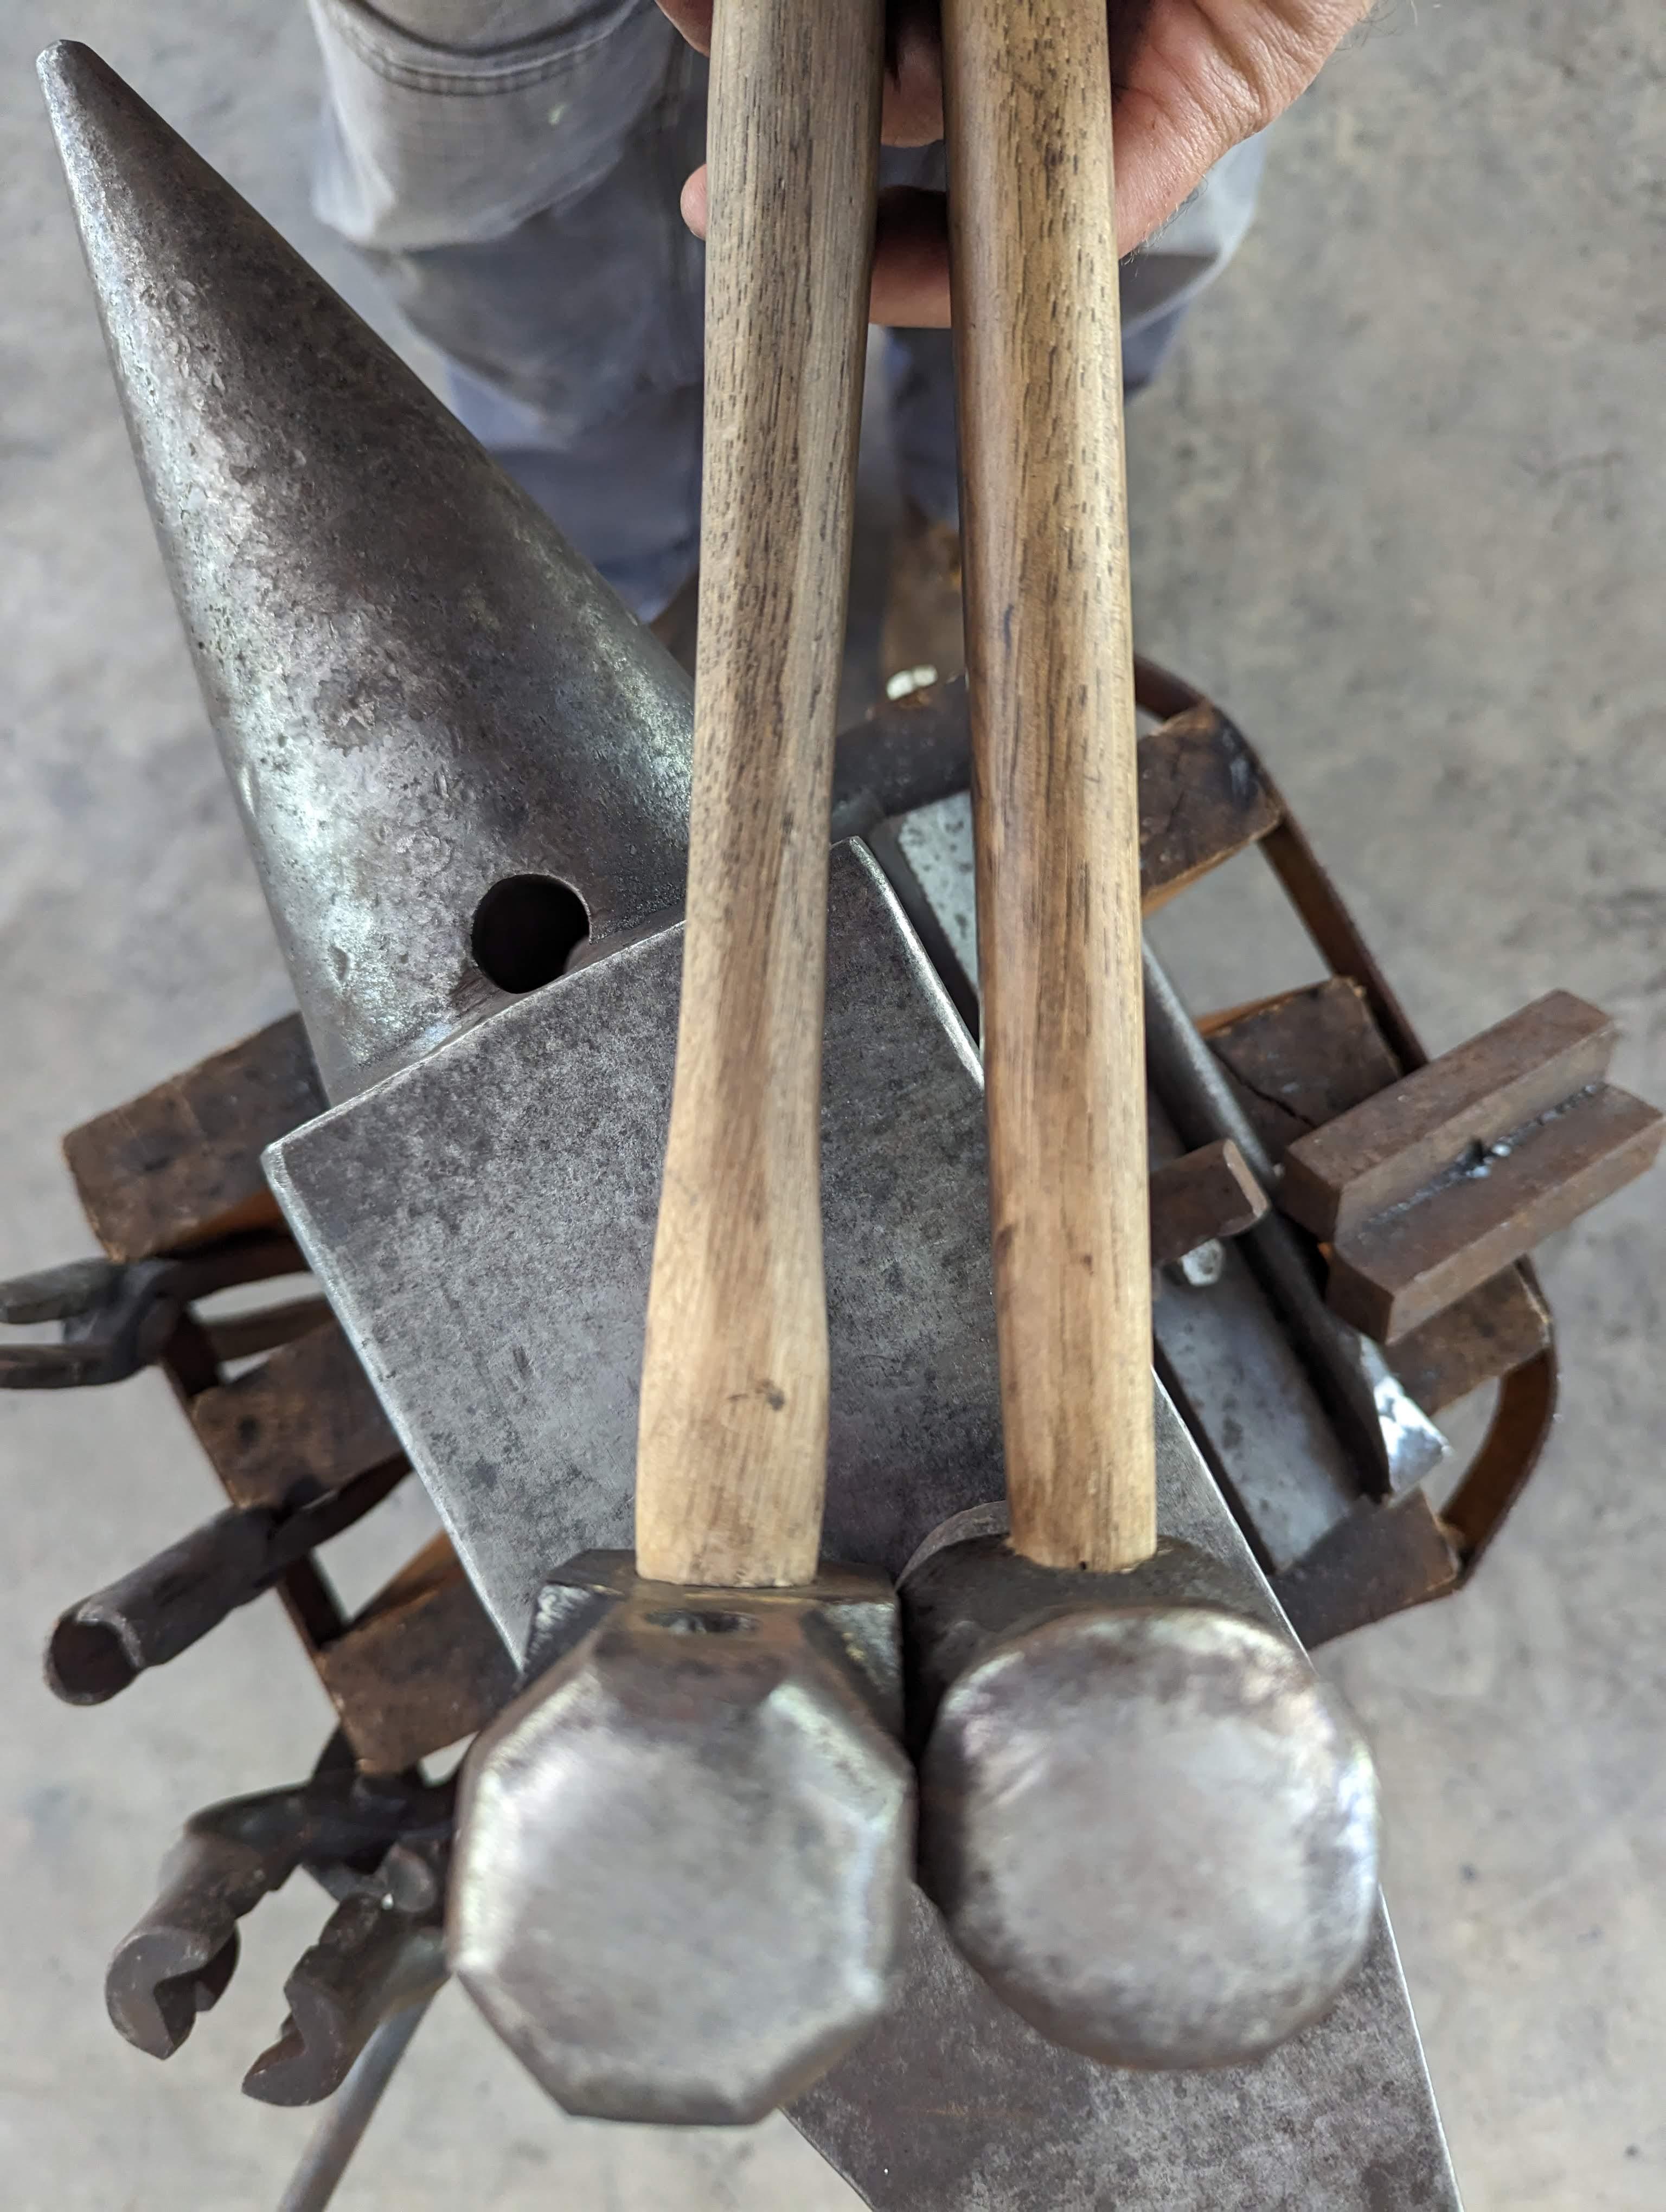
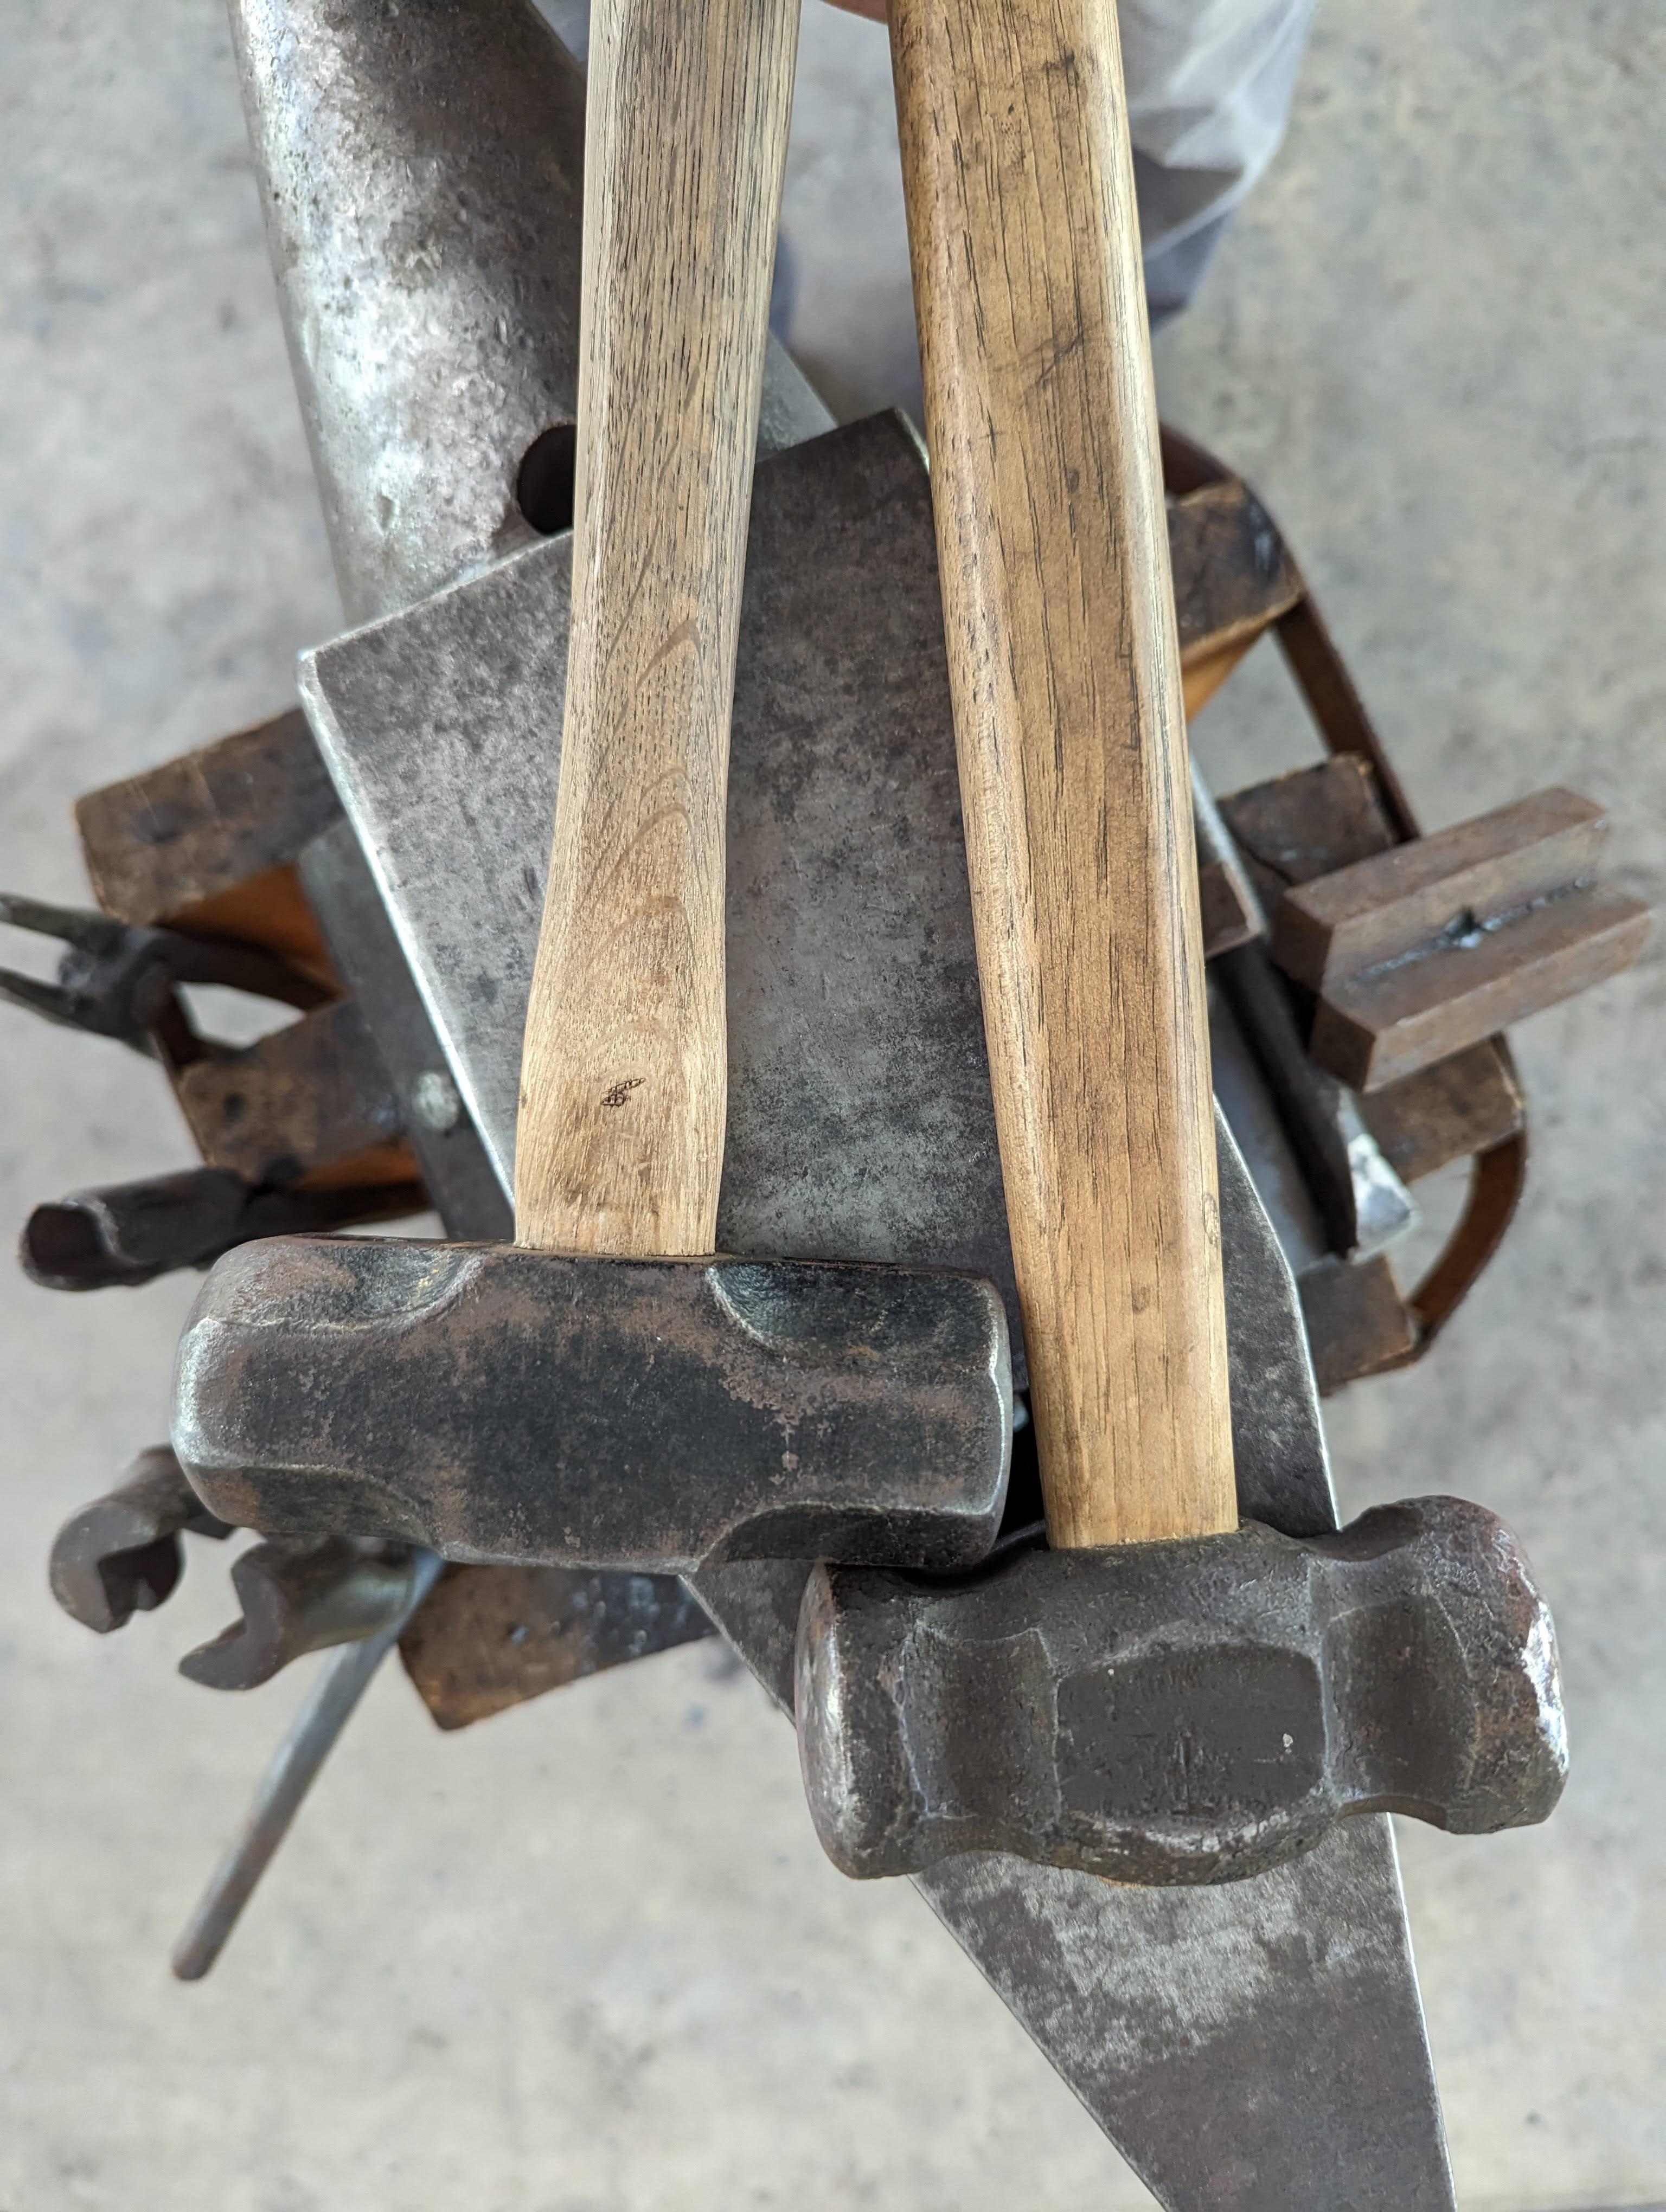
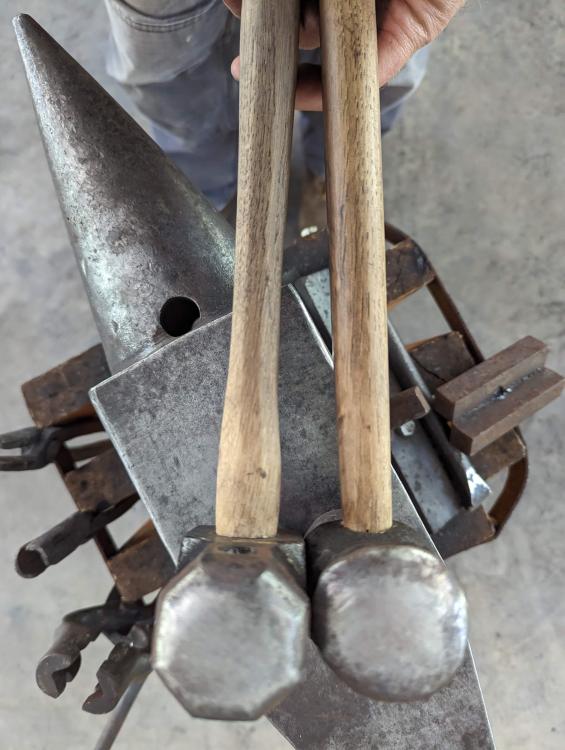
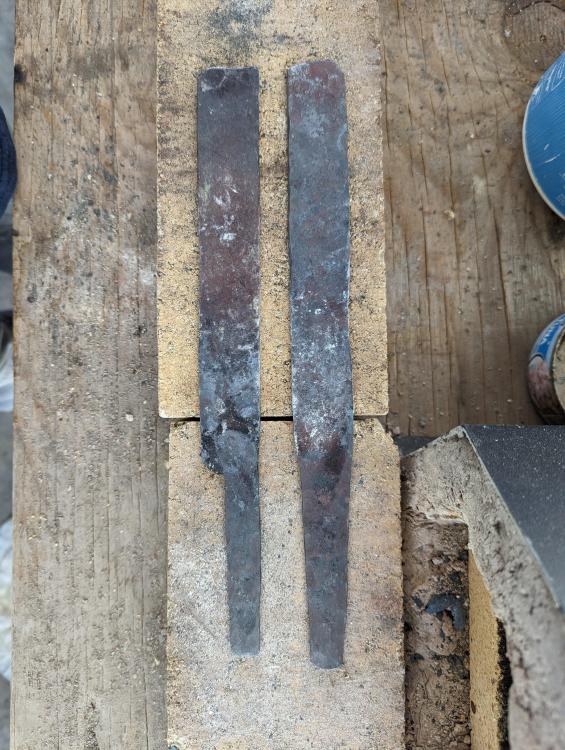
HA! My Google phone doesn't recognize my thumb print at the moment. I had an unusual bout of hammer hand blisters several days ago and had to use electrical tape just to finish the tong blanks I was forging. Blisters formed on the proximal phalanges of my index and middle fingers and on the distal phalanx (I had no idea that was the singular of phalanges) of my thumb. The thumb blister was almost 3/4 of an inch long. I was forging 3/4 inch sucker rod, and perhaps because I was impatient on those first few heats or because it is a bit harder to forge, I had some trouble moving the higher carbon steel. I went to my biggest hammer (3 lbs, Harbor Freight mod) with the octagonal handle. Boom, blisters. Perhaps the blisters arose not from the octagonal cross section but rather from the hour-glass profile and the more awkward swings I was making the the heavier hammer. Still, I'm blaming the octagonal handle. Since sticking to my slab handled hammer, blisters gone bye bye. I like saying phalanges.
-
What did you do in the shop today?
wirerabbit replied to Mark Ling's topic in Blacksmithing, General Discussion
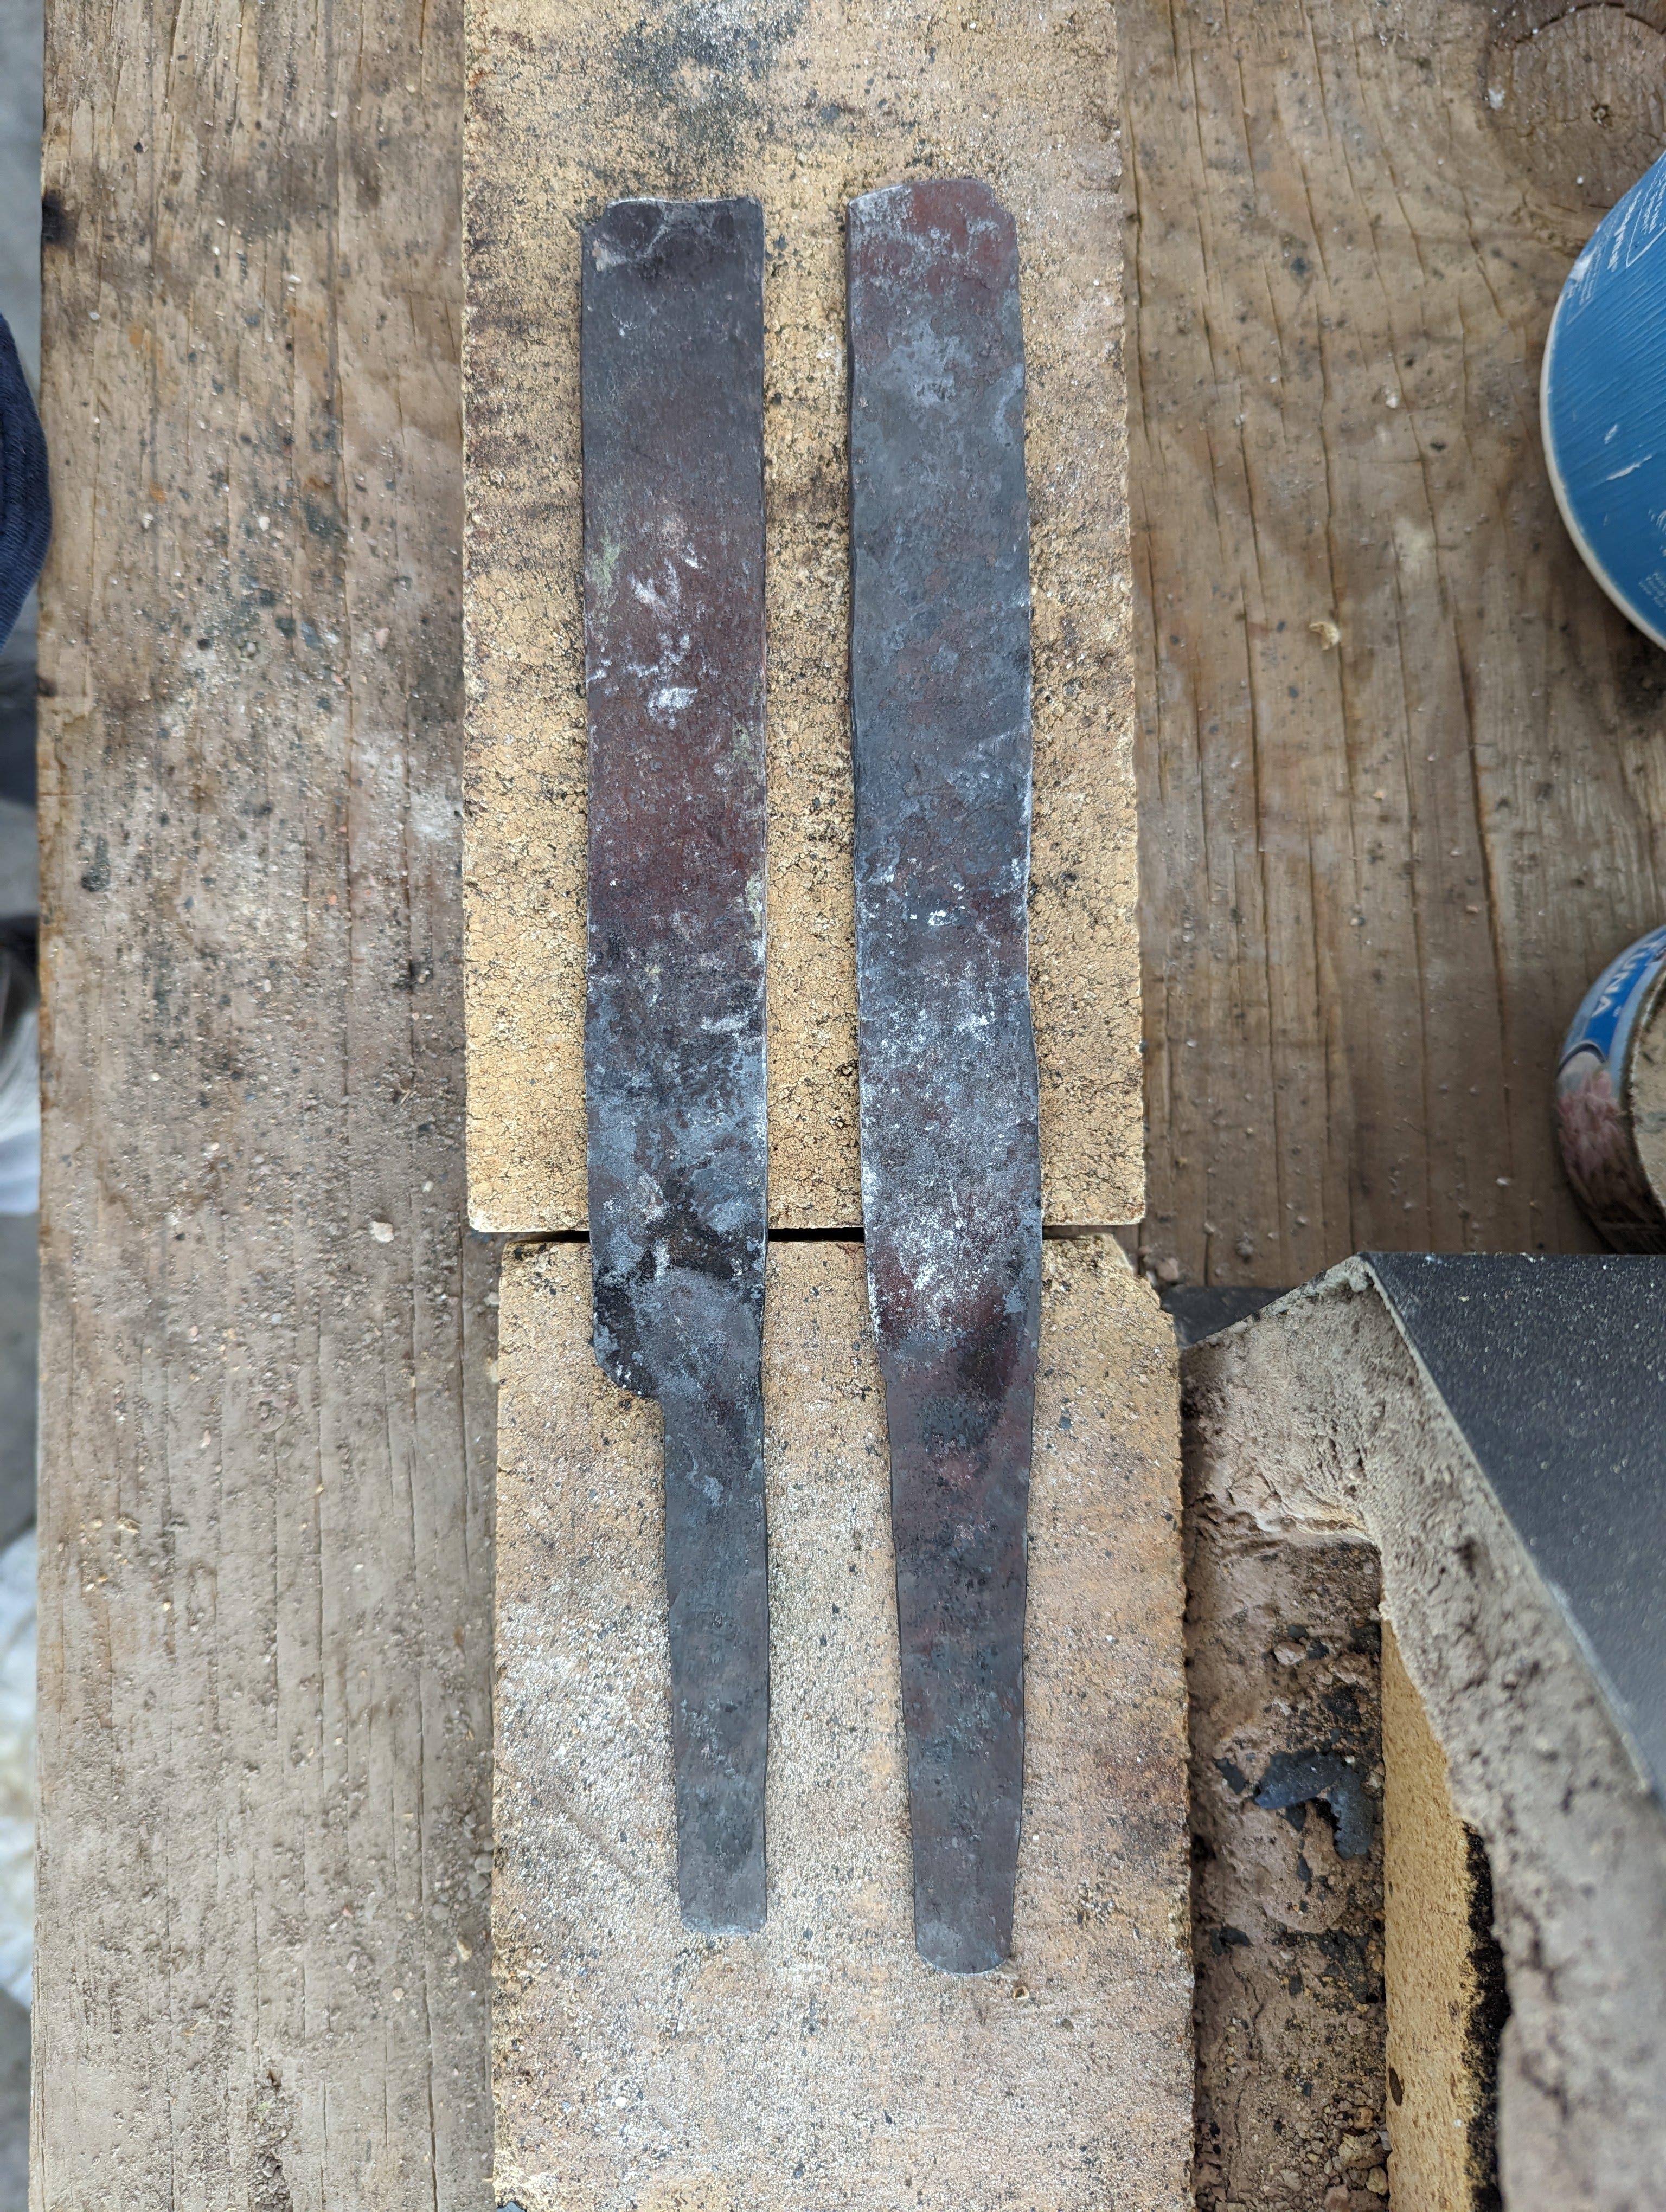
Made these cute tongs from 1/2 inch square bar... so I could make these... to chop this. Oh, now I have to learn how to make handles. Ugh.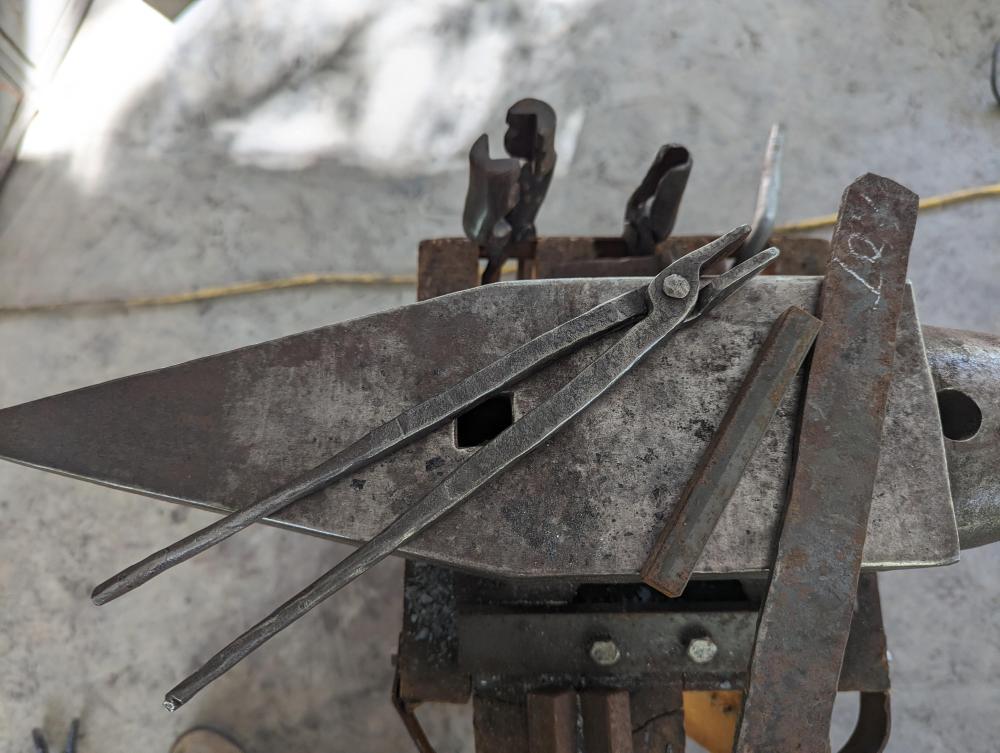
-
Steel wheel JBOD charcoal forge project
wirerabbit replied to wirerabbit's topic in JABOD - Just A Box Of Dirt
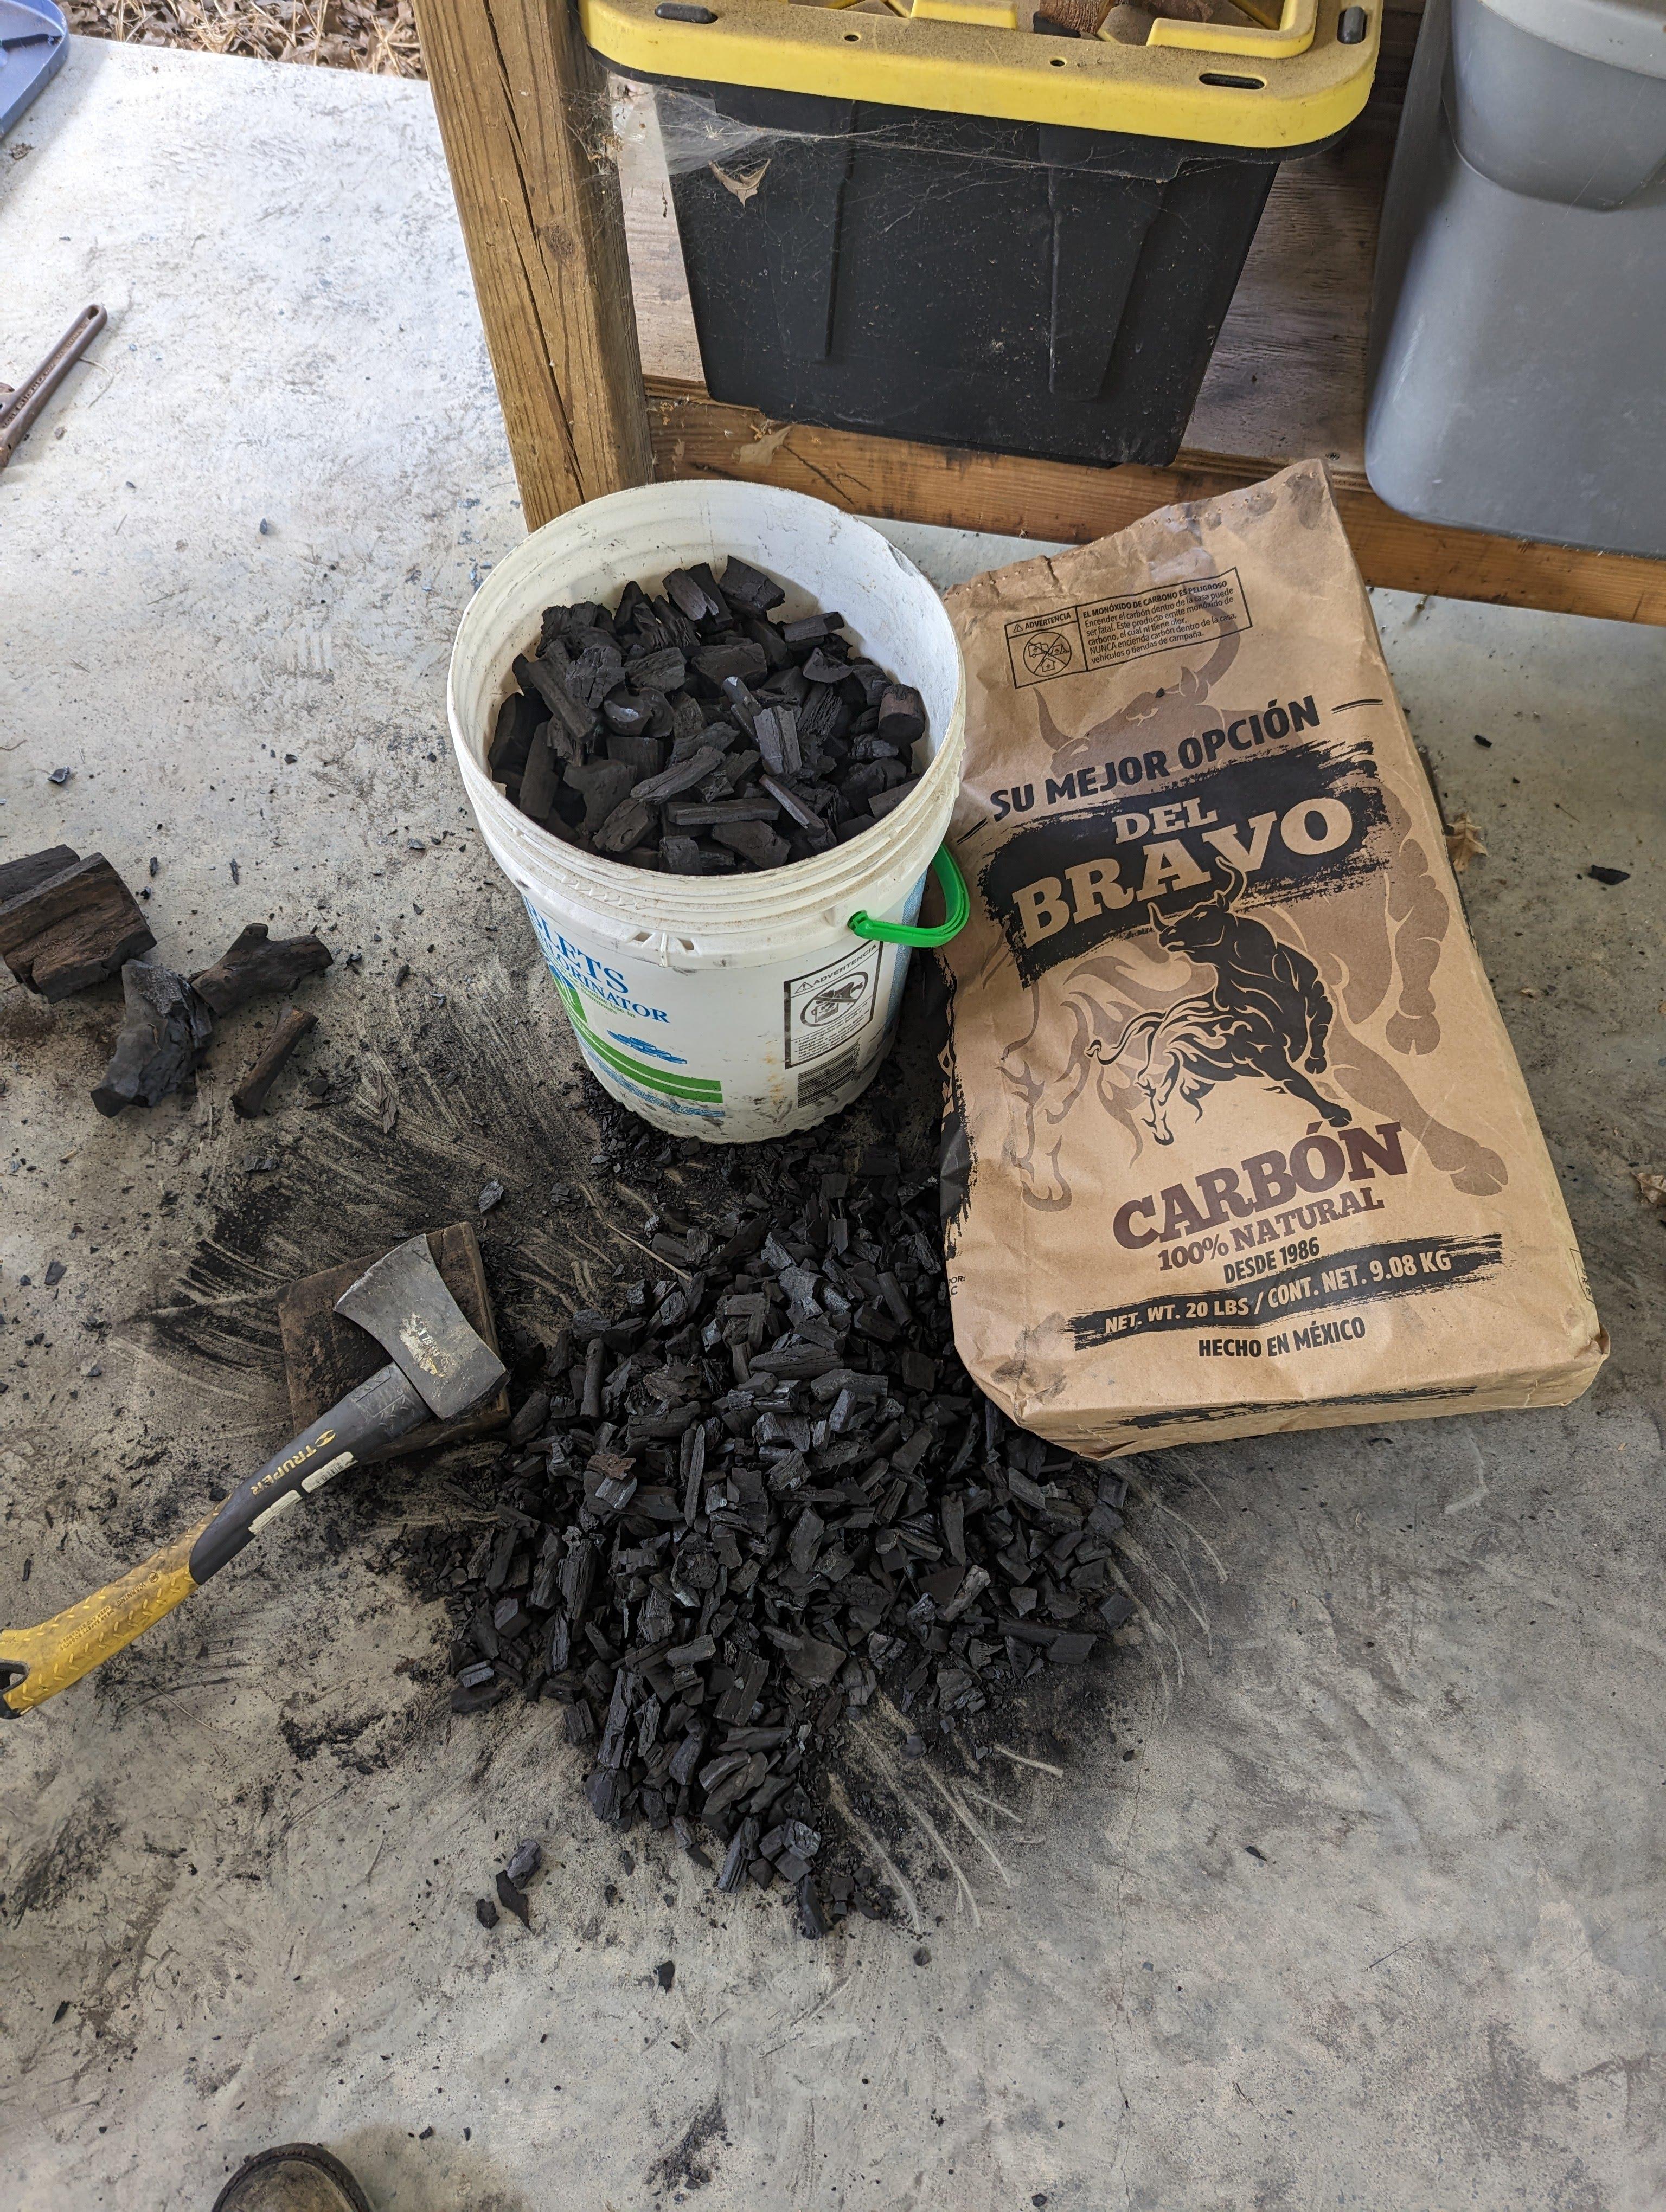
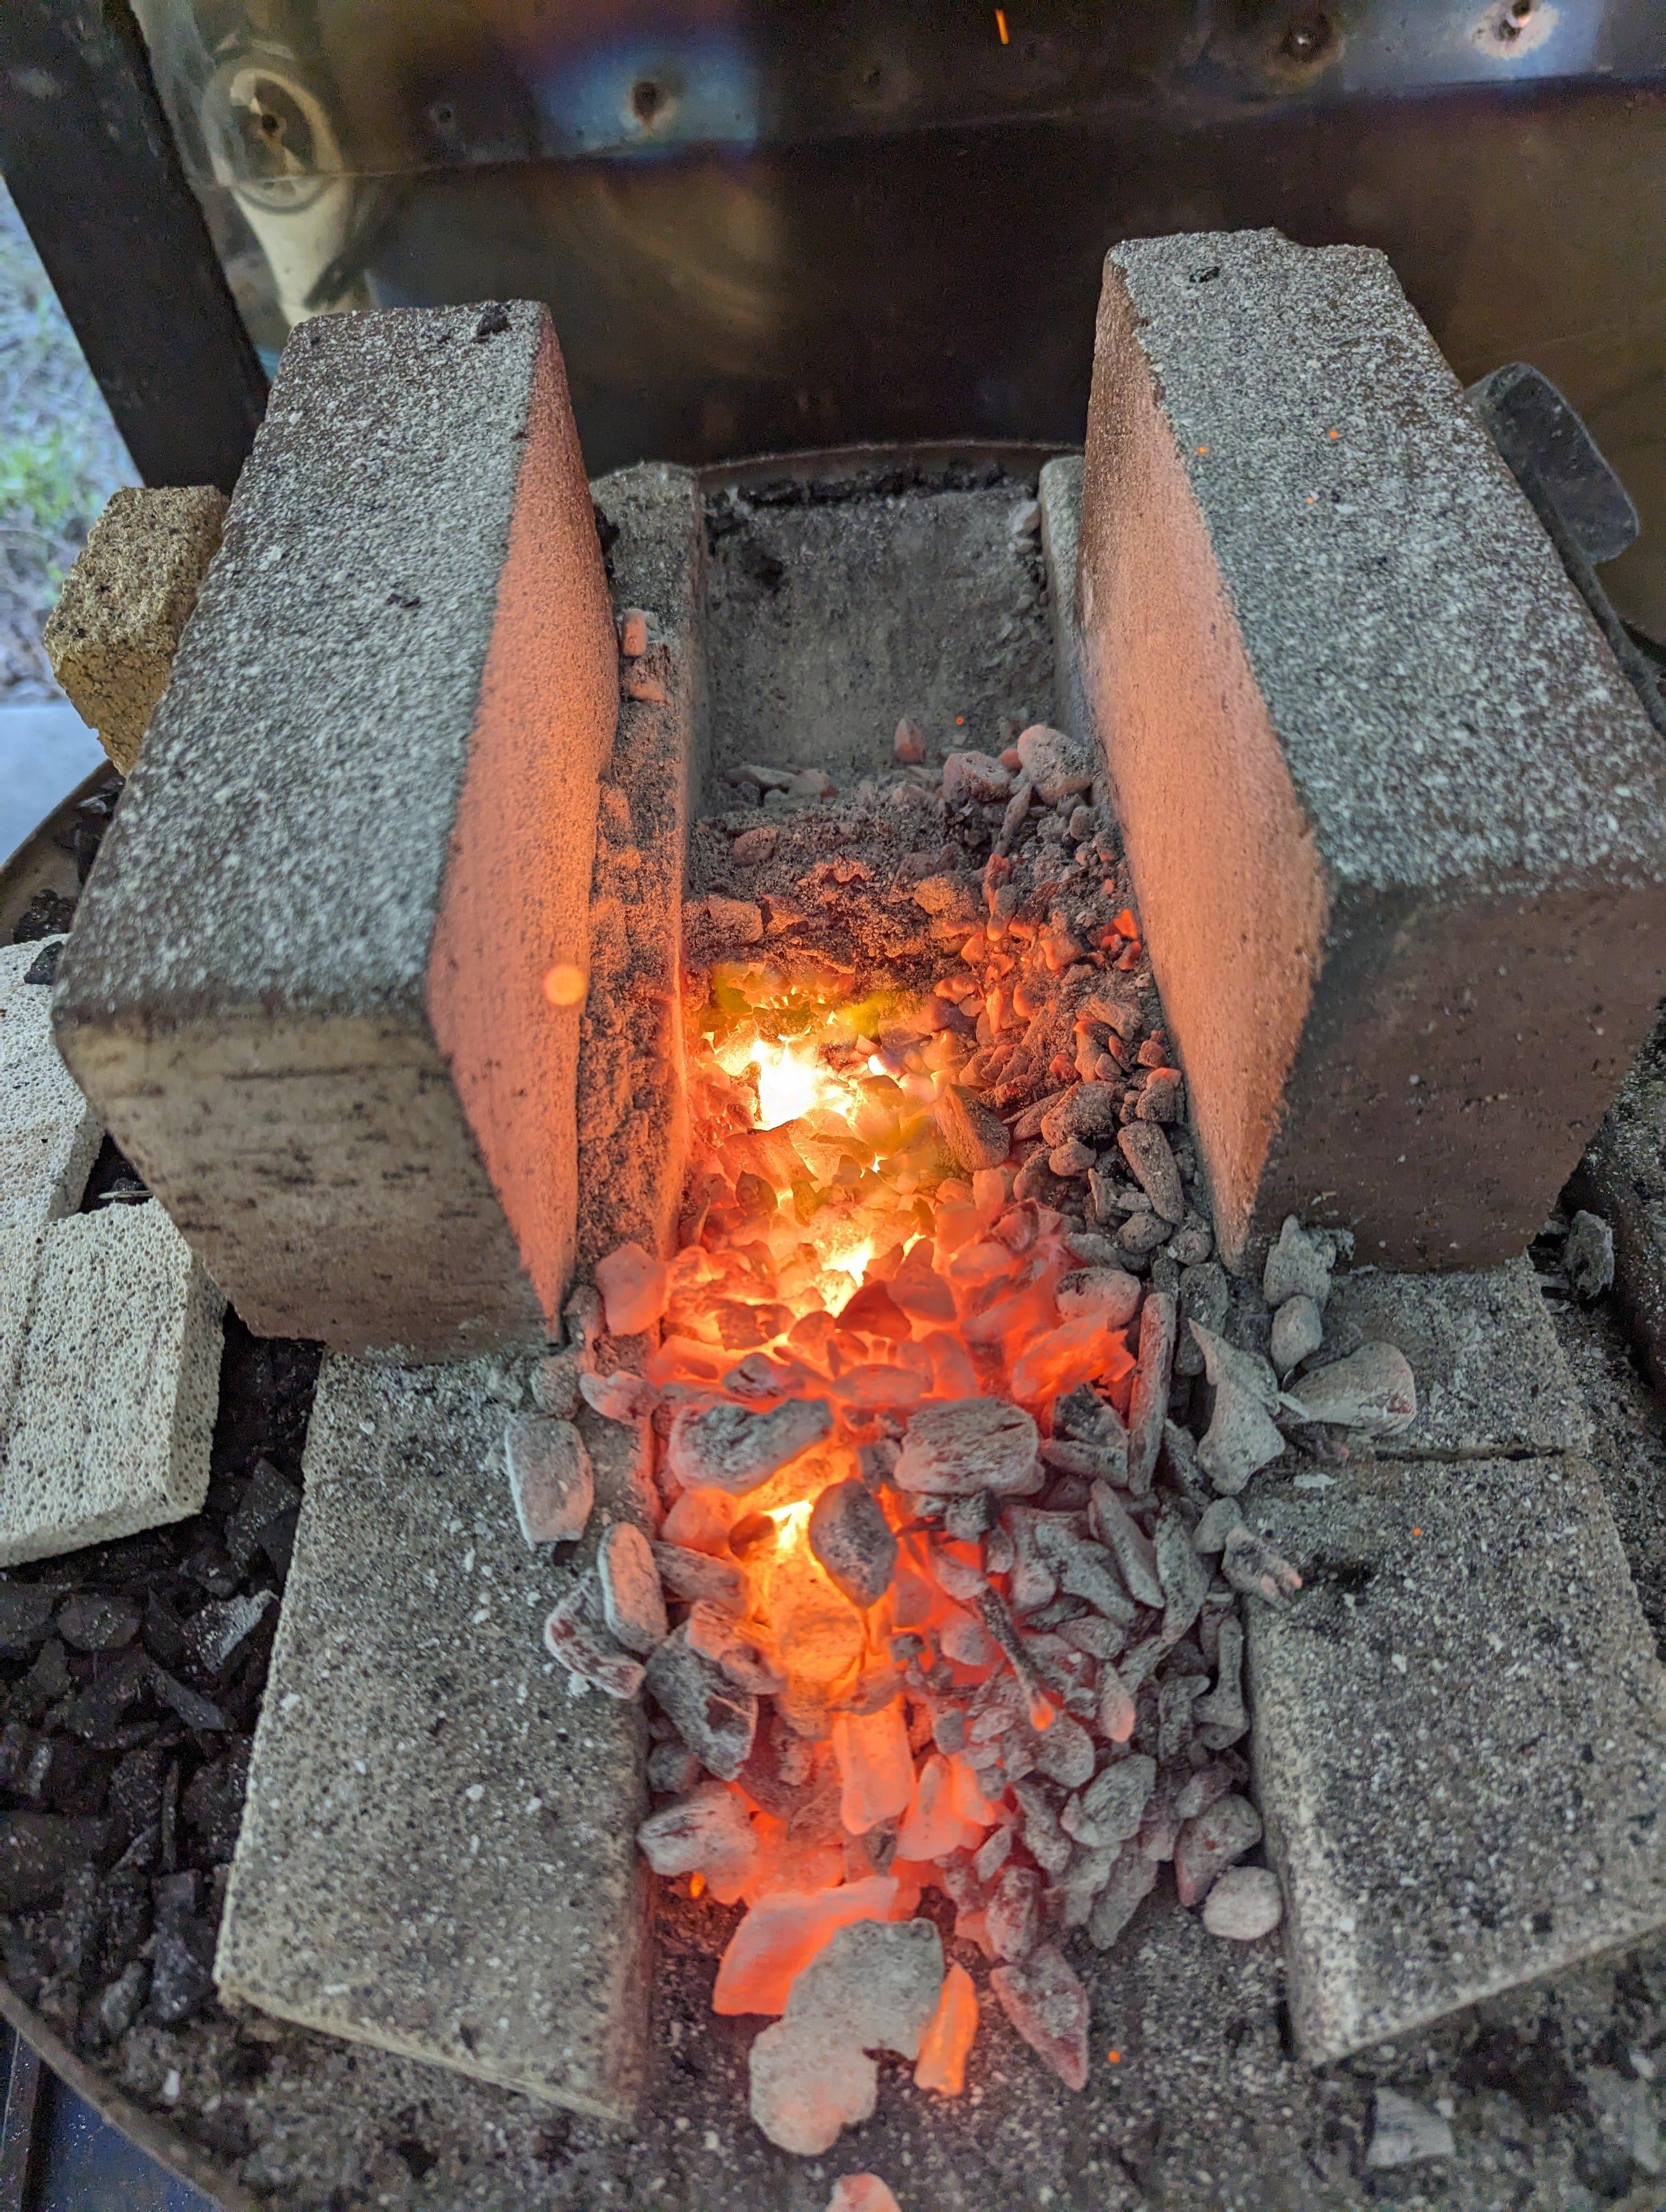
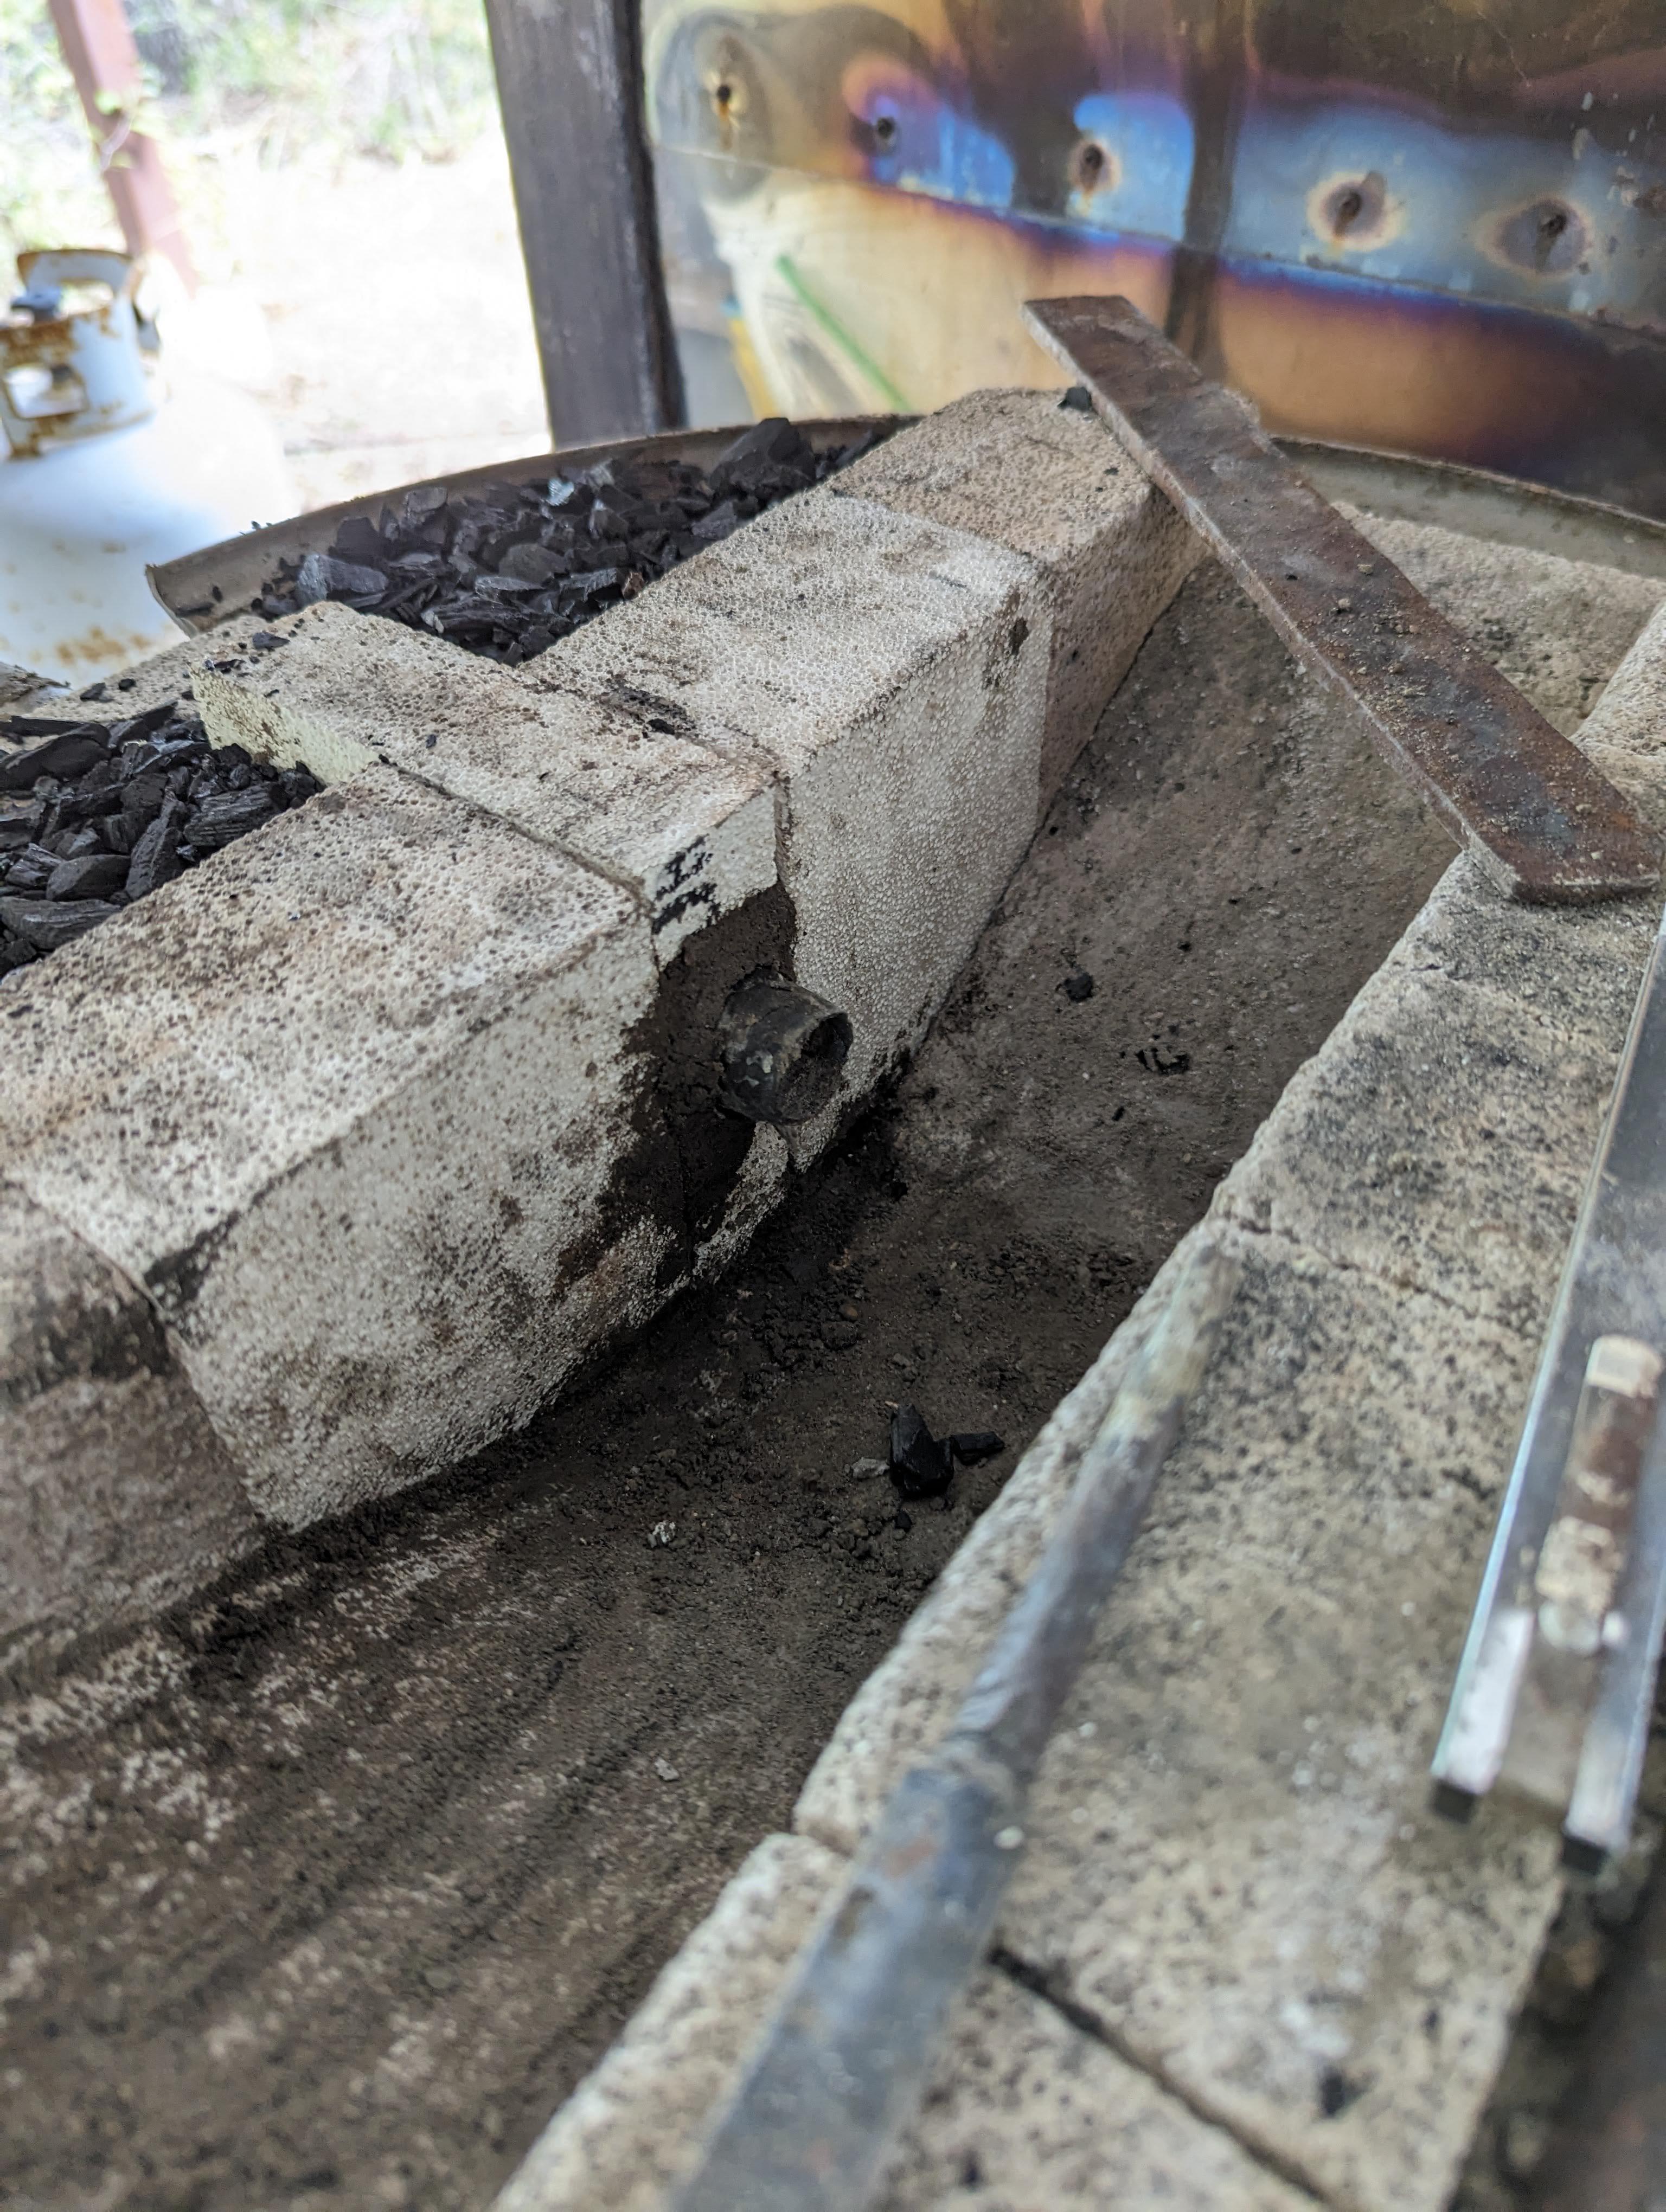
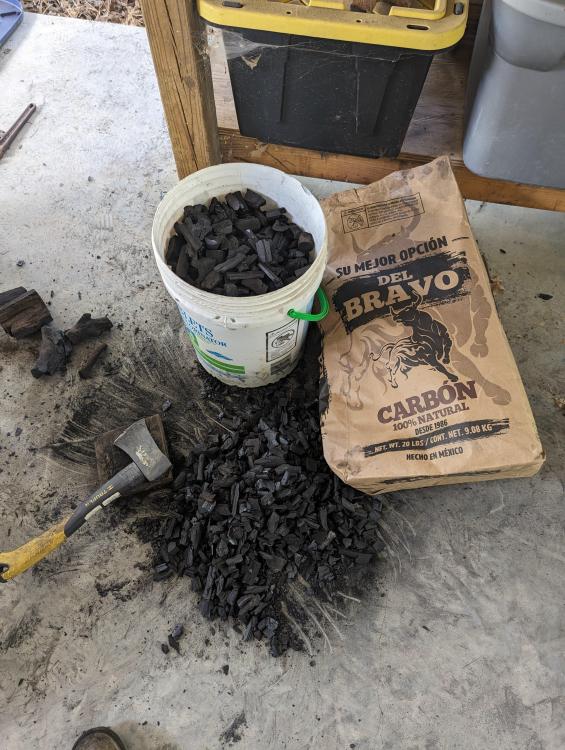
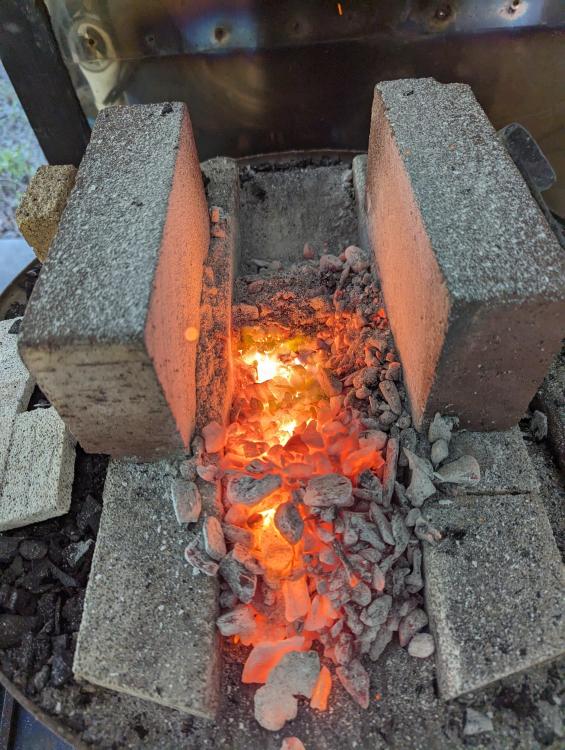
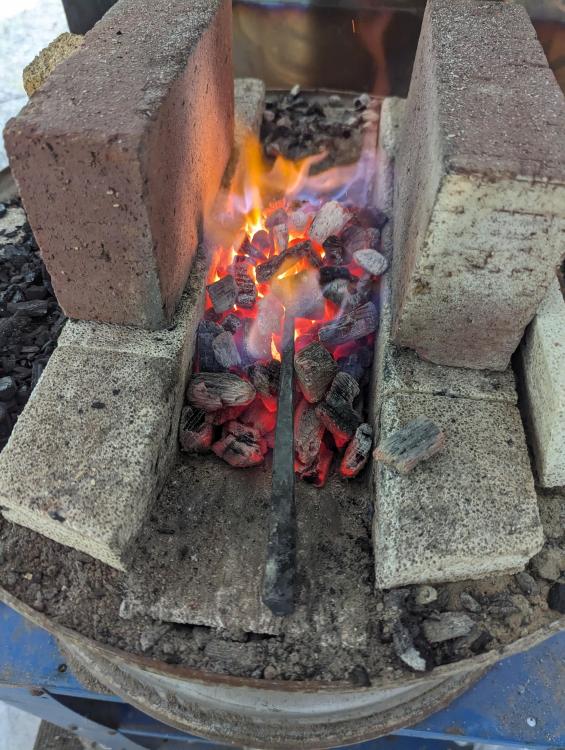
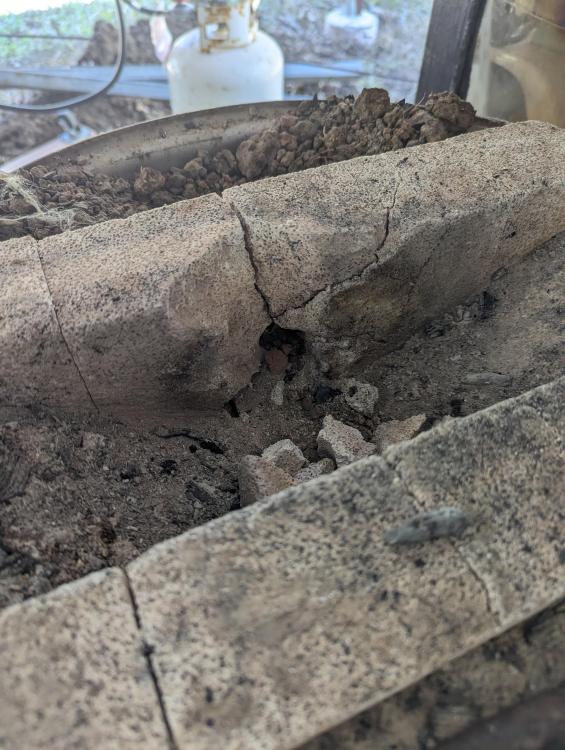
I'm now filling the fire pot to approximately one inch below the tuyere with charcoal fines before I start the fire with paper and my firing charcoal. The fines seem to allow me to move the fire back and forward when placing metal with less catching than before. The fire after some long forging session. Notice the hot spot is closer to the tuyere on the left wall. I raked away the top of the fire to better show the hot spot. For now I will leave in the 3/4 inch tuyere, but enlarging the pipe might increase the hot spot and move it a bit further into the center of the fire pot. I estimate that I get a good 3 inch heat without moving the piece, which is plenty of hot metal while I'm still learning.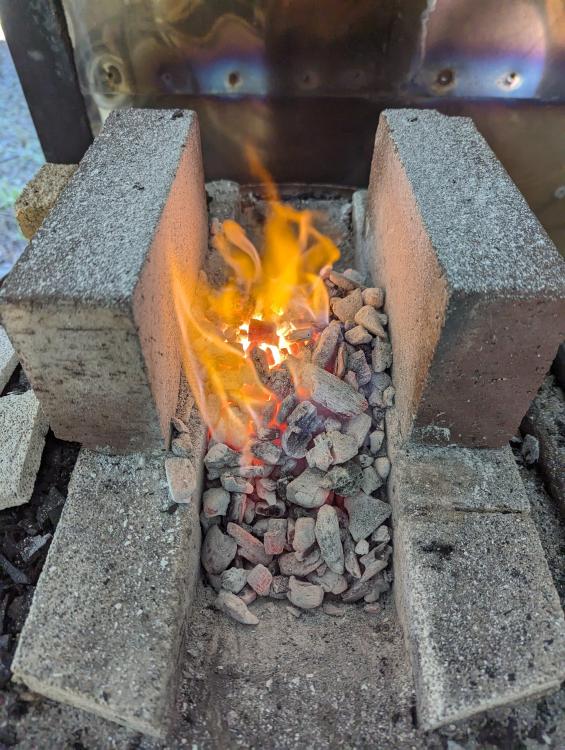
-
I love the look and feel of those types of handles. You might try an obround sectioned, sometimes called a slab, handle as well. They are easier to make and also feel quite nice in the hand. Welcome to the forum.
-
Your original video. I spent some time looking through the channel of that Spanish documentarian to see if I could spot any other older charcoal forges, but I couldn't. I'm still trying to research the two piece cast iron tuyere I came across on the web
-
Great original video, John. Did you notice that the charcoal forge used by the copper smith was an updraft, or were my eyes playing tricks on me? T
-
Steel wheel JBOD charcoal forge project
wirerabbit replied to wirerabbit's topic in JABOD - Just A Box Of Dirt
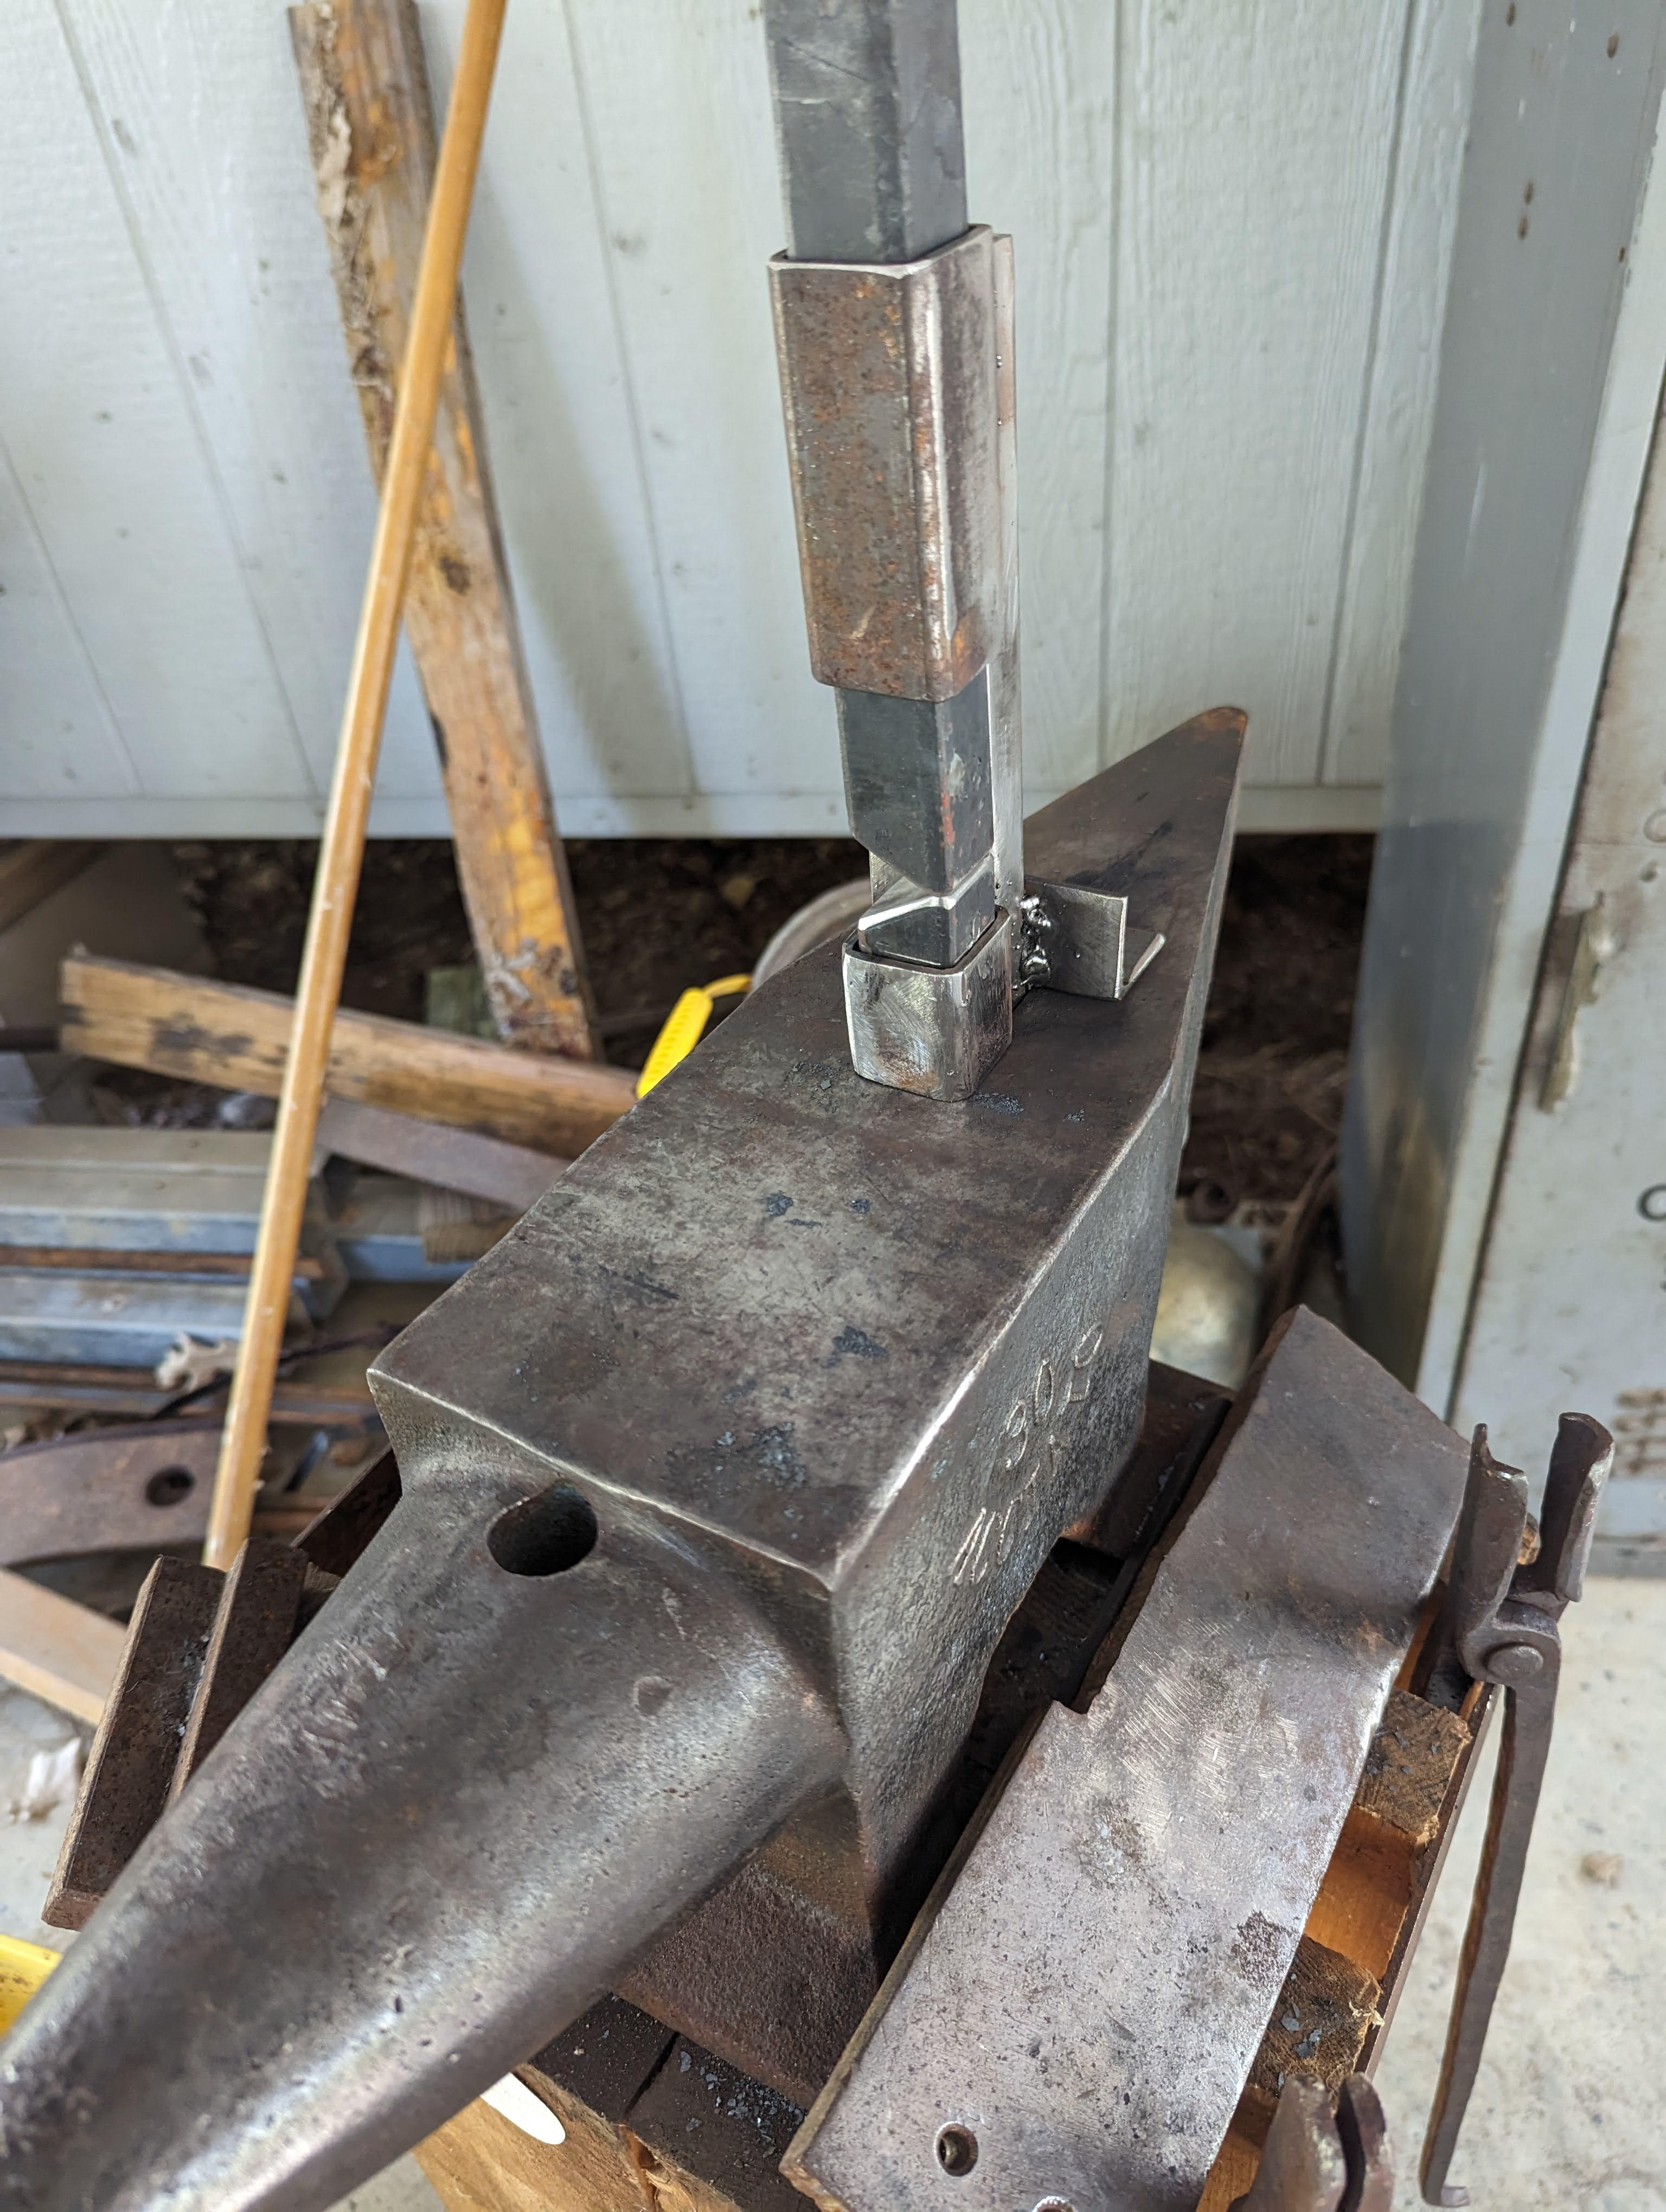
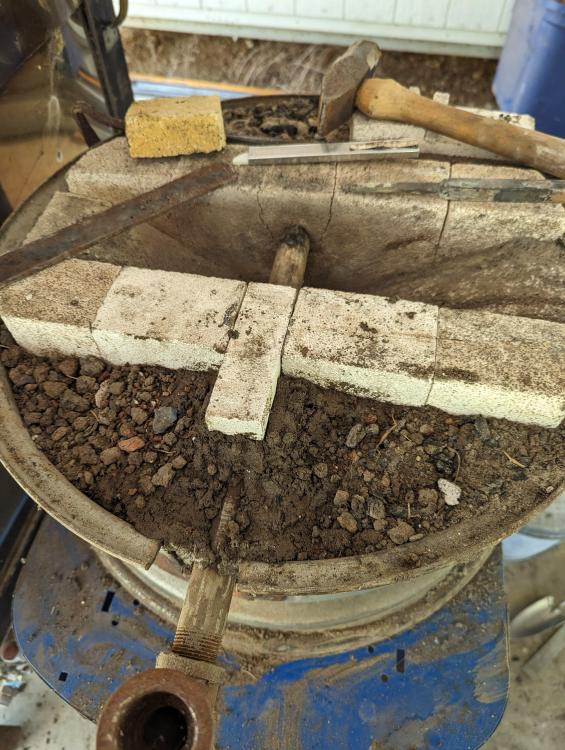
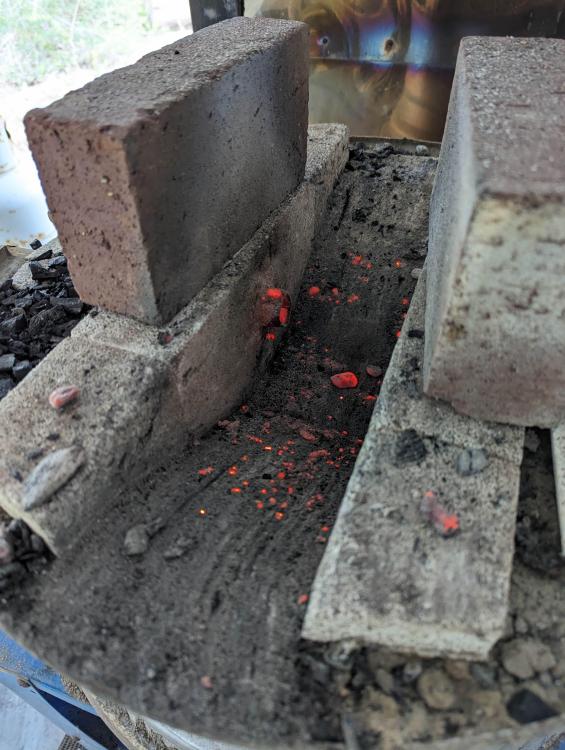
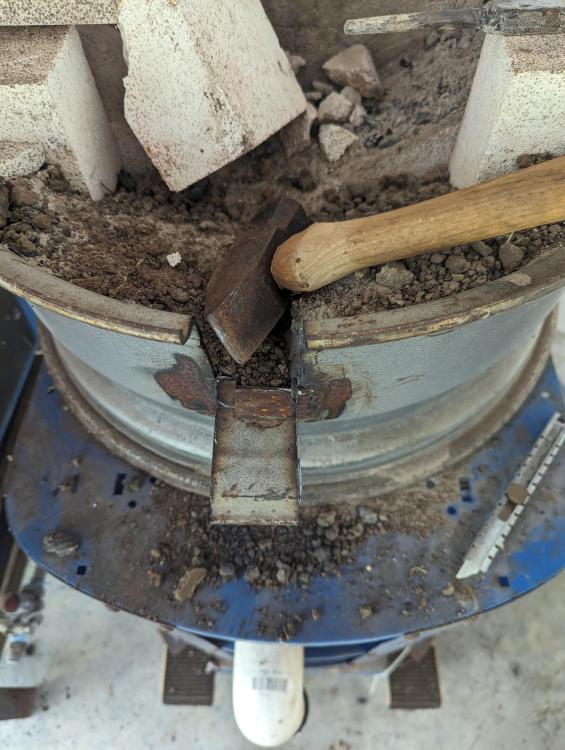
I have made my latest adjustment to the forge. I have left the softbrick bowl, but moved the tuyere up two inches in the bowl. The pipe diameter has not changed (3/4 inch) and the angle of the pipe has not changed (0 deg from horizontal). Here you can see the blow pipe pushed all the way in just for stability sake while I take a picture and decide how I will support it. Previously, it was captured by the hole drilled through the steel wheel and the rammed earth above it. Replaced the cracked softbrick with a pair of half bricks and a small top brick. I'm hoping this will move enough to prevent cracking. Returned the native dirt fill for structure. In the picture blow you can judge the height of the tuyere in the firepot by where it currently sits against the far wall. Here is everything in place. I used sand, local soil, softbrick dust, and charcoal fines to make the chinking I placed around the blowpipe. Pipe sticks out about 1/2 to 3/4 of an inch. The alteration has moved the heart of the fire up (as expected) so that I can now sit steel in level with my current hearth. I continue to forge with 1 to 1.5 inch lumps of charcoal in the entire pot, so no charcoal fines bed as in a Japanese forge of similar shape. This does make placing the iron back in the fire less smooth than in a coal fire. The charcoal doesn't want to make way for the piece. Simply moving the charcoal back and away then pulled back in place works great. Here is a bit of rebar I'm working into a spoon for my case hardening project. Two hours (about) of forging and I pulled out the fire to check things. Chinking didn't blow out and the pot seems to be doing fine. Now I'll use this configuration for about 20 hours of forging and judge the results, but so far I'm really digging it. With the tuyere in the lower position, this kiln was heating up one inch bar with no problem. I can't wait to see how this tweak handles such big stock. I've got an eye punch and a monkey tool to make! Now we case harden some guillotine dies.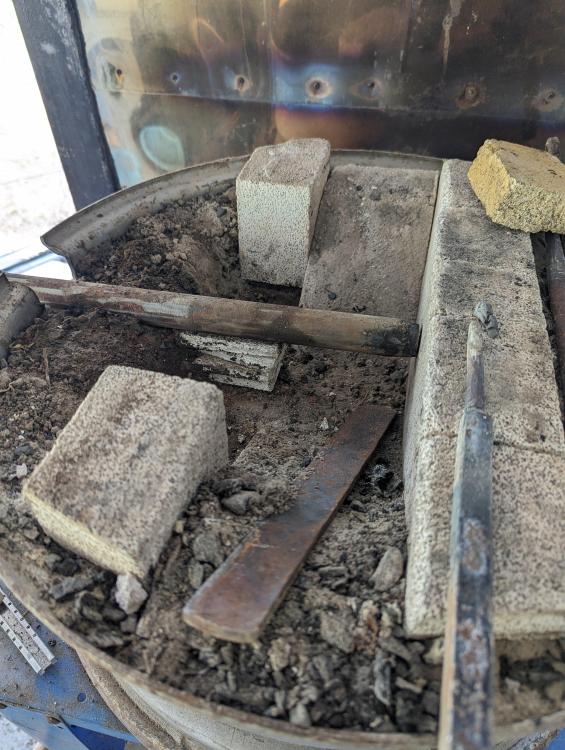
-
I have continued my research on charcoal forges off and on after building my first forge about 3 years ago. My forge is a mashup of a JABOD, sideblast, viking trench, and maybe a Japanese forge. Who really knows? I am using it as a test bed for various ideas. You can check out my latest modifications as well as the earliest versions of my forge here. While rooting around the internet, I came across this tasty nugget from an old page of Neil Osberg's. He documents an Ox shoe charcoal forge that has a very interesting tuyere. Unfortunately, Neil Ostberg passed away October of 2021, in West Bend, Wisconsin, so I can't go to the source. Does anyone have a name for this style of tuyere that might get me further along in my research. Neil's short description identifies it as a Spanish design used in North and South America since the discovery of the Americas. I'm sure many of you have books that might cover such a thing. Titles would be much appreciated. I'm sure I can find a copy to Inter Library Loan if I had a title, author etc. Also, if any of you knew Neil or use one of Neil's replica tuyeres, I'd love to hear your thoughts. Thanks for everyone's help, T
-
Steel wheel JBOD charcoal forge project
wirerabbit replied to wirerabbit's topic in JABOD - Just A Box Of Dirt
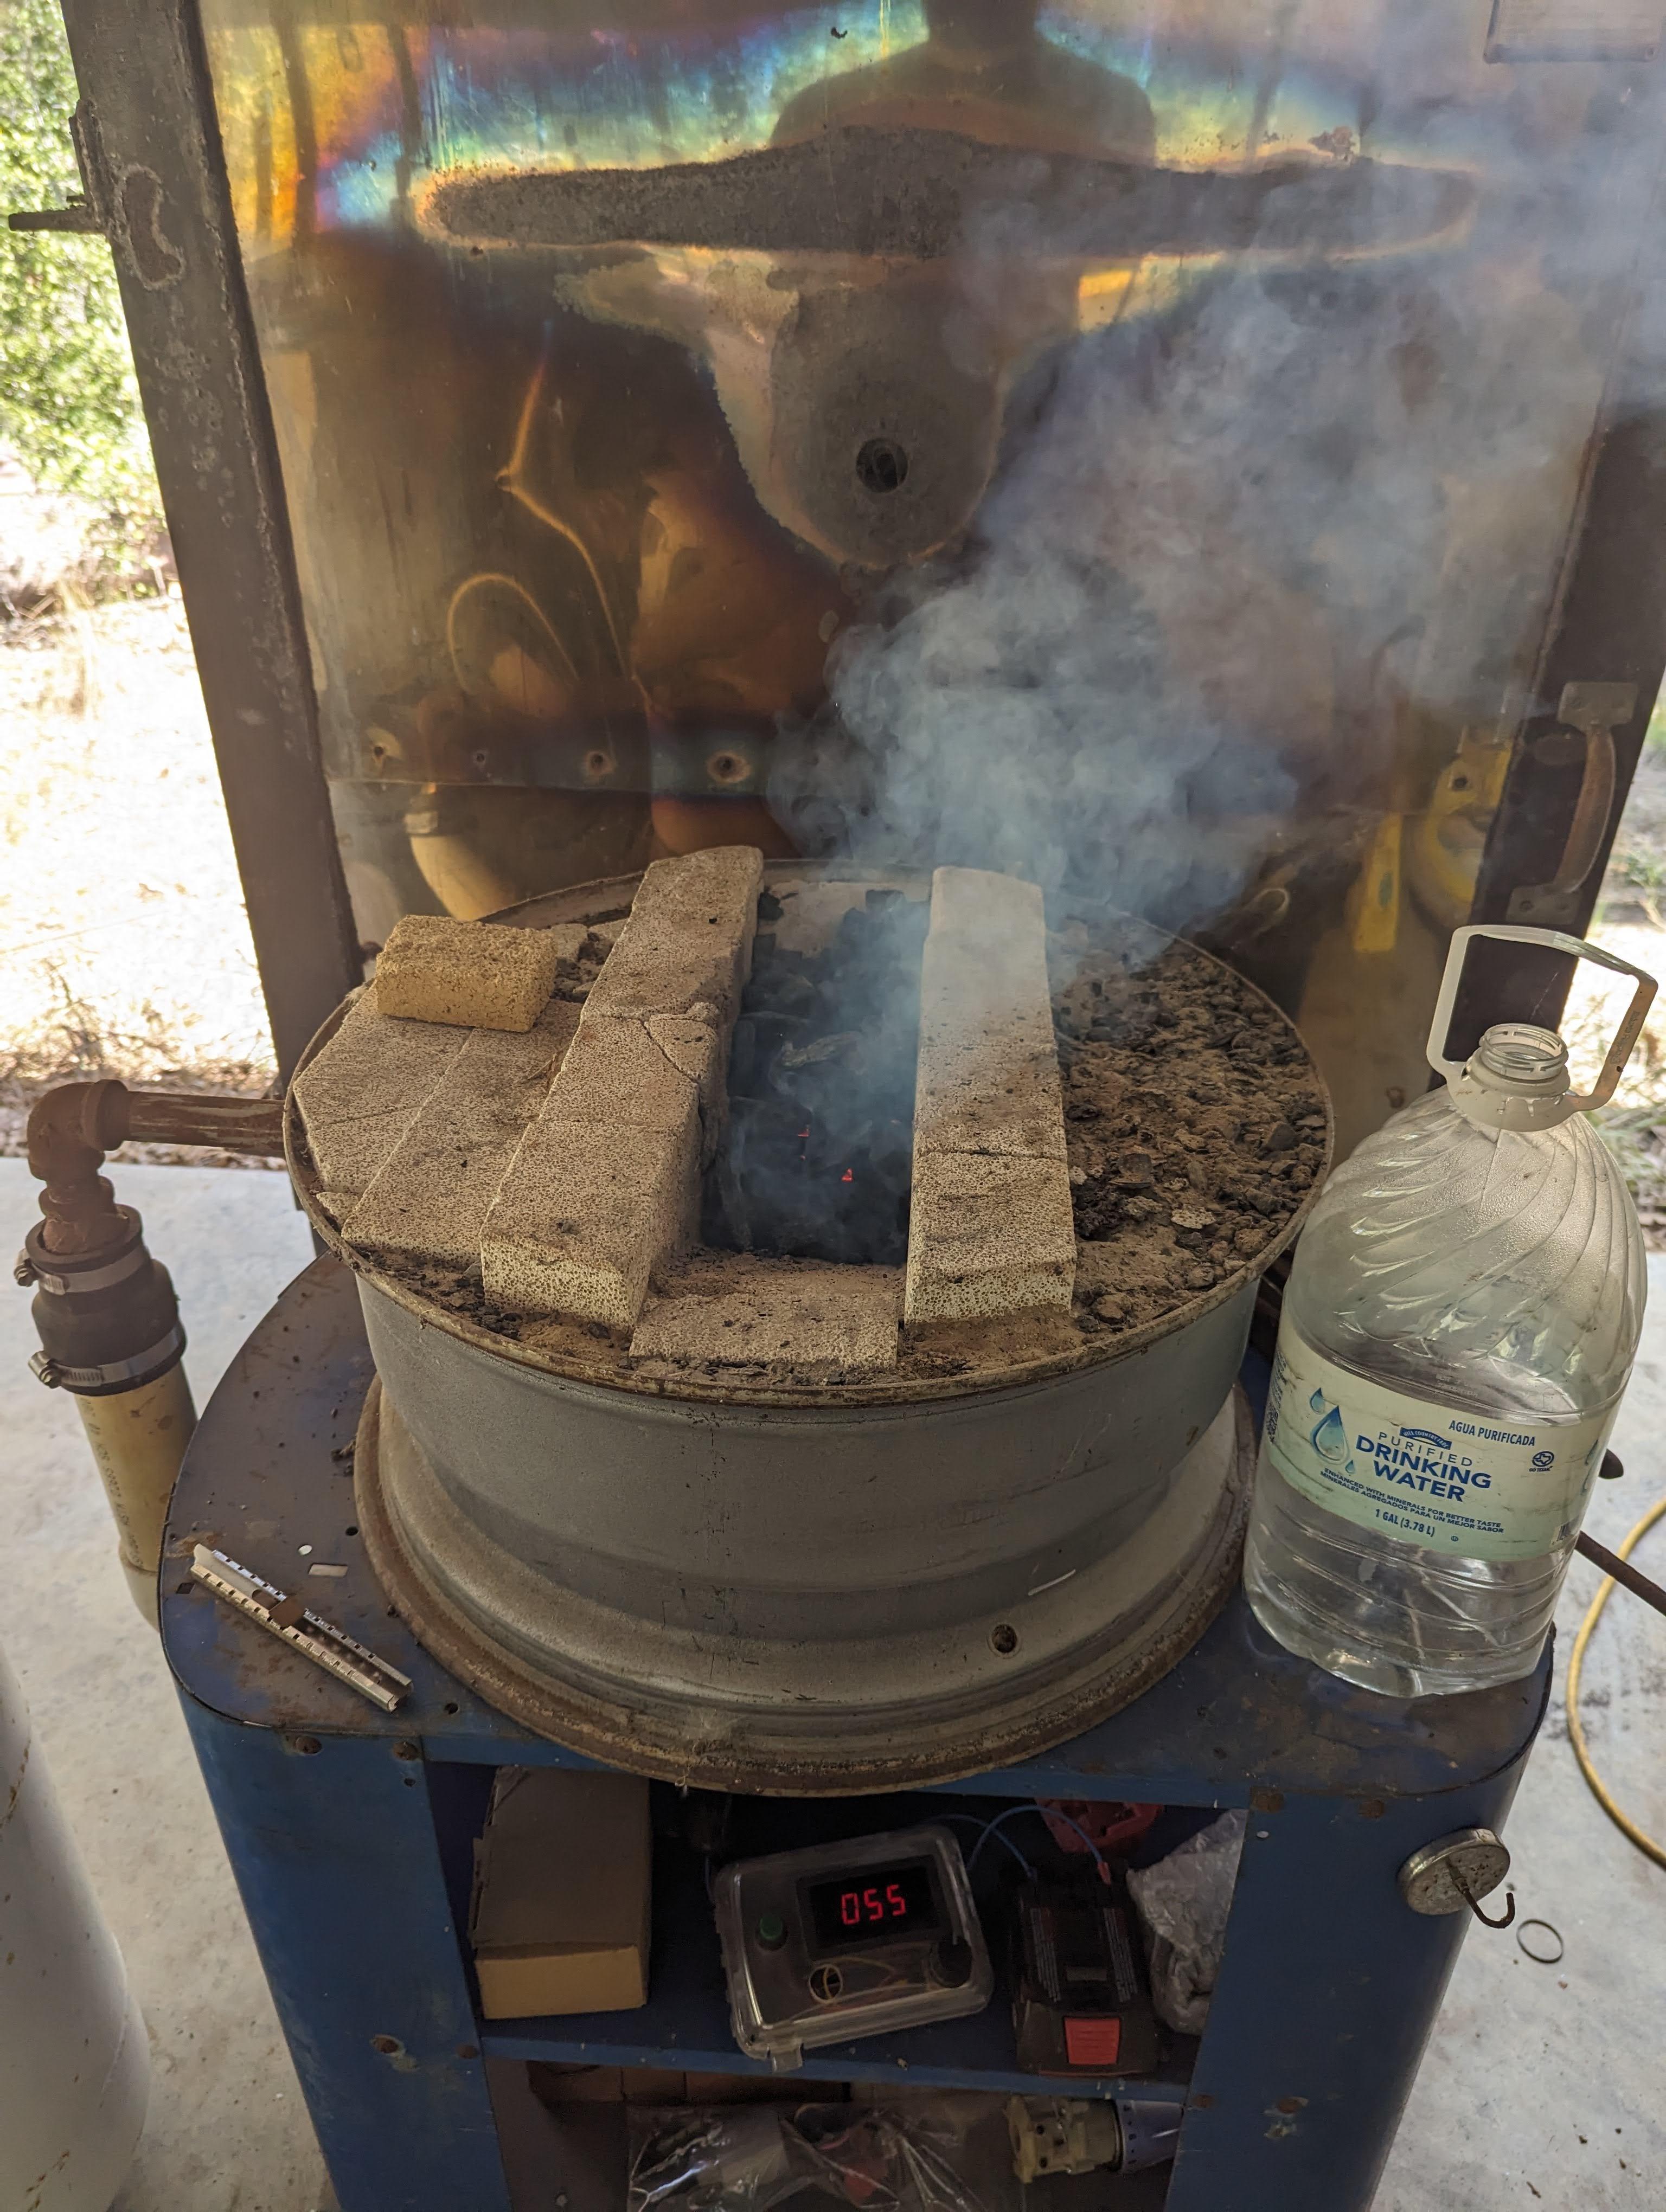
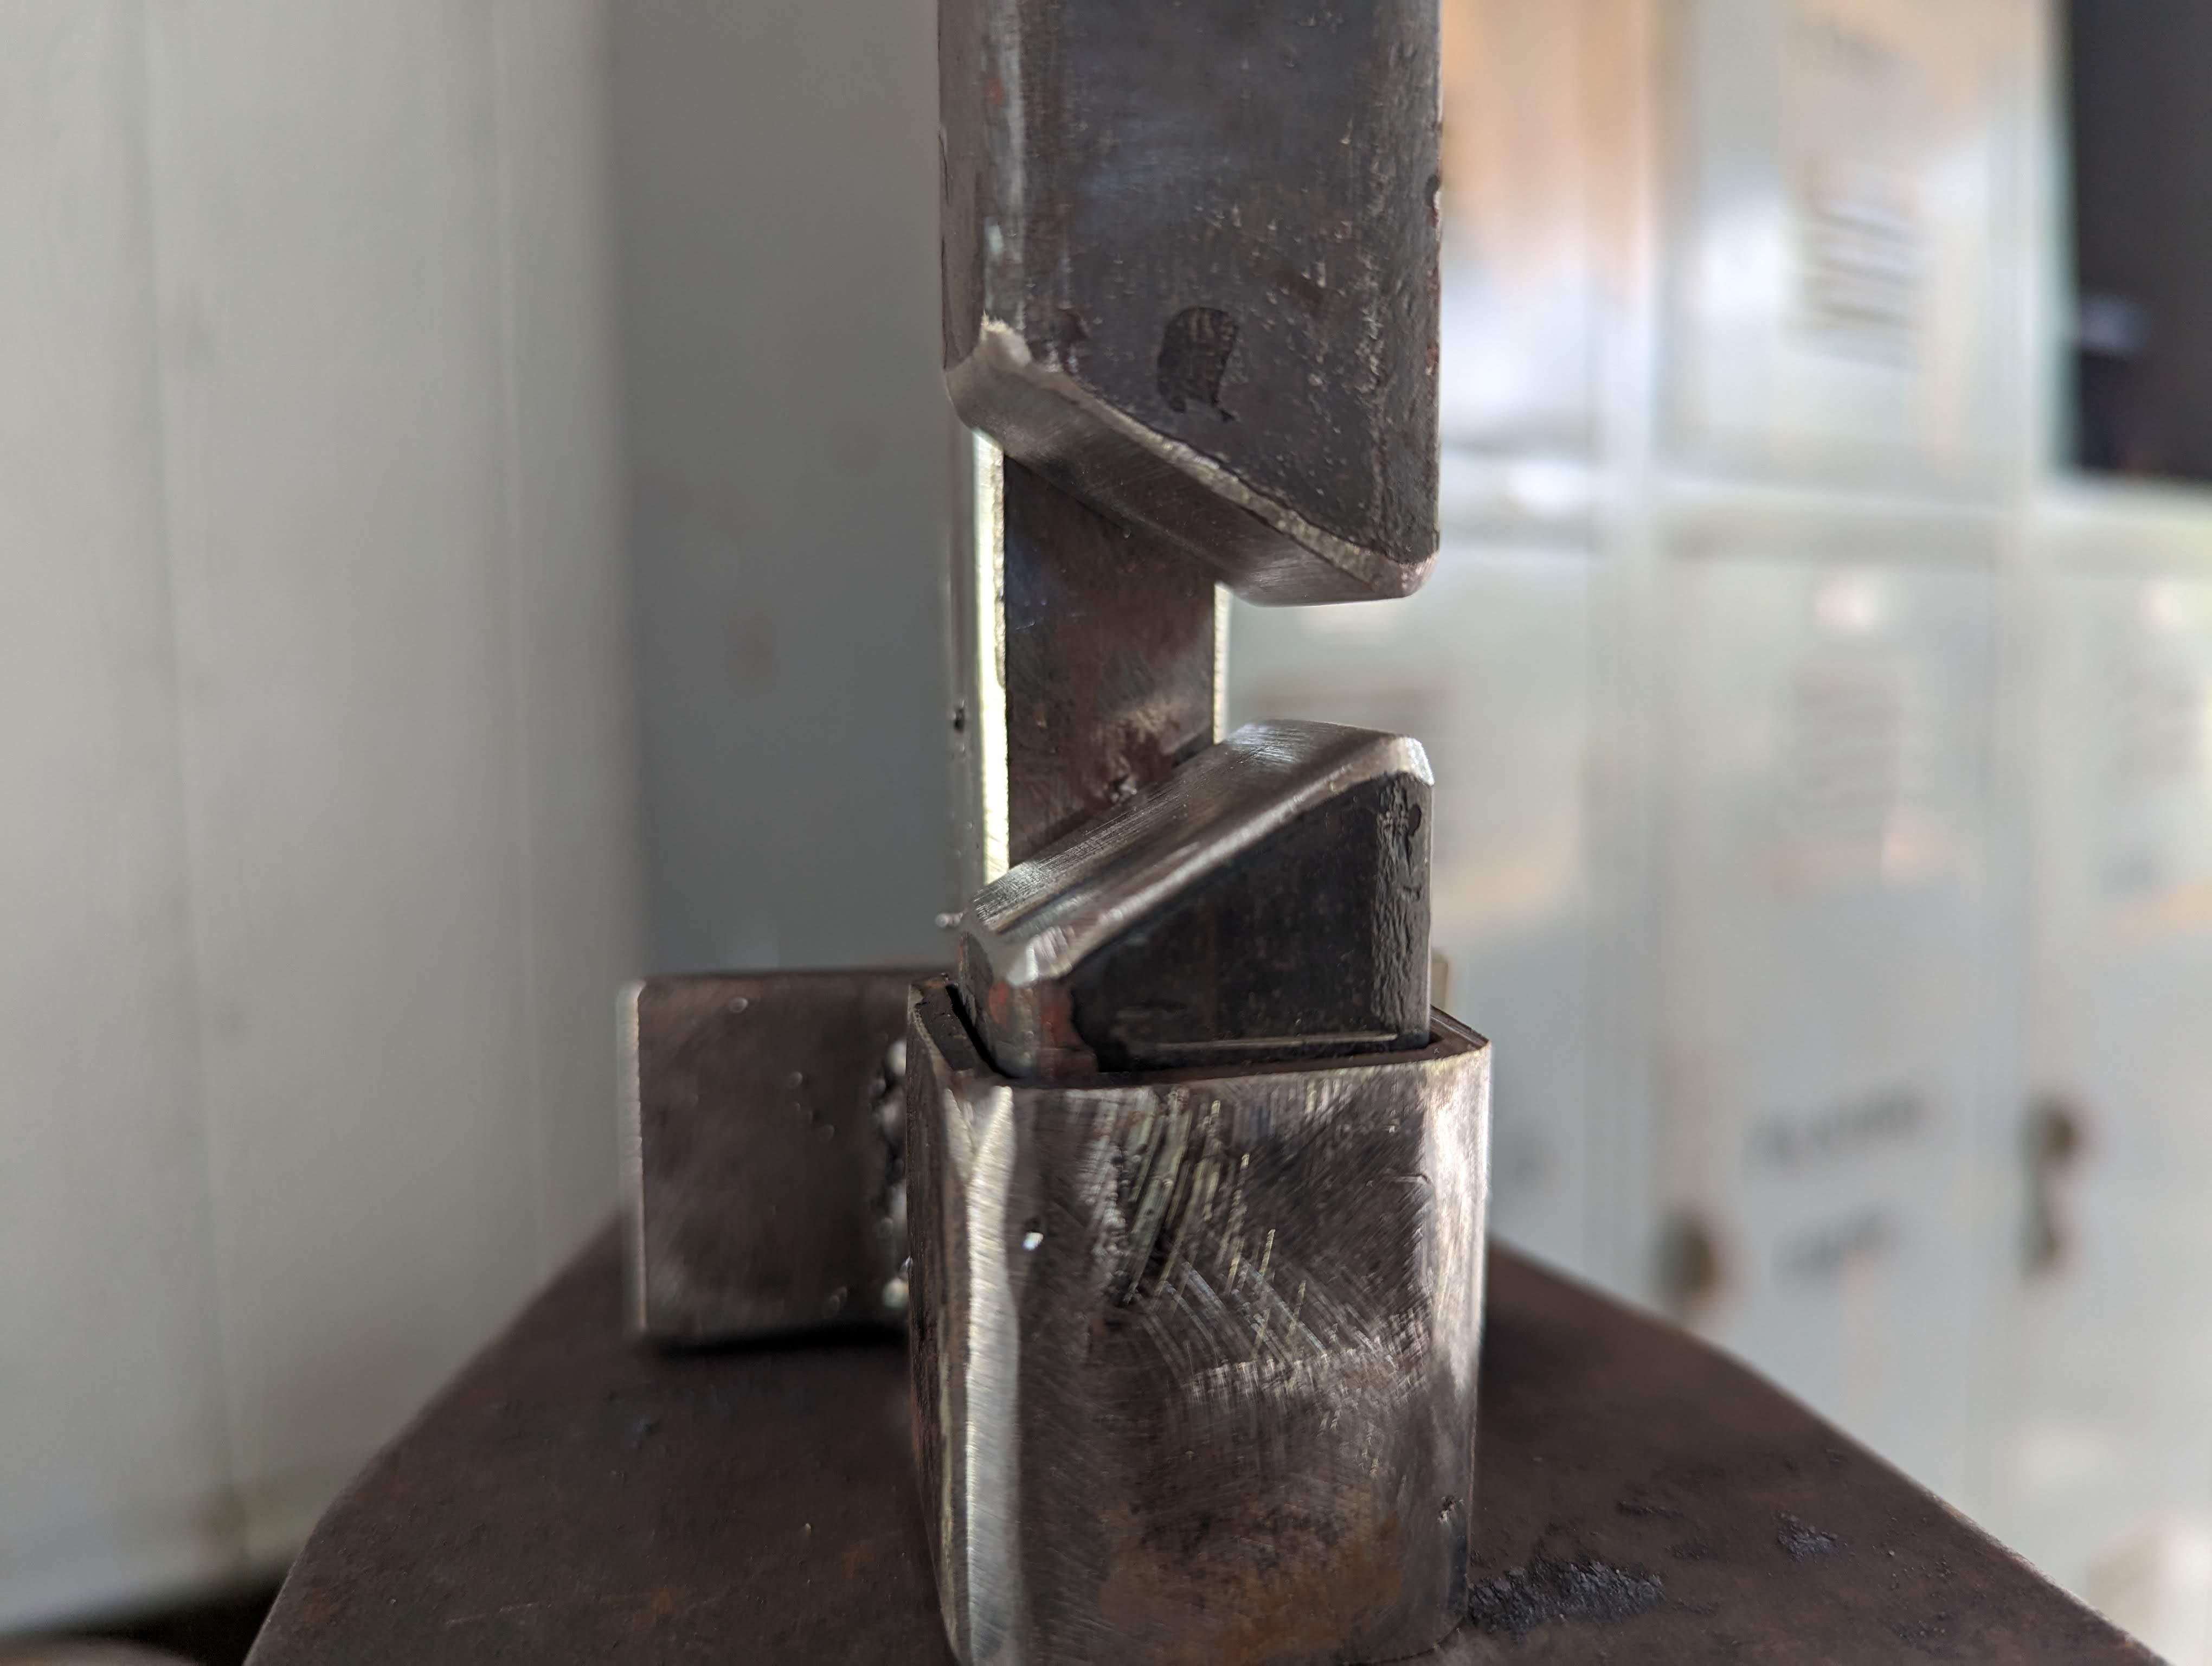
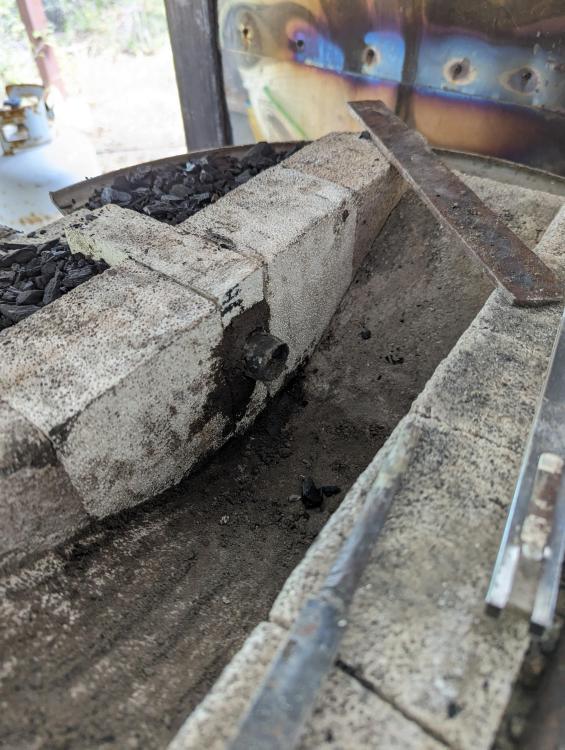
Holy Toledo! Has it really been four years? Wow, I knew all my forging tools were rusty, but I had no idea how long it has been. Good news: forge still works great! Don't you love the smoke at start up? And check out those nice blue will-o'-the-wisps. I fired up the charcoal forge to taper some one inch square bar hardy tools just to see if the forge could get that much steel hot in a reasonable time. It can. I preheated the other tools at the top of the pile to save some heat. I pulled the tuyere, and you can see how the softbrick didn't like the expansion of the steel. I'll cut a replacement brick with more room for this next iteration. I've provided a knockout for the tuyere pipe so that I can play with height and angle. At this point, I'm pretty much done with the earthenworks and will backfill with refractory cement or similar. Thankfully I now have a two-burner propane forge to help me in the meantime. I've got more tongs to make and some product to develop. Although my forge is no longer a JBOD in the strictest sense, it has been a very profitable learning experience, a simple forge to fire and ideal for modification. Looking forward to finding that ultimate charcoal forge. T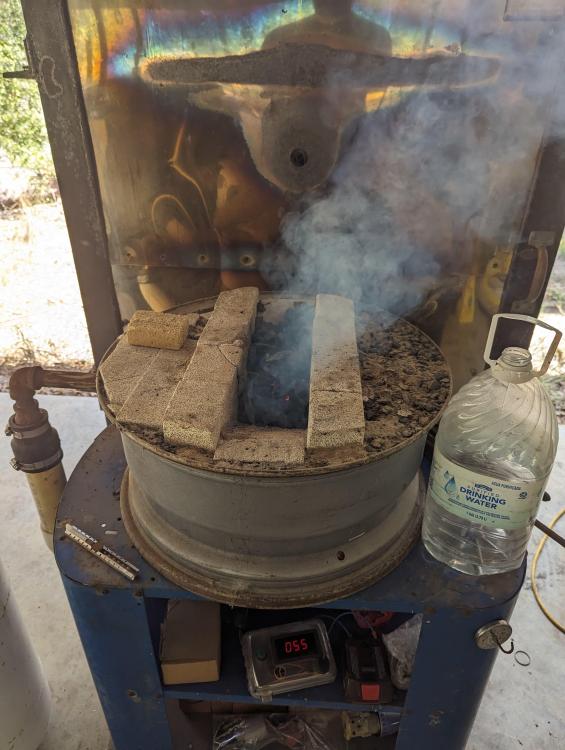

-
What did you do in the shop today?
wirerabbit replied to Mark Ling's topic in Blacksmithing, General Discussion
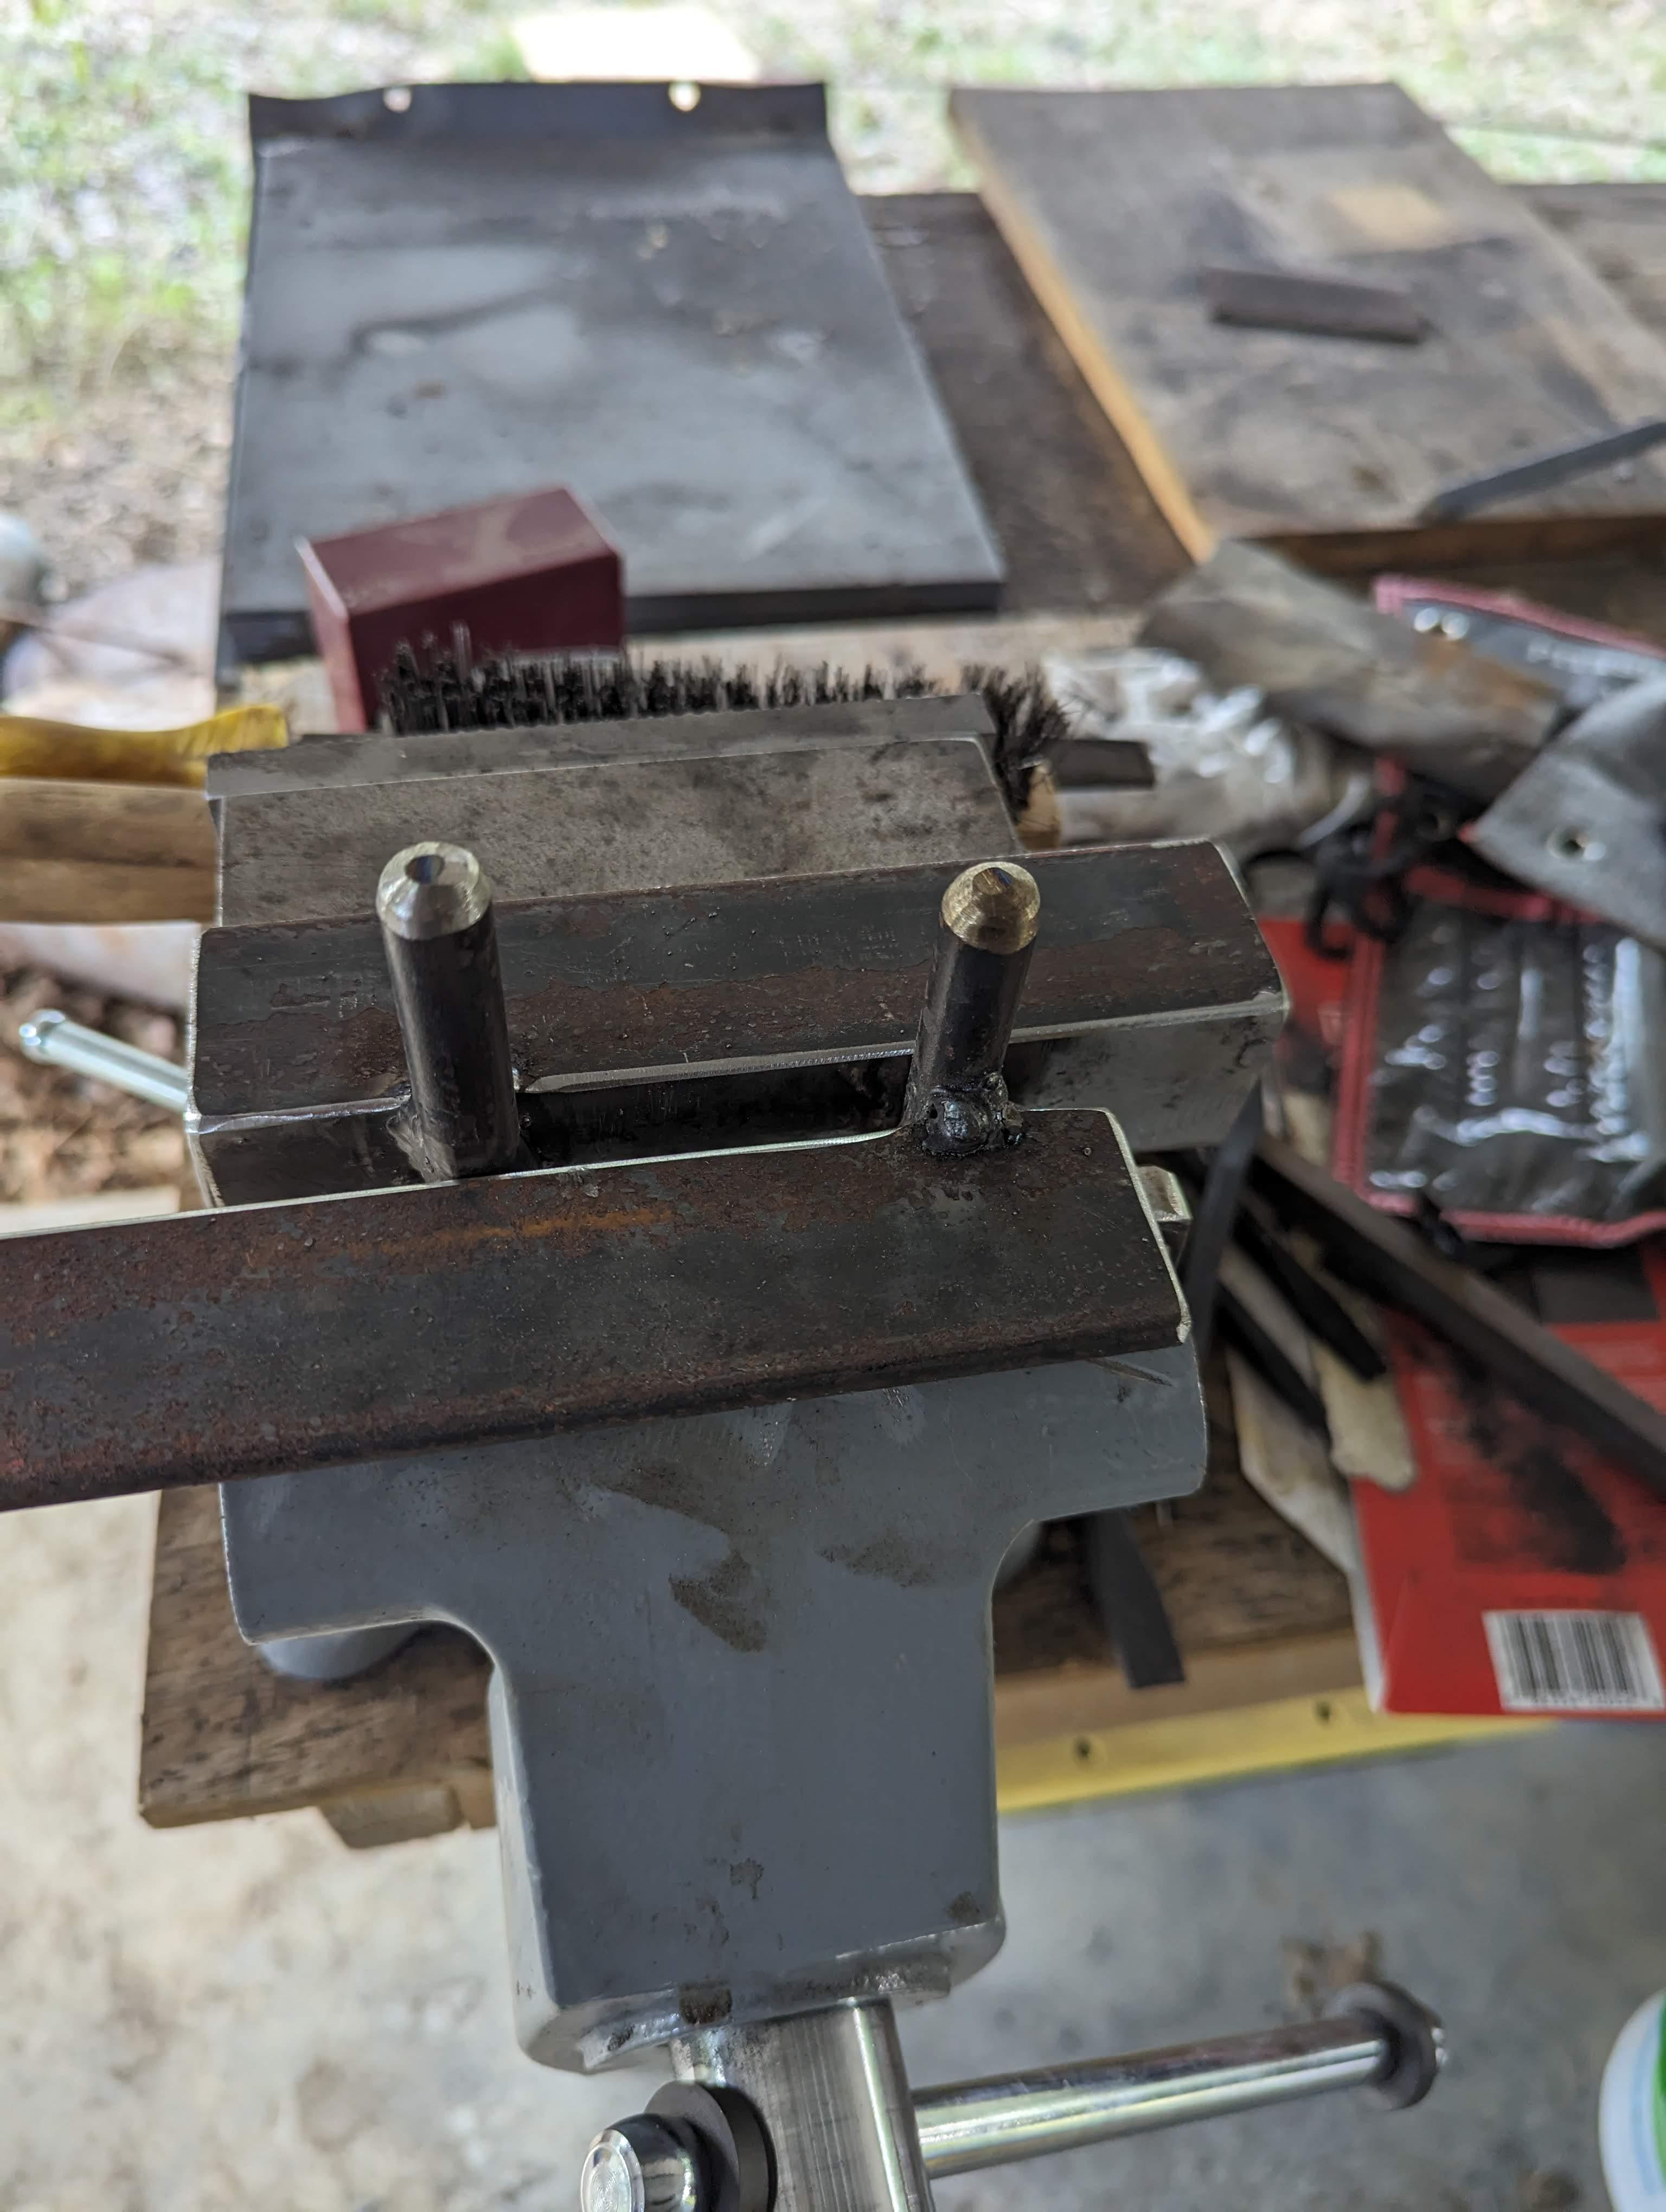
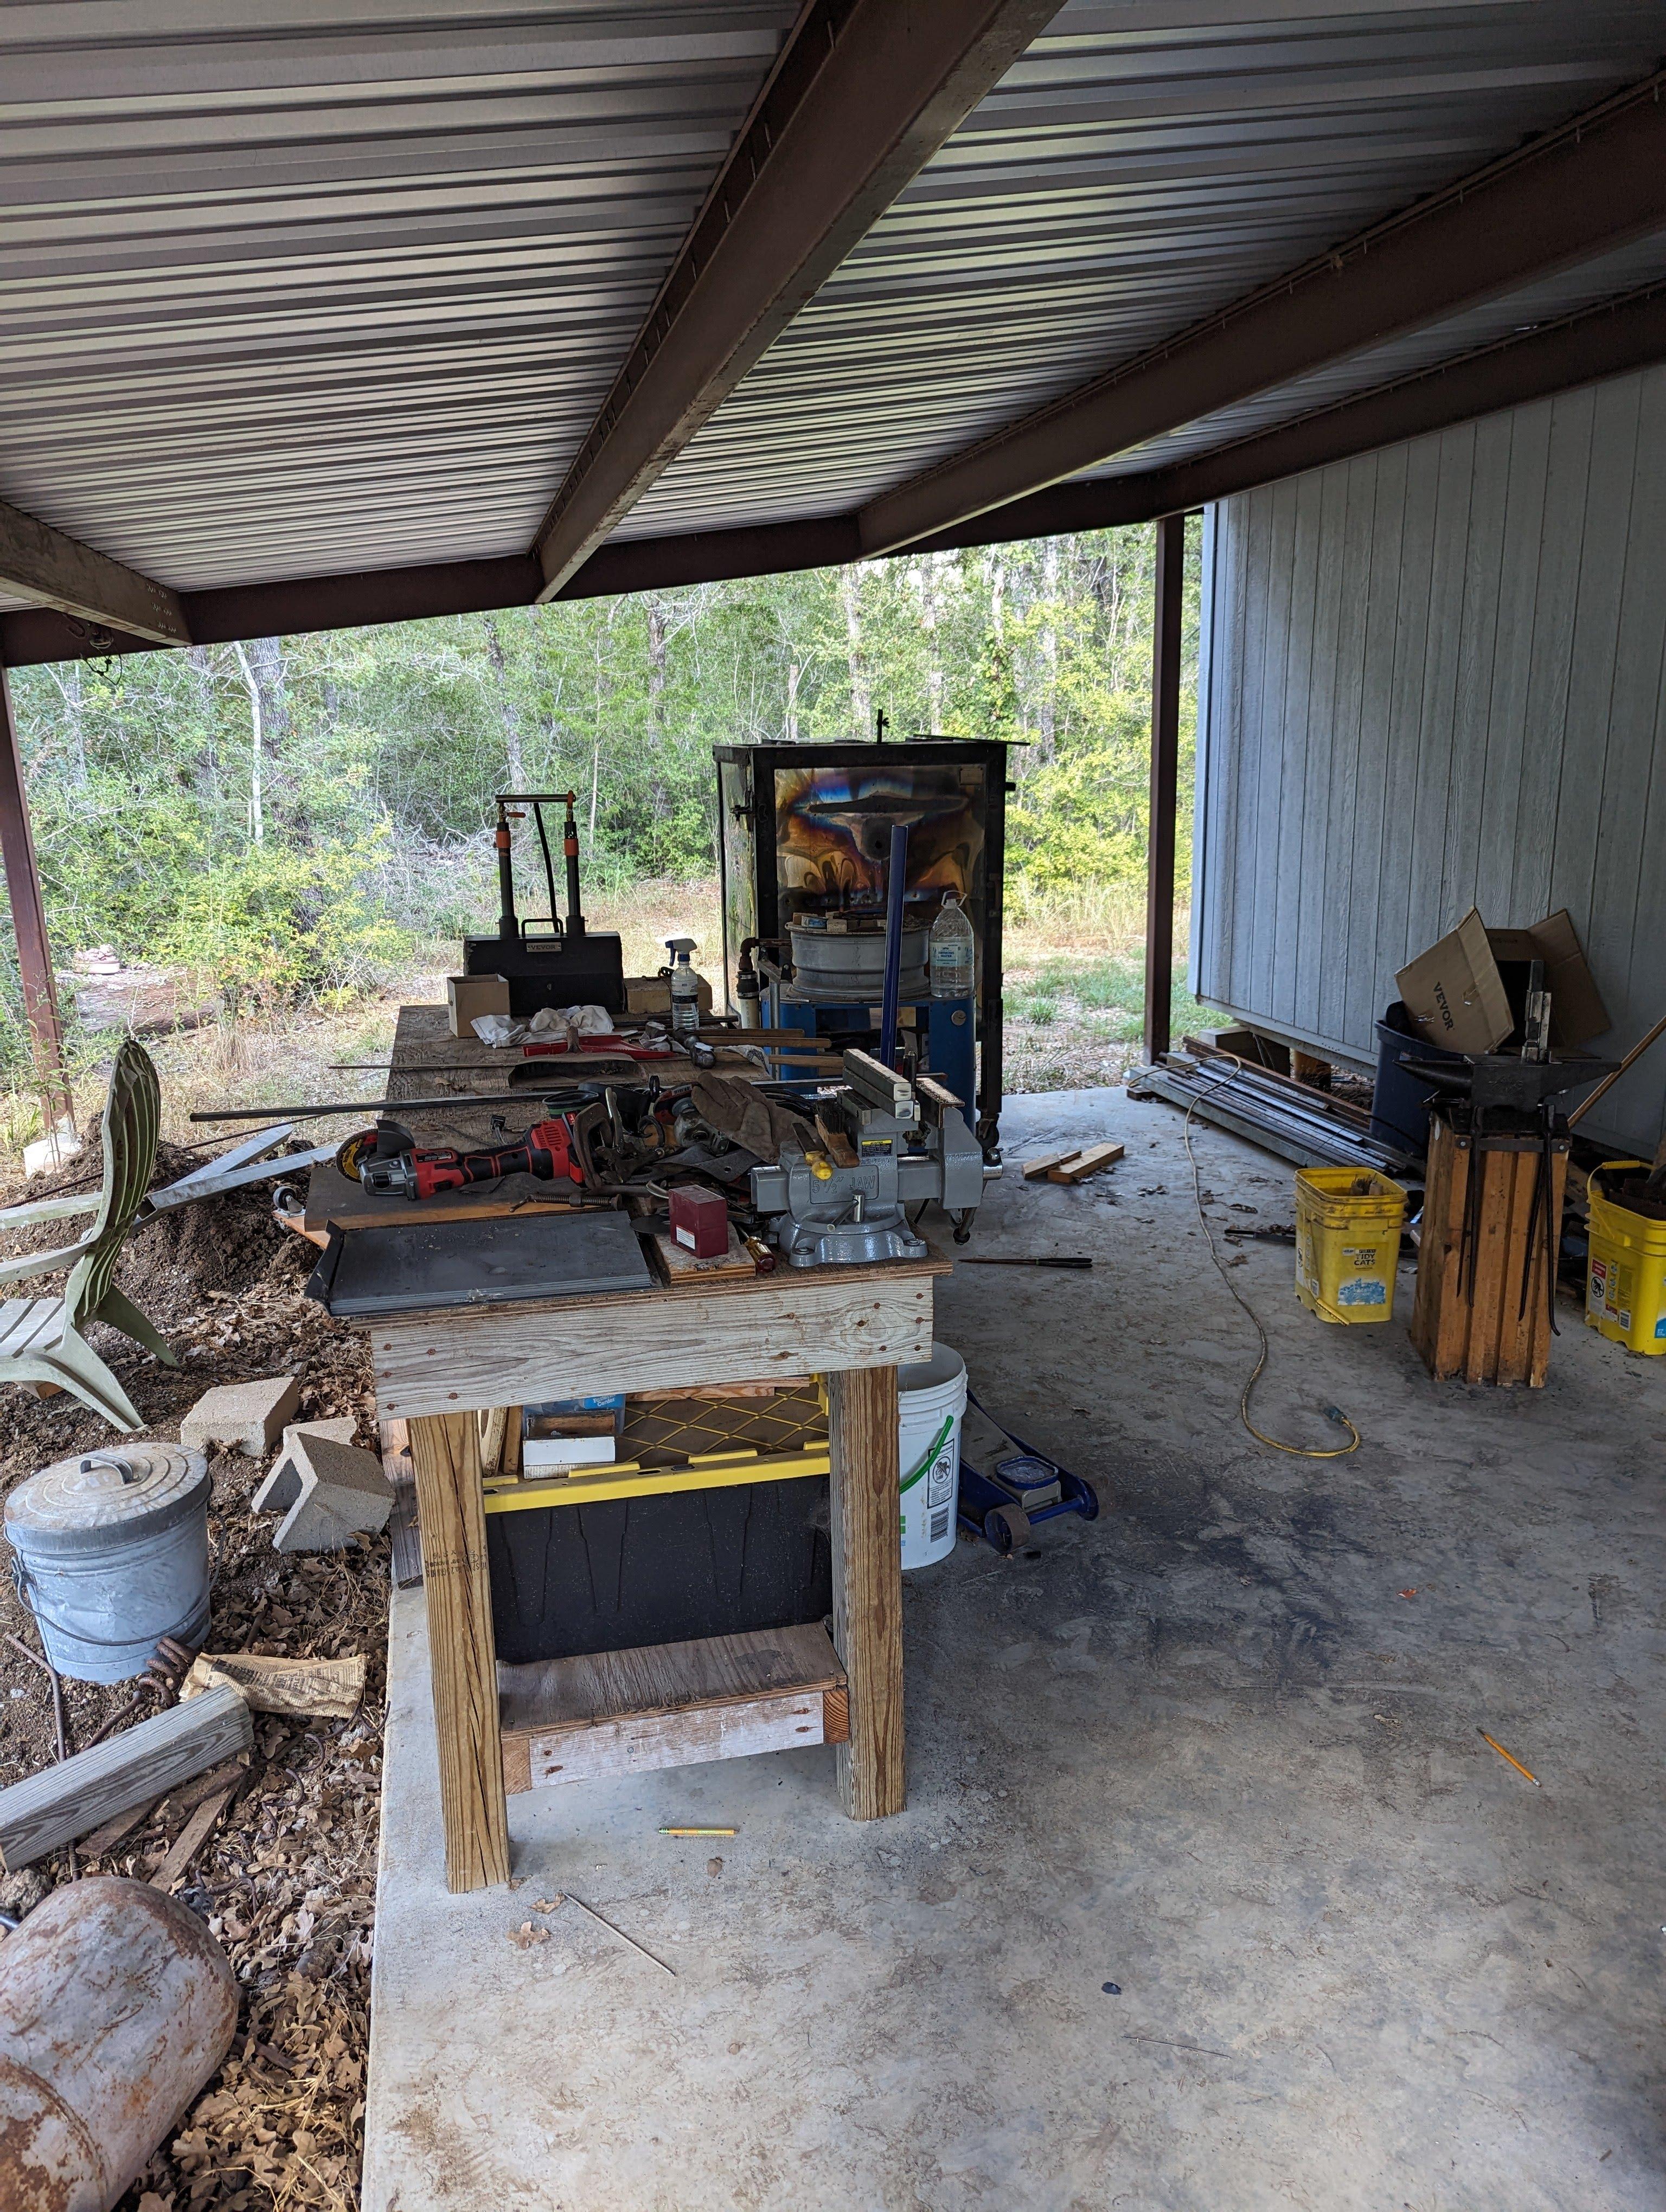
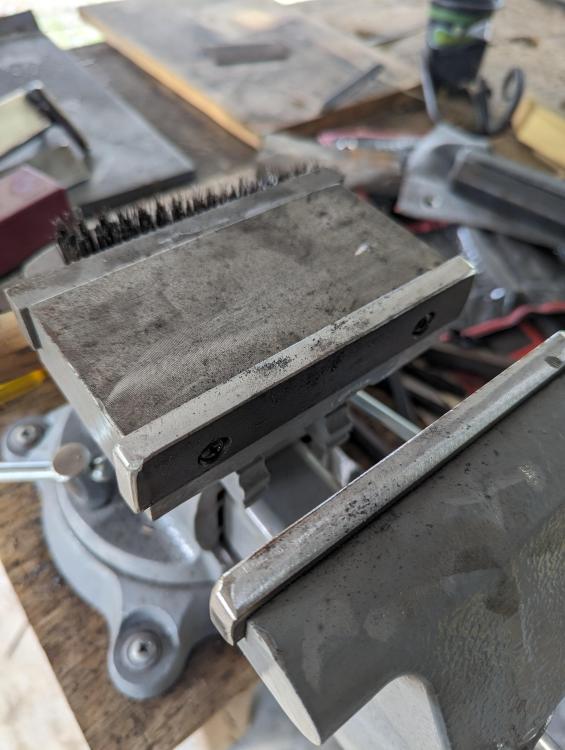
Wow. You all are making some great stuff. I've been away from the anvil for so long, I'm sure I have to relearn everything! The main thing is that I've gotten back to the anvil and have tried to set up my space under a tin roof. Reorganized the space and made some much needed tools/jigs. You don't have to tell me my welding is BAD. I know. Made some adjustable bending forks for the bench vice. Speaking of vise. I replaced the hardened jaws with some mild steel. I've already hit it with an errant grinding wheel. Oops. Plenty of room here. No more forging on the driveway under the oak tree. Made a simple butchering/fullering tool for the anvil. First set of tools is a 30 degree butcher for tenons, etc. I have more steel for other shapes I'm looking forward to getting some stuff made in the shade! If anyone sees any problems with my set up, let me know.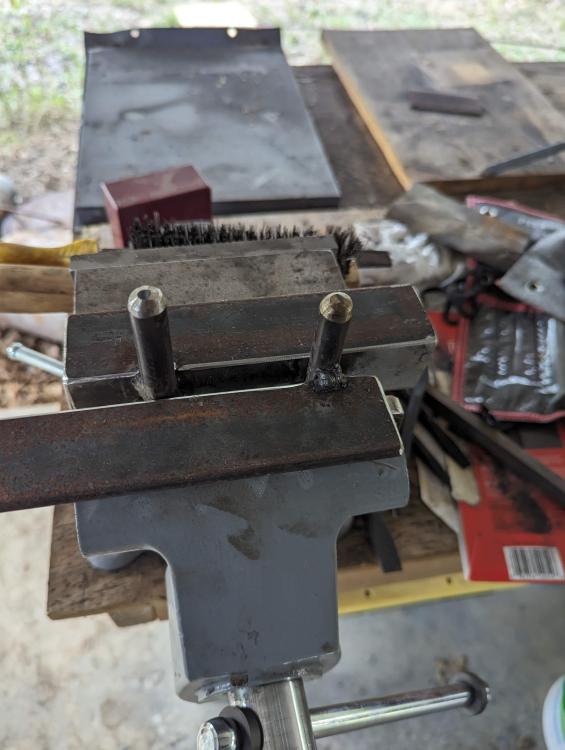


-
If you're good a fabricating, you might want to try to modify the design to allow for the inevitable hotface expansion of those bricks. Might reduce cracking. With so few brick, easing up on the nuts might be enough. I'm not sure how the integrated burner holder will be affected, however. Keep on keepin' on. T
-
What did you do in the shop today?
wirerabbit replied to Mark Ling's topic in Blacksmithing, General Discussion
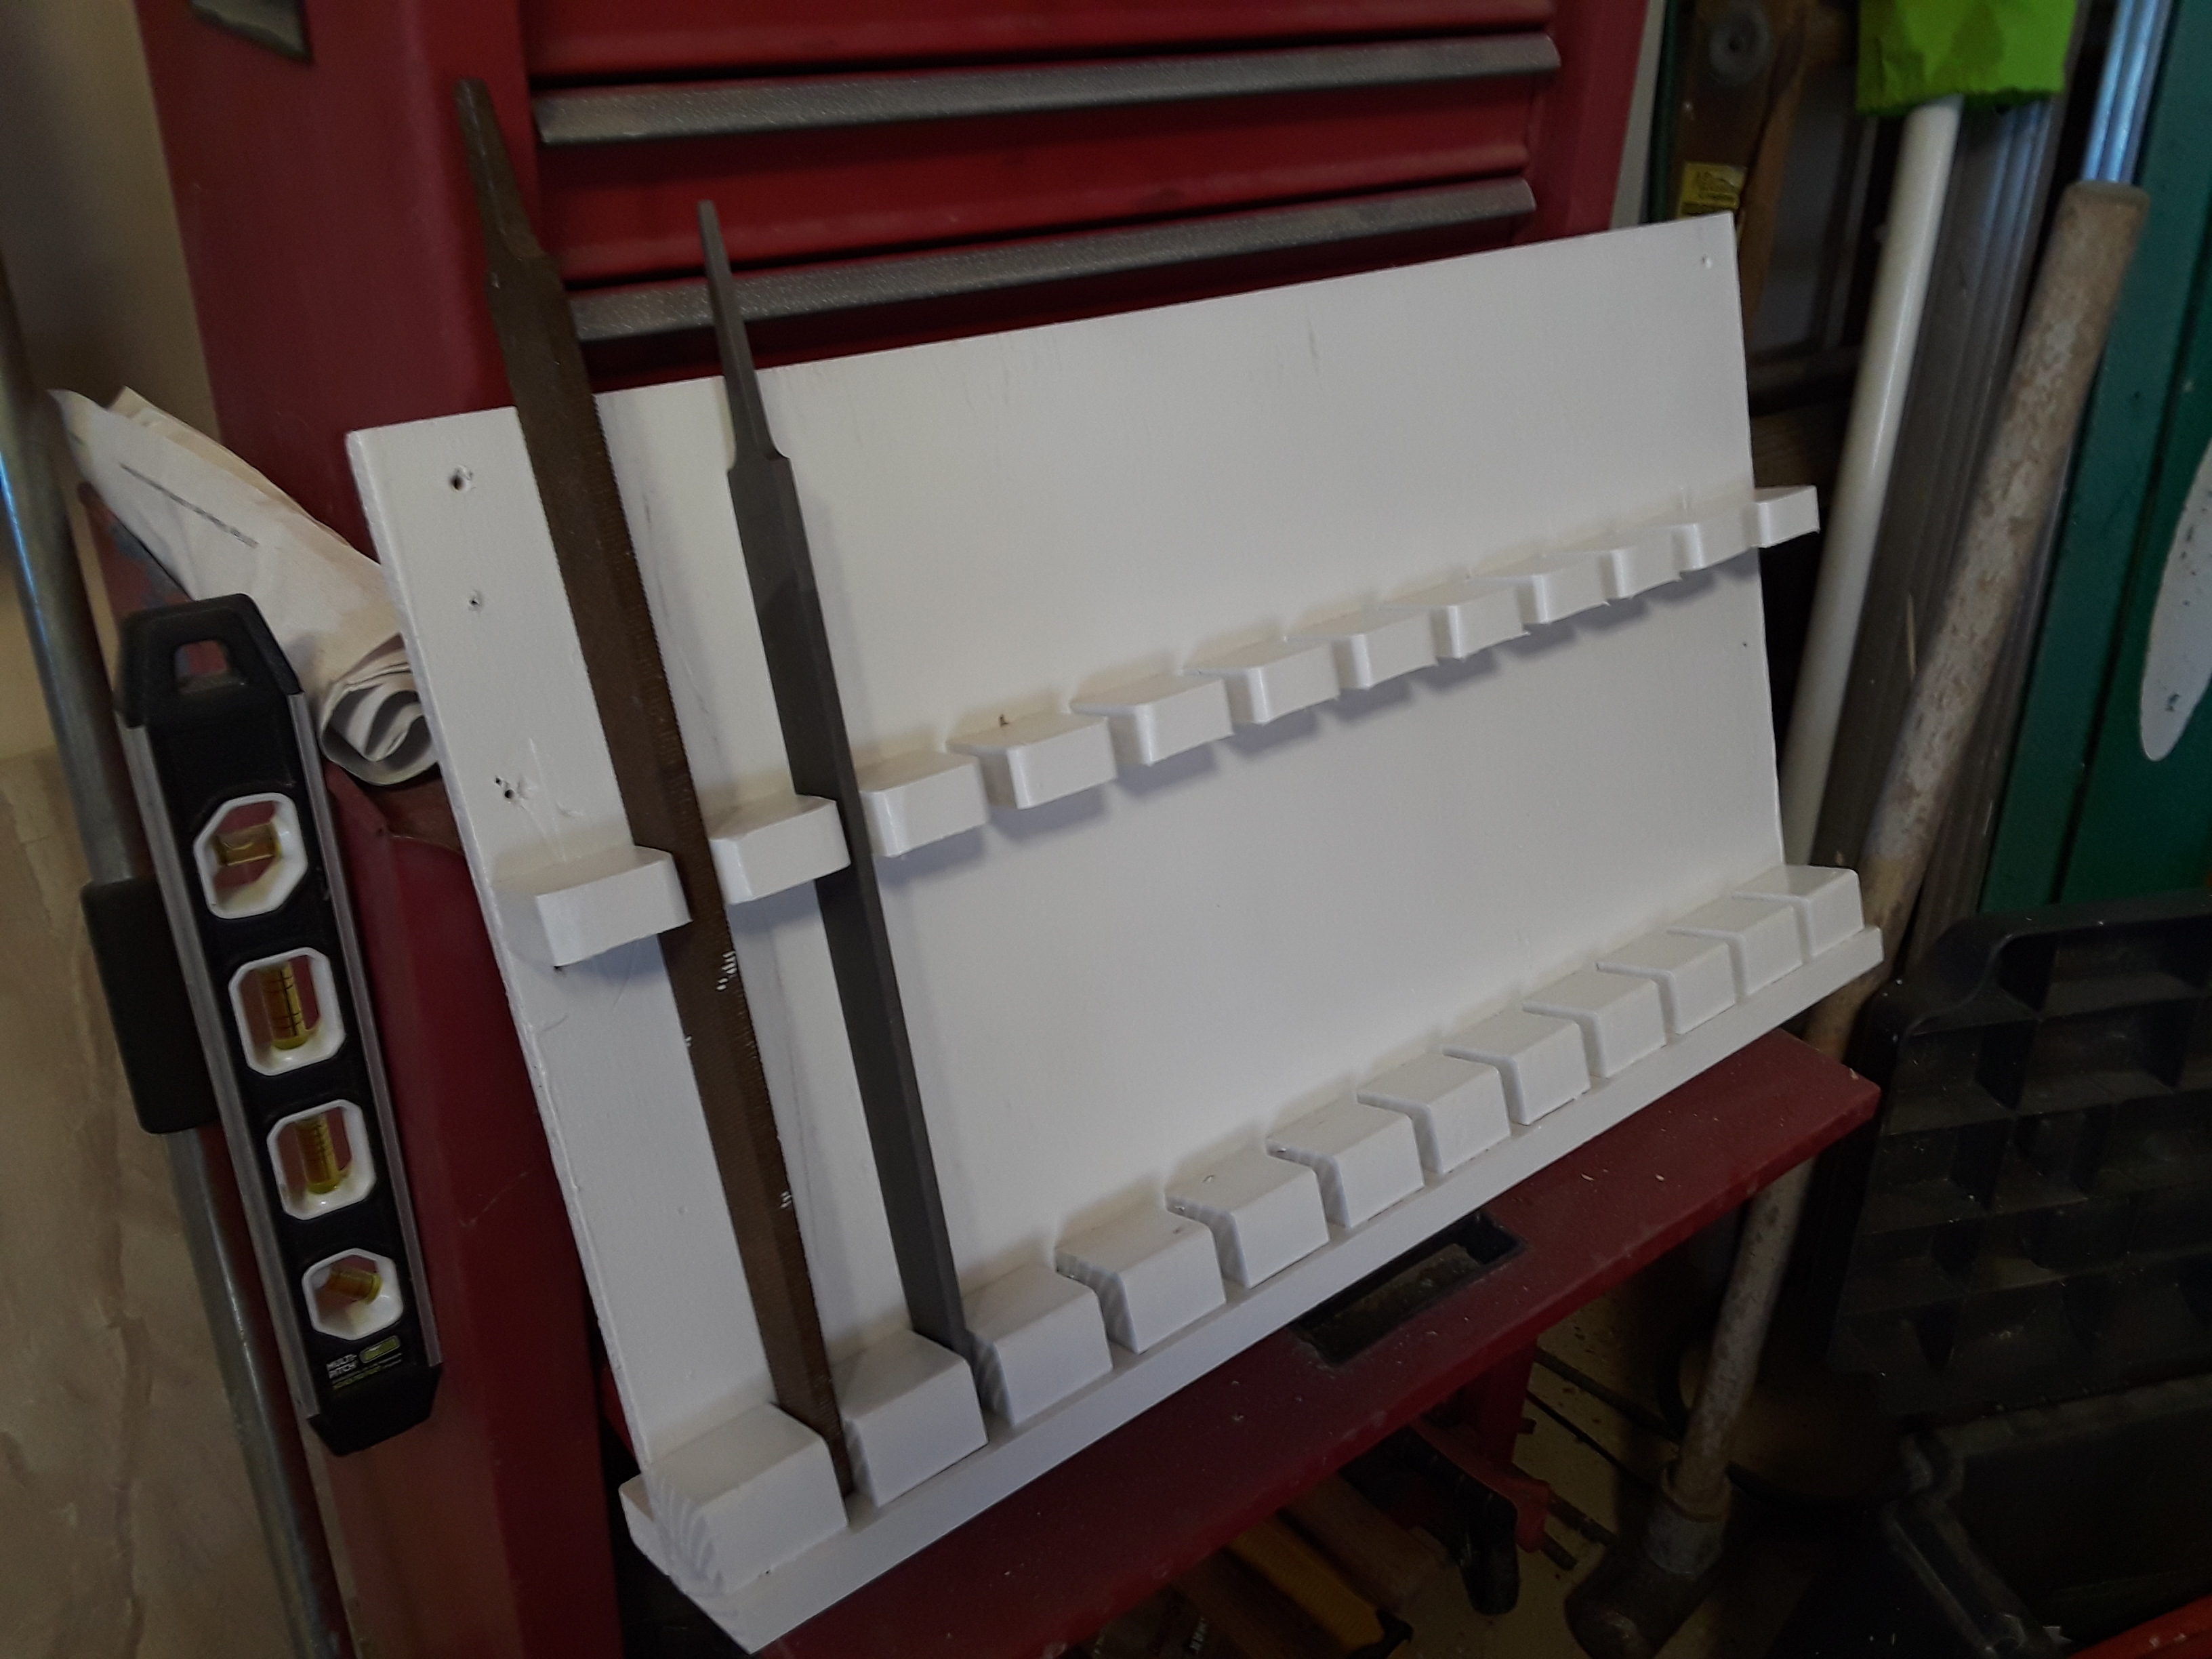
Now the files have a home!
-
Making a keychain with rusty old nails!
wirerabbit replied to TechnicusJoe's topic in Blacksmithing, General Discussion
Now I have to make myself a 60 deg v-swage. Great. -
What type of welder do I need
wirerabbit replied to Jaegers Forge and Foundry's topic in Welding Equipment
I bought a Forney Easy Weld 100ST (stick) and am happy with the welding it has done. It is a light duty, hobby box, but I have already made money with it. You should be able to do all the billet tacking you need with that box. It is a single phase box, so don't expect to weld up one inch plate. I have used it on both a 15 and a 20 amp circuit with no problems so far. Like Frazer, I am NOT a welder. In fact I had just started teaching myself welding before I started teaching myself blacksmithing! You Tubers is a wonderful thing when taken with a few pounds of salt. I too have welded up a hardy tool or two. Still waiting to test out the welds. I'll let you know how well my welding has progressed when I procure more charcoal. -
Please do not mischaracterize my safety habits because you refuse to read carefully. I, in no way was suggesting the use of unencapsulated ceramic fiber. I was trying to put DoubleG (unnecessarily) at ease that his lungs were not going to fill up with phlegm after one or two exposures to his kaowool. information is readily available online from more credible sources regarding health risks associated with exposure to ceramic fibers. I do not need to cite sources for such a simple concept like one or two short duration, low level exposures to ceramic fiber is not going to give you cancer. On the other hand, dangers of prolonged exposure to refractory ceramic fibers is fairly understood and the basis of my own praxis as well as my statement: Best advise is if you do not understand it, do not use ceramic fiber. Ever. Safer for everyone. If you are willing to do the work to understand the product, RCFs can be useful tools if used and handled correctly. Know you tools. Be safe. It's your job. Sound good?
-
Good idea to get rid of the lose fiber blanket, but no worries. Sporadic exposure of a few hours over a few days to the fibers is negligible. Those of us repeatedly exposed, spending long work days over months and years, are the ones who really need to be careful with that stuff. I rarely touch that stuff without wearing my P-100. Although someone just suggested piling more fuel in the firepot, rather than topping with brick or fiber, I have seen solid-fuel forges set up pretty much like what you are doing. You should experiment and let us know which system seems to work for you and what you are doing. I have not really tried the enclosed forge (oven) and have had good luck with a nice deep coal bed, but I'm using charcoal rather than coal.
-
Harbor Freight in the house! I got the itch too and bought every 2 lb and 3lb hammer HF offered. I ground them to my liking and away I've gone. Whatever it takes to hammer on some hot metal. Looks like you are on your way. Show us what you're making.
-
Certified Welding Process Forklift Tynes Forks
wirerabbit replied to WeldShmeld's topic in Welding/Fab General Discussion
I believe the first response told him what he needed to know. -
If we assume the temperature in the fore did not greatly exceed 2600 deg, that damage looks like the bricks were fluxed. Can you tell us what exactly you coated the bricks with? What binder did you use with the zirconium silicate? I suspect either something in the brick wash is fluxing the brick or the brick itself is not up to scratch.
-
Frazer's Corner of the Internet [photo heavy]
wirerabbit replied to Frazer's topic in Member Projects
Looking great Frazer. Nice find on the forge. I'm looking forward to seeing some more of your work out of that new forge! I don't know about you, Frazer, but I'm getting mighty cold down here in Texas. It has only dropped to 27 deg. once this week and I feel like the world is ending. Forging certainly has for me. T -
Fantastic! A poker and a rake were the first things I made as well. I'm still in the making-blacksmith-tooling mode. By the time I've built up a useful number of tools, I believe I should have pretty decent start with respect to forging and fire control. Still so much to learn, but soooooo cold outside right now. Keep up the good work.
-
Oso, I go to Westbrook Metals for the fresh stuff. They have no problem with small orders and will cut sticks down for you. They usually have whatever mild steel onsite, but some of the alloys might need to be brought from off site. Best to call with your order. Check out their website.
-
I'd try to find either a clay supplier or industrial supplier that can sell you refractories. I have never found a good deal online compared to my local (1.2 hours away) clay store. At $5.40 a brick at my supplier the K28s are indeed not cheap, but I just saw K23s for $12 each online. OUCH. The spirit of the JABOD is great, though: cheap as dirt. Has let many of us start on our journey with little money down!