

bluerooster
-
Posts
568 -
Joined
-
Last visited
Content Type
Profiles
Forums
Articles
Gallery
Downloads
Events
Posts posted by bluerooster
-
-
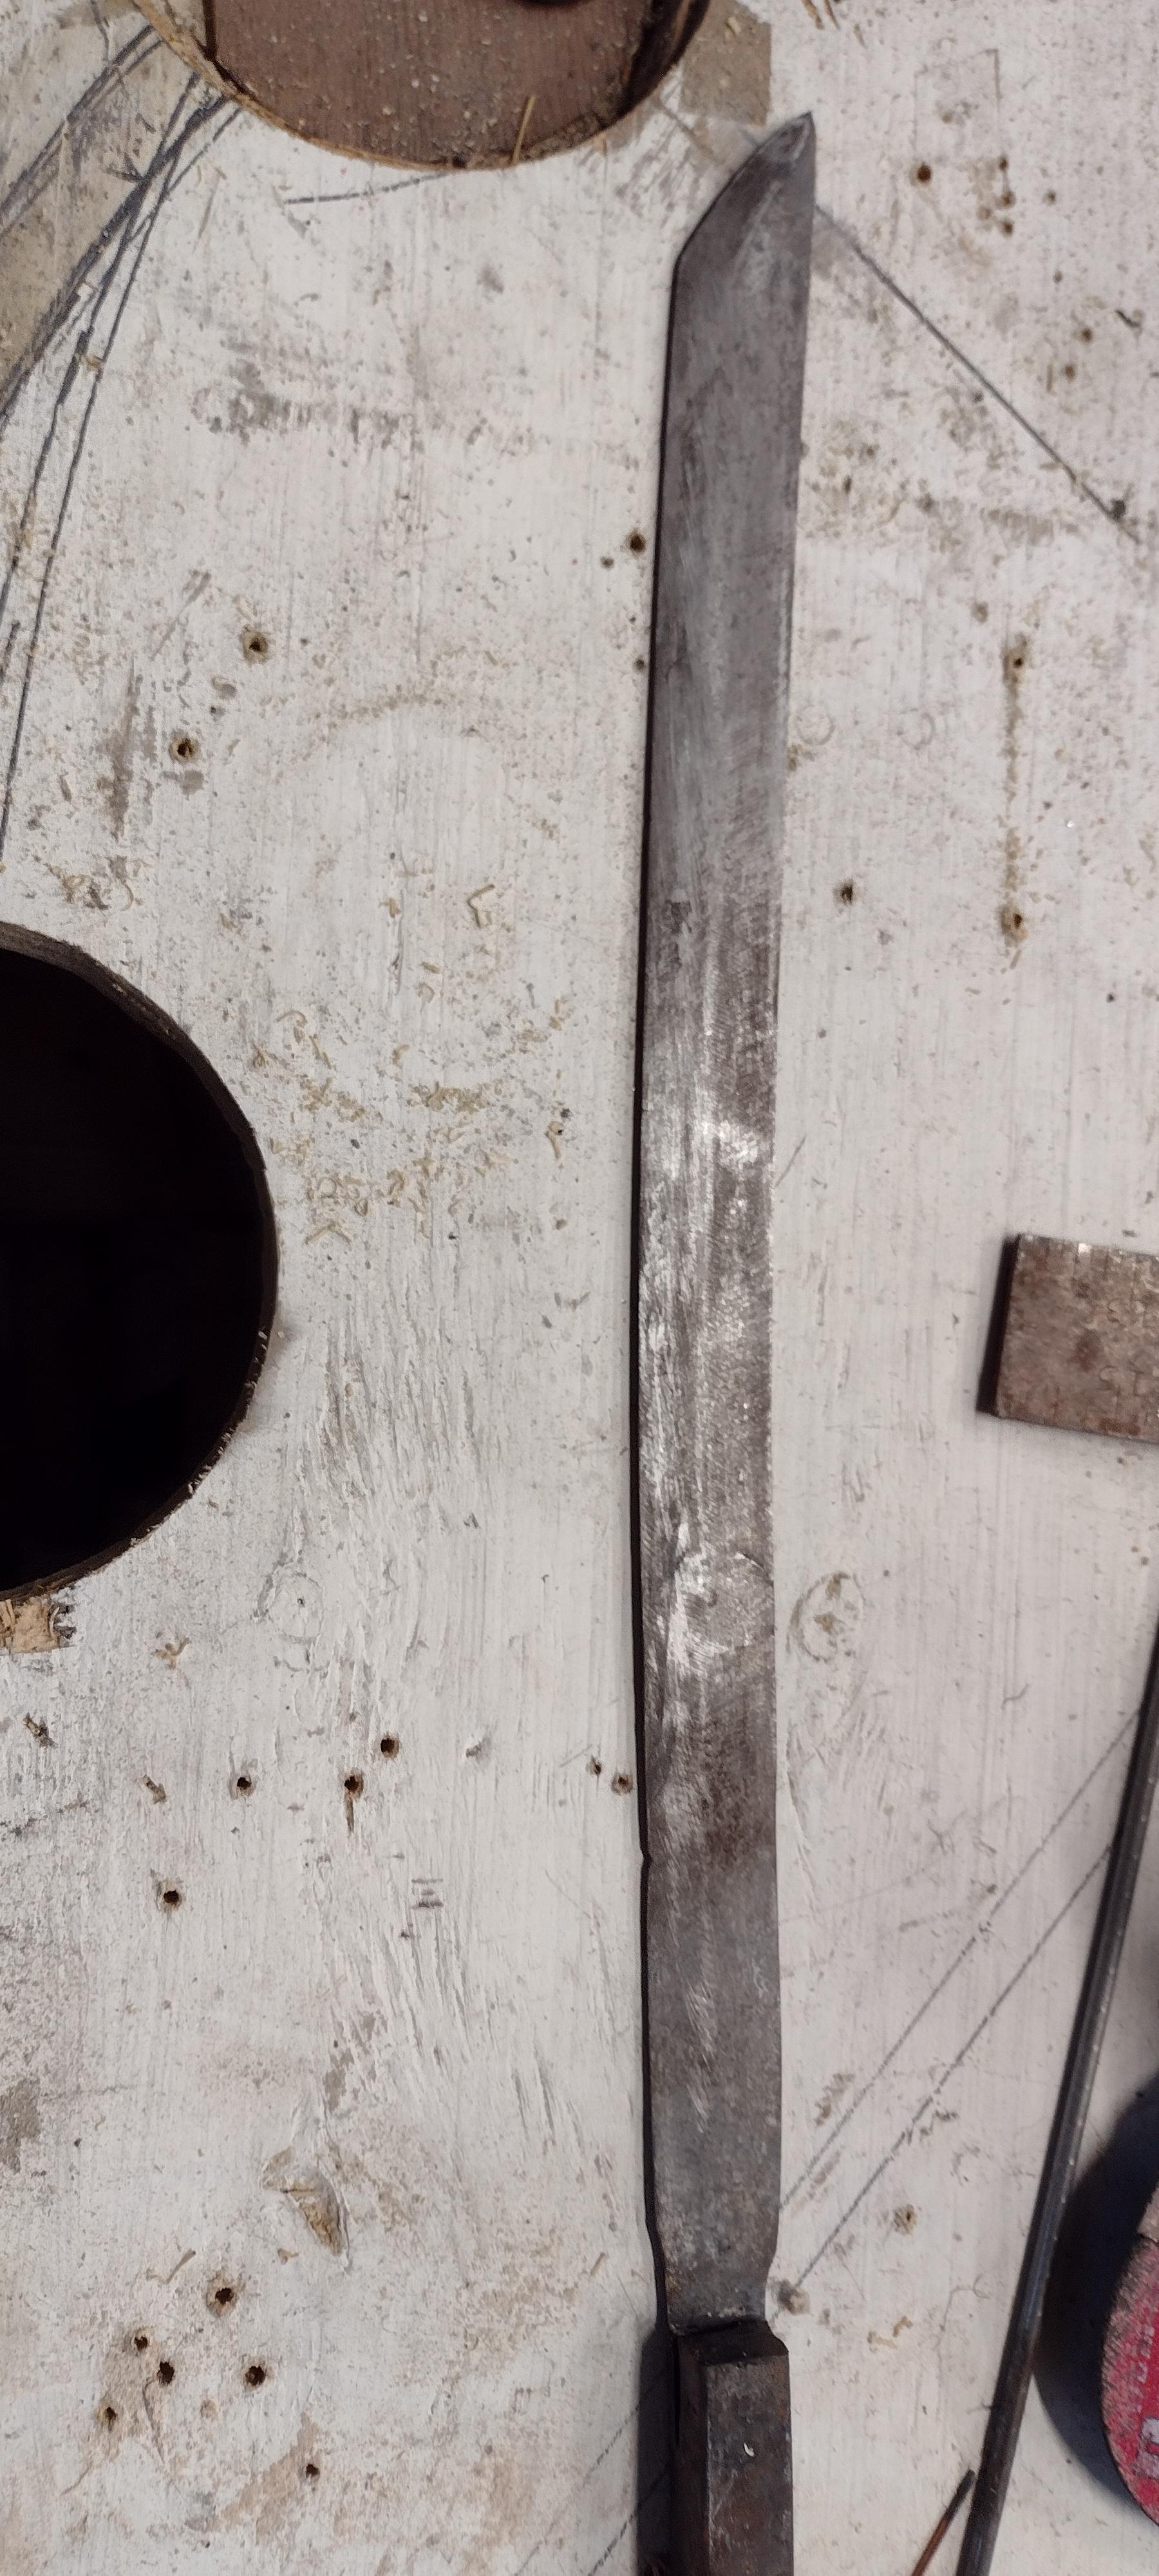
Thanx for the information. I suspected something like that. The "saber effect" was what I was after. But the hook to the right (warp) took me by surprise. I put it back in the heat and got the warp out of it, and left it in the normalized state. I'm afraid to re harden it, as I don't want to curve it any more than it is now. I guess I'll hang it on the "wall of shame" and start over.
-
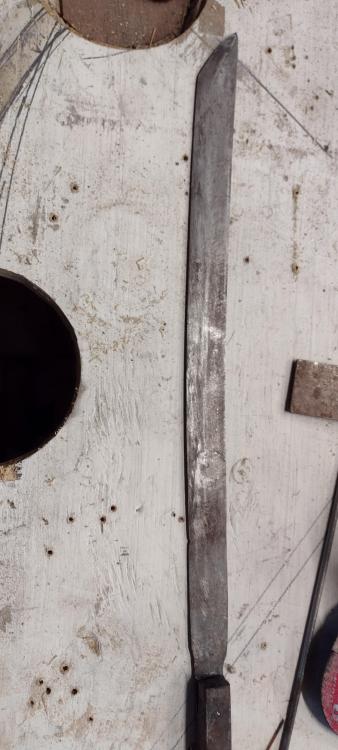
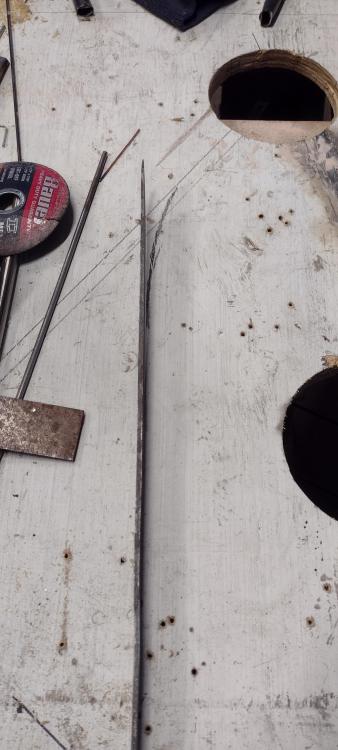
Pics of the blade. The second pic shows where the bend was.
-
What causes a blade to bend when quenched? All was going well, it was straight in all directions, heated to just above critical temp, and held there for a minute or two. Then into the quench. It took an immediate hook to the right.
It's a cable billet that I'd welded up a couple of weeks ago. It was an experimental blade, using clay on the spine to get a "Hamon". It took a beautiful curve, but also a bend to the right.
Could it be the clay was thicker on one side, causing one side to cool faster than the other?
-
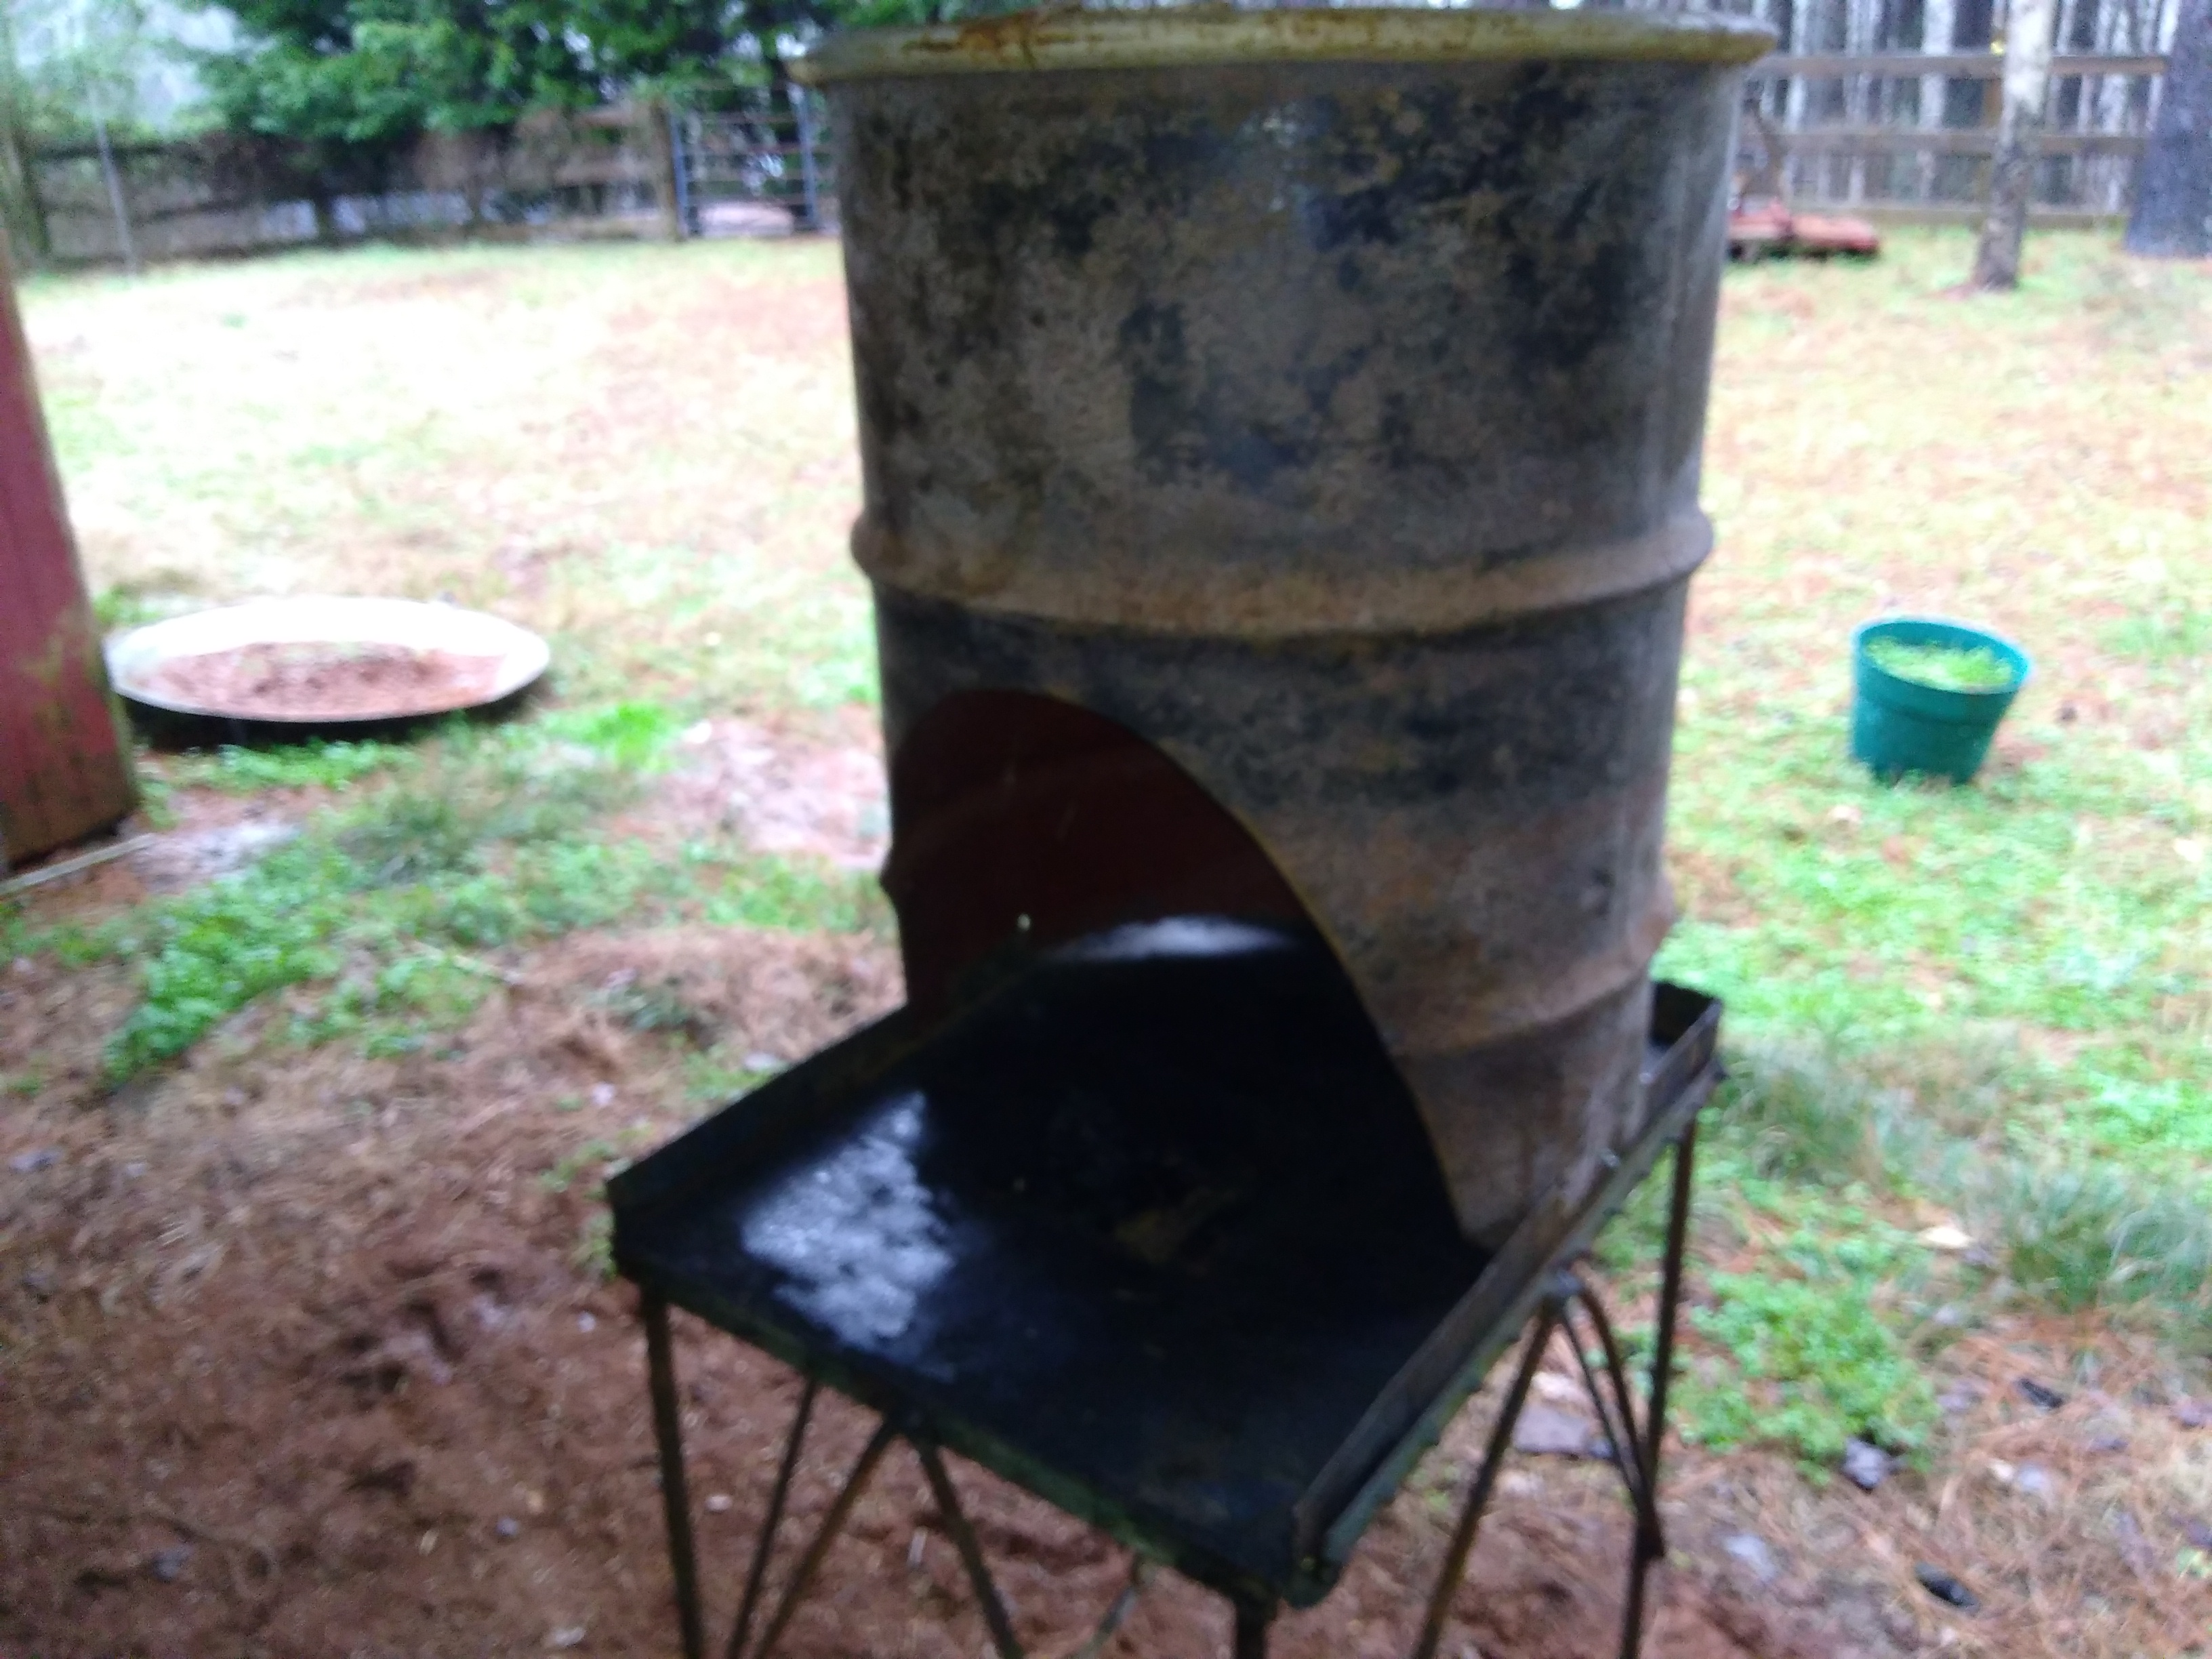
The hood on my forge is due for replacement. It's rusting so badly, that it's dropping huge rust flakes on the hearth causing some massive klinker. It was ok until the rain cap blew off. It was a few months till I got the chance to get it fixed. Had to replace the lower 5 foot section of flue pipe as well. That was a couple of months ago. Now the whole thing needs to be replaced.
I'll be going with a side draft this time. Instead of the barrel that I have now.

-
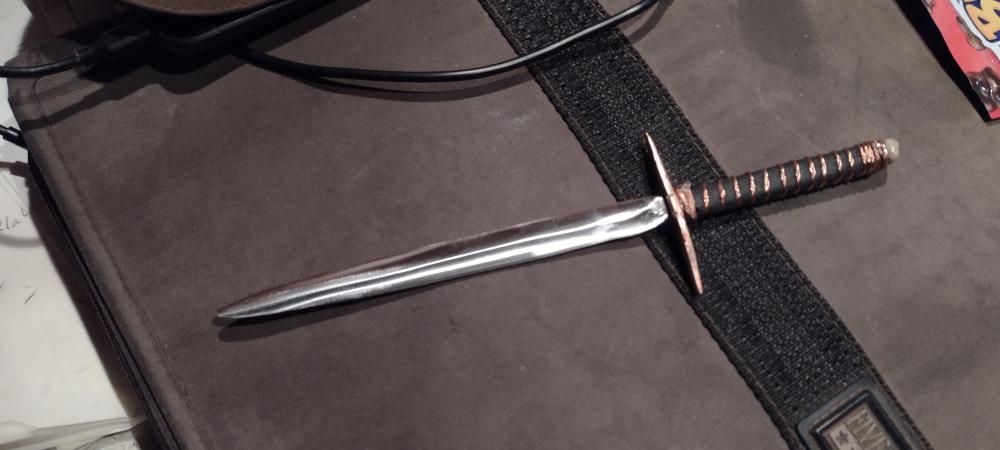
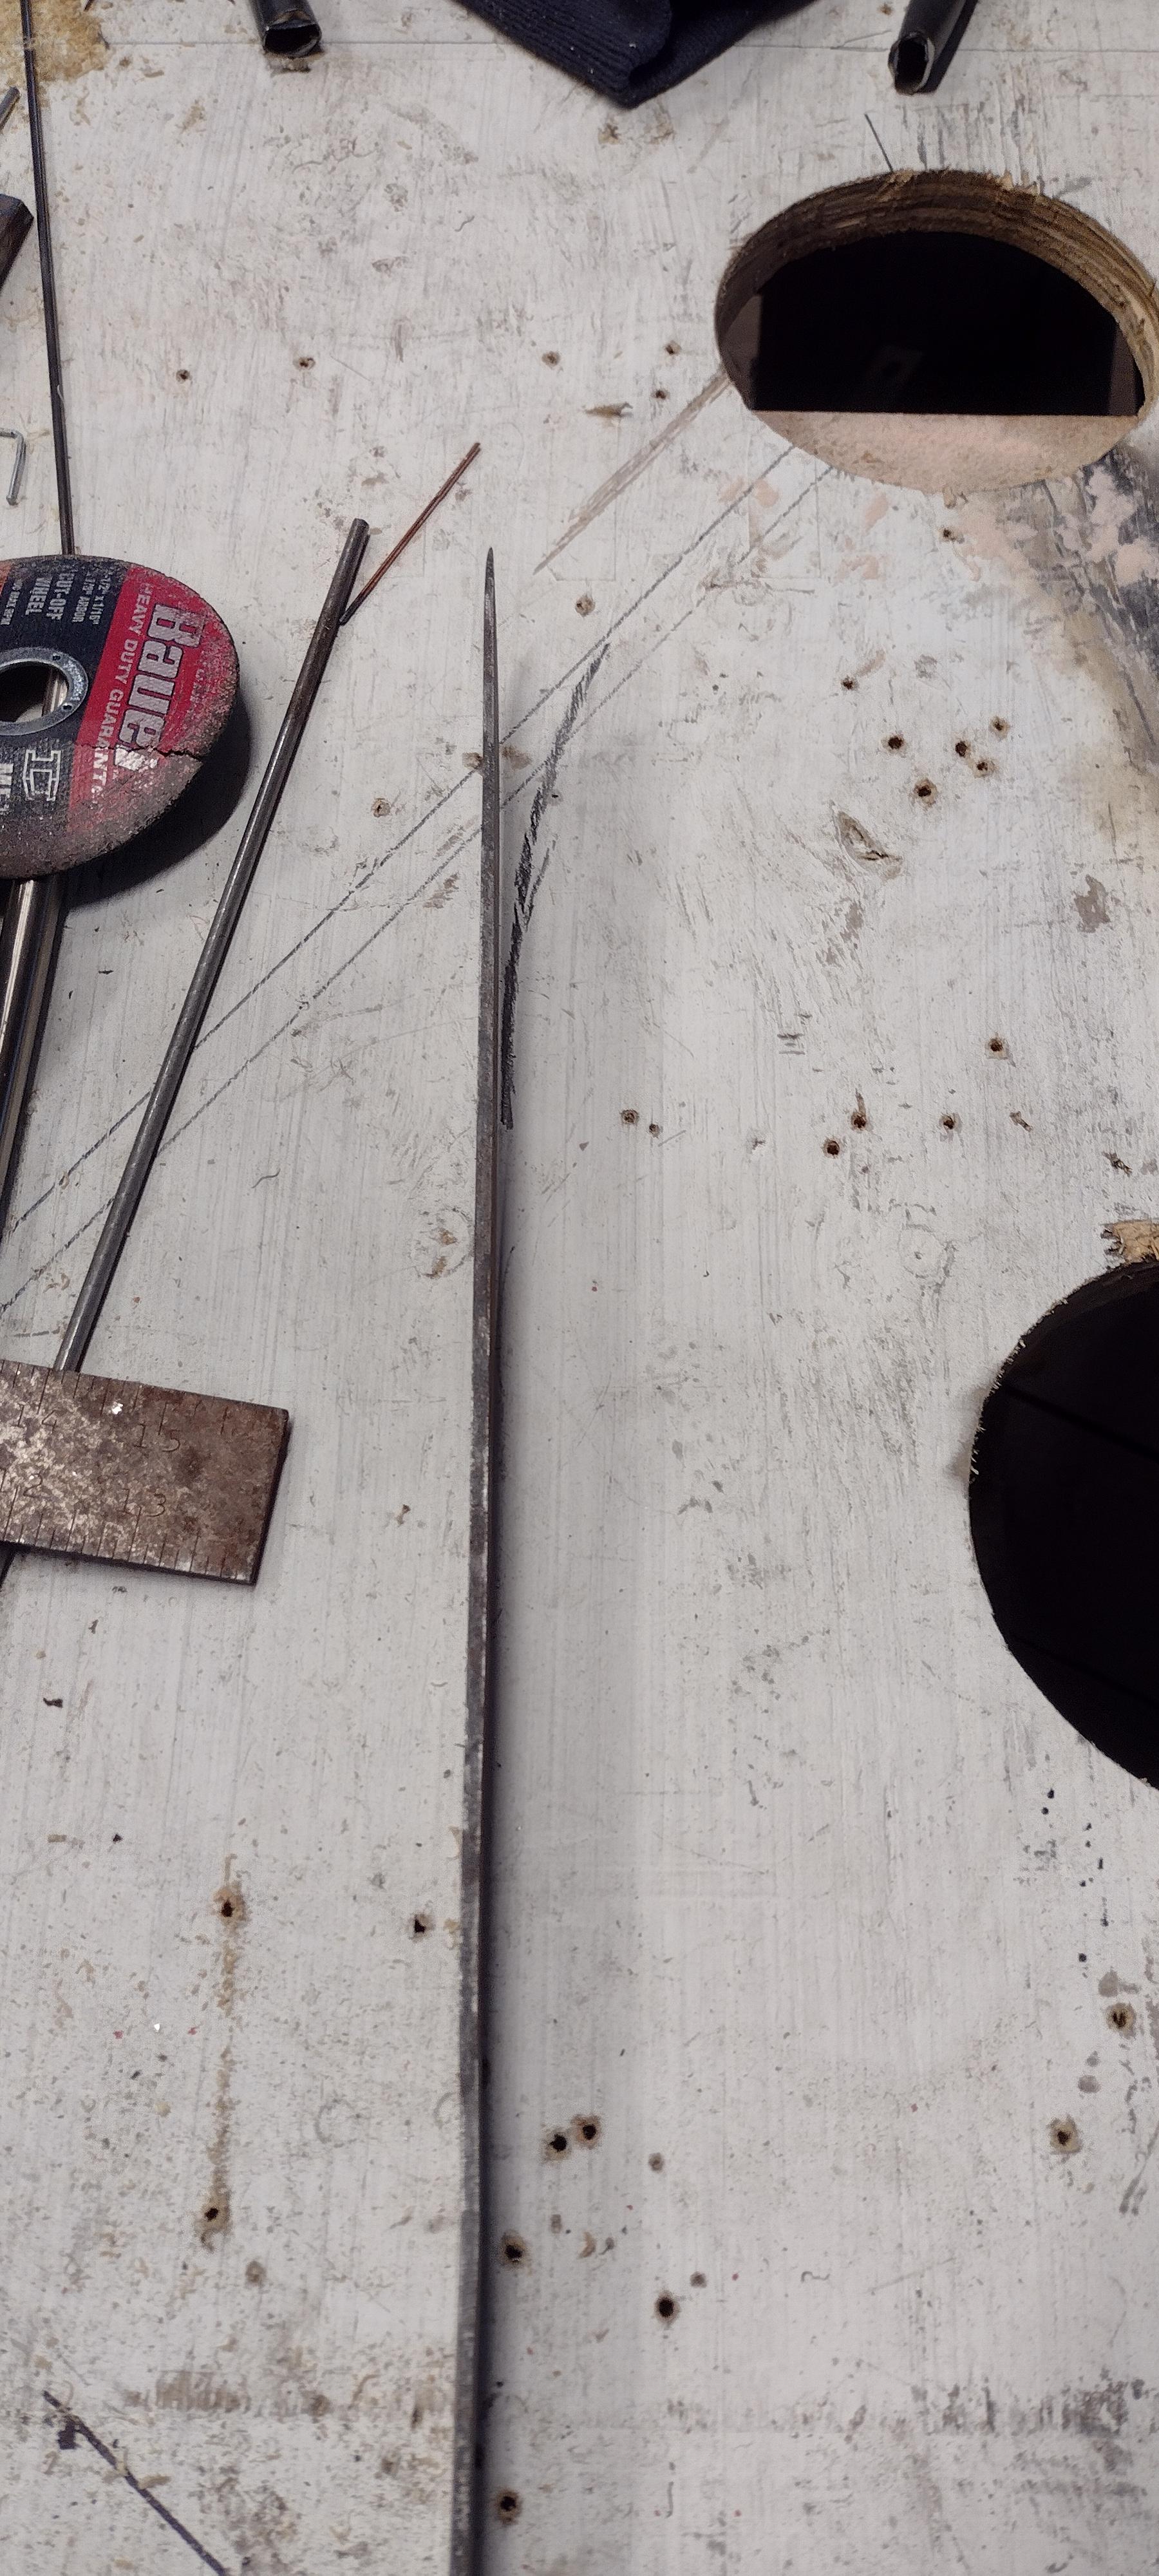
Well, I started drawing out the cable billet today. It got to the point where the cable "handle" was no longer trustworthy so I cut it off and welded a piece of 3/4" square stock to it for a handle. It decided that it wanted to be a blade of some sort, and I decided that it needs to be the best slickest most polished blade that I've ever made. So I stopped drawing when it was about 7/32" thick, and within a 1/16" of my desired width. Then grind to spec. I now wish I'd made it longer, and thinner. Spent all afternoon grinding, got it clean, and straight, and it's still too thick. I only want about 3/32 at the spine, 5/64" at center, then taper to the edge.
I could have thinned it by 3/32" which would have lengthened it by nearly an inch. Resulting in both longer tang, and longer blade.
-
I've been thinking about making a cone mandrel that fits the Hardy hole for stuff like that.
-
Chimaera, I kinda cheated on it. It was a choker made of 7/8" cable. The loops were cable doubled back and a fitting swaged on to hold it. This billet is that swaged part of the cable. It was still rather tedious getting it to welding temp through the whole piece. Heat it slowly and allow it to soak for a while then bring temp up some more and soak a while, until it's finally up to welding temp. It took many heats to insure that it's welded through. I believe that once it's drawn, and shaped, I can grind through the outer layer to reveal the pattern.
-
I've straightened many old axles. It's best done cold if you can. If you must use heat, only use what it takes to get it to move. And as mentioned before let it cool slowly on it's own.
-
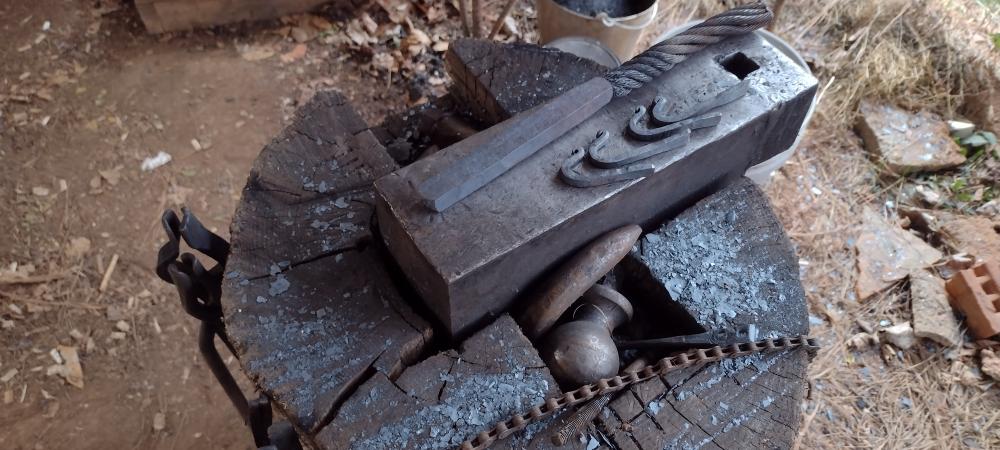
Got the cable billet done, now what to make of it. Also made a few wonky hooks for mounting and hanging keys.
-
So far what I've seen here is so good that I'm embarrassed to submit my entry. Oh well, it's forged from a Model A Ford leaf spring. No heat treat it's a letter opener.
-
You have a point there. I may need to make one more. But I don't expect it to hold up for more than 2 or 3, before it gets out of line, and starts twisting the tubes.
-
Still unable to post from my preferred machine. But Linux seems to work OK. Not much time at the Forge, got the start on a letter opener for the challenge, but I have another more pressing project so the letter opener is on the back burner,
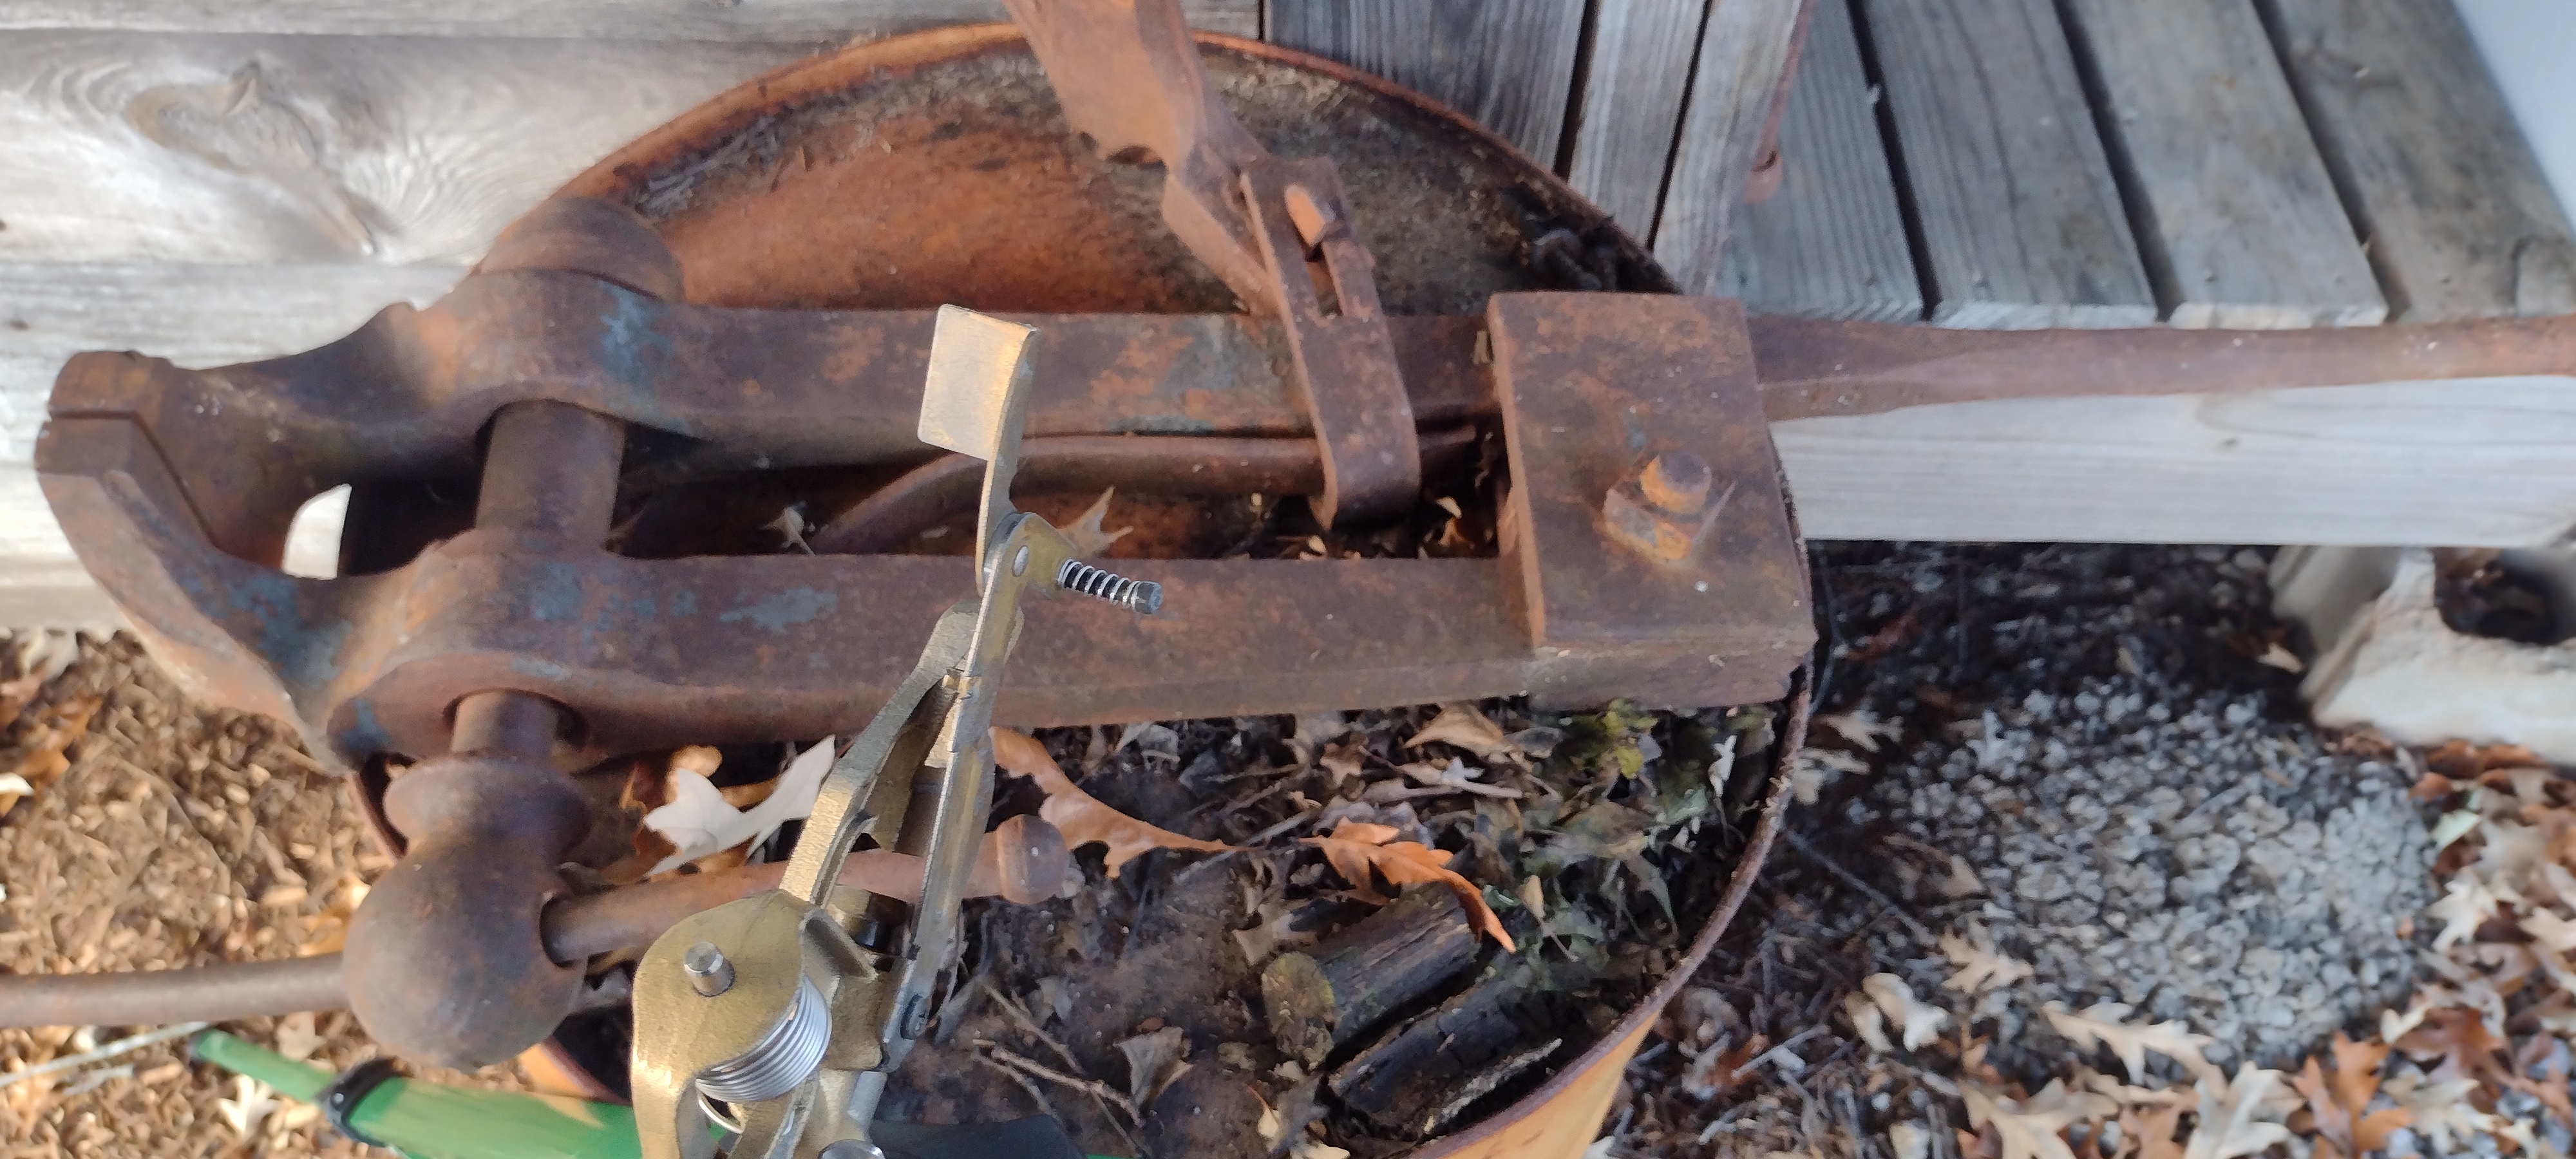
The project in queastion requires a nice smooth bend in a single tube. The only bend in the whole project. The bend requires a roller bender, to make about a 35 degree bend over about 2 feet of a 5 foot tube. so I had to stop and make a tubing roller/bender. Sort of a pain for a one time use for a single bend. But tha's how it goes some times.
Here's a pic of the roller, and the curved tube. I'm sorry but I don't have a way to resize pics on this machine.

-
On 9/29/2022 at 2:15 PM, gewoon ik said:
200A wow. Big cables you all have to install.
I have 63A at my house. At 230V x3 (an old system. Yay 3phase, but only at 230V and no neutral).
Workshop has 380V, but only 25A. Still plenty of power.
That's how it works. Ohms law, Lower voltage-more current (amps) required. Higher voltage-less amps required for the same power (watts).
And 3 phase is kinda neat in that a 3 phase motor will run on single phase as long as you can get it started. Which is why a rotary phase converter is so simple to build.
-
It's still sitting there. I hope it will follow me home.

-
I guess I'll jump in on this as well. So far I've seen some nice things, it will be hard to top. But it's All in good fun anyway and I might accidentally learn something to boot.
-
Well, I'm typing on my cell phone so please disregard any misspelling of words.
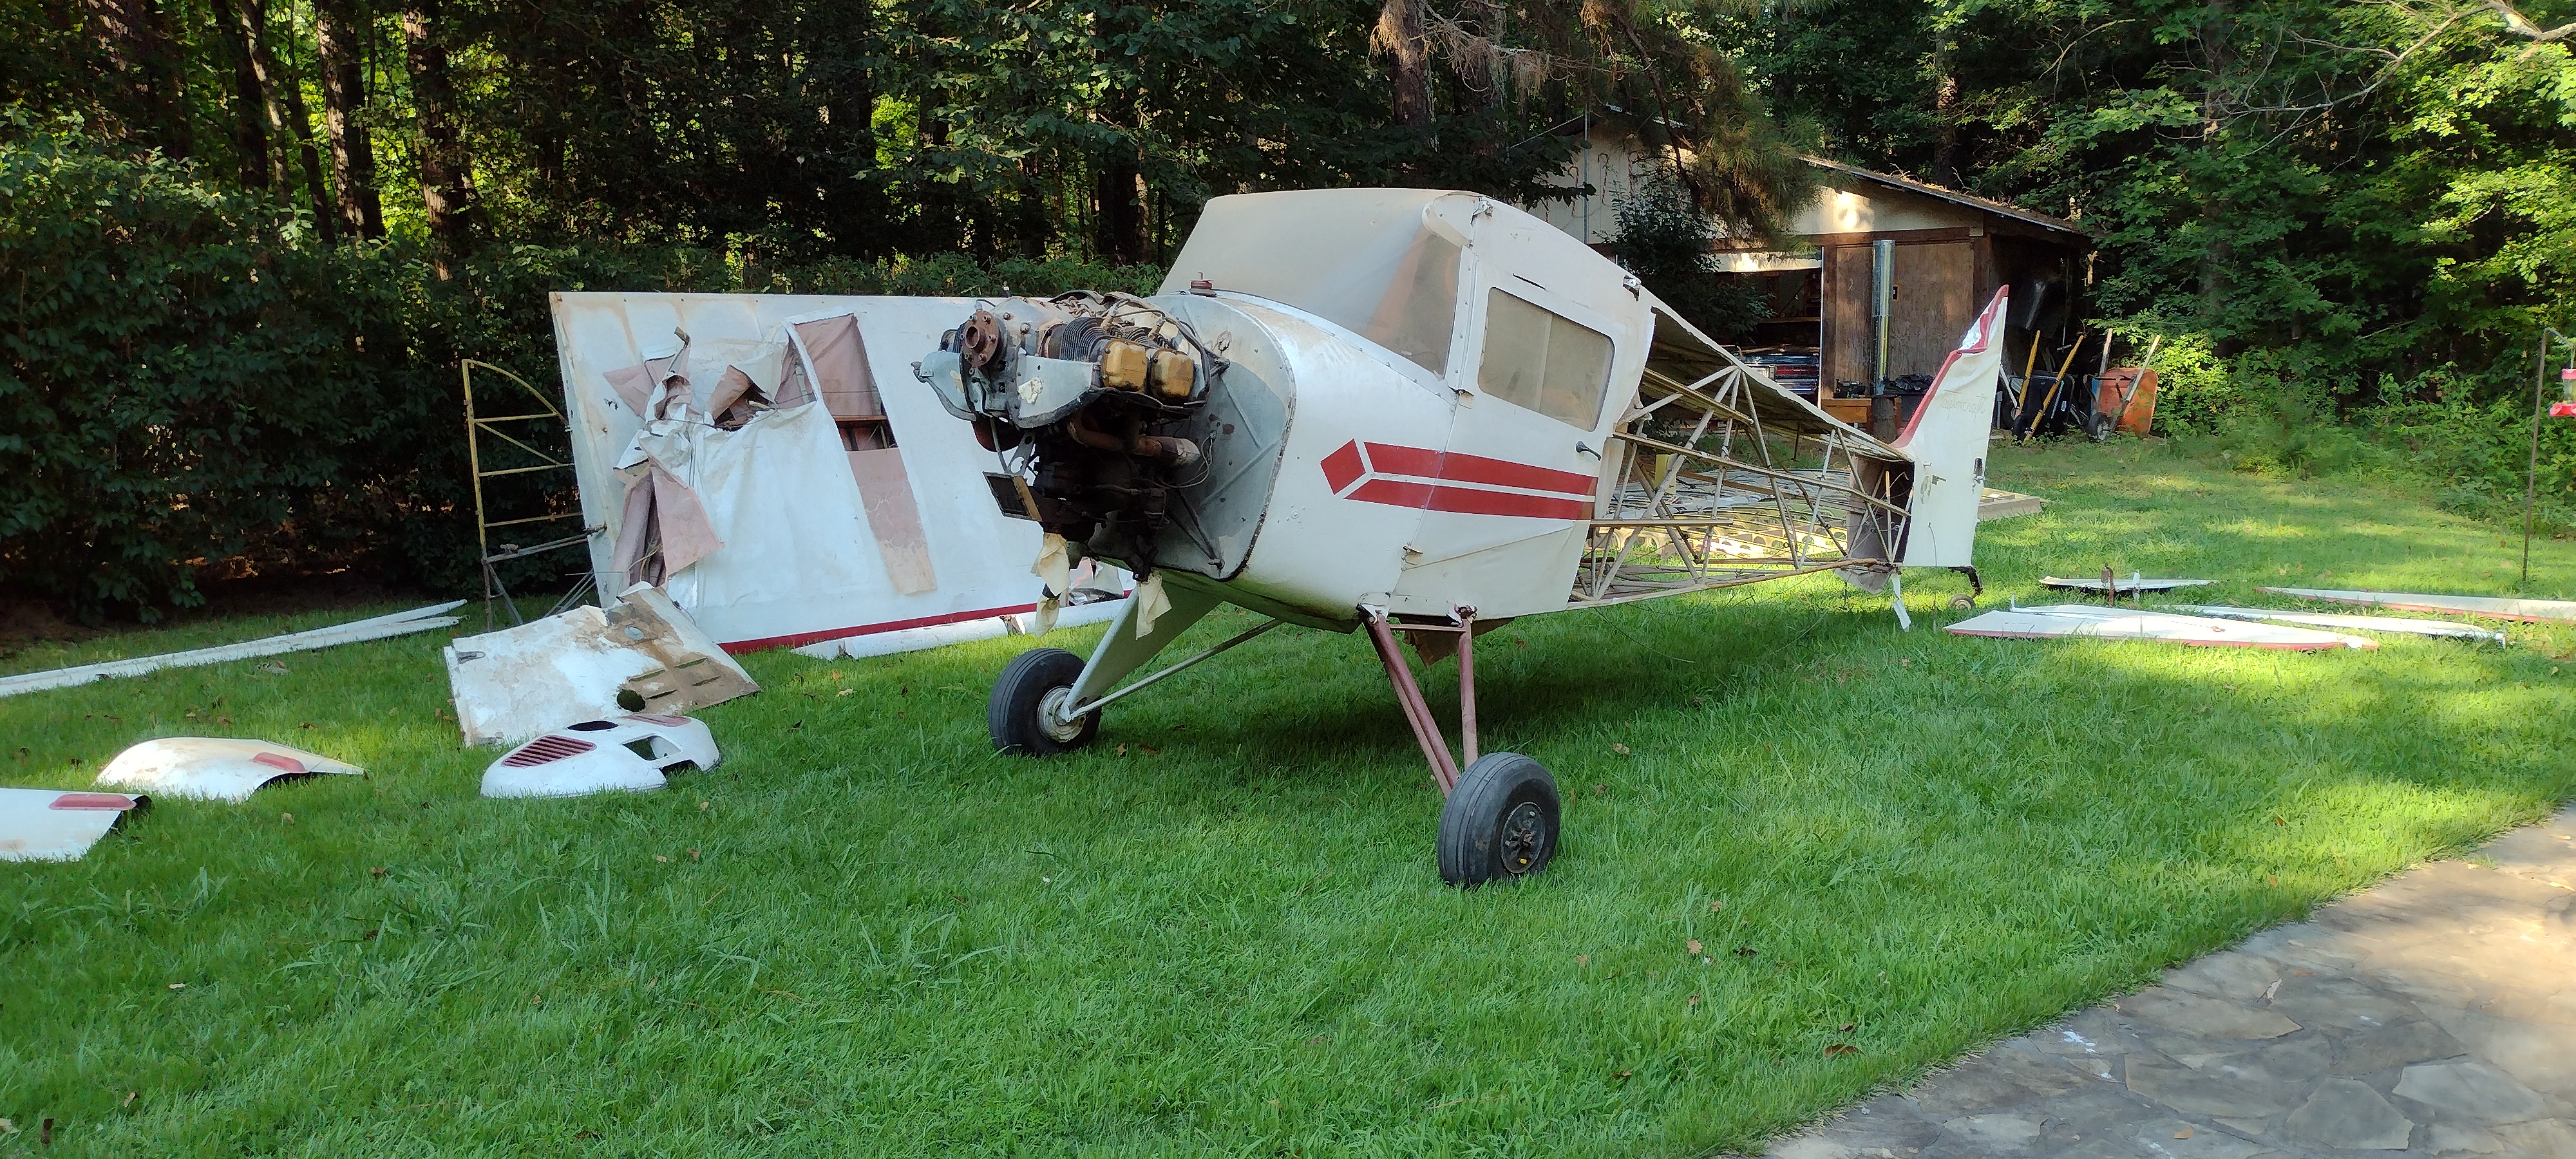
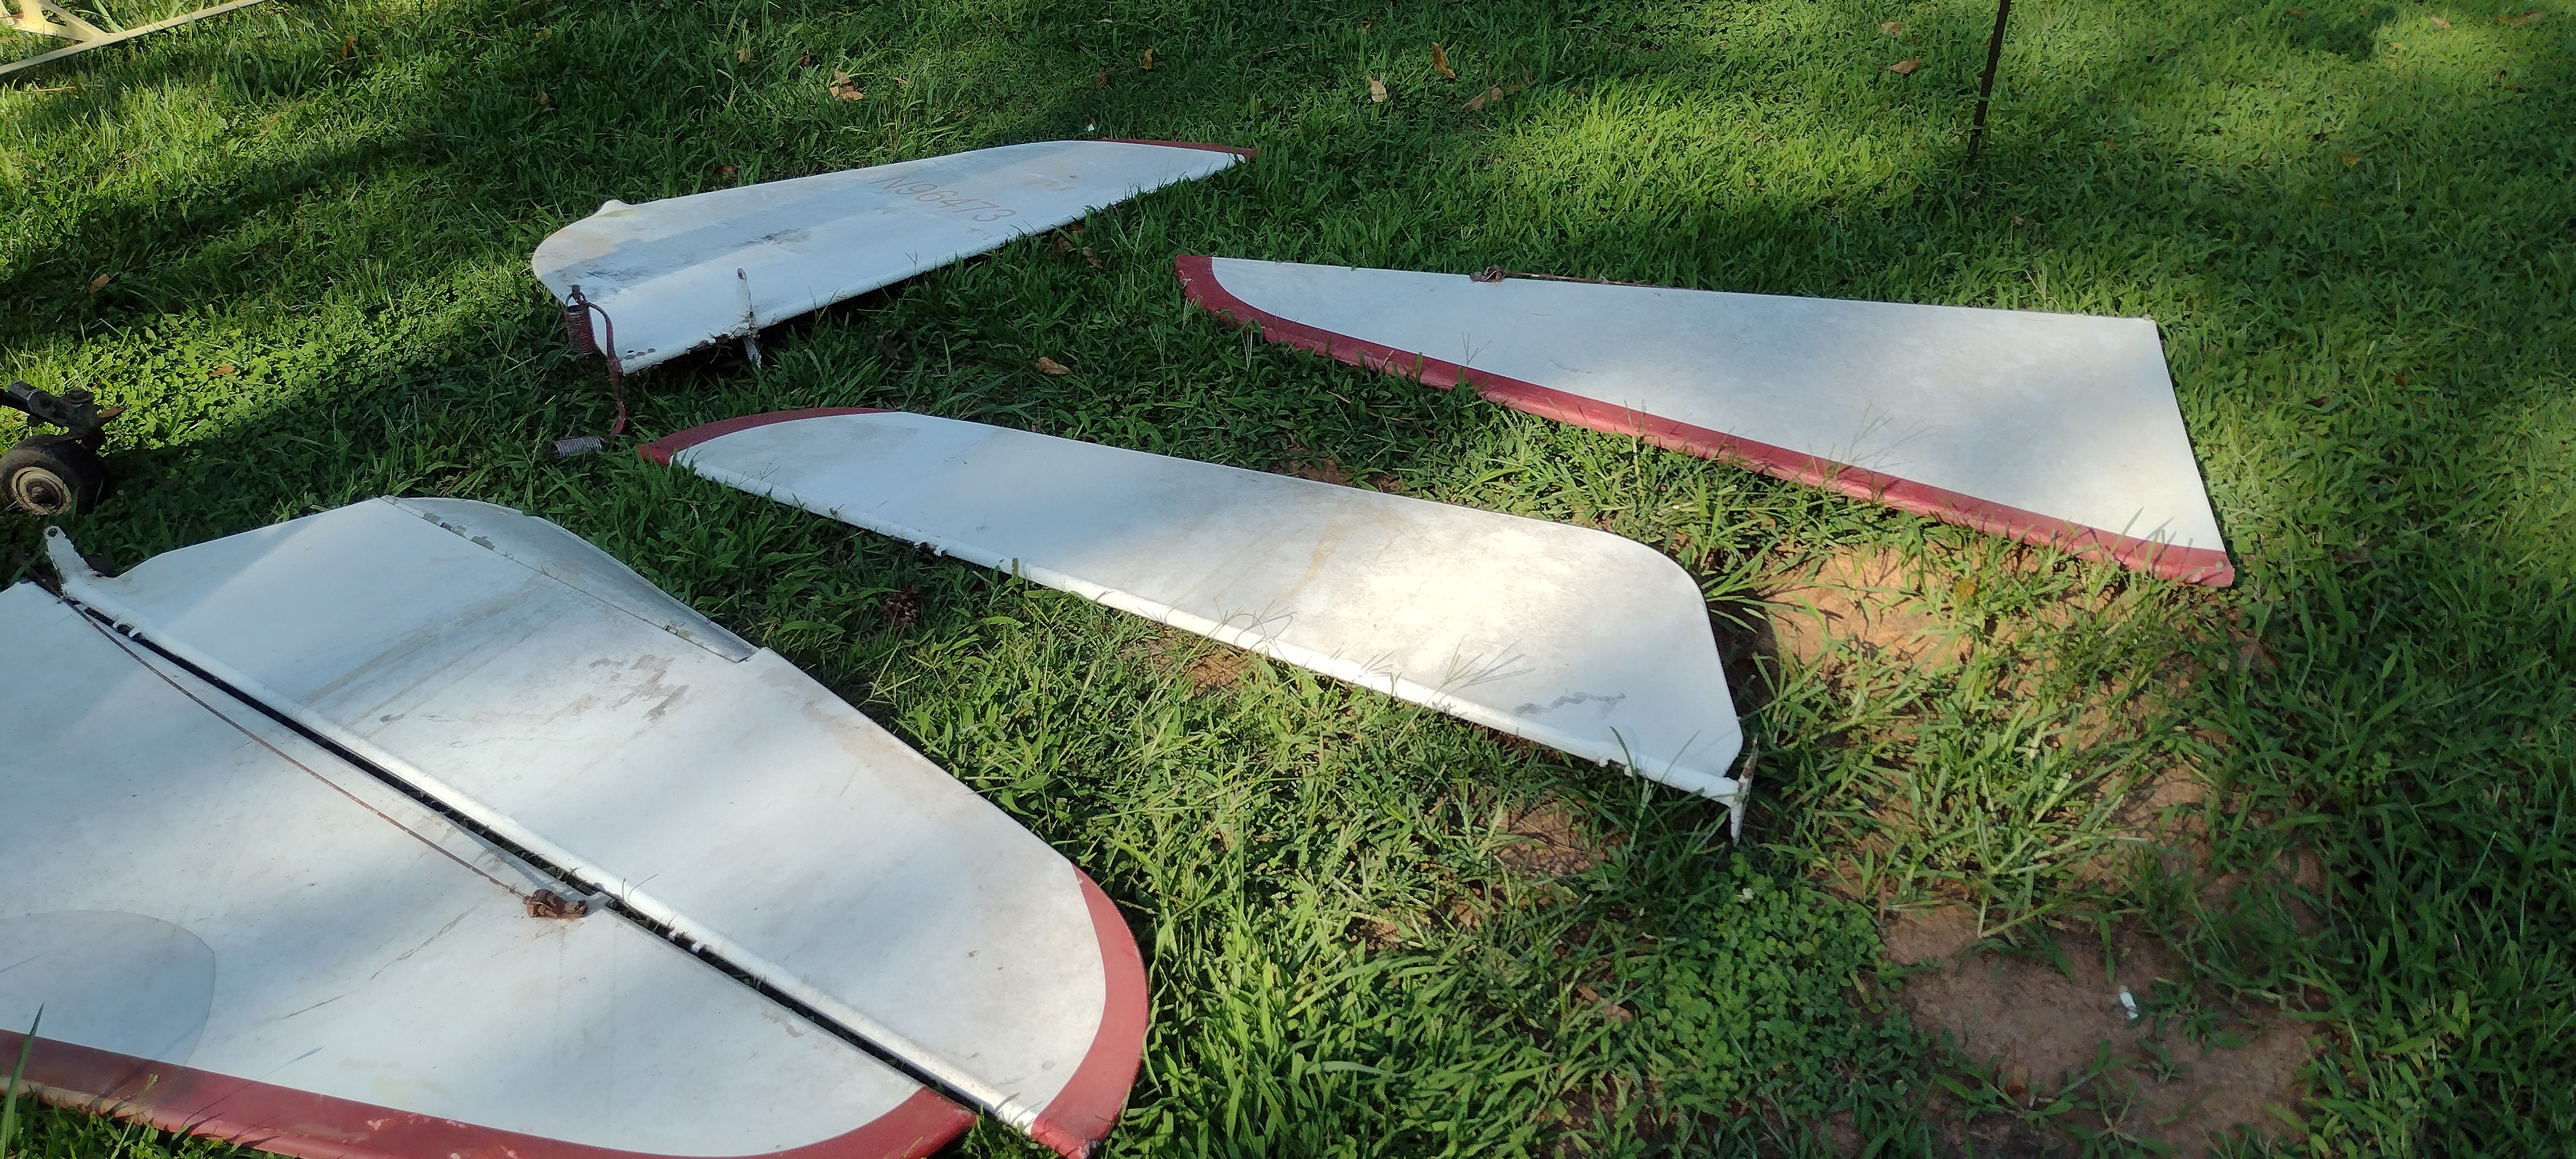
I've been away from the forge for some time now. And working out of town doesn't help any. I did, however, have a couple of things follow me home. They will require restoration before I can use them. But should be fun to play with when finished.
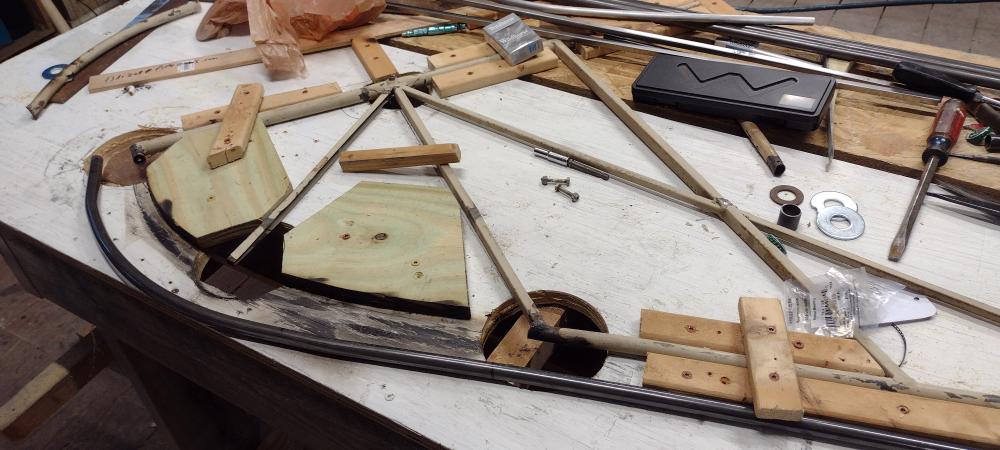
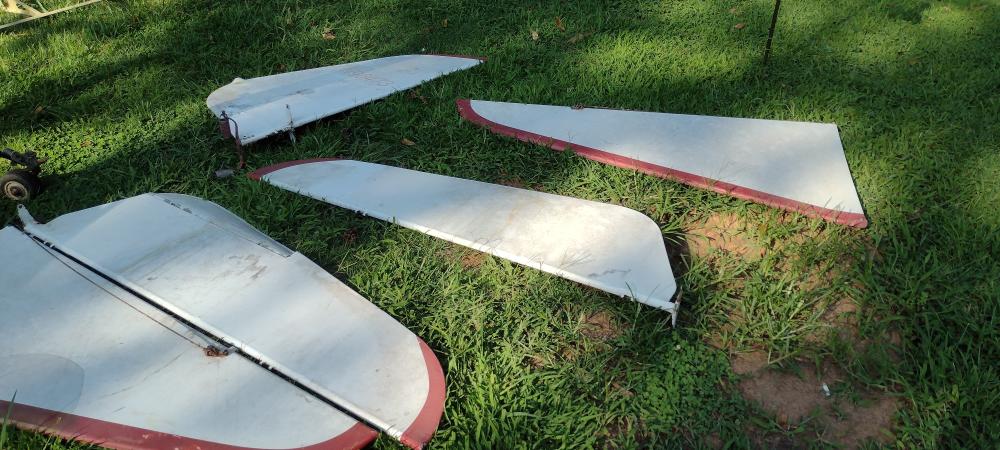
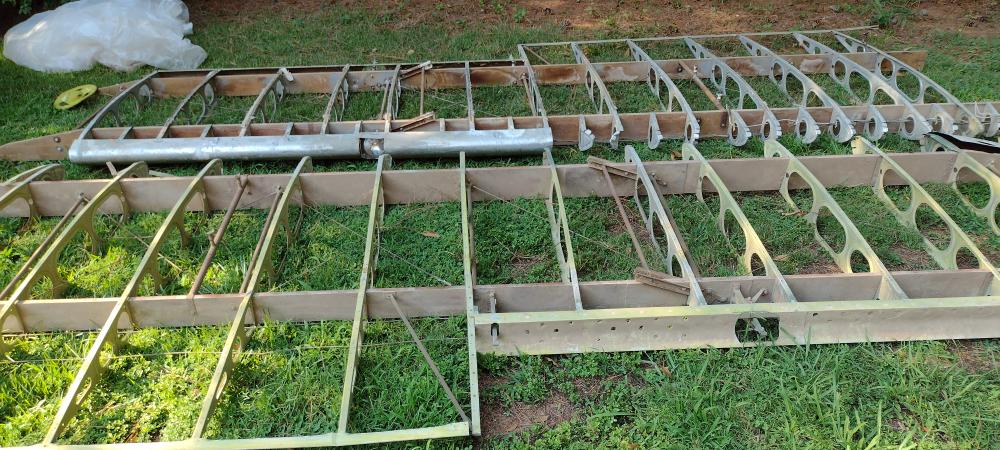
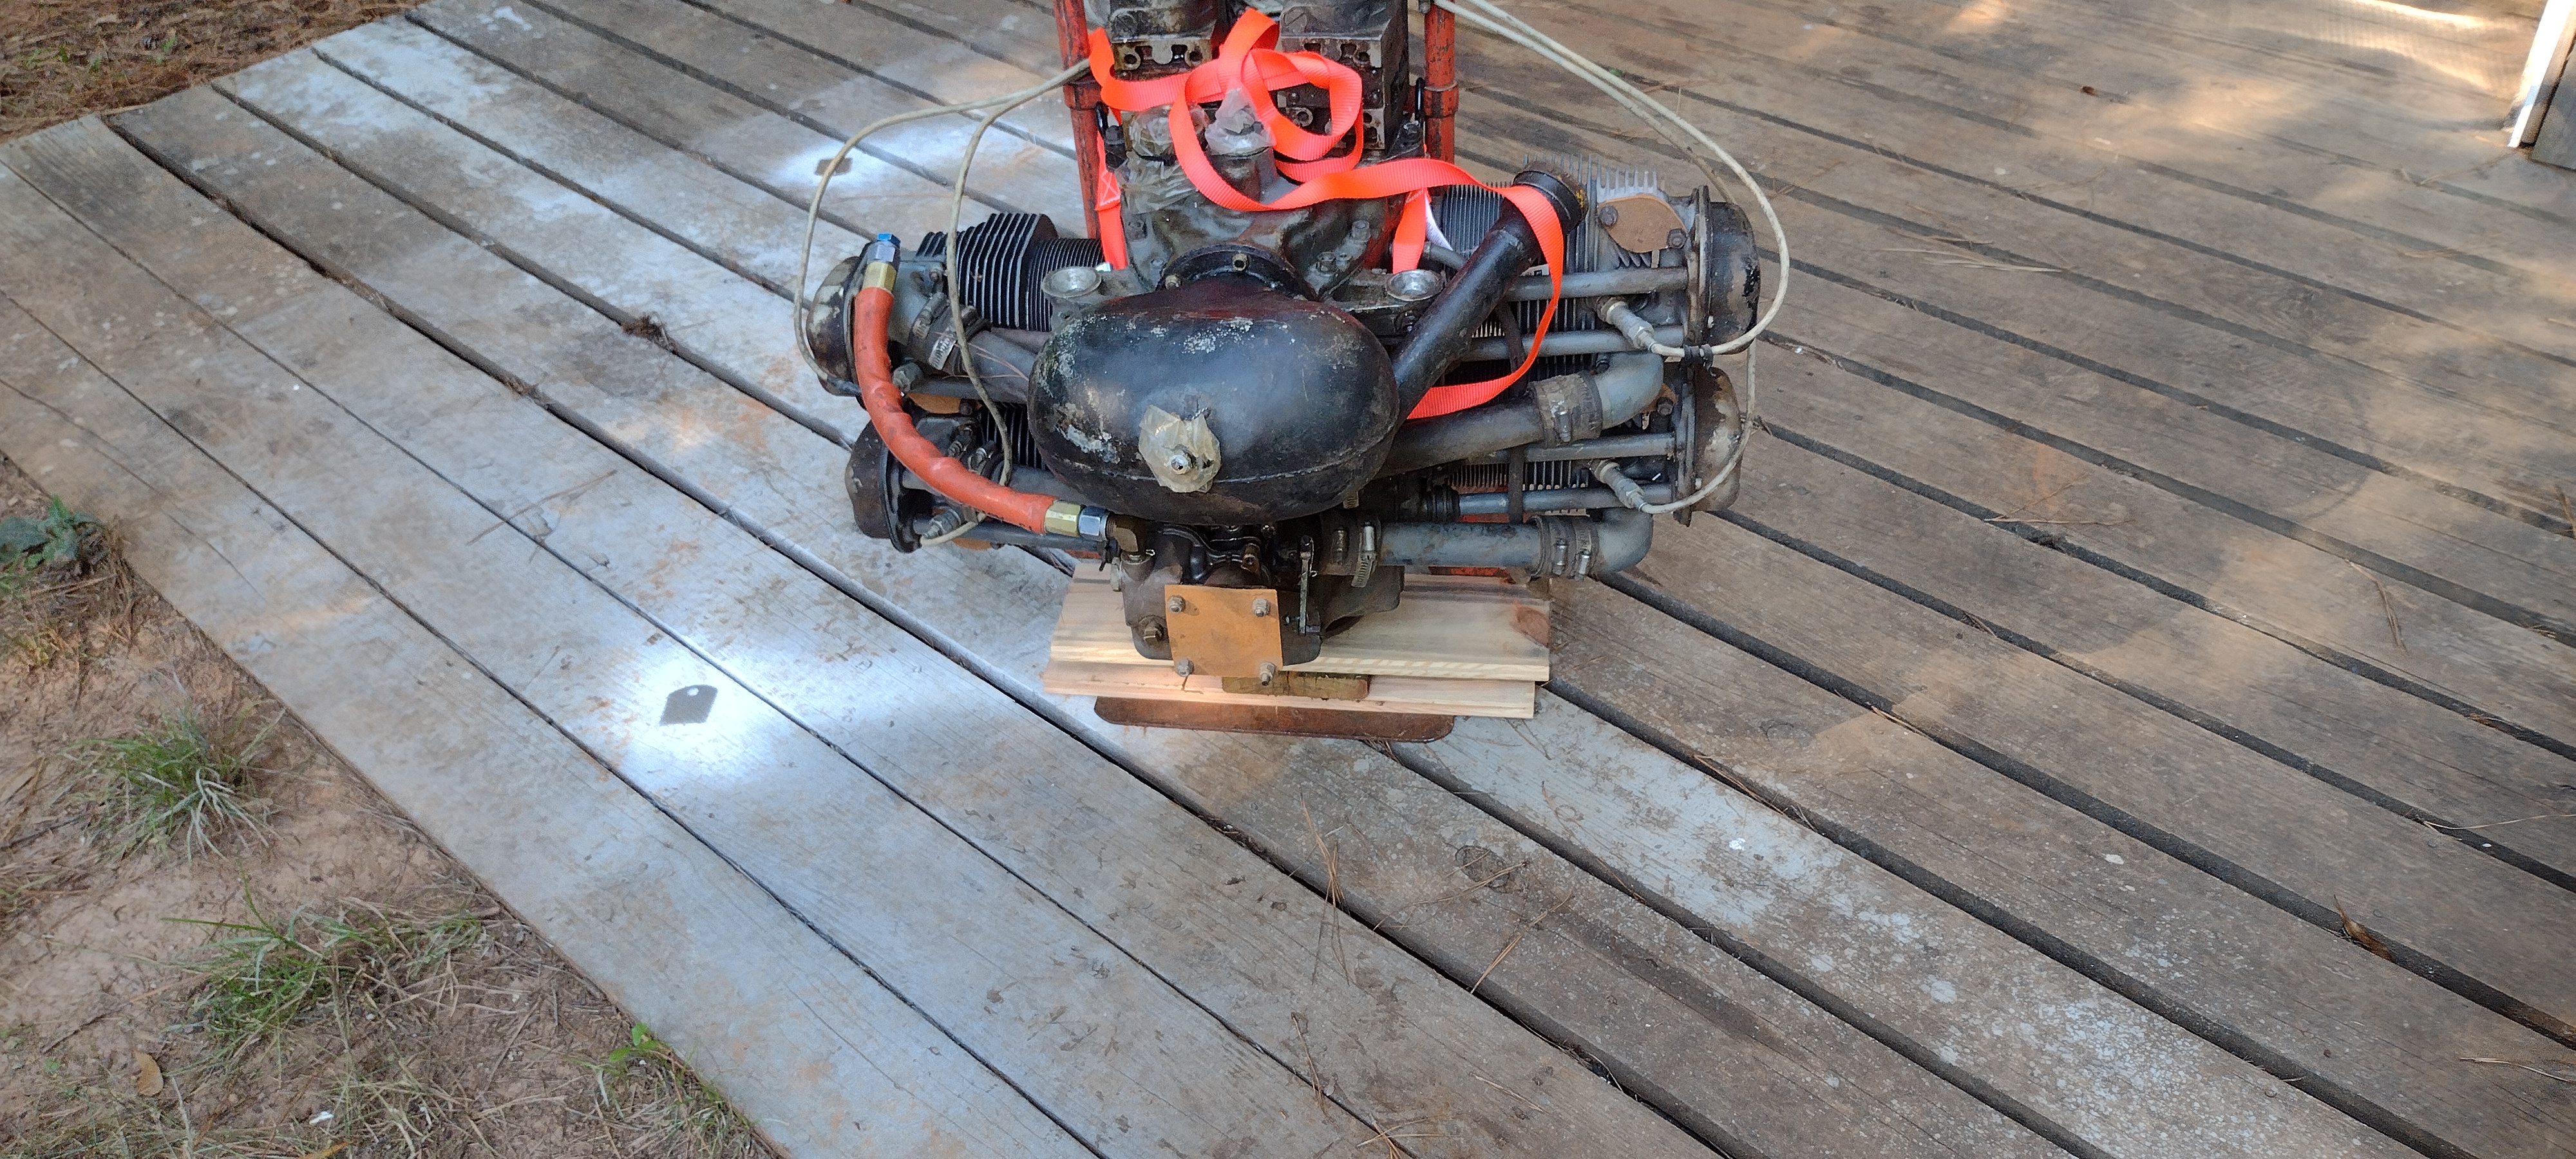
Now I need to find some 1025 thin wall tubing, the fuselage needs a few pieces replaced.
Also, I must apologize if the pics are too big. I have no way to resize them on my phone.

-
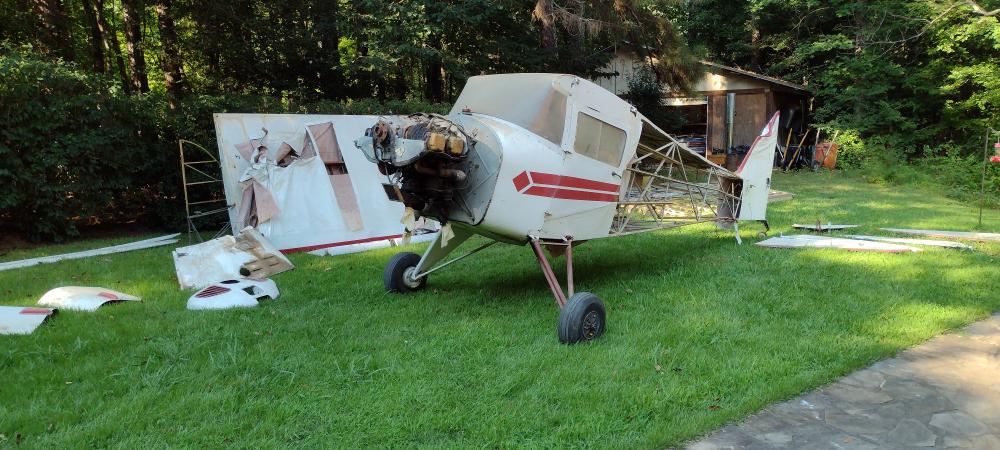
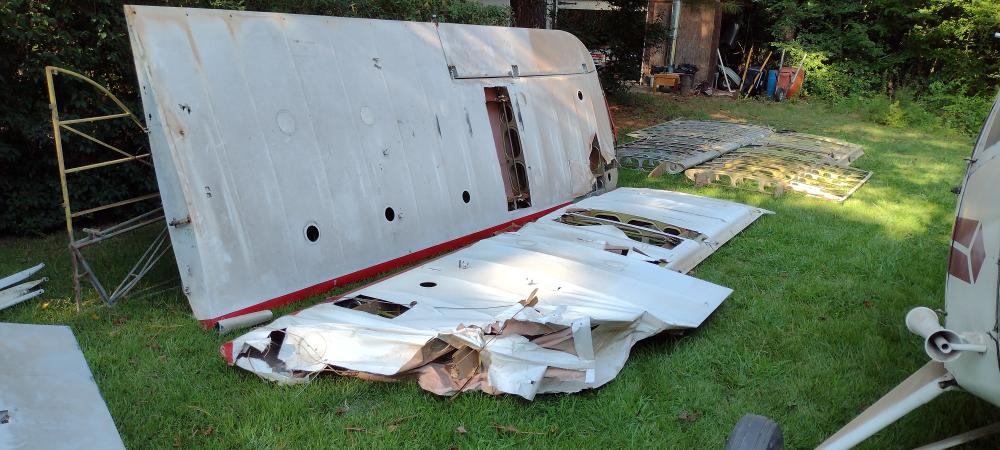
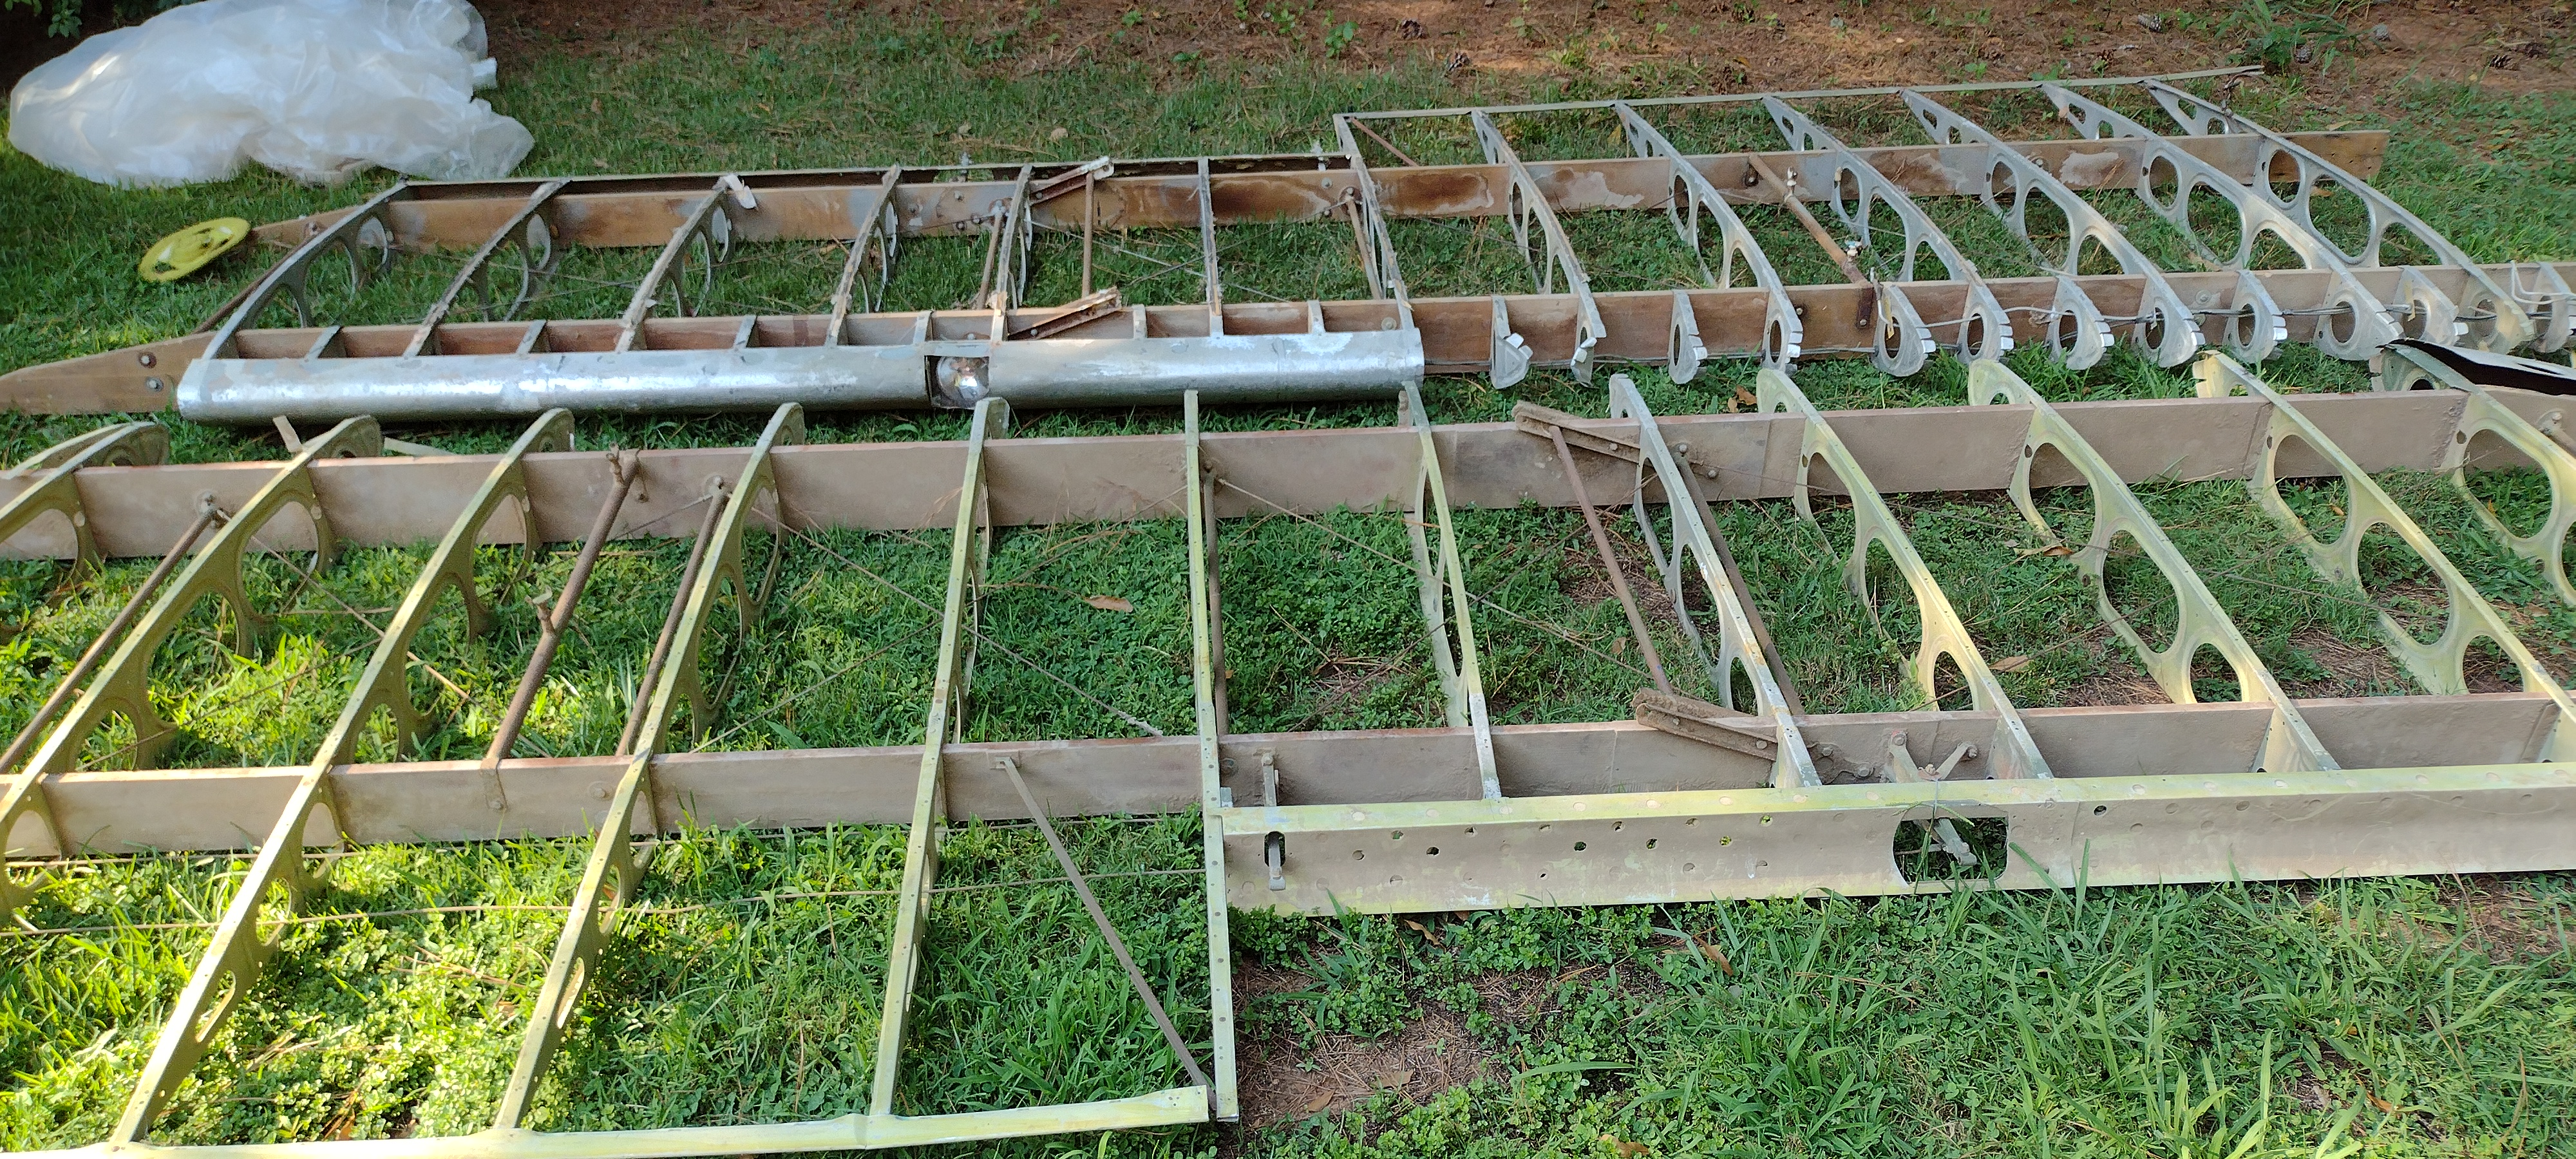
Not blacksmith related by a long shot. But couldn't pass this up. A long time friend of mine flew west back in Jan. I didn't know it until I decided to cajole him into selling me one of his projects. The number that I called put me in touch with the person handling his estate. Well here's what I got home with yesterday, at a more than fair price.
.jpg.312c4686f77bb8057b64c22adfcf116c.jpg)
.jpg.6fd380e0154a804b688b9eedf9b5f35d.jpg)
.jpg.096492c79f30796cd16f733acdbc1942.jpg)
.jpg.7585e2538a273d586a5e769d1c9cb596.jpg)
.jpg.4ac22bdb7a21679bcdd83ab39dc35719.jpg)
It's not one, but two Taylorcraft BC12-D airplanes. One, complet, but damaged. The other missing a bunch of parts, but in good shape. (take 2 make 1) This will be a long term project, but will be fun when completed.
-
Been away from the forge for a few months now with the "honey do" list, coupled with the heat. Decided to forge out a handle for the latest gate latch today, only to find that the flue has rusted away, and will need replaced prior to any forging. And all the bits of rusted flue pieces will need to be sorted from the pile of coke.
Last week I hauled off a load of scrap iron, (mostly sheet steel, and stuff not really useful at the forge). Got $5/100 for it. Cleaned out the shop, hauled off 2 pickup loads of stuff to the dumpster. Re-arranged everything else in the process. Made several trips to the burn pit with the tractor. Then cut up an old floor jack. hated to do that, but the sum of the parts being worth more than the whole, and I needed the wheels anyway. Saved the hydraulics for a future press project. but still no forge time. :(
-
Made and installed a gate latch. Material was an old Model A Ford leaf spring.
.jpg.73cde8ee0cc4857a1c083904771cca58.jpg)
-
Sorting coke from clinker, Hint: coke floats, clinker sinks.
-
I've not been at the forge for several weeks now. Between the "honey dews, and the dew point spread, (100+/100)The weather has not been conducive to forging. Temps have been bumping the century mark for a while now, and the dewpoint has been keeping it humid as all get out, with zero wind. I went out to the Goldfish pond, and had to go past the forge. Everything is covered with cobwebs, and rust. I usually buy a bag of coal a week, but this bag has lasted me over a month. Good fire management, or not firing the forge? I haven't done anything since the last thumb latch project, and still have to forge the hinges to match.
-
On 5/27/2022 at 12:28 PM, Dewnmoutain said:
i made (dramatic pause!) a sprinkler can!
Finally got sick of using a plastic bottle and holding my arm over the flames
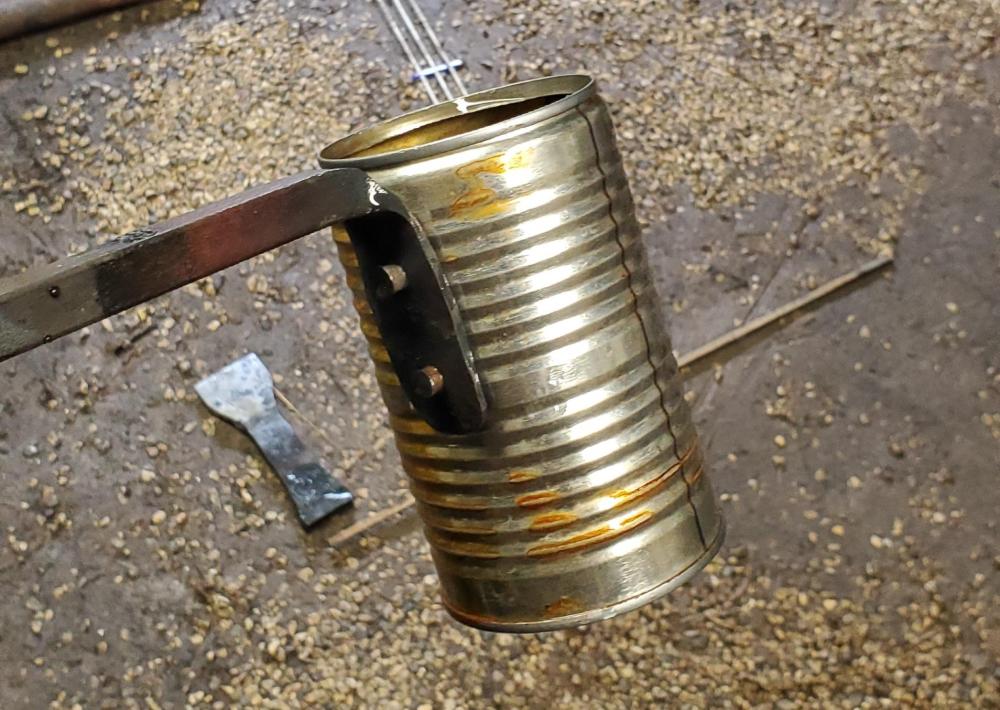
Hard to beat a soup can rivited to a handle. That's how I made mine.
")
-
I'll give it a go. Thanx for the info.
-
Gloves do not reduce the feel if you know what you're feeling for. IOW; If you learned with gloves on, gloves will not be a detriment. And your tactile sense will become more sensitive. I work for a guy who insists that no-one wear gloves, even in winter. He allows that you can't feel when things are in proper alignment. Mabe he can't, but without gloves in winter, I can't feel anything except pain. My fingers go numb, at about 40 degrees, at about 38 degrees I'm in severe pain. I can feel to within .03125" with gloves on in winter. Close enough for framing.


Story behind your screen name?
in Everything Else
Posted
We used to raise gamefowl. I came up with a strain of blues that were mostly Hatch, but showed blue. They were un beatable.