louspinuso
-
Posts
65 -
Joined
-
Last visited
Content Type
Profiles
Forums
Articles
Gallery
Downloads
Events
Everything posted by louspinuso
-
Mikey, Thanks for that info. I'll continue to burn off the gasses. Hopefully I'll have time to beat on some steel this weekend. I'm so excited Lou
-
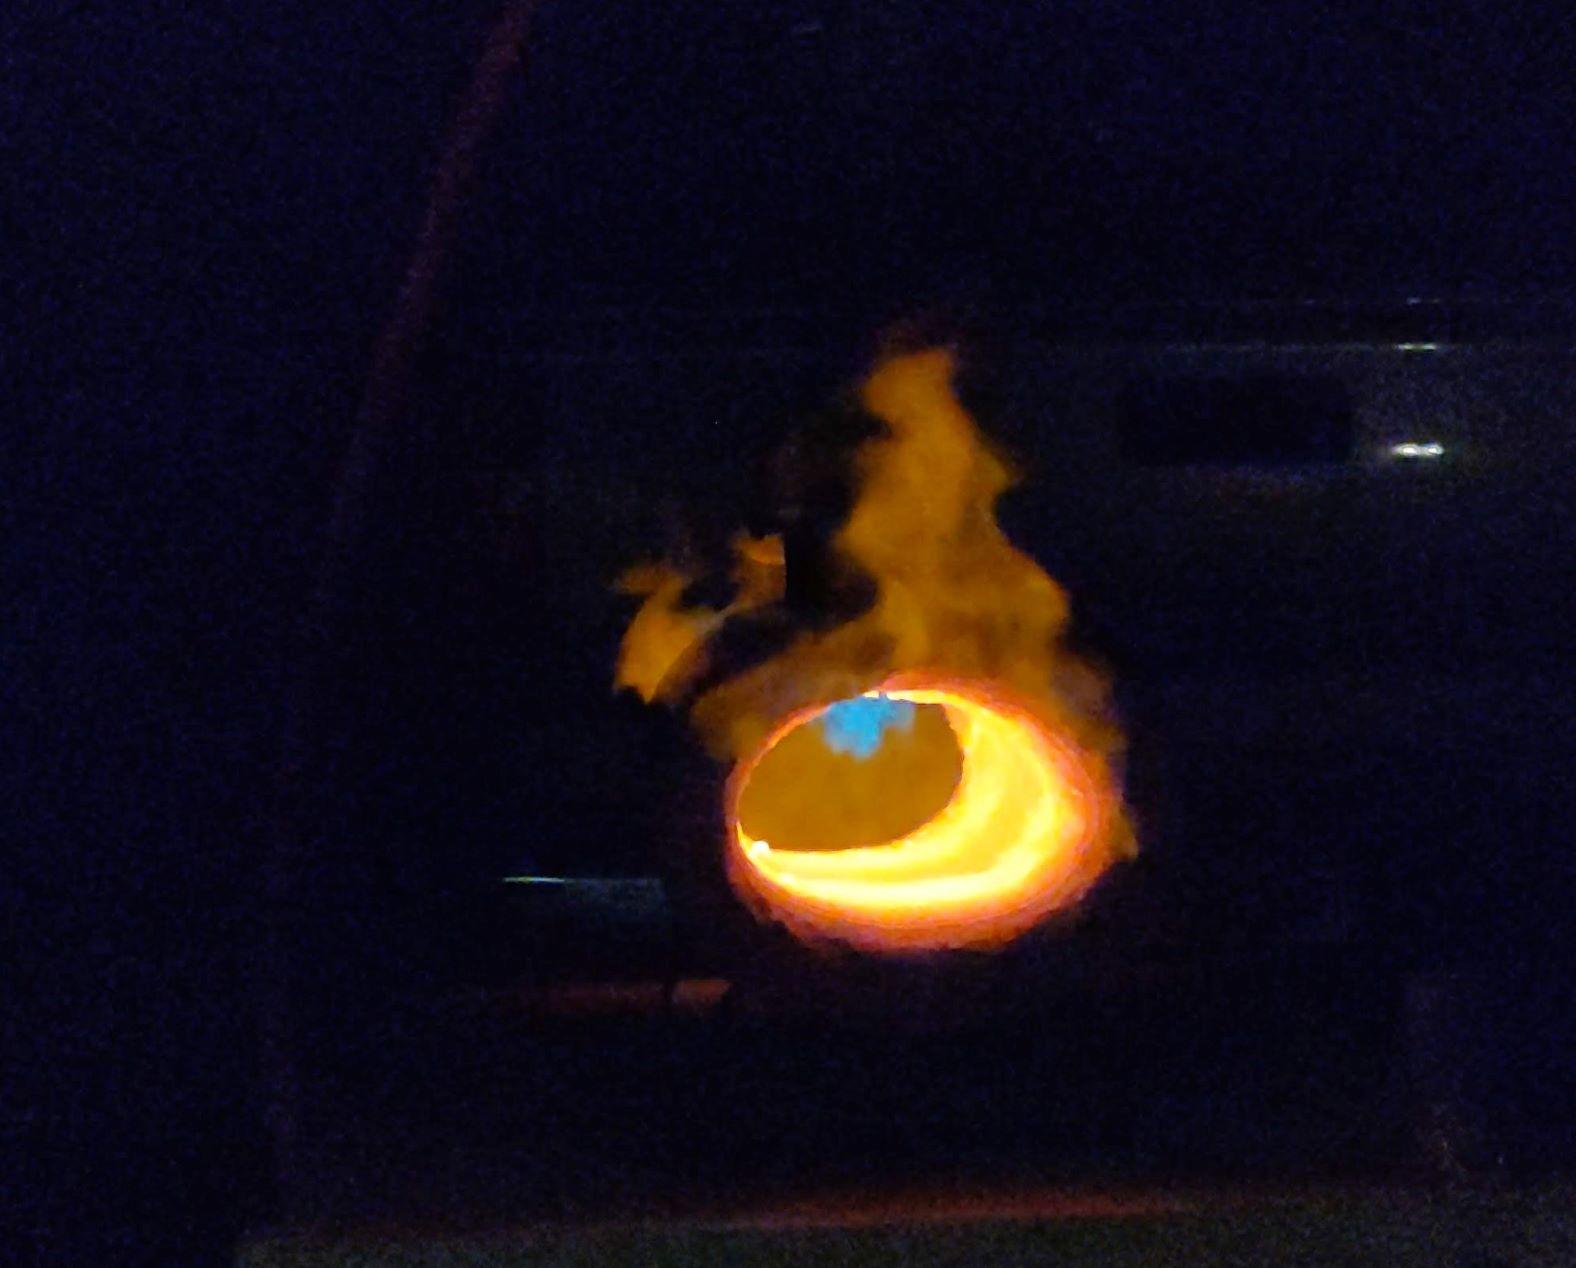
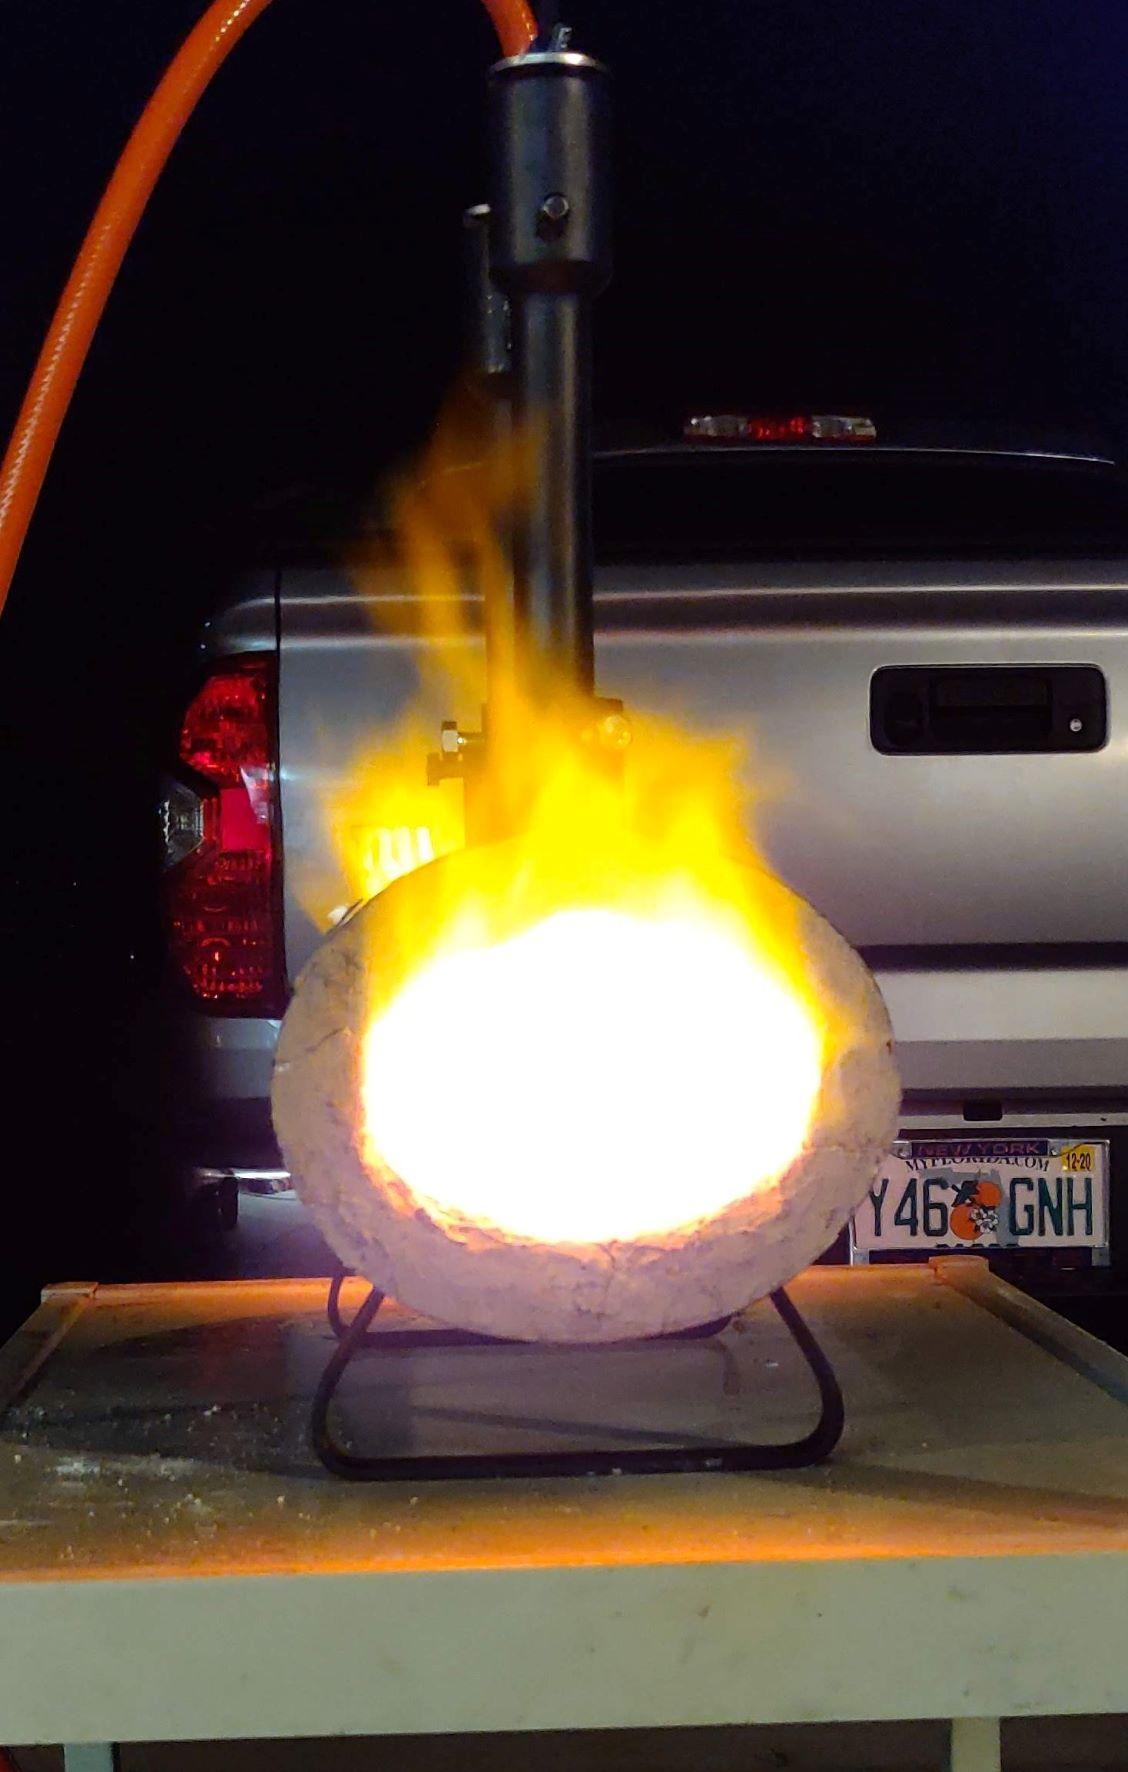
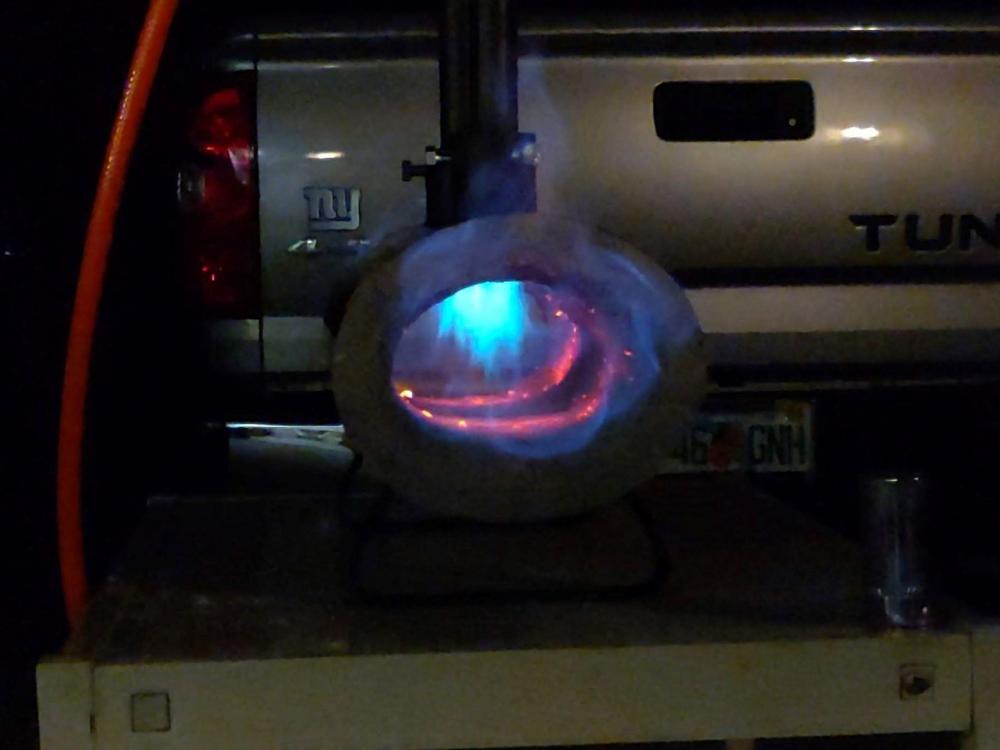
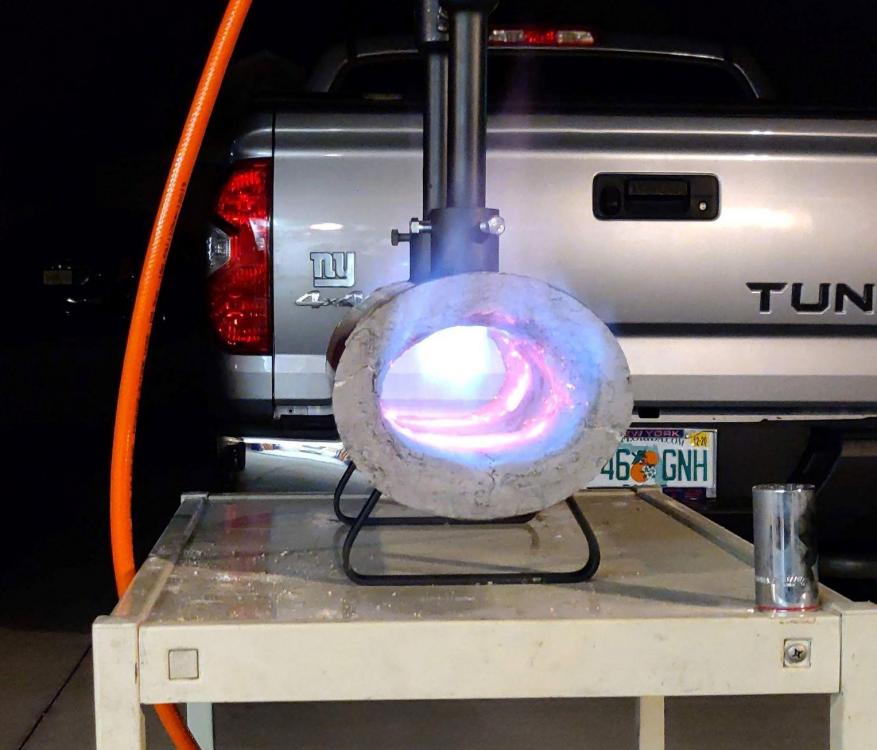
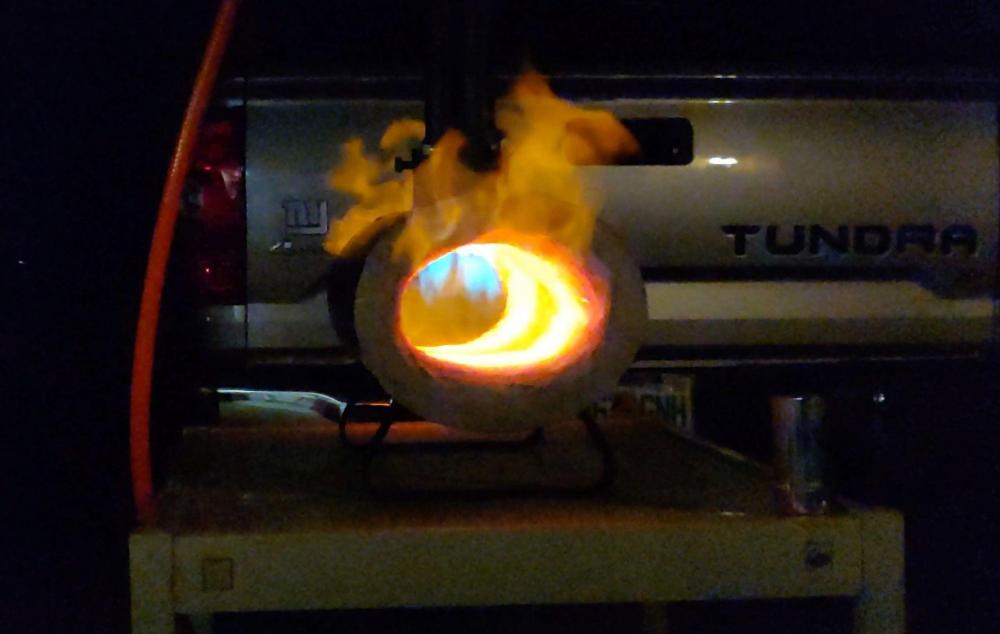
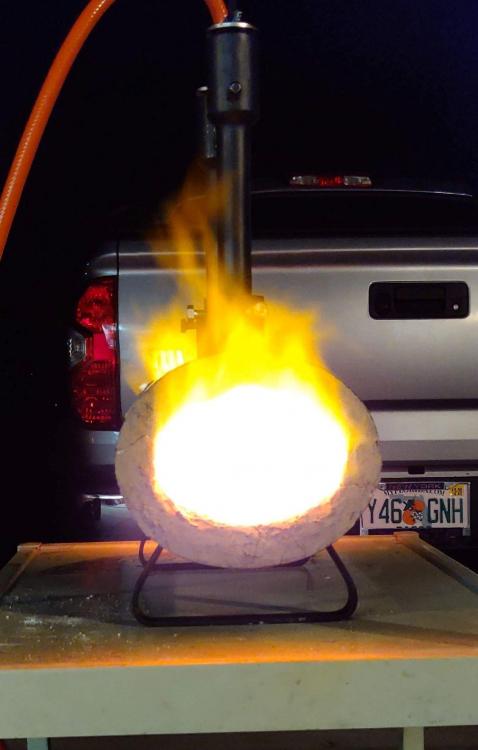
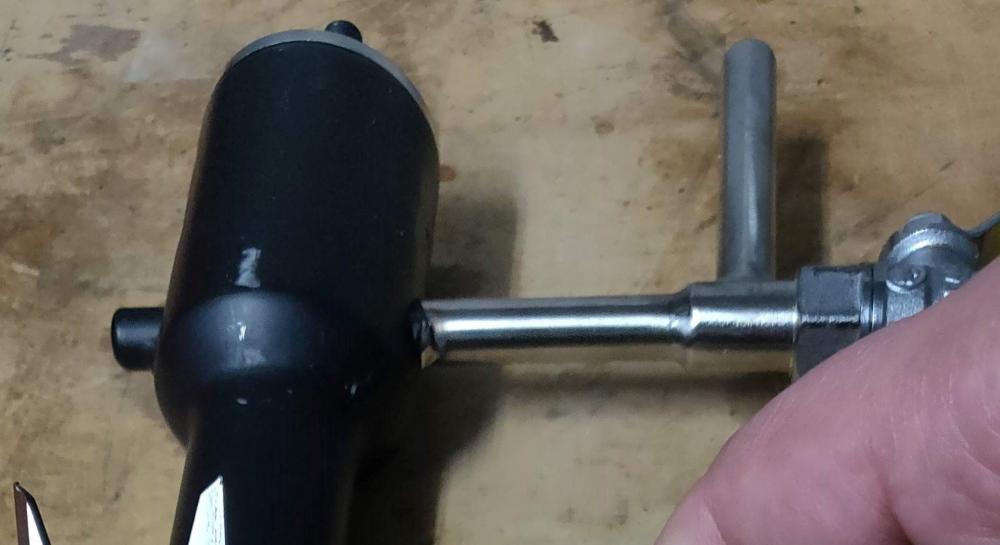
Ok, I finally hooked up the burners and lit the forge. I played with it a bit and ran it for 15 minutes, then let it cool for 15 minutes then fired it for 15 minute then let it cool for 15 minutes and then fired it for 30 minutes. These photos are from that 30 minute firing. During the previous firings I was messing with the pressure and the choke(?) settings. Anyway, when it first starts up, the flame looks as follows (the first image was shot with a higher shutter speed to try to get "better" photos). As you can see, it starts out with all blue flames ( and quite a bit of dragons breath) After about 5 minutes, it looks like this As you can see the dragons breath has turned orange, but the flame from the burner still appears to be blue. After 30 minutes, nothing much has changed from the 5 minute mark. Not sure if I need to lower the pressure, or let more air in. The pressure is very low now as it is (I'll have to get a good photo and do the conversion tomorrow, had to run in to get online and start this upgrade), it's barely registering on the gauge. And in the last pic, you can see how "open" the air intake is. Is this ok or is there something I need to work on here? Thanks in advance

-
3D printed plastic burner experiments (photo heavy)
louspinuso replied to Another FrankenBurner's topic in Gas Forges
Understood. TBH, even if you don't release the STL, I'm sure people would pay to get some based on the results I'm reading here. -
3D printed plastic burner experiments (photo heavy)
louspinuso replied to Another FrankenBurner's topic in Gas Forges
Do you have these STL's available? I'm still a ways away from doing a diy burner build, but this looks like a great way to improve efficiency when I get to that point. -
Thanks Frosty. I was pretty sure that this was cracking because I used too much water to thin it out before applying that second lower layer in an effort to get a smoother finish, though what you say makes perfect sense. I never did get a chance to fire up the forge yesterday. I had some late work and then a sick baby so that killed a few hours I wasn't expecting. I have some more late work tonight (two upgrades at midnight and 0100) so between baby bedtime (2030) and that first upgrade, I'll have 4 hours I need to stay awake so I'll likely have photos of the burners burning tonight. Thanks for all the guidance, this forum is great.
-
Thanks Mikey. I've got the forge in my oven right now. I'm waiting for it to cool down just a little bit in the closed oven then I'll move it to my garage and plumb the burners to the propane, place the burners in the ports and bring it outside and fire it up. Should have a photo or 2 posted tonight or tomorrow to show how everything is burning.
-
You're welcome Eventlessbox. I'm hoping to put fire to forge tonight so we'll see what the flames look like and how well this process I'm following holds up over the next few weeks. Hopefully this information is helpful and informative to other people as well.
-
Just posted the video on applying the Greenpatch 421 in the forge. Figured I'd post it here in case anyone was curious to see what the process I used looks like. Anyway, here's the video. I look forward to any comments that you may have that can help me improve my techniques.
-
3D printed plastic burner experiments (photo heavy)
louspinuso replied to Another FrankenBurner's topic in Gas Forges
Frosty, It turns out that this was actually the original form of the proverb, which dates to the 16th century. This is how it was said and taught until around 1935 when popular usage of the phrase changed (according to Google). I believe that the reason Ted Kaczynski used that phrase is because a professor of his in University said it like that and he used the phrase in that way (I could be wrong on that part). Lou -
Yeah, supposedly it's a very high heat "glue". It's what's basically holding the "mortar" I'm using to line my forge with. I don't know how easy it is to find a ceramics supply shop around you, but I've seen it for sale in ceramics shops here in the states. If you feel confident cooking off lye and silic(a,on,one, whichever is needed), the go for it. I'm always worried when dealing with caustic agents that I'll spill and cause more damage that it would've been to just buy the thing I was doing in the first place. As Irondragon stated, it is also known as sodium silicate and that is what it was listed as in my local ceramics shotp. It sometimes goes by the moniker "Silicic acid, sodium salt". Here's some info from Wikipedia on it's use in refractories.
-
I'll have to take my calipers to it, but it's just a stainless steel tube that is welded in place. I have a neighbor that works in a shop where they do a lot of car restorations and he said that he could weld a stainless steel barb on there if I wanted and if I find one, I think I'll do it. The hose slips over that and is held in place with a hose clamp I'm more afraid of messing this up than anything else. If you think those cracks are ok then I'll start the drying out process tomorrow during the day and try to fire it by tomorrow night (weather permitting). Here's hoping. You guys are awesome, thanks!
-
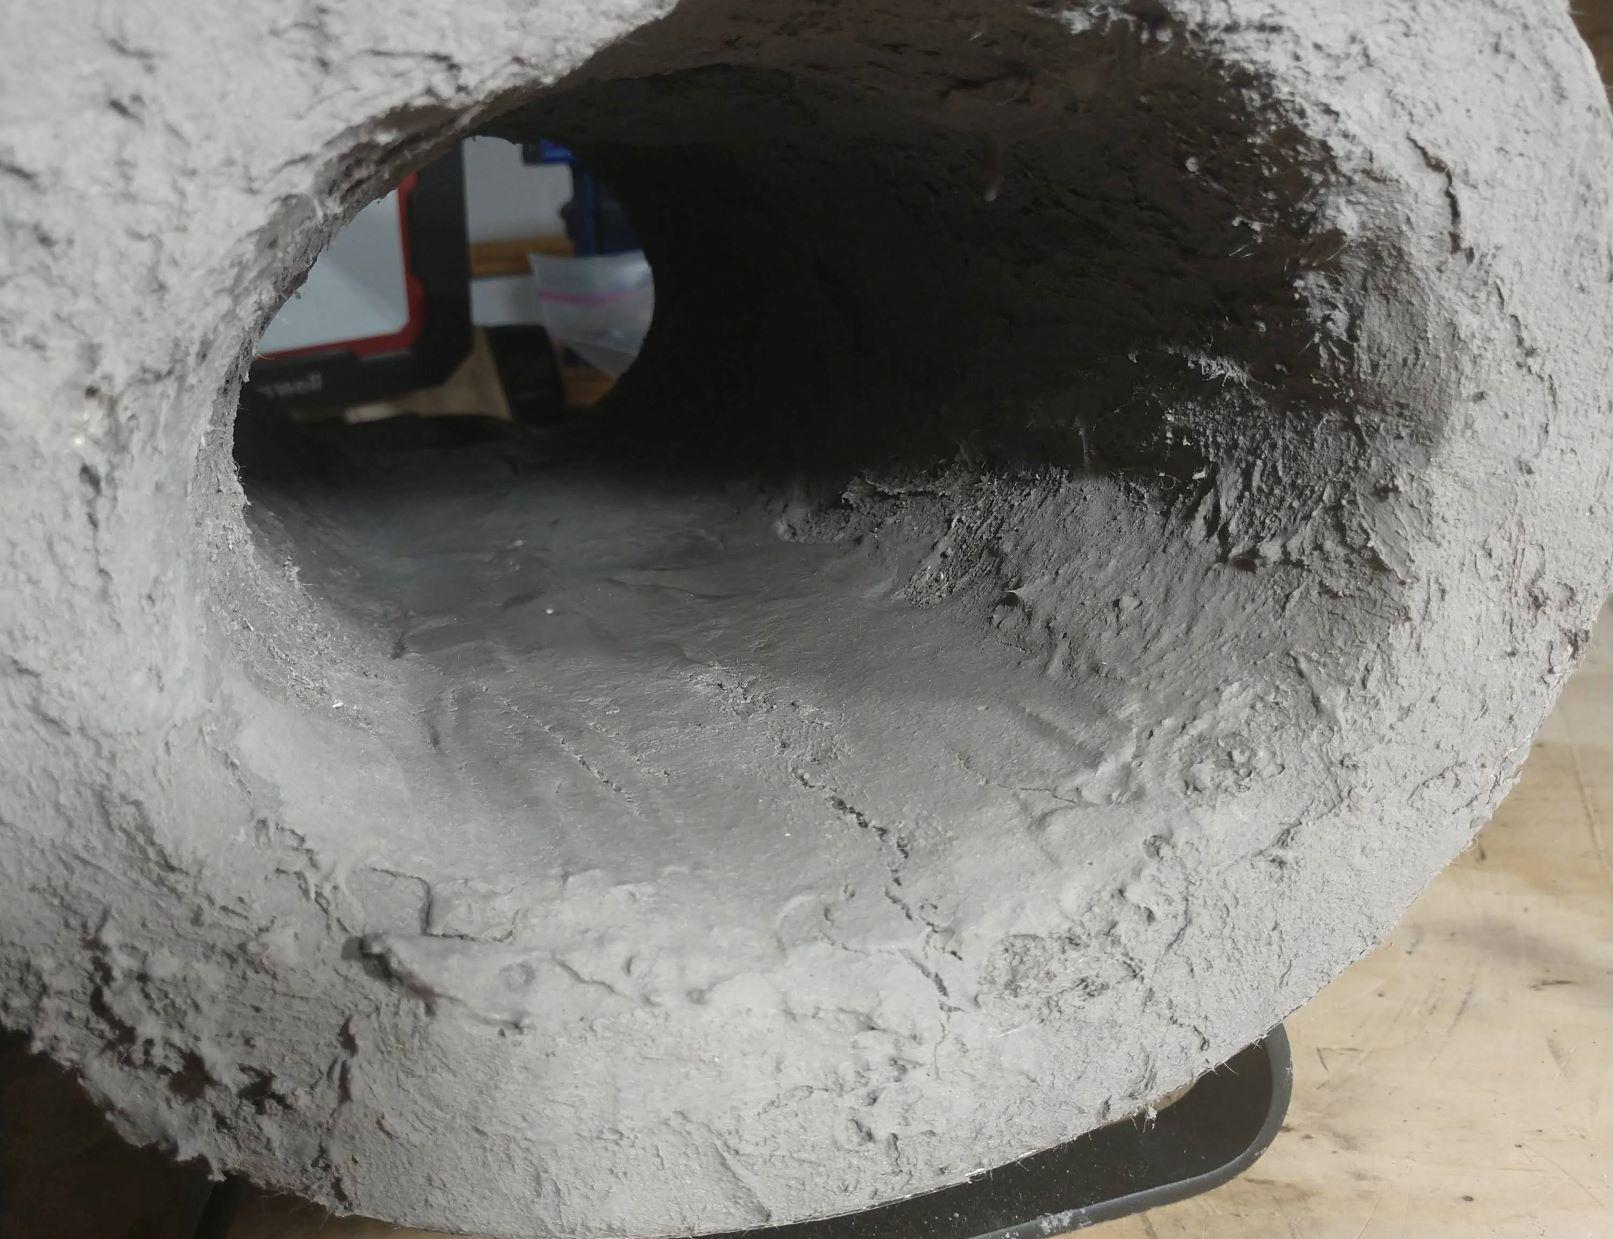
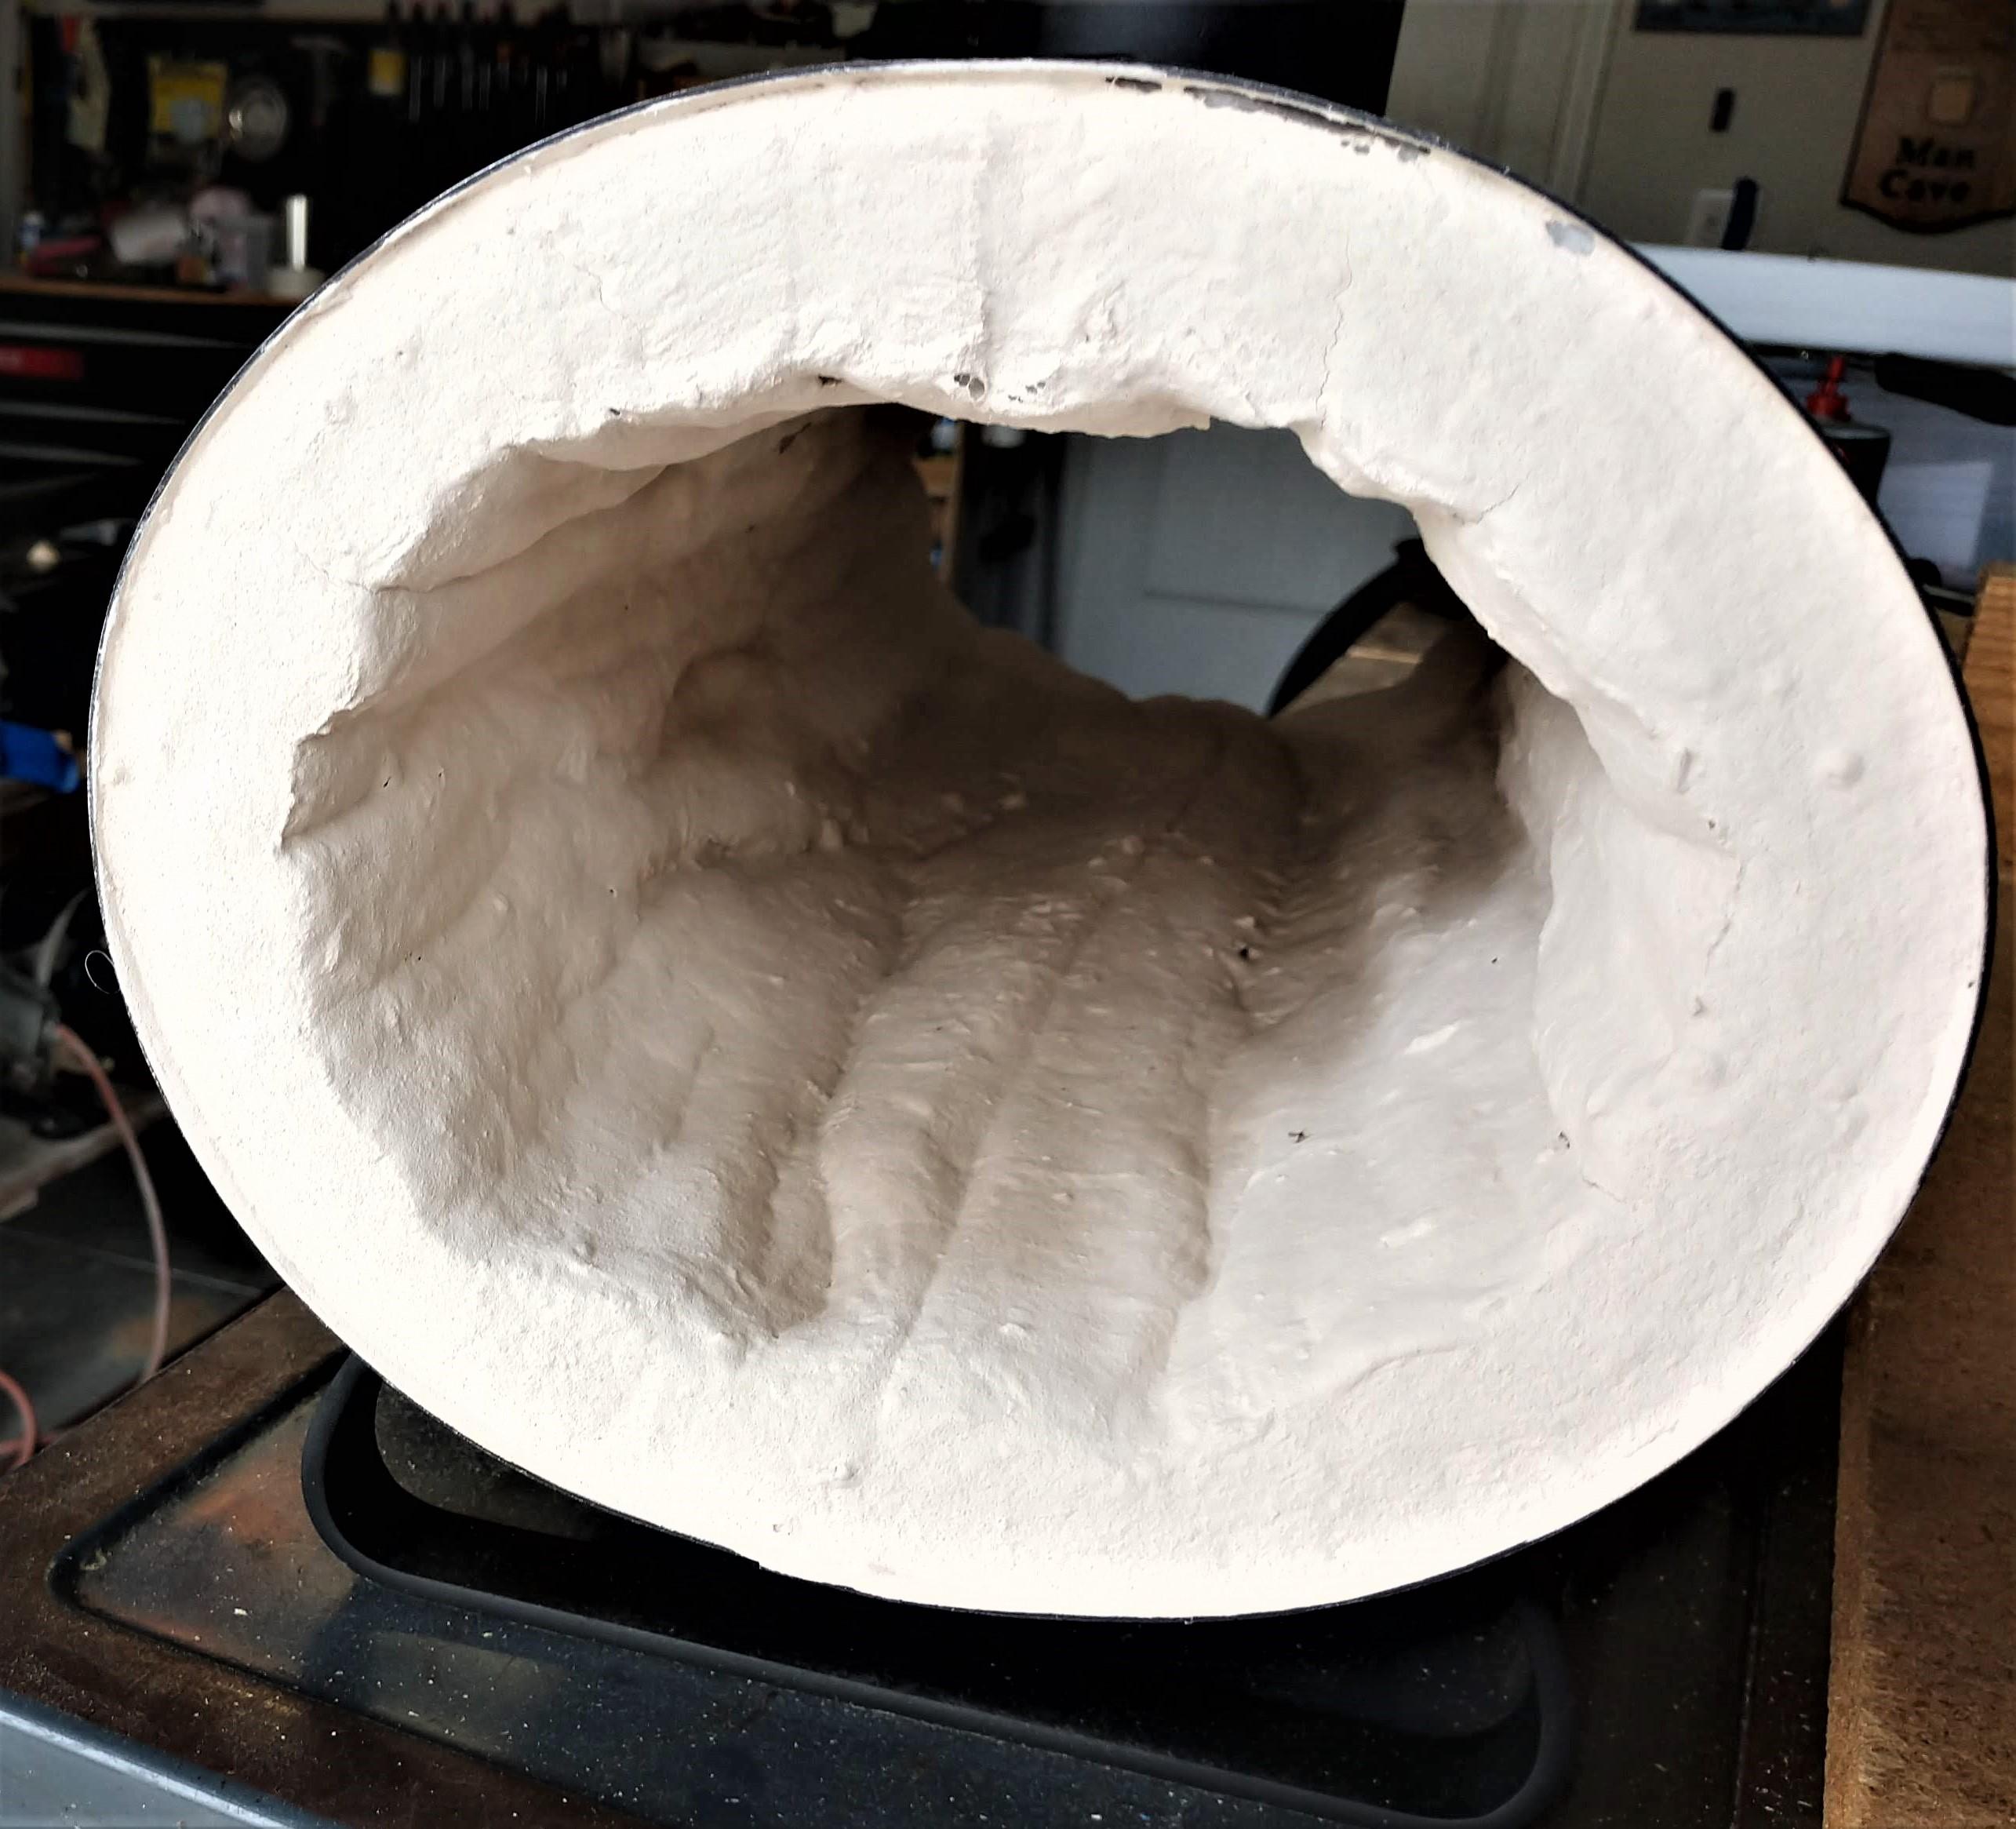
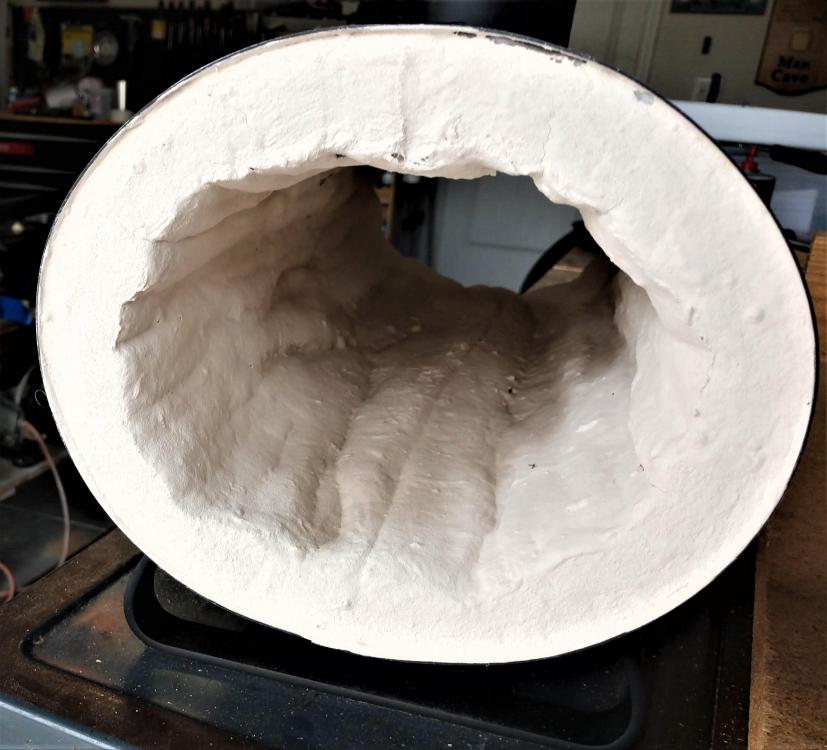
Ok, just got to my computer and can finally post the photos I took tonight. As you can see, the bottom, which is much smoother, is where I thinned down the Greenpatch 421 with water and spread. This is also where the cracks are forming. The sides (and top) where I spread it as the thickness that it was in the tub (I mixed well before using) there is no cracking, but there is plenty of rough texture. I believe that this is because there is very little to NO water in this product and is all held together with water glass. To the end I wonder if maybe thinning this out with more water glass would be a better option as it might shrink less (but I'm not sure if it's even worth it) but then there's the concern that there is less material when it does dry. The full strength medium appears "fully dried" at this point, however, I would still oven heat it until I'm sure all moisture was driven off. Where I thinned it to make it more spreadable (and cracking) the center is still "damp" even though the outer edges have dried. I think at this point the plan is to wait for the center to dry completely, mix up another not so loose batch, spread it thinly on the floor fill in the cracks and wait for another drying cycle. Rinse, repeat until the bottom looks sufficiently hard and smooth with no cracking. Stay tuned, I guess!


-
Eventlessbox, Yep just about two hours away. If you're ever in or around Pasco and want to grab a beer, give me a holler. Lou
-
Ok, so Saturday night I applied the Greenpatch 421 in the forge. It dried pretty xxxx stiff overnight. This stuff dries very rough, as Dodge said back in 2009 in this topic. As a result, last night (off camera) I thinned some down to a paste like consistency, basically thin enough to move easily with a little trowel pressure but thick enough that it doesn't run, and layed it on the bottom of the forge about 1/4 inch thick. I think I'll add a little bit more on top of that when this dries, maybe another 1/8 - 1/4 inch and the go through the drying process. I'll definitely get that on camera. I didn't get any pictures while I was doing the work as my hands were just FULL of the stuff and I didn't want to get it on my phone or camera. I'll take some screen grabs out of the video to post, but this stuff, even after mixing well with a mortar paddle, is THICK, like clay so instead of troweling it on, I grabbed it in my hands and smeared it on over everything as evenly as I could. Most of the inside looks like the outside of a typical Florida stucco house. Not sure if perfectly smooth is necessary, we'll see how this reacts. At this rate I'll be (hopefully) burning this stuff in by next weekend and possibly even beating on some steel. As usual, thanks for the words of encouragement and all the help. Lou
-
No problem. Good luck on that anvil acquisition!
-
Exactly!!
-
Maxwell, no but I like that one. It means if you keep doing the same thing and your failing the same way, you're doing it won't. If you keep doing the same thing and your results are different each time, something wrong with either your methods or your material so keep going till you figure it out. Mistakes are just lessons learned there hard way.
-
If you're results are consistently wrong, your probably being insane. If you're results are wrong but inconsistent, your being persistent.
-
Ain't that the truth Irondragon.
-
Thanks for the additional advice. I think the quote you're going for is: Quote by Albert Einstein: “Never memorize something that you can look up.” and that's a good bit of advice, IMO. Also, thanks for the kind words on the video and my narration. I completely understand about the background noise and that means I either need to get a good lavalier mic or narrate everything after the fact (which is the more likely option going forward). I totally understand about the backlighting but the lighting in the garage is so poor that I thought it would only help. I have an idea for lighting for the next time I do this so it should be MUCH better. Also thanks for the explanation on "buttering". While I am a technical person by trade, and my hobbies involve me working with my hands, I have a background in cooking and when coating something wet with something else wet in cooking, that generally just leaves you a mess. This is why I made the chicken cutlet reference. This is the reason you dredge the chicken in flour first, then dip in egg wash and then dip in breadcrumbs to make chicken cutlets. That egg base with the bread crumbs is the magic in chicken cutlets and making that stick to the chicken requires flour. On the other hand, fried chicken is all about soaking your pieces in milk/butter milk/whatever your family secret is and then dropping it in the seasoned flour. That flour will stick very well to the now soaking chicken pieces and then go into the fryer (again wet to dry, never wet to wet or dry to dry), but this is way outside the scope of this convesation . Also, if I understand you correctly, you're saying I should just take the greenpatch up to about 230 and once dry fire from there. My initial plan (and I may have not been clear) is to start at below 212F (the lowest my oven will go, actually, which is in the 160 - 175 F range) then after an hour, go to 200f, then wait an hour and go to 300F, then wait an hour and go to 400F, etc until I hit the ovens maximum and then let it cool in the oven, closed, until the temperature is dropped (slowly to minimize cracking) enough to handle, and then fire. Additionally you say to not use the firebricks as the floor. These are hard firebricks, not the soft ones so not sure if that makes a difference, but if I don't use those, can I make a thick flat layer of Greenpatch for the bottom to use? Or should I just go to the Dollar Tree and pickup a bag of unscented kitty litter and wet that down till it dissolves, add grog, lay it flat on the bottom, dry it again in the oven until it's got no moisture and then fire it with the burners? Just trying to get it right the first time . As for the borax directions, that sounds EXACTLY like how to make soda ash (except you start with sodium bicarbonate). After an hour or so at about 200F, the baking soda turns into sodium carbonate (one carbon is released with the H2O). This is used in salt water aquariums to raise alkalinity and pH. Yet another expensive hobby I was in for a while about 10 or so years ago. Loved it, will never do it again.
-
Mikey, I'm guessing mine is the economical variety. I touched some of the portions of the encapsulated wool this morning and if I apply pressure I can feel some "spring" under neath it (I feel like I can easily crack this if I press too hard) so I'm hoping that the IR lining I add will help, though I wonder about how it will affect the coating I currently have on the wool. Will the weight cause it to crack? Will the newly introduced moisture help it lock with the current rigidizer or will it cause more of a slippery surface? Just things I'll have to figure out as I go along. The other questions I have is just how thick I should go with this. My initial thought is to set the whole thing upside down (burner ports down) and put a 1/8" to 1/4" (3mm to 6mm) thick layer down and wait for that to at least set mostly. Then build my way up the sides slowly until it's mostly up the walls and flip the whole thing back right side up and apply that last center portion and then place the 2 firebricks that become the floor directly on top of that while still moist, hoping they will act like a sort of reverse keystone to keep things from sliding down. Worst case scenario, I'll just do several thinner skim coat layers allowing it to hold itself up like plaster and just keep smoothing it over as I go. Either way, I'm sure it will be fine. Thanks for all the advice, you guys are really great
-
Mikey, I'll take your word on that . I'm not ready to crack open another subject yet. Frosty, I understand what you're saying, and I completely understand that this is a personal problem that I have. I'm literally the sort of person that "misses the forest for the trees" is almost always an accurate description of my state of being. I get bogged down in details that suddenly bring me to an almost standstill until I'm familiar enough that I'm ready to move on, whether I need to know that much detail or not. I have gotten better in my old age and do sometimes just jump right in and do it. It's something I had to force myself to do whenever I needed to learn a new programming or scripting language (my primary job is in IT and this happens more often than you can imagine). So while in the 80's and 90's I could've run you through every option of every compiler for every language that I was using, now I just look up what I need when I need it and just use it. Now if I want to learn a new programming language, instead of breaking out a book and studying, I find a problem that needs a solution and just jump in with the new language looking up the details as I go. I just need to learn to do this with more things. Thanks for the encouragement. Lou Ok, so I finally finished narrating and editing the video where I apply the rigidizer to the forge. If you want to see it, here is a link to the video. Video quality is better, but I still need to work on lighting and audio. Thanks guys, Lou
-
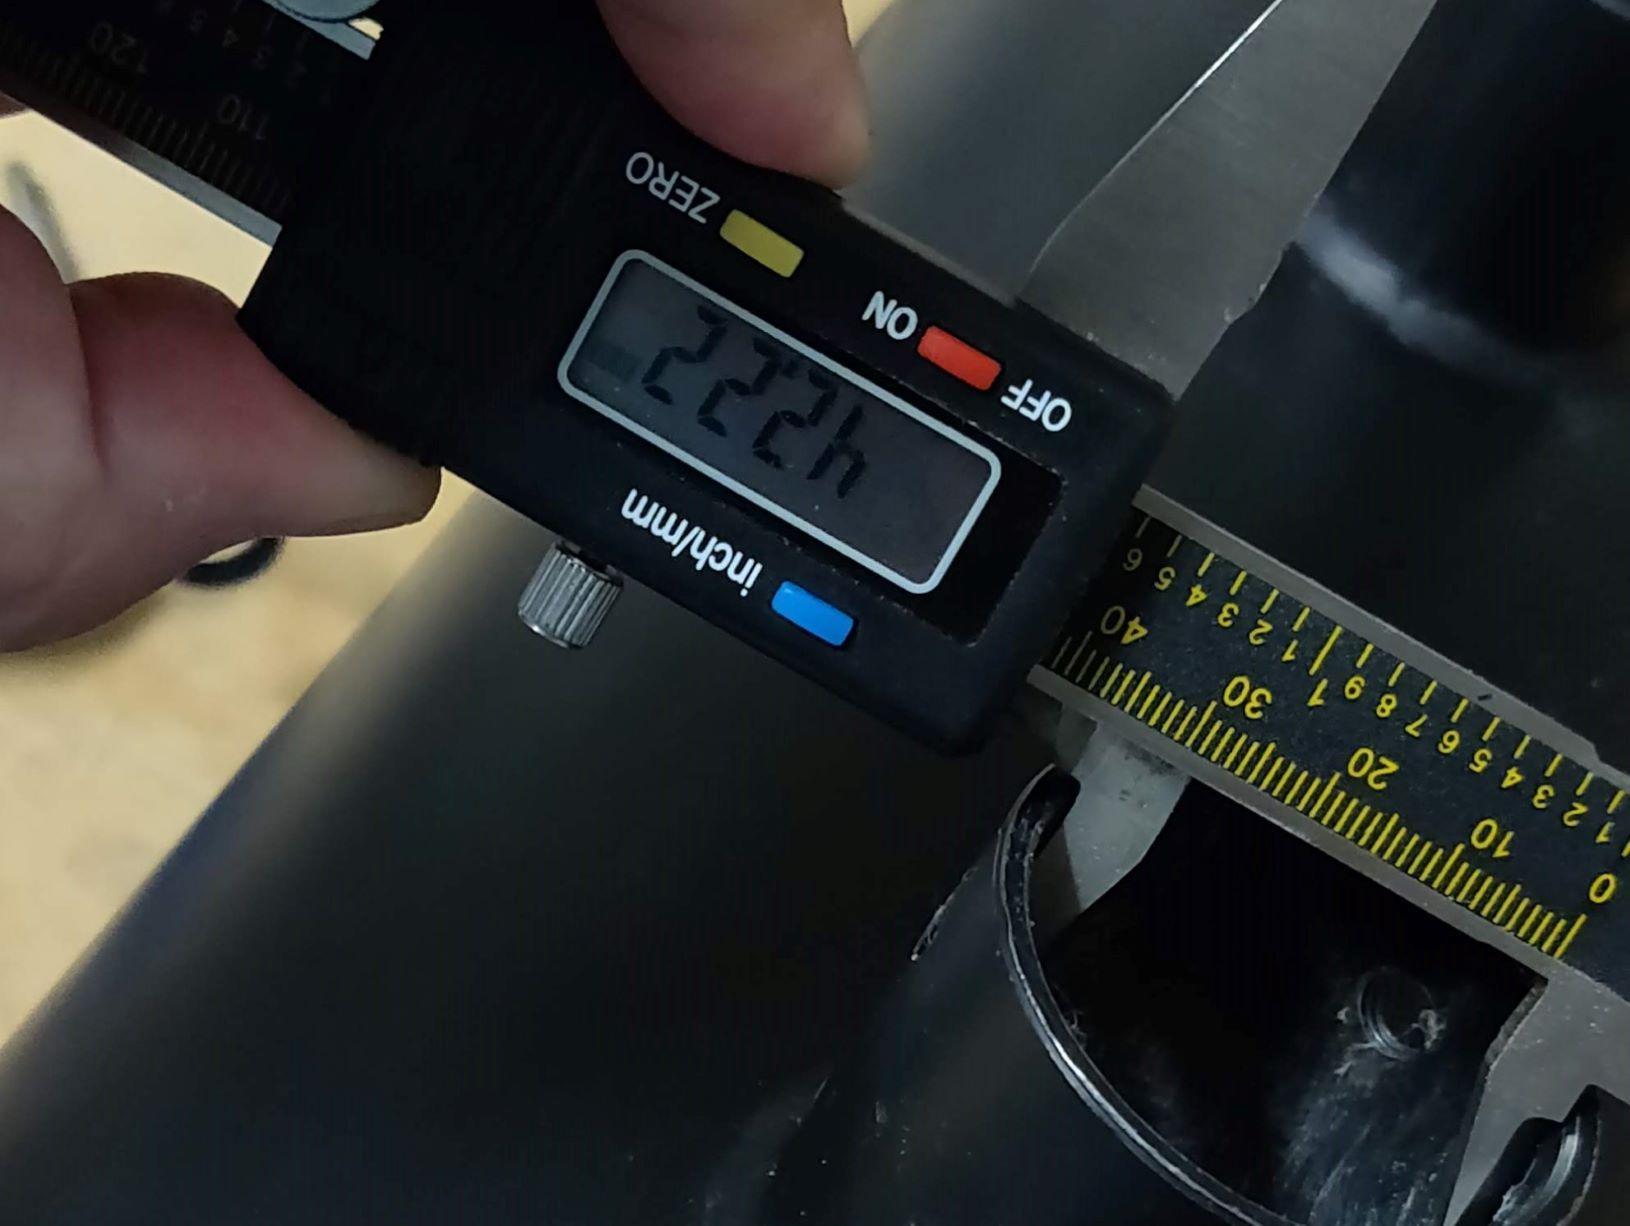
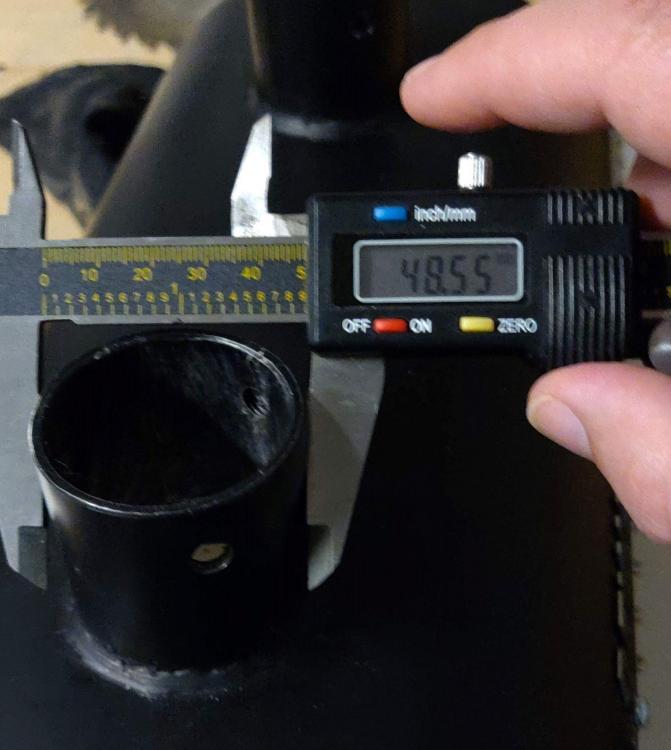
Eventlessbox In answer to your question about the burner ports, the OD is 48.55mm (or 1.91in) and the ID is 42.22mm (or 1.67in). The depth of the port tube (on the short side on the outside) is 46.15mm (or 1.82in). I didn't get a very good picture of that measurement. I didn't measure the depth on the inside because I'm not sure if you'd want the depth of just the steel, to the end of the KAOwool, or to the IR liner I'll be adding "soon". Warning, these measurements were taken with a cheap caliper. I also took various measurements of the burners as well. Let me know if you're interested in seeing those.

-
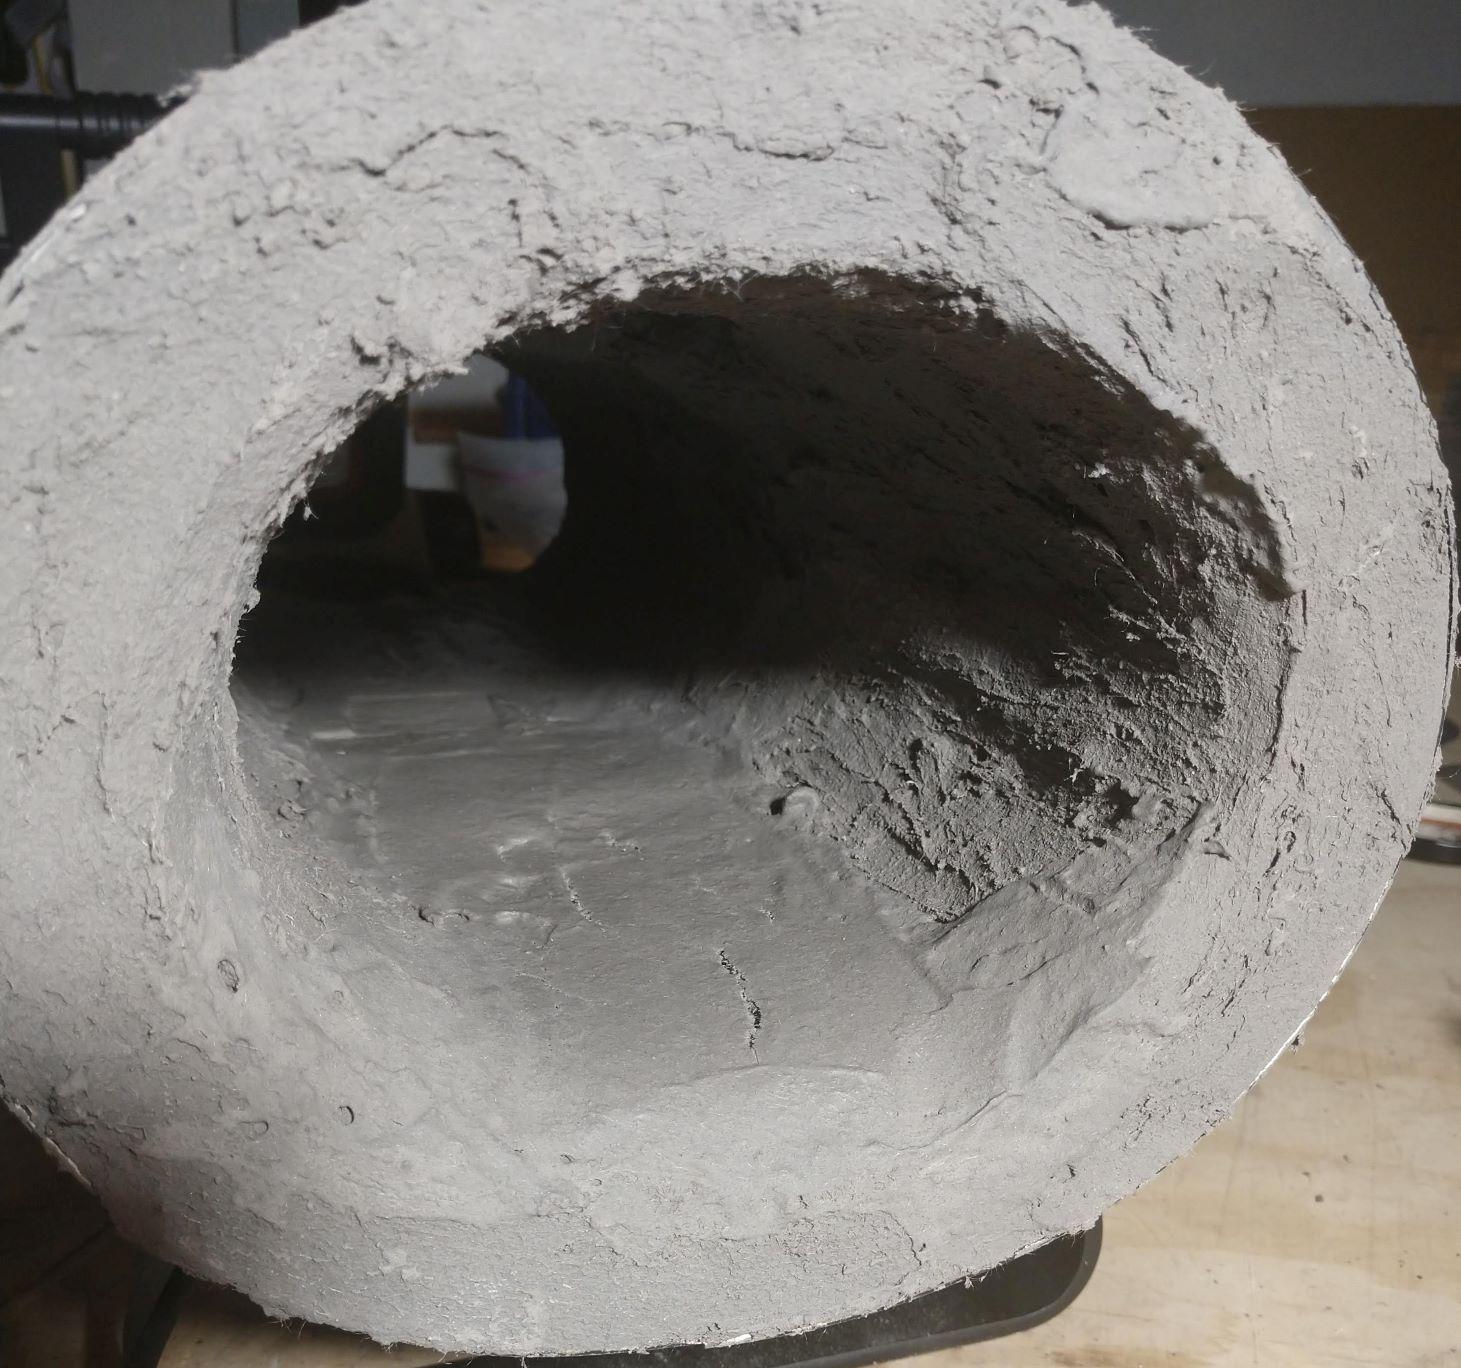
Frosty, Good point about the curing. I have been trying to do some more research on this Greepatch 421 ready mix, and the best I could guess is that the moisture in the premix is actually a special type of water glass made of "silicic acid, sodium salt", of which the MDS reports that it contains between 2.5% and 10%. This would explain why it doesn't cure in the bucket (though it might dry out). Additionally, the PDS lists only 0.1% Lime, which doesn't sound like enough to cause much of a curing action, leaving me to believe that what we have here is something that needs to be dried (which is why I suspect they recommend the 100 degree F per hour method) and then fired hot. If I knew I'd have to learn so much chemistry before prepping a forge, I'd spent more time reading about the properties of ceramics and cements, but then I'd be another 2 or so years out before jumping in. Interestingly enough, I first became interested in building a forge/foundry around 2012, shortly after watching an episode of James May's Man Lab where James May melts aluminum in a cheap homemade foundry and casts it into a lemon squeezer. Before that moment, I never thought it was possible to get (useful) metal hot enough to change properties in a home environment. 6 years later I thought I had done enough research to get a premade forge up and running, turns out, I was wrong . I've also attached a photo of the forge I took this morning (Tuesday 2/19) where you can see that the bottom center is still damp. The current humidity is 89% so I'm sure I might just hang an incandescent bulb in there (60 watt in there I think should do) to help finish the drying process. Based on this, I'm guessing I have WEEKS before the Greenpatch is dry enough to bother sticking in the oven. I'll keep you all posted on how it goes. Mikey, I'll go renew my membership to my local library and see what they have on textbooks for ceramics. It's not that I don't think they'll have anything useful, it's just that I don't think I have enough of a background knowledge in ceramics that cracking any of those books would be very helpful. Most likely the soonest I'll be able to check that out will be on Wednesday afternoon.
-
Frosty, just went through that posting and I see that kast-o-lite is made by the same manufacturers as the greenpatch and seems to have quite similar properties with the exception that greenpatch is sold ready to use. Based on the expected temperatures/humidity over the next couple of weeks, I think I'll let it cure for about a week when I put it in my oven cold and start at the lowest setting, which is about 175, and then go an hour at a Time raising the temp up to 500. After that I'll put the burners on and adjust slowly till it appears that vitrification occurs (I suspect I'll see glowing orange on the inside at that point). You guys are full of great info. Thanks so much